Windows 11 ISO Insider Preview Build 22000.132

windows 11Microsoft just released Windows 11 ISo file, based on the latest Insider Preview Build 22000.132. Inside build, you can try all-new features like clock updated app, snip tool, and everything releases so far via various patches. You can also use Windows 11 ISO file to do a clean install on your computer, but if you go with this option all of your existing files will be deleted.

Microsoft says it added the ability to name your PC during the setup experience. You’ll also get to experience the Get Started app that’s designed to help you get going on your new Windows 11 PC (even if it’s not actually a new one).

Download ISO

  • Go to the Windows Insider Downloads page. You will need to sign in with a Microsoft account registered with the Insider Program.
  • Scroll down to Select Edition and select the build you want to download. You will most likely want the one at the top from the developer channel, as this is where Windows 11 should arrive first. So far, only Windows 10 builds are available. Click confirm.
  • Select your preferred language. Not all languages ​​available for Windows are compatible with the Insider program, so you may have to stop depending on where you are from.
  • Click the download button and the ISO file will start downloading.
  • This is definitely an easier method, but unfortunately, it is not available yet. We will update this article once Windows Insider ISOs are available. Later, once Windows 11 64 bit is available to everyone, you can also download the stable build of Windows 11 iso. Microsoft offers the Media Creation Tool and Upgrade Assistant, which usually do just that. It will be some time before Windows 11 versions of the tools are available, as the operating system is only getting closer to this holiday.
If you like to learn and find out more about various Windows errors, and how to repair them go to our vast archive or use search to find articles that will explain and help you in solving your issue.
However, if you prefer to do things fast and with automatization then we are proposing to use an automated solution for your issues. The application that we are recommending is Advanced System Repair Pro
Advanced System Repair utilizes multiple tools all in one to give you a quick, simple, reliable, and very thorough diagnosis of your PC. It brings you all the tools you need in one program to clean, fix, protect, optimize and boost your PC!
1-Click Maintenance
All the tools to make it simple and easy! It's like having a professional technician at the click of a mouse.

Junk Cleaner
Keeping your computer free from unnecessary clutter also helps make your computer last longer. Like any other machine, if you keep it clean and take care of it, it will serve you better for longer!

Optimize background apps
Optimize applications background activity with the built-in Application Optimizer feature.

Disk Defrag
With a simple 1-click, Advanced System Repair speeds up your PC by assembling fragmented files on your machine and organizing them more efficiently.

Malware Removal
Finds and removes all types of harmful malware including trojans, worms, bots, adware, spyware, PUPs, and more!

Privacy Cleaner
The all-in-one privacy suite to Clean Your Tracks & Protect Your Privacy! Make your computer safe, secure, and more efficient!

System Tweak/Optimizer
ASR will analyze your complete system and settings to adjust your PC to function at its maximum performance.

Registry Cleaner
Over time, as you install and uninstall applications, the registry can become cluttered with old entries and broken settings which can result in program crashes, and annoying messages and slow the computer down.
Visit our Advanced System Repair Pro Download page to inform yourself about all the benefits of this software and get a free trial copy of it.
advanced system repair pro

Advanced System Repair Pro

One-click automated PC repair solution
ASR logo
With Advanced System Repair Pro you can easily
Replace damaged files
Restore performance
Free disk space
Remove Malware
Protects WEB browser
Remove Viruses
Stop PC freezing
DOWNLOAD
Privacy Policy | Terms of Use | Uinstall
Advanced System Repair Pro is compatible with all versions of Microsoft Windows including Windows 11

Share this article:

You might also like

SettingSyncHost.exe High CPU usage
One of the important processes in the Windows operating system is the Setting Synchronization or SettingSyncHost.exe. This process is the one responsible for synchronizing the settings of your computer with other devices. It is the one that replicates settings like OneDrive, Internet Explorer, wallpapers, and so on, to other systems. However, it has been known to cause high CPU usage in Windows 10 and there are times when it causes the system to freeze or system lags. So if you notice that the SettingSyncHost.exe process is causing high CPU usage in your computer, worry not for this post will guide you in fixing them. You have to be cautious when you notice high CPU usages caused by system processes since cybercriminals mostly set the names of viruses in a way that the system or the user won’t be able to identify them. Cyber crooks could name the virus and malware the same as one of the system processes like SettingSyncHost.exe to make it seem like it’s a legitimate process. Thus, you need to keep in mind that original system processes like the SettingSyncHost.exe file are located in the System32 folder. The original SettingSyncHost.exe file is located in the System32 folder. To check for the same, right-click on the troublesome process in the Task Manager and select Open file location. If the place is any other than the System32 folder, run a full system anti-virus scan on the system. The SettingSyncHost.exe causes high CPU usage when it gets stuck in the sync process and is not able to come out of the loop. To fix this problem, you need to follow the solutions offered below but before you proceed, make sure that you create a System Restore point first.

Option 1 – Apply some registry tweak

The first thing you can do is to apply some tweaks to the Windows Registry. To get started, follow these steps:
  • Tap the Win + R keys to open the Run utility and type “Regedit” in the field and then tap Enter to open the Registry Editor.
  • Next, navigate to this registry path: HKEY_CURRENT_USERSoftwareMicrosoftInputPersonalizationTrainedDataStore
  • From there, right-click on the key and select Permissions.
  • After that, check the box next to “Allow” for Full Permission for every user group.
  • Now click on the Apply and OK buttons to save the changes made.
  • Then restart your computer.

Option 2 – Close the Host process for setting synchronization

If the registry tweak didn’t work, you can try to close the host process for setting synchronization, especially if this process continues to hog resources. You can terminate this process by opening the Task Manager. From there, end the process or task of the host process. On the other hand, you can also turn off the Host process for synchronization by opening Settings > Accounts > Sync settings located in the left pane. After that, turn off the Sync setting.

Option 3 – Run the Hardware and Devices Troubleshooter or the Performance Troubleshooter

Hardware and Devices Troubleshooter:

  • The first thing you need to do is click on Start and then on the gear-like icon to pull up the window for Settings.
  • After opening Settings, look for the Update and Security option and select it.
  • From there, go to the Troubleshoot option located on the left-hand side of the list.
  • Next, select Hardware and Devices from the list and open the Troubleshooter and run it. Once it is doing its job, wait for it to complete the process and then restart the system.
  • After the system restarts, check if the problem’s now fixed. If not, refer to the next option given below.

Performance Troubleshooter:

  • Tap the Win + R keys to open the Run dialog box.
  • Type “exe /id PerformanceDiagnostic” in the field and hit Enter to open the Performance troubleshooter.
  • Then click on Next to get started. Wait until the process is completed.

Option 4 – Try scanning your computer using Windows Defender

As mentioned, it is possible that the SettingSyncHost.exe could be infected with a virus or malware. To eliminate it, you have to scan your computer using security programs like Windows Defender.
  • Tap the Win + I keys to open Update & Security.
  • Then click on the Windows Security option and open Windows Defender Security Center.
  • Next, click on Virus & threat protection > Run a new advanced scan.
  • Now make sure that Full Scan is selected from the menu and then click the Scan Now button to get started.
Read More
Windows.UI.Xaml.Markup.XamlParseException UWP
Although the UWP platform is still new, it is working efficiently and significantly and it’s apparent that Microsoft is betting big on it. It helps developers in building applications for Windows 10 that are more modern and beautiful as well as responsive with the help of the .NET Core and XAML. However, all things considered, it still isn’t perfect and it could still encounter some errors. One of these errors is the Windows.UI.Xaml.Markup.XamlParseException UWP app error. This particular error can occur to any Universal Windows Platform or UWP application and according to security experts, it is due to some XAML parsing error. To fix this error, you can try to reinstall the faulty program or check its privacy settings. You can also run both the Program Compatibility and Windows Store Apps troubleshooters as well as run System Restore. For more information, check out the given options below.

Option 1 – Try to reinstall the faulty application

If you encounter this error in an application that is not a system-related one, then you can just uninstall it from the Windows 10 Settings app and then reinstall it again from the Microsoft Store. On the other hand, if it is a system application like the Camera or Calculator app, you can just uninstall and reinstall it using a PowerShell script.

Option 2 – Try to check the Privacy Settings of the concerned app

You might also want to check if all the Privacy Settings required for a certain application are configured properly as it could also cause issues like the Windows.UI.Xaml.Markup.XamlParseException UWP app error.

Option 3 – Try to run the Program Compatibility Troubleshooter

You might also want to run the Program Compatibility Troubleshooter. This built-in troubleshooter is available in the Windows Update & Security section. From there, select Troubleshoot. This will find a list of programs for you and since you have already downloaded the driver files, just click on Not Listed located at the top of the program list. After that, browse and select the driver files and then let the program do its job. In addition, you can try to run the Windows Store apps troubleshooter as it can also help you resolve the problem.

Option 4 – Run System Restore

If you have recently made changes in your computer’s settings, you could also run System Restore to fix the Windows.UI.Xaml.Markup.XamlParseException UWP app error. How? Refer to these steps:
  • Tap the Win + R keys to open the Run dialog box.
  • After that, type in “sysdm.cpl” in the field and tap Enter.
  • Next, go to the System Protection tab then click the System Restore button. This will open a new window where you have to select your preferred System Restore point.
  • After that, follow the on-screen instructions to finish the process and then restart your computer and check if the problem is fixed or not.
Read More
Fix Invalid file handle Error during ...
If you encounter an error saying, “Invalid file handle” when you try to rename, copy, delete a file or other operations in your Windows 10 computer, then read on as this post will guide you in what you can do to fix it. This kind of error pops up when the operating system tries to carry out an operation on a folder or file using the following words:
CON, PRN, AUX, NUL, COM1, COM2, COM3, COM4, COM5, COM6, COM7, COM8, COM9, LPT1, LPT2, LPT3, LPT4, LPT5, LPT6, LPT7, LPT8, and LPT9
When you rename or create a folder or file using the reserved words given above, you could encounter an error that says, “The specified device name is invalid”. This occurs since these words are Windows system reserved words that you can’t use, unlike any other words. Thus, if you have a folder or file which contains any of the reserved words on another computer that runs a non-Windows operating system and you try to copy or rename it Windows, then it’s no wonder why you’re getting this error message. In such cases, you can always click on the Skip button to stop the operation. However, if there are various folders or files, you can just use the Command Prompt to carry out the task. All it takes is a simple command that will get rid of the folder as well as the files in it. How? Refer to the instructions given below. Step 1: Tap the Win + R keys to open the Run utility. Step 2: Next, type “cmd” in the field and then tap Enter to open Command Prompt. Step 3: After opening Command Prompt, execute the following command:
rd \.file-folder-path /S /Q
Note: The “rd” command will remove the directory or the folder while the “\.” command will select the current computer. The “/S” command, on the other hand, helps you in removing all the sub-directories and the files that are in the CON folder. The “/Q” command is not really mandatory since it helps you remove everything silently without any confirmation message. For example, if you have a folder named “CON” located on your Desktop, the path will be like this “C:/Users/<username>/Desktop/CON”. In this case, the command should be like this:
rd \.C:Users<username>DesktopCON /S /Q
However, if the error pops up for a whole different reason, you could use the following command instead to remove the reparse point extended functionality. Once you’ve entered the given command below, you should now be able to delete the file.
FSUTIL reparsepoint delete C:Users<username>DesktopFileName DEL C:Users<username>DesktopFileName
Read More
Your password may have expired or ...
There are instances when you have to connect to another Windows 10 PC via remote connection from another Windows 10 PC. However, when you encountered an error saying, “Your password may have expired or the remote pc might not accept blank passwords” while doing so then read on as this post will walk you through how you can fix it. Here is the full content of the error message:
“Your password may have expired, or the remote PC might not accept blank passwords. Try connecting again. If this keeps happening, ask your admin or tech support for help.”
It is unknown what the exact cause of the error message is as it could involve several factors. Even so, there are still various potential fixes you can try to fix this kind of error. You can try to check if your password has expired or troubleshoot any issues with the network. You could also use a remote desktop application or configure the settings of firewall or restart the remote desktop service. For more details, refer to each one of the given options below. But before you proceed, make sure that you have someone to help assist you on the other side to help you troubleshoot the issue.

Option 1 – Try to check if the password has expired

The first thing you can do to fix the problem is to check if the password has expired as it could be the reason why you’re experiencing this problem. You have to make sure that you are using a user account that is on the remote computer and then check if the user account password has not expired yet. And if your PC is not within your access, then you can just ask someone to verify the password for you.

Option 2 – Try to troubleshoot network issues

To troubleshoot network-related issues that might be the one that triggers the error, you need to run the Network Troubleshooter. To get started, refer to these steps:
  • Open the Search bar on your computer and type in “troubleshoot” to open the Troubleshoot settings.
  • Next, scroll down and select the “Network Adapter” option from the right pane.
  • Then click on the Run Troubleshooter” button.
  • After that, your computer will check for any possible errors and will pinpoint the root cause of the problem if possible.
  • Restart your computer.

Option 3 – Try to use a remote desktop software

A number of users reported that the issue occurred when they used the universal app for Remote Desktop and they were able to fix it by switching to the Remote Desktop application. Thus, you can try to switch to the remote desktop software and see if it fixes the problem or not.

Option 4 – Try to configure Firewall settings

You might also want to configure the settings of the Firewall as it could also help in fixing the problem. It is possible that the firewall is blocking the incoming connection on the remote computer. To check if whether the firewall is the culprit or not, follow the steps below.
  • Go to Windows Security and then go to Firewall and network application.
  • Next, click on the Advanced Settings link. This will open the classic Windows Defender Firewall and Advanced Security application.
  • From there, look for the rule named “Remote Desktop – User Mode (TCP-In)” under inbound rules and check if it has been disabled or not.
  • If the rule is disabled, you have to enable it.
  • Once done, check if the error is now fixed or not.

Option 5 – Try to restart the Remote Desktop service

If none of the four given options given above worked, you might want to restart the Remote Desktop service as it can help you in fixing the problem. To do so, follow these steps:
  • Tap the Win + R keys to open the Run dialog box and type “services.msc” in the field and hit Enter to open the Windows Services Manager.
  • Next, from the list of services, look for the Remote Desktop Service and right-click on it, and then click on the Restart option.
  • Once done, check it was able to fix the “Your password may have expired or the remote pc might not accept blank passwords” error or not.
Read More
How to use Control Panel in Windows 11
Windows 11 has brought us a new and revamped settings application that will cover most personalization and overall settings for your operating system. But as much as the new settings app is tweaked and modified there are still some things that can be modified only inside Control Panel. windows 11 control panel
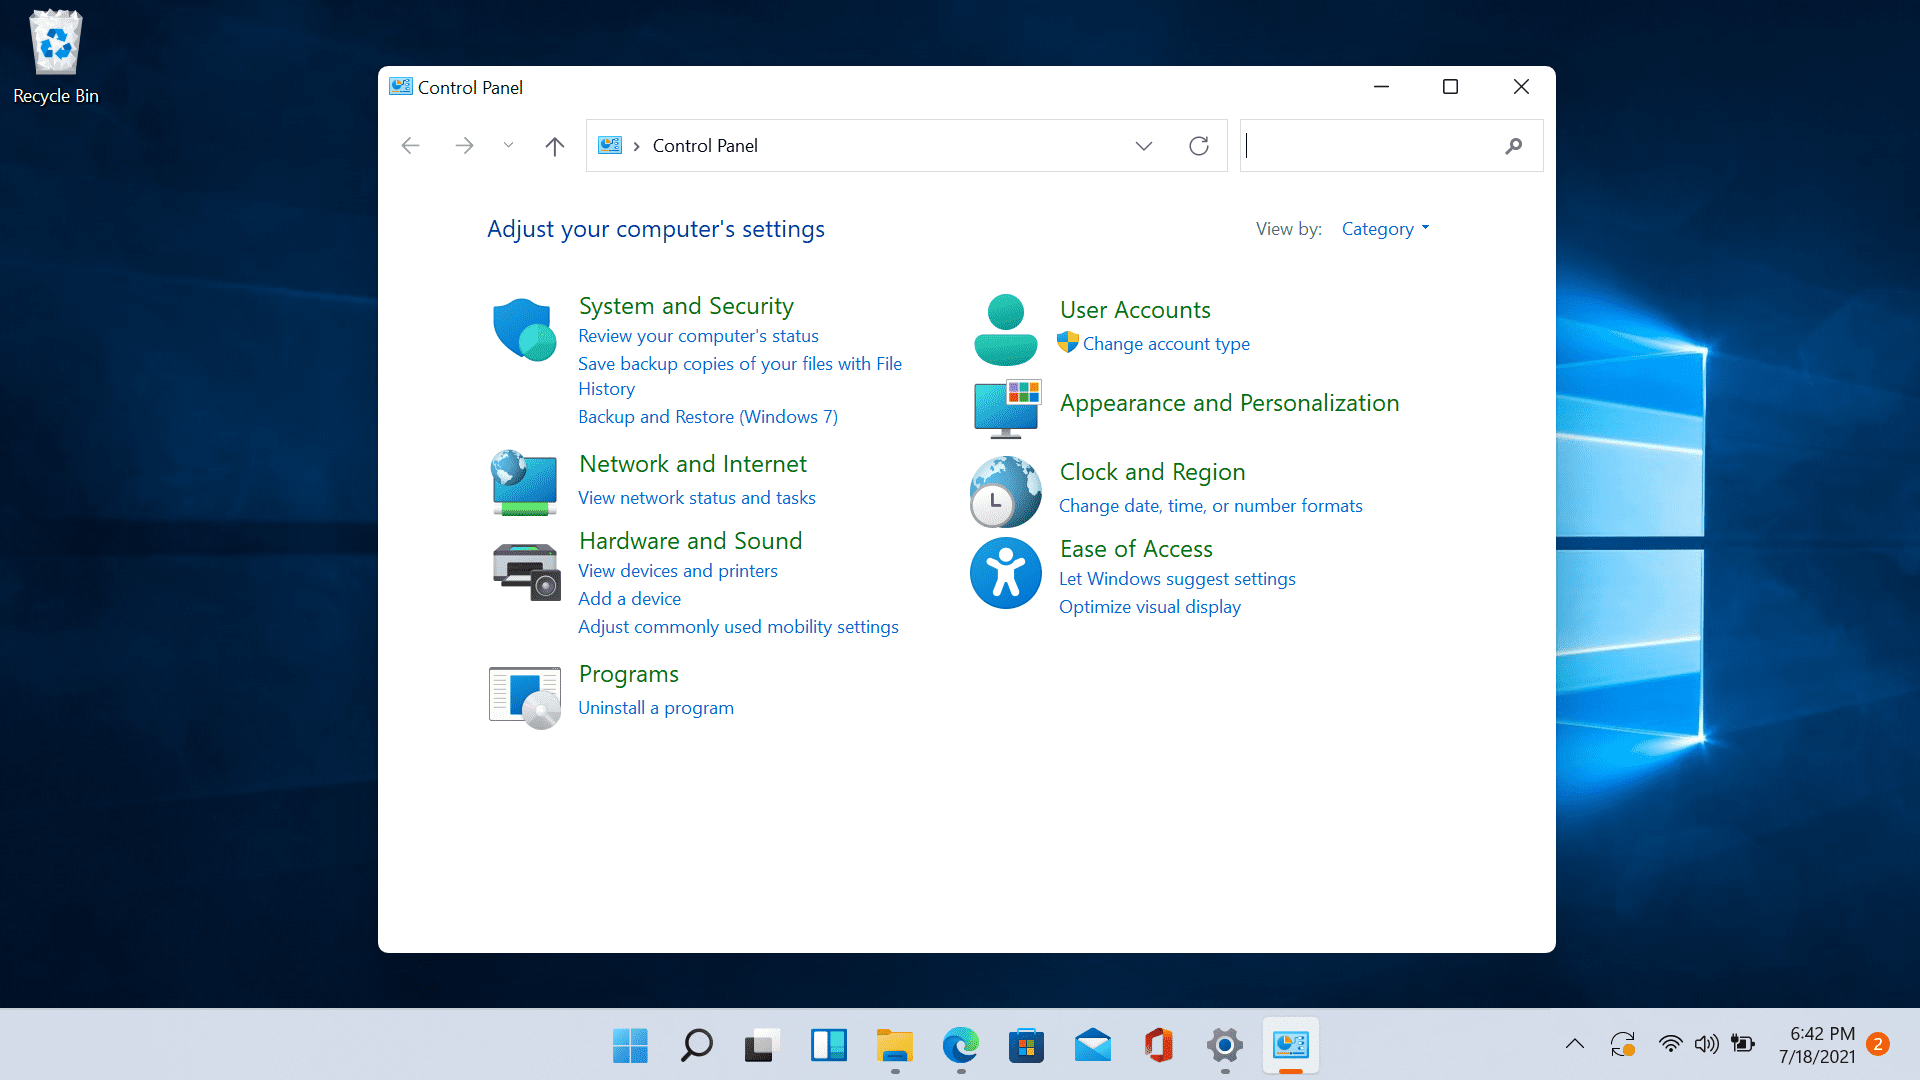
Since the Control Panel icon itself is somewhat not right away once clicked on the start button we are presenting you a couple of ways to open it so you can change each detail you want.

Via Start menu

The most straightforward and easiest way to reach and open the control panel is via the Start menu. In order to do it just click on the Start menu and type in the control panel. Then click on Control Panel Icon in the results.

Pin Control panel icon to the taskbar

In order to actually pin the control panel to Taskbar, you will need to open it first. Use the previous simple and fast steps in order to quickly open it then in the taskbar right-click on its icon. Choose Pin to Taskbar and close control panel. Now you can open the control panel quickly just by clicking it on its icon in the Taskbar.

Add Desktop icon

If you liked the idea to have an icon that you can click in order to fast open the control panel but you are not very fond of the icon being located in your Taskbar then let's place it on Desktop instead. In order to place a special control panel icon on the desktop, we will use Windows setting app. Open settings app with ⊞ WINDOWS + I and go to Personalization tab. Inside the personalization tab, go to Themes and click on Desktop Icon Settings. Check the box beside Control Panel and click on OK. The Control Panel icon will appear now on your Desktop and you can double click on it to launch it.

Run Control Panel from the Run dialog box

Same as in the previous version of Windows you can also open the Control Panel via Windows built-in run menu. This is mostly the preferred way to gain access to it by system administrators. Press ⊞ WINDOWS + R to open the run dialog. Inside dialog type in control and press ENTER. Control Panel will open right away.
Read More
How to Resolve HP Printer Spooler Not Running Error

HP Printer Spooler Not Running Error

HP Printer Spooler Not Running - What is it?

If you have the HP printer, then you may come across this error. HP Printer Spooler not running errors does not mean there is anything wrong with your printer. It indicates printer driver issues.

Solution

Restoro box imageError Causes

There can be multiple causes behind the HP printer Spooler not running error code such as:
  • The poor or unsuccessful printer driver installation
  • Invalid registry entries
Though this is not a critical error code as it does not pose serious damage threats to your PC, however, it is advisable to resolve it as it can cause you a great deal of inconvenience especially if you want to take out printouts every now and then.

Further Information and Manual Repair

Here are some ways you can try to resolve HP Printer Spooler Not Running Error on your system: 1. Reinstall the HP Printer driver on Your System
  • Simply go to the control panel and then click on the Device Manager option
  • Once you click it you will see details pane with a list of devices. Now simply click on the printer, to reinstall the driver software.
  • Double click on it to open the properties dialog box
  • After that click on the driver tab and then click update driver
Once you update the driver, try using the Printer to see if it works. Sometimes you may come across a pop-up displaying the following message: ‘Driver installed correctly, Device is ready to use however, you may not see the printer under the printer’s pane. This triggers registry issues. 2. To resolve registry issues, install Restoro on your system. This is a highly functional registry cleaner integrated with a powerful antivirus. It helps resolve registry issues, malware, and guarantees system optimization. This feature-filled tool is the answer to all your PC-related issues. Restoro is a next-generation PC repair software that extends outstanding usability and helps PC users resolve errors efficiently. Its simple navigation and user-friendly interface make it so easy to use that even novice users can also work around it and repair issues without any hassle or difficulty. It’s a smart and intuitive in-built registry cleaner that wipes out all the unnecessary and obsolete files on your hard disk. This includes junk files, internet history, invalid registry keys, and files from the uninstalled old program versions. Sometimes the files from the uninstalled programs hamper your ability to update new program versions thus leading to unsuccessful driver installation. Nonetheless, all such files are removed in seconds with this helper and you are then ready to reinstall the driver. This registry cleaner cleans the clutter from your hard disk and optimizes your system's speed, lowering your PC boot time significantly. Total System Care can be used on all Windows versions To fix the HP printer spooler not running error on your computer, simply click here to install Restoro. Run it to scan for the error and fix it in seconds. Once the issue is resolved, update the printer driver. You’ll see the driver will be updated successfully and the HP printer will also appear in the printer’s panel. By installing Restoro on your system, you can also resolve several other issues like privacy errors triggered by malware and virus infections. With this tool, you will not have to download and run a separate anti-virus on your system.
Read More
How to Fix Error Code 0xC004C003 When Installing Windows 10

How to Fix Error Code 0xC004C003 When Installing Windows 10

What is Error Code 0xC004C003?

Error code 0xC004C003 has to do with activating Windows 10 after a clean install. This problem has been a frequent nuisance to users trying to update from Windows 7 or 8.1 following the invite path they got from Microsoft.

Solution

Restoro box imageError Causes

There are several problems that may have caused error code 0xC004C003. The most common of them are:
  • The product key entered was invalid, and cannot be used to activate the new OS.
  • The user followed the proper installation procedure, but the Windows update servers were too busy to handle the activation at that moment.
  • The free upgrade invitation was followed but after the reinstallation, the copy of Windows 10 was still not activated.
  • The user tried to perform a full clean install of Windows 10 instead of upgrading from Windows to Windows 10

Further Information and Manual Repair

A lot of solving error code 0xC004C003 has to do with the method in which the user has tried to update the system. If one decided to try and update the program before being invited to do so by the update manager, he must wait. Unfortunately, if one chooses to do it on his own and download a clean install, he was never given a product code to authenticate the process. There are two options to address error code 0xC004C003 — either restore to the previous Windows Operating System or call Microsoft (or visit their Website) and purchase a product key. The Windows update servers are very busy. There are lots of Microsoft users around the world, and the servers are doing their best to get to each and every one of the users as fast as possible, but they can only move at a certain speed. Your best bet is to sit back and wait a while. But what if you were invited, and properly downloaded Windows 10, then decided to do a clean install? It is advised that one do not try to enter Windows 7 or 8.1 serial code as this will not work. However, unlike the problem above, these users will NOT need to purchase a product key. According to Microsoft Support Staff, the installation servers are also very jammed because of the high numbers of installations going on right now. No matter what posts you may read, the key IS genuine, and it is NOT blocked, broken, or invalid. To check if Windows has been properly activated, open the Command Window. Make sure you are logged into an administrator profile; otherwise this check will not work. Type in “slmgr.vbs/ato” and click Enter and then wait. While waiting, the command will check on the status of the activation. Windows Script Host will open and show whether or not it is activated. A lot of users have reported that the activation did not work for the first few times. However they later reported after some more attempts, no issue was found in the way the operating system updated and that the activation process went smoothly. This is most likely due to the overload on the Windows Update servers, so bear with Microsoft. Users have reported that when trying to correct error code 0xC004C003, they have followed the upgrade path and then been told by Microsoft that the key was invalid and they had to purchase a new one. If the upgrade path provided by Windows 7 and Windows 8.1 is correctly followed then there is nothing to worry about Just wait a while and try it again. If there are prolonged issues, speak with a technician by visiting the Microsoft website and contacting the help center by calling the number provided. Give them all relevant information and they will be sure to help accordingly. The best solution to fix error code 0xC004C003 is to wait. In essence, the user will be waiting to reenter the same product key. According to Microsoft, and many user posts found online, it is recommended to wait a while and then try to activate again. This seemed to be an answer to most users' problems, and seem to work just fine. If the problem persists, take it to a windows repair technician to have it sorted out. If that does not work, use a powerful automated tool to fix the problem.
Read More
Your account has been disabled error
If you are trying to log into your user account on your Windows 10 computer but encountered an error message instead that says, “Your account has been disabled, Please see your system administrator”, read on as this post will guide you on how you can fix this problem. In this kind of scenario, you won’t be able to access your data unless you have access to the administrator account. This problem could be caused by several problems. It is possible that malware has infected your computer and has changed some settings in your computer, especially if your system has been under a malware attack not too long ago. The malware could’ve changed the “Account is disabled” option. The only thing you can do to resolve this kind of problem is to log into your computer using another administrator account and then change the setting. However, if you don’t have a second administrator account, you can just enable the built-in hidden administrator account on your computer. You shouldn’t have any problem enabling the hidden administrator account as it is quite easy when you can log into your account. And in this post, you will be guided on how you can enable the hidden administrator account using the Registry Editor to fix the “Your account has been disabled, Please see your system administrator” error.

To get started, follow the instructions given below.

  1. First, you need to start your computer and ensure that you are on the error screen. From there, you will see the Power options located on the right-hand side.
  2. Click on the Power options and tap and hold the Shift key and then select Restart.
  3. After that, the Advanced Boot Options will appear and from there select Troubleshoot > Command Prompt.
  4. Next, you have to select your user account and enter the user account’s password to open Command Prompt.
  5. After opening Command Prompt, open your screen and type “Regedit” and then tap Enter on your keyboard.
  6. Now select the HKEY_LOCAL_MACHINE in the Registry Editor and go to File > Load Hive.
  7. Afterward, you have to open the Windows installation drive and go to the location – WindowsSystem32Config
  8. From there, you should find a file named “SAM” – select this file and click the Open button.
  9. Next, you have to enter a key name. You can just input whatever you prefer.
  10. Once done, navigate to this path: HKEY_LOCAL_MACHINEkey_nameSAMDomainsAccountUsers
  11. From this path, you will see a key named “000001F4” – select this key and double click on the “F” entry that you can find on the right-hand side of the screen.
  12. After that, look for the value data line labeled “0038” which should show 11 in the first column. You have to replace it with 10.
  13. Once done, click on the OK button and close the Registry Editor and the Command Prompt to restart your computer.
  14. Now once your computer has restarted, sign in to the Administrator account and open the Computer Management window. You can just search for it using the search bar in the Taskbar.
  15. After you open Computer Management, go to Local Users and Groups > Users – where you can find all the user accounts. Look for your deleted user account and right-click on it and select Properties and then unmark the checkbox that says “Account is disabled”. This should fix the problem.
Read More
Windows keyboard shortcuts for easy life
Hello everyone and welcome to our useful tips and tricks and problem-solving article blog. This time we are doing something different, instead of solving issues this time we are focusing on some quality of life tips like keyboard shortcuts in your Windows 10.
Shortcut Keys Description
Windows Key Opens/closes the Start menu.
Windows Key + Up Arrow Maximizes the selected window.
Windows Key + Down Arrow Reduces the window size. (Restore down.)
Windows Key + M Minimizes all open windows.
Windows Key + Shift + M Opens minimized windows.
Windows Key + Tab Shows Task View.
Windows Key + L Locks the screen.
Windows Key + A Opens the Action Center.
Windows Key + V Opens Clipboard History.
Windows Key + I Opens the Settings menu.
Windows Key + F Opens the Feedback hub.
Windows Key + H Opens the dictation toolbar.
Windows Key + P Opens the projection settings.
Windows Key + . (Windows Key + ;) Opens the emoji panel.
Windows Key + C Opens Cortana in listening mode.
Windows Key + C (Windows Key + Q) Opens Windows Search.
Windows Key + G Opens the Xbox game bar.
Windows Key + X Opens the secondary start menu.
Windows Key + <number> Opens the app in the taskbar relative to the number input. For example, if Chrome is the fourth app on the taskbar, using Windows Key + 4 will open Chrome.
Windows Key + Alt + <number> Opens the right-click menu for the app in the taskbar relative to the number input. For example, if Chrome is the fourth app on the taskbar, using Windows Key + Alt + 4 will open Chrome’s right-click menu.
Windows Key + D Shows/hides open apps on the desktop.
Windows Key + E Opens File Explorer.
Windows Key + U Opens Ease of Access in the Settings menu.
Windows Key + Print Screen Takes a screenshot of the desktop.
Windows Key + Control + F Opens the Find Computers window.
Windows Key + Control + D Creates a virtual desktop.
Windows Key + Control + Left Arrow Switches to the virtual desktop on the left.
Windows Key + Control + Right Arrow Switches to the virtual desktop on the right.
Windows Key + Control + F4 Closes the active virtual desktop.
Windows Key + Space Switches between installed languages (for writing text).
Read More
Fix Windows Update error 0x80246008
Updating your Windows 10 computer does not always go smoothly as there are some errors you can encounter along the way. One of these Windows Update errors is the error code of 0x80246008. This kind of error can occur during different phases of an update that’s being downloaded or installed and even when an update is being initialized. If you narrow down the cause of this Windows Update error, you’ll most likely see that it is related to the deliverability of a file to a computer from the servers of Microsoft. In other words, the error might be due to conflicts from programs like Firewall as well as third party programs like Antivirus or it could also be due to corrupted disk image or system files or it could be that any of the supporting Windows Update components and services are not working properly. Whatever the cause may be, the potential fixes provided in this post can be applicable to Windows Updates as well as the Microsoft Store. Refer to the suggestions provided below to resolve the Windows Update Error 0x80246008 but before you proceed, make sure that you create a System Restore point first.

Option 1 – Apply some tweak in the Windows Registry from Command Prompt

  • Tap the Win + X keys and select Command Prompt (Admin) to open Command Prompt with admin privileges.
  • Next, navigate to the root location of the bootable device inside the Command Prompt command line.
  • Once you’re in the root location, type the following command and tap Enter to execute it:
reg add HKLMSYSTEMCurrentControlSetControlBackupRestoreFilesNotToBackup
  • After that, close the Command Prompt command line and then tap the Win + R keys to open Run utility.
  • In the field, type “services.msc” and click OK or tap Enter to open the Windows Services Manager.
  • From there, look for the following services:
    • Windows Update – Manual (Triggered)
    • Background Intelligent Transfer Service – Manual
  • Now open their Properties and make sure that their Startup type is as mentioned above and that they are running. If they are not running, just click on the Start button.

Option 2 – Run the System File Checker Scan

If the registry tweak didn’t work, you can run a System File Checker scan instead. It is a built-in command-line utility that replaces bad and corrupted system files to good system files that might be the cause why you’re getting the error when you try updating your computer. To run the SFC command, follow the steps given below.
  • Tap Win + R to launch Run.
  • Type in cmd in the field and tap Enter.
  • After opening Command Prompt, type in sfc /scannow
The command will start a system scan which will take a few whiles before it finishes. Once it’s done, you could get the following results:
  1. Windows Resource Protection did not find any integrity violations.
  2. Windows Resource Protection found corrupt files and successfully repaired them.
  3. Windows Resource Protection found corrupt files but was unable to fix some of them.
  • Restart your computer.

Option 3 – Run the Windows Update Troubleshooter

If the System File Checker wasn’t able to resolve the Windows Update error, you could also try running the Windows Update Troubleshooter as it could also help in fixing any issues related to Windows Update including this one. To run it, go to Settings and then select Troubleshoot from the options. From there, click on Windows Update and then click the “Run the troubleshooter” button. After that, follow the next on-screen instructions and you should be good to go.

Option 4 – Try to disable your antivirus program

Disabling the antivirus program or any security software installed in your computer is always a good idea you can try when the Windows Update process does not go smoothly. So before you try updating your computer again, make sure to disable the antivirus or security program and once the Windows Update is done, don’t forget to enable the antivirus program back again.

Option 5 – Try deleting the files from the SoftwareDistribution folder and resetting the Catroot2 folder

The downloaded Windows Updates are placed in a folder called “SoftwareDistribution”. The files downloaded in this folder are automatically deleted once the installation is completed. However, if the files are not clean up or if the installation is still pending, you can delete all the files in this folder after you pause the Windows Update service. For complete instructions, refer to the steps below.
  • Open the WinX Menu.
  • From there, open Command Prompt as admin.
  • Then type in the following command – don’t forget to hit Enter right after typing each one of them.
net stop wuauserv net start cryptSvc net start bits net start msiserver
  • After entering these commands, it will stop the Windows Update Service, Background Intelligent Transfer Service (BITS), Cryptographic, and the MSI Installer
  • Next, go to the C:/Windows/SoftwareDistribution folder and get rid of all the folders and files thereby tapping the Ctrl + A keys to select them all and then click on Delete. Note that if the files are in use, you won’t be able to delete them.
After resetting the SoftwareDistribution folder, you need to reset the Catroot2 folder to restart the services you just stopped. To do that, follow these steps:
  • Type each one of the following commands.
net start wuauserv net start cryptSvc net start bits net start msiserver
  • After that, exit Command Prompt and restart your computer.
Read More
1 2 3 162
Logo
Copyright © 2022, ErrorTools. All Rights Reserved
Trademarks: Microsoft Windows logos are registered trademarks of Microsoft. Disclaimer: ErrorTools.com is not affiliated with Microsoft, nor claim direct affiliation.
The information on this page is provided for information purposes only.
DMCA.com Protection Status