Diagnosing your PC/Preparing Automatic Repair

Windows 10 is has a lot of features that help a user in optimizing a computer. So when the operating system encounters a problem, it is able to provide users with proper resources to get the problem fixed. There are even times when a user is not notified and an issue is either being repaired or dodged in the background. This kind of feature is known as the Diagnosis of the Automatic Repair feature that starts when your computer is booting. In such times, you will either see the “Diagnosing your PC” or “Preparing Automatic Repair” message on your screen.

Although this feature is useful and has proven to be effective, some users reported that the process gets stuck. If you experience the same problem, read on as this post will guide you on what to do to fix it but before you start troubleshooting the problem, you might want to perform a Hard Boot first. All you have to do is to power down your computer, remove the battery and the AC adapter and then reconnect them. After that, tap and hold the power button for about 20 seconds and see if your computer boots up properly. If it doesn’t, follow the given fixes below.

Option 1 – Try disabling the automatic Startup Repair

The Automatic Startup Repair window will automatically open during boot when you have some system driver-related problem. So if you think that this is where the problem lies, you can try to disable the automatic Startup Repair.

  • Click on Troubleshoot and go to the Advanced options.
  • After that, select Command Prompt and execute the following command:

bcdedit /set recoveryenabled NO

  • Restart your computer after that and then check.

Option 2 – Run the System File Checker

System File Checker or SFC is a built-in command utility that helps in restoring corrupted files as well as missing files. It replaces bad and corrupted system files to good system files that might be the cause why you’re facing this problem. To run the SFC command, follow the steps given below.

  • Type “cmd” in the Start search and then right-click on the appropriate search result.
  • Next, select “Run as administrator” to open Command Prompt with admin privileges.
  • After opening Command Prompt, type in sfc /scannow

The command will start a system scan which will take a few whiles before it finishes. Once it’s done, you could get the following results:

  1. Windows Resource Protection did not find any integrity violations.
  2. Windows Resource Protection found corrupt files and successfully repaired them.
  3. Windows Resource Protection found corrupt files but was unable to fix some of them.
  • Now restart your computer and see if the problem is fixed or not.

Option 3 – Run CHKDSK to check your disk for errors

When it comes to some issues concerning the hard drive or removable devices, there is a utility in Windows that might help which is called “chkdsk”. This error check utility can help with several issues in the system.

  • Tap the Win + S keys to open the Search box.
  • Then type “command prompt” in the field and from the search results that appear, right-click on Command Prompt and select “Run as administrator”.
  • After opening an elevated command prompt, copy and paste the following command and hit Enter:

chkdsk /r /f

  • Now if you are prompted to run CHKDSK after your reboot your computer, just tap Y and reboot your PC.
  • If CHKDSK is not able to find any errors, tap the Win + E keys and navigate the access window. From there, right-click on the concerned drive and click on Properties.
  • After opening Properties, click on the tab Tools and then click on the “Check” button under the Error-checking section.
  • Wait until the process is completed and then restart your computer.
  • Once your computer has restarted, try accessing the file and check if the error persists.

Option 4 – Run the DISM tool

The next thing you can do is run the DISM tool. This tool is known to repair potentially corrupted files in your system as having them could also system issues like your computer getting stuck in the “Diagnosing your PC” or “Preparing Automatic Repair” screen.

  • Tap the Win + X keys and click on the “Command Prompt (Admin)” option.
  • After that, input each one of the commands listed below sequentially to execute them:
    • Dism /Online /Cleanup-Image /CheckHealth
    • Dism /Online /Cleanup-Image /ScanHealth
    • Dism /Online /Cleanup-Image /RestoreHealth
  • Once you’ve executed the commands given above, restart your computer and check if the problem is now fixed.

Option 5 – Try to use installation media to boot and repair your computer

Another thing you can try to resolve the issue is to use the Windows installation bootable media so you can boot and repair the operating system. To use it, follow these steps:

  • You need to first create an installation media which has the dame version of the operating system installed in your computer.
  • After that, once you reach the Install Windows screen, click on the “Repair your computer” link.
  • Wait until the repair is completed and then shut down your computer
  • Now once your computer has restarted, check if it can now boot properly.
If you like to learn and find out more about various Windows errors, and how to repair them go to our vast archive or use search to find articles that will explain and help you in solving your issue.
However, if you prefer to do things fast and with automatization then we are proposing to use an automated solution for your issues. The application that we are recommending is Advanced System Repair Pro
Advanced System Repair utilizes multiple tools all in one to give you a quick, simple, reliable, and very thorough diagnosis of your PC. It brings you all the tools you need in one program to clean, fix, protect, optimize and boost your PC!
1-Click Maintenance
All the tools to make it simple and easy! It's like having a professional technician at the click of a mouse.

Junk Cleaner
Keeping your computer free from unnecessary clutter also helps make your computer last longer. Like any other machine, if you keep it clean and take care of it, it will serve you better for longer!

Optimize background apps
Optimize applications background activity with the built-in Application Optimizer feature.

Disk Defrag
With a simple 1-click, Advanced System Repair speeds up your PC by assembling fragmented files on your machine and organizing them more efficiently.

Malware Removal
Finds and removes all types of harmful malware including trojans, worms, bots, adware, spyware, PUPs, and more!

Privacy Cleaner
The all-in-one privacy suite to Clean Your Tracks & Protect Your Privacy! Make your computer safe, secure, and more efficient!

System Tweak/Optimizer
ASR will analyze your complete system and settings to adjust your PC to function at its maximum performance.

Registry Cleaner
Over time, as you install and uninstall applications, the registry can become cluttered with old entries and broken settings which can result in program crashes, and annoying messages and slow the computer down.
Visit our Advanced System Repair Pro Download page to inform yourself about all the benefits of this software and get a free trial copy of it.
advanced system repair pro

Advanced System Repair Pro

One-click automated PC repair solution
ASR logo
With Advanced System Repair Pro you can easily
Replace damaged files
Restore performance
Free disk space
Remove Malware
Protects WEB browser
Remove Viruses
Stop PC freezing
DOWNLOAD
Privacy Policy | Terms of Use | Uinstall
Advanced System Repair Pro is compatible with all versions of Microsoft Windows including Windows 11

Share this article:

You might also like

Epic games and many more coming in Win store
Microsoft store is ready and prepared for Windows 11 official release on October 5th and it is coming with some surprises. Windows store
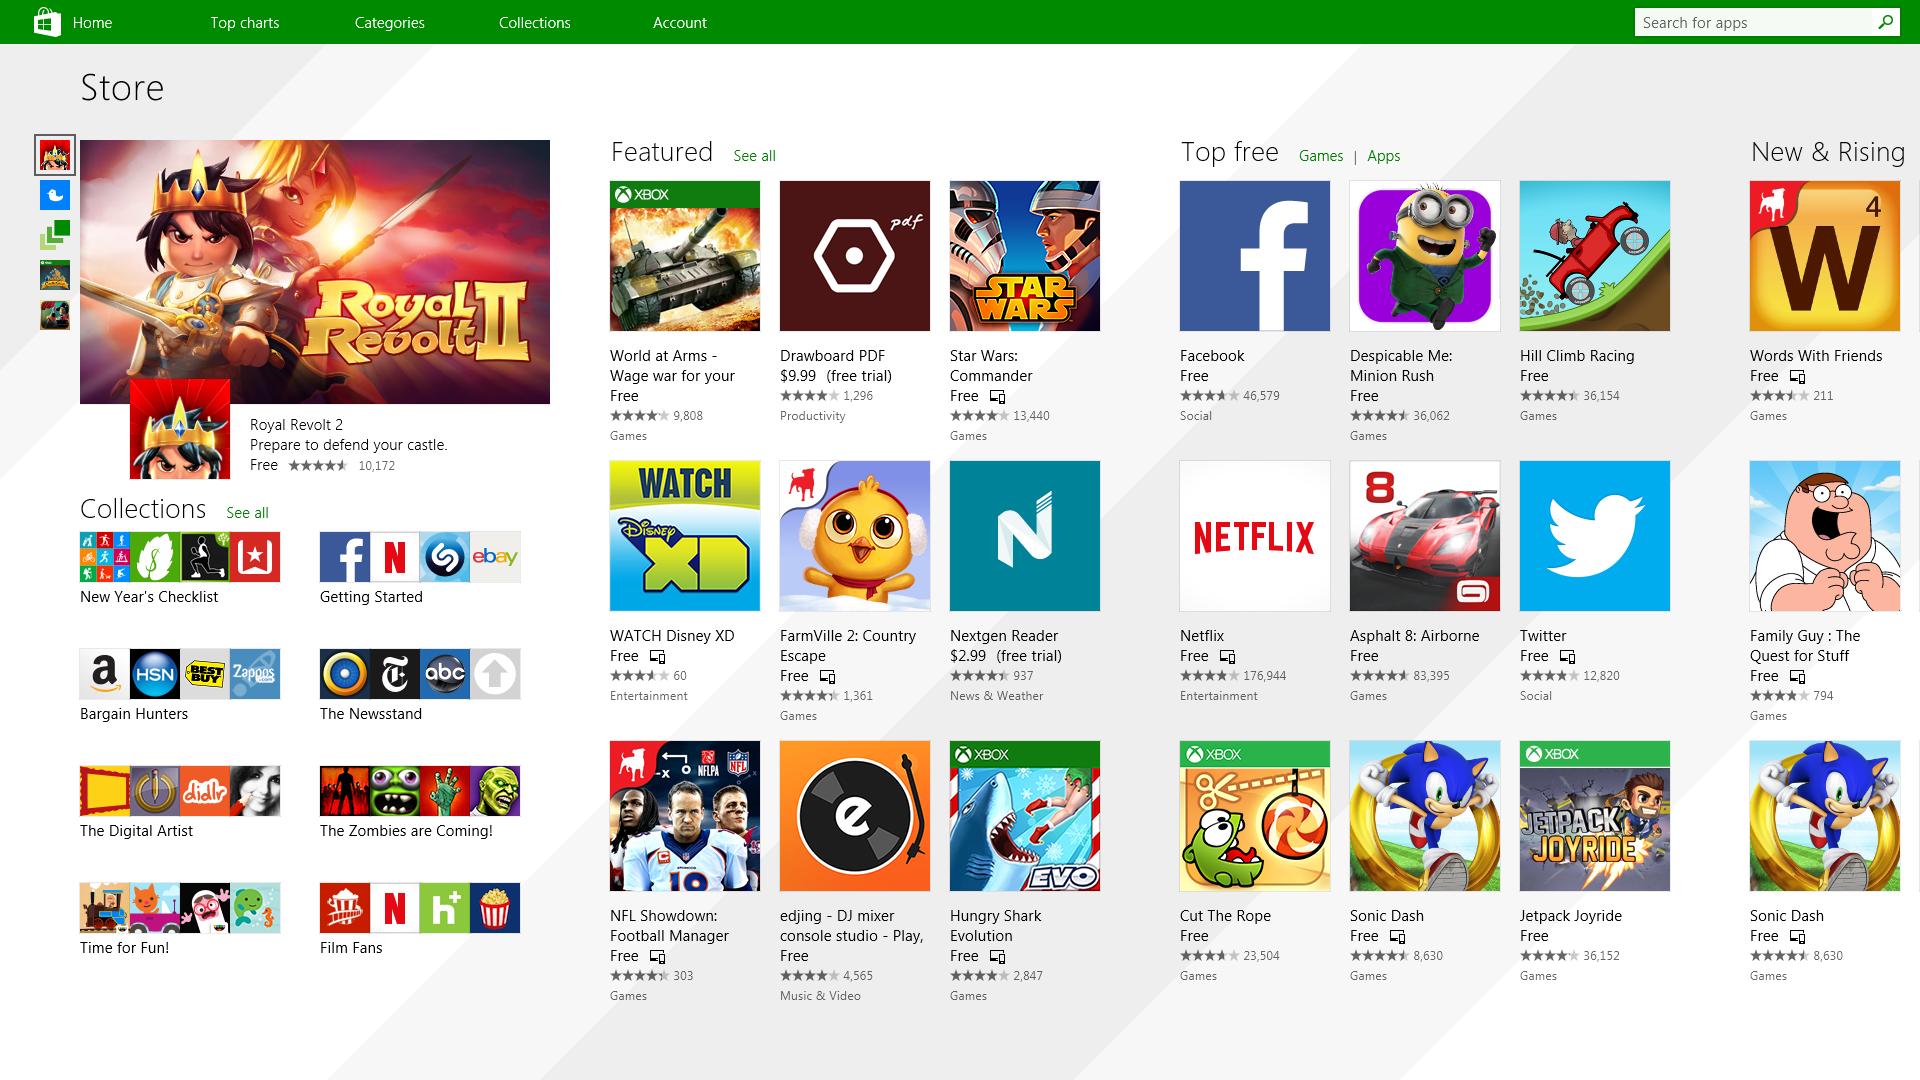
It has officially confirmed that many open source and free applications will be in it like Opera, VLC, discord, Libre office, etc. It seems that Microsoft wants to place its store as one place to go for all of your software needs. Another great surprise is the coming of Epic games store implementation. It was officially confirmed but not explained in detail, will we have Epic store opened in Windows store or we will only get installer as a package we will see but this is some great news. As for how it states now, it seems that the Windows store aims to eliminate searching the web for applications and bring them all into one environment with reviews and ratings so you know which one to install and use. It also features a great search engine to find proper applications for your needs. The new store will come to Windows 10 as well but after all Windows 11 has been mostly released and adopted. So expect it via update in two or three months' time. It would be great if some larger companies decide to join MS stores like Autodesk, Adobe, the Foundry, etc so you can install everything you need from it but one can only hope.
Read More
VirtualBox FATAL:No bootable medium found!
If you continuously encountered the “VirtualBox FATAL: No bootable medium found, System halted” error when you try to install Windows 10 in VirtualBox, read on as this post will give you some potential fixes to resolve the problem – you will be guided on how to choose the ISO image to fix this error in VirtualBox. This kind of error is a very common one especially if you have a corrupted ISO file or if you have not selected an ISO file for your virtual machine. Like pointed out, this error pops up when you have a corrupted ISO file or if the ISO file is not attached to the virtual machine. You have to select the ISO file while you create the virtual hard disk, else, you will most likely face this problem, and to fix it, you need to download fresh Windows ISO, create a new IDE Controller, assign Windows ISO to the IDE Controller and then boot your virtual machine. For detailed steps, follow the instructions below but before you start, make sure that you have a valid and uncorrupted Windows ISO. Step 1: First, you need to open the VirtualBox program on your computer and select the virtual machine. Step 2: Next, click on the Settings button or you can also right-click on the virtual machine and select Settings from the context menu. Step 3: Once you’re in the Settings panel, go to the Storage section and from there, create a Controller: IDE. Step 4: To create a Controller: IDE, click the Add new storage controller icon and select the “Add IDE Controller” option. Step 5: After that, click the Add optical drive icon and click on the Choose disk button. You will then see all the attached and non-attached ISO files. However, you have to add the new ISO file that you just downloaded. Step 6: To add the new ISO file, click the Add button and select the ISO file and then select the .iso file from the Non Attached section. Step 7: Now click the Choose button and afterward, make a checkmark in the Live CD/DVD checkbox and then select the IDE Primary Master from the drop-down menu of the Optical Drive. Step 8: Once you’re done, save the changes made and try booting into your virtual machine again.
Read More
Radeon Settings are currently not available
One of the most common brands of GPUs that comes in a large number of computers is AMD’s Radeon Graphics processing units. AMD included the Radeon Settings panel so that users can control how the hardware functions. However, as of late, a lot of users reported that the Radeon Settings panel throws an error that says, “Radeon Settings are currently not available. Please try again after connecting AMD graphics” when they try to use it. This kind of error in the Radeon Settings panel is most likely caused by either corrupted drivers or incompatible drivers. If you are one of the users who are facing this problem, worry not for this post will guide you in fixing this error. You can either use the Device Driver Uninstaller or change the driver version. For more details, make use of the options provided below.

Option 1 – Try to use the Device Driver Uninstaller

The first thing you can do to fix the problem is to uninstall the AMD Radeon drivers by using the Device Driver Uninstaller software. After you’ve uninstalled the AMD Radeon drivers using this software, go to the official website of AMD to download the AMD Radeon drivers. Once you’ve downloaded them, you can install them by simply running the executable file. Once the installation of the new AMD Radeon drivers is done, try to open the Radeon Settings panel and see if the error is now fixed or not. If not, refer to the next given option below.

Option 2 – Try changing the Driver version

If you have followed the instructions in the first option then you can proceed to the next given steps below.
  • Now that you’ve completely uninstalled the AMD Radeon drivers and reinstalled their latest working versions, check if the drivers are still updating. If they are, you need to stop them.
  • To disable the drivers being automatically updated, you need to go to the Group Policy Editor by tapping the Win + R keys to open the Run utility and then type “gpedit.msc” in the field and tap Enter or click OK.
  • After opening the Group Policy Editor, navigate to this policy setting: Computer Configuration > Administrative Templates > System > Device Installation > Device Installation Restrictions
  • From there, double click on the “Prevent installation of devices that match any of these device IDs” policy setting to open a new window, and from this window, you will see the following description of the setting:
“This policy setting allows you to specify a list of Plug and Play hardware IDs and compatible IDs for devices that Windows is prevented from installing. This policy setting takes precedence over any other policy setting that allows Windows to install a device. If you enable this policy setting Windows is prevented from installing a device whose hardware ID or compatible ID appears in the list you create. If you enable this policy setting on a remote desktop server the policy setting affects the redirection of the specified devices from a remote desktop client to the remote desktop server. If you disable or do not configure this policy setting devices can be installed and updated as allowed or prevented by other policy settings.”
  • Now set the radio button of the policy setting to “Enabled”. This will turn off the delete confirmation prompt. Note that setting the radio button to either Not Configured or Disabled will turn off the driver being automatically updated.
  • Next, click on the Show button under the Options section. And in the field that pops up, type in the Hardware ID of your GPU and click OK. You can find the GPU’s Hardware ID under this location: Device Manager > <DEVICE NAME> Properties > Details > Hardware IDs
  • Once you’re done, click the Apply and OK buttons to save the changes made.
  • Close the Group Policy Editor and restart your PC and see if the “Radeon Settings are currently not available. Please try again after connecting AMD graphics” error is now fixed.
Read More
How to Fix Windows 10 Error 80240020

How to Fix Windows 10 Error 80240020

Error Code 80240020 – What is it?

Users who receive Error Code 80240020 when attempting to install and/or upgrade to Microsoft Windows 10, are receiving the error because the Windows 10 installation folder is either corrupted or unfinished. As a result of this error code, your download and the subsequent update will not process correctly. Users who receive this code do not have to do anything specific, as it might mean that they are attempting to update before their system is ready. These users can simply wait for their computer to prompt them for the update, and then follow the on-screen instructions for the update. However, if a user is seriously wanting to update to Microsoft Windows 10 prior to the prompt, there are ways around error code 80240020. Common symptoms include:
  • A dialog box appears with the Error Code 80240020
  • Microsoft Windows 10 upgrade is unsuccessful or freezes in the process of updating and displays the error code message.

Solution

Restoro box imageError Causes

This error is only caused by one type of issue, and that is unfinished or corrupted files being present in the Windows 10 installation folder.
  • Files that are unfinished in the Windows 10 installation folder are a result of the download not processing correctly, therefore the update is not successful because your computer does not have the files that it needs.
  • Files that are corrupted in the Windows 10 installation folder are a result of either a faulty download or preexisting corrupted files that need to be purged.
Until your system is ready to download the new Microsoft Windows 10 upgrade, you will be unable to install the upgrade. As stated, you have the option of waiting for your system to prompt you to download (which means that your system has made the necessary changes to its own files and is ready for the upgrade), or you can use the following steps to correct the issue yourself.

Further Information and Manual Repair

Users and Microsoft Tech Support personnel have discovered three methods to correct error code 80240020. Each of these methods should be attempted by someone who is comfortable with computer software and programs. Anyone who is not comfortable with software should either contact Microsoft Support or wait for their computer to prompt them for the Microsoft Windows 10 upgrade.

Method 1:

  1. Back up the Registry of your operating system.
  2. Find the Registry Key: [HKEY_LOCAL_MACHINESOFTWAREMicrosoftWindowsCurrentVersionWindowsUpdateOSUpgrade]
  3. Note: this Registry Key should already exist, if it does not exist, create it.
  4. Create a brand new DWORD Value that is named AllowOsUpdate
  5. Set the Value to 0x00000001.
  6. Close and reopen your Control Panel.
  7. Restart the Microsoft Windows 10 upgrade.

Method 2:

  1. Download the Microsoft Windows 10 ISO (installation device) from the following website: http://www.microsoft.com/en-us/software-download/windows10
  2. Users must select the appropriate ISO, either 32 bit or 64 bit, depending upon their individual computer.
  3. Extract the ISO file to a separate USB device or burn the program to a compact disc.
  4. Run the Microsoft Windows 10 upgrade directly from the software that you have thus created.

Method 3:

  1. Access the files on your computer via MY COMPUTER
  2. Under the C: drive, access the WINDOWS folder
  3. Select the SOFTWARE DISTRIBUTION folder, followed by the DOWNLOAD folder.
  4. Delete any files within this download folder.
  5. If you are unable to delete these files, open the command prompt (CMD) as the administrator, and type “net stop wuauserv” into the CMD prompt window. Press ENTER. This should allow you to delete the files from step 4.
  6. Once the files are deleted, open and run the CMD as the administrator and type “wuauclt.exe /updatenow”. Press ENTER.
  7. Access the WINDOWS UPDATE folder from your control panel, the update and download should resume without further interference from the user.
As with any other error codes, if the above methods do not rectify the issue, it may be necessary to download and install a powerful automated tool to rectify error code 80240020.
Read More
Best Browsers in 2021 with browser description
In today's digital life, when we access the internet daily, browsers are essential almost as our operating system, after all, we do access all of the internet data via them, and having a good, reliable, and personal browser tailored for our needs can make all the difference in the world. In today's article, we will introduce you to the five greatest browsers of today, we will point their advantages and disadvantages and why should you pick one or another. As with each piece of software, there is not an ultimate browser, better than anything else and we will not favor anyone on this list, the decision which you should use is solely up to you, we are here to provide you with an objective opinion on each one. All of this being said, let's begin with the countdown in no particular order.
  1. Mozilla firefox.

    firefox browser If you consider yourself a power user or you value your privacy then firefox is the browser for you. It is open source and is packed with great features like reporting when your email has been used for a known data breach, it stops annoying pop-up notifications, stops browser fingerprinting, and many more. Firefox is also a cross-platform browser making it a great choice if you want to transfer and use your data across multiple devices with one account. The downside of firefox however is its speed, this browser is the slowest on this list, I guess features and advantages took their tool in the speed department, but if that is not a concern for you and you feel like the positives outweigh some slower speed, grab it here.
  2. Google Chrome

    chrome browser Chrome browser has been a game-changer when it was released and even today some of its features are still great and needed. It is packed with some great features like tab freezing, for example, it is cross-platform meaning that also as firefox you can change data between browsers on different devices. it is a very expandable browser with tons of extensions and its speed performance is very very good. The downside of Chrome are two things sadly, one of them is its hunger for RAM, the browser takes a big chunk of RAM once it is active and on some older computer with limited RAM it performs slowly, another is telemetry which its sending, in other words, other browsers don’t come with the lingering fear that Google’s just a little bit too involved in all of our lives. But if downsides do not trouble you and you have a decent amount of RAM in your system chrome might be the best solution for you, grab it here and check it out.
  3. Microsoft Edge

    edge browser Or should I say Microsoft edge 2.0 since this new Edge is completely recoded and rethought, a completely new browser based on chromium. The first version of the edge was an inhouse attempt from Microsoft and it was a disaster, I guess the lesson was learned, and this new edge we have today is a great Browser, it is lightning fast and packed with some great features with one among them standing out I just love, that is the ability to save web pages as applications and truth to be told you have to try this in order to see al great advantages it offers. A very interesting feature is that edge itself wins the speed race from all of the 5 contestants here which is a great surprise. Of course, the downside of annoying Microsoft pushing it to be your default is, well it's Microsoft, as chrome is tied to Google so is edge tied to Microsoft, and the same dreaded feeling that big MS is watching you. If however, you do not concern yourself with these kinds of things, since it is already part of Windows 10, give it a spin and try it, I am sure you will at least love its blazing speed.
  4. Vivaldi

    vivaldi browser A new kid on the block, relatively unknown Browser Vivaldi offers some great customizable features no other one on this list offers, a very unique and down to each detail customization option, you can literally tweak each and every aspect of this browser making it best customizable and personal browser ever. How it is also based o chromium, every chrome extension works in it naturally. It is very good in speed and constantly updated and developed. The downside, well if you are anything like me, you could spend ages trying to customize it, ages, it has tons of features, and making it really feel and tick as you want can consume a really lot of time. If this thing does not bother you at all, grab Vivaldi here.
  5. Opera

    opera browser Last but not least, we have another relic of the old browser age, the Opera browser. Packed with great security and great in-house features like a built-in VPN, built-in ad blocker, built-in crypto wallet, etc this browser seems like a swiss army knife. Opera is full of features and it shows once you start using it. The downside of opera is that its look and feel are specifically tailored to a certain type of user and not everyone will find that appealing or attractive, add some great but hidden and hard to come by features and it may go unnoticed. However, I think you should really give it a go since it definitely deserves more attention than it gets. Grab it here and check it out.
That's it, 5 great browsers to look up, I hope that you have enjoyed the read and I hope to see you again here for more articles. If you would like to read more helpful articles and tips about various software and hardware visit errortools.com daily.
Read More
How to Fix Error Code 0xc004f210 in Windows 8

Error Code 0xc004f210 – What is it?

Error code 0xc004f210 occurs when Windows 8 users fail to activate their Windows operating system. Users will be able to identify error code 0xc004f210 because of the following common symptoms which occur:

Solution

Restoro box imageError Causes

If you enter an invalid product key or do not have a digital entitlement for the edition of Windows you are attempting to activate, you may experience error code 0xc004f210. Since this error usually occurs due to these main reasons, you will most likely find success resolving this issue by ensuring you use a valid product key or activate an appropriate edition of Windows based on the edition of your digital entitlement.

Further Information and Manual Repair

Error codes can be resolved through manual repair procedures that seek to fix the underlying issues causing the error. In the case of error code 0xc004f210, you should be able to resolve this error by using the methods below. You may also consider contacting a Windows repair technician if you have difficulty resolving the error code.

Method One: Enter Valid Product Key

To successfully activate your operating system and resolve error code 0xc004f210, you will need to enter a valid product key in the Update & security section of Windows. Follow the instructions below to enter the product key.

  • Step one: Click the Start button then select Settings
  • Step two: Select Update & security then Activation
  • Step three: Click the Change product key
  • Step four: Enter a valid product key

If the issue causing error code 0xc004f210 is related to the use of an invalid product key, you should be able to successfully activate your Windows operating system. Should the problem persist, however, you will need to attempt the next manual repair method explained below? Note: Failure to fix this error code might result in other Windows 10 error messages.

Method Two: Ensure Edition of Windows Matches Your Digital Entitlement

Digital entitlement allows Windows users to access activation without using a product key. This digital entitlement only affects Windows 8 users who are attempting to activate versions of Windows 10 that include Windows 10 Pro. Once you are using a genuine copy of Windows 8.1 and your edition of Windows matches your entitlement, you may proceed with the instructions below.

  • Step one: Click the Start button then select Settings
  • Step two: After selecting Settings, click Update & Security
  • Step three: Select Windows Update then the Check for updates tab
  • Step four: Click activate Windows 10 update

You should be able to activate your Windows update once you follow the instructions above. Remember error code 0xc004f210 is an activation code related to product keys or your digital entitlement so once these issues are rectified, you should have no problem activating your operating system of choice and enjoying the benefits it offers. If, however, the problem remains unresolved after you have attempted both manual repair methods, there may be unusual issues affecting your system. Contact Microsoft to rectify the issue or get help from a Windows repair technician.

Method Three: Download an Automated Tool

If you wish to always have at your disposal a utility tool to fix these Windows 8 and other related issues when they do arise, download and install a powerful automated tool.

Read More
New vulnerability found in Windows
Windows users need to be on high alert. Microsoft has confirmed a critical vulnerability has been found in all versions of Windows which presents an immediate threat, and you need to act now. A critical new zero-day hack has been found which affects all Windows versions. windows vulnerabilityTracked as CVE-2021-34484, the “zero-day” flaw enables hackers to breach all versions of Windows (including Windows 10, Windows 11, and Windows Server 2022) and take control of your computer. Microsoft mistakenly thought it had patched the vulnerability (which was first found in August) when it was publicly disclosed in October. But the fix itself was found to be flawed, something the company admitted, and this drew even more attention to the vulnerability. Microsoft subsequently promised to “take appropriate action to keep customers protected” but two weeks later, a new fix has still not arrived. Luckily the third-party security specialist 0patch has beaten Microsoft to the punch with a ‘micropatch that it has now made available for all Windows users “Micropatches for this vulnerability will be free until Microsoft has issued an official fix," 0patch confirmed. You will need to register for a 0patch account and install its download agent before the fix can be applied, but with 0patch fast becoming a go-to destination for hot fixes which beat software companies to the punch this is a no brainer. Hopes will be high that Microsoft can release an effective patch sooner rather than later but, until then, all Windows users must act now if they want to be safe. Download 0patch here: https://blog.0patch.com/2021/11/micropatching-incompletely-patched.html
Read More
How to Fix Tcpip.sys Blue Screen Error in Windows 10
If you have received a BSOD error message that says, “Tcpip.sys”, read on as this post will show you how you can fix the problem. The “Tcpip.sys” means Transmission Control Protocol over Internet Protocol. It is a library of a set of rules that are used to interconnect different devices all over the internet. The Tcpip.sys file is a driver and if a BSOD error message includes this one, it could only mean that the driver file is corrupted or incompatible with your system or there are some conflicting programs installed in your computer. To fix this error, you can try the following workarounds. Make sure to carefully follow each one of them.

Option 1 – Check for conflicting or incompatible programs by putting your PC in a Clean Boot state

As mentioned, the “tcpip.sys” BSOD error might be caused by some problematic programs that clash with your existing operating system. Several users reported that numerous programs that are supposedly designed to enhance computer performance are causing conflict in the system instead. To identify which program is causing the problem, you need to put your computer in a Clean Boot State. To do so, follow the steps below.
  • Log onto your PC as an administrator.
  • Type in MSConfig in the Start Search to open the System Configuration utility.
  • From there, go to the General tab and click “Selective startup”.
  • Clear the “Load Startup items” checkbox and make sure that the “Load System Services” and “Use Original boot configuration” options are checked.
  • Next, click the Services tab and select the “Hide All Microsoft Services” checkbox.
  • Click Disable all.
  • Click on Apply/OK and restart your PC. (This will put your PC into a Clean Boot State. And configure Windows to use the usual startup, just simply undo the changes.)
After putting your PC in a Clean Boot State, try creating a system restore point and see if the problem still occurs. Clean Boot troubleshooting is designed to help you isolate the problem. For you to execute a clean boot troubleshooting, you must do a couple of actions (the steps are given above) and then restart your PC after every action. You might have to disable one third-party app after the other to really isolate the issue. And once you’ve narrowed down the problem, you can either disable the third-party app that’s causing the problem or remove it. Note that you must switch your PC back into the Normal Startup mode after you’re done troubleshooting the problem. Here’s how you can do it:
  • From the “Start” menu, go to System Configuration.
  • After that, switch to the General tab and click the option for “Normal Startup”.
  • Next, go to the Services tab and clear the checkbox for “Hide all Microsoft services”.
  • Then find and click “Enable all” and if prompted, you have to confirm.
  • Afterward, go to the Task Manager and enable all the Startup programs and confirm the action.
  • Restart your PC when prompted.

Option 2 – Disabling Antivirus Software

There are cases when the “tcpip.sys” BSOD error is caused by the antivirus program installed in your computer that’s blocking some essential operations. Because of this, the operating system fails which throws up the BSOD error. As you know, the antivirus program is designed to protect the computer and monitor every action in the system. However, there are instances when the antivirus program gives false positives and shuts down some modules even if it’s harmless. So this could be the case for the “tcpip.sys” error. To verify if the problem is indeed caused by the antivirus program in your computer, you need to temporarily disable it. After you’ve disabled it, restart your PC and then check if the problem’s fixed or not.

Option 3 – Try to update all your Drivers

From time to time, drivers get corrupted or outdated so it’s no surprise that they conflict with the operating system and cause errors like the “tcpip.sys” BSOD error. To fix the problem, you need to update all your drivers especially the network driver since the “tcpip.sys” error is closely related to this driver. Follow the steps below to update your drivers.
  • Tap the Win + R keys to launch Run.
  • Type in devmgmt.msc into the box and tap Enter or click OK to open the Device Manager.
  • After that, a list of device drivers will be displayed. If you see a red or yellow sign that shows up against the driver, right-click on the driver’s name and select “Update Driver Software” or “Uninstall”. And if you find any “Unknown device”, you need to update it as well.
  • Select the “Search automatically for updated driver software” option and then follow the instructions to complete the process.
  • Restart your PC.
Note: You also have the option to go directly to the website of your graphics card manufacturer and check if there’s a new update – if there is, download it. After that, you could also check if there’s a new update of the game you’re getting the issue of the black bar.
Read More
Permission to view object security properties
In an operating system, it is ideal for an administrator to have permission to access all the folders and files. However, there are times when you try to access the security settings or attempt to view the properties of a file, you could encounter an error saying, “You do not have permission to view this object’s security properties, even as an administrative user”. This kind of error may be caused by several reasons. For one, if your computer is infected with a virus or malware which might have caused some changes to the concerned folder or file. It could also occur if a program or service is using the folder or file simultaneously which explains why you’re not able to access the system. It could also be that the folder or file might have been owned by a user account that no longer exists or you might not have the permissions to view the targeted folder or file even though you’re logged in as administrator. To fix the “You do not have permission to view this object’s security properties, even as an administrative user” error, here are some options that might help.

Option 1 – Put your computer in a Clean Boot State

You can also troubleshoot the problem in a Clean Boot state. It could be that there are some third-party applications in your computer that’re preventing you from accessing security settings or properties of a file and to isolate this possibility, you need to boot your computer in a Clean Boot State and then try installing the program again. Putting your computer in this state can help you identify which program is the culprit and thus isolates the problem. In a Clean Boot state, your computer will start using only the pre-selected minimal set of drivers and startup programs. Note that you have to disable and enable one process at a time.
  • Log onto your PC as an administrator.
  • Type in MSConfig in the Start Search to open the System Configuration utility.
  • From there, go to the General tab and click “Selective startup”.
  • Clear the “Load Startup items” check box and make sure that the “Load System Services” and “Use Original boot configuration” options are checked.
  • Next, click the Services tab and select the “Hide All Microsoft Services” check box.
  • Click Disable all.
  • Click on Apply/OK and restart your PC. (This will put your PC into a Clean Boot State. And configure Windows to use the usual startup, just simply undo the changes.)
  • After you’ve set your computer into a Clean Boot State, try to check if the error is now fixed and that you can now view the Properties.

Option 2 – Try booting your computer into Safe Mode and delete inactive users

Aside from the Clean Boot State, you can also reboot your computer in Safe Mode and then delete all the inactive users. There are instances when the folder was created or owned by a user account that’s either deleted or inactive now and so you need to get rid of these inactive user accounts to resolve the error.
  • First, boot your computer in Safe Mode.
  • Then right-click on the concerned folder or file and select Properties.
  • Next, select Advanced in the Security tab and click on Add.
  • A new window will appear and from there, click on “Select a principal”.
  • And then type the name of the user to who you wish to give permissions in the “Enter the object name to select” box.
  • Now select Check Names and this would resolve the user name.
  • After that, click OK to save the settings. This will close the window and take you back to the previous one.
  • Next, from the drop-down menu, change the Type to Allow and select the Full Control checkbox.
  • Click OK to save the changes made and then restart your computer in a normal mode.

Option 3 – Try to take ownership of the folder or file

Another thing you can do to fix the problem is to take ownership and force the system into giving permissions to the Administrator. How? Refer to these steps:
  • Type “command prompt” in the Windows Search bar and then right-click on the relevant search result and select “Run as administrator”.
  • After that, if a User Account Control or UAC prompt appears, just click on Yes to proceed.
  • Next, type and enter this command: TAKEOWN /F <path>
  • Note that the <path> is the location of the folder or file in File Explorer.
  • Now type and enter this second command: ICACLS <path> /grant administrators:F
  • Finally, once the command has been executed, restart your computer and then see if you can now access the folder or file.

Option 4 – Try scanning your computer using Windows Defender

As mentioned, the error when accessing the security settings or properties of a folder or file might be due to a virus or malware. It could be that it had made some modifications that prevents you from accessing security settings or properties. To eliminate it, you have to scan your computer using security programs like Windows Defender.
  • Tap the Win + I keys to open Update & Security.
  • Then click on the Windows Security option and open Windows Defender Security Center.
  • Next, click on Virus & threat protection > Run a new advanced scan.
  • Now make sure that Full Scan is selected from the menu and then click the Scan Now button to get started.
Read More
An Easy Guide to Fixing Internal Error 2503

An Easy Guide to Fixing Internal Error 2503

Internal Error 2503 - What is it?

Internal Error 2503 mostly pops up on Windows 8. It occurs when you try to uninstall or install software on Windows 8. The error code message may vary and displayed in different formats such as:
The installer has encountered an unexpected error installing this package. This may indicate a problem with this package. The error code is 2503. Called RunScript when not marked in progress The installer has encountered an unexpected error installing this package. This may indicate a problem with this package. The error code is 2503. Called Install Finalize when no installation is in progress

Solution

Restoro box imageError Causes

Some of the most common causes for internal error 2503 are:
  • Permission not granted to access the Windows Installer Folder
  • Viruses
  • Problems with Windows Installer

Further Information and Manual Repair

To repair this issue on your PC without any professional assistance, try the DIY methods given below:

Method 1

Internal error 2503 may occur when your account has limited privileges. You don’t have the privilege to use or access the Windows Installer folder. Your inability to access this folder hampers you from successfully install or uninstall the desired program on your PC. To gain access, you need to ensure you have permission.
  • For this navigate to the C:\windows folder. Here find the installer folder and then right-click and choose properties.
  • After that click on the security tab and check if the System and Administrator account has Full access permission.
  • For that make sure the system group option has ‘all’ selected to allow you full permission.

Method 2 - Re-register Windows Installer

Another alternative to resolve internal error 2503 is to re-register Windows Installer.
  • To do this, go to Start and click Run. Now type ‘msiexec /unreg’ in the Run box and then press enter.
  • Follow the same steps and now type ‘msiexec /regserver’ in the box and then press enter. This will resolve the issue.

Method 3 - Remove Viruses

If internal error 2503 is triggered by a viral infection on your PC, then it is advisable to download an antivirus and scan your entire system. Viruses are notorious for system failures and pose data security threats. If not removed timely, these malicious programs can damage your PC. To remove all viruses on your system, run an antivirus. An antivirus detects all malicious software programs including viruses, malware, adware, and spyware. Delete all the malicious files found right away. This will help resolve internal error 2503.
Read More
1 2 3 162
Logo
Copyright © 2022, ErrorTools. All Rights Reserved
Trademarks: Microsoft Windows logos are registered trademarks of Microsoft. Disclaimer: ErrorTools.com is not affiliated with Microsoft, nor claim direct affiliation.
The information on this page is provided for information purposes only.
DMCA.com Protection Status