Windows computer shuts down instead of Sleep

As you know the Windows 10 operating system is has a lot of features and some of them are related to turning off your computer in different ways in order to save power at different levels. These particular features are Shut down, Restart, Hibernate, and Sleep. However, there are times when you might encounter some issues when using any of the aforementioned features. One of these issues is when your computer shuts down instead of going to Sleep.

This issue could be caused by several factors including a bug related to the Intel Management Engine Interface or IMEI driver as well as any misconfiguration in the power settings of the BIOS or UEFI. If your computer is going through this problem, read on as this post will guide you in fixing it.

There are several potential fixes you can try to fix the problem. You can try to check the Sleep Advanced Settings or run the built-in Power troubleshooter or run the Power Efficiency Diagnostic Report. In addition, you can also try to troubleshoot the problem in a Clean Boot State or reset or update the BIOS.

Option 1 – Check the Sleep Advanced Settings

  • Click on the Windows key and type “control panel” in the field and select the related search result.
  • Next, select the Security and Maintenance option and click on the Power Options.
  • After that, you have to select the Change Plan Settings but keep in mind that this option is barely readable so you need to read each option carefully.
  • Now click on the Change advanced power settings button and a new window will appear.
  • Then look for the “Sleep” option and expand it. Make sure that the “Allow hybrid sleep” option is on.
  • Reboot your computer and check if your computer now functions properly. If it still didn’t work, you may have to reverse the changes you’ve made.

Option 2 – Try to run the Power troubleshooter

The next thing you can do is to run the Power troubleshooter. To do so, follow these steps:

  • Go to Settings and navigate to Update & Security > Troubleshoot.
  • After that, look for the “Power” option from the given list of built-in troubleshooters and click on it.
  • Next, click on the “Run the troubleshooter” button to run the Power troubleshooter.
  • Once the troubleshooter is done identifying the problems, follow the next on-screen instructions to resolve the problem.

Option 3 – Troubleshoot Sleep Mode issue in a Clean Boot State

The issue with Sleep Mode might be caused by some third-party programs installed on your computer. This program might be the one that puts your computer to sleep and so to isolate this possibility, you have to put your PC in a Clean Boot State using the steps below.

  • Log onto your PC as an administrator.
  • Type in MSConfig in the Start Search to open the System Configuration utility.
  • From there, go to the General tab and click “Selective startup”.
  • Clear the “Load Startup items” check box and make sure that the “Load System Services” and “Use Original boot configuration” options are checked.
  • Next, click the Services tab and select the “Hide All Microsoft Services” check box.
  • Click Disable all.
  • Click on Apply/OK and restart your PC. (This will put your PC into a Clean Boot State. And configure Windows to use the usual startup, just simply undo the changes.)
  • After that, try to put your computer to sleep again.

Option 4 – Try to run the Power Efficiency Diagnostics Report

You could also try to run the Power Efficiency Diagnostics Report to fix the problem. This tool is helpful and will help you analyze the status of the battery but note that this can be quite overwhelming especially if you’re not well-versed in this matter.

Option 5 – Try to update the BIOS

Updating the BIOS can help you fix the ATTEMPTED_WRITE_TO_READONLY_MEMORY BSOD error but as you know, BIOS is a sensitive part of a computer. Even though it is a software component, the functioning of the hardware depends on it largely. Thus, you must be careful when modifying something in the BIOS. So if you don’t know much about it, it’s best if you skip on this option and try the other ones instead. However, if you are well-versed in navigating the BIOS, then follow the steps below.

  • Tap the Win + R keys to open the Run dialog box.
  • Next, type “msinfo32” in the field and press Enter to open System Information.
  • From there, you should find a search field on the bottom where you have to search for the BIOS version and then press Enter.
  • After that, you should see the developer and version of the BIOS installed on your PC.
  • Go to your manufacturer’s website and then download the latest version of BIOS on your computer.
  • If you are using a laptop, make sure that you keep it plugged in until you have updated the BIOS.
  • Now double click on the downloaded file and install the new BIOS version on your computer.
  • Now restart your computer to apply the changes made.

Note: If updating the BIOS didn’t help, you might want to consider resetting it instead.

If you like to learn and find out more about various Windows errors, and how to repair them go to our vast archive or use search to find articles that will explain and help you in solving your issue.
However, if you prefer to do things fast and with automatization then we are proposing to use an automated solution for your issues. The application that we are recommending is Advanced System Repair Pro
Advanced System Repair utilizes multiple tools all in one to give you a quick, simple, reliable, and very thorough diagnosis of your PC. It brings you all the tools you need in one program to clean, fix, protect, optimize and boost your PC!
1-Click Maintenance
All the tools to make it simple and easy! It's like having a professional technician at the click of a mouse.

Junk Cleaner
Keeping your computer free from unnecessary clutter also helps make your computer last longer. Like any other machine, if you keep it clean and take care of it, it will serve you better for longer!

Optimize background apps
Optimize applications background activity with the built-in Application Optimizer feature.

Disk Defrag
With a simple 1-click, Advanced System Repair speeds up your PC by assembling fragmented files on your machine and organizing them more efficiently.

Malware Removal
Finds and removes all types of harmful malware including trojans, worms, bots, adware, spyware, PUPs, and more!

Privacy Cleaner
The all-in-one privacy suite to Clean Your Tracks & Protect Your Privacy! Make your computer safe, secure, and more efficient!

System Tweak/Optimizer
ASR will analyze your complete system and settings to adjust your PC to function at its maximum performance.

Registry Cleaner
Over time, as you install and uninstall applications, the registry can become cluttered with old entries and broken settings which can result in program crashes, and annoying messages and slow the computer down.
Visit our Advanced System Repair Pro Download page to inform yourself about all the benefits of this software and get a free trial copy of it.
advanced system repair pro

Advanced System Repair Pro

One-click automated PC repair solution
ASR logo
With Advanced System Repair Pro you can easily
Replace damaged files
Restore performance
Free disk space
Remove Malware
Protects WEB browser
Remove Viruses
Stop PC freezing
DOWNLOAD
Privacy Policy | Terms of Use | Uinstall
Advanced System Repair Pro is compatible with all versions of Microsoft Windows including Windows 11

Share this article:

You might also like

Choosing default browser in Windows 11
Default applications in previous Windows versions were a pretty straightforward process. The user went to the settings application and picked for each category which application he would like to choose from the list of installed ones. In Windows 11 things are little changed. In this article, we will show you how to choose the default internet browser inside Windows 11, and sadly it is a more tedious task than in previous versions.

windows 11 default browser
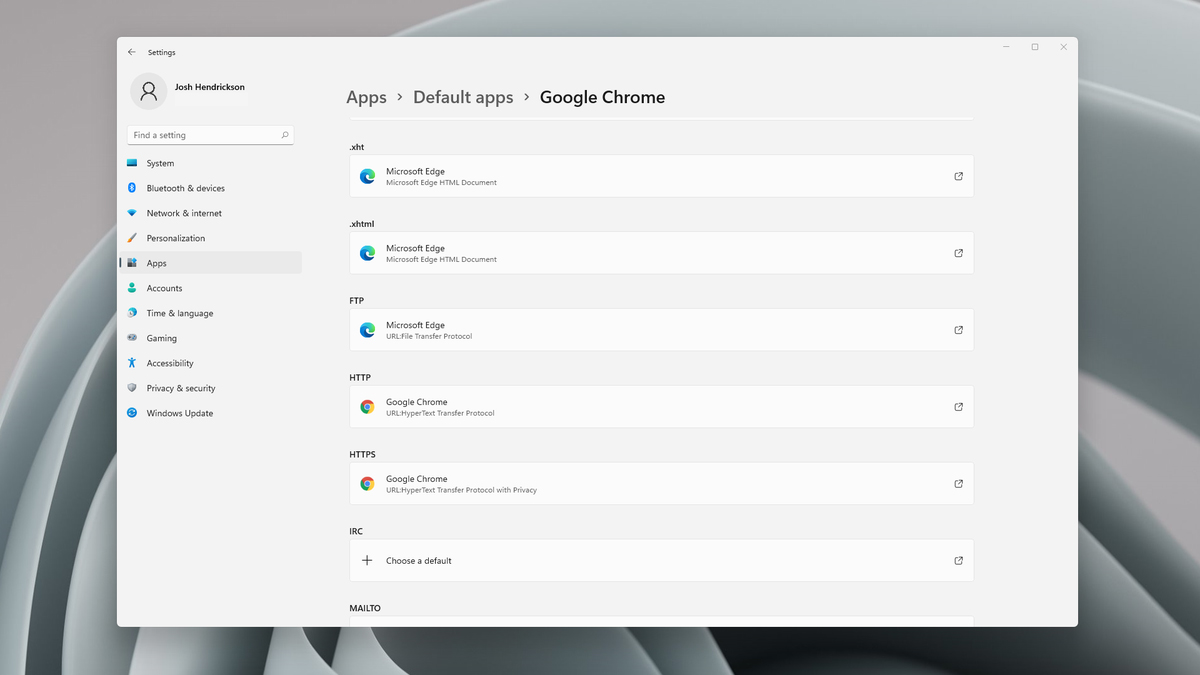
Choosing default browser in settings

As in previous versions of the Windows operating system you will need to use the settings application in order to change your default Internet browser. Previously, in Windows 10, a variety of general categories like email, web browser, and photo viewer were all listed under the Default Apps section of the Settings panel. It was easy to click on one of those categories and click on the option you like best from the small pop-up suggestion window. In the Windows 11 Insider Build, you’ll see a gauche list of an individual file or link types that you’ll need to specify your preferred browser for. The types include: HTM, HTML, PDF, SHTML, SVG, WEBP, SHT, FTP, HTTP, and HTTPS. There are additional optional types you can specify your preferred browser for as well. The issue here is in order to use a single browser which most users do you will have to go through each file type and set your preferred one. I am really not sure why this was introduced or why it has to be this way, all I can do is hope that in the final release of Windows 11 this feature will be rolled back as it used to be and that you could set your default browser in just one simple click.
Read More
How to Fix 0x80070643 Error Code
[vc_row][vc_column][vc_column_text]

Repair 0x80070643 Error Code

What is the Ox80070643 Error Code?

The 0x80070643 error is a Windows Update error. It may appear on your computers due to several reasons.  Though this error does not pose any harmful threats to your system it is still advisable to fix it to ensure your system works perfectly and there are no installation issues.

Solution

Restoro box imageError Causes

The error 0x80070643 error code is usually triggered:
  • When the MSI software update registration fails
  • .NET framework installation becomes corrupted on your PC
Though it does not cause any serious damages it is advisable to repair this issue as it may hamper your ability to install updates on your PC.

Further Information and Manual Repair

If you experience the error 0x80070643 on your PC, you don’t have to panic. This error is rated as easy to resolve. All you have to do to fix this error is to uninstall and reinstall the .NET Framework. Here is a step by step guide to repairing the error 0x80070643:
  1. First close all the currently running programs on your PC
  2. Then go to the start menu and click on the control panel. After you click on it you will see a Programs option here.
  3. Now click on Programs and then click ‘Programs and Features
  4. Under the Programs and Features section, you will see lots of programs. Double click on Microsoft .Net Framework 4 Client Profile.
  5. Now as you double click on it a dialog box will open in front of the screen with 2 options Repair .Net Framework 4 Client Profile to its original state and the other option would be Remove.Net Framework 4 Client profile from this computer. Click on the first option that says Repair.
  6. After clicking on the Repair tab, click ‘Next’ and then click ‘Finish’. This shows that the .NET Framework is repaired.
  7. Now to bring the changes into effect, restart your PC and reboot.
  8. After rebooting it, go to the start menu again and type Windows Update in the search box.
  9. Click ‘Windows update’ to check for and install updates.
Follow these steps to resolve the 0x80070643 error code issue immediately. Nonetheless, to avoid the error 0x80070643 from occurring again, it is suggested that you download the Windows Update tool. This helps keep your system updated. By updating the latest vulnerability and performance improvements on your PC, you can ensure your PC works smoothly and is not exposed to such errors and threats.[/vc_column_text][/vc_column][/vc_row]
Read More
How to Fix Unable to contact your DHCP Server
If your IP address expires, you will most likely experience interruptions when browsing the web. In such cases, you have to release and renew the IP address by executing the following commands:
  • ipconfig /release
  • ipconfig /renew
So if you are trying to renew the IP address of your Windows 10 computer using the commands given above but you encounter an error message instead that says, “Unable to contact your DHCP Server”, then you’ve come to the right place as this post will guide you in fixing this error. This kind of error indicates that the NIC can’t communicate with the DHCP server which is why it’s not able to release new IP addresses. It could be due to many reasons. To fix this error, you can try to roll back, update or reinstall the Network Adapter drivers. You could also run the built-in Network Adapter troubleshooter, as well as start or restart the DHCP client service.

Option 1 – Try to rollback your Network driver

If you have updated the driver software as of late and you suddenly got this error, you might have to roll back the device driver – in other words, switch back to the previous working version. To do that, follow these steps:
  • Tap the Win + R keys to launch the Run window and then type in the “devmgmt.msc” command and hit Enter to open the Device Manager window.
  • Under the Device Manager, you will see a list of drivers. From there, look for the Network Adapters and expand it.
  • Next, select the driver entries that are labeled appropriately other than anything in the context of the WAN Miniport.
  • Then select each one of them and double click to open a new mini window.
  • After that, make sure that you’re on the Driver tab and if you are not, just navigate to it then click the Roll Back Driver button to switch back to the previous version of your Network adapters.
  • Now restart your computer to successfully apply the changes made.

Option 2 – Try to update the Network drivers

If rolling back to the previous version of the Network adapter drivers didn’t help, then you need to update them instead. To do so, here’s what you have to do:
  • Tap the Win + R keys to launch the Run window and then type in the “devmgmt.msc” command and hit Enter to open the Device Manager window.
  • Under the Device Manager, you will see a list of drivers. From there, look for the Network Adapters and expand them.
  • Then right-click on each one of the Network drivers and update them all.
  • Restart your PC and see if it helped in fixing the BSOD error.
Note: If updating the network drivers didn’t help in fixing the problem, you can also try to uninstall the very same drivers and restart your Windows 10 PC. After that, the system itself will reinstall the drivers you just uninstalled. Alternatively, you can also download and install the drivers from the manufacturer’s website directly.

Option 3 – Run the Network Adapter troubleshooter

Running the built-in Network Adapter troubleshooter can also help in fixing the “Unable to contact your DHCP Server” error. To run the Network Adapter Troubleshooter, refer to these steps:
  • Open the Search bar on your computer and type in “troubleshoot” to open the Troubleshoot settings.
  • Next, scroll down and select the “Network Adapter” option from the right pane.
  • Then click on the Run Troubleshooter” button.
  • After that, your computer will check for any possible errors and will pinpoint the root cause of the problem if possible.
  • Restart your computer.

Option 4 – Try disabling the IPv6 in the Network Center

  • Tap the Win + X key combination and click on Network Connections.
  • This will open the Settings app on a specific page. Now on the right-side panel, click on the Network and Sharing Center link.
  • After that, it will open the Control Panel and from there, click on the network that your computer is connected to and then click on Properties.
  • Next, uncheck the entry that says, “Internet Protocol Version 6 (TCP/IPv6)” in the list that populates.
  • Now click on OK and close all other windows.
  • Restart your computer and see if the error is now fixed.

Option 5 – Start or restart the DHCP client service

If the DHCP client service is either inactive or stopped, you can try to start or restart it to resolve the error. You can do this via the Services Manager.
  • Tap the Win + R keys to open the Run utility.
  • Then type “services.msc” in the field and tap Enter or click OK to open the Services Manager.
  • After that, look for the DHCP client service from the list of services displayed.
  • Once you found it, right-click on it and select the Start or Restart option.
Read More
An Easy Guide to Fixing Error 115

How to Fix Error 115

Error 115 - What is it?

Error 115 is a type of GameGuard redundant execution error.  If you have GameGuard installed on your PC, then you will most likely experience this error code. GameGuard is basically an anti-cheating robot toolkit developed by INCA Internet. It is installed to block possibly malicious applications and common methods of cheating on multiplayer online role-playing games. But at the same time, this software is infamous for error pop-ups. Error 115 is displayed on the Windows screen when a game has been executed multiple times or you have left the game running without logging out. Error 115 is displayed in the following format:
GameGuard Execute Error: 115 ‘There are multiple events of game execution or GameGuard is already running. Close the game then try again.’

Solution

Restoro box imageError Causes

The error 115 may appear on your Windows screen due to multiple reasons. These include:
  • Multiple executions of the game
  • Antivirus Conflict
  • Firewall Conflict
  • Registry Overloaded with Bad and Invalid Entries
This error may cause a great deal of inconvenience to you if you love to play multi-player role-playing games over the web like Blood Feud, 9Dragons, Phantasy Star Universe, and Alliance of Valiant Arms. To avoid such inconvenience, it is advisable to fix this error immediately.

Further Information and Manual Repair

Here are some easy do-it-yourself methods to resolve the error 115 on your PC. These methods require no technical expertise.

Method 1 - Terminate the Game Already Running on Your System

To resolve the issue, hit ‘Ctrl+Shift+Esc’ to launch Task Manager. Here you will find a list of applications running on your system, terminate the gaming application to resolve error 115.  If this doesn’t work, then restart your PC.

Method 2 - Disable Antivirus Programs or Firewall Temporarily

Sometimes this error may appear on your computer screen because of antivirus or Firewall security conflict. These programs often block gaming applications and software like GameGuard and because of that, you are unable to play online games on your system. To fix the issue, try disabling these programs on your PC temporarily.

Method 3 - Clean and Repair the Registry

The error 115 may also occur because of the registry issue with Symantec. Follow these steps to enable the game to run:
  • Go to your start menu then find Run then write Regedit.
  • Find HKEY_LOCAL_MACHINE. To proceed, go to SYSTEM then CurrentControlSet, and then Services.
  • Look in the list for SysPlant and click it. Then look for the word 'Start', right-click on Start, and select rename.
  • Rename 'start' to 'DWORD: 00000004’ then close Regedit and reboot your PC to activate changes.

Method 4 - Download and Run Total System Care.

This process can be slightly tricky and a bit time-consuming. Therefore it is advisable to download Restoro. This is a cutting-edge, easy-to-use PC Fixer deployed with a powerful registry cleaner. It removes all the unnecessary files cluttering the registry like bad and invalid registry entries. It fixes the damaged registry and enables it to resume back to its normal functioning. Click here to download Restoro.
Read More
Fix Error Code 0x80090016 for PIN and MS Store
If you encounter Error Code 0x80090016 while trying to create a PIN or when you are using Microsoft Store, then you’ve come to the right place as this post will guide you in how you can fix this problem. Recently some users reported that they were unable to sign in or set up the Windows 10 Login PIN. Note that the potential fixes for this issue are totally different in both scenarios. Here’s the error message you get when you encounter the PIN related error:
“Something went wrong, We weren’t able to set up your PIN. Sometimes it helps to try again or you can skip for now and do this later.”
On the other hand, here’s the error message you get for the Microsoft Store-related error:
“Try that again, Something happened on our end and we couldn’t sign you in.”
Here are some potential fixes you can try to fix the Error Code 0x80090016 in the Microsoft Store:

Option 1 – Try to sync the Date and Time

The first thing you can try is to sync the Date and Time of your computer as the wrong Date and Time settings are one of the most common causes of connection problems like the Error Code 0x80090016. This is because of the incompatibility between the SSL Certificate validation date and the System Clock. Thus, you have to sync your System Clock. Refer to the steps below to do so.
  • Start by tapping the Win + I keys to open the Windows Settings.
  • Next, go to Time & Language > Date & time.
  • From there, turn the toggle on for the “Set time automatically and Set time zone automatically” option on the right-side panel.
  • After that, click on Region & language located on the left side panel and make sure that the Country or region on the right-side panel is set to the country you live in.
  • Now close the Settings app and restart your computer and see if it fixes the problem or not.

Option 2 – Try to re-register the Microsoft Store app via PowerShell

  • Tap the Win + X key combination or right-click on the Start button and click on the Windows PowerShell (Admin) option.
  • If a User Account Control or UAC prompt appears, just click on Yes to proceed and open the Windows PowerShell window.
  • Next, type in or copy-paste the following command to re-register the Microsoft Store app and tap Enter:
powershell -ExecutionPolicy Unrestricted Add-AppxPackage -DisableDevelopmentMode -Register $Env:SystemRootWinStoreAppxManifest.xml
  • Wait for the process to be completed and then restart your computer.

Option 3 – Try to reset the Microsoft Store cache

Just like browsers, Microsoft Store also caches as you view apps and games so it is most likely that the cache is no longer valid and must be removed. To do so, follow the steps below.
  • Right-click on the start button and click on Command Prompt (administrator).
  • Next, type in the command, “exe” and tap Enter. Once you do, the command will clear the cache for the Windows Store app.
  • Now restart your PC and afterward, try opening Microsoft Store again and then see if Error Code 0x80090016 is resolved or not.

Option 4 – Try to run the Windows Store Troubleshooter

The Windows 10 Store Apps Troubleshooter will help you in fixing the Error Code 0x80090016. This is a great built-in tool from Microsoft that helps users fix any app installation issues. So this is worth a try to solve the problem. This built-in tool also helps you fix the Windows 10 Store if it isn’t working. To use the Windows Store Troubleshooter, follow the steps below.
  • Tap Win + I keys again to open the Windows Settings panel.
  • Go to Update & Security and then go to Troubleshoot.
  • On your right-hand side, scroll down to find the Windows Store Apps and then click on Run the troubleshooter option and see if it fixes the problem.
On the other hand, you can use the options below if you encounter Error Code 0x80090016 while setting up your PIN.

Option 5 – Try to manage the NGC Folder

  • You need to boot your computer into Safe Mode first.
  • Next, delete all the contents of the NGC folder and you can do that by taking ownership of the folder first. To do so, refer to these sub-steps:
    • First, locate the concerned folder and right-click on it then select Properties.
    • Next, click on the Edit button in the Properties window and click OK to confirm if you got a User Account Control elevation request.
    • After that, select user/group from the permission windows or click on the Add button to add another user or group. It would be best if you add “Everyone” to give permission.
    • Then check “Full Control” under the “Allow” column to assign full access rights control permissions.
    • Now edit the permission to Full Control for “Everyone”.
    • Click OK to save the changes made and then exit.
  • After you take ownership of the folder, you can now delete all of its contents.
  • Once you’re done, restart your computer and see if the problem is fixed.

Option 6 – Try to use the Group Policy Editor

  • Tap the Win + R keys to open the Run dialog box
  • Then type “gpedit.msc” in the field and hit Enter or click OK to open the Group Policy Editor.
  • Next, navigate to this setting: Computer Configuration > Administrative Templates > System > Logon
  • After that, double click on “Turn on convenience PIN Sign-in” and set its radio button to Enable. This policy setting has the following description:
“This policy setting allows you to control whether a domain user can sign in using a convenience PIN. If you enable this policy setting, a domain user can set up and sign in with a convenience PIN. If you disable or don’t configure this policy setting, a domain user can’t set up and use a convenience PIN. Note: The user’s domain password will be cached in the system vault when using this feature. To configure Windows Hello for Business, use the Administrative Template policies under Windows Hello for Business.”
  • After you set the radio button to Enable, it will turn on the Logins using the PIN. Note that setting the radio button to Disabled or Not Configured will turn off the Logins using the PIN.
  • Now exit the Group Policy Editor and restart your PC so that the changes can take effect.
Read More
How to Disable Restart in Firefox
Mozilla Firefox has introduced a new feature known as Restart with Windows which allows the browser to automatically start when your Windows 10 computer boots. This means that if you leave the Firefox browser opened while shutting down your computer, Firefox will re-open automatically along with the tabs that were opened right before you shut down your computer. Although some users may find this feature convenient, there are others who do not approve at all as it could be a nuisance. So if you’re one of the latter, then read on as this post will show you how you can disable the Restart with Windows feature in the Firefox browser on your Windows 10 computer. Refer to the instructions laid out below to get started.
  • Step 1: Open Mozilla Firefox and if it’s opened already, just open a new tab and then type the following text in the address bar:
about:config
  • Step 2: After typing the text given above, hit Enter and if a prompt with a warning message pops up, simply click on the “I accept the risk!” button to proceed.
  • Step 3: Next, type “Restart” in the search filter which should display the following preference in the window:
“toolkit.winRegisterApplicationRestart”
  • Step 4: After that, check for the preference value and then see if it’s set to true or not. If it is set to true, then it means that the Restart with Windows feature is enabled so obviously, to disable it, you need to set its value to false.
  • Step 5: Now restart your computer without closing Firefox. After restarting your computer, you should no longer see Firefox starting automatically.
The Restart with Windows feature by default is disabled for most users. On the other hand, Mozilla will have this feature enabled as the default configuration in the coming weeks so it’s best that you now know what to do when that time comes since the newer versions of Mozilla Firefox are already being shipped with the Restart with Windows feature. However, if this post did not help you, then you might want to check if the feature has been added to the Startup folder, and from there, you can disable this startup program using the Task Manager > Startup tab.
Read More
How to Allow or deny Apps permissions
As you know, each one of the applications that you use in your Windows 10 computer has its own set of permissions by default. These applications either allows or denies the interactions between a few other applications, depending on their own needs. This is why you might suddenly encounter a message that says,
“This app wants to access your pictures” or “This app wants to access your account info”
both of which are followed by two buttons that will ask you to Allow or Deny the action. You can always click on any of the given options. This will determine the permission of the application. Users in Windows 10 are given the option to either allow or deny applications in accessing their account information like name, picture and other account information. Thus, in this post, you will be guided on how you can change the Privacy settings of these apps to allow or deny them permission to access not just your account info but for all users, as well as specific apps in Windows 10. The user account information is part of the Privacy data in Windows 10 that you can control easily using the Settings app. In fact, you can revoke or grant access permission for your account information, all the users and specific applications to do that, follow each one of the instructions provided below carefully.

Allow or deny apps permission to account info for yourself:

Step_1: The first thing you have to do is open Settings. From there, select Privacy. Step_2: After that, scroll and look for Account info and select it. Step_3: Now turn off the toggle button for the “Allow apps to access your account info” option if you want to deny apps permission to your account info. But if you want to allow them access, simply turn the toggle button on. Keep in mind that when you allow access or permission, you can select which apps can access your picture, name, and other account info by simply using the settings on the page you’re currently in.

Now if you want to allow or deny apps to access your account info for all the users, here’s what you have to do:

Step_1: First, open Settings and click on the icon for Privacy. Step_2: Next, scroll down until you see the Account info located on the left side and then click on it. Step_3: After that, click on the Change button under the “Allow access to account info on this device” section. If you want to deny account info access for all other users, then turn the toggle button off. Doing so will automatically disable not just the account info access for all users but also for all the apps as well.

On the other hand, if you want to allow or deny account info access to specific apps, you can do so by following these steps:

Step_1: As you did earlier, go to Settings and click on the Privacy icon. Step_2: After that, scroll down and select Account info located on the left side. Step_3: Now turn on or off the toggle button under the “Choose which apps can access your account info” section if you want to deny or allow specific apps permission to access Account Info. If you’ve turned on the toggle button under the “Allow apps to access your account info”, all the apps get access permissions by default.
Read More
Fix ntkrnlmp.exe Blue Screen in Windows
The ntkrnlmp.exe file is a file associated with the Windows operating system’s NT Kernel and other system processes. It is also related to the “CRITICAL PROCESS DIED” error. So if you encounter a Blue Screen of Death error that’s related to this file, then you’ve come to the right place as this post will guide you in fixing the ntkrnlmp.exe Blue Screen error. This kind of Blue Screen error might be caused by the file getting corrupted or infected with some malware. Aside from these causes, the error might also be due to the corruption and malfunction of the graphics card drivers. Before you troubleshoot the problem, you might want to try performing System Restore especially if you tend to create a System Restore point every now and then. Performing System Restore could help you resolve the ntkrnlmp.exe Stop error. You can do this option either by booting into Safe Mode or in System Restore. If you are already in the Advanced Startup Options, just directly select System Restore and proceed with the next steps. And if you have just booted your PC into Safe Mode, refer to the steps below.
  • Tap the Win + R keys to open the Run dialog box.
  • After that, type in “sysdm.cpl” in the field and tap Enter.
  • Next, go to the System Protection tab then click the System Restore button. This will open a new window where you have to select your preferred System Restore point.
  • After that, follow the on-screen instructions to finish the process and then restart your computer and check if the problem is fixed or not.
If System Restore didn’t help, then proceed to the given options below.

Option 1 – Disable the C-states and EIST in the BIOS

The first thing you can do is try to disable the C-states and EIST in the BIOS. To do that, refer to the steps given below.
  • Go to the BIOS and from there look for an option named CPU Configuration which can usually be found under the Advanced menu.
  • Next, look for CPU Power Management and under that section, disable both the “Intel EIST” and “Intel C-state” options.
  • After you disable them, save the changes you’ve made and exit the BIOS.
  • Now restart your computer and check if the ntkrnlmp.exe BSOD error is now fixed.

Option 2 – Try to update, rollback or disable drivers

If the first option didn’t help in fixing the ntkrnlmp.exe Blue Screen error the next thing you can do is to roll back, or update, or disable device drivers in your computer. It is most likely that after you updated your Windows computer that your driver also needs a refresh. On the other hand, if you have just updated your device drivers then you need to roll back the drivers to their previous versions. Whichever applies to you, refer to the steps below.
  • Open the Devices Manager from the Win X Menu.
  • Then locate the device drivers and right-click on them to open the Properties.
  • After that, switch to the Driver tab and click on the Uninstall Device button.
  • Follow the screen option to completely uninstall it.
  • Finally, restart your computer. It will just reinstall the device drivers automatically.
Note: You can install a dedicated driver on your computer in case you have it or you could also look for it directly from the website of the manufacturer.

Option 3 – Configure the Driver Verifier Manager

The Driver Verifier Manager is another tool in Windows that could help you fix driver-related issues. And so if you want to fix the ntkrnlmp.exe Blue Screen error you need to use the Driver Verifier Manager:
  • Type in the keyword “Verifier” in the Cortana search box to search for Verifier in Windows 10.
  • After that, select the option “Create custom settings”.
  • Make sure that you have checked everything except the options “DDI compliance checking” and “Randomized low resources simulation”.
  • Next, select the option “Select driver names from a list” option.
  • Afterward, you have to select all the drivers from any unofficial or third-party provider. To simply put it, you have to select all the drivers that are not supplied by Microsoft.
  • Then click on the Finish button.
  • Open Command Prompt as administrator and execute this command – verifier /querysettings
  • The command you just executed will display the Driver Verifier settings so if you see any of the flags enabled boot your Windows 10 PC into Safe Mode.
  • Open the Command Prompt as admin again and run this command – verifier /reset
  • The command will reset the Driver Verifier. Once the process is done, restart your PC and check.

Option 4 – Run the Blue Screen Troubleshooter

The Blue Screen troubleshooter is a built-in tool in Windows 10 that helps users in fixing BSOD errors like ntkrnlmp.exe. It can be found on the Settings Troubleshooters page. To use it, refer to these steps:
  • Tap the Win + I keys to open the Settings panel.
  • Then go to Update & Security > Troubleshoot.
  • From there, look for the option called “Blue Screen” on your right-hand side and then click the “Run the troubleshooter” button to run the Blue Screen Troubleshooter and then follow the next on-screen options. Note that you might have to boot your PC into Safe Mode.
Read More
How to Turn On or Off Tailored Experiences
In this post, you will be guided on how you can turn on or turn off the Tailored Experiences feature in Windows 10 using three methods – via Settings, Registry Editor, and Group Policy Editor. The Tailored Experiences feature in Windows 10 helps Microsoft in delivering recommendations about Microsoft Products. The diagnostic data that comes with it allows Microsoft to know about its consumers’ experiences as well as collect feedback. To simply put it, tailored experiences are personalized tips, ads, and recommendations that enhance Microsoft products and services for consumer needs. And when you enable this feature, Windows will collect information from your browser, apps, features, and many more. After collecting information, it will offer contents that are tailored based on the data gathered on the lock screen of your computer, Windows tips, and other related functions. On the other hand, the diagnostic data is the one that allows Microsoft to get feedback from the customer. So if you’ve noticed some prompts when you use Windows that ask you about the experience, that’s actually a part of the diagnostic data. A lot of users find this feature useful. However, there are also skeptical ones that don’t share the same sentiments. If you are one of the skeptical ones, you actually have the option to turn this feature off if you do not want Microsoft to show ads, recommendations, and so on. It is also recommended that you enable the Diagnostic Data collection as you can choose to delete any collected data, as well as control the feedback frequency from Automatic to Once a day, or once a week, or to never. As mentioned, there are three methods you can choose from to either turn on or turn off Tailored Experiences. You can do it via Settings, Registry Editor, and the Group Policy Editor. To get started, follow the options provided below.

Option 1 – via Settings

To turn on or off Tailored Experiences using Settings, refer to these steps:
  • Go to Settings and here, click on Privacy.
  • Next, go to Diagnostic and Feedback.
  • From there, toggle off the control under the Tailored experiences option to turn it off or toggle it on, if you want to turn it on.

Option 2 – via Registry Editor

To turn on or off Tailored Experiences via Registry Editor, follow the steps below.
  • Tap the Win + R keys to open the Run dialog box and type “Regedit” in the field and then tap Enter to open the Registry Editor.
  • Next, navigate to this registry path: HKEY_CURRENT_USERSoftwareMicrosoftWindowsCurrentVersionPrivacy
  • After that, look for the DWORD named “TailoredExperiencesWithDiagnosticDataEnabled” and change its value to 0 if you want to turn it off or 1 if you want to turn it on.

Option 3 – via Group Policy Editor

To turn on or off Tailored Experiences using the Group Policy Editor, here’s what you have to do:
  • Tap the Win + R keys to open the Run prompt and type “gpedit.msc” in the field and hit Enter to open the Group Policy Editor.
  • Next, navigate to this policy setting: User ConfigurationAdminstrative TemplatesWindows ComponentsCloud Content
  • Here, double click on the “Do not use diagnostic data for tailored experiences” option and select Enabled. Once you do that, you will see the following description:
“This policy setting lets you prevent Windows from using diagnostic data to provide tailored experiences to the user. If you enable this policy setting, Windows will not use diagnostic data from this device (this data may include browser, app, and feature usage, depending on the “diagnostic data” setting value) to customize the content shown on the lock screen, Windows tips, Microsoft consumer features, and other related features. If these features are enabled, users will still see recommendations, tips, and offers, but they may be less relevant. If you disable or do not configure this policy setting, Microsoft will use diagnostic data to provide personalized recommendations, tips, and offers to tailor Windows for the user’s needs and make it work better for them. This setting does not control Cortana tailored experiences, since there are separate policies to configure it.”
Read More
Fix Windows Script Host in Windows startup
In case you don’t know, the Windows Script Host provides capabilities such as batch files but it also includes many other features like it can be used by a user manual as well as created by the operating system to automate the flow of operations in the system. However, there are a lot of errors that could take place in such a process. One of them is the following error:
“Script: <PATH of the VBS Script> Line: x Char: x Error: The description of the error. Code: xxxxxxxx Source: (Source of the error)”
At the time of writing, it isn’t clear yet what the root cause of the error really is but there are several potential fixes you can check out to fix it. You can try to run the System File Checker or set the default value for the .vbs key, or troubleshoot the problem in a Clean Boot State. You could also try to repair Install Windows 10 or scan your computer for malware. For more detailed instructions refer to the following options.

Option 1 – Try to run a System File Checker scan

  • In the Windows Start Search, type “command prompt” and right-click on Command Prompt from the search results, and then select the “Run as administrator” option.
  • After opening Command Prompt with admin privileges, type the “sfc /scannow” and tap Enter to execute it.
  • Once the scan is finished, restart your computer and see if the Windows Script Host error.

Option 2 – Try setting the default value for the .vbs key

  • Tap the Win + R keys to open the Run dialog box and type “Regedit” in the field and tap Enter to open the Registry Editor.
  • Next, navigate to this registry path: ComputerHKEY_CLASSES_ROOT.vbs
  • From there, double click on the default string and change its Value data to “VBSFile”.
  • Exit the Registry Editor and restart your computer for the changes to take effect.

Option 3 – Try troubleshooting the problem in a Clean Boot State

Setting your computer in a Clean Boot State can help you diagnose and later troubleshoot the problems in your computer. During this state, the system will start with a minimal number of drivers and startup programs that help in isolating the problem with the interfering software. To put your computer in a Clean Boot State, follow the given steps below.
  • Log onto your computer as an administrator.
  • Type in MSConfig in the Start Search to open the System Configuration utility.
  • From there, go to the General tab and click “Selective startup”.
  • Clear the “Load Startup items” check box and make sure that the “Load System Services” and “Use Original boot configuration” options are checked.
  • Next, click the Services tab and select the “Hide All Microsoft Services” check box.
  • Click Disable all.
  • Click on Apply/OK and restart your PC. (This will put your PC into a Clean Boot State. And configure Windows to use the usual startup, just simply undo the changes.)
  • From there, start to isolate the problem by checking which one of the programs you installed recently is the root cause of the problem.

Option 4 – Try to repair install Windows 10

  • First, you have to click this link and then click the Download Tool Now button.
  • Next, click the “Use the tool to create installation media (USB flash drive, DVD, or ISO file)…” option and follow the next given instructions on the screen.
  • Now select the ISO file option in step 5.
  • After that, you should now have an ISO file.
  • Next, go to the location where you’ve downloaded the ISO file.
  • Then right-click on the Windows 10 ISO file and select the Open with option and then select File Explorer.
  • Now click on “setup.exe” and follow the next instructions that appear on the screen. When asked, you have to select either Nothing (clean install) or Keep personal files only option. Take note that you must not select the “Keep personal files, apps, and Windows settings”.

Option 5 – Try scanning your computer using Windows Defender

It is possible that your computer is infected with malware which could be why you’re getting the Windows Host Script error. Thus, you need to scan your computer using Windows Defender.
  • Tap the Win + I keys to open Update & Security.
  • Then click on the Windows Security option and open Windows Defender Security Center.
  • Next, click on Virus & threat protection > Run a new advanced scan.
  • Now make sure that Full Scan is selected from the menu and then click the Scan Now button to get started.
Read More
1 2 3 162
Logo
Copyright © 2022, ErrorTools. All Rights Reserved
Trademarks: Microsoft Windows logos are registered trademarks of Microsoft. Disclaimer: ErrorTools.com is not affiliated with Microsoft, nor claim direct affiliation.
The information on this page is provided for information purposes only.
DMCA.com Protection Status