What to do if the Windows 10 Control Panel is not opening

The Control Panel is one of the most important tools in Windows which allows users to control and change various settings. However, there are cases when it experiences some problems like when users aren’t able to open it. Recently, a lot of users complained about not being able to open the Control Panel. To be more specific, users were able to open it but only lasted for a second, and then it’s gone. This is not just some issue you can ignore as this will prevent you from accessing some major settings in your computer and you won’t be able to perform some important task without it.

According to security experts, this issue is most likely caused by a bug in the Windows Update. If you have installed an update recently, then it’s most likely the culprit. Aside from the Windows Update, there are also other things that can cause this issue. Some of them are the IDT audio panel and a control panel file that causes conflicting issues with the control panel that leads to this problem. Aside from these aforementioned cases, the Windows Error reporting services could also be one of the causes of this issue. As you can see, since there are a lot of possible causes for this problem, this post prepared a lot of options as well which you have to check out. Follow each one of them and see which one worked best for you.

Option 1 – Try updating your Windows 10 PC

If you haven’t updated your PC to the latest version of Windows 10, then you should. A lot of users found that the issue with the Control Panel was fixed right after they updated their Windows 10 PCs. This is probably because Microsoft has probably released a fix on one of the latest updates.

Option 2 – Try uninstalling the IDT Audio Panel

For some users, uninstalling the IDT Audio Panel from their PCs did the trick. You can also try doing the same thing to fix the vanishing Control Panel. According to these users. The IDT audio panel was the one that’s causing the issue. To uninstall the IDT audio panel, here’s what you have to do:

  • Tap the Win + R keys at the same time to open the Run dialog box.
  • Then type in “appwiz.cpl” in the field and tap Enter to open the “Uninstall or change a program” screen of the Control Panel.
  • From there, look for the IDT audio panel, select it and then select the Uninstall option and follow the next on-screen instructions that appear.

Note: If you are unable to locate the IDT audio panel or you simply can’t access the Uninstall or change program screen or you can’t keep Control Panel open for a long time, here’s what you can do:

  • Tap the Win + R keys at the same time once again to open the Run dialog box.
  • And in the field, type in “devmgmt.msc” and hit Enter to open the Device Manager.
  • After opening the Device Manager, look for the “Sound, video and game controllers” option and double-click on it.
  • From there, locate the IDT audio panel or “IDT High Definition CODEC” and select Uninstall and follow the next instructions that appear.

Option 3 – Try deleting or renaming IDTNC64.cpl

IDTNC64.cpl is a control file in the control panel. However, it might be the one that’s causing the problem as it could be conflicting with the control panel. As a result, the control panel crashes after a second or more. Many users have fixed the problem by either renaming or deleting this file – the safer option would be is renaming it.

  • Tap the Win + E keys to open File Explorer.
  • In the address bar located at the top, type in “C:\Windows\System32” and tap Enter to open this folder.
  • From there, look for the IDTNC64.cpl file, right-click on it and select the Rename option.
  • You can name the file anything you want but it’s better if you rename it to “oldcpl”.
  • After you rename the file, try opening the Control Panel again. It should work fine now.

Option 4 – Try to disable the Windows Error Reporting Service

As mentioned earlier, the Windows Error Reporting Service is also known to cause the issue so some users disable it and got the issue fixed.

  • Tap the Win + R keys.
  • In the field, type in “MSConfig” and hit Enter to open System Configuration.
  • After opening System Configuration, go to the Services tab and look for the Windows Error Reporting Service and uncheck its checkbox.
  • Click the Apply button and click OK. You should now see a date in the Disable Date column. Then check if the Control Panel is now working properly if not, restart your computer and check once more. That should fix the problem.

Option 5 – Try opening Control Panel via Run

This option is more of a workaround than a solution as it does not really fix the issue with the Control Panel but rather helps you in accessing the controls at the very least.

  • Tap the Win + R keys to open Run.
  • Type in “appwiz.cpl” in the field and tap Enter to open the Uninstall or change program screen of the Control Panel.
  • Next, copy and paste “Control panel all control panel items” on the address bar located at the top-mid part of your screen. You must not type the given address and simply copy and paste it. After that, you will see a list of control panel controls you can use.
If you like to learn and find out more about various Windows errors, and how to repair them go to our vast archive or use search to find articles that will explain and help you in solving your issue.
However, if you prefer to do things fast and with automatization then we are proposing to use an automated solution for your issues. The application that we are recommending is Advanced System Repair Pro
Advanced System Repair utilizes multiple tools all in one to give you a quick, simple, reliable, and very thorough diagnosis of your PC. It brings you all the tools you need in one program to clean, fix, protect, optimize and boost your PC!
1-Click Maintenance
All the tools to make it simple and easy! It's like having a professional technician at the click of a mouse.

Junk Cleaner
Keeping your computer free from unnecessary clutter also helps make your computer last longer. Like any other machine, if you keep it clean and take care of it, it will serve you better for longer!

Optimize background apps
Optimize applications background activity with the built-in Application Optimizer feature.

Disk Defrag
With a simple 1-click, Advanced System Repair speeds up your PC by assembling fragmented files on your machine and organizing them more efficiently.

Malware Removal
Finds and removes all types of harmful malware including trojans, worms, bots, adware, spyware, PUPs, and more!

Privacy Cleaner
The all-in-one privacy suite to Clean Your Tracks & Protect Your Privacy! Make your computer safe, secure, and more efficient!

System Tweak/Optimizer
ASR will analyze your complete system and settings to adjust your PC to function at its maximum performance.

Registry Cleaner
Over time, as you install and uninstall applications, the registry can become cluttered with old entries and broken settings which can result in program crashes, and annoying messages and slow the computer down.
Visit our Advanced System Repair Pro Download page to inform yourself about all the benefits of this software and get a free trial copy of it.
advanced system repair pro

Advanced System Repair Pro

One-click automated PC repair solution
ASR logo
With Advanced System Repair Pro you can easily
Replace damaged files
Restore performance
Free disk space
Remove Malware
Protects WEB browser
Remove Viruses
Stop PC freezing
DOWNLOAD
Privacy Policy | Terms of Use | Uinstall
Advanced System Repair Pro is compatible with all versions of Microsoft Windows including Windows 11

Share this article:

You might also like

MS releases ISO for Windows 10 build 21354
On April 7th Microsoft has released Windows build 21354 for their flagship OS and updates are rolling. Alongside the new update builds Microsoft has decided to create and release Windows 21354 build as an installable ISO image for anyone who wishes to do a clean installation of Windows without the need to update it after the installation. We have not seen this move by Microsoft in a long time and honestly, we are welcoming it, it is always great to have updated ISO Windows build than to install the old version and sit through an hour or more of updates. If you are interested in getting this ISO image and you are part of the insider program you can download it from here. If you would like to read more helpful articles and tips about various software and hardware visit errortools.com daily.
Read More
The application was unable to start 0xc00007b
As you know, Windows programs depend on several operations to get executed and at the same time, there are also numerous parameters that have to be fulfilled for a program to get executed. However, based on some reports, there was an error when some users tried to run a program. This error says, “The application was unable to start correctly (0xc00007b)”. There could be various reasons why this error occurs but the main one is most likely due to an x86 application that is not compatible with the x64-based operating system. To fix this problem, you can run the Check Disk utility or reinstall the application or the Microsoft .NET Framework. You can also try reinstalling DirectX or replace the corrupted DLL file(s). For more details, refer to the given options below.

Option 1 – Try running the Check Disk utility

  • In the Windows Search box, type “command prompt” and from the search results, right-click on Command Prompt and select “Run as administrator”.
  • After opening Command Prompt, type this command and tap Enter: chkdsk <Partition Letter>: /f
  • The command you entered will start to check for errors and fix them automatically. Else, it will throw an error message saying, “Chkdsk cannot run because the volume is in use by another process. Would you like the schedule this volume to be checked the next time the system restarts? (Y/N)”.
  • Tap the Y key to schedule Disk Check the next time your computer restarts.

Option 2 – Re-enable the Microsoft .NET Framework

You could also try to disable the Microsoft .NET Framework then enable the latest version of the .NET Framework on your PC and check if the error is fixed

Option 3 – Try to reinstall the program

There are times when some supporting module for your application under the hood could have messed up the application where you get the error. To fix this, you have to uninstall the program and then download its latest version from its official site and then install it again. Once you’re done, run the application and see if the error is fixed.

Option 4 – Run System File Checker scan

If reinstalling the program didn’t work, you can also try running the System File Checker or SFC scan to fix the error. System File Checker is a command utility built into your computer that helps restore corrupted files and missing files. Refer to the following steps to run it:
  • Hit the Win + R keys to launch Run.
  • Type in cmd in the field and tap Enter.
  • After opening Command Prompt, type in sfc /scannow
The command will start a system scan which will take a few whiles before it finishes. Once it’s done, you could get the following results:
  1. Windows Resource Protection did not find any integrity violations.
  2. Windows Resource Protection found corrupt files and successfully repaired them.
  3. Windows Resource Protection found corrupt files but was unable to fix some of them.
  • Reboot your computer.

Option 5 – Try running the DirectX Diagnostic Tool

Since the error has something to do with the DirectX Graphics APIs, you can run the DirectX Diagnostic tool to resolve the problem.

Option 6 – Try updating or re-installing DirectX

If the DirectX Diagnostic tool didn’t work, you can try to update or reinstall DirectX instead. This can help in fixing the problem because when you reinstall or update DirectX, it will replace the incompatible or corrupted components of DirectX from your computer.
Read More
Get public IP address inside Windows 10
There are a lot of online services and a lot of ways to get your public IP address. One of them being typing whats my IP in Google search and you will get immediate results. But there is a way to get the same information inside Windows 10 which could be very useful if for any reason you can not connect to mentioned services. By checking public IP directly inside your windows you can make sure that the issue for not being able to open some websites is not due to your public IP. In order to use this Windows feature, we will be checking our public IP using Windows PowerShell. To open Power Shell in Windows first press ⊞ WINDOWS + R to open the run dialog keyboard with windows and r markedInside run dialog type Powershell and press ENTER In the Powershell type in the following command and press ENTER
(Invoke-WebRequest -uri "http://ifconfig.me/ip").Content
When the command finishes you will see what is your public IP address, if you wish to know more about your connection type in and press ENTER:
Invoke-RestMethod -Uri ('https://ipinfo.io/')
This command will provide you with further information like city, region, country, and others.
Read More
Combine Hard drives with storage spaces
Why combining hard drives with storage spaces? Ok, I will admit it, I am a modern digital hamster when it comes to digital goods. I like to collect stuff and more than anything else I like to have all of that at the tip of my fingers. And how digital goods grow in size themselves (movies on Blu-ray are like 50GB each) and the collection grows in size single hard drive is starting to be completely obsolete when it comes to storage. Sometimes we will need large storage for these kinds of personal collections, sometimes we will need it for work reasons. Whatever your reason might be Windows 10 is offering us a solution via Storage spaces. Storage spaces is an integral part of Windows and it is meant as a tool to provide you with a RAID environment without a RAID controller. Of course, combining multiple hard drives via storage paces instead of RAID will not be so fast or stable but for home use of storing a large quantity of data is perfectly enough. With Storage Spaces you will also have an option to reduce some space for increased security of data loss if by any chance one of your HDD fails.

How to Create a Storage Space

To create storage space in Windows, press ⊞ WINDOWS + R to open the run dialog. keyboard with windows and r markedIn the run box type in Control Panel and press ENTER run dialog with control panel typed inIn Control Panel find Storage Spaces and left-click on it. Control panel with storage spaces markedOnce storage spaces open, left-click on Create a new pool and storage space storage spaces manage storage spacesOnce you click on create new, you will be greeted with a list of hard drives you can use for this operation. storage spaces select drivesPlease note that all hard drives you choose will be completely erased and formatted and then assign a single drive letter. Click on Create pool. storage spaces resiliency type optionsYou will find yourself in new storage options where you can assign a drive letter, give storage space a name, etc.

Storage spaces types

One thing I would like to focus on here is resiliency type, when you expand the resiliency type drop-down menu you will see 4 options inside. Simple, Two-way mirror, Three-way mirrors, and Parity. Simple: If you choose Simple as an option, you will have maximum hard drive space but no resiliency at all, meaning that if by any chance any of your hard drives malfunction, you are losing your data from that drive completely. Two-way mirror: This option will save your data if one of your drives fails but you need at least 2 drives and storage space will be limited since some of it will be a safe backup option for the case of a drive failure. However if one of your drives fails, you can replace it in a second and keep on working as nothing happened. Three-way mirror: This option similar to the previous one will offer you safe data-keeping from a hard drive failure. this option will save your data even if 2 hard drives malfunction but it will require having 5 of them connected in order to be able to choose this option. Parity: Maybe the most popular option among people who want to have 2 or 3 drives merged but do not want to lose too much space of the two-way mirror option. It offers some protection and it does not take so much space as two-way does, let us say it is a kind of win-win situation.

Conclusion

I personally go for simple and have an important backup on optical drives but only for reason I could use more space, know that this way is requiring from me to always have a backup in optical media and that I will need to restore all of it back if even one HDD fails which could take time. But if this way is ok with you, go for it, you will have more space to use.
Read More
How to turn off check boxes in File Explorer
By default inside Windows 11 in File Explorer, once the file is selected, the small check box will appear beside it on left indicating visually that the file is selected. Older users will remember this feature from old Windows Vista and the feature itself is great if you are on some sort of touch device and need to select multiple files. windows 11 File ExplorerHowever, if you are working on a computer with a keyboard and mouse this feature might annoy you and seem like something that is not needed. Like many things inside Windows 11 this feature also can be customized and turned OFF if you do not want it. In this guide, we will see how to turn these boxes off. Microsoft has somewhat hidden this feature but luckily it is not difficult to find it if you know where to look.

Turning check boxes OFF

  1. Open File Explorer (if you do not have an icon on your Taskbar, right-click on the Start button and select File Explorer from the menu)
  2. Click on View on the top toolbar
  3. Select Show
  4. Uncheck Item Check Boxes
That is everything that needs to be done, after the checkbox is unchecked all check boxes from File Explorer will disappear. If you wish to turn boxes back ON, just follow the steps and check the box beside Item Check Boxes.
Read More
A Guide to Quick Fixing Error 10013

Repair Error 10013

Error 10013 - What is it?

Error 10013 is a type of Socket Windows PC error. Socket error 10013 occurs when the attempt to access the server is denied. This indicates that the needed socket connection is denied which further implies that a port is blocked or unreachable.

Solution

Restoro box imageError Causes

The socket error 10013 can occur due to multiple reasons:
  • Antivirus or firewall software
  • Incompatible drivers
  • Registry corruption
  • Misconfigured files

Further Information and Manual Repair

To resolve the socket error 10013 on your PC, here are some methods that you can try:

1. Disable Firewall

To resolve this issue on your PC, you may have to temporarily disable Firewall. Sometimes Firewall can stop you from connecting to the server. Try doing this; it is most likely to resolve the error. If the Firewall is the reason for the denied access, turning it off will surely help.

2. Disable your Antivirus Software

If disabling the Firewall doesn’t resolve the issue, try disabling your antivirus software temporarily. If the error still persists, then try other solutions listed below.

3. Upgrade Drivers

Incompatible drivers could be a reason too for denied server access. Your server may no longer be using the drivers that you have on your PC which is why you may not be getting permission to access it. If this is the cause, then the best way to resolve it is to upgrade drivers. To find out about new drivers, visit the software manufacturer’s website for new drivers and then download them to your PC.

4. Registry Issues

Sometimes the underlying cause of the error could be registry issues and misconfigured files. If you don’t wipe out unnecessary and obsolete files from your systems like junk files, cookies, internet history, temporary files, and other files from your PC, it can damage and corrupt the registry and misconfigured files thereby causing socket error 10013 on your system. To resolve registry issues and repair your PC, download Restoro. It is an advanced, easy to use, and highly functional PC fixer embedded with multiple utilities including a powerful registry cleaner. It is deployed with an intuitive algorithm that scans and detects all registry issues in seconds. It removes all the unnecessary and obsolete files stored in your PC overloading your registry. This registry cleaner repairs the damaged and misconfigured files and restores the registry, thereby resolving socket error 10013 on your system right away. It has simple navigations and a user-friendly interface which makes it very easy for all levels of users to work around and use it to its maximum advantage.  Furthermore, it can be installed on all Windows PC. Restoro is compatible with all Windows versions. In addition to this, it also includes several other value-added features such as an antivirus, a system optimizer, and an Active X controls and class scanner. These utilities can be used to resolve numerous other PC-related errors. Click here to download Restoro today and resolve socket error 10013 on your PC right away.
Read More
Renaming items in the Win+X menu
As you know, the Win + X menu, which is the shortcut context menu, is a useful way to launch several utilizes in Windows such as Power Options, Windows PowerShell, Event Viewer, Device Manager, and so on. However, there are times when you might experience difficulty in identifying the required utility. This is actually a part of the Windows 10 shell that goes out of scope in the customization of Windows 10. However, there is an easy trick you can use to do that. So in this post, you will be guided on how you can rename the options in the Win + X menu in Windows 10. In case you don’t know, the context menu is divided into three groups. Microsoft has categorized the bottom-most part as Group 1, while the middle part is categorized as Group 2 and the first part as Group 3. To rename these options, you need to use File Explorer and follow the instructions laid out below. Step 1: First, tap the Win + E keys to open File Explorer. Step 2: Next, navigate to this path: %LocalAppdata%MicrosoftWindowsWinX Step 3: From there, you should see three folders as Group 1, Group 2, and Group 3. Open the appropriate folder of your choice. Step 4: After that, right-click on the shortcut option you want to rename and then select Properties. Step 5: Next, navigate to the Shortcut tab under the Properties window. Step 6: Now in the text field of Comment, enter the new name of the option you selected. Step 7: Click on the Apply and OK buttons to save the changes made. Note: You can now either Sign back in or sign out of your Windows 10 User Account to see the result of the changes you’ve made. You could also restart the process of File Explorer via Task Manager. This will close the File Explorer as well as the shell components and then only launch the shell components again. In addition, you can check the Win + X menu to see the customized name that you’ve just set for a particular option. As you can see, even though it does not add anything extra, it is still a lot better in knowing how you can customize it.
Read More
Creating a new Windows 10 user account
When we purchase a computer, usually it is meant to be used by one person. Sometimes we would like to share our computer with other people, with friends and family members but we would also like to keep some privacy for ourselves in the process. Lucky for us Windows 10 will let us create multiple user accounts which then can be used by other persons with their own settings, documents, etc. The only requirement is to already have one user account which is automatically created when Windows is installed. This guide will lead you step by step in the creation of a new user account within Windows 10, so grab your favorite drink, and let's begin.

Creating new account

First thing is to click on the windows icon on the bottom left and open start menu, from start menu click once on settings. Windows 10 Star menu with marked settings iconWhen the settings window opens, choose ACCOUNTS on it. Windows settings accounts section selectedWindows will then go to the accounts settings page. Within that page, click on the Family & other users to open the setting for the chosen section on right. On the right settings, screen navigate to the lower section and click once with the left button on add someone else to this PC When add someone else to this PC is clicked, pop up window will appear which will ask you to provide the persons email address and later on the password of his/her Microsoft account, after the required information is provided you are done, a new user has been added and he can use his Microsoft credentials on the login screen to use this computer.

Setting up a user without Microsoft ID

However, if you do not wish to add a new user via his Microsoft login credentials or the person does not have them, on the pop-up window click on I don't have this person's sign-in information. User account no informationThis will open yet another pop-up giving you the option to create a Microsoft account for this person, to use a phone number instead of a Microsoft account, or to create a new email address for the user. Any of these options will create a new user for this computer with provided credentials but there is the last option at bottom of the pop-up which will allow you to create a local user only without a Microsoft account. This user will be able to use this computer, will not be able to transfer his document through various devices like he/she would if using a valid Microsoft account but it could use the computer and personalize it fully to his/her liking. user account new account without ms idOnce the link is clicked, you will be presented with a floating window requiring you to input needed information in order for the account to be created. You will need to provide username, password, and answers to 3 security questions. user account create an accountOnce all information has been provided, click on next and your new non-Microsoft local user has been created. Now when you click on Family & other users you will see that Windows has added a new user with the provided name to this computer. If you wish, you can add another user in the same manner, following the previous steps. Microsoft Windows does not have a limit for how many users can be on one computer so feel free to create as many as you like.

User account options

Now, clicking on the existing created user will open user options. From there you will have options to remove the user, therefore removing him/her from this computer, note that removing the local user will remove permanently his/her settings and they would not be able to be restored, or you can change the user account type. User account new accountClick on Change account type. User account account typeUnder account type, you will have the option to promote this user to an administrator if you wish or you can leave it as a standard user.
Read More
New Chrome update brings surveillance debate
Google Chrome 94 is here and it has introduced a controversial idle detection API. For those people that do not know what idle detection API is, well basically Chrome can be asked by a website to report when a user of the site has a site open and is idle on the device. The issue that people have with this is that this particular feature can be used to report when the user is not using a computer at all. chrome idle detection feature
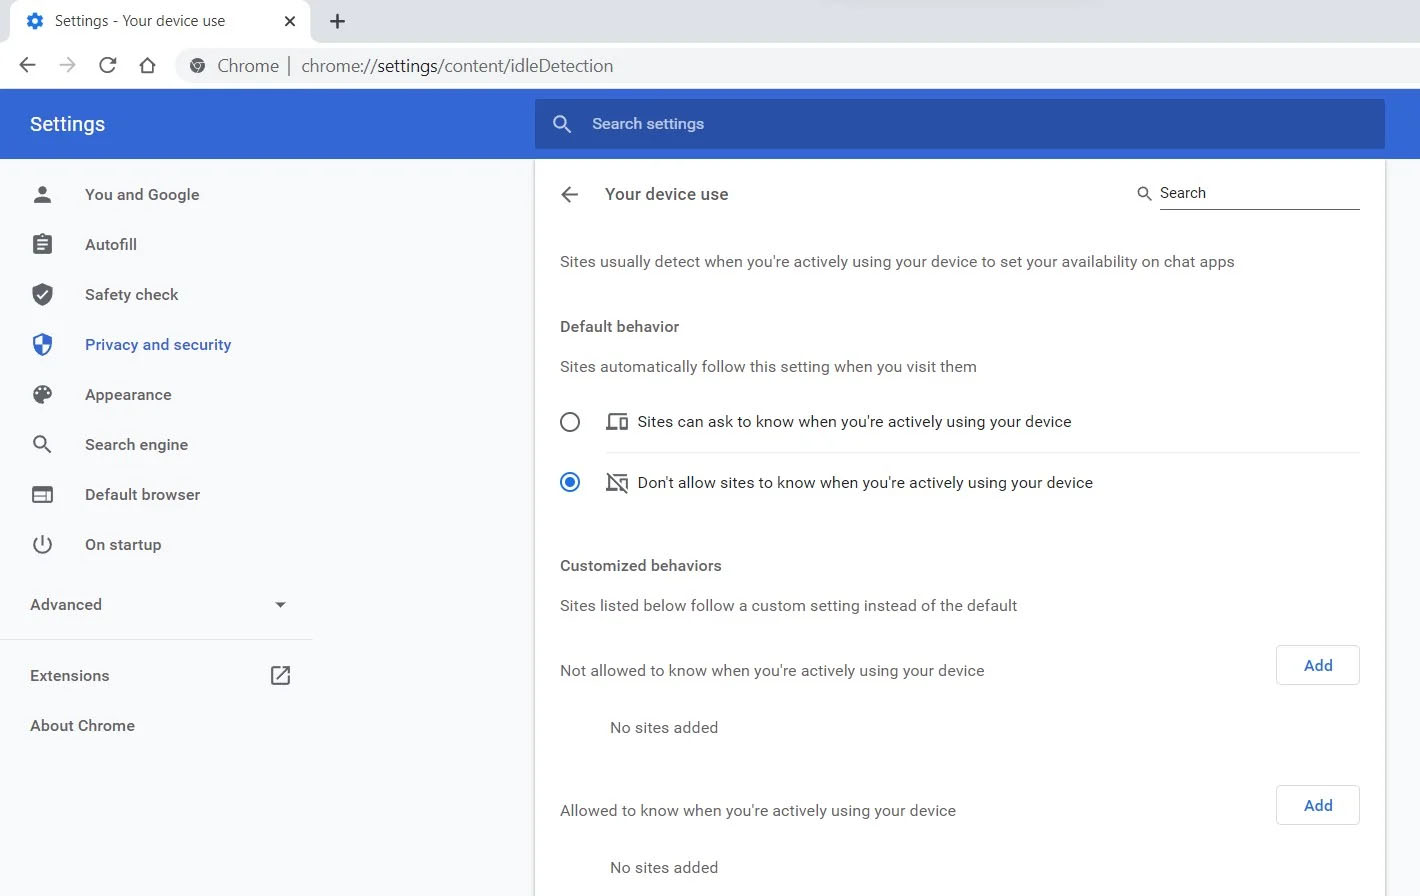
Good thing is that website or web application will prompt you to allow it to use this feature like when a site/application wants to use your microphone or web camera. Developers are on board with this feature since it can provide them with more telemetric data on how users are interacting with their website/application but there are some that are strongly voicing against this. Tantek Çelik, Mozilla Standards Lead, commented on GitHub, saying:
As it is currently specified, I consider the Idle Detection API too tempting of an opportunity for surveillance capitalism motivated websites to invade an aspect of the user’s physical privacy, keep long-term records of physical user behaviors, discerning daily rhythms (e.g. lunchtime), and using that for proactive psychological manipulation (e.g. hunger, emotion, choice)… Thus I propose labeling this API harmful and encourage further incubation, perhaps reconsidering simpler, less-invasive alternative approaches to solve the motivating use-cases.
Others who have spoken against this feature are people from the WebKit development team inside Apple. Ryosuke Niwa, an Apple software engineer who works on WebKit said:
That doesn’t seem like a strong enough use case for this API. For starters, there is no guarantee that the user won’t immediately come back to the device. Also, who is such a service supposed to know what another device user might be using at any given point? We’re definitely not going to let a website know all the devices a given user might be using at any given point. That’s a very serious breach of the said user’s privacy. It seems to me that such a suppression/distribution mechanism is best left for the underlying operating systems/web browsers to handle.
Of course, technology itself as always can be used for good or for bad and time will tell if this feature has brought good stuff or it has paved another brick in surveillance and privacy manipulation. As said for now option will prompt for agreement and let's hope that it will be used for good causes from this day into the future.
Read More
Remove HowToSimplified PUP Removal Tutorial

HowToSimplified is a browser extension developed by MindSpark inc. This extension offers users easy access to DIY tutorials, guides, and websites just a few clicks away. There is also a top video selection with the most popular DIY videos at the moment.

This extension, though it may look useful in the beginning, hijacks your browser's default search provider, it changes your default home page to HowToSimplified, powered by the MyWay search engine. During your browsing sessions, it will record your website visits, collect information, clicks, and sometimes even personal data. This information is later used to deliver ads that are injected into your browser search results. Aside from sponsored links, and additional unwanted ads that this extension displays, it also may from time to time display pop-up ads during your browsing sessions.

Multiple anti-virus scanners have detected HowToSimplified as a Browser Hijacker and are therefore not recommended to keep on your computer for security and privacy reasons.

About Browser Hijackers

Browser hijacking means that a malicious program code has control over and altered the settings of your internet browser, without your approval. Almost all browser hijackers are made for marketing or advertising purposes. In most cases, browser hijacking is used for earning ad revenue that comes from forced advert clicks and site visits. It could seem naive, but most of such sites aren’t legitimate and could pose a severe threat to your online safety. In a much worst case, your browser can be hijacked to download malware that can do a lot of damage to your computer system.

How you can recognize a browser hijack

There are many symptoms that indicate your browser has been highjacked: home page is changed; bookmark and the new tab are also changed; the default web engine is changed and your browser security settings have been cut down without your knowledge; find new toolbars that you simply didn’t add; unstoppable flurries of popup advertisements show up on your personal computer screen; your internet browser has become unstable or starts running sluggishly; you can’t navigate to certain internet pages, like computer security software related websites.

How they invade PCs

Browser hijackers infect computer systems through malicious email attachments, downloaded infected documents, or by visiting infected websites. They can also be deployed via the installation of a web browser toolbar, add-on, or extension. Other times you may have accidentally accepted a browser hijacker as part of an application bundle (generally freeware or shareware). An example of some notorious browser hijacker includes Babylon, Anyprotect, Conduit, DefaultTab, SweetPage, Delta Search, and RocketTab, but the names are regularly changing. Browser hijacking can lead to severe privacy issues and even identity theft, disrupt your browsing experience by taking command over outbound traffic, drastically slows down your personal computer by consuming a lot of resources, and cause system instability as well.

Browser Hijacker Malware – Removal

The one thing you can try to get rid of a browser hijacker is to find the malware inside the “Add or Remove Programs” list of the Windows Control Panel. It might or might not be there. When it is, uninstall it. However, many hijackers are harder to track down or remove since they might get themselves associated with some critical computer files that enable it to operate as a necessary operating-system process. Amateur computer users shouldn’t ever attempt the manual form of removal methods, since it requires detailed system knowledge to carry out repairs on the computer registry and HOSTS file.

How One Can Eliminate a Virus that is Blocking Websites or Preventing Downloads

Practically all malware is detrimental and the extent of the damage will vary greatly depending on the type of malware. Some malware is meant to hinder or block things that you want to do on your computer. It may well not let you download anything from the web or it will prevent you from accessing a few or all internet sites, especially the anti-malware websites. If you are reading this article right now, you may have perhaps realized that a malware infection is the cause of your blocked internet connectivity. So how to proceed if you need to install an anti-malware program like Safebytes? There are a few actions you can take to get around this problem.

Install the anti-malware in Safe Mode

The Windows operating system comes with a special mode referred to as “Safe Mode” where just the minimum required applications and services are loaded. If the malware is obstructing the internet connection and affecting your PC, starting it in Safe Mode allows you to download anti-malware and run a diagnostic scan while limiting potential damage. To enter into Safe Mode or Safe Mode with Networking, press the F8 key while the PC is starting up or run MSCONFIG and look for the “Safe Boot” options under the “Boot” tab. Once you’re in Safe Mode, you can attempt to install your anti-malware software application without the hindrance of the malicious software. At this point, you can actually run the antivirus scan to get rid of viruses and malware without interference from another malicious application.

Obtain the anti-malware program using an alternate web browser

Web-based viruses can be environment-specific, targeting a particular internet browser or attacking specific versions of the web browser. If you seem to have a trojan attached to Internet Explorer, then switch to a different browser with built-in security features, such as Firefox or Chrome, to download your favorite anti-malware program – Safebytes.

Install and run anti-malware from the USB drive

Another solution is to create a portable anti-malware program on your USB thumb drive. Try these simple measures to clear up your infected PC using portable anti-malware. 1) Download the anti-malware on a virus-free computer. 2) Plug the Thumb drive into the uninfected computer. 3) Double-click the Setup icon of the antivirus program to run the Installation Wizard. 4) Choose a thumb drive as the place when the wizard asks you where you want to install the application. Follow the on-screen instructions to complete the installation. 5) Transfer the USB drive from the uninfected PC to the infected PC. 6) Double-click the EXE file to run the Safebytes software right from the thumb drive. 7) Click on “Scan Now” to run a complete scan on the affected computer for viruses. If, after all of these methods, you are still having troubles with the possible infection, feel free to write to us with your question, through chat or email. If you are unsure which method to employ, simply call our toll-free number 1-844-377-4107 to speak to our technical support team. Our experts can walk you through the virus removal process on the phone and fix the computer remotely.

Protect Your Personal Computer From Viruses and Malware With SafeBytes Security Suite

Nowadays, an anti-malware tool can protect your laptop or computer from various kinds of internet threats. But exactly how to choose the best one amongst the many malware protection software that is available on the market? Perhaps you might be aware, there are several anti-malware companies and products for you to consider. A few of them are great but there are lots of scamware applications that pretend as authentic anti-malware software waiting to wreak havoc on the computer. You must be careful not to choose the wrong product, especially if you purchase a paid application. When thinking about trustworthy programs, Safebytes AntiMalware is certainly the highly recommended one. SafeBytes anti-malware is a powerful, highly effective protection tool designed to assist users of all levels of IT literacy in detecting and eliminating malicious threats from their PC. This tool can easily detect, eliminate, and protect your PC from the most advanced malware intrusions including spyware, adware, trojan horses, ransomware, parasites, worms, PUPs, as well as other possibly damaging software programs. SafeBytes has great features when compared to other anti-malware programs. A few of them are listed as below: Best AntiMalware Protection: Built on a highly acclaimed anti-virus engine, this malware removal application has the capacity to identify and remove various obstinate malware threats such as browser hijackers, potentially unwanted programs, and ransomware that other common anti-virus software will miss. Live Protection: SafeBytes provides real-time active monitoring service and protection against all known computer viruses and malware. It’ll constantly monitor your computer for hacker activity and also gives users superior firewall protection. Web Protection: Safebytes allots all websites a unique safety score that helps you to have an idea of whether the webpage you’re about to visit is safe to view or known to be a phishing site. “Fast Scan” Features: SafeBytes Anti-Malware possesses a multi-thread scan algorithm that works up to five times faster than any other protection software. Very Low CPU and RAM Usage: SafeBytes is a lightweight application. It uses up a really small amount of processing power as it works in the background therefore you won’t notice any computer performance difficulties. 24/7 Customer Support: You will get 24/7 technical support to quickly resolve any concern with your security tool.

Technical Details and Manual Removal (Advanced Users)

If you wish to manually remove HowToSimplified without the use of an automated tool, it may be possible to do so by removing the program from the Windows Add/Remove Programs menu, or in cases of browser extensions, going to the browsers AddOn/Extension manager and removing it. You will likely also want to reset your browser. To ensure the complete removal, manually check your hard drive and registry for all of the following and remove or reset the values accordingly. Please note that this is for advanced users only and may be difficult, with incorrect file removal causing additional PC errors. In addition, some malware is capable of replicating or preventing deletion. Doing this in Safe Mode is advised.

The following files, folders, and registry entries are created or modified by HowToSimplified

Files: C:DOCUME1USER1LOCALS1Tempnsu1.tmp C:76681c9c0f70e45328483cc27310678c28751a66f9849aa13f34d2e7f8c650 C:DOCUME1USER1LOCALS1Tempnsf2.tmp C:DOCUME1USER1LOCALS1Tempnsf2.tmpnsDialogs.dll C:DOCUME1USER1LOCALS1Tempnsf2.tmpSystem.dll C:DOCUME1USER1LOCALS1Tempnsf2.tmpnsDialogs.dll C:DOCUME1USER1LOCALS1Tempnsf2.tmpSystem.dll C:Program FilesHowToSimplified_8e Registry: Key: HKCUSOFTWAREMicrosoftWindowsCurrentVersionExplorerBrowser Helper ObjectsValue: Verizon Broadband Toolbar Data: A057A204-BACC-4D26-8398-26FADCF27386 Key: HKEY_CURRENT_USERSoftwareMicrosoftWindowsCurrentVersionRun Value: Hoolapp Android Data: C:usersuserappdataRoamingHOOLAP~1Hoolapp.exe Key: HKEY_CURRENT_USERSoftwareMicrosoftWindowsCurrentVersionRun Value: ctfmon.exe Data: C:Program Files3rundll32.exe C:Program Files3lni28.dat,FG00
Read More
1 2 3 162
Logo
Copyright © 2022, ErrorTools. All Rights Reserved
Trademarks: Microsoft Windows logos are registered trademarks of Microsoft. Disclaimer: ErrorTools.com is not affiliated with Microsoft, nor claim direct affiliation.
The information on this page is provided for information purposes only.
DMCA.com Protection Status