Taskbar is not visible in Remote Desktop

Recently, several users reported an issue on their Windows 10 computers where the taskbar is not visible when they tried to connect to a computer via Remote Desktop Protocol or RDP. The Remote Desktop Connection feature uses the RDP which allows users to access a computer remotely. This is actually different from the taskbar being hidden automatically until the pointer hovers on it since, in this scenario, the taskbar is completely not accessible which makes using the remote computer entirely difficult, if not impossible.

There are several suggestions you can check out to resolve this problem, you can try to restart the process of Windows Explorer via Task Manager or you could clear the cache for multiple processes. You could also try to reinstall the Shell Experience components or show the local taskbar in the Remote desktop. Moreover, you could also try to update, uninstall or roll back the display driver/graphics card driver. For more details, refer to each one of the options given below.

Option 1 – Try to restart the Windows Explorer process

The first option you have to try to fix the problem with the taskbar is to simply restart the Windows Explorer process in the Task Manager.

  • Tap the Ctrl + Shift + Esc keys to open the Task Manager.
  • Next, go to the Processes tab and find the process of Windows Explorer.
  • Once you find it, right-click on it and select Restart to restart its process.
  • After that, restart your computer and see if you can now see the Taskbar.

Option 2 – Try clearing the cache of multiple processes

The next thing you can do to resolve the problem is to clear the cache of many processes in your computer. To do so, follow these steps:

  • Open the Notepad app and paste the following content in the text area:

@echo off

taskkill /f /im explorer.exe

taskkill /f /im shellexperiencehost.exe

timeout /t 3 /NOBREAK > nul

del %localappdata%PackagesMicrosoft.Windows.ShellExperienceHost_cw5n1h2txyewyTempState* /q

timeout /t 2 /NOBREAK > nul

start explorer

@echo on

  • After that, tap the Ctrl + S keys to save the changes you’ve made in Notepad and select the “All files” as its file type, and then name it “CacheClearTWC.bat”.
  • Next, go to the location where you saved the file using File Explorer and then run it. This will run a couple of batch scripts which will clear the cache of multiple processes in the system.
  • Tap the Win + X keys and select the “Windows PowerShell (Admin)” option to open PowerShell as admin.
  • Next, execute this command in the command line: Get-appxpackage -all *shellexperience* -packagetype bundle |% {add-appxpackage -register -disabledevelopmentmode ($_.installlocation + “appxmetadataappxbundlemanifest.xml”)}
  • After the command has been executed, this will reinstall the Shell Experience components and should fix the problem with the taskbar.

Option 4 – Update, uninstall or rollback the Graphics card drivers

  • First, boot your computer into Safe Mode.
  • After that, tap the Win + R keys to launch Run.
  • Type in MSC into the box and tap Enter or click OK to open the Device Manager.
  • After that, a list of device drivers will be displayed. From there, look for the Display Adapters and click on them.
  • After that, right-click on each entry under the Display Adapters and select the “Uninstall Device” option from the menu.
  • Now restart your computer.
  • After restarting your computer, go to the Settings app and Check for Updates in the Windows Update section.

Note: You also have the option to go directly to the website of your graphics card manufacturers like NVIDIA, Intel, or AMD and go to the section called Drivers then check if there’s a new available update – if there is, download and install it.

If you like to learn and find out more about various Windows errors, and how to repair them go to our vast archive or use search to find articles that will explain and help you in solving your issue.
However, if you prefer to do things fast and with automatization then we are proposing to use an automated solution for your issues. The application that we are recommending is Advanced System Repair Pro
Advanced System Repair utilizes multiple tools all in one to give you a quick, simple, reliable, and very thorough diagnosis of your PC. It brings you all the tools you need in one program to clean, fix, protect, optimize and boost your PC!
1-Click Maintenance
All the tools to make it simple and easy! It's like having a professional technician at the click of a mouse.

Junk Cleaner
Keeping your computer free from unnecessary clutter also helps make your computer last longer. Like any other machine, if you keep it clean and take care of it, it will serve you better for longer!

Optimize background apps
Optimize applications background activity with the built-in Application Optimizer feature.

Disk Defrag
With a simple 1-click, Advanced System Repair speeds up your PC by assembling fragmented files on your machine and organizing them more efficiently.

Malware Removal
Finds and removes all types of harmful malware including trojans, worms, bots, adware, spyware, PUPs, and more!

Privacy Cleaner
The all-in-one privacy suite to Clean Your Tracks & Protect Your Privacy! Make your computer safe, secure, and more efficient!

System Tweak/Optimizer
ASR will analyze your complete system and settings to adjust your PC to function at its maximum performance.

Registry Cleaner
Over time, as you install and uninstall applications, the registry can become cluttered with old entries and broken settings which can result in program crashes, and annoying messages and slow the computer down.
Visit our Advanced System Repair Pro Download page to inform yourself about all the benefits of this software and get a free trial copy of it.
advanced system repair pro

Advanced System Repair Pro

One-click automated PC repair solution
ASR logo
With Advanced System Repair Pro you can easily
Replace damaged files
Restore performance
Free disk space
Remove Malware
Protects WEB browser
Remove Viruses
Stop PC freezing
DOWNLOAD
Privacy Policy | Terms of Use | Uinstall
Advanced System Repair Pro is compatible with all versions of Microsoft Windows including Windows 11

Share this article:

You might also like

KFConsole enters the console competition
Yes, you read that right, KFC is making a console partnered with Cooler Master. Bizzare at it sounds, it is even more bizarre that the console is designed to keep your food warm!!! You can pull out the drawer from the console out on its top and place some food there in order to keep it warm. kfconsole drawer
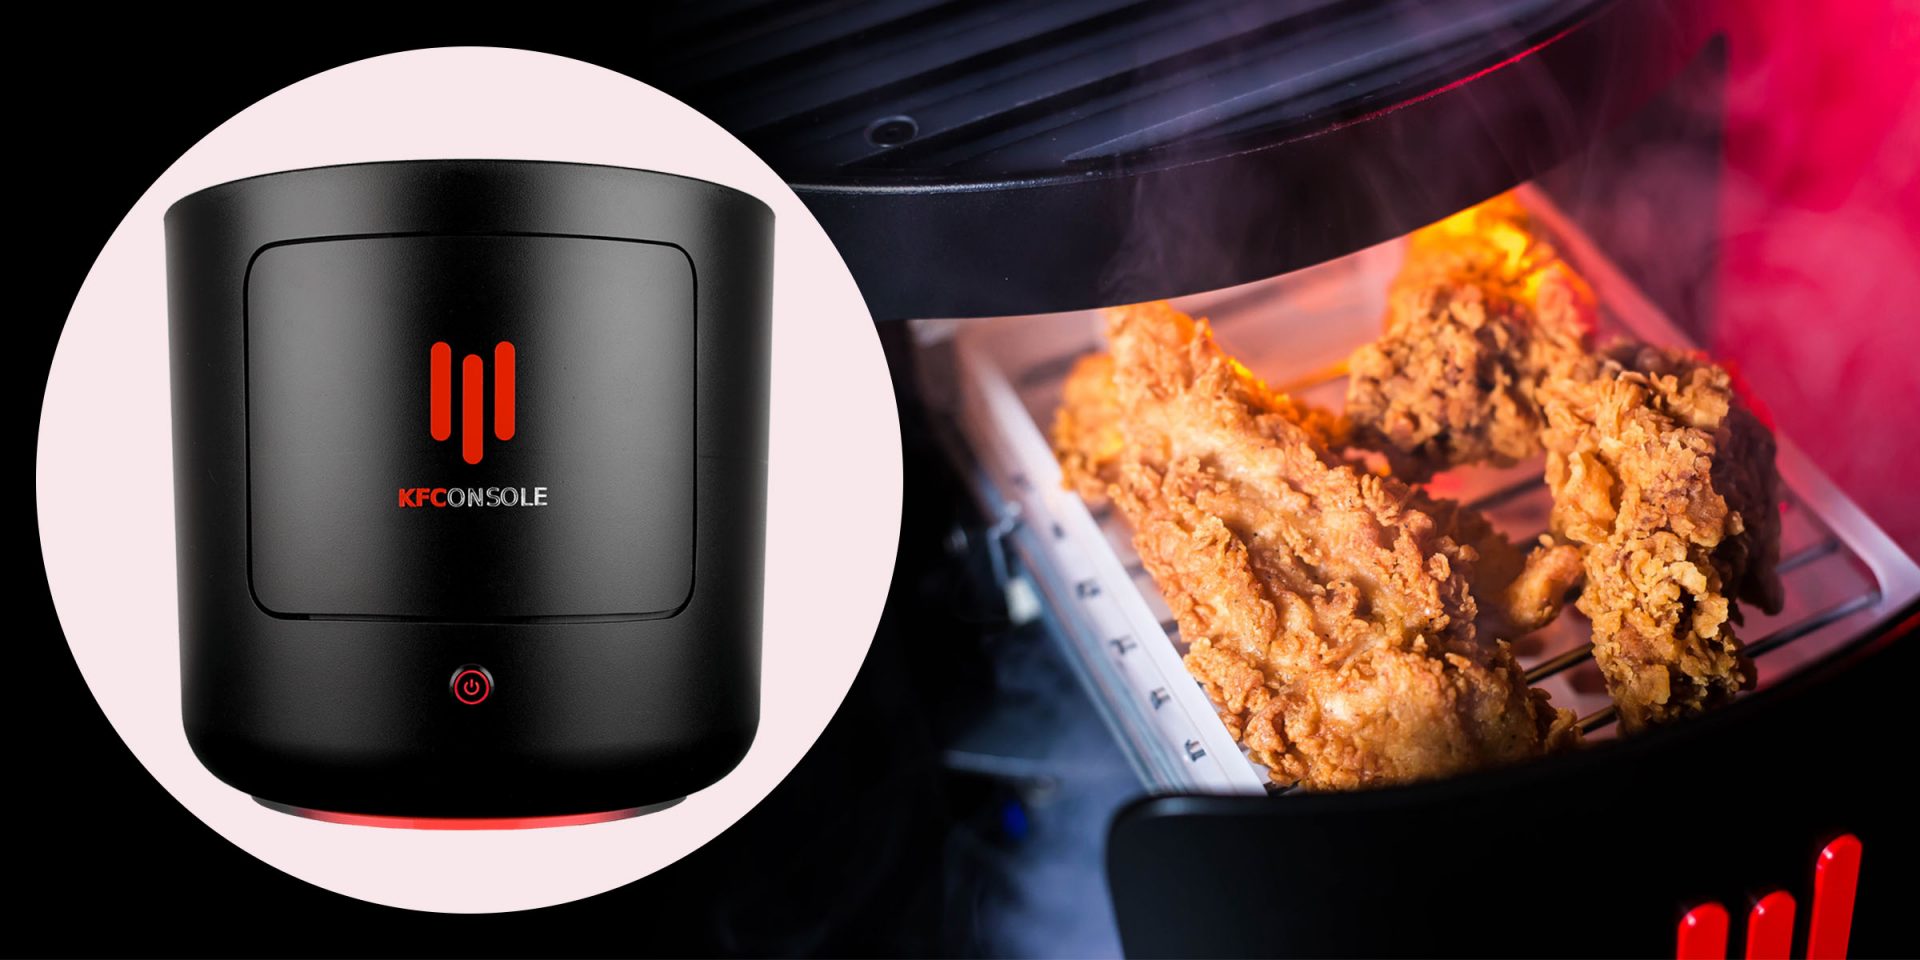
The console itself is coming in cylindrical shape powered by Intel CPU and ASUS GPU of the unknown chipset. It has Seagate Baraccuda 1TB SSD and it is VR-ready. The console will have raytracing and will be 4K ready.

My thoughts

Well, my thoughts are somewhat strange, on one side I am not really sold on food heating gimmicks and without specific hardware specifications, it is difficult to say how much power the console will have. Price is also not leaked so that is also a stumbling stone for making an informed opinion. I am a little puzzled and concerned about this whole heating food thing because personally, I can see 2 issues: Console overheating and fat dripping on inside hardware, I am sure they have somehow eliminated this but I would be very interested to see how.
Read More
Copy and Paste feature is not working
One of the most basic and commonly used features in the Windows operating system is the copy and paste feature that helps users accomplish tasks in a faster and easier way. However, if you notice that it’s not working properly for some reason, then this post might be of help as it will provide you with options you can check out to resolve the problem. You can encounter this kind of problem with the copy and paste feature if some system files are corrupted or if there’s some third-party application or process that interferes with this function. Worry not though for there are some options you can check out to fix this. You can try to restart the rdpclip.exe process or the explorer.exe process. You could also try to reinstall the program where you encountered the issue with the Copy and Paste function. In addition, you could try clearing the clipboard history or run the built-in tools like the DISM tool and SFC scan. You could also troubleshoot the problem in a Clean Boot State or use the Refresh Windows tool. For more information, refer to each one of the options below.

Option 1 – Try to restart the rdpclip.exe and the explorer.exe processes

The first thing you can do to resolve the problem is to restart certain processes namely, the rdpclip.exe process and the explorer.exe process via Task Manager.
  • First, right-click on your Taskbar and select the Task Manager.
  • Next, look for the rdpclip.exe process and right-click on it, and select the End process option.
  • After that, click on the File tab > Run new task and then type “rdpclip.exe” and tap Enter.
  • This should help fix the problem. If not, you could also try to restart the explorer.exe process – just look for the explorer.exe process in the Task Manager and right-click on it, and then select the Restart option.

Option 2 – Try reinstalling the concerned program

If you only experience this issue on a particular program, you might want to uninstall this program and install it back again, and then see if it fixed the problem or not.

Option 3 – Try to clear the clipboard history

You could also try clearing the clipboard history as it has been known to help in fixing this kind of issue. You can clear the clipboard history using the command line.
  • Tap the Win + R keys to launch the Run dialog box and type “cmd” in the field and hit Enter to open Command Prompt.
  • Next, execute this command: echo off | clip
  • After that, check if the Copy and Paste function is now working properly or not.

Option 4 – Try running the DISM tool

You can run the DISM tool as well to help fix the “Tile Database is corrupt” error. Using this built-in tool, you have various options such as the “/ScanHealth”, “/CheckHealth”, and “/RestoreHealth”.
  • Open the Command Prompt with admin privileges.
  • Then type in the following commands and make sure to hit Enter right after you type each one of them:
    • Dism /Online /Cleanup-Image /CheckHealth
    • Dism /Online /Cleanup-Image /ScanHealth
    • DISM.exe /Online /Cleanup-image /Restorehealth
  • Do not close the window if the process takes a while as it will probably take a few minutes to finish.
  • Once it’s done, check if it was able to fix the corrupted Start Menu or not.

Option 5 – Try to run System File Checker or SFC scan

  • Tap Win + R to launch Run.
  • Type in cmd in the field and tap Enter.
  • After opening Command Prompt, type in sfc /scannow and hit Enter.
  • Once done, restart your computer.

Option 6 – Restart your computer in a Clean Boot State

If a third party program like antivirus is the one that’s causing the problem, you can try to put your computer in a Clean Boot State to isolate the issue by following these steps:
  • Log onto your PC as an administrator.
  • Type in msconfig in the Start Search to open the System Configuration utility.
  • From there, go to the General tab and click “Selective startup”.
  • Clear the “Load Startup items” check box and make sure that the “Load System Services” and “Use Original boot configuration” options are checked.
  • Next, click the Services tab and select the “Hide All Microsoft Services” check box.
  • Click Disable all.
  • Click on Apply/OK and restart your PC. (This will put your PC into a Clean Boot State. And configure Windows to use the usual startup, just simply undo the changes.)
  • Now try to connect your device or copy the files to your external device again and check if the problem with the Copy and Paste function is fixed.
Read More
Fix The selected boot device failed in Windows
If you suddenly receive an error message that says, “The selected boot device failed, Press <Enter> to Continue” during an installation on your Windows 10 computer, you should know that this kind of error can occur when you use a USB stick as well as a DVD Disk to boot from. This error indicates that some settings inside your BIOS are not compatible with the bootable device that you have created. Note that fixing this kind of error does not vary from device to device at all. All you have to do is change some settings in the BIOS and create a proper bootable disk. Follow the options given below to fix the “The selected boot device failed, Press <Enter> to Continue” error. The options below do not have to be necessarily followed in the same sequence since you can create a bootable USB drive before you change some settings in the BIOS.

Option 1 – Disable the Secure Boot in the BIOS

Disabling the Secure Boot in the BIOS settings is definitely recommended to resolve the issue. To disable Secure Boot, here’s what you have to do:
  • First, boot your computer into Windows 10.
  • Next, go to Settings > Windows Update. From there, check if there is anything that you have to download and install if you see any available updates. Usually, OEMs send and update the list of trusted hardware, drivers, and operating systems for your computer.
  • After that, go to the BIOS of your computer.
  • Then go to Settings > Update & Security > Advanced Startup options. If you click on Restart Now, it will restart your computer and give you all the advanced options.
  • Next, select Troubleshoot > Advanced Options. As you can see, this screen offers you further Options including System Restore, Startup repair, Go back to the previous version, Command Prompt, System Image Recovery, and UEFI Firmware Settings.
  • Select the UEFI Firmware Settings which will take you to the BIOS.
  • From there, go to the Security > Boot > Authentication tab where you should see Secure Boot. Note that every OEM has its own way of implementing the options so it varies.
  • Next, set Secure Boot to Disabled and set Legacy Support to On or Enabled.
  • Save the changes made and exit. Afterward, your computer will reboot.

Option 2 – Make a proper bootable USB Drive/Stick

To make a proper bootable USB drive, you need to use the Windows Media Creation tool. The Media Creation tool in Windows allows you to use the ISO installation file to make a bootable device that you can use to install Windows on your PC. Note that this is kind of different from the usual installation process as it could erase your computer’s current settings and data on the primary drive. Thus, before you proceed, you need to backup all your data into some removable drive and then use the Media Creation Tool to make a bootable drive.
  • After making the bootable drive, you need to plug it into your computer and then reboot.
  • Next, tap the F10 or Esc key to open the boot options.
  • Now set the boot priority of the removable drive the highest. Once the setup comes forth, follow the next onscreen instructions and install Windows without any problems.
Read More
How to enable God mode inside Windows 11
God mode windows 11
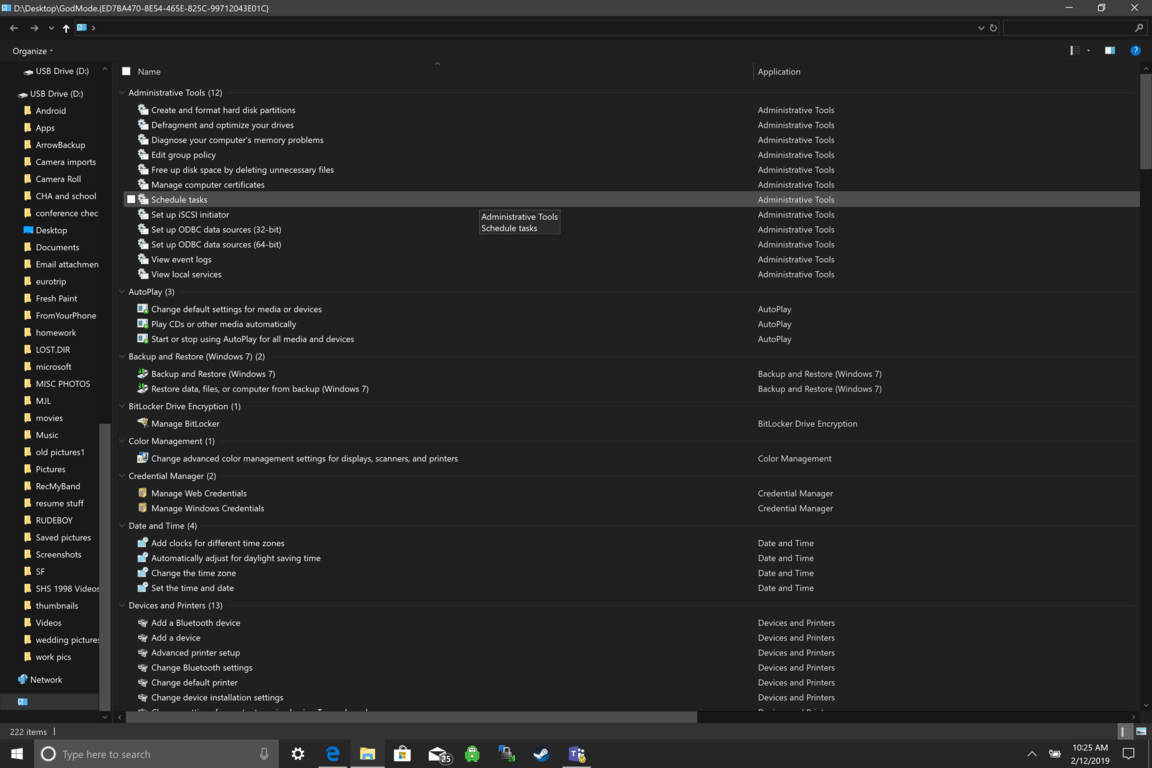
Like in Windows 10, Windows 11 will also support God mode to be enabled and used. For those readers that do know what God mode is, let me explain it in simple terms. God mode is the icon on the desktop that once clicked will open and let you adjust every option in the control panel and some hidden features for Windows inside one application. There are a lot of advantages to having this one-click fast access to features, especially if you are a power user. Luckily creating such an awesome icon and enabling God mode is very easy to accomplish, all you have to do is:
  1. Create a new folder where you want to have the God mode icon
  2. Rename folder exactly: {ED7BA470-8E54-465E-825C-99712043E01C}
  3. Enjoy God mode
As you can see creating and accessing all settings at your fingertips is much easier than most people think. Enjoy your ultimate access to Windows 11 features and if you wish you can drag and drop sections from it into the desktop or anywhere for easy access to that specific topic.
Read More
Remove Task View button from Windows 11
Task ViewTask View feature inside Windows 11 is actually a great feature, letting you quickly view open windows and virtual desktops. How Task view itself could be reached with keyboard shortcut combination of ⊞ WINDOWS + TAB some users will prefer this way of using it and thus button on the taskbar is something you do not want or need. There is a very easy way to remove mentioned button and I will show you how to do it. Right-click the taskbar button itself and click on Hide From Taskbar. That’s it, you have done it. Now in order for you to bring it back if you change your mind, you will have to do some extra steps but it is nothing difficult. Right-click on the taskbar and click on Taskbar settings, you will be lead to Personalization > Taskbar. Inside locate Taskbar Items and switch Task View to ON, you will see the Task View button right away showing itself again.
Read More
Preventing installation of Removable Devices
In case you don’t know, Windows 10 supports installation and use of a number of removable devices which includes plug and plays mouse, keyboard, and other USB-based devices. But this could actually pose a threat to the integrity of a computer system and thus, some organizations pose a restriction in using these kinds of devices. the restriction on these devices is also useful especially if you keep on leaving your computer idle and someone tries to mess it up by plugging in a removable device. In such situations, the restriction will defend the user against data theft. Thus, in this post, you will be guided on how you can prevent the installation of removable devices on your Windows 10 computer. There are two options that can help you in preventing the installation of any removable devices on your computer – you can either try to use the Registry Editor or use the Group Policy Editor instead. Follow whichever option you want to use the instructions given below but before you start, don’t forget to create a System Restore Point first.

Option 1 – Prevent installation of Removable Devices via Registry Editor

  • Tap the Win + R keys to open the Run dialog box and type “Regedit” in the field and hit Enter to open the Registry Editor.
  • Next, navigate to this registry path: HKEY_LOCAL_MACHINESOFTWAREPoliciesMicrosoftWindowsDeviceInstallRestrictions
  • From there, look for a DWORD named “DenyRemovableDevices” and set its value to “0”. On the other hand, if you can’t find this DWORD, just simply create it and set its value to 0.
  • Once done, exit the Registry Editor and reboot your PC to apply the changes made.

Option 2 – Prevent installation of Removable Devices via Group Policy Editor

Keep in mind that the Group Policy Editor is not available in the Home Edition of the Windows operating systems. Thus, if you are using one, just stick to the first option, otherwise, proceed to the following steps.
  • Tap the Win + R keys to open the Run utility and type “gpedit.msc” and click OK or tap Enter to open the Group Policy Editor.
  • After that, go to this policy setting: Computer ConfigurationAdministrative TemplatesSystemDevice InstallationDevice Installation Restrictions
  • Next, look for the “Prevent installation of removable devices” entry and once you find it, set it as “Enabled”. From this window, you should see the following description of this policy setting:
“This policy setting allows you to prevent Windows from installing removable devices. A device is considered removable when the driver for the device to which it is connected indicates that the device is removable. For example, a Universal Serial Bus (USB) device is reported to be removable by the drivers for the USB hub to which the device is connected. This policy setting takes precedence over any other policy setting that allows Windows to install a device. If you enable this policy setting, Windows is prevented from installing removable devices and existing removable devices cannot have their drivers updated. If you enable this policy setting on a remote desktop server, the policy setting affects redirection of removable devices from a remote desktop client to the remote desktop server. If you disable or do not configure this policy setting, Windows can install and update device drivers for removable devices as allowed or prevented by other policy settings.”
  • Then click the Apply and OK buttons to save the changes made.
  • Now restart your computer to save the changes made. This should prevent the installation of any removable devices in your Windows 10 computer.
Read More
Fix igfxem.exe application error in Windows 10
When you get an igfxem.exe error in Windows, it is not really clear what does this means, usually, Windows throw us some code or we get a DLL error, rarely we get an EXE error. So what does this error means? Intel Graphics Executable Main Module, shortly called as IgfxEM module is a part of the Windows operating system. When you run Microsoft .NET Framework applications that use the AS/400 Data Queue ActiveX control (Mseigdq.dll) to read from and to write to IBM iSeries (AS/400) data queues, you may experience this error. In order to overcome this error and cope with it try the following things:
  1. Increase Virtual Memory

    Go to the Start Menu and click on Settings. Type performance. Choose Adjust the appearance and performance of Windows. In the new window, go to the Advanced tab and under the Virtual memory section, click on Change. At the bottom of the new window, check what the Recommended value is and how it compares to Currently allocated. If the current setting is significantly less than the recommended, uncheck the Automatically manage paging file size for all drives box at the top of the same windows and then click on Custom size. Enter the Recommended value in the Initial Size box, and a larger figure in the Maximum size box. Click OK to save the new settings.
  2. Download and update .NET framework

    Go to the Microsoft website and download the latest .NET framework. Once the download is complete, install the package following onscreen instructions.
  3. Reinstall INTEL graphic drivers

    Go to the intel website and download the latest graphic drivers for your graphic card model. Once the download is complete, install the package following onscreen instructions.
  4. Run SCF scan

    If all else fails, run command prompt and inside type sfc /scannow
Read More
A Guide to Fixing Error 0x80004005

Fix Error 0x80004005

Error 0x80004005 - What is it?

Error 0x80004005 is a typical Outlook error. This error code occurs either when sending emails or receiving them. The error message may be displayed in either of the following formats:
‘Sending and receiving reported error "0x80004005": The operation failed.’ ‘This message could not be sent. Try sending the message again or contact your network administrator. The client operation failed. Error is [OX80004005- 0X0004B9-OXOO501].’

Error Causes

There are several causes for the error 0x80004005 such as:
  • The Script Blocking Feature Enabled While Using Norton Antivirus
  • Spyware
  • Viruses
  • Registry problems-Missing or corrupt registry keys
It is advisable to repair and resolve error 0x80004005 immediately as it may cause a great deal of inconvenience to you. This error may hamper your ability to receive and send emails from your Outlook account and lower your productivity too as you may be unable to communicate with your peers.

Further Information and Manual Repair

To fix error 0x80004005, you don’t have to wait for the network personnel or be a technical expert yourself. This may be a critical error but the good news is that it is easy to resolve. Here are some effective methods and quick fixes to resolve the error 0x80004005 instantly.

Method 1: Disable Script Blocking Feature in Norton Antivirus

After installing Norton Antivirus on your PC, if you start experiencing the Outlook error 0x80004005, then the best way to resolve it is to simply disable the script blocking feature. However, the downside of this is that by disabling this feature your PC will become vulnerable to viruses and malware.

Method 2: Disable the New-Mail Notification Feature in MS Outlook

If you don’t have Norton Antivirus downloaded on your PC, then try method 2. This method involves disabling the new-mail notification feature in MS Outlook. The error code 0x80004005 is often resolved by switching off this feature. Try it to see if it works. To disable the new-mail feature all you have to do is open your Outlook account and then go to the Tools menu, then go to Options and then select the ‘Preferences’ tab. After that click on the ‘Emails Options’ tab and then simply uncheck the check-box against ‘Display a notification message when new mail arrives’. To confirm changes press OK.

Method 3: Scan for Viruses

The error 0x80004005 may also be triggered due to viral infection or spyware. Such malicious software enters your PC through phishing emails and while downloading files and attachments. You may not be aware of this but your PC may be infected by viruses. It is important you remove them immediately as they can expose you to serious risks including privacy issues, identity thefts, data breaches, and more. Congratulations, you have just fixed Error 0x80004005 in Windows 10 all by yourself. If you would like to read more helpful articles and tips about various software and hardware visit errortools.com daily. Now that’s how you fix Error 0x80004005 in Windows 10 on a computer. On the other hand, if your computer is going through some system-related issues that have to get fixed, there is a one-click solution known as Restoro you could check out to resolve them. This program is a useful tool that could repair corrupted registries and optimize your PC’s overall performance. Aside from that, it also cleans out your computer for any junk or corrupted files that help you eliminate any unwanted files from your system. This is basically a solution that’s within your grasp with just a click. It’s easy to use as it is user-friendly. For a complete set of instructions in downloading and using it, refer to the steps below Perform a full system scan using Restoro. To do so, follow the instructions below.
      1. Download and install Restoro from the official site.
      2. Once the installation process is completed, run Restoro to perform a full system scan. restoro application screen
      3. After the scan is completed click the “Start Repair” button. restoro application screen
Read More
Fix Error 0x8000704ec in Windows 10
Universal Windows Platform (UWP) applications are the modern application in the windows store that can be used in all the Window devices like Xbox, Hololens, Tablet, PC or Phone. Basically, UWP provides a common platform for every device that runs Windows 10. When attempting to login into these applications and receive this error:
Can’t sign in with a Microsoft account This program is blocked by group policy. For more information, contact your system administrator. 0x8000704ec
Then this post is for you. We will guide you on how to easily resolve issues, please follow the steps provided.
  1. Local group policy editor solution

    • Press ⊞ WINDOWS + R to open the Run dialog.
    • In the Run dialog box type gpedit.msc and press ENTER to open Group Policy Editor.
    • Inside the Local Group Policy Editor, navigate to the path below:
    Computer Configuration > Windows Settings > Security Settings > Local Polices > Security Options
    • On the right pane, double-click on Accounts: Block Microsoft accounts to edit its properties.
    • Under Local Security Setting tab, click on the drop-down and select This policy is disabled.
    • Click Apply > OK to save the changes.
    • Exit Group Policy Editor.
  2. Registry editor solution

    As always, it is highly recommended to make a backup of the registry editor just in case that something goes wrong.
    • Press ⊞ WINDOWS + R to open the Run dialog.
    • In the Run dialog box, type regedit and hit ENTER to open Registry Editor.
    • Navigate to the registry key path below:
    HKEY_LOCAL_MACHINE\SOFTWARE\Microsoft\Windows\CurrentVersion\Policies\System
    • At the location, on the right pane, identify the NoConnectedUser key. The key value might be set to either 1 or 3.
    • Now, double-click the NoConnectedUser entry to edit its properties.
    • Input 0 in the Value data field and hit Enter to save the change.
Read More
What to do if Google Drive Unable to Connect
As you know, the Google Drive service is a Backup and Synchronization service provided by Google. It was launched way back in April 2012 which provides users with the options to synchronize, store and share files by uploading them to Google’s servers where they stay until they are deleted personally by the users and can be accessed anywhere using the Google Account that’s used to upload them. Recently, a lot of users reported that they were unable to connect to Google Drive from their Windows 10 computers. This kind of problem has been noticed in the middle of the upload process and can be seen at times after the app launches. If you also experience the same issue, then you’ve come to the right place as this post will guide you in fixing it. There are a lot of possible reasons why this kind of problem occurs. It could be that the app was not able to launch properly or the internet got disconnected when the app was about to launch. It is also possible that the Firewall has blocked the app from connecting to the internet or that the antivirus program is preventing the app from making contact with its database. Aside from that, it is possible that the account you are using on your computer is preventing Google Drive from connecting to the internet due to some configuration errors. Follow the suggestions provided below to fix the connection issue with Google Drive.

Option 1 – Configure the Firewall

As mentioned, the Windows Firewall might be blocking the app from contacting its database so, in this option, you have to allow Google Drive through the Firewall. To do so, follow these steps:
  • In the Windows Start Search, type “firewall” and click on the “Allow an app or feature through Windows Firewall” option from the search results.
  • After that, you will see a list of apps, and here, click on the “Change Settings” button.
  • Next, scroll down and make sure to check both the “Public” and “Private” options for Google Drive.
  • Now click on Ok to save the changes made and then try to launch Google Drive again.

Option 2 – Try to launch Google Drive again

Google Drive might have not launched properly that’s why it can’t connect to its servers so you can try to launch it again and see if it helps.
  • Tap the Ctrl + Shift + Esc keys to open the Task Manager.
  • Next, go to the Processes tab and click on the “View” option located at the top.
  • After that, uncheck the “Group by Type” option and click on the “Google Drive Sync” from the list of processes.
  • Then click on the “End Task” option and close the Task Manager.
  • Launch Google Drive again and see if the issue is now resolved.

Option 3 – Temporarily disable third-party antivirus

Aside from Firewall, antivirus programs, especially the third party ones, are also known to block files applications the instant it detects a threat to the system. Thus, your antivirus program might be the reason why you can’t download anything on your Windows 10 computer. To fix this, you can try to disable the antivirus program on your computer in the meantime and then try to launch Google Drive again. Do not forget to enable them again as disabling them can leave your computer vulnerable to cyber threats.

Option 4 – Try to create a new account

There are times when a certain configuration for a user account might be blocking some elements of the Google Drive app. In such cases, you can try to create a new account to fix the problem.
  • Click on the Windows key and then click on the icon for Settings.
  • From there, click on the Accounts button and select the “Family & Other People” option from the left pane.
  • Next, click the “Add someone else to this PC” option.
  • After that, click on the “I don’t have this person’s sign-in information” option and select the “Add a user without a Microsoft Account” setting.
  • Type in the credentials for the new account you are creating and click on Next.
  • After the account is created, click on the account and then select the “Change account type” option.
  • Click on the drop-down menu and select the “Administrator” option and then click on OK.
  • Now sign out of the current account and sign in to the new one and then open Google Drive again.
Read More
1 2 3 162
Logo
Copyright © 2022, ErrorTools. All Rights Reserved
Trademarks: Microsoft Windows logos are registered trademarks of Microsoft. Disclaimer: ErrorTools.com is not affiliated with Microsoft, nor claim direct affiliation.
The information on this page is provided for information purposes only.
DMCA.com Protection Status