System Restore gets stuck or hangs up

As you know, System Restore is a useful tool in Windows operating system that helps users in fixing system issues by undoing any recent changes to the computer that may have caused the problem. However, there are times when you might encounter some issues when running this tool and one of these issues is when System Restore suddenly gets stuck or hangs up on initializing the restoration of the Registry in Windows 10. If you encounter a similar problem, read on as this post will guide you on what you can do in such cases.

There are several things you can do when you face this kind of problem in System Restore. First, you can try to wait it out, give it more time to load, which should not take longer than 5 minutes. And if it’s still stuck after that time, give it another hour. However, if nothing changed after an hour, then you need to troubleshoot the problem further. Keep in mind that you must not interrupt System Restore by shutting it down abruptly, it could result in an unbootable system.

To get started in troubleshooting the problem, you need to follow each one of the suggestions offered below.

Option 1 – Try to use the Windows Recovery Environment

The first troubleshooting option you need to try is to simply tap the power button for about 10 seconds. This is what you have to do when you have to interrupt System Restore or reset your Windows 10 computer. Tapping the power button for 10 seconds will perform a hard shutdown and once your computer shuts down, restart your computer again and follow the steps below but before you do that, make sure that you have a Windows bootable USB or DVD.

  • First, insert the bootable USB or DVD and boot into it, and select the “Repair your computer” option.
  • Next, once you see the manufacturer logo on your computer, tap the key to enter into Windows Recovery Environment.
  • After that, change the Boot sequence to DVD drive under the UEFI Firmware settings and restart your computer.
  • Once your computer has restarted, select the boot order and make changes accordingly as displayed in the BIOS.

Option 2 – Try to run the Automatic Repair Utility

You might also want to use Automatic Repair in fixing the error. To do so, follow the steps below.

  • You can start by creating and booting from a bootable Windows 10 USB Stick.
  • After that, click on Repair your computer located on the bottom left corner when you are on the initial Windows Startup screen.
  • Next, click on Troubleshoot, and then on the other screen, click the Startup Repair option.
  • Now select the operating system you want to repair. Once you do that, it will start to repair your operating system. Wait until the process is completed and then check if the problem’s now fixed.

Option 3 – Try to run System Restore in Safe Mode

If you can’t boot into your Windows 10 computer, you can try to run System Restore again in the Advanced Startup Options.

  • Boot your computer into Safe Mode.
  • After that, select an option > Troubleshoot > Advanced Options > Startup Settings > Restart.
  • Once your computer has restarted, tap the F6 key to enable Safe Mode with Command Prompt and to run System Restore from there.
  • Now in Command Prompt, type the “rstrui.exe” command to run System Restore in Safe Mode. This will help in fixing the problem since it would be safer to perform System Restore of the computer.
If you like to learn and find out more about various Windows errors, and how to repair them go to our vast archive or use search to find articles that will explain and help you in solving your issue.
However, if you prefer to do things fast and with automatization then we are proposing to use an automated solution for your issues. The application that we are recommending is Advanced System Repair Pro
Advanced System Repair utilizes multiple tools all in one to give you a quick, simple, reliable, and very thorough diagnosis of your PC. It brings you all the tools you need in one program to clean, fix, protect, optimize and boost your PC!
1-Click Maintenance
All the tools to make it simple and easy! It's like having a professional technician at the click of a mouse.

Junk Cleaner
Keeping your computer free from unnecessary clutter also helps make your computer last longer. Like any other machine, if you keep it clean and take care of it, it will serve you better for longer!

Optimize background apps
Optimize applications background activity with the built-in Application Optimizer feature.

Disk Defrag
With a simple 1-click, Advanced System Repair speeds up your PC by assembling fragmented files on your machine and organizing them more efficiently.

Malware Removal
Finds and removes all types of harmful malware including trojans, worms, bots, adware, spyware, PUPs, and more!

Privacy Cleaner
The all-in-one privacy suite to Clean Your Tracks & Protect Your Privacy! Make your computer safe, secure, and more efficient!

System Tweak/Optimizer
ASR will analyze your complete system and settings to adjust your PC to function at its maximum performance.

Registry Cleaner
Over time, as you install and uninstall applications, the registry can become cluttered with old entries and broken settings which can result in program crashes, and annoying messages and slow the computer down.
Visit our Advanced System Repair Pro Download page to inform yourself about all the benefits of this software and get a free trial copy of it.
advanced system repair pro

Advanced System Repair Pro

One-click automated PC repair solution
ASR logo
With Advanced System Repair Pro you can easily
Replace damaged files
Restore performance
Free disk space
Remove Malware
Protects WEB browser
Remove Viruses
Stop PC freezing
DOWNLOAD
Privacy Policy | Terms of Use | Uinstall
Advanced System Repair Pro is compatible with all versions of Microsoft Windows including Windows 11

Share this article:

You might also like

Fixing the Port in use, please wait
Recently, a number of Windows 10 users reported an issue wherein they try to print from their PCs but were unable to and got an error message instead that states, “Port in use, please wait”. However, no matter how long they waited, nothing changed and they were still unable to print from their computers. On the other hand, when some of the users attempted to print wirelessly from their mobile devices, the printing continues which indicates that there is some issue between the computer and the printer. So if you are one of the users who are currently facing this problem, then this post should help. To fix this issue with your Printer, here are some possible fixes you can try that might work.

Option 1 – Run the Printer Troubleshooter

The first thing you can do to fix the “Port in use, please wait” error is to run the Printer Troubleshooter. This built-in troubleshooter in Windows 10 can help you fix most print issues. It checks if you have the latest printer drivers and then tries to fix and update them automatically. Aside from that, it also checks if you have connectivity issues or if the Print Spooler and the required Services are running fine. To run it, follow the steps below.
  • Tap the Win + R keys to open the Run dialog box.
  • Next, type “msdt.exe /id PrinterDiagnostic” in the field and click OK or hit Enter to open the Printer Troubleshooter.
  • Then click the Next button and follow the next on-screen instructions to fix the issue with the printer.

Option 2 – Try updating the Printer drivers

You might also want to try updating your printer drivers. All you have to do is locate the USB Composite Device. For complete details, follow the steps below.
  • First, click the Start button and type “device manager”.
  • Then click on the “Device Manager” from the search results to open it.
  • From there, look for the USB Composite Device option and right-click on it, and select the Update Driver from the options.
  • Restart your PC and then click the “Search automatically for updated driver software” option.
Note: You also have the option to download the latest version of your Printer from the manufacturer’s website.

Option 3 – Try selecting the correct port for your Printer

If the first two options given above didn’t work, then maybe it’s time to select a correct port for your printer since the wrong port has been selected which is why you’re getting the “Port in use, please wait” error.
  • Open “Devices and Printers” from the Start search.
  • Next, look for your printer from the list of devices and right-click on it, and then select Printer Properties.
  • Now go to the Ports tab under the newly opened Properties window and make sure that the port type matches the connection on the list of ports currently in use.
Note: If your printer is using a USB connection then the port should have a USB or DOT 4 in its description but if your printer is using a network connection then it should have the following description:
  • WSD
  • Network
  • IP
And if you notice that there are several listings for the same type of port, you have to change the selection to a different one and then click the OK button to save the changes made.
Read More
Happy New Year from ErrorTools.com!!!
As we are on the last day of 2021, our team here at errortools.com would like to express their great gratitude to you all for being with us all this time and would also want to wish you error-free 2022!!! Thank you for being part of this community, we wish you all the best in the upcoming 2022 and hope that we will see you again From all members of errotools, HAPPY NEW YEAR!!! new year christmass tree
Read More
Fix 0x00000016 Blue Screen Error
If you are a gamer, you might have encountered either the CID HANDLE CREATION or VIDEO TDR ERROR errors with an error code of 0x00000016 as you play a game. These kinds of Stop errors have something to do with the Graphics card driver. It could be that your Graphics card driver needs to be updated or it may be corrupted. Whichever the case is, you can try fixing this error using the given solutions below but before you proceed, make sure to create a System Restore Point first so that you can easily roll back to the previous state of your computer in case something does not go as expected.

Option 1 – Try checking if your graphics card is enabled and update it as well

Although the problem is quite massive, the fix could be as simple as enabling the graphics card if it turns out to be disabled. There might be some strange reason why your graphics card disables itself. Thus, the best and first option you can try is to check if the graphics card is enabled or not. To do so, follow these steps:
  • Tap the Win + R keys to open the Run dialog box.
  • Then type “devmgmt.msc” in the field and hit Enter to open the Device Manager.
  • After opening the Device Manager, look for your graphics card option among the list of device drivers. Once you found it, check if it is enabled or not. If it’s not enabled, you should see a gray arrow pointing downwards. Right-click on the card and select Enabled.
  • Next, right-click on the graphics card once more and click on the Update Driver Software option and then click on the “Search automatically for updated driver software” option.

Option 2 – Reinstall the Graphics card drivers

  • Tap Win + R to open Run then type “devmgmt.msc” in the field and hit Enter to open the Device Manager.
  • From there, look for the Display adapters and uninstall each one of the graphics card drivers by right-clicking on them and selecting the Uninstall device option.
  • After uninstalling the graphics card drivers, close the Device Manager and tap Win + R to open Run once again.
  • After that, type “appwiz.cpl” in the field and hit Enter to open Programs & Features in the Control Panel.
  • Next, look for any program that’s related to your GPU manufacturers like Nvidia, AMD, or Intel. Right-click on any GPU-related entry and click on Uninstall to uninstall them and then follow the next on-screen instructions that appear afterward.
  • Now restart your computer.
  • Once your computer has restarted, go to the GPU manufacturer’s website and download the latest driver version for your graphics card model and then install it.
  • Restart your computer once again. That should fix the problem.

Option 3 – Try reinstalling the game

If updating and reinstalling your Graphics card driver didn’t help, then you can try to reinstall the game where you’re getting the CID HANDLE CREATION or VIDEO TDR ERRORS.

Option 4 – Uninstall the programs you installed recently

Chances are, some programs that you just installed might be the one that’s causing the BSOD error. Thus, you need to uninstall the program to resolve the problem.
  • In the search box, type in “control” and then click on Control Panel (desktop app) among the search results.
  • After that, select Programs and Features from the list which will give you a list of all the programs installed on your computer.
  • From there, look for the concerned program and select it and then uninstall it.
Note: If you have downloaded the app from the Windows Store, you can simply right-click on it from the application list and then uninstall it. In addition, you might also want to check the hardware components of your computer that might not support the operating system itself. You can disconnect all the external devices like USB drives, scanners, printers, etc., and then reboot your PC. After that, add the devices again one after the other and check if the BSOD error is now fixed or not.

Option 5 – Try disabling your monitor’s Sleep functionality

There are times when the Sleep functionality of your monitor can also cause BSOD errors like CID HANDLE CREATION or VIDEO TDR errors. There are also times when the graphics card is running in the background and the display goes to sleep and then it’s turned back on but you encounter this kind of Blue Screen error. This is why you can try to disable your computer monitor’s Sleep mode.

Option 6 – Run the Blue Screen Troubleshooter

The Blue Screen troubleshooter is a built-in tool in Windows 10 that helps users in fixing BSOD errors like CID HANDLE CREATION or VIDEO TDR errors. It can be found on the Settings Troubleshooters page. To use it, refer to these steps:
  • Tap the Win + I keys to open the Settings panel.
  • Then go to Update & Security > Troubleshoot.
  • From there, look for the option called “Blue Screen” on your right-hand side and then click the “Run the troubleshooter” button to run the Blue Screen Troubleshooter and then follow the next on-screen options. Note that you might have to boot your PC into Safe Mode.

Option 7 – Try to run the Chkdsk utility

Running the CHKDSK utility might also help you resolve the CID HANDLE CREATION or VIDEO TDR errors. If your hard drive has issues with integrity, the update will really fail as the system will think that it’s not healthy and that’s where the CHKDSK utility comes in. The CHKDSK utility repairs hard drive errors that might be causing the problem.
  • Open Command Prompt with admin privileges.
  • After opening Command Prompt, execute the following command and hit Enter:
chkdsk /f /r
  • Wait for the process to be completed and then restart your computer.
Read More
Watch old game intros in 4k or 8K hi-definition
AI and neural networks are more and more being used in all parts of our lives. From face detections to deep fakes it is both amusing and frightening to watch at the same time. From some really bad uses of neural networks and AI overall, looking at you deep fakes, upscaling videos or images are mostly harmless pieces of work not harming anyone. There is one cool YouTube channel, well there are more but this one seems to have most of the videos on it and if I am wrong I apologize. https://www.youtube.com/channel/UC33rC3GO1UZFAkMcCCwjyWg So upscale is like previously mentioned a YouTube channel that hosts old game trailers and into videos but in full 4K or 8K video resolution, fully upscaled using neural networks. There are some videos that are not maybe top-notch but the large quantity of them is pretty well upscaled and they do indeed look great. So if you have some time and want that old nostalgia fix, go and check it out. You might find something that will bring that old you out and you might even drop a smile or two remembering old good days, I know I have.
Read More
Create BlueTooth shortcut on desktop
If you have a BlueTooth device on your computer, you know that each time you need to receive or transfer the file you need to find the icon in the system tray, right-click on it and choose the desired option. But there is a simpler solution, create a Bluetooth icon on the desktop so it is always easy to access. Open File Explorer by pressing ⊞ WINDOWS + E Go to C:\Windows\System32 Find fsquirt.exe Right-click on it and choose copy Go to the desktop and right-click, choose paste Rename the file to Bluetooth And, you are done!
Read More
Razer unveils their first internal PC hardware
razer pc hardware componentsRazer is a well-known brand among PC gamers and users, it started as a peripheral manufacturer focused on keyboards and mouse but after years passed Razer expanded its inventory offerings. It soon started offering headphones and lately has branched into wider product lines like gaming chairs and protection masks. It is not a big surprise that Razer is expanding into other branches of the PC industry. This time, however, it has revealed not one but three new hardware for your PC. Case fans, all in one liquid cooler and power supply. There are not many details about the products themselves but one thing is one hundred percent confirmed, they come with Razer Chroma, all of them, even the fans.

Katana Chroma ATX PSU

razer power supply
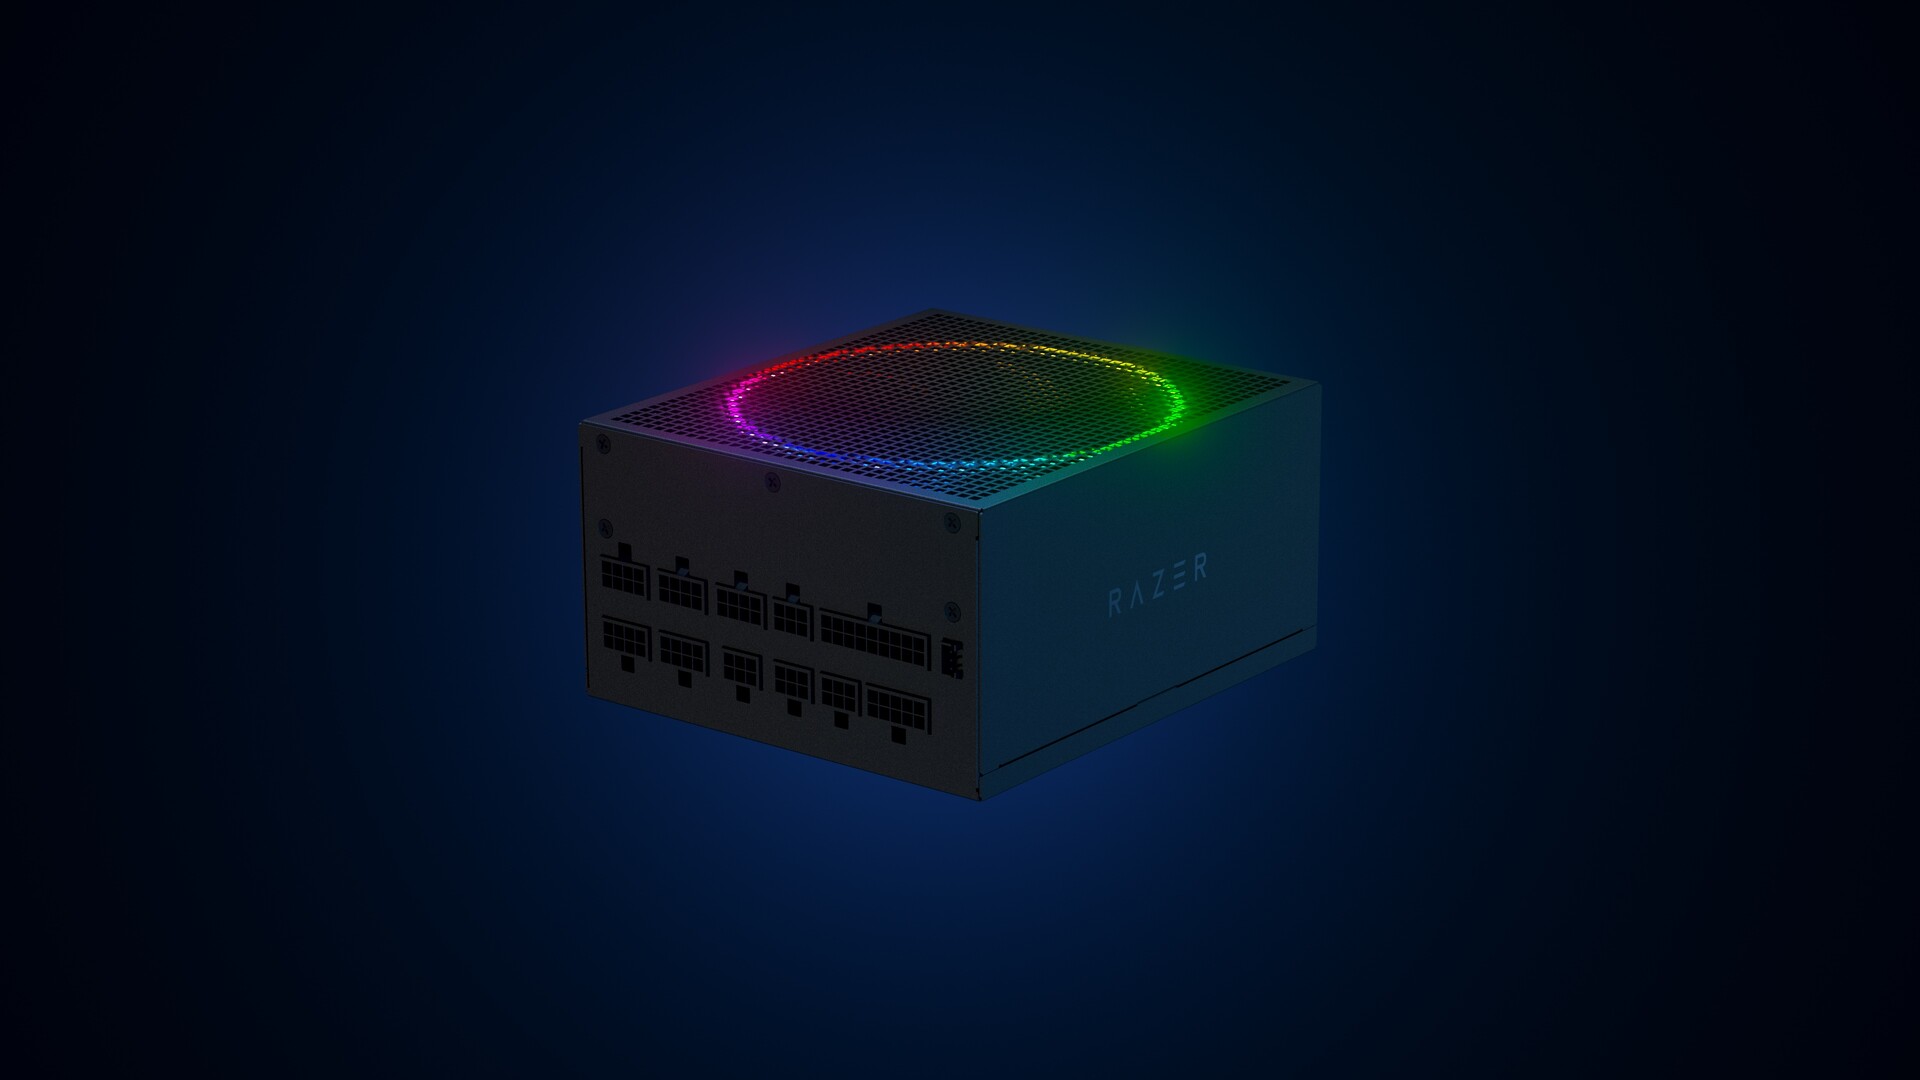
Most interesting for me personally is Razers Katana, the power supply unit. It is a modular power supply ranging from 750W to 1200W with the additional option of Titanium rated one with an impressive 1600W of power. Power supply will start shipping in early 2022 and at the time of writing this article no price range has been released.

Razer Hanbo AIO

razer water cooling
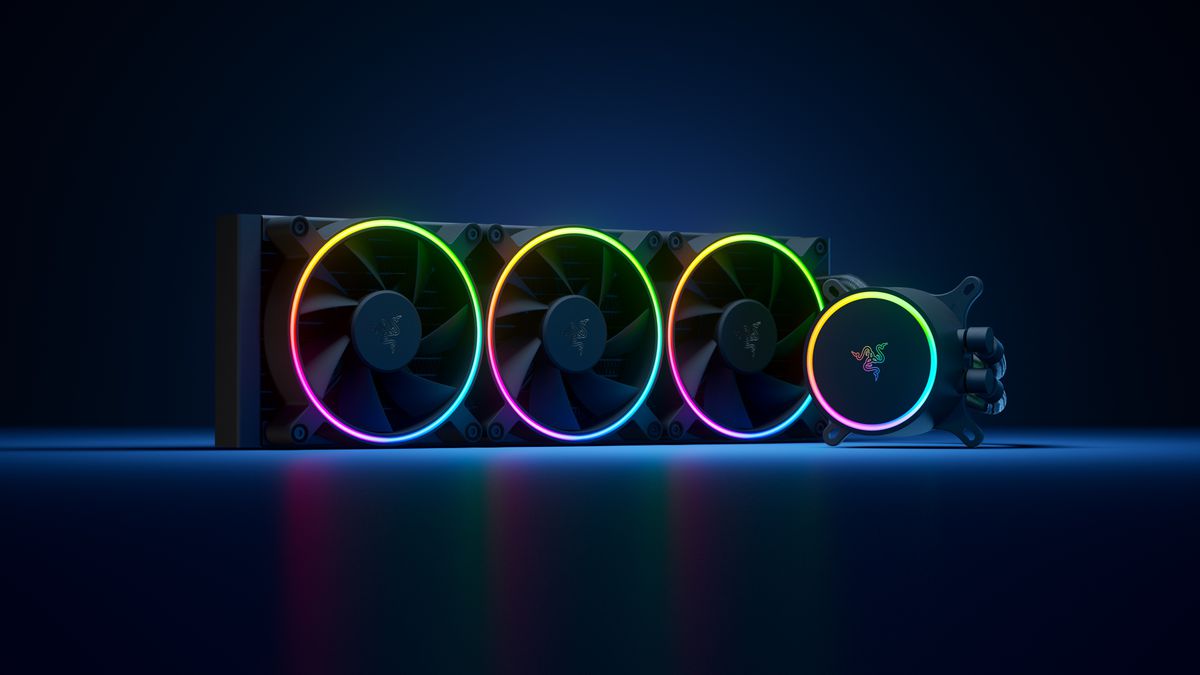
Hanbo liquid cooler will feature an optimized intake design so it can ensure greater heat transfer and fluid dynamic for improved reliability and silent operation. Radiator comes in 240mm size with two fans and a larger one of 360mm with three fans. The pump will be able to rotate in any direction of full 360 degrees so it can fit in any case. Hanbo will be released in November this year but no pricing has been released so far.

Razer Kunai Chroma case fans

razer case fansKunai fans will boast high static pressure performance with lowered noise. They will go as far as 2200rpm for the 120mm version where the 140mm version will go up to 1600rpm. They will come with addressable LEDs and up to eight fans will be able to be connected to Razer’s PWM fan controller that will come with a magnet at the back for easy attachment to any steel part of PC casing. PWM will use Razer’s Synapse software to customize pulse width modulation in order to improve airflow and noise. PWM will be priced at $49.99 in the Razer Store and it is available for preorder. Fans are priced at $44.99 for one 120mm or $129.99 for a three-pack of 120mm. One 140mm will go for $49.99 and a three-pack will be $129.99.
Read More
Could not configure one or more components
If you are trying to install or upgrade your Windows 10 computer but suddenly encountered an error message saying, “Windows could not configure one or more system components”, read on as this post will show you how you can fix the problem. You are not alone in experiencing this problem as other users also reported having the same scenario. Some of them reported getting the following error message:
“Windows could not configure one or more system components. To install Windows restart the computer with error code 0xc1900101-0x30018.”
When you check on the Windows 10 rollback log, you will see a part with the “iisetup.exe” that’s related to the abort. Usually, the upgrade process completes over 50% and gets stuck and then rolls back later on and generates the error logs. This kind of error, in most cases, appears during the upgrade of Windows 10 and is related with the Internet Information Services or IIS in Windows 10. For some unknown reason, it restricts the installation or the upgrade which causes the error to appear. To fix the “Windows could not configure one or more system components” error, you can try to remove the IIS from the Windows Features or rename the “inetsrv” folder. You could also move all the folders related to IIS to another drive. For more details, refer to the options provided below.

Option 1 – Try to remove the IIS from Windows Features

The IIS is installed from the Windows Features and you can find it at Control Panel > Programs. From there, uncheck the checkbox for the Internet Information Services. Once done, click on the OK button to save the changes. Note that this process will get rid of all the related programs, services, and folders from Windows 10. So if you want to, you can just install them later on or use an offline installer from the official site of Microsoft.

Option 2 – Try renaming the inetsrv folder

The next option you can check out to resolve the problem is to rename the “inetsrv” folder. If you have uninstalled IIS from the Windows Features, this should remove the folders as well, however, it didn’t remove the folder then you have to delete the folders that are related to the IIS by following these steps:
  • First, you have to boot into the Advanced Recovery Mode and from there, open Command Prompt.
  • Next, execute this command to rename the folder from this location, C:Windowssystem32inetsrv: rename C:/Windows/system32/inetsrv/inetsrv.old
  • Once done, boot into your computer normally and try to upgrade Windows 10 again, and check if the problem is fixed or not.

Option 3 – Try to move the folders related to IIS to a different drive

  • Tap the Win + R keys to launch the Run utility and type “services.msc” in the field and hit Enter to open the Windows Services Manager.
  • Next, look for the Application Host Helper Service from the list of services and stop it.
  • Once done, take ownership of the “WinSxS” folder and then move the *windows-iis*.*” folders to another drive. You can just search using the “*windows-iis*.*” keyword in the Start Search.
  • Next, tap the Ctrl + X keys and paste the folders to another drive.
  • After that, start the update process for Windows 10 again.
Read More
REvil vanishes over night without trace
REvilREevil is one of the most active and successful hacking groups connected to Russia and operating all over the world. The group recently demanded a huge bitcoin ransom for an attack targeting IT firm Kaseya in the USA. Since Tuesday blog and payment site run by REvil group cannot be longer reached without any kind of explanation or why. The reason behind the disappearance is unknown but has sparked speculation that the group may have been targeted deliberately by authorities. US President Joe Biden said he raised the issue with Vladimir Putin during a phone call on Friday, after discussing the subject during a summit with the Russian president in Geneva last month. Mr. Biden told reporters that he had "made it very clear to him...we expect them to act" on information and also hinted the US could take direct digital retaliation on servers used for intrusions. The timing of Tuesday's outage has sparked speculation that either the US or Russian officials may have taken action against REvil - though officials have so far declined to comment and cyber experts say sudden disappearances of groups are not necessarily uncommon. The development comes after a series of high-profile ransomware attacks which have hit major US businesses this year. The FBI accused REvil - also known as Sodinokibi - of being behind a ransomware attack on the world's largest meat processing company JBS last month.
Read More
How to Repair Missing MSVCR100.dll Error

Fix Missing MSVCR100.dll Error

What is MSVCR100.dll Error?

Msvcr100.dll is a dynamic link library file. This file is loaded into the memory at runtime for successful program execution. This process is also referred to as runtime dynamic linking. The Msvcr100.dll belongs to the Microsoft Visual C++ Runtime Library. It is a core Windows component used by numerous Windows-based applications to load and run smoothly on Windows PC. Msvcr100.dll error occurs when the process of runtime dynamic linking fails. Due to this error, you are unable to access the desired application. The error code is displayed in either of the following formats:
  • “Msvcr100.dll Not Found"
  • "This application failed to start because msvcr100.dll was not found. Re-installing the application may fix this problem."
  • "Cannot find [PATH]msvcr100.dll"
  • "msvcr100.dll  is missing from your computer"
  • "XXX.exe - System Error - MSVCR100.dll is missing from your computer."

Solution

Restoro box imageError Causes

Narrowing down the cause of the Msvcr100.dll error is not possible as this error can occur on your PC due to multiple reasons. However, here are some of the most common causes of Msvcr100.dll error code on Windows PC:
  • Msvcr100.dll file corrupt and damaged
  • Missing Msvcr100.dll file
  • Corrupt runtime code library
  • Registry issues
  • Malware attack and viral infection

Further Information and Manual Repair

Here are some of the best ways to resolve this error on your system:

Reinstall the application causing the error

As dll are shared files used by multiple programs to load and run, there is the possibility of it getting deleted when uninstalling a certain program. If so, then the best way to fix it is to reinstall the application that is causing the error to pop up on your screen. This way you’ll be able to set up the program again and install the Msvcr100.dll file back on your system.

Download Microsoft Visual C++ 2010 Redistributable Package

Another way to resolve this error is to download Microsoft Visual C++ 2010 Redistributable Package. To do this, first, see if you are running a 32 bit or 64-bit copy of Windows. XP users go to the start menu and click run then type winver and press enter. In Vista and Windows 7, go to the start menu and type computer and click properties. The information you require is under Windows Edition. Once you find out whether you are using a 32 bit or a 64-bit version, accordingly, download the correct version of Microsoft Visual C++ 2010 Redistributable Package directly from Microsoft’s official website. Simply download and install the software. Then follow the prompts to add the toolbox to your PC. After that, restart your computer; most likely the error message will be gone. If it still persists, then this means the error is either related to the registry or malware.

Download and Run Restoro

Restoro can be used to resolve both malware infection and registry issues on your PC that could be triggering Msvcr100.dll errors. Restoro is a next-generation and multi-functional PC repair tool embedded with powerful utilities like an antivirus, a registry cleaner, and a system optimizer. The registry cleaning feature detects all registry issues and Msvcr100.dll errors. It removes unnecessary and obsolete files on the disk, like junk files, cookies, internet history, and temporary files cluttering the disk and damaging dll files. It repairs the damaged and corrupt dll files and restores the registry. Simultaneously the antivirus feature scans and removes all malicious software on your system. These include spyware, viruses, Trojans, adware, and malware that can damage dll files. This software is efficient and resolves the Msvcr100.dll error in seconds. It is easy to use and has a simple navigation. It is compatible with all Windows versions. Click here to download Restoro on your PC and resolve the Msvcr100.dll error today!
Read More
How to Repair Windows 10 Error 0x800ccc13

How to Repair Windows 10 Error 0x800ccc13

Error Code 0x800ccc13– What is it?

0x800ccc13 is an error message related to sending email using Outlook. Many people are receiving this error after making an upgrade from Windows 7 or Windows 8.1 to Windows 10. The error message appears when you try to send an email message with the use of a POP3 account or an IMAP account in an Outlook profile that has an Exchange Server 2010 mailbox configured. A common complaint would be: Since upgrading to Windows 10 I cannot send email from Outlook 2013. Mail stays in the Outbox, and I get: Error 0x800CCC13. Cannot connect to the network.

Symptoms

This problem may arise under the following situations:
  • You are using Microsoft Office Outlook in online mode to connect to a Microsoft Exchange Server 2010 mailbox
  • When you add an additional POP3 or IMAP account in the same Microsoft Outlook profile
  • You are sending an attachment through email.
  • You try sending an email by selecting POP3 or IMAP account as the sender
During these circumstances, the email message stays in the Outbox and you receive the following error message: Task '<the POP3 account or the IMAP account> - Sending' reported error (0x800CCC13): 'Unable to connect to the network. Check your network connection or modem.'

Solution

Restoro box imageError Causes

Error Code 0x800ccc13 occurs because the system files in Windows 10 during the upgrade became corrupted and most likely caused authentication issues. It can happen with any version of Outlook. Damaged data files will also cause error code 0x800ccc13 to manifest. Overall, the corruption of the Microsoft Windows System could be a result of an installation partially done (or an incomplete one), deletion of any application or hardware erroneously, and or malware or adware infestation.

Further Information and Manual Repair

Method 1:

Use the Windows System File Checker to repair corrupted files Verify that your SMTP, username, and password settings are correct. Now, in order to correct missing or corrupt Windows System files, try the following solution by running a command. This is known as the System File Checker. Follow the steps below to invoke the program using a command prompt command:
  1. At first, you need to open the command prompt. To do so, right-click the Windows button in the bottom left of the screen, and select Command Prompt (Admin).
  2. Now, enter the following command
sfc/scannow
When it is done, a message will confirm that Windows found some corrupt or missing files and it has successfully repaired those. Check the Outlook and see if your emails are sending. If the problem persists, don’t worry there is another way to solve this. Users have found another command helpful is using the NetShell utility from the command prompt, which is similar to the above solution.
  1. Open the Command prompt by Right-clicking the Windows button in the bottom left of the screen and select Command Prompt (Admin).
  2. Enter the following command
netshwinsosk reset
This helpful command will reset the network adapter to its default settings. Hope this will solve your problem. If not, you may want to try the Method 2 listed below.

Method 2:

For this method, you need to consider the following things:
  • Are you using POP3, IMAP, or Exchange server for your email account?
  • How many email accounts have you configured in your Outlook?
  • Is there an undelivered email stuck in your Outbox?
  • If you are trying to send an attachment, what is the size of the attachment?
Try the following:
  1. Move or delete any undelivered email that is stuck in the Outbox folder, and then try sending an email and verify the result
  2. Start Outlook in Safe Mode by following the instructions below
Hold down Windows key + R. Copy this command Outlook /safe Note, there is a space between Outlook and / Paste it in the open box and press Enter If Outlook in Safe Mode works, disable the add-ins by following the steps below and determine if the problem is caused by add-ins.
  • Click File menu, click Options, Add-ins, Go button beside Manage Com-in Add.
  • If there are add-ins listed, clear the checkbox.
  • Close Microsoft Office and restart it.
  • Disable the add-ins one at a time. Now, restart Outlook and repeat the procedure once more. If the problem appears again, it will help you find which add-in is causing the problem.
  1. Start the computer using the clean boot. Now, try to send an email and see the result.
  2. If the problem still lingers, create a new profile and configure the email account.
If you do not possess the technical expertise required to accomplish this yourself or do not feel comfortable doing so, download and install a powerful automated tool to get the job done.
Read More
1 2 3 162
Logo
Copyright © 2022, ErrorTools. All Rights Reserved
Trademarks: Microsoft Windows logos are registered trademarks of Microsoft. Disclaimer: ErrorTools.com is not affiliated with Microsoft, nor claim direct affiliation.
The information on this page is provided for information purposes only.
DMCA.com Protection Status