Sandbox failed to start with error 0xc030106

If you suddenly encountered an error when you try to run the Windows Sandbox that says, “Windows Sandbox failed to start, Error 0xc030106, The virtual machine or container exited unexpectedly”, read on as this post will guide you on what you can do to resolve the problem.

According to security experts, this kind of error in Windows Sandbox is due to some issues with the supporting virtualization component. It could also be caused by other factors and to fix it, there are several potential fixes you need to check out. You can try running the Windows Sandbox as an administrator. You should also make sure that all the supporting processes are running properly, as well as try to install any pending Windows Updates.

Option 1– Try to run Windows Sandbox as an admin

  • In the Start Menu, scroll down until you see the entry for the Windows Sandbox.
  • Then right-click on it and select More and then select the “Run as administrator” option to open it with admin privileges.
  • Next, if a User Account Control or UAC prompt pops up, just click on Yes to proceed.
  • You should now be able to open the Windows Sandbox without the error. However, if the error persists, proceed to the next given options below.

Option 2 – Ensure that all the supporting processes and services are running properly

If running Windows Sandbox as an administrator didn’t fix the error, you have to ensure that all related processes for Windows Sandbox are running properly. To do that, follow these steps:

  • Tap the Win + R keys to launch the Run utility and type “services.msc” in the field and hit Enter to open the Windows Services Manager.
  • Next, from the list of services, look for the following services in the given order:
    • Network Virtualization Service
    • Virtual Disk
    • Hyper – V Virtual Machine
    • Hyper – V Host Compute Service
    • Container Manager Services
  • After you find the aforementioned services, restart each one of them.
  • Once done, try to open the Windows Sandbox again and see if the error is fixed or not.

Option 3 – Try to install any pending Windows Updates

If the second option still didn’t work, then you might want to check Windows Updates on your computer and see if there are any pending Windows Updates you have to install. All you have to do is go to the Windows 10 Settings app and then go to the Windows Updates section and click on the “Check for updates” button to check if there are any pending updates that are needed to be installed. This could fix the Windows Sandbox error.

If you like to learn and find out more about various Windows errors, and how to repair them go to our vast archive or use search to find articles that will explain and help you in solving your issue.
However, if you prefer to do things fast and with automatization then we are proposing to use an automated solution for your issues. The application that we are recommending is Advanced System Repair Pro
Advanced System Repair utilizes multiple tools all in one to give you a quick, simple, reliable, and very thorough diagnosis of your PC. It brings you all the tools you need in one program to clean, fix, protect, optimize and boost your PC!
1-Click Maintenance
All the tools to make it simple and easy! It's like having a professional technician at the click of a mouse.

Junk Cleaner
Keeping your computer free from unnecessary clutter also helps make your computer last longer. Like any other machine, if you keep it clean and take care of it, it will serve you better for longer!

Optimize background apps
Optimize applications background activity with the built-in Application Optimizer feature.

Disk Defrag
With a simple 1-click, Advanced System Repair speeds up your PC by assembling fragmented files on your machine and organizing them more efficiently.

Malware Removal
Finds and removes all types of harmful malware including trojans, worms, bots, adware, spyware, PUPs, and more!

Privacy Cleaner
The all-in-one privacy suite to Clean Your Tracks & Protect Your Privacy! Make your computer safe, secure, and more efficient!

System Tweak/Optimizer
ASR will analyze your complete system and settings to adjust your PC to function at its maximum performance.

Registry Cleaner
Over time, as you install and uninstall applications, the registry can become cluttered with old entries and broken settings which can result in program crashes, and annoying messages and slow the computer down.
Visit our Advanced System Repair Pro Download page to inform yourself about all the benefits of this software and get a free trial copy of it.
advanced system repair pro

Advanced System Repair Pro

One-click automated PC repair solution
ASR logo
With Advanced System Repair Pro you can easily
Replace damaged files
Restore performance
Free disk space
Remove Malware
Protects WEB browser
Remove Viruses
Stop PC freezing
DOWNLOAD
Privacy Policy | Terms of Use | Uinstall
Advanced System Repair Pro is compatible with all versions of Microsoft Windows including Windows 11

Share this article:

You might also like

Manually cleaning your PC registry
[vc_row][vc_column][vc_column_text]

Manually cleaning your PC registry

Manually cleaning your PC registry may be the worst or best thing you ever decide to do. Registry keys that lie around on your computer, unused, can cause your computer to lag. This can end up in your computer not being able to load the easiest of programs and being slow at loading anything, let alone something that would take up a decent amount of memory. If your computer has slowed to almost an absolute stop, it is most probably the registry’s fault and the only option then is to clean it. You can get programs to do this for you, but they can be riddled with inaccuracies and viruses that could harm your computer even more. This is why some people choose to manually edit their computer. However, this is not without its flaws.

Registry Keys

Registry keys tend to have really long names. These names will be full of numbers and hyphens and will most likely give you no indication of what they do. Even some computer experts find it hard to understand what every computer’s registry keys do. This can make it very hard to see which ones are causing the problem; and if you don’t know what’s causing the problem, then there is no way you will be able to fix it. Some registry keys will be completely menial in what they do but some could be vital to even allow Windows to work on your computer.

Manual Registry Repair

Registry keys can also cause huge problems if you manually delete the wrong one. A lot of registry cleaners have the option to revive a key that they have deleted on you, which means that fixing an error that they made would be easy enough to do. However, when you manually delete registry keys, it will be an awful lot harder to get them back to work again afterward. This can cause your computer many problems and if you delete even one wrong key it is possible your computer will not even start. With the horrid naming system they have as well, it makes it very hard to determine what is important and what is not, which means it is all too likely that you will delete something important. However, those are the risks you have to take when you are cleaning out your registry. A registry cleaner has the same likelihood of messing with your computer and deleting something wrong that you have, so it is the same either way however a registry cleaner will do it with less hassle. But, some people say that if you do it yourself, it’s more likely to be right; that is why they prefer to do it manually and that is alright.

Conclusion

So, if you are manually deleting your registry keys that are unused, you’ll have to use a program that comes with Windows known as ‘regedit.exe’ which is incredibly difficult to use but may just be worth the hassle in the end. So, you don’t really need to put up with a slow computer, but be careful when messing with your registry manually! To repair and resolve this and other PC-related issues Click Here to download Restoro.[/vc_column_text][/vc_column][/vc_row]
Read More
Fix Kernel Power Blue Screen in Windows
To function properly and as intended, Windows 10 depends on a number of resources and software components. Even with a simple task as powering the machine, there are already several smaller software components supporting it. However, if any of these resources or components experience issues, it will affect the overall function of the computer. One of the errors reported is the Kernel Power Blue Screen error which is triggered by the Windows Kernel that mostly comes with a Windows Kernel Event ID 41 error. This kind of error can turn off and reboot the computer randomly. Here’s an example of a Bugcheck code entry with the same event:
 “EventData BugcheckCode 159 BugcheckParameter1 0x3 BugcheckParameter2 0xfffffa80029c5060 BugcheckParameter3 0xfffff8000403d518 BugcheckParameter4 0xfffffa800208c010 SleepInProgress false PowerButtonTimestamp 0Converts to 0x9f (0x3, 0xfffffa80029c5060, 0xfffff8000403d518, 0xfffffa800208c010)”
This kind of BSOD error is caused by an issue with the Power Supply components in both the software and hardware parts of your computer. In such cases, if your computer is stuck in a reboot loop, you need to troubleshoot the problem via Safe Mode or in the Advanced Startup options screen.

Option 1 – Try disabling Overclocking

If you have enabled Overclocking, you might have to disable it as some users reported that the Kernel-Power Blue Screen error started to appear right after overclocking. To disable it, follow the steps below.
  • Go to the Start Menu and open Settings.
  • Next, select Update and Security and go to the Recover tab.
  • From there, click on Restart now in Advanced startup. This will restart your computer.
  • Once you’re in the Advanced startup, go to Troubleshoot and then select Advanced Options.
  • From there, select the UEFU Firmware Settings.
  • Now click on Restart. Once your computer has restarted, it will automatically open BIOS.
  • From the BIOS, go to the Advanced tab and navigate to Performance and then look for Overclocking.
  • Once you’ve found Overclocking, make sure that it is disabled. If it’s not, then disable it and then save the changes made by tapping the F10 key.
  • Start your computer normally and check if the Kernel-Power Blue Screen error is now fixed.

Option 2 – Try to run the Power troubleshooter

The next thing you can do is to run the Power troubleshooter. To do so, follow these steps:
  • Go to Settings and navigate to Update & Security > Troubleshoot.
  • After that, look for the “Power” option from the given list of built-in troubleshooters and click on it.
  • Next, click on the “Run the troubleshooter” button to run the Power troubleshooter.
  • Once the troubleshooter is done identifying the problems, follow the next on-screen instructions to resolve the problem.
Note: You could also try to run the Blue Screen troubleshooter to fix the Kernel-Power BSOD error. You can find it under the same page as the Power troubleshooter.

Option 3 – Try to replace the Power Supply Unit

You could also try to consider physically replacing the Power Supply Unit or PSU of your computer and see if that helps or not.

Option 4 – Run the Windows Memory Diagnostic tool

Since this error could be caused by some issues in the memory, you can try running the Windows Memory Diagnostic tool and see if it helps.
  • Tap the Win + R keys to open Run and type exe and hit Enter to open the Windows Memory Diagnostic Tool.
  • After that, it will give two options such as:
    • Restart now and check for problems (Recommended)
    • Check for problems the next time I start my computer
  • Once your computer has restarted, perform a basic scan or you could also go for the “Advanced” options such as “Test mix” or “Pass count”. Simply tap the F10 key to start the test.
Note: After you select the option, your PC will restart and check for memory-based issues. If it finds any issues, it will automatically fix them and if there’s no issue found, then it’s most likely not a memory-based issue so you should try the other options given below.

Option 5 – Try to check physically check your RAM

In this option, you have to check your RAM physically especially if you tend to use multiple physical RAMs on your computer so it can be quite tricky and technical. You have to check first if they are of the same frequency and then verify if the chip is compatible or not. You also have to check if the sockets are attached using some adapter or non-recommended apparatus as it can cause some problems while giving performance hit to your computer.

Option 6 – Try to update the BIOS

Updating the BIOS can help you fix the Kernel-Power BSOD error but as you know, BIOS is a sensitive part of a computer. Even though it is a software component, the functioning of the hardware depends on it largely. Thus, you must be careful when modifying something in the BIOS. So if you don’t know much about it, it’s best if you skip on this option and try the other ones instead. However, if you are well-versed in navigating the BIOS, then follow the steps below.
  • Tap the Win + R keys to open the Run dialog box.
  • Next, type “msinfo32” in the field and press Enter to open System Information.
  • From there, you should find a search field on the bottom where you have to search for the BIOS version and then press Enter.
  • After that, you should see the developer and version of the BIOS installed on your PC.
  • Go to your manufacturer’s website and then download the latest version of BIOS on your computer.
  • If you are using a laptop, make sure that you keep it plugged in until you have updated the BIOS.
  • Now double click on the downloaded file and install the new BIOS version on your computer.
  • Now restart your computer to apply the changes made.
Note: If updating the BIOS didn’t help, you might want to consider resetting it instead.

Option 7 – Disable Fast Start-up

If you want your computer to boot faster, then you might have enabled Fast Start-up. This feature is ideal for computers that are using a hard disk drive. However, turning on this feature also means that when the computer boots, it might lag some drivers that are loaded when it initially boots up. Thus, it might be the potential cause of the Kernel-Power BSOD error. Thus, you need to disable Fast Start-up. To do that, follow these steps:
  • Boot your PC into Safe Mode.
  • Then tap the Win + R keys to open the Run dialog box.
  • Next, type in “control” to open Control Panel.
  • After that, select Hardware and Sound and click on Power Options.
  • Select “Choose what the power buttons do” from the left side menu pane and click on Change settings that are currently unavailable.
  • Afterward, uncheck the “Turn on fast startup (Recommended)” entry and click on Save Changes.
  • Now restart your PC for the changes to take effect and then check if the problem’s fixed afterward.
Read More
How to Remove RelevantKnowledge From PC

RelevantKnowledge is a potentially unwanted program. It is typically bundled by 3rd-party installers and download managers that include other potentially unwanted programs (PUPs). In most cases, the installer will present the user with an RK survey at the end of the setup in order to relate the user’s future behavior to various questions.

From the published: RelevantKnowledge is an online market research community consisting of over 2 million members worldwide, which provides insight into how its members interact with the Internet. In exchange for an agreement to have their Internet behavior monitored, computer users who join RelevantKnowledge are offered various value propositions, including the ability to download screensavers or other software offerings, entry into sweepstakes, and a host of other benefits.

Multiple anti-virus scanners have detected possible malware in RelevantKnowledge.

About Browser Hijackers

If you’ve ever downloaded software via the internet (shareware, freeware, etc,), it’s quite possible you’ve unintentionally installed unwanted programs on your PC. Potentially Unwanted Programs (PUP), also referred to as Potentially Unwanted Applications (PUA), are applications that you never wanted in the first place and often come bundled with freeware. Once installed, the majority of these applications can be tough to get rid of and become much more of an annoyance rather than a necessity. It is clear by its name – unwanted applications – but did not really constitute “malware” in the traditional sense. This is because, the majority of PUPs get into a computer not because they slip through the security holes, for instance, but because the users have got installed them themselves – 100 % unknowingly needless to say. A PUP might not be regarded as malicious or dangerous but nevertheless, it is a common reason for clunky OSs; some PUPs are a lot more aggressive by deliberately slowing down your PC.

The harm unwanted programs could do

PUPs come in various forms. Typically, they could be seen in adware bundlers that are known to use aggressive and misleading advertising. The majority of bundlers install many adware programs from a number of vendors, each of which features its own EULA policy. Safebytes Anti-Malware totally eradicates this threat and safeguards your computer against PUP or adware infection. Additionally, the majority of free programs nowadays come with a few unwanted add-ons; in most cases a web browser toolbar or browser modification such as a homepage hijacker. They can modify browser settings, change the default search engine, replace the default home page with their own websites, slow down internet speed, and also will damage your system as well. PUPs carry a dangerous bite if left unchecked. The most detrimental part of installing a PUP is the spyware, adware, and keystroke loggers that might hide inside. These are programs that don’t really do anything good for you; in addition to taking up space on your hard disk drive, they also slow down your PC, often modify settings without your authorization, the list of frustrating features goes on and on.

Tips on how to avoid getting a PUP

• When installing anything on your personal computer, always study the fine print, including the license agreement. Do not accept terms of use that are for bundled programs. • Use ONLY custom or manual install method – and never thoughtlessly click Next, Next, Next. • Use good antimalware software, such as Safebytes Anti-Malware which offers real-time protection against PUPs. • Think carefully before you download any kind of shareware or freeware. Turn off or get rid of toolbars and browser extensions you don’t actually need. • Always download applications from the original website. The majority of PUPs find their way onto your laptop or computer is via download portals, so steer clear of it entirely.

What To Do If You Cannot Install Safebytes Anti-Malware?

Viruses may cause a lot of damage to your personal computer. Some malware is meant to interfere with or block things that you want to do on your computer system. It may well not allow you to download anything from the net or stop you from accessing some or all websites, particularly the anti-malware sites. If you are reading this article now, you’ve probably realized that virus infection is the real cause of your blocked internet connectivity. So how to proceed if you need to download and install an anti-malware program like Safebytes? Although this kind of problem can be harder to get around, there are a few actions you can take.

Download the application in Safe Mode with Networking

In Safe Mode, you may change Windows settings, un-install or install some applications, and remove hard-to-delete viruses. If the malware is set to load automatically when the computer starts, shifting to this mode can prevent it from doing so. To start the computer into Safe Mode, press the “F8” key on your keyboard just before the Windows boot screen appears; Or right after normal Windows boot up, run MSCONFIG, look over “Safe Boot” under Boot tab, and then click Apply. As soon as you reboot into Safe Mode with Networking, you can download, install, and update anti-malware software from there. Right after installation, run the malware scanner to eliminate standard infections.

Use an alternate web browser to download antivirus software

Web-based viruses could be environment-specific, aiming for a specific internet browser or attacking specific versions of the browser. The most effective solution to overcome this problem is to go with a browser that is well known for its security measures. Firefox has built-in Phishing and Malware Protection to keep you secure online.

Install anti-malware on a USB drive

Another option is to save and operate an antivirus software tool entirely from a Flash drive. Do these simple actions to clean up your infected PC using a portable antivirus. 1) On a virus-free computer, download and install Safebytes Anti-Malware. 2) Insert the USB drive into the clean PC. 3) Double click on the downloaded file to open the installation wizard. 4) Select the drive letter of the flash drive as the location when the wizard asks you exactly where you would like to install the antivirus. Follow the directions to complete the installation process. 5) Transfer the thumb drive from the uninfected computer to the infected PC. 6) Double-click the Safebytes Anti-malware icon on the pen drive to run the application. 7) Simply click “Scan Now” to run a complete scan on the affected computer for malware.

Protect Your Computer & Privacy With SafeBytes Anti-Malware

Want to download the best anti-malware software program for your laptop? There are lots of applications on the market that comes in free and paid versions for Windows systems. A few are really worth your money, but many aren’t. You need to pick a tool that has got a good reputation and detects not only computer viruses but other types of malware also. Among few good applications, SafeBytes Anti-Malware is the highly recommended program for the security-conscious individual. SafeBytes antimalware is a highly effective and user-friendly protection tool that is suitable for end-users of all levels of IT literacy. After you have installed this application, SafeByte's sophisticated protection system will make sure that no viruses or malware can seep through your PC. SafeBytes has excellent features when compared to other anti-malware programs. Here are some popular features present in this tool: World-class AntiMalware Protection: Safebytes is made on the best virus engine within the industry. These engines will detect and remove threats even during the early stages of a malware outbreak. Real-time Active Protection: SafeBytes delivers complete and real-time security for your laptop or computer. They’re highly efficient in screening and getting rid of numerous threats because they’re constantly revised with the latest updates and safety measures. Internet Security: Through its unique safety score, SafeBytes informs you whether a site is safe or not to visit it. This will ensure that you’re always certain of your safety when browsing the net. Very Low CPU and Memory Usage: This program is not “heavy” on the computer’s resources, so you will not notice any overall performance difficulties when SafeBytes is operating in the background. 24/7 Online Technical Support: SafeBytes provides 24/7 technical support, automatic maintenance, and upgrades for the best user experience.

Technical Details and Manual Removal (Advanced Users)

If you wish to manually remove RelevantKnowledge without the use of an automated tool, it may be possible to do so by removing the program from the Windows Add/Remove Programs menu, or in cases of browser extensions, going to the browsers AddOn/Extension manager and removing it. You will likely also want to reset your browser. To ensure the complete removal, manually check your hard drive and registry for all of the following and remove or reset the values accordingly. Please note that this is for advanced users only and may be difficult, with incorrect file removal causing additional PC errors. In addition, some malware is capable of replicating or preventing deletion. Doing this in Safe Mode is advised.

The following files, folders, and registry entries are created or modified by RelevantKnowledge

Files: File%COMMONPROGRAMSRelevantKnowledgeAbout RelevantKnowledge.lnk. File%COMMONPROGRAMSRelevantKnowledgePrivacy Policy and User License Agreement.lnk. File%COMMONPROGRAMSRelevantKnowledgeSupport.lnk. File%COMMONPROGRAMSRelevantKnowledgeUninstall Instructions.lnk. File%PROGRAMFILESRelevantKnowledgechrome.manifest. File%PROGRAMFILESRelevantKnowledgecomponentsrlxg.dll. File%PROGRAMFILESRelevantKnowledgecomponentsrlxh.dll. File%PROGRAMFILESRelevantKnowledgecomponentsrlxi.dll. File%PROGRAMFILESRelevantKnowledgecomponentsrlxj.dll. File%PROGRAMFILESRelevantKnowledgeinstall.rdf. File%PROGRAMFILESRelevantKnowledgerlcm.crx. File%PROGRAMFILESRelevantKnowledgerlcm.txt. File%PROGRAMFILESRelevantKnowledgerlls.dll. File%PROGRAMFILESRelevantKnowledgerlls64.dll. File%PROGRAMFILESRelevantKnowledgerloci.bin. File%PROGRAMFILESRelevantKnowledgerlph.dll. File%PROGRAMFILESRelevantKnowledgerlservice.exe. File%PROGRAMFILESRelevantKnowledgerlvknlg.exe. File%PROGRAMFILESRelevantKnowledgerlvknlg64.exe. File%PROGRAMFILESRelevantKnowledgerlxf.dll. Directory %COMMONPROGRAMSRelevantKnowledge. Directory %PROGRAMFILESRelevantKnowledgecomponents. Directory %PROGRAMFILESRelevantKnowledge. Registry: Key mkndcbhcgphcfkkddanakjiepeknbgle at HKEY_LOCAL_MACHINESOFTWAREGoogleChromeExtensions. Key RelevantKnowledge at HKEY_LOCAL_MACHINESOFTWAREMicrosoftWindows NTCurrentVersionWinlogonNotify. Key rlvknlg at HKEY_LOCAL_MACHINESOFTWAREMicrosoftESENTProcess. Value 3C5F0F00-683D-4847-89C8-E7AF64FD1CFB at HKEY_LOCAL_MACHINESOFTWAREMozillaFirefoxExtensions. Value %PROGRAMFILESrelevantknowledgerlvknlg.exe at HKEY_LOCAL_MACHINESYSTEMControlSet001ServicesSharedAccessParametersFirewallPolicyStandardProfileAuthorizedApplicationsList. Value %PROGRAMFILESrelevantknowledgerlvknlg.exe at HKEY_LOCAL_MACHINESYSTEMControlSet002ServicesSharedAccessParametersFirewallPolicyStandardProfileAuthorizedApplicationsList. Value %PROGRAMFILESRelevantKnowledgerlvknlg.exe at HKEY_LOCAL_MACHINESYSTEMControlSet003ServicesSharedAccessParametersFirewallPolicyStandardProfileAuthorizedApplicationsList.
Read More
Best graphic design software for 2022

2021 is nearing toward the end and with just a couple of days remaining in this year, we are happy to look forward to the next year. So in large anticipation of what will next year bring us, we are taking a good design look at this one and making a list for you of what graphic design software you should learn and use in the upcoming 2022.

graphic design softwareBefore we dive into it in more detail and predictions please be aware that this article is based upon my personal opinion drawn from the research of current trends and standards. That being said let's dive right into details.

Adobe Photoshop

Whatever you like it or not, Adobe has cemented itself with its flagship application Photoshop and how things are looking this situation will not change any time soon. Photoshop is an extraordinary pixel manipulation software that has the ability to work with both animations and vector graphics as well making it a great single application for all-around design needs. It has been industry-standard design software for the web, print, and all other kinds of design all over the globe and this will not change in near future. With its constant updates and expansion of its abilities, this is a must-have tool in your design tool belt. If you are looking to find work as a designer you will have to know how to work with photoshop.

Adobe illustrator

Many will tell you that what is photoshop for raster graphics, the illustrator is for vector. First started as illustrator 88 on Mac right away it took first place for vector graphics from FreeHand and it continued on its path of vector dominance. After some time and more integration with photoshop Adobe managed to overthrow Corel Draw as well winning the title for best vector editing software with illustrator. Same as with photoshop, if you are planning to work in a serious industry you will need to know the illustrator.

Adobe InDesign

We are still in Adobe train and it is moving hard, InDesign is graphic design software aimed for paper publications. If you need to create and prepare any kind of professional publication for printing InDesign is the application to go to. With its specific print aimed features it is a must-have for any graphic designer.

Corel Draw Graphic Suite

Once the king of vector and print design but dethroned by Adobe Corel Draw still has some punches to stay relevant in the field. With some cool features like symmetry and long shadows, it stands out from its competitors for its ease of use. Corel was always focused on easy to learn, difficult to master and it is still following that kind of thinking. Granted not many employers will require you to be a master of Corel Draw but some of them will request that you are familiar with the application. One of perhaps the greatest advantages of Corel over Adobe is not locking you into subscription making Draw suite as a great choice for freelancers and designers that want to own software, not rent it.

Affinity Designer

The first software from Affinity was Photo, made as a cheap version one-time purchase competitor for photoshop. Later it has released Designer, also a one-time purchase competitor for illustrator. If we are going to take a good look into a feature for feature comparison, both Adobe and Corel will win over Affinity but if we take a look at a price that is a one-time purchase Affinity will win over easily. Priced only at $54.99 it is a steal, and taking into account that many designers will not require any very advanced features found in Corel or Adobe applications Affinity is the way to go.

Inkscape & GIMP

Speaking of price, nothing beats free, and both Inkscape and GIMP are completely free. offering very decent and competitive features applications will require you to get used to their own specific UI and workflow, but once you get a grasp of them, you will be able to do most design work in them. One of the downsides of using these free open source apps is their limited export options but if all that is required from you is to deliver a typical SVG, JPG, EPS, PNG, or PDF file you are good to go.

Conclusion

If you have followed the graphic design scene you will notice that nothing has changed and it will not change in near future. This just speaks about how much industry is defined and how little change is there over time. I advise if you can to get and learn adobe suite since it is industry standard and it is required from almost every employer today. Rest applications of the list are great alternatives and can bring you income and offer you a way to finish your project.

Read More
Guide for Removing SysPlayer from Windows

SysPlayer is a potentially unwanted ad-supported media application from Goobzo.com. It can display targeted ads, hijack browser search results, and can display pop-up ads. This player gathers information about your visited websites, the number of clicks on each website, and cookie information containing sensitive data, that it occasionally sends back to the server.

Multiple Anti-virus programs detect SysPlayer as malicious or potentially unwanted as of the time of publication of this video. It has been associated in bundles with iWebar, which is also flagged by many AVs.

From the publisher:

SysPlayer is an extremely lightweight free Media Player with built-in codecs, which supports the most popular video and audio formats, as well as DVD, audio CD, Webcams, and other devices. It lets you play your video files, and watch images.

About Potentially Unwanted Applications

People have experienced it – you download and install a piece of free software, next you see some unwanted programs on your computer system, find a strange toolbar on your web browser, or find your default search engine has been changed. You did not set them up, so how did they appear? A Potentially Unwanted Program, also known as PUP, in short, is actually software that contains adware, installs toolbars, or has other hidden goals. These types of programs are almost always bundled up with free software which you download via the internet or may also be bundled inside the custom installers of many download sites. Despite being considered very destructive, PUPs aren’t necessarily computer viruses or malware The main reason for this is the fact that the majority of PUPs get into users’ PC’s not because they exploit security weaknesses, for example, but because the users give consent to download and install it – unknowingly in general. On the other hand, there is no doubt that PUPs are still bad news for PC users as they can be incredibly dangerous to the computer in many ways.

What do PUPs do on your computer, really?

Unwanted programs can be found in many forms. More often, they can be found in adware bundlers which are known to use aggressive and misleading advertising. The majority of bundlers install many adware applications from several companies, each of which possesses its own EULA policy. Total System Care entirely eliminates this threat and protects your computer against unwanted programs or malware infection. PUPs that come as browser add-ons and toolbars are readily recognizable. They’ll modify web browser settings, change default search provider, substitute the default home page with their very own websites, decelerate internet speed, and can ruin your system also. They may look innocent but PUPs are usually spyware. They could include things like information gathering code which could gather and send your private information to organizations. Even if the PUPs really aren’t inherently malicious, these programs still do practically nothing good on your computer – they’ll take valuable system resources, slow down your computer, weaken your computer security, and make your system more vulnerable to trojans.

Protect yourself from PUPs

• Read the terms and conditions so that the end-user license agreement (EULA) you’re accepting is only for the program you actually intend to download. • Pick the “custom” install whenever installing a software program. Particularly, pay attention to those tiny boxes that have been checked by default, where you might ‘agree’ to receive advertising or install software bundlers. • Have a top-notch anti-virus program like Total System Care which will protect your personal machine from PUPs. Once you install this software, protection from viruses and PUPs is already switched on. • Avoid installing a freeware program you will not use. Prior to adding a toolbar or browser extension, think of whether it is really needed. • Always download programs from the original website. The majority of PUPs find their way to your computer system is through download portals, so stay away from it entirely.

What To Do If You Cannot Install Any Anti-virus?

Practically all malware is bad, but certain kinds of malicious software do a lot more damage to your computer or laptop than others. Some malware variants modify web browser settings by including a proxy server or modify the PC’s DNS configuration settings. In these instances, you’ll be unable to visit certain or all of the sites, and therefore not able to download or install the necessary security software to eliminate the malware. If you are reading this article, you probably have got affected by malware that stops you from installing security software such as Safebytes Anti-Malware. Even though this sort of issue will be harder to get around, there are some steps you can take.

Eliminate viruses in Safe Mode

The Windows operating system includes a special mode known as “Safe Mode” in which just the bare minimum required applications and services are loaded. If the malware is obstructing access to the internet and affecting your computer, launching it in Safe Mode allows you to download anti-virus and run a diagnostic scan while limiting possible damage. In order to enter into Safe Mode or Safe Mode with Networking, press F8 while the computer is starting up or run MSCONFIG and look for the “Safe Boot” options in the “Boot” tab. Once you restart into Safe Mode with Networking, you could download, install, and update the anti-malware program from there. At this point, you are able to run the antivirus scan to get rid of computer viruses and malware without hindrance from another application.

Use an alternate web browser to download an anti-malware program

Some malware only targets certain internet browsers. If this is your case, employ another web browser as it can circumvent the computer virus. If you’re not able to download the anti-virus application using Internet Explorer, this means the virus may be targeting IE’s vulnerabilities. Here, you should switch over to a different internet browser like Firefox or Chrome to download the Safebytes Anti-malware program.

Create a portable USB antivirus for removing malware

Another option would be to make a portable antivirus program on your USB thumb drive. Follow these steps to employ a USB drive to clean your corrupted system. 1) On a virus-free PC, download and install Safebytes Anti-Malware. 2) Plug the USB drive into the uninfected computer. 3) Double-click on the downloaded file to open the installation wizard. 4) Pick thumb drive as the location when the wizard asks you exactly where you would like to install the software. Follow the activation instructions. 5) Transfer the USB drive from the uninfected PC to the infected computer. 6) Double-click the EXE file to run the Safebytes tool right from the thumb drive. 7) Click the “Scan” button to run a full computer scan and remove malware automatically.

SafeBytes Anti-Malware: Light-weight Malware Protection for Windows Computer

If you’re looking to buy anti-malware for your computer system, there are many brands and applications for you to consider. A few of them do a good job in eliminating threats while many will harm your computer themselves. It is important to opt for a company that creates industry-best antimalware and has achieved a reputation as reliable. When considering trustworthy applications, Safebytes AntiMalware is certainly the highly recommended one. SafeBytes can be described as a powerful, real-time antivirus application that is created to assist the everyday computer end user in safeguarding their PC from malicious threats. Once you have installed this software program, SafeBytes superior protection system will make sure that absolutely no viruses or malicious software can seep through your PC. SafeBytes anti-malware takes computer protection to a whole new level with its advanced features. The following are some of the great features included in the product. World-class AntiMalware Protection: This deep-cleaning antimalware program goes much deeper than most anti-virus tools to clean out your personal computer. Its critically acclaimed virus engine finds and disables hard-to-remove malware that hides deep within your computer. Active Protection: SafeBytes gives real-time active supervision and protection from all of known viruses and malware. They’re extremely effective in screening and getting rid of numerous threats because they’re regularly improved with new updates and alerts. Quick Multi-threaded Scanning: Safebytes Anti-Malware, with its advanced scanning engine, provides extremely fast scanning which will quickly target any active online threat. Web Protection: SafeBytes checks and provides a unique safety ranking to every single site you visit and block access to web pages known to be phishing sites, thus safeguarding you from identity theft, or known to contain malware. Light-weight Utility: SafeBytes provides complete protection from online threats at a fraction of the CPU load due to its enhanced detection engine and algorithms. 24/7 Premium Support: Support service is accessible 24 x 7 x 365 days through chat and email to answer your concerns.

Technical Details and Manual Removal (Advanced Users)

If you wish to manually remove SysPlayer without the use of an automated tool, it may be possible to do so by removing the program from the Windows Add/Remove Programs menu, or in cases of browser extensions, going to the browsers AddOn/Extension manager and removing it. You will likely also want to reset your browser. To ensure the complete removal, manually check your hard drive and registry for all of the following and remove or reset the values accordingly. Please note that this is for advanced users only and may be difficult, with incorrect file removal causing additional PC errors. In addition, some malware is capable of replicating or preventing deletion. Doing this in Safe Mode is advised.

The following files, folders, and registry entries are created or modified by SysPlayer

Files: Search and Delete: SysPlayer.lnk Search and Delete: sysp.exe Search and Delete: AccDownload.dll Search and Delete: SysPlayer.lnk Search and Delete: SysPlayerMenu.dll Search and Delete: SysPlayerMenu64.dll Search and Delete: imageformatsqjpeg4.dll Search and Delete: libvlc.dll Search and Delete: libvlccore.dll Search and Delete: msvcp100.dll Search and Delete: msvcr100.dll Search and Delete: QtCore4.dll Search and Delete: QtGui4.dll Search and Delete: QtNetwork4.dll Search and Delete: QtSql4.dll Search and Delete: QtXml4.dll Search and Delete: sqldriversqsqlite4.dll Search and Delete: SysPlayer.exe Search and Delete: uninstall.exe Search and Delete: Updater.exe Search and Delete: SPMupdate1.job Search and Delete: SysPlayerUpd.job Registry: Key HKCUSoftwareTrolltechOrganizationDefaultsQt Plugin Cache 4.8.false Key HKCUSoftwareTrolltechOrganizationDefaultsQt Factory Cache 4.8 Key HKLMSOFTWARESysPlayer Key HKLMSOFTWAREMicrosoftWindowsCurrentVersionUninstallSysPlayer Key HKLMSOFTWAREClassesSysPlayerFile Key HKLMSOFTWAREClassesFoldershellexContextMenuHandlersSysPlayerMenuExt Key HKLMSOFTWAREClassesDirectoryshellexContextMenuHandlersSysPlayerMenuExt Key HKLMSOFTWAREClassesAppIDSysMenu.DLL Key HKLMSOFTWAREClasses*shellexContextMenuHandlersSysPlayerMenuExt
Read More
Fix Mic not working in DOTA2
DOTA2 involves teams of five players each, where each player chooses a “hero” character. Each game has two teams pitted against each other, on opposite sides of a map. Once you start, you and your teammates try to level up by fighting and defeating heroes from other teams as well as non-player characters who exist within the game universe. Once you have a strong enough team, you would then try to attack an opposing team’s base. If you destroy their “ancient,” your team wins. The teamwork and interactivity required to play the game are some of its biggest attractions. You can text and voice chat as part of the Dota 2 gameplay, enabling you and your team to come up with strategies to take over your opponents’ base and fortifications. For this reason, a properly working microphone and headset are important if you are to get the most out of this exciting online game. However, there are many times when you find that there are audio dropouts when you try to speak into your microphone. The question “How do I get my mic to work on Dota 2?” is one of the most commonly asked on gaming forums related to this game. Here are solutions for why this can happen:
  1. You are logged in to another computer that is running the STEAM client

    While entirely rare, there are cases where the microphone in Steam is disabled because the same account is active and in use on a different computer. It may not notify you that your account is in use elsewhere. If this is the error, try to log out on other devices and then test it on only one system. If you cannot access the other computer that has access to your account, then change your password. This will automatically disconnect your Steam account from the other computer and let you enjoy voice chat in Dota 2 and other Steam games.
  2. Your microphone is not properly set up in Dota 2

    From the main Dota 2 menu, before you start a match, you can set up your microphone for voice chat. At the top, left-hand corner, click the gear icon to open Settings Select the AUDIO tab and ensure that the Sound Device and Speaker Configuration are set to default. On the same tab, activate Voice (Party) and set your Push to Talk shortcut key for your team. Select the appropriate Open Mic Threshold using the slider at the bottom of this tab to get your microphone recorded at a comfortable level.
  3. The Windows Audio Enhancements setting is turned on

    If you still cannot get your microphone to work properly, then your problem could be Windows Audio Enhancement. It is possible to get your microphone to work with Dota 2 by disabling these features. Right-click your volume icon on the system tray and select Recording Devices. Choose your active microphone then click its Properties button. On the Microphone Enhancements tab, make sure the checkboxes marked Voice enhancements and Acoustic Echo cancellation is unchecked Reboot your PC and retry using your microphone to chat.
  4. Your audio drivers need to be updated

    If you try all of the steps above and still have Dota 2 not recognizing your mic input update mic drivers by going in device manager and choosing update driver.
Read More
How to Fix the TWCU.EXE Failed to Load Library File Error in Windows 10
The TWCU.EXE or TP-LINK Wireless Client Utility is a configuration application required to run wireless adapters successfully. The TP-LINK Wireless Client Utility application only exists on computers that are using the TP-LINK adapters. Upon the installation of this application, the service will be automatically added to the Windows service list that will continuously run in the background. The Twcu.exe is placed at the C:\Program Files\TP-LINKTP-LINK\Wireless Utility folder and is used by TP-LINK to connect to the internet. The name of the main executable file is twcu.exe and can be viewed in the Services tab of the Task Manager. If you are one of the users who just upgraded to Windows 10 from the previous Windows versions, then you’ll most likely see an error saying, “Failed to load the library file!” that has something to do with twcu.exe or TWCU. This error pops up when you go to your desktop and every time you log into your Windows 10 PC. Like pointed out, this error is related to the TP-LINK Wireless Client Utility and every user who is using the TP-LINK Wireless Client Utility is experiencing this problem which may be due to some compatibility issues especially when you start getting this error right after you upgraded to Windows 10. To fix this problem, follow each one of the options given below.

Option 1 – Try running in Compatibility Mode

The best thing you can do is to run the TP-LINK Wireless Client Utility in the compatibility mode since the problem is due to some compatibility issue. To run this utility in the compatibility mode, here’s what you have to do:
  • Look for the TP-LINK Wireless Client Utility which should be located on your desktop.
  • Once you find it, right-click on it and select Properties from the context menu.
  • After that, go to the Compatibility tab and mark the checkbox for “Run this program in compatibility mode for:” and from the drop-down list, select either Windows 7 or Windows 8.
  • Click the Apply button and then click OK to save the changes made and check if it has resolved the issue or not.

Option 2 – Try troubleshooting compatibility

This option is almost the same as the first one except it is an alternative way of fixing the TP-LINK Wireless Client Utility in case the first one didn’t work. In this option, you will troubleshoot the compatibility issue of the TP-LINK Wireless Client Utility.
  • Look for the TP-LINK Wireless Client Utility which as mentioned, is on your desktop.
  • Then right-click on it and select the “Troubleshoot compatibility” from the context menu.
  • After that, click on the “Try recommended setting” option. Once the process is done, the error message should be gone.
Read More
Reversing Mouse & Touchpad scrolling direction
As you know, aside from making computing a lot easier, mouse and touchpad, it also makes computing more efficient and less time-consuming. And so life is unimaginable without these useful devices. However, it is a known fact that you can’t customize these devices since all touchpads and mice come with their own default scrolling direction but worry not for in this post you will be guided on how you can reverse their default scrolling directions. Every user has their own different preferences when it comes to scrolling directions. You might want the scrolling directions to look like the page is being scrolled in the same direction in where you move your fingers over the touchpad or you might prefer it in an inverted way. Reversing the scroll direction for your device’s touchpad is really easy as Windows by default offers this customization. So if you are trying to find a way to reverse the scrolling direction of your mouse, then you have to follow a tricky little method which will be provided in this post. It is apparent from the number of settings the touchpad is available that it has become more customizable. You can configure everything, from its gestures, taps, sensitivity, and even its scrolling direction. And now, if you want to reverse its scrolling direction, here’s what you have to do: Step 1: Tap the Win + I keys to open Settings. Step 2: From there, go to Devices and select Touchpad from the menu. Step 3: Next, look for the Scrolling Direction setting. Step 4: Then click on the drop-down and select your preferred setting.  If you want the same direction scrolling, just select the “Downwards motion scrolls down” option, and if you want the opposite select the other one. After you carry out these steps, the settings will be applied right away and you will see the changes. On the other hand, if you want to change the scrolling direction for your mouse, the procedure is not as simple as it was for the touchpad.

To reverse the scrolling direction for a mouse, refer to these steps:

Step 1: In the Start Search, type “device manager” and click on the appropriate result to open the Device Manager. Step 2: After opening the Device Manager, look for your Mouse under the “Mice and other pointing devices” section. It is mostly listed as an “HID-compliant mouse”. Step 3: Right-click on your mouse and click Properties. Step 4: From there, go to the Details tab and from the drop-down menu, select Device Instance Path. Step 5: Now take note of the value displayed on its value field and then tap the Win + R keys to open the Run dialog box. Step 6: Type in “Regedit” in the field and hit Enter to open the Registry Editor. Step 7: Next, navigate to the following location:
HKEY_LOCAL_MACHINESYSTEMCurrentControlSetEnumHID
Step 8: From this folder, you have to start matching the values in the first part of the value you’ve taken note of. Step 9: Open the folder which has the same value and repeat this for the second part of the value. Step 10: Afterwards, click on the Device Parameters and look for a property named “FlipFlopWheel” and invert its value from 0 to 1 or 1 to 0 to reverse the scrolling direction. And then restart your PC to apply the changes made. After you restart your PC, you should see the changes in the scrolling direction of your mouse. Note that you can change the value back to its original value or just use the registry backup to undo the changes you’ve made.
Read More
Best free & paid eMail clients in 2021
Having an eMail in today's modern world is no longer a privilege or being geeky, it has surely become a necessity. From Facebook to LinkedIn or Steam many services today require you to have an account in order to use them, and in order to create an account, you need working eMail. That being said many people today have several eMail accounts, one for social media, one for work, maybe even one for very close friends and family. How creating eMail today is completely free we might end up with several eMail accounts. eMail clients have also evolved much since their first days and became more than just applications for receiving eMails, today they can take various different tasks having additional features built into them like calendar, batch eMail processing, etc. Taking all of said into account I am presenting to you within my personal opinion some of the best eMail clients starting with free ones.

Best free eMail clients

Google Gmail

https://gmail.com gmail eMail client
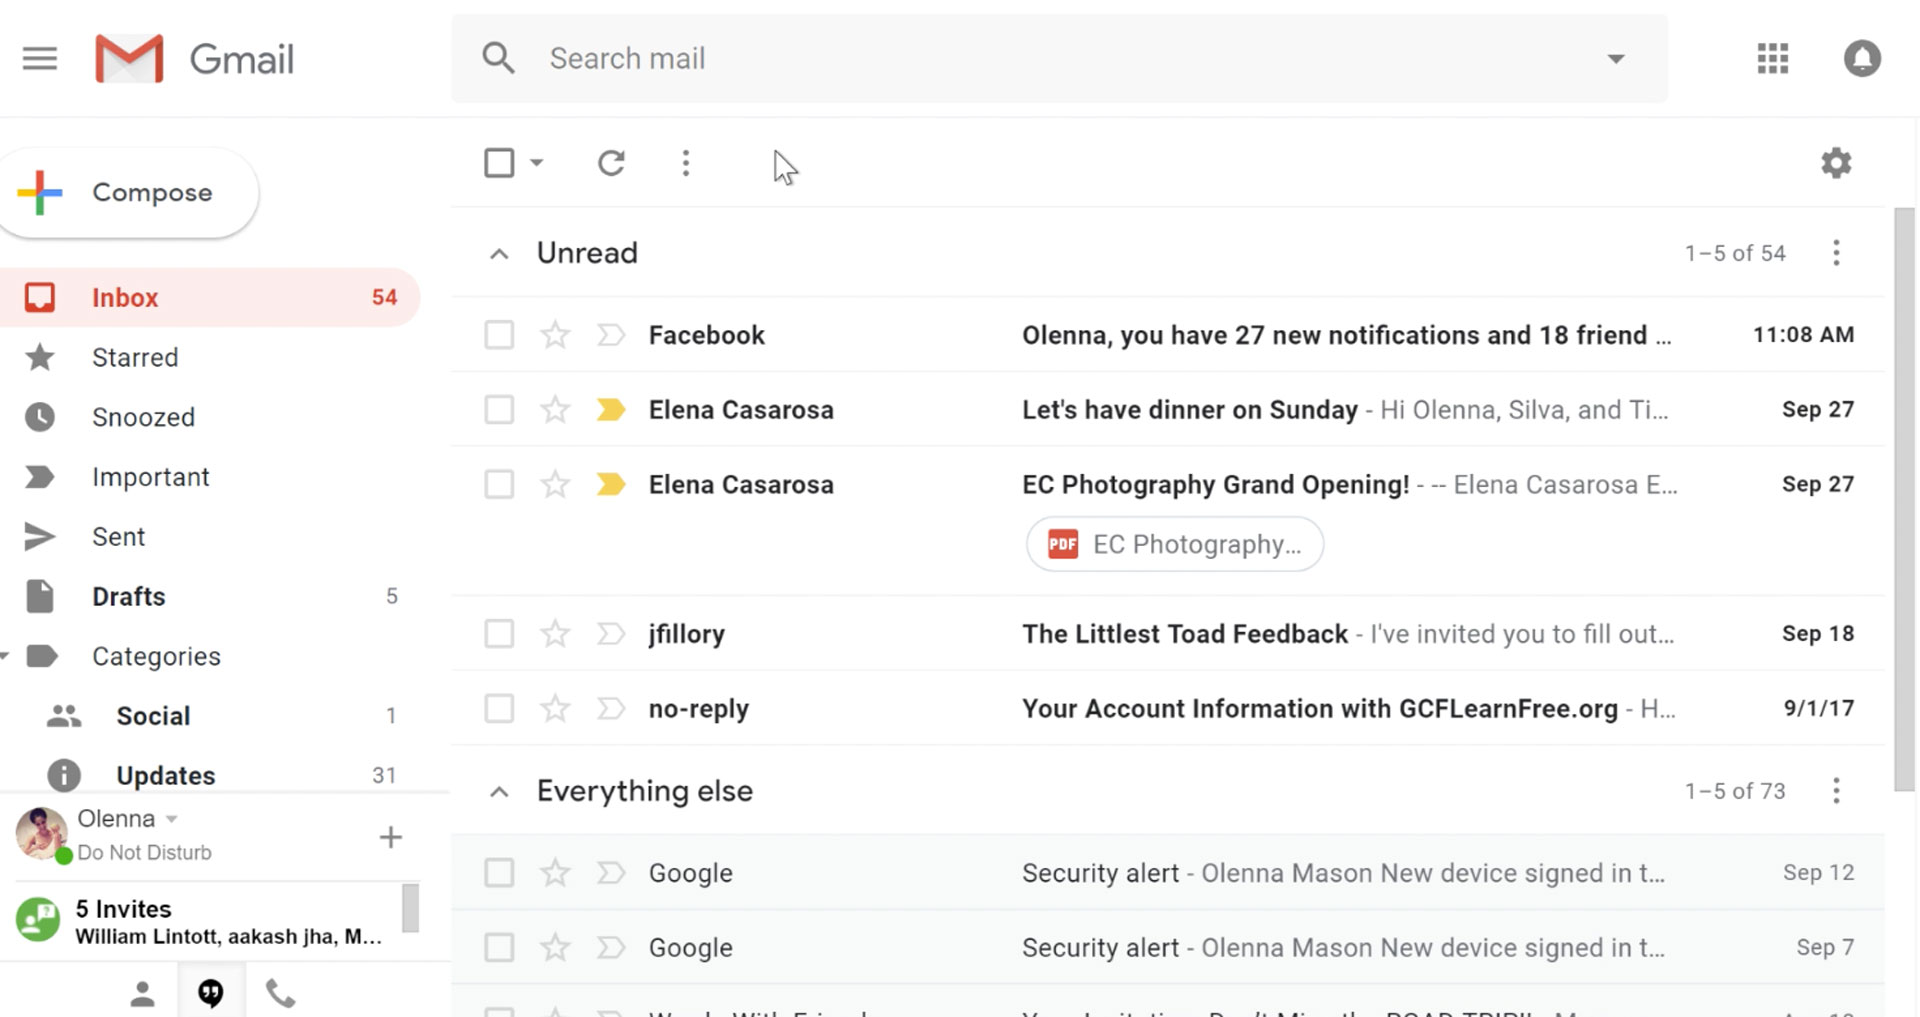
It would be very difficult to even start a free eMail list without mentioning Google's Gmail. Introduced all the way back in 2004 as an invite-only service it became over time the most popular email platform largely due to the fact Google is offering free eMail accounts. There are a lot of good things to be said about Gmail itself, most of the area is clutter-free and the largest space is reserved for eMail itself letting users focus on what is important. WEB client itself means that you do not need to have any application installed on your device, altho via Google chrome, you can use Gmail offline offering you flexibility if needed. The ability to connect and manage other accounts like Outlook, Yahoo, etc is just making Gmail even more attractive, and the snooze feature is a really neat little detail that will pause eMail notifications if you need to focus on other things. Lack of organizing messages into folders is a little confusing since Gmail offers its own unique label system but sometimes I need to have old reliable save eMail to folder. All in all, Gmail is a great service and it offers a great eMail on the go experience.

Mail eMail client

https://www.microsoft.com/en-us/p/mail-and-calendar/ mail eMail app
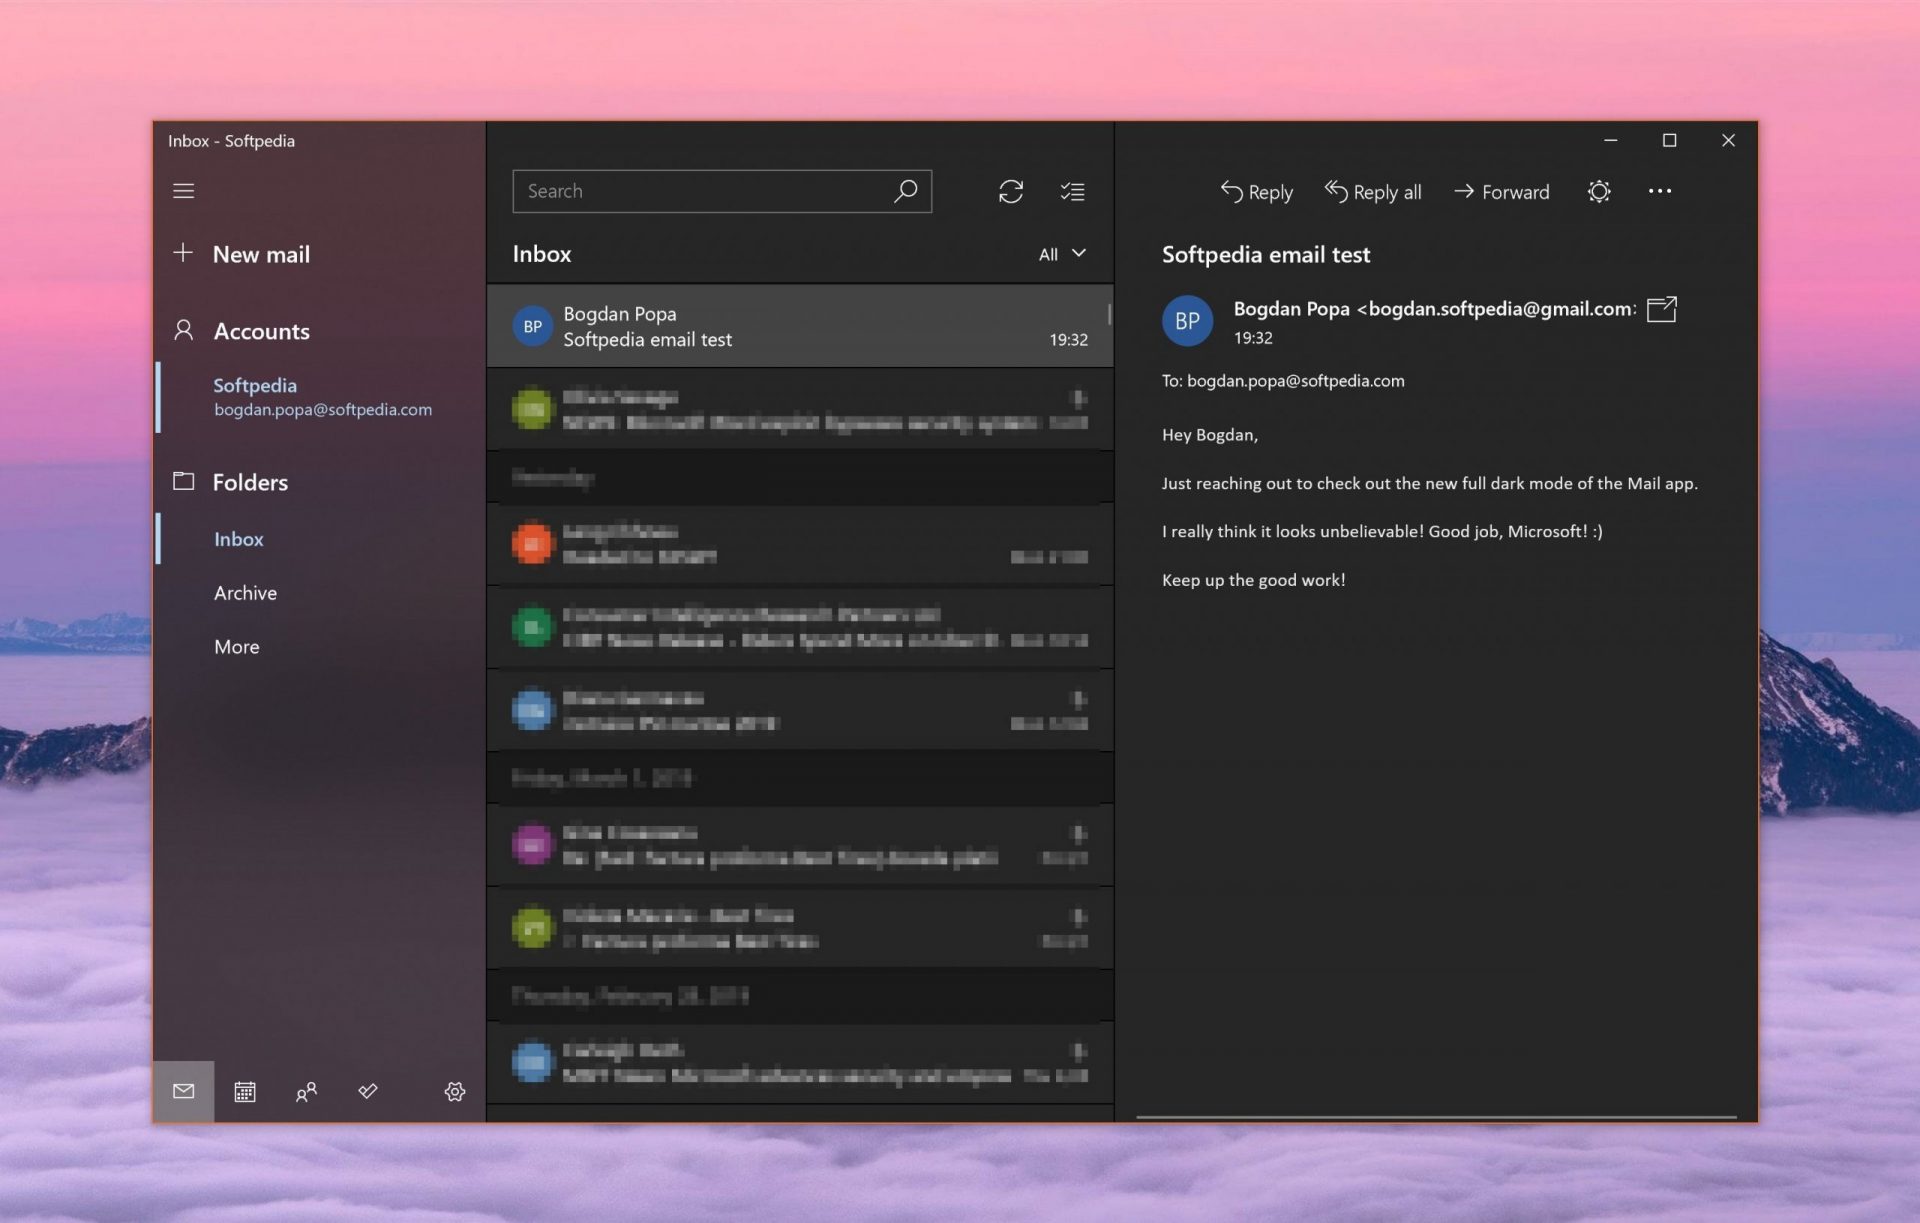
Free Windows eMail client simply called Mail is what was once outlook express. Mail itself has the ability to work with other popular accounts like Google Gmail account, Yahoo, iCloud etc. How it comes with Windows OS and it integrates very well with Microsoft Calendar, this eMail client is for many the first choice. On the negative side, I might say this is a strip-down version of Outlook which is paid solution so some features are missing if we would compare the two. Overall, a simple and nice eMail client worth your time, especially if you are on the Windows platform.

Mozilla Thunderbird

https://www.thunderbird.net mozilla thunderbird eMailGreat eMail client matching in functions against paid and premium solutions of big tech companies. Fueled with plenty of customization options and reskinning ones this eMail client offers a lot for its free price tag. It is also fueled by Mozilla community focusing on privacy and security. It can work with any mail service and it is lightweight with a clean look, altho the look itself can be heavily customized. The bad side is that client itself relies on email services to provide cloud-based emails, so if you are receiving your email via a service that does not have a cloud-based service in itself all of your received emails will be locked to the computer where you have received them. Also customizing it can be sometimes a little too technical for the average computer user. All in all, Thunderbird is one great eMail client and it would be a shame not to use it because of its technical side, if you need a reliable and secure eMail client on a single machine, look no further than Thunderbird.

Paid eMail clients

Microsoft Outlook

https://www.microsoft.com/en-us/microsoft-365/ microsoft outlook
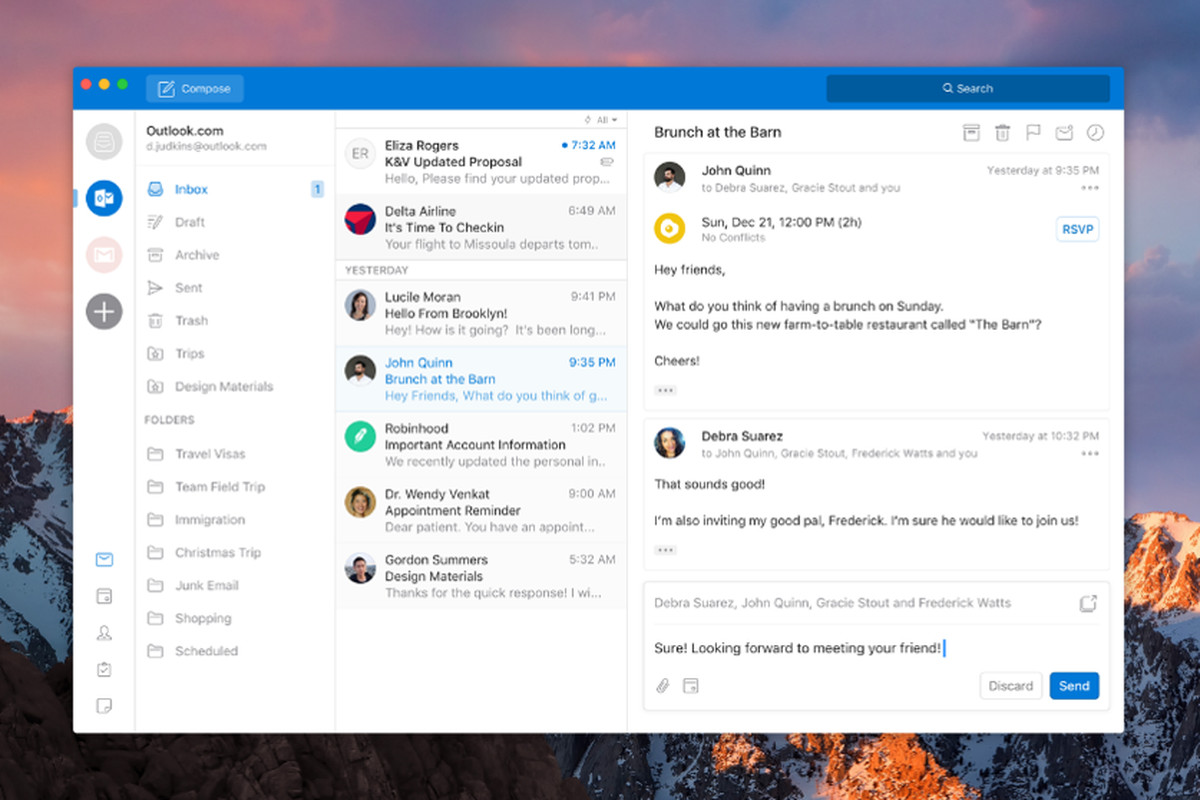
Outlook comes as a part of the Microsoft Office suite and as one of the oldest eMail clients, it is still widely popular and adopted through many users and businesses. It has tight integration with all Microsoft services and full integration with Calendar making it one of the if not the best eMail client out there. Outlook also has a free online service completely free for personal use as well. The downside is that you can not get it as a separate product if you want a business version other than as a part of the Office suite. The final verdict would be that this is perhaps the best eMail client out but the big downside is that there is no desktop version outside the Office suite.

eM Client

https://www.emclient.com/ em client
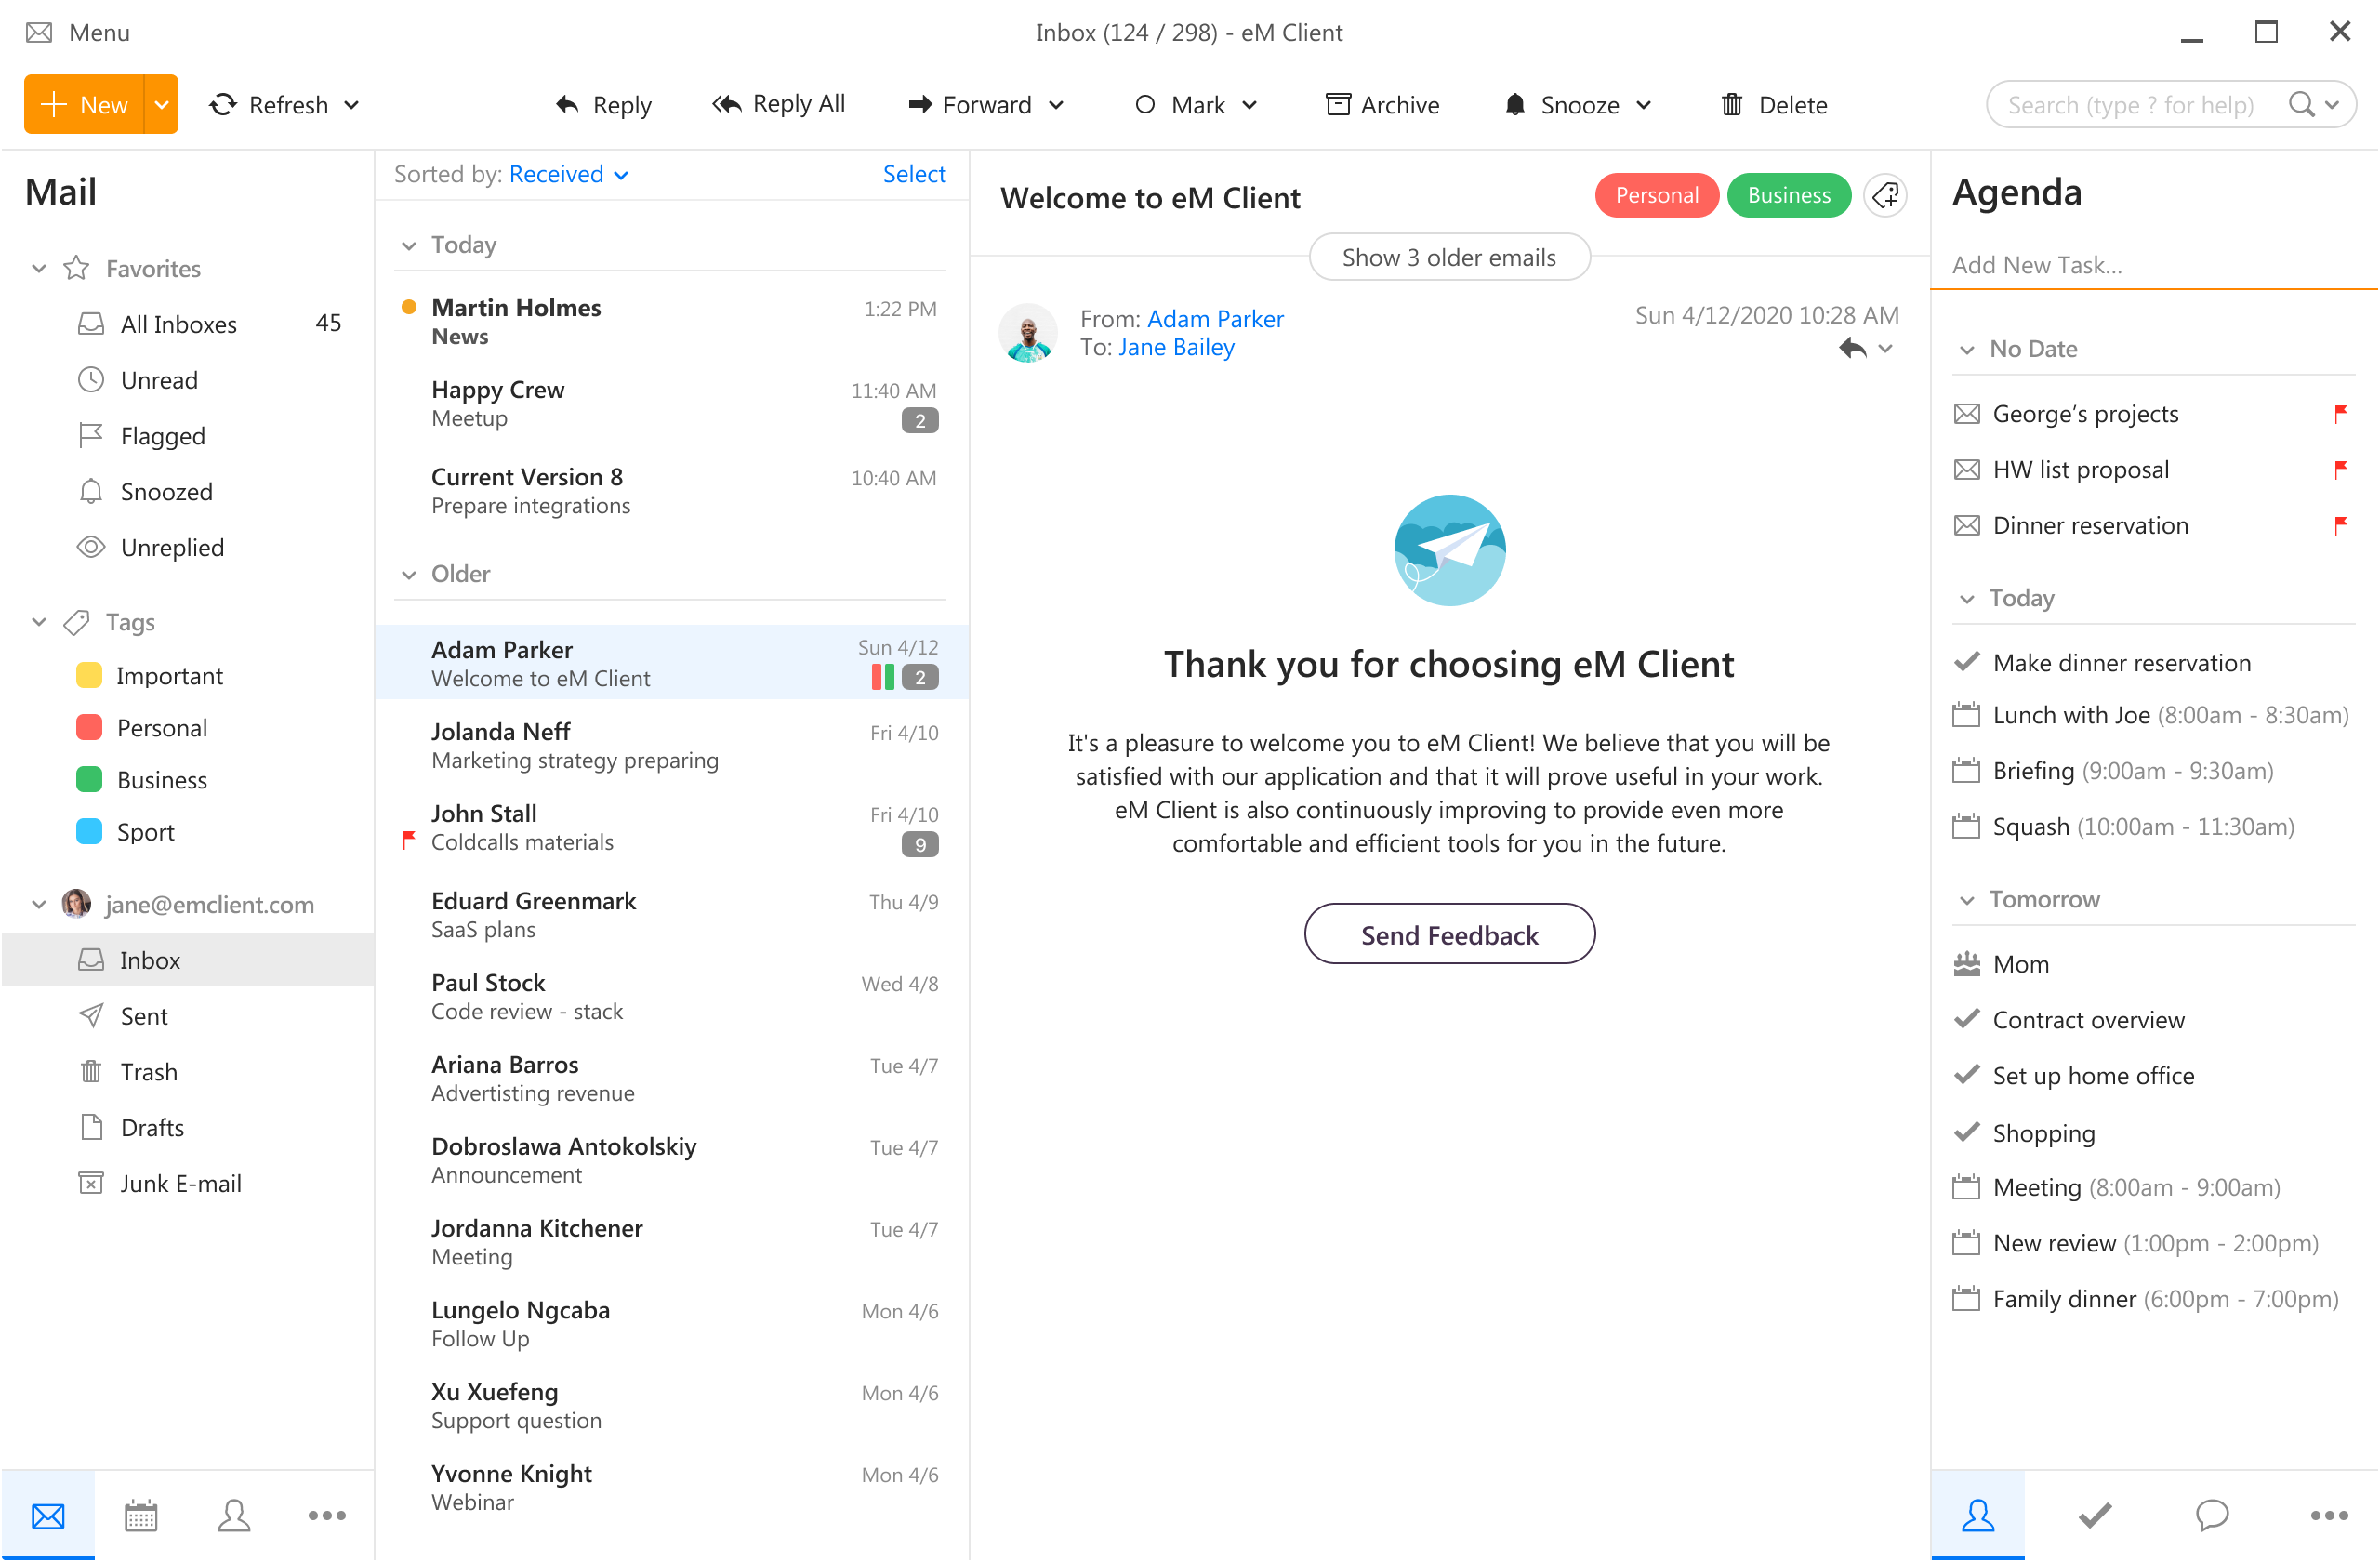
eM Client offers a wide array of features, including a calendar, contacts, and chat. Support is provided for all the major email services including Gmail, Yahoo, iCloud, and Outlook.com. The latest version also offers PGP encryption, live backup, basic image editing capabilities, and auto-replies for Gmail. Its automatic system makes it very easy to get emails from other services since there is no manual setting, all that is needed is to type in your email and eM Client will do everything else automatically. A one-time purchase is not pricy and it could offer some features that some free clients are missing. Go check it out with a free trial and see if it is for you.

Mailbird

https://www.getmailbird.com mailbird
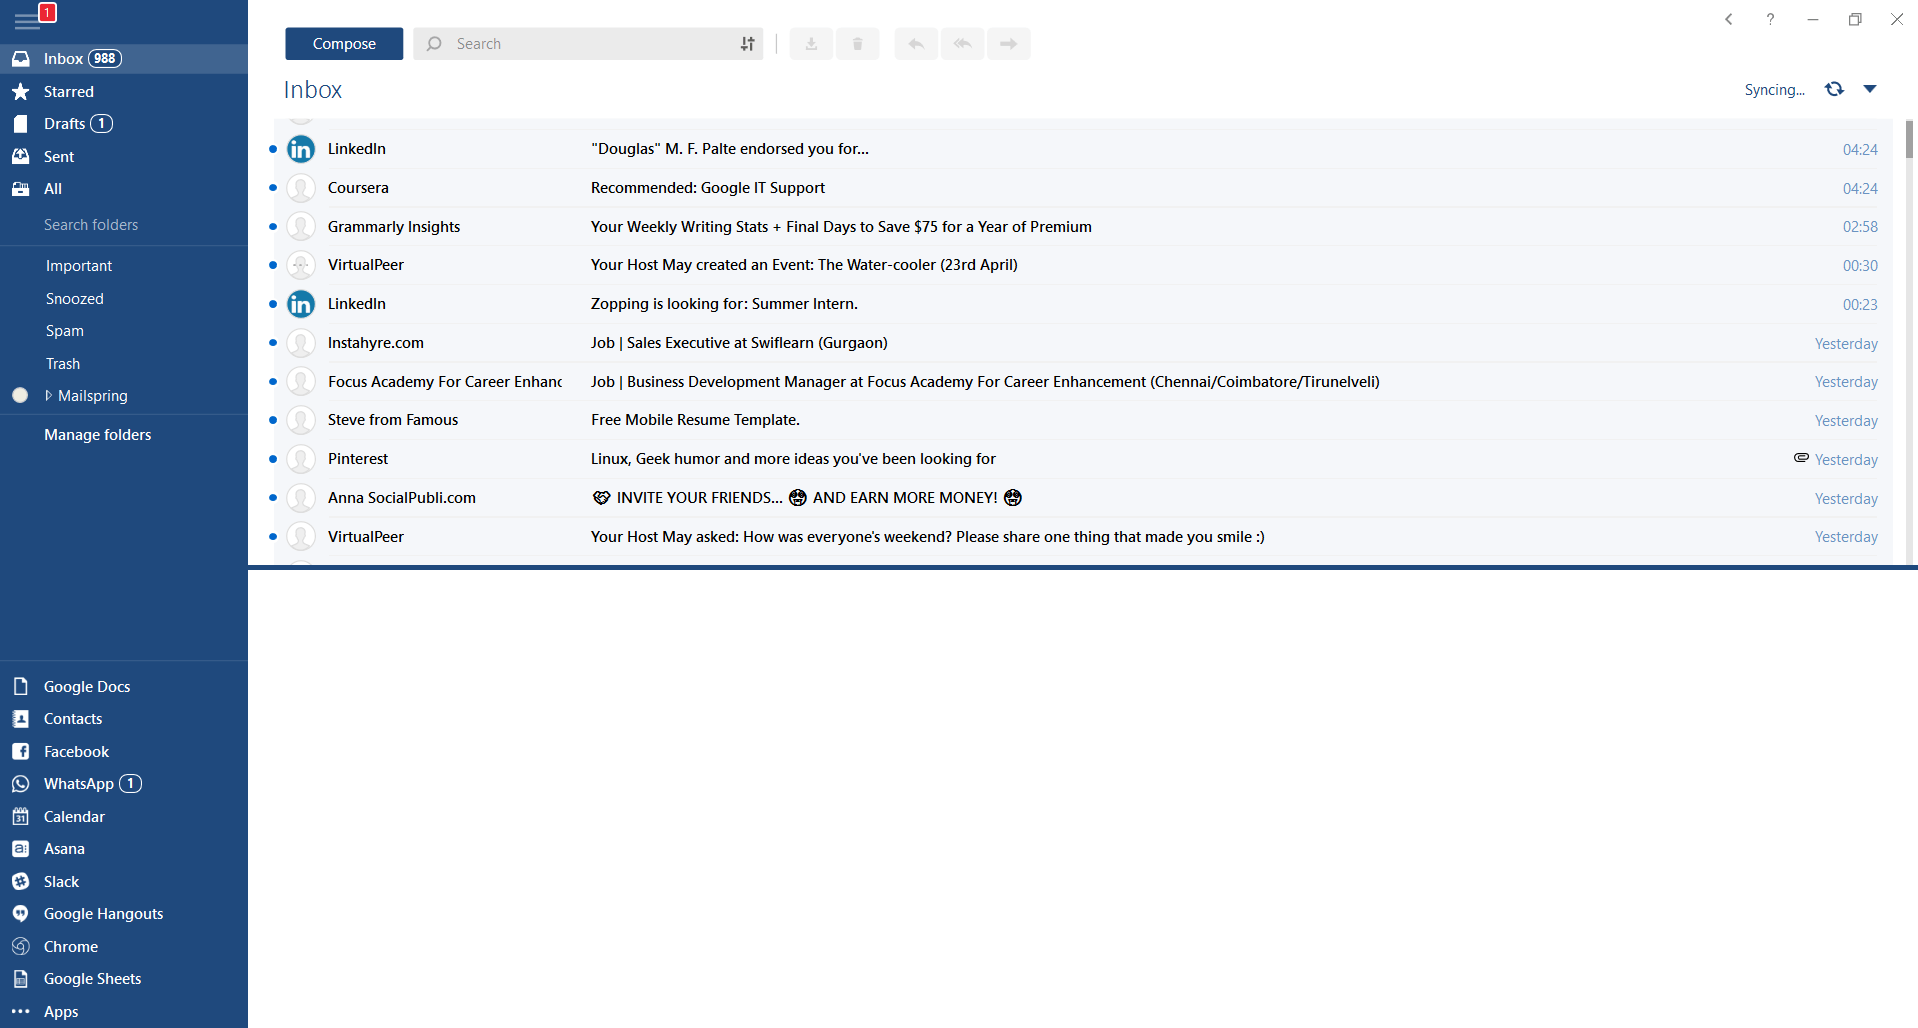
This eMail client's main focus is the simplicity of use with visual appeal while tackling multiple eMail accounts. It has many built-in apps along with a customizable interface. Unlike some more Microsoft-centric email clients, Mailbird Business supports a diverse range of integrated apps, including WhatsApp, Google Docs, Google Calendar, Facebook, Twitter, Dropbox, and Slack, all making for a better-streamlined workflow. The downside of this client is the yearly subscription plan. I think people, in general, want to get away from software subscription plans so I will include this as a downside but bear in mind it is downside just in terms of a business plan not in the client itself.

Inky

https://www.inky.com/ inky eMail client
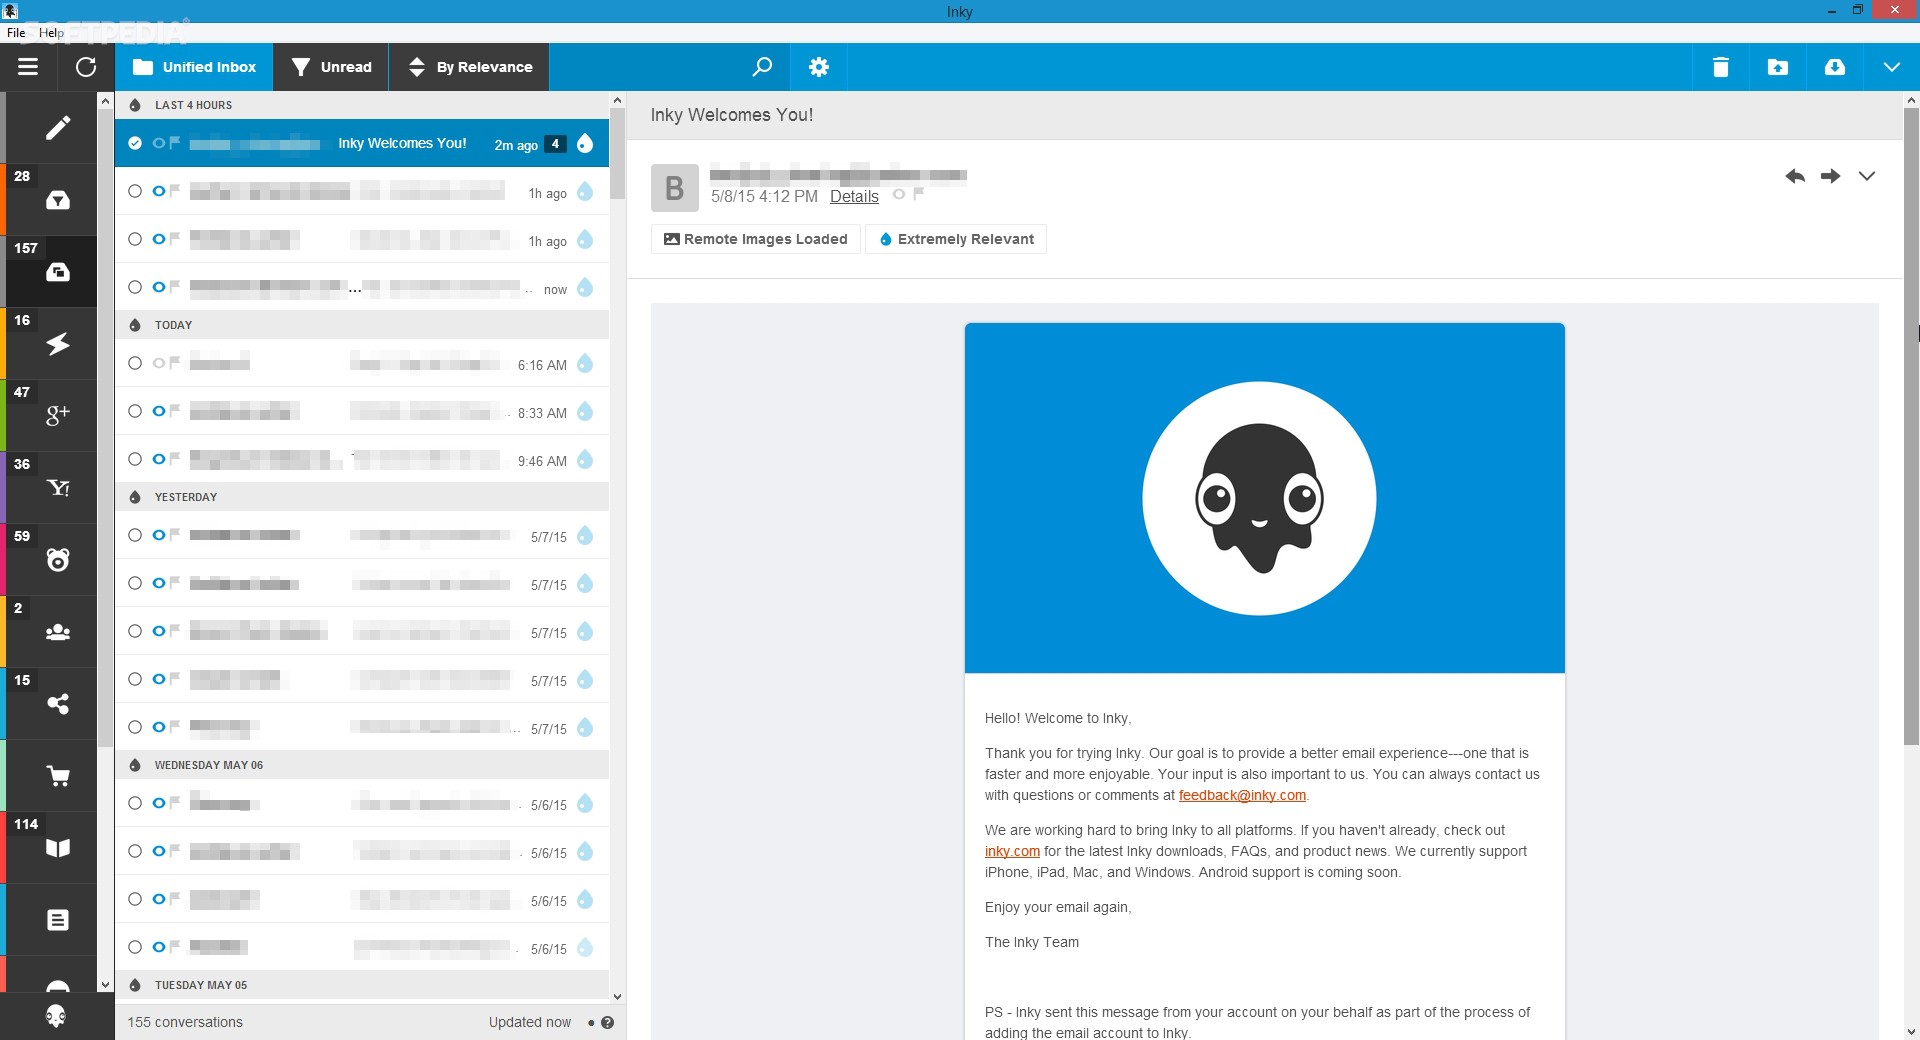
Inky is eMail client if you are looking for security. It uses AI along with machine learning in order to block all types of phishing attacks that can get through to other clients. The proprietary machine learning technology can literally read an email to determine if it has phishing content, and then is able to quarantine the email or deliver it with the malicious links disabled. It also takes things a step further and offers an analytics dashboard, which allows an administrator to see patterns of attacks based on dates, or targeted users. The downside is that client itself is so much focused on security that sometimes some nonsecurity features get overlooked and provide a poor experience but if you need a good and greatly secured eMail client Inky is one to check out.
Read More
Software review series: BitWarden
BitWarden
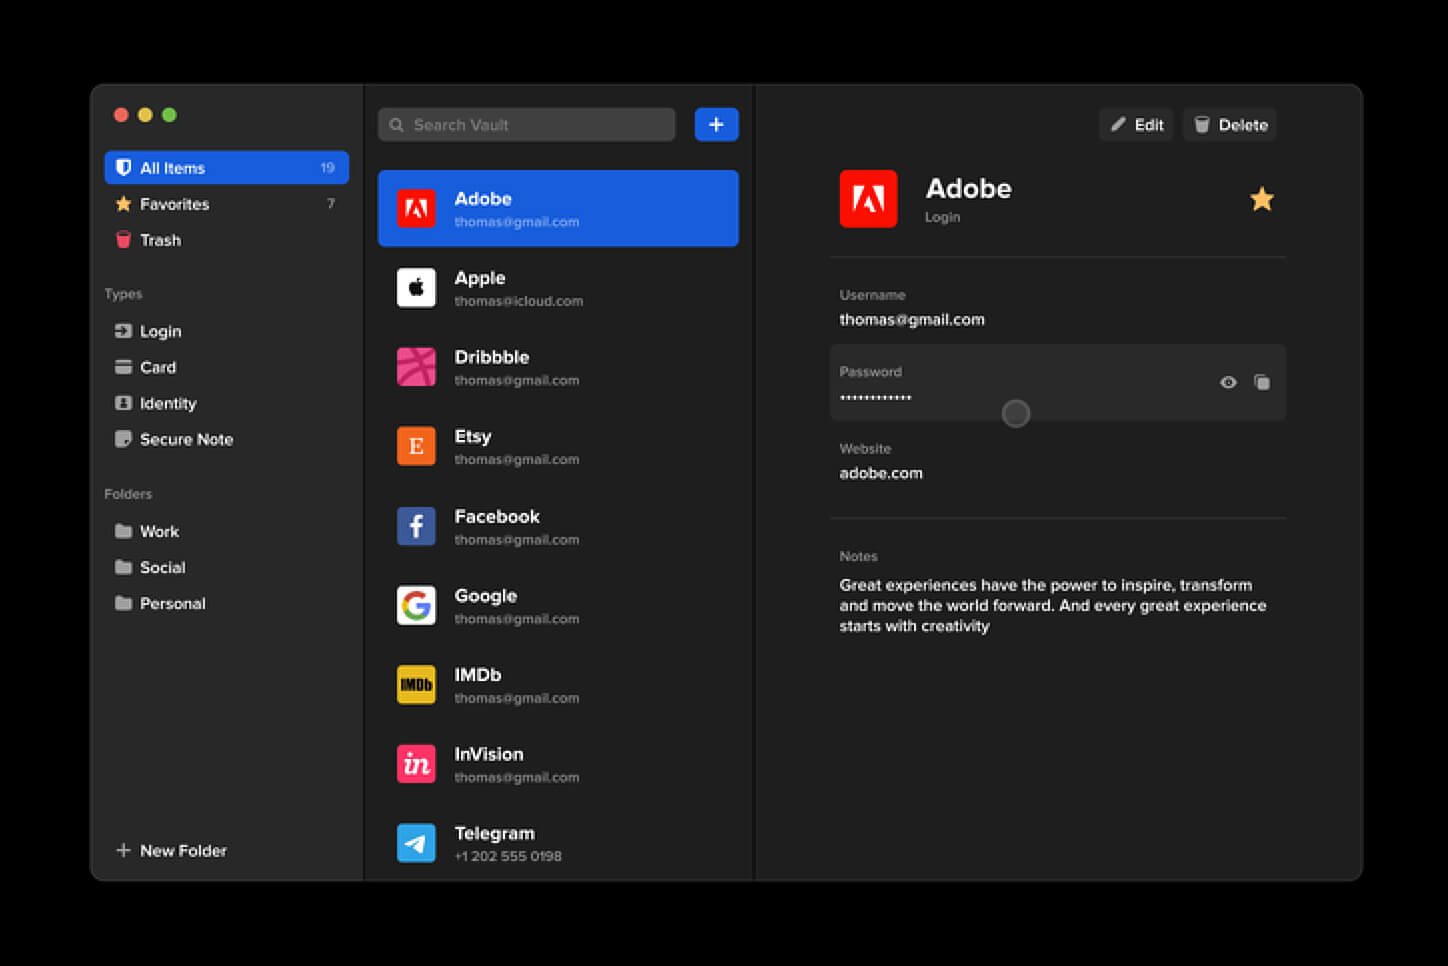
Many times we were talking and writing here on Errortools.com about security, privacy, hacking, identity theft, etc. We tried to raise important security questions and I hope I have managed to at least shed some light and change maybe some bad behaviors for some, helping them embrace better routines about their security on their PC. In this light, I will today present you with one neat and awesome piece of software, a password manager worth your time and money (if you want premium features): BitWarden.

What BitWarden offers?

The first thing that it offers is the completely free basic plan, granted BitWarden is not an open-source project nor completely free but it has an unlimited free basic plan that will cover 90% of user needs. There is also a free basic unlimited plan for Organizations letting you and one more user share files and other stuff via BitWarden making it a cool option if you need it. Premium features offer you encrypted sharing of files, two-step login, 1GB file attachments (encrypted), Bitwarden Authenticator (TOTP), Vault Health Reports, Emergency Access, and Priority Support. The cost for all of these additional features is 10 USD per year for an individual plan or 40 USD per year for organizations where you will get an increase of maximum users from 2 to 6. Yes, you read that correctly, only 10 USD per YEAR for the whole set of features. Granted if you do not need any of them, enjoy the free version forever. Besides very low premium cost BitWarden will offer you compatibility with all major browsers and devices including both Android and iOS platforms making it a great cross-platform solution to login and maintain your passwords anywhere with just one click. Once installed all you need to do is set one master password and be very careful not to lose or forget this one, if you do all of your other generated passwords will be lost forever.

Features

Secure Password Sharing

Share your encrypted data quickly and easily, and only with the users or teams who need access

Cross-Platform Accessibility

Access critical data in your Bitwarden vault from any location, browser, and device

Cloud-Based or Self-Host

Get up and running in minutes in the cloud or you can self-host Bitwarden for complete data control

Security Audit & Compliance

Open source and third-party audited, Bitwarden complies with Privacy Shield, GDPR, CCPA regulations

Vault Health Reports

Access insightful reports to reveal weak, reused passwords, and other helpful data security metrics

Directory Sync

Our powerful Directory Connector streamlines user and group onboarding and keeps them in sync

Always-On Support

Our Customer Success agents are available to support you around the clock

Detailed Event Logs

Bitwarden creates audit trails to help you keep track of user and group access to sensitive data

Flexible Integrations

Unite your existing systems with Bitwarden using SSO authentication, Directory services, or powerful APIs

Conclusion

There are many password managers out there but via recommendation I have tried BitWarden and truth to be told, I really never felt the need to try anything else, it is great at what it does and it is moving forward with features and it is constantly updated and maintained.
Read More
1 2 3 162
Logo
Copyright © 2022, ErrorTools. All Rights Reserved
Trademarks: Microsoft Windows logos are registered trademarks of Microsoft. Disclaimer: ErrorTools.com is not affiliated with Microsoft, nor claim direct affiliation.
The information on this page is provided for information purposes only.
DMCA.com Protection Status