Mfplat.dll is missing or was not found

One of the primary packages that install the Windows Media Player is the Media Feature Pack among other related files that are needed by the associated software products. And one of the essential DLL files in that package is the mfplat.dll file which is needed by various games and streaming services. So if this DLL file goes missing, you will most likely encounter any of the following error messages:

  • “mfplat.dll missing”
  • “The application failed to start because mfplat.dll was not found.”
  • “The program can’t start because mfplat.dll is missing from your computer.”

In other circumstances, the Media Feature Package does not come pre-installed with the main Windows package especially for those who use Windows N, thereby causing the error to pop up. The main cause of this problem is that users who use Windows 10 N do not have the Media Feature pack pre-installed with the installation package. Aside from that, the installation package could go missing after a few Windows Updates or if you have uninstalled it by accident. To resolve this problem, you need to check out each one of the given options below.

Option 1 – Try to enable Media Playback via Command Prompt

If you encounter the mfplat.dll missing error when you attempt to run PLEX or other similar streaming service and you’ve already verified that the Media Feature Pack is indeed installed, you might want to try enabling it using an elevated Command Prompt. There are cases when a particular Windows Update ends up disabling the feature and creates the grounds which results in the mfplat.dll missing error. Thus, you can have to enable the feature via Command Prompt.

  • Tap the Win + R keys to open the Run dialog box.
  • Then type “cmd” in the field and hit Enter to open an elevated Command Prompt.
  • Next, click on Yes if a User Account Control prompt pops up.
  • After opening Command Prompt, copy and paste the following command and hit Enter to execute it:

dism /online /enable-feature /featurename:MediaPlayback

  • Close Command Prompt and then open the app once again to check if the problem is now fixed.

Option 2 – Try installing the Media Feature Pack for Windows 10 N version

As mentioned, the Windows 10 N version does not come with Windows Media Player. Meaning to say, the Media Feature Pack is also not installed by default or won’t be updated by the Windows Update component. So if you are not quite sure what Windows 10 version you currently have installed, refer to these steps:

  • Tap the Windows key + S and then type “about” in the search box.
  • From the search results, click on the “About your PC” to open the About tab of the Settings app.
  • Afterward, scroll down to the Windows specifications and check your Windows version under Edition.

Note: If you have verified that your PC is using the Windows 10 N version, you need to install the appropriate Media Feature Pack for your computer. How? Refer to the steps below:

  • Click this link to download and install the Media Feature Pack from Microsoft’s official website.
  • Upon installation, select the edition you want to install using the drop-down menu and then click on Confirm. Take note that there are few reasons why you’d want to install the older version since most streaming services like PLEX and most games usually require version 1803.
  • After that, wait until the request is validated. The download should begin in a few minutes automatically.
  • Once the download is completed, open the installation executable file and follow the next on-screen instructions to install the Media Feature Pack on your computer.
  • Restart your computer. After your computer has rebooted, open the application where you’re getting the mfplat.dll missing error and then check if the problem is now fixed.

Option 3 – Try to extract a copy of the mfplat.dll file from the windows.old directory

If you encounter the error shortly after you just upgraded to Windows 10 from an older version, the best thing you can do to resolve the problem is to use windows.old directory to fetch an old copy of the mfplat.dll file. To do so, follow the steps below.

  • Go to the Windows drive and then look for the windows.old directory where it preserves a copy of your old operating system as well as associated files in case something goes out of hand during the upgrade process.
  • After that, open the windows.old folder and then go to the syswow64 folder.
  • Next, from the syswow64 folder, copy the mfplat.dll file and paste it to C:/windows/syswow64.
  • Restart your computer and check if the error is now resolved or not.
If you like to learn and find out more about various Windows errors, and how to repair them go to our vast archive or use search to find articles that will explain and help you in solving your issue.
However, if you prefer to do things fast and with automatization then we are proposing to use an automated solution for your issues. The application that we are recommending is Advanced System Repair Pro
Advanced System Repair utilizes multiple tools all in one to give you a quick, simple, reliable, and very thorough diagnosis of your PC. It brings you all the tools you need in one program to clean, fix, protect, optimize and boost your PC!
1-Click Maintenance
All the tools to make it simple and easy! It's like having a professional technician at the click of a mouse.

Junk Cleaner
Keeping your computer free from unnecessary clutter also helps make your computer last longer. Like any other machine, if you keep it clean and take care of it, it will serve you better for longer!

Optimize background apps
Optimize applications background activity with the built-in Application Optimizer feature.

Disk Defrag
With a simple 1-click, Advanced System Repair speeds up your PC by assembling fragmented files on your machine and organizing them more efficiently.

Malware Removal
Finds and removes all types of harmful malware including trojans, worms, bots, adware, spyware, PUPs, and more!

Privacy Cleaner
The all-in-one privacy suite to Clean Your Tracks & Protect Your Privacy! Make your computer safe, secure, and more efficient!

System Tweak/Optimizer
ASR will analyze your complete system and settings to adjust your PC to function at its maximum performance.

Registry Cleaner
Over time, as you install and uninstall applications, the registry can become cluttered with old entries and broken settings which can result in program crashes, and annoying messages and slow the computer down.
Visit our Advanced System Repair Pro Download page to inform yourself about all the benefits of this software and get a free trial copy of it.
advanced system repair pro

Advanced System Repair Pro

One-click automated PC repair solution
ASR logo
With Advanced System Repair Pro you can easily
Replace damaged files
Restore performance
Free disk space
Remove Malware
Protects WEB browser
Remove Viruses
Stop PC freezing
DOWNLOAD
Privacy Policy | Terms of Use | Uinstall
Advanced System Repair Pro is compatible with all versions of Microsoft Windows including Windows 11

Share this article:

You might also like

Five Ways of Fixing Error Code 37

Repair Device Manager Error Code 37

What is Error Code 37?

Error Code 37 is a Device Manager Error Code that you may come across when you are unable to use an installed hardware device on your PC. It will pop up on your screen with the following display:

“Windows cannot initialize the device driver for this hardware. (Code 37)”

If you receive the above message, it means that your operating system was unable to acknowledge the drivers for a particular peripheral device.

Solution

driverfix boxError Causes

Error Code 37 mainly occurs due to device driver corruption. However, there are other factors that can trigger this error code, some of which are the following:

  • Missing device drivers
  • Out-of-date device drivers
  • Presence of malware or spyware in the system
  • The particular device is not compatible with your PC

Device driver corruption or other data corruption is not uncommon and part of everyday PC use.

From an installation gone wrong to an unexpected shutdown, commonly generated data errors are considered the main culprit behind error codes.

Further Information and Manual Repair

Just like most PC error codes, Error Code 37 isn’t that difficult to get rid of. There are many DIY methods you can try to have your PC running smoothly in no time. Here are a few methods to resolve this issue:

Method 1: Restart your PC

It is possible that the display of the error code is merely due to a temporary issue with your peripheral device and not anything serious.

Therefore, the quickest and easiest method to solve the error code 37 is to simply restart your PC.

Method 2: Scan for Viruses

If restarting does not do the trick, a quick scan for viruses and removing them is another simple method you can follow to fix your PC.

Since the error code is due to corruption of data, viruses such as malware or spyware create error in your PC’s registry and eliminating them can help restore some of the corrupt data, which also speeds up your PC.

Method 3: Undo recent changes

A possible explanation for the error code may be the recent changes in your Device Manager or due to the peripheral device installation. You can thus undo the changes by either:

  • Remove or change settings of the installed peripheral device
  • Roll back the version of the driver to the one before the update.
  • Use System Restore to reverse the changes made in the Device Manager

Method 4: Manually uninstall and reinstall the drivers

If the above stated methods do not help in speeding up your PC and is still giving you an error code, you may want to manually uninstall and reinstall the corrupt or missing drivers. Here are the following steps:

  • Double-check if the installed external device is properly connected and working smoothly
  • Open Device Manager and double click on the device that is causing problems
  • When it opens, click on the ‘Driver’ tab and click ‘Update Driver’

Method 5: Use DriverFIX

However, updating the missing or corrupt drivers can be time consuming and may also require having a hardware documentation ready that contains specific details about the driver that you should download.

To avoid this time-consuming process, you can use DriverFIX software.

DriverFIX will help you to download the required driver without you having to waste your precious time and effort looking it up in a user manual. This latest software technology is embedded with its own database that tracks the missing or corrupt driver according to your PC’s motherboard version and specific details.

It is user-friendly, which means that it will relieve you from the frustration of such PC error codes appearing from time to time and enable your PC to work efficiently in no time.

Click here to download DriverFIX to resolve Device Manager error code 37 today!

Read More
Fix Downloader.dll Not Found Error in Windows
Stumbling upon downloader.dll not found error is not pleasant to experience, usually, it means that desired application can not be started. There could be several reasons why this error happens from user mistakes, corrupted files, bad installation, and even bad RAM memory. Whatever the reason might be solutions provided are the same for all and offer a fix to this issue. it is advisable to follow provided solutions from start to finish not skipping any one of them since they are tailored to address the simplest solutions and issues and move toward more complicated ones.
  1. Reinstall application

    If you are receiving Downloader.dll not found when trying to run just a single certain application, reinstall the application, there is the possibility that the application has somehow corrupted downloader.dll during the installation process. Reinstalling might fix the problem.
  2. Run SFC scan

    SFC scan is the tool meant to scan all files and fix any corrupted ones. To run this tool, open the command prompt in administrator mode by right-clicking on the windows start button and then left-clicking on the command prompt (admin). When you are in command prompt type in SFC /scannow and let the whole process finish.
  3. Update device driver

    If previous steps have not provided results, go to device manager and visually check is there a device with an exclamation or other sign next to it, if there is, right-click on it and choose update driver.
  4. Use RESTORO to fix the issue

    If you have not managed to fix the issue with provided steps, use a dedicated fixing error tool like RESTORO to fix your PC errors.
Read More
Fix Some apps need to be uninstalled
When you update or upgrade your computer to Windows 10, the setup will look for the compatibility of both the hardware and software. And in this process, if suddenly got an error message saying, “Some apps need to be uninstalled” or “You need to uninstall a program in order to continue”, you have to look for the program(s) that might be causing the compatibility issues. But worry not as this post will help you resolve the issue. Simply follow the given suggestions below.

Option 1 – Look for the incompatible programs

There are times when Windows 10 will point out the programs that are incompatible with Windows 10. In this situation, just click on the Uninstall and continue button and then wait for the process to be completed. For more information, you can check out the official site Ready for Windows by Microsoft. This site can help you determine which software versions are compatible with Windows 10 and which ones are not. All you have to do is select the Windows 10 version and type your App name, after that, you will see the results about its compatibility. Thus, it’s now easier for you to figure out which software is causing an issue and if there is a new updated version available that you can install instead.

Option 2 – Try to install the Windows Update in a Clean Boot State

Putting your PC in a Clean Boot state can also help you install Windows Updates or Upgrades without any trouble because, during this state, you can start the system with a minimum number of drivers and startup programs that will surely help you in isolating the root cause of the issue.
  • Log onto your PC as an administrator.
  • Type in MSConfig in the Start Search to open the System Configuration utility.
  • From there, go to the General tab and click “Selective startup”.
  • Clear the “Load Startup items” checkbox and make sure that the “Load System Services” and “Use Original boot configuration” options are checked.
  • Next, click the Services tab and select the “Hide All Microsoft Services” check box.
  • Click Disable all.
  • Click on Apply/OK and restart your PC. (This will put your PC into a Clean Boot State. And configure Windows to use the usual startup, just simply undo the changes.)
  • After that, try to install the Windows Updates or upgrade again.

Option 3 – Try creating a new user account

Creating a new user account can resolve the “Some apps need to be uninstalled” error when upgrading or updating your Windows 10 PC. All you have to do is create a new admin account and initiate the setup. And this is a new user account, there will be no third-party applications installed on your computer. Thus, the installation should go through without any trouble. And in case you’ve already installed programs for that user, you just have to uninstall them all and then re-run the setup.

Option 4 – Perform a clean install

If none of the options worked, you can try to clean install Windows 10. Just make sure that you have the ISO from the official Microsoft Website and then a bootable USB drive to install Windows 10 again. Take note that this will delete all the data from your drive where Windows 10 was installed previously.
Read More
Enable or disable Fast User Switching
When your computer is slow, you don’t have much choice but to wait until it gets done with a task at its own pace, albeit a slow one. So if you want to switch user accounts on your computer a couple of times daily, then a slow computer can get really irritating. What makes system processes slow is that the accounts have some programs or applications running and resources allocated to them. And besides, if your computer is already low on performance, it will kill the natural fluidic flow of the user. But worry not, for this post will guide you in switching user accounts with the help of some minor tweaks in your Windows 10 computer. To disable or enable Fast User Switching, you have two methods to do that using the Registry Editor and the Group Policy Editor. Either way, refer to the instructions laid out below.

Option 1 – Enable or disable Fast User Switching via Registry Editor

  • Tap the Win + R keys to open the Run dialog box.
  • After that, type “Regedit” in the field and tap Enter to open the Registry Editor.
  • Next, go to this registry key: HKEY_LOCAL_MACHINESOFTWAREMicrosoftWindowsCurrentVersionPoliciesSystem
  • Then right-click on System and select New > DWORD (32-bit) Value and name this newly created DWORD as “HideFastUserSwitching”.
  • Now double click on it. If you want to enable Fast User Switching, input “0” as the value, and if you want to disable it, input “1” as its value.
  • Restart your PC to successfully apply the changes made.

Option 2 – Enable or disable Fast User Switching via Group Policy Editor

Take note that this option will not work if you are using the Windows 10 Home edition since the Group Policy Editor does not come with Windows 10 Home. Refer to the steps below to enable or disable Fast User Switching using Group Policy Editor.
  • Tap the Win + R keys to open the Run dialog box and then type in “gpedit.msc” in the field and hit Enter to open the Group Policy Editor.
  • Next, navigate to this path inside the Group Policy Editor: Computer ConfigurationAdministrative TemplatesSystemLogon
  • Now double click on the configuration listing labeled as “Hide entry points for Fast User Switching” to open the configuration page.
Note: On the configuration page, you will see the following description:
“This policy setting allows you to hide the Switch User interface in the Logon UI, the Start menu, and the Task Manager. If you enable this policy setting, the Switch User interface is hidden from the user who is attempting to log on or is logged on to the computer that has this policy applied. The locations that the Switch User interface appears in the Logon UI, the Start menu, and the Task Manager. If you disable or do not configure this policy setting, the Switch User interface is accessible to the user in the three locations.”
  • From there, you can choose to enable or disable the Fast User Switching depending on your preferences. After you’ve selected, click OK and exit the Group Policy Editor.
  • Now restart your PC to apply the changes made successfully.
Read More
How to Fix Windows 10 Error 0x800488AB

How to Fix Windows 10 Error 0x800488AB

Code 0x800488AB – What is it?

The Error Code 0x800488AB will appear when a user is in the Windows 10 Mail app and has provided an Outlook.com e-mail address. The mail app will give a message that the “account information is out of date” and it does provide an option to fix the issue. After clicking the Fix button, this error code will show up to the user. Common symptoms include:
  • A dialog box will appear with the Error Code 0x800488AB
  • Microsoft Windows 10 Mail App will not retrieve (or subsequently send) mail
  • User cannot delete and re-add the Outlook email account in the Windows 10 Mail app
  • User can still access and log in to various Microsoft websites, including logging into the Outlook Mail website

Solution

Restoro box imageError Causes

This error can be caused by a few different actions of the user when they have changed a password or a PIN number to access their Outlook mail. This error does have a relatively easy fix after the cause is determined and where the break-in information has occurred. A few of the causes may be:
  • If the user changes their password on the Microsoft website and uses the alternative PIN login method to access the Mail App.
  • The log-in information on the Microsoft website does not match the login information on the Windows 10 App.
  • The login information was changed on the Microsoft website and was not updated to reflect on the Windows 10 Mail app.
The Microsoft website and Microsoft Mail app do not share the knowledge of the change in login credentials, therefore the log-in credentials appear to be incorrect when trying to access the Microsoft Mail app. It should be noted that a user may bypass the password option if they log in to the Microsoft Mail app while using the alternative PIN log-in method, thus still leaving the password undetected.

Further Information and Manual Repair

As is the case with all new technology and having a few wrinkles, the release of Microsoft Windows 10 is not left out. There have been a few discussions of errors and bugs, including Error Code 0x800488AB. As of right now, there are three different methods that can be utilized by any at-home user. These methods are rather simple and make sense when the problem has been identified.

Method 1:

Run the built-in Windows Store Apps troubleshooter:
  1. Press the Windows Key and then type ‘troubleshoot’ and hit Enter
  2. Select “View all” on the left panel and run the “Windows Store Apps” troubleshooter from the list displayed and see if it works.

Method 2:

Use the System File Checker tool to repair corrupted or missing system files:
  1. Click Start.
  2. Type cmd, and then press CTRL+SHIFT+ENTER to open the elevated command prompt (I.e. Command prompt with administrative rights).
  3. The User Account Control window should appear, be sure that the action it exhibits is correct, and then press the Continue button.
  4. Type or copy-paste the below command line into it without quotes:
“Sfc /scannow”

Method 3:

  1. Press the Windows Key
  2. Search for "Credentials Manager"
  3. Click on Windows Credentials
  4. Look for any reference to your windows account (generally your @outlook.com is listed)
  5. Delete them.
  6. Then select your account at the top of the start menu and select Log Out.
  7. If using a Pin Code, switch to type input and put your password into the box.
When you go to Mail, and select "Fix Issues" it will detect your password and your account should sync with new emails. In some cases, depending on why this particular error code was caused, you may have to use a powerful automated tool to have it resolved.
Read More
How to do Disk cleanup in Windows 10
Disk cleanup is part of Windows 10 tools and it is essential in keeping your computer up and running in optimal settings and to free so much needed space as well as remove temporary files that can accumulate over time. Using disk cleanup from time to time is recommended and a very useful habit that will save you some headaches and optimize your computer running time, speed up boot sequence, etc. Think of it like cleaning up your desk, from time to time it can get too overwhelmed with junk and non-important things and if you are keeping it tidy all the time each time you need to find something it will be much faster and easier, same goes with computers, so if you do not have it, try to develop a habit that once per month you start disk clean up and remove trash from your hard drive. In order to do so, press ⊞ WINDOWS + E to bring File Explorer up Keyboard with windows and e markedOnce File Explorer is up and running right-click on the hard drive you wish to run disk cleanup on and click on properties. file explorer hd propertiesProperties Windows will open on the general tab, on that tab you have disk cleanup on the lower right part of properties, click on it. local disk properties cleanupWait for Windows to gather information about your hard drive and files on it. After it is finished you will be greeted with the next screen: disk cleanup section chooserHere you can thick and mark which items you would like to get rid of and which ones you would like to keep. Note that you can freely tick all of them and remove them since removing these files will not break WIndows in any way. make your choices and click on ok. You can also click on Clean up system files to run system files cleaner and get rid of junk there, you will not be able to choose any options there, Windows will alone clean up what is not needed. After disk cleanup is finished least thing you will have is more free disk space, but like mentioned, keeping your Windows and computer healthy goes a long way in its usability, speed, and performance.
Read More
Fix THREAD_STUCK_IN_DEVICE_DRIVER 0x000000EA
If a program tried and failed to use the Graphics rendering capabilities of a computer, Windows 10 will most likely throw a Blue Screen error that says, “ THREAD_STUCK_IN_DEVICE_DRIVER ”. 0x000000EA is the Stop code for this particular Blue Screen error and could be caused by a bad display driver or bad video card. Whatever the cause is, here are some suggestions you need to check out to resolve this Blue Screen error.

Option 1 – Try to rollback, update, or disable the Graphics card drivers

Since the THREAD_STUCK_IN_DEVICE_DRIVER Blue Screen error has something to do with Graphics card drivers, you can either roll back, update or disable them depending on your preference in order to resolve the error.
  • First, boot your computer into Safe Mode.
  • After that, tap the Win + R keys to launch Run.
  • Type in devmgmt.msc into the box and tap Enter or click OK to open the Device Manager.
  • After that, a list of device drivers will be displayed. From there, look for the Display Adapters and click on them.
  • After that, right-click on each entry under the Display Adapters and select the “Uninstall Device” option from the menu.
  • Now restart your computer.
  • After restarting your computer, go to the Settings app and Check for Updates in the Windows Update section.
Note: You also have the option to go directly to the website of your graphics card manufacturers like NVIDIA, Intel, or AMD and go to the section called Drivers then check if there’s a new available update – if there is, download and install it.

Option 2 – Try removing hardware or drivers that you’ve installed recently

If you have recently installed some hardware or drivers, you might want to disable or remove them since external devices are proven to be one of the factors that trigger Blue Screen errors like THREAD_STUCK_IN_DEVICE_DRIVER. All you have to do is physically disconnect any external devices that are connected to your computer and then check if it fixes the BSOD error or not.

Option 3 – Run System File Checker at boot time

  • Once you get to the Welcome Screen part, click on Next.
  • Afterward, click on the Repair your computer option located on the bottom-left part of the window.
  • Then click on Troubleshoot.
  • Next, select the Advanced Options and then Command Prompt.
  • After opening Command Prompt, type the “sfc /scannow” command and hit Enter to run the System File Checker scan.
  • Wait until the process is completed and type “exit” to close Command Prompt and then restart your computer to successfully apply the changes made.

Option 4 – Try to run the Blue Screen Troubleshooter

As you know, the Blue Screen troubleshooter is a built-in tool in Windows 10 that helps users in fixing BSOD errors like the THREAD_STUCK_IN_DEVICE_DRIVER error. It can be found in the Settings Troubleshooters page. To use it, refer to these steps:
  • Tap the Win + I keys to open the Settings panel.
  • Then go to Update & Security > Troubleshoot.
  • After that, look for the option called “Blue Screen” on your right-hand side and then click the “Run the troubleshooter” button to run the Blue Screen Troubleshooter and then follow the next on-screen options. Note that you might have to boot your PC into Safe Mode.

Option 5 – Try to manually check the Graphics Card hardware

You might also want to check the physical status of your Graphics card and you can do this by disconnecting the Graphics card or any other external device connected to your computer. Once you’ve removed the external device, check it for any damages. If there’s none, connect it back to your computer and check if the THREAD_STUCK_IN_DEVICE_DRIVER Blue Screen error is fixed or not.

Option 6 – Uninstall any faulty drivers

You can also uninstall any faulty drivers via Device Manager. How? Refer to these steps:
  • Tap the Win + R keys to launch the Run dialog box.
  • Then type “devmgmt.msc” in the field and tap Enter to open the Device Manager.
  • From there, look for any faulty drivers. You can identify them easily as they will be marked with a yellow exclamation point. And then check which entries would not affect the normal functioning of your PC.
  • Now click on the entries of every faulty driver and click on the Uninstall option.
  • Once you’ve uninstalled them, restart your computer to allow your computer to reinstall the faulty drivers you’ve just removed.
Read More
Razer unveils their first internal PC hardware
razer pc hardware components
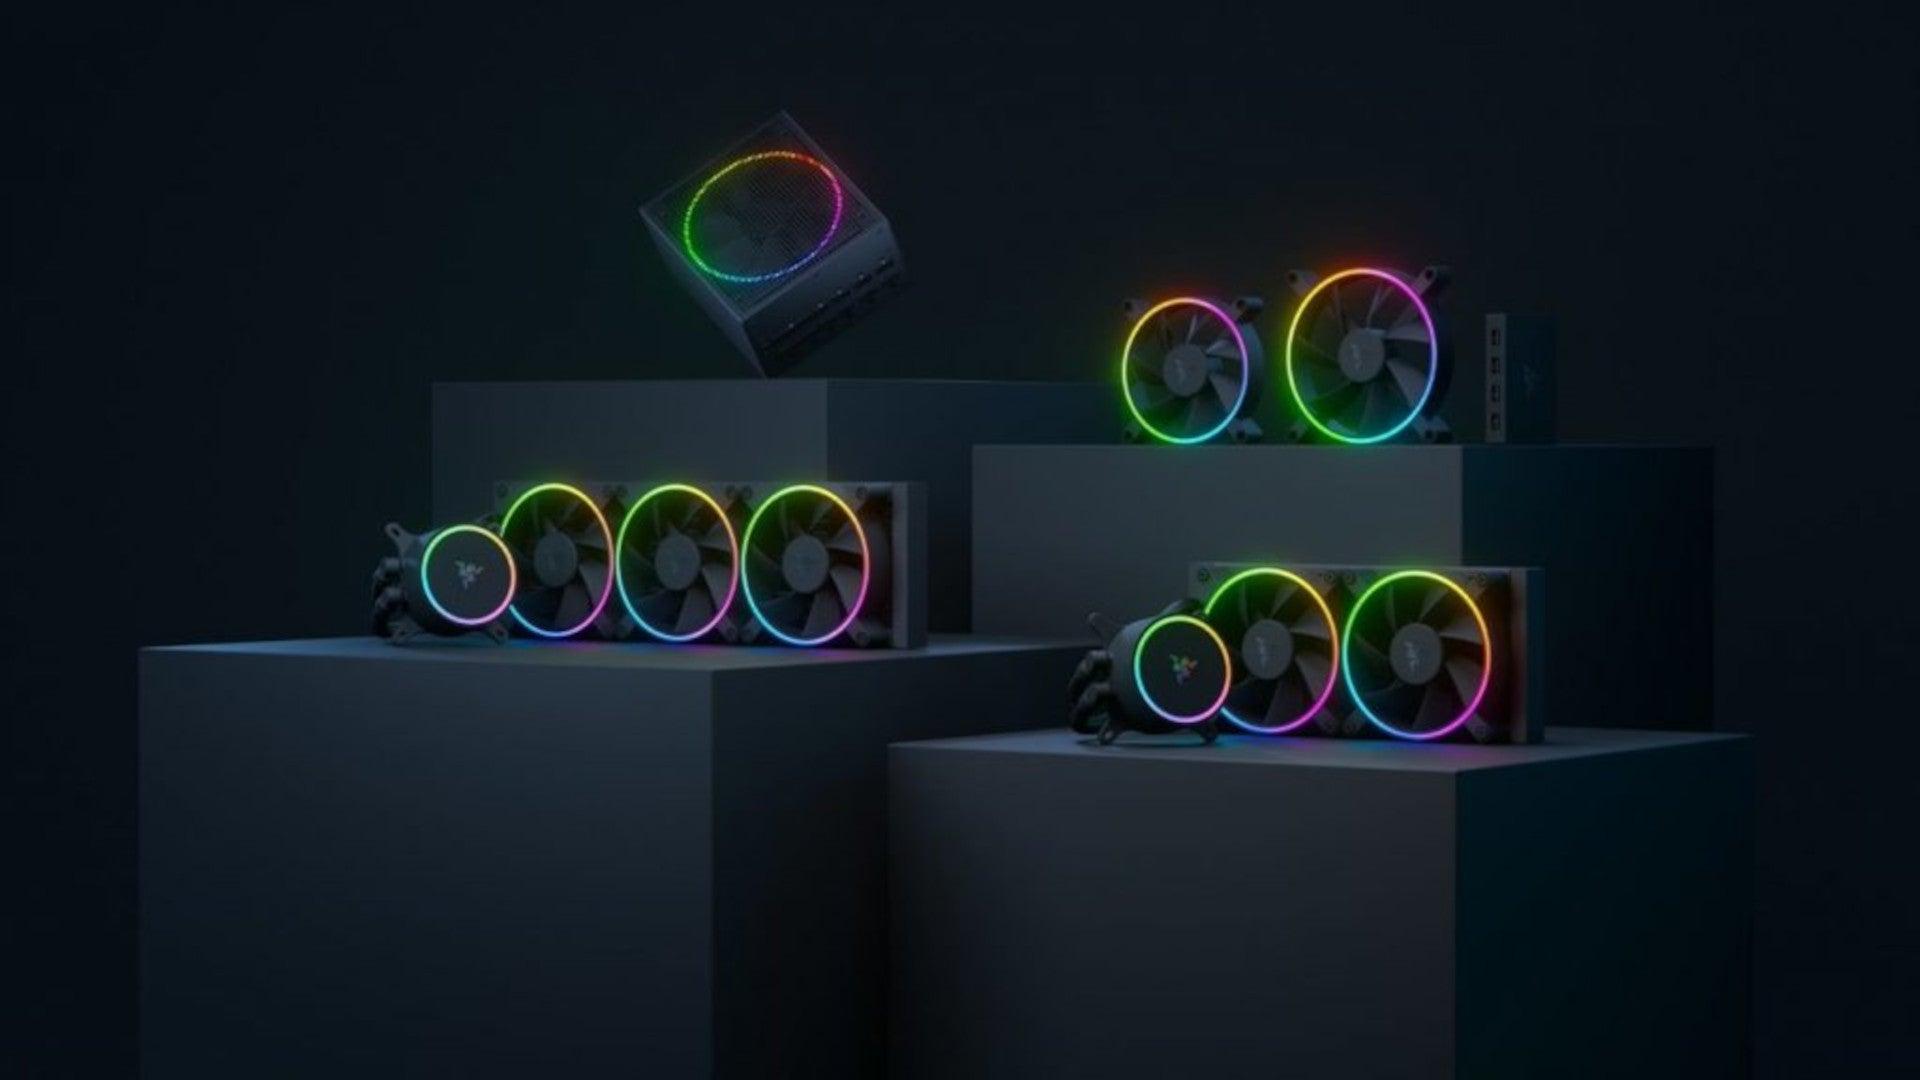
Razer is a well-known brand among PC gamers and users, it started as a peripheral manufacturer focused on keyboards and mouse but after years passed Razer expanded its inventory offerings. It soon started offering headphones and lately has branched into wider product lines like gaming chairs and protection masks. It is not a big surprise that Razer is expanding into other branches of the PC industry. This time, however, it has revealed not one but three new hardware for your PC. Case fans, all in one liquid cooler and power supply. There are not many details about the products themselves but one thing is one hundred percent confirmed, they come with Razer Chroma, all of them, even the fans.

Katana Chroma ATX PSU

razer power supply
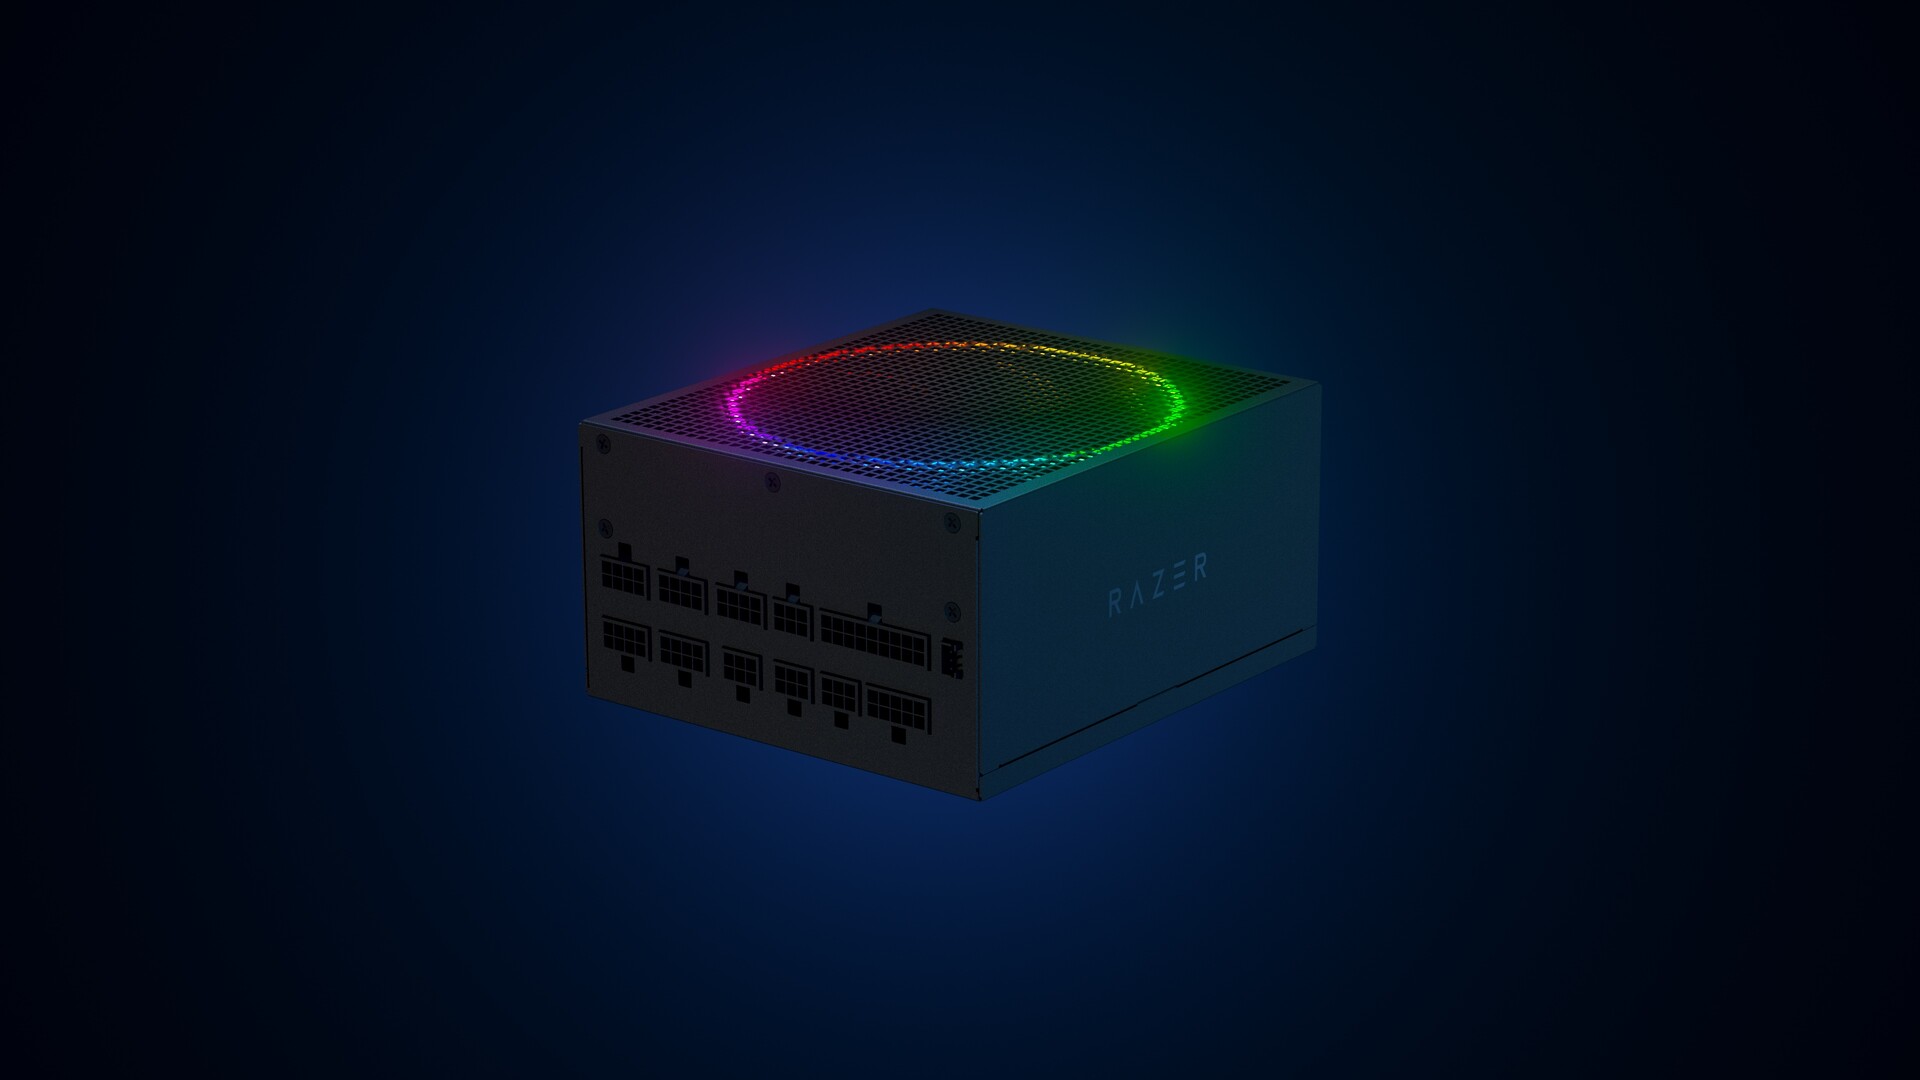
Most interesting for me personally is Razers Katana, the power supply unit. It is a modular power supply ranging from 750W to 1200W with the additional option of Titanium rated one with an impressive 1600W of power. Power supply will start shipping in early 2022 and at the time of writing this article no price range has been released.

Razer Hanbo AIO

razer water cooling
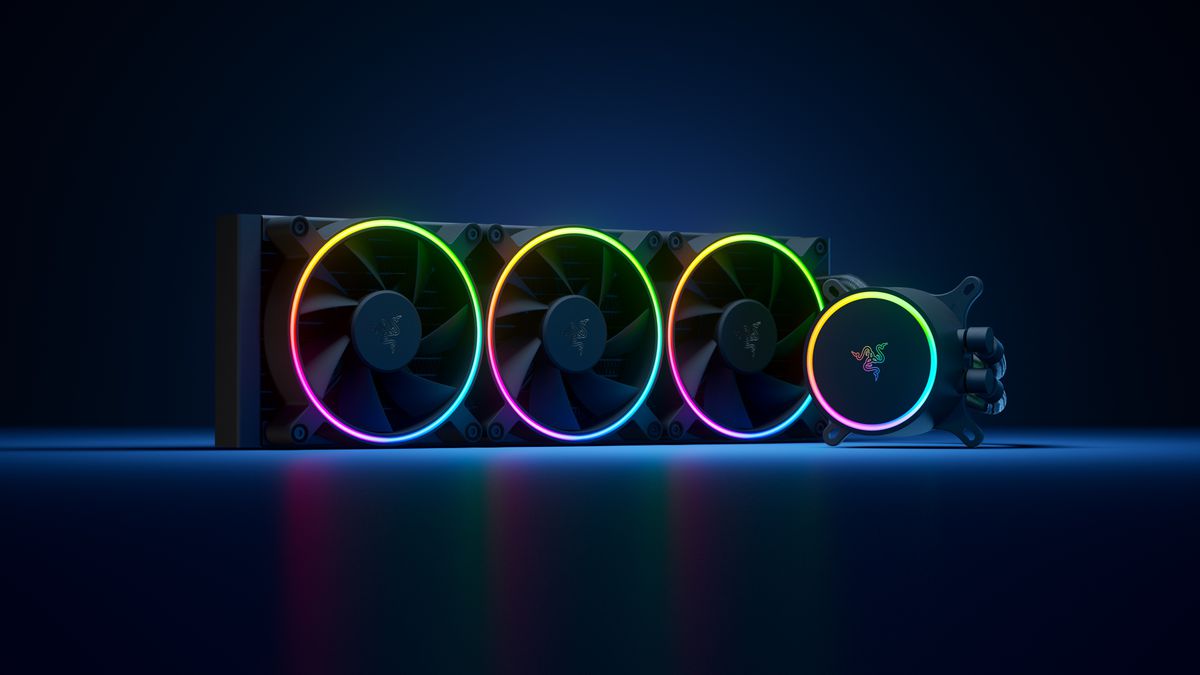
Hanbo liquid cooler will feature an optimized intake design so it can ensure greater heat transfer and fluid dynamic for improved reliability and silent operation. Radiator comes in 240mm size with two fans and a larger one of 360mm with three fans. The pump will be able to rotate in any direction of full 360 degrees so it can fit in any case. Hanbo will be released in November this year but no pricing has been released so far.

Razer Kunai Chroma case fans

razer case fans
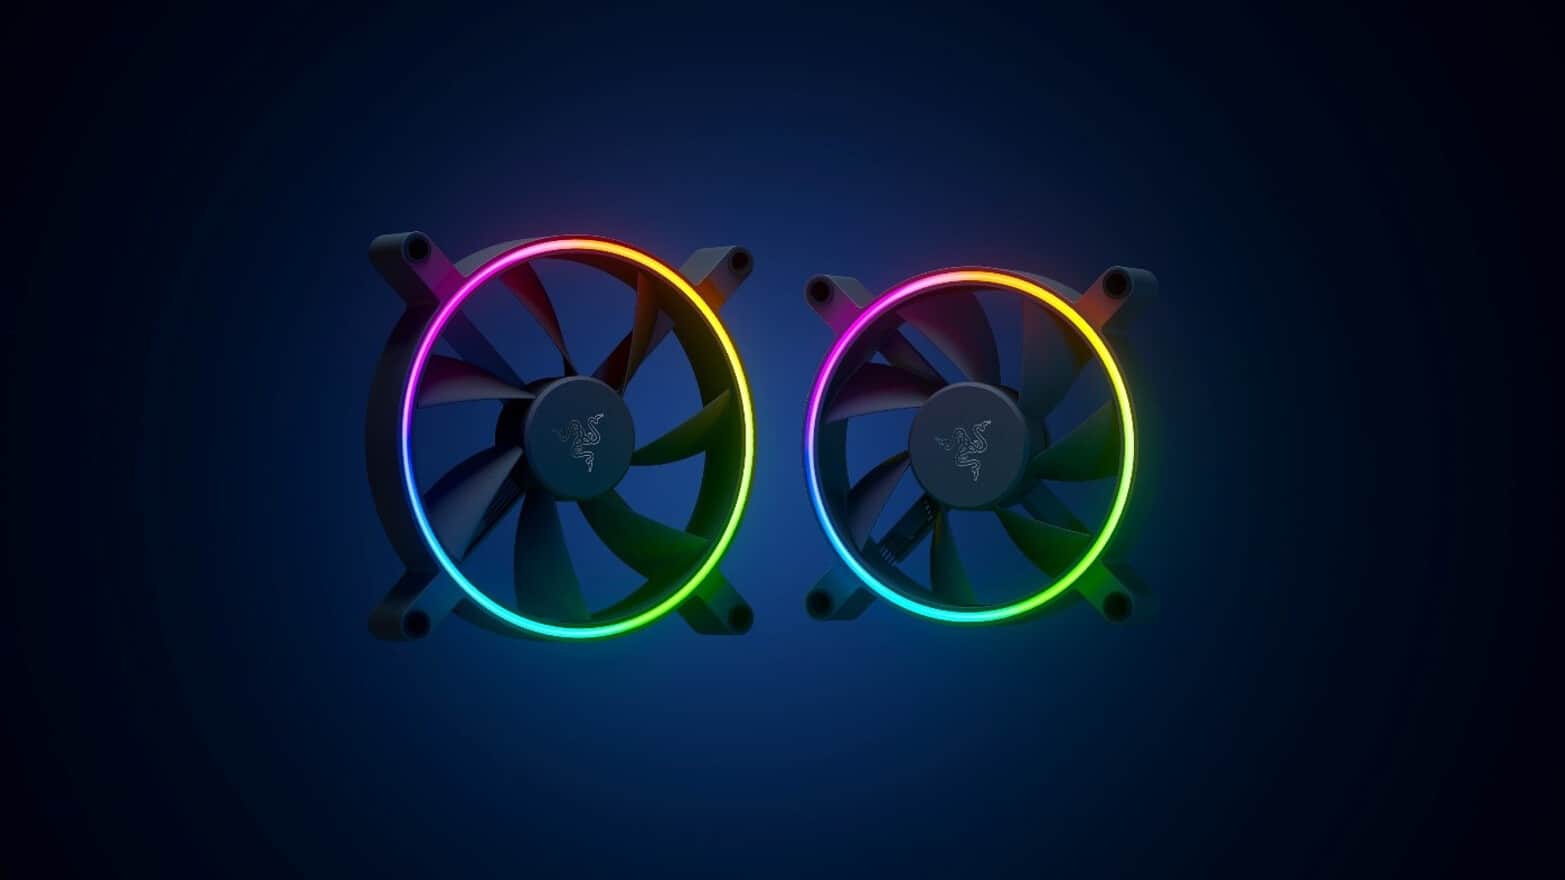
Kunai fans will boast high static pressure performance with lowered noise. They will go as far as 2200rpm for the 120mm version where the 140mm version will go up to 1600rpm. They will come with addressable LEDs and up to eight fans will be able to be connected to Razer’s PWM fan controller that will come with a magnet at the back for easy attachment to any steel part of PC casing. PWM will use Razer’s Synapse software to customize pulse width modulation in order to improve airflow and noise. PWM will be priced at $49.99 in the Razer Store and it is available for preorder. Fans are priced at $44.99 for one 120mm or $129.99 for a three-pack of 120mm. One 140mm will go for $49.99 and a three-pack will be $129.99.
Read More
Fix Windows Update Error Code 0x8024402c
Connecting to Microsoft’s Windows Update servers does not always go smoothly since you could run into a number of errors. One of these errors is the error code 0x8024402c. You can see this error code when you check for Windows Updates. This kind of Windows Update error occurs when the proxy or the firewall settings are incorrectly configured. As a result, the client’s connection to the Windows Update servers fails. There are two things you can do to resolve error code 0x8024402c. First, you can try to fix the Proxy Settings. Second, you can set up Automatically Detect the connection settings. In addition, you can also try to perform System Restore as it could also help in fixing the problem. Performing System Restore might help you in fixing the error code 0x8024402C. Refer to the steps below to use System Restore.
  • Tap the Win + R keys to open the Run dialog box.
  • After that, type in “sysdm.cpl” in the field and tap Enter.
  • Next, go to the System Protection tab then click the System Restore button. This will open a new window where you have to select your preferred System Restore point.
  • After that, follow the on-screen instructions to finish the process and then restart your computer and check if the problem is fixed or not.
If performing System Restore didn’t help in fixing the problem, then try the two given options below.

Option 1 – Try fixing the Proxy Settings

  • In the Cortana search box, search for Internet Explorer and then click on the related search result.
  • After that, tap the Win + T keys on your keyboard and click on Internet Options.
  • Next, navigate to the Connections tab and click on LAN Settings.
  • Then click on the Advanced button and delete all the entries in the list generated in the Exceptions section. And if the Advanced button is disabled because the “Use a proxy server for your LAN (These settings will not apply to dial-up or VPN connections)” option is disabled then you are good to go. Now proceed to the next step.
  • Tap the Win + X keys or right-click on the Start button and select Command Prompt (Admin) or you could also search for “cmd” in the Cortana search box and right-click on Command Prompt from the search results and select the “Run as administrator” option.
  • If a User Account Control appears, click on Yes to proceed. After that, type each one of the commands listed below, and don’t forget to hit Enter after you type each one of them.
    • netsh winhttp reset proxy
    • net stop wuauserv
    • net start wuauserv
  • Now restart your computer and check if the problem is fixed or not by checking for Windows Updates again.

Option 2 – Try setting up Automatically Detect the connection settings

  • Type in “internet options” in the Cortana search box and then click on the related search result.
  • After that, navigate to the Connections tab.
  • Next, click on the LAN Settings button located under the Local Area Network (LAN) settings section.
  • Then uncheck the “Use a proxy server for your LAN (These settings will not apply to dial-up or VPN connections)” option under the Proxy Server section and click OK.
  • Now restart your computer to apply the changes made successfully.
Read More
Razer Huntsman V2 mechanical keyboard
Razer huntsman
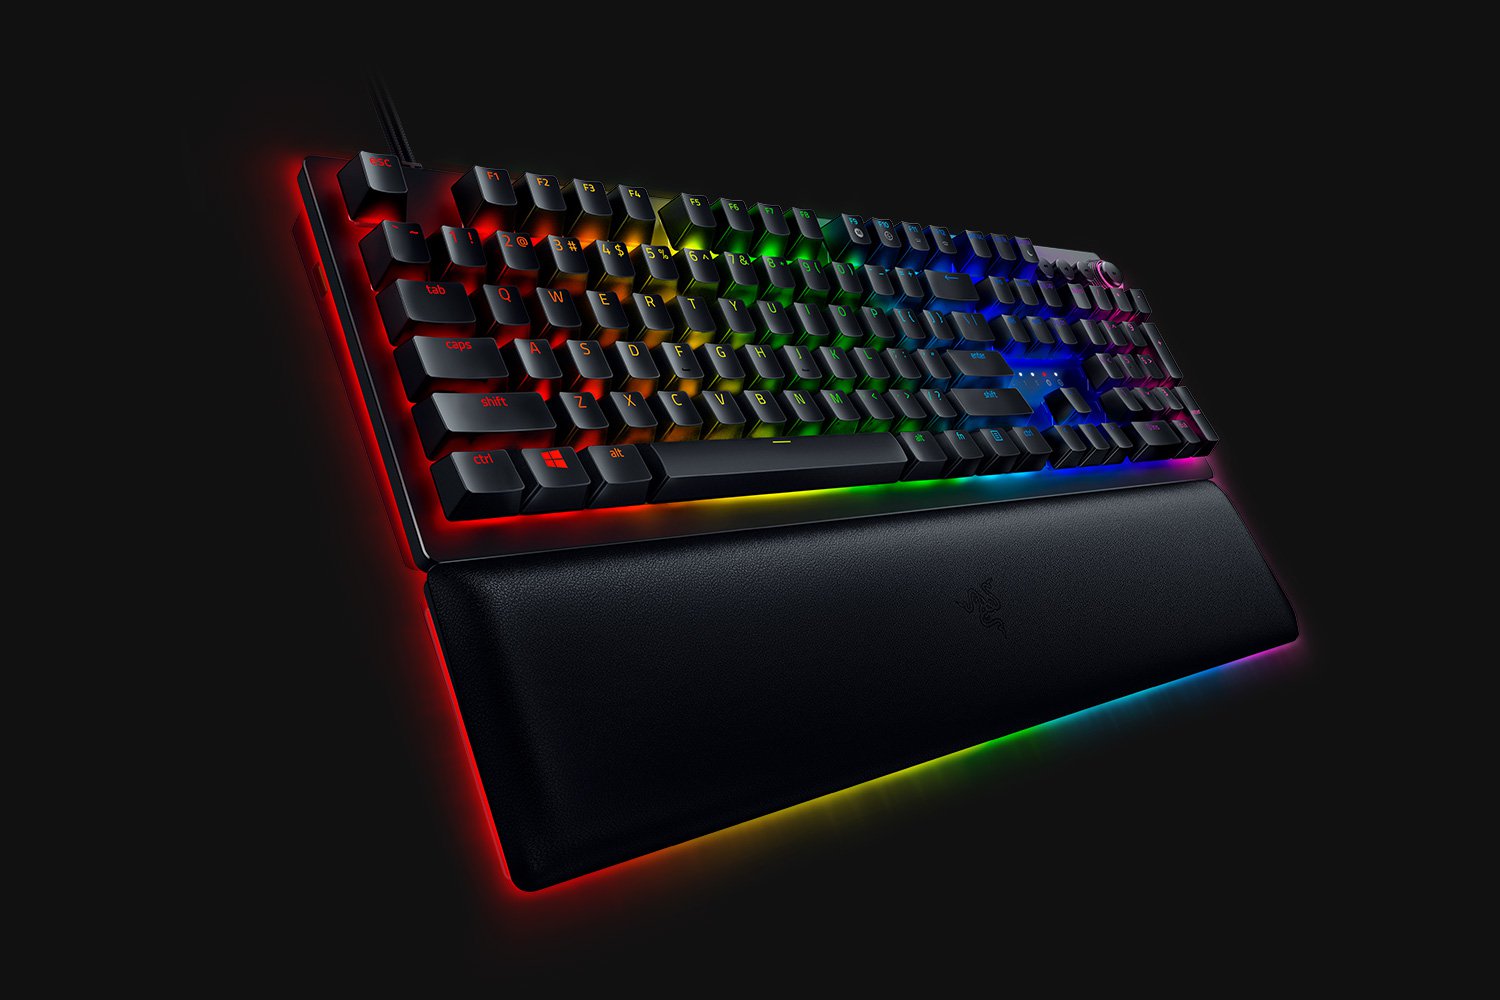
When it comes to computer peripherals first thing that comes to people's minds is probably Mouse and Keyboard. Also when discussing peripherals brands, Razer is not a stranger and over the years it has built its name and cult following. Razer’s mechanical keyboards have been always in the upper field of quality and trust from users and Huntsman is no different.

Tech specifics of Huntsman keyboard

  1. Mechanical optical switches Razer has introduced their new optical technology switch with this keyboard. These switches are faster and more accurate than typical mechanical switches and if tests are to be believed this is the fastest keyboard currently on the market.
  2. Multi-functional digital dial A multi-function digital dial with three tactile media keys gives you instant access to everything from brightness to volume in seconds. All programmable and customizable through Synapse 3, so you can set your preferred configurations right at your fingertips.
  3. 10-key rollover Anti-ghosting technology that enables 10-key simultaneous presses at the same time
  4. 4-side underglow with Razer chroma Go crazy and personalize lighting effects any way you want with a full 4-side underglow and 38 customization zones. Powered by Razer Chroma

Feel and noise

In the department of noise, well it is the mechanical keyboard so naturally, it will be louder than membrane ones but in terms of comparing it to other mechanical keyboards it is within the same noise range, maybe just a tiny bit silenced. The keyboard comes with 2 different types of switches, purple clicky ones that are louder and have that *click* sound for sound feedback, and red ones, that are not equipped with clicky sound but are linear providing slightly faster performance. If you choose the Huntsman elite model of the keyboard it will come with a nice hand resting mat that is very comfortable and feels right. Using a keyboard feels like using a Razer keyboard, it is responsive and gives that superior mechanical feeling.

Conclusion

Razer Huntsman mechanical keyboard is not the cheapest nor the best on the market but it is the fastest one out. It is in the top tier of keyboards and worth the investment.
Read More
1 2 3 162
Logo
Copyright © 2022, ErrorTools. All Rights Reserved
Trademarks: Microsoft Windows logos are registered trademarks of Microsoft. Disclaimer: ErrorTools.com is not affiliated with Microsoft, nor claim direct affiliation.
The information on this page is provided for information purposes only.
DMCA.com Protection Status