Chrome does not save passwords

Recently, a number of users reported that their Google Chrome browser does not remember any accounts, login sessions, as well as passwords. So if you are one of the users who experience the same problem, then you’ve come to the right place as this post will guide you on what you can do your Chrome browser does not save passwords, remember accounts and login sessions in Windows 10.

This issue in Chrome could be caused by a lot of factors. It is possible that there is a setting in Chrome that prevents the browser from saving any data. It is also possible that the Google Chrome profile or the Cache folder for Chrome has become corrupted. Moreover, a third-party antivirus program could also be blocking the browser’s functionality in saving data. Whatever the cause is here are some suggestions you could follow that will help you fix the problem but before you do that, you can try to update your Chrome browser to its latest version first. If it didn’t work, then proceed to the given options below.

Option 1 – Try to clear browser cache

  • Open your Google Chrome browser.
  • After that, tap the Ctrl + H keys. Doing so will open a new panel that allows you to delete the browsing history and other data in your browser.
  • Now select every checkbox that you see and click on the Clear data button.
  • Then restart your Chrome browser and check if you can now complete the download again.

Option 2 – Try to delete the cache files for Google Chrome

The next thing you can do is to delete Chrome’s cache files or its store information which helps it in loading cached webpages faster when you pull them up. However, if it turns out that the cache files are corrupted, then it’s no wonder why Chrome is unable to save passwords. To fix this, you can try to delete the cache files for Google Chrome webpages and you can do it by following these steps:

  • First, open Google Chrome.
  • Next, open this address in Chrome – chrome://settings/clearBrowserData
  • After that, go to the Advanced tab and select all time as well as the first four options.
  • Now click on the Clear data option and then restart the Chrome browser once the cache has been cleared.

Option 3 – Try allowing Google Chrome to keep local data

If the option to keep local data is disabled in Google Chrome’s settings, it won’t be able to store local data in the browser. Thus, you need to enable it by following these steps:

  • Open Chrome and enter this address – chrome://settings/clearBrowserData
  • After that, drag the toggle button off for the “Keep local data only until you quit your browser” option.
  • Once done, restart Google Chrome and check it fixed the problem or not.

Option 4 – Try to enable the setting that offers to save password

As you know, a lot of websites offers users a choice to save a password and you can also do the same with the Chrome browser. You just have to enable this particular setting by going to the address, chrome://settings/passwords. From there, drag the toggle button for the setting Offer to save passwords, off.

Option 5 – Try to create a new profile for Chrome

If your user profile in Google Chrome ends up getting corrupted, it is most likely the reason why Chrome is unable to save passwords. Thus, you need to create a new user profile. How? Follow the steps below.

  • First, click on the account icon located at the top-right corner of the profile.
  • Next, go to the Manage People section and select Add Person > Add.
  • After that, enter the details to add the new account and then restart Chrome.

Option 6 – Reset Chrome

Resetting Chrome can also help you fix the problem. This means that you will be restoring its default settings, disabling all the extensions, add-ons and themes. Aside from that, the content settings will be reset as well and the cookies, cache, and site data will also be deleted. To reset Chrome, here’s what you have to do:

  • Open Google Chrome, then tap the Alt + F keys.
  • After that, click on Settings.
  • Next, scroll down until you see the Advanced option, once you see it, click on it.
  • After clicking the Advanced option, go to the “Restore and clean up option and click on the “Restore settings to their original defaults” option to reset Google Chrome.
  • Now restart Google Chrome.

Option 7 – Try to clean reinstall Chrome

There are instances when programs leave files behind after you’ve uninstalled them and the same thing can happen to Chrome so before you reinstall Chrome, you have to make sure that you have deleted the User Data folder. To do so, refer to the following steps:

  • Hit the Win + R keys to open the Run dialog box.
  • Next, type “%LOCALAPPDATA%GoogleChromeUser Data” in the field and hit Enter to open the User Data folder.
  • From there, rename the default folder and name it something else, e.g. “Default.old”.
  • After that, install Google Chrome again and check if the issue is now fixed.
If you like to learn and find out more about various Windows errors, and how to repair them go to our vast archive or use search to find articles that will explain and help you in solving your issue.
However, if you prefer to do things fast and with automatization then we are proposing to use an automated solution for your issues. The application that we are recommending is Advanced System Repair Pro
Advanced System Repair utilizes multiple tools all in one to give you a quick, simple, reliable, and very thorough diagnosis of your PC. It brings you all the tools you need in one program to clean, fix, protect, optimize and boost your PC!
1-Click Maintenance
All the tools to make it simple and easy! It's like having a professional technician at the click of a mouse.

Junk Cleaner
Keeping your computer free from unnecessary clutter also helps make your computer last longer. Like any other machine, if you keep it clean and take care of it, it will serve you better for longer!

Optimize background apps
Optimize applications background activity with the built-in Application Optimizer feature.

Disk Defrag
With a simple 1-click, Advanced System Repair speeds up your PC by assembling fragmented files on your machine and organizing them more efficiently.

Malware Removal
Finds and removes all types of harmful malware including trojans, worms, bots, adware, spyware, PUPs, and more!

Privacy Cleaner
The all-in-one privacy suite to Clean Your Tracks & Protect Your Privacy! Make your computer safe, secure, and more efficient!

System Tweak/Optimizer
ASR will analyze your complete system and settings to adjust your PC to function at its maximum performance.

Registry Cleaner
Over time, as you install and uninstall applications, the registry can become cluttered with old entries and broken settings which can result in program crashes, and annoying messages and slow the computer down.
Visit our Advanced System Repair Pro Download page to inform yourself about all the benefits of this software and get a free trial copy of it.
advanced system repair pro

Advanced System Repair Pro

One-click automated PC repair solution
ASR logo
With Advanced System Repair Pro you can easily
Replace damaged files
Restore performance
Free disk space
Remove Malware
Protects WEB browser
Remove Viruses
Stop PC freezing
DOWNLOAD
Privacy Policy | Terms of Use | Uinstall
Advanced System Repair Pro is compatible with all versions of Microsoft Windows including Windows 11

Share this article:

You might also like

Dune part two is officially green-lighted
Dune, arguably one of the best science fiction novels ever written was brought to a big screen first time by David Linch. Sadly movie itself went through development hell and a lot of troubles and the end result was somewhat strange. The audience was divided on it, some hated it, some loved it but for sure it left a mark in cinema history. Years have passed and just when people forgot about ever receiving another try on a book adaptation Denis Villeneuve has brought his vision of Frank Herbert's novel into its full glory on a big screen. The interesting thing about this new Dune movie was that from the start Denis envisioned it as a two-movie part openly saying that book itself is too complex to be done in a single movie. But, the issue arises when information about Dune part two was hanging on a thread on how well Dune part one will be received and performed in the box office. This naturally brought all kinds of speculation and worry among fans of the franchise, especially because the movie itself was really good and well made. Well for all of you fans and people who wanted to see a continuation of the story can rest at peace now since the Legendary picture has officially announced and green-lighted Dune part two. The budget was given and we can expect part two at the beginning of 2023. dune 2 annoucment
Read More
Fix Copy & Paste issue in Windows 10
Copy & Paste function is an essential option in properly working Windows, from copying text to weblinks and many other sources like pictures and files it is one of the crucial features in Windows. When the copy and paste feature is not working we are somewhat left in Windows limbo, essentially Windows itself is working but without this specific feature it is very hard, almost impossible to get any work done, if you are an unfortunate user who has faced this particular issue do not worry, we have solutions for you.
  1. Update Windows

    Glitches come in various forms and sometimes they are introduced in updates, check to see if it is available Windows update and if it, download and install it, there is a very high chance that the next update will bring fixes for known glitches.
  2. Disable antivirus

    A good antivirus is an essential piece of software for any PC, however, sometimes it can interfere with the basic operations of windows itself. Disable it completely to see if copying and pasting will start to work, if this is a case, see can you somehow turn options off in antivirus or switch to another one.
  3. Run Check disc

    Corrupted applications and system files can cause issues with Windows functioning, the easiest way to solve this issue is to run build-in Windows Check disk utility and let it scan and fix potential issues.
  4. Run SFC

    If the check disk failed to fix the issue, run command prompt as administrator and type in sfc /scannow, file checker will go through all files and fix if it finds anything including corrupted system files. Reboot your system after the operation completes. Please note that an SFC scan can take a long time sometimes, do not interrupt the scanning process and leave it to finish.
  5. Restart rdpclip process

    Restarting rdpclip.exe can solve the issue. Open task manager and under process find rdpclip.exe, right-click on it and end it, then go to windows/system32 and search for rdpclip.exe and double click it. Please note that you will be able to find this process only if you are on a remote PC machine, on a local user machine rdpclip is not running.
  6. Rollback to the previous system restore point

    If this particular issue was introduced in the latest update and previous solutions have not worked, roll back to the restore point where everything was working as it should.
  7. Stop virtualization

    if you are using virtual software there is a chance that the shared clipboard feature is interfering with Windows, turn the Virtual machine off and try copy & paste again.
Read More
How to use Control Panel in Windows 11
Windows 11 has brought us a new and revamped settings application that will cover most personalization and overall settings for your operating system. But as much as the new settings app is tweaked and modified there are still some things that can be modified only inside Control Panel. windows 11 control panel
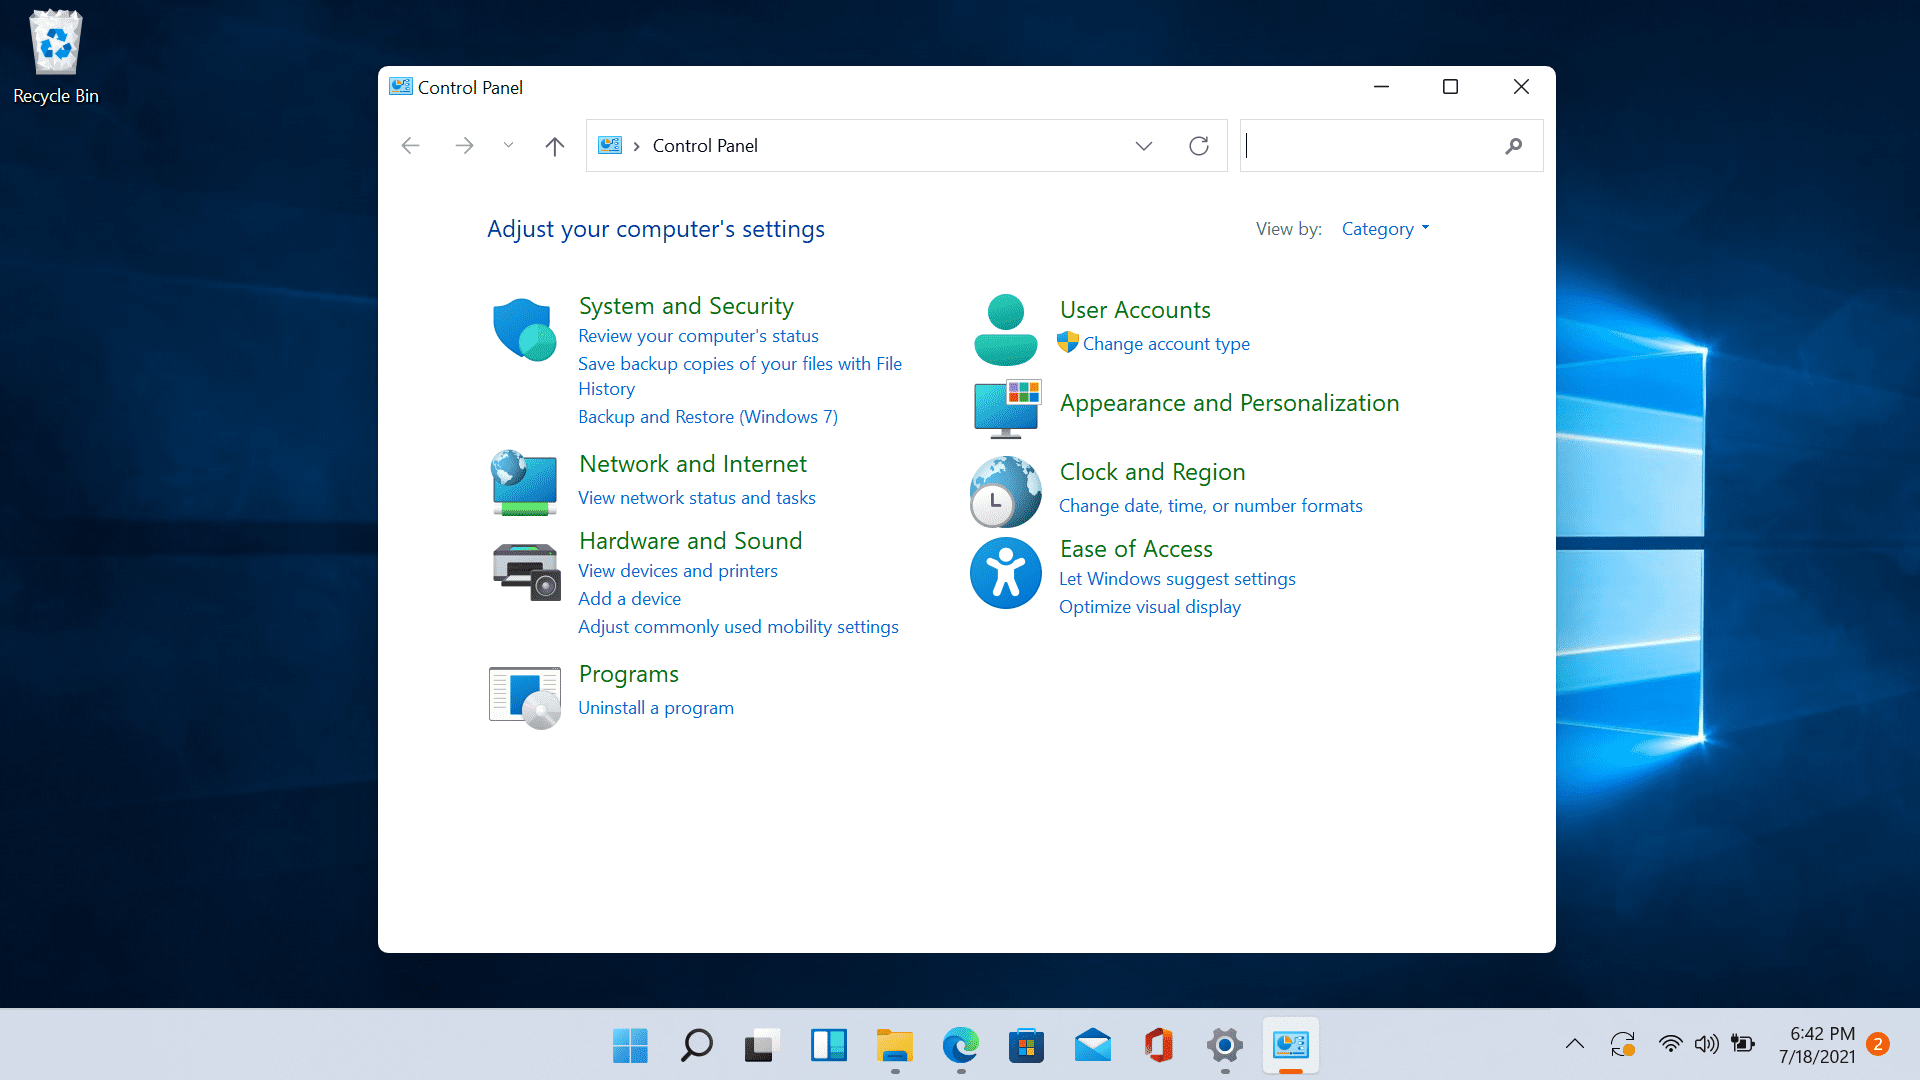
Since the Control Panel icon itself is somewhat not right away once clicked on the start button we are presenting you a couple of ways to open it so you can change each detail you want.

Via Start menu

The most straightforward and easiest way to reach and open the control panel is via the Start menu. In order to do it just click on the Start menu and type in the control panel. Then click on Control Panel Icon in the results.

Pin Control panel icon to the taskbar

In order to actually pin the control panel to Taskbar, you will need to open it first. Use the previous simple and fast steps in order to quickly open it then in the taskbar right-click on its icon. Choose Pin to Taskbar and close control panel. Now you can open the control panel quickly just by clicking it on its icon in the Taskbar.

Add Desktop icon

If you liked the idea to have an icon that you can click in order to fast open the control panel but you are not very fond of the icon being located in your Taskbar then let's place it on Desktop instead. In order to place a special control panel icon on the desktop, we will use Windows setting app. Open settings app with ⊞ WINDOWS + I and go to Personalization tab. Inside the personalization tab, go to Themes and click on Desktop Icon Settings. Check the box beside Control Panel and click on OK. The Control Panel icon will appear now on your Desktop and you can double click on it to launch it.

Run Control Panel from the Run dialog box

Same as in the previous version of Windows you can also open the Control Panel via Windows built-in run menu. This is mostly the preferred way to gain access to it by system administrators. Press ⊞ WINDOWS + R to open the run dialog. Inside dialog type in control and press ENTER. Control Panel will open right away.
Read More
Fix SAFE_OS phase error in Windows
As of late, users have been reporting about getting an error saying, SAFE_OS phase error during Replicate_OC operation when they tried to upgrade their Windows 7 or Windows 8.1 computers to Windows 10. Although the error code in this problem could vary, in this situation, it states:
0xC1900101 – 0x20017, The installation failed in the SAFE_OS phase error during Replicate_OC operation
To fix this issue, you need to follow the given options below. But before you do, you need to create a System Restore point first so that if anything goes wrong, you can always undo the changes you’ve made.

Option 1 – Try to change the Windows 10 installation

According to security experts, one of the main causes of this error is the KB3064209Windows Update. This particular update is the one responsible for updating the CPU Microcode for processors made by Intel. Thus, if you don’t use an Intel processor, you can skip this option and proceed to the next one. However, if you use Intel, make sure to follow the instructions in this option carefully. Take note that in this solution, C: partition is referred to as the OS Partition while H: partition is referred to as the USB Pen Drive.
  • First, you need to download the Windows 10 ISO from the Windows 10 Media Creation tool and then copy its contents to the Pen Drive H.
  • Next, tap the Win + X keys and click on the Command Prompt (Admin0 option. If a User Account Control appears, simply click Yes.
  • After opening Command Prompt, type the following command:
dism /Mount-Image /ImageFile:H:sourcesboot.wim /index:1 /MountDir:C:UsersUserDesktopmount
  • Now navigate to the following path in the Windows File Explorer:
C:UsersUserDesktopmountWindowsSystem32mcupdate_GenuineIntel.dll
  • From there, right-click on the file named “mcupdate_GenuineIntel.dll and click on Properties.
  • Next, go to the Security tab and click on Advanced. In the Advanced section, change the Owner to your User Account and click OK.
  • And then back to the Security tab, click on the Edit button and check on Full control to make sure that your User Account has all the privileges.
  • Now click on Apply and then OK.
  • After that, delete the file you saw earlier which is named mcupdate_Genuine.dll.
  • Then close all the Windows File Explorer instances and go back to the Command Prompt window and unmounts the image you mounted before by typing the following command:
dism /Unmount-Image /MountDir:C:UsersUserDesktopmount /commit
  • Afterward, repeat the steps from mounting up until here for these files:
    • wim /index:2
    • wim /index:1
    • wim /index:2
  • Now delete the mount folder and remove the USB Pen Drive and then boot with the installer.

Option 2 – Try to perform a Disk Cleanup

Chances are, some unnecessary files in your computer might be interrupting the installation process which explains why you’re getting SAFE_OS phase error during Replicate_OC operation instead so you need to perform a Disk Cleanup in order to fix the problem.

Option 3 – Try updating all your drivers

Every now and then, drivers get corrupted or outdated so it’s no surprise that they conflict with the operating system and cause errors like the SAFE_OS phase error during the Replicate_OC operation. To fix the problem, you need to update all your drivers. Follow the steps below to update your drivers.
  • Tap the Win + R keys to launch Run.
  • Type in devmgmt.msc into the box and tap Enter or click OK to open the Device Manager.
  • After that, a list of device drivers will be displayed. If you see a red or yellow sign that shows up against the driver, right-click on the driver’s name and select “Update Driver Software” or “Uninstall”. And if you find any “Unknown device”, you need to update it as well.
  • Select the “Search automatically for updated driver software” option and then follow the instructions to complete the process.
  • Restart your PC.
Note: You also have the option to go directly to the website of your graphics card manufacturer and check if there’s a new update – if there is, download it.

Option 4 – Try to update your system’s BIOS

Aside from outdated drivers, outdated BIOS could also be the reason why you’re getting the SAFE_OS phase error during Replicate_OC operation which is why you need to update your system’s BIOS in order to resolve the issue.

Option 5 – Try checking the Windows Services status

  • In the Cortana search box, search for “Services” and then click on the Services icon.
  • After that, the Services utility will be opened in a new window.
  • Next, look for the following services:
    • BITS (Background Intelligent Transfer Service)
    • Windows Update Service
    • Cryptographic Service
  • Then right-click on each one of the services and click on Properties. From there, select Automatic from the drop-down of the Startup Type menu.
  • Now click on OK for each one of them and restart your PC to apply the changes made.

Option 6 – Try to check the RAM modules

There are many times when all the components of the RAM weren’t able to be used by the computer so you need to check the RAM modules.
  • You need to first turn off your PC and then take out your RAM physically.
  • Next, clean it with a soft cloth and blow some air into the RAM slot in the motherboard.
  • After that, put your RAM back in the same slot.
  • Then try updating your computer system again.
Read More
REvil vanishes over night without trace
REvilREevil is one of the most active and successful hacking groups connected to Russia and operating all over the world. The group recently demanded a huge bitcoin ransom for an attack targeting IT firm Kaseya in the USA. Since Tuesday blog and payment site run by REvil group cannot be longer reached without any kind of explanation or why. The reason behind the disappearance is unknown but has sparked speculation that the group may have been targeted deliberately by authorities. US President Joe Biden said he raised the issue with Vladimir Putin during a phone call on Friday, after discussing the subject during a summit with the Russian president in Geneva last month. Mr. Biden told reporters that he had "made it very clear to him...we expect them to act" on information and also hinted the US could take direct digital retaliation on servers used for intrusions. The timing of Tuesday's outage has sparked speculation that either the US or Russian officials may have taken action against REvil - though officials have so far declined to comment and cyber experts say sudden disappearances of groups are not necessarily uncommon. The development comes after a series of high-profile ransomware attacks which have hit major US businesses this year. The FBI accused REvil - also known as Sodinokibi - of being behind a ransomware attack on the world's largest meat processing company JBS last month.
Read More
Changing the Ownership of a File or Folder
There are many times when you have to change the ownership of a folder or a file so that other users can use them as well or if you want to transfer files to them, or an old account has been removed and all the files need to be assigned to a new user. Windows 10 keeps all these files locked under the account by default which created a folder or file. So unless a user is an admin or if the file belongs to that particular user, other users won’t be able to access or edit the file. So if you want to change the ownership of a folder or a file, then you’ve come to the right place as this post will guide you on how exactly you can do that.

To get started, make sure to follow the instructions provided below carefully.

Step 1: First, you need to open File Explorer by tapping the Win + E keys. Once you’ve opened it, navigate to the folder or file that you want to change the ownership. Step 2: Right-click on the folder or file and click on Properties and then go to the Security tab. Step 3: From there, click on the Advanced button located at the bottom right part of the window to open the Advanced Security Settings of the folder or file. Step 4: As you can see, the current owner will be listed with the Change link available next to the “Owner” label. Now click on this link to open the Select User or Group window. Step 5: After that, click on the Advanced button once again and click on the “Find Now” button to see the list of all the users as well as groups that are available in the computer. Step 6: Then select the user you want to give ownership to and click on the OK button and then click the OK button once more to save the changes made. Step 7: This will take you back to the Advanced Security Settings window but this time, the owner will be changed to whoever user you’ve selected. But you’re not done yet as you still have to check two additional options to help you completely transfer the ownership of the sub-folders as well as the files. You have to check the checkbox of the following options:
  • Replace owner on sub-containers and objects
  • Replace all child permission entries with inheritable permission entries from the object.
Step 8: After that, you need to click the Apply and OK buttons to confirm and save the changes made. This will completely transfer the ownership of the file. However, there is still one last thing you have to do – you have to go back to the Advanced Security Settings window to remove the access of any other user on the folder or file. Once you’re there, remove the existing user to make sure that the only assigned user has the access to the folder or file.
Read More
Software and hardware cleaning tips
Spring is almost here and with spring comes work, nature wakes up, people wake up, no more heating bills, time to start working, and time to start cleaning your PC. Good day everyone and welcome to another tip & trick for your PC. This time we are talking about cleaning your PC and keeping it up to software tight so you are ready for the upcoming spring season. Thank you for being with us and let's start:

Uninstall applications that you are not using

The unused applications can cause many issues for PC, from taking unnecessary disk space to even causing slower boot times if they have active services that require to be all-time up and running. They could slow down other applications like file explorer if they have extensions installed into them and can take RAM space with their background processes. If you are not using a particular application anymore or do not plan to use it soon it is always best practice to delete it from the system and thus removing all services and processes that go with it freeing so much-needed RAM and disc space.

Remove browser extensions you do not need

Browser extensions like applications can cause some issues with PC performance. if you spend a lot of time on the internet browser extensions can slow down browser and page loadings, they can make browsers take up more RAM memory and if they are outdated they could even present a serious security threat. Best practices are to keep only the extensions that you need all time, maybe some password managers or similar, extensions that you use on a daily basis, the rest should be uninstalled.

Remove things from the startup

Many services are booted along with Windows itself, some of them are crucial to the system even working, some not so. By eliminating not-needed services from the startup menu you will make sure that your boot times and overall performance of the system are in healthy form and that your PC is more responsive.

Organize files, folders, and desktop

The speeding of computer is not the only thing that you need to take care of, in order to be prepared and have maximum efficiency you will need to organize your files and folders as well. In a working environment, we often tend to save and place files all over the place, and in time they clog up desktop and hard drives. If the files are not well organized we will lose precious time trying to find anything that we need and require, so instead of wasting your time in locating files, why not organize them for easy and logical search so you can access them easily when needed.

Clean taskbar and start menu

Taskbar and start menu as well can be clogged with icons and non-organized application shortcuts and document shortcuts. Remove everything you do not need for that tidy and easily accessible access.

Sort bookmarks

It is very likely that you have plenty of bookmarks saved in our browser. It is also very likely that these bookmarks are not sorted and organized and now would be a great time to do it. Like files bookmarks also can cause you a lot of time loss if you need to find a specific one in a sea of many.

Run disc cleanup

Built-in disc cleanup utility will find temporary files, unused ones, and plenty of other junk on your hard drive. Now would be a great time to run it and get rid of junk files from your system.

Physically clean your computer

Now when we have taken care of the software part of our computer and system, it is time to clean up the computer itself. Unplug your computer and clean it, we will not go into details of this procedure, there is already an article on our site which deals with this part in detail so look it up if you need assistance with this part.

Clean your peripherals

Besides the computer for effective and pleasant work take care of your screen, keyboard, mouse, printer, etc. All of these devices need to be dust-free and clean if you expect them to behave on top of their game. If you would like to read more helpful articles and tips about various software and hardware visit errortools.com daily.
Read More
Fix DLL is not designed to run on Windows
As you know, DLL files in the Windows environment contain all the code needed by programs in order to properly function. And like with most other software, the functions in the DLL file have to be compatible with Windows especially if they are using any built-in service. So if you encounter an error that says, “DLL is either not designed to run on Windows or it contains an error”, when you try to launch a program, then this could be due to a compatibility issue. To fix this error, read on as this post will walk you through doing that. Based on the reports of users who encountered this error, the error pointed to a DLL file that was either designed to run on a different version of Windows. It is also possible that the DLL file itself is the problem. Here’s the complete error message:
“Bad Image – DLL file is either not designed to run on Windows or it contains an error. Try installing the program again using the original installation media or contact your system administrator or the software vendor for support.”
According to security experts, the DLL files that are known to trigger this kind of error message are msvcr100.dll, msvcr110.dll, msvcp140.dll, lmirfsclientnp.dll, and so on. To fix this problem, you can try to update or reinstall the program that’s throwing the error to its latest version. You could also ask the vendor for the latest version of the DLL as well as run a System File Checker scan.

Option 1 – Try to update or reinstall the program to its latest version

The first thing you can do to fix the problem is to update or reinstall the program that’s throwing the error. It is possible that the version of DLL might be using a system call that is deprecated. So if you had updated your Windows 10 computer recently, you might want to check for an update of the software or you could also try to reinstall its latest version.

Option 2 – Try asking the vendor for the latest version of the DLL

The next thing you can do to fix the error is to ask for the latest version of DLL from the vendor. There are times when the software uses an open-source version of DLL so it is better if you ask the vendor if there is a DLL file that has to be updated. If there is, then you need to make sure to register the DLL once you have it.

Option 3 – Try to re-register the problematic DLL file

You can also try to re-register the DLL to resolve the problem. The Regsvr32 tool is a command-line utility that can be used to register and unregister OLE controls like DLL and ActiveX (OCX) controls in the Windows operating system. Follow the steps below to use it.
  • Open Command Prompt as admin from the WinX menu.
  • Next, type the following commands in the elevated Command Prompt and hit Enter to execute the command. This will re-register the affected DLL file using the Windows operating system tool, regsvr32.exe.
    • exe /[DLL file]
    • exe [DLL file]
Note: Replace “[DLL file]” with the name of the DLL file that was pointed out in the error.
  • After you execute the given commands, you should see a message saying, “DllRegisterServer in vbscript.dll succeeded” if the Regsvr32 tool was able to run successfully. After that, try to install the program again and see if it now works.

Option 4 – Try to replace the DLL file from a trusted source

  • First, you need to get the new DLL file from another computer with preferably the same file version number.
  • After that, you need to boot your PC into Safe Mode and navigate to the paths listed below and then replace the file using a USB drive or other external storage devices.
    • x86: This PC > C:/Windows/System32
    • x64: This PC > C:/Windows/SysWOW64
  • Next, type “cmd” in the Cortana search box and right-click on Command Prompt, and select “Run as administrator” to open it with administrator privileges.
  • Now type the “regsvr32 ntdll.dll” command and hit Enter.
  • Restart your PC and check if the error is now fixed.

Option 5 – Run System File Checker scan

If reinstalling the program didn’t work, you can also try running the System File Checker or SFC scan to fix the error. System File Checker is a command utility built into your computer that helps restore corrupted files and missing files. Refer to the following steps to run it:
  • Hit the Win + R keys to launch Run.
  • Type in cmd in the field and tap Enter.
  • After opening Command Prompt, type in sfc /scannow
The command will start a system scan which will take a few whiles before it finishes. Once it’s done, you could get the following results:
  1. Windows Resource Protection did not find any integrity violations.
  2. Windows Resource Protection found corrupt files and successfully repaired them.
  3. Windows Resource Protection found corrupt files but was unable to fix some of them.
 Reboot your computer.

Option 6 – Troubleshoot the isDone.dll error in a Clean Boot State

You can also troubleshoot the “DLL is either not designed to run on Windows or it contains an error” in a Clean Boot state. It could be that there are some third-party applications in your computer that are preventing the application from getting installed and to isolate this possibility, you need to boot your computer in a Clean Boot State and then try installing the program again. Putting your computer in this state can help you identify which program is the culprit and thus isolates the problem. In a Clean Boot state, your computer will start using only the pre-selected minimal set of drivers and startup programs. Note that you have to disable and enable one process at a time.
  • Log onto your PC as an administrator.
  • Type in MSConfig in the Start Search to open the System Configuration utility.
  • From there, go to the General tab and click “Selective startup”.
  • Clear the “Load Startup items” check box and make sure that the “Load System Services” and “Use Original boot configuration” options are checked.
  • Next, click the Services tab and select the “Hide All Microsoft Services” check box.
  • Click Disable all.
  • Click on Apply/OK and restart your PC. (This will put your PC into a Clean Boot State. And configure Windows to use the usual startup, just simply undo the changes.)
  • After you’ve set your computer into a Clean Boot State, make sure that you’re signed in as administrator and then try to install the application again.

Option 7 – Try scanning your computer using Windows Defender

The DLL file might also be infected with malware or virus and to eliminate it which could explain why you’re getting the “DLL is either not designed to run on Windows or it contains an error”. Thus, you have to scan your computer using security programs like Windows Defender.
  • Tap the Win + I keys to open Update & Security.
  • Then click on the Windows Security option and open Windows Defender Security Center.
  • Next, click on Virus & threat protection > Run a new advanced scan.
  • Now make sure that Full Scan is selected from the menu and then click the Scan Now button to get started.
Read More
Webpage was blocked (ERR_BLOCKED_BY_CLIENT)
If you are browsing the web but suddenly encountered the ERR_BLOCKED_BY_CLIENT error on your Chrome browser in Windows 10, read on as this post will guide you in fixing this problem. This kind of error has already been reported by a number of Chrome users and it seems that the problem has something to do with a plugin or extension. Here’s the exact content of the error:
“This webpage was blocked by an extension (ERR_BLOCKED_BY_CLIENT)”
This kind of error, as pointed out, could be caused by an extension or plugin on Chrome that is blocking the web page. It is also possible that the version of Chrome is obsolete or that there could be more than 100 bookmarks in the Bookmark Manager. Before you troubleshoot the problem, make sure that you download the latest version of Google Chrome and see if it fixes the error. If it didn’t, then you can try opening a web page in Incognito Mode or disable and remove the extension that’s causing the problem. You could also try to remove any surplus bookmarks.

Option 1 – Try to open the web page in Incognito Mode

The first thing you can do to fix the problem is to try opening the web page in Incognito Mode. When your browser is in this mode, it will work without extensions. This would help in fixing the problem especially if it was caused by some extension or toolbar in your browser. All you have to do is open any web page in Chrome and tap the Ctrl + Shift + N key combination to open a window in Incognito Mode.

Option 2 – Try to disable and get rid of the problematic extension

After you’ve isolated the problem and have determined that an extension is the one that’s causing it, then the next thing you have to do is to disable or get rid of that extension.
  • Open Chrome and press Alt + F keys.
  • Go to More tools and click Extensions to look for any suspicious browser extensions or toolbars.
  • Click the Recycle bin and select Remove.
  • Restart Chrome and press Alt + F keys again.
  • Proceed to On Startup and mark Open a specific page or set of pages.
  • To check if the browser hijacker is still active, click Set pages, if it is active, overwrite the URL.
Note: If removing the browser extensions or toolbars didn’t work, you can also try to reset your Google Chrome browser.
  • Open Google Chrome, then tap the Alt + F keys.
  • After that, click on Settings.
  • Next, scroll down until you see the Advanced option, once you see it, click on it.
  • After clicking the Advanced option, go to the “Restore and clean up option and click on the “Restore settings to their original defaults” option to reset Google Chrome.
  • Now restart Google Chrome.

Option 3 – Try removing surplus bookmarks

If your Chrome browser is already supporting more than 100 bookmarks, you might want to consider deleting them as it could also be one of the reasons why you’re getting the ERR_BLOCKED_BY_CLIENT error. To remove these bookmarks, just open the bookmark library by typing this address “chrome://bookmarks/” in the address bar of Chrome and tap Enter and press Shift and then select the surplus bookmarks by using the arrow keys. After that, click Delete to get rid of them.

Option 4 – Try clearing browser data

There are times when some data in the browser is conflicting with the loading of the website and triggers errors like ERR_BLOCKED_BY_CLIENT. And so you can try to clear your browser’s data. This might be a very basic solution but oftentimes it works in fixing this kind of error in Google Chrome. Follow the steps below to clear the data in your browser.
  • Open your Google Chrome browser.
  • After that, tap the Ctrl + H keys. Doing so will open a new panel that allows you to delete the browsing history and other data in your browser.
  • Now select every checkbox that you see and click on the Clear browsing data button.
  • Then restart your Chrome browser and check if you can now open any website or not.
Read More
How to Fix Error Code 0x8007232B

How to Fix Error Code 0x8007232B

Error Code 0x8007232B (Code 0x8007232B) – What is it?

Error code 0x8007232B (Code 0x8007232B) is an error that occurs when you attempt to activate Windows Server 2008 or Windows Vista.

Common symptoms include:

  • Attempting to activate Windows 7, Windows 8, or Windows Server 2012 and you receive an error message.
  • The error message says: “Windows could not be activated. Key management services host could not be located in domain name system, please have your system administrator verify that a KMS is published correctly in DNS”
  • The error message says “The directory name, file name, or volume label syntax is incorrect”.

Error Causes

  • Error Code 0x8007232B occurs when you attempt to use media that is volume licensed to install: Windows 8, Windows 7, Windows Vista Enterprise, Windows Vista Business, Windows Server 2012, Windows Server 2008, Windows Server 2008 R2.
  • This error code also occurs when the activation wizard is unable to connect to a Key Management Service host computer.

Further Information and Manual Repair

Error code 0x8007232B can be seen when you are trying to activate windows, on several different operating systems. This problem can usually be easily corrected, but in the event that it can't, please contact a computer repair technician. When you try to install any of the previously mentioned Windows products, they use a generic product key to install the volume-based license software. If you do have a KMS host computer configuration and see these error codes, that means the correct DNS entries are not being seen on the computer. If there is not a KMS host computer setup, you need to do this setup, otherwise switch to a MAK product key method, and activate the volume license installation that way.

Method One:

Using a Multiple Activation Key as opposed to KMS activation

  1. Click the Start icon, click on All Programs, click on Accessories, right-click on Command prompt.
  2. Click on “Run as administrator”. Type in the password or provide confirmation if prompted for administrator password or confirmation.
  3. When asked for the command prompt, enter in the following and then hit the Enter buuton: slmgr -ipk xxxxx-xxxxx-xxxxx-xxxxx-xxxxx  Note: this placeholder represents the MAK product key.

Method Two:

Configure a KMS host server for the clients to activate against.

A KMS host server needs to be configured for the clients to activate against. When there are no KMS host servers configured near you, install and activate a KMS server key. After this, configure a computer on the network to host this KMS software and publish the Domain Name System (DNS) settings.

Method Three:

When the client cannot locate a KMS host on the network for activation:

1. Verify that your computer has the KMS host installed and activated by using a KMS key that is registered in DNS. You will follow these steps to do that:

  1. Click the Start button, click on All Programs, click Accessories, and then right-click on Command Prompt.
  2. Click on Run as Administrator. Type the password or provide confirmation if you are asked for an administrator password or for confirmation.
  3. In the command prompt box, type the following command and press ENTER: nslookup -type=all _vlmcs.tcp>kms.txt
  4. Then open the KMS.txt file generated by this command. The file will contain at least one entry that relays the SRV service location.

2.  A KMS host server registers a DNS SRV record once every 24 hours by default. You should check the registry to see if the KMS host server is registering with the DNS. Follow these steps to do so:

  1. Click on Start, type in regedit, and then press Enter.
  2. Locate HKEY_LOCAL_MACHINESOFTWAREMicrosoftWindowsNTCurrentVersionSL and then click on it.
  3. The KMS server does not register in DNS if the DisableDnsPublishing subkey is existing and has a value of 1. If this subkey is missing altogether, create a DWORD value called the DisableDnsPublishing. If the dynamic registration is suitable, the subkey value should be changed to 0. Right-click DisableDnsPublishing, click on Modify, enter 0 into the Value data box, and click OK.  
Congratulations, you have just fixed Error Code 0x8007232B in Windows 10 all by yourself. If you would like to read more helpful articles and tips about various software and hardware visit errortools.com daily. Now that’s how you fix Error Code 0x8007232B in Windows 10 on a computer. On the other hand, if your computer is going through some system-related issues that have to get fixed, there is a one-click solution known as Restoro you could check out to resolve them. This program is a useful tool that could repair corrupted registries and optimize your PC’s overall performance. Aside from that, it also cleans out your computer for any junk or corrupted files that help you eliminate any unwanted files from your system. This is basically a solution that’s within your grasp with just a click. It’s easy to use as it is user-friendly. For a complete set of instructions in downloading and using it, refer to the steps below Perform a full system scan using Restoro. To do so, follow the instructions below.
      1. Download and install Restoro from the official site.
      2. Once the installation process is completed, run Restoro to perform a full system scan. restoro application screen
      3. After the scan is completed click the “Start Repair” button. restoro application screen
Read More
1 2 3 162
Logo
Copyright © 2022, ErrorTools. All Rights Reserved
Trademarks: Microsoft Windows logos are registered trademarks of Microsoft. Disclaimer: ErrorTools.com is not affiliated with Microsoft, nor claim direct affiliation.
The information on this page is provided for information purposes only.
DMCA.com Protection Status