Firefox shows wrong or no bookmark favicon

If you have just updated your Mozilla Firefox browser as of late and you noticed that it’s showing wrong or no bookmark favicon at all, then read on as this post will provide you with potential solutions that can help you resolve the problem. The basic thing you can do to fix it is to either refresh or reset the cache for favicon and then force restart the favicon service. However, if you’ve already tried this and it didn’t work, then there are still other options you can try. You can try to rebuild the configuration file for the favicon or restart the favicon service. You could also try disabling all the add-ons on your browser or scan your computer for adware. For more details, refer to each one of the options laid out below.

Option 1 – Try to rebuild the favicon configuration file

Mozilla Firefox actually creates a file each time you bookmark a webpage and this is called “favicons.SQLite”. This file is located on your computer and for you to fix the issue in Firefox, you need to rebuild this file and in order to do that, follow these steps:

  • First, you need to unhide the hidden files in your computer by enabling the “Show hidden files” option so that you’ll be able to see the hidden files in your computer.
  • After that, navigate to this path: C:Usersyour_usernameAppDataLocalMozillaFirefoxProfilesyour_profile_name
  • From there, you need to find the “favicons.SQLite” file and once you found it, delete it.
  • Next, you have to open the Firefox browser and create the same favicon configuration file which should be automatically created.
  • Now check if you can now see bookmark favicons on your Firefox browser or not.

Option 2 – Try to restart the favicon service

If the first option didn’t work, you can try to restart the favicon service instead. Restarting the favicon service can help if you do not see the correct bookmark favicon on your Firefox browser. To restart this service, follow the steps below.

  • You need to first open the Firefox browser and in the address bar, type “about:config” and tap Enter.
  • After that, you will see a page that displays a warning message. On that page, you need to click the “I accept the risk!” button to proceed.
  • Next, using the search box on the page, look for the “devtools.chrome.enabled” option. The value for this option should be set to “False” by default.
  • Double click on this option to set its value to “True”.
  • Once done, go to Menu > Web Developer > Browser Console or you could also tap the Ctrl + Shift + J keys, alternatively.
  • Afterwards, paste this command in the pop-up window that appears and then tap the Enter button: var fS = Components.classes["@mozilla.org/browser/favicon-service;1"] .getService(Components.interfaces.nsIFaviconService); fS.expireAllFavicons();
  • Once you’re done, restart your Firefox browser to check if it fixes the problem or not.

Option 3 – Try to disable all the add-ons in Firefox

The next option you can try to fix the problem is to disable all the installed add-ons in Firefox. More often than not, add-ons can cause issues in the browser so it is possible that one of the add-ons in Firefox is causing it to show incorrect or no bookmark favicon. To resolve this problem, you have to disable all the add-ons by opening Firefox and then going to Menu > Add-ons or you could also tap the Ctrl + Shift + A keys. After that, go to the Extensions section and click on the respective Disable buttons for each one of the add-ons. Once done, restart your computer and check if you can now see the bookmark favicons or not.

Option 4 – Try scanning your computer using Windows Defender

It is possible that the bookmark favicon problem is caused by some adware in the Firefox browser so you have to scan your computer to check by using security programs like Windows Defender.

  • Tap the Win + I keys to open Update & Security.
  • Then click on the Windows Security option and open Windows Defender Security Center.
  • Next, click on Virus & threat protection > Run a new advanced scan.
  • Now make sure that Full Scan is selected from the menu and then click the Scan Now button to get started.
If you like to learn and find out more about various Windows errors, and how to repair them go to our vast archive or use search to find articles that will explain and help you in solving your issue.
However, if you prefer to do things fast and with automatization then we are proposing to use an automated solution for your issues. The application that we are recommending is Advanced System Repair Pro
Advanced System Repair utilizes multiple tools all in one to give you a quick, simple, reliable, and very thorough diagnosis of your PC. It brings you all the tools you need in one program to clean, fix, protect, optimize and boost your PC!
1-Click Maintenance
All the tools to make it simple and easy! It's like having a professional technician at the click of a mouse.

Junk Cleaner
Keeping your computer free from unnecessary clutter also helps make your computer last longer. Like any other machine, if you keep it clean and take care of it, it will serve you better for longer!

Optimize background apps
Optimize applications background activity with the built-in Application Optimizer feature.

Disk Defrag
With a simple 1-click, Advanced System Repair speeds up your PC by assembling fragmented files on your machine and organizing them more efficiently.

Malware Removal
Finds and removes all types of harmful malware including trojans, worms, bots, adware, spyware, PUPs, and more!

Privacy Cleaner
The all-in-one privacy suite to Clean Your Tracks & Protect Your Privacy! Make your computer safe, secure, and more efficient!

System Tweak/Optimizer
ASR will analyze your complete system and settings to adjust your PC to function at its maximum performance.

Registry Cleaner
Over time, as you install and uninstall applications, the registry can become cluttered with old entries and broken settings which can result in program crashes, and annoying messages and slow the computer down.
Visit our Advanced System Repair Pro Download page to inform yourself about all the benefits of this software and get a free trial copy of it.
advanced system repair pro

Advanced System Repair Pro

One-click automated PC repair solution
ASR logo
With Advanced System Repair Pro you can easily
Replace damaged files
Restore performance
Free disk space
Remove Malware
Protects WEB browser
Remove Viruses
Stop PC freezing
DOWNLOAD
Privacy Policy | Terms of Use | Uinstall
Advanced System Repair Pro is compatible with all versions of Microsoft Windows including Windows 11

Share this article:

You might also like

Brave and Vivaldi are blocking google FLoC
FLoC is Google’s alternative to third-party cookies and is based on machine learning. This will allow the browser, any browser, to anonymously study how users are browsing and then group them into ‘cohorts’. Following this, you will be served ads based on your cohort and not on your individual data. So, you are still going to be targeted with ads but in a more anonymous manner. Google claims that this will improve user privacy since this “federated learning” happens on the user’s device and artificial intelligence-based learning involves sharing lesser users than what happens with third-party cookies. If something like this gets widely adopted by ad companies and services, it should “protect users” from tracking methods that are more intrusive than third-party cookies, like browser fingerprinting.

Who is against it?

Privacy-focused browsers DuckDuckGo, Brave, and Vivaldi have all warned users against FLoC and have said that they are going to block it on their end. Brave says that Google FLoC has a design that does not respect the customer’s privacy and consent. It has been designed to provide browsing behavior and interest data with any website that users may interact with, and this process does not involve fully informed consent. Vivaldi, another popular Chromium-based web browser, has also made its stance clear regarding the status of FLoC. The company said in a Reddit thread that the FLoC experiment does not work in Vivaldi. It happens because for FLoC to work, some features need to be enabled under the hood, but Vivaldi does not provide those options. The company also added that it plans to stop the entire FLoC component from being a part of the browser, regardless of how Google may implement it. Considering that Brave and Vivaldi have been privacy-focused browsers since their beginnings, the decision to stay away from FLoC is not surprising.
Read More
Blu-ray player does not recognize the disc
So, you just made some popcorns, dimmed light, relaxed in from of the TV, pressed play on your application and Blu-ray drive can not read your movie. Your movie night failed sadly, but there is hope and in this article, we are going to explore and offer you solutions on what to do when something like this happens so you do not miss another movie night and some hard-earned relaxation. Please note that in this article we are assuming that you are using a Blu-ray player on your PC, so some of the solutions presented are meant only for this case. So the first thing that you are supposed to do is to check the disc itself. You can turn the disc around and visually check the disc for fingerprints and scratches which can be fatal for disc playing, alternatively, you can try to play the same disc on another device and if it fails there also it is not the disc, it is your drive. So if it is no issue with the disc let's see that seems to be a problem with the drive. The common thing that could stop disc reading are cables, check all connections and cables in the back of your device to be sure that everything is plugged in correctly and nicely. After checking cables if the issue persists lens cleaning is the next step. Over time lens from the Blu-ray, the device becomes dirty and dust accumulates on it, there are special cleaning discs on market made especially for this purpose, to clean the dirty lens of optical devices. If you have one put it in and clean your lens. After lens cleaning with a specialty disc, a good idea would be to use compressed air in a can to reduce the dust inside so no excess dust will accumulate quickly again on the lens itself.

So the device is cleaned and checked and still no disc playing?

Update firmware first. In order to accomplish this visit your device manufacturer's website and follow instructions there on how to upgrade firmware. If this did not helped also update or reinstall device drivers. Go to device manager and update drivers for your device by right-clicking on it and choosing update driver. If none of the things helped, go to command prompt as administrator and type in SFC /scannow, leave the process to finish, and reboot.
Read More
Windows Update service could not be stopped
If you are running the Windows Update service but decided to stop it but you encountered an error message instead that says, “The Windows Update service could not be stopped”, read on as this post will help you fix the problem. This kind of error appears when you use the Command Prompt to stop the Windows Update service, especially if you are using cmd without admin privileges. A lot of users reported that they were not able to disable the automatic Windows Update in Windows 10 using Command Prompt. The command used to stop the Windows Update service is the “net stop wuauserv” command. However, when some users executed this command, they got the error message. So if you are one of these users that can’t stop the Windows Update Service via Command Prompt, you can try to fix that using PID as well as checking the Service dependencies. For more details, follow the given options below.

Option 1 – Try to stop the Windows Update service via PID

In case you don’t know, each running service or process has its own unique ID or PID and you can find it in the Task Manager. You can use it to stop the Windows Update service. How? Refer to these steps:
  • Tap the Ctrl + Shift + Esc keys to open the Task Manager.
  • Next, go to the Services tab and look for the service named “wuauserv” and get its PID.
  • After that, type “cmd” in the Windows Start search and right-click on Command Prompt from the search results and then select the “Run as administrator” option.
  • After opening Command Prompt with admin privileges, execute this command: taskkill /f /pid <PID>
Note: You need to replace “<PID>” with the PID of the “wuauserv” service. For instance, the PID is 6676, then this is how the command should be “taskkill /f /pid 6676”.
  • After you execute the command, you will this message on your screen, “SUCCESS: The process with PID 6676 has been terminated” which indicates that you have stopped the Windows Update service successfully.

Option 2 – Try to check the Service dependencies

Dependencies of a Windows Service in Windows 10 are when windows services depend on other services. Such is the case with the Windows Update service – it also depends on three different services such as the Remote Procedure Call or RPC service, DCOM Server Process Launcher, and the RPC Endpoint Mapper. Meaning to say, if two of these services are not working as expected, then the dependant service will also be affected. This could be the reason why the Windows Update service could not start.
  • Tap the Win + R keys to open the Run dialog box.
  • Next, type “services.msc” in the field and hit Enter to open Windows Services.
  • From the list of Services, look for the following services:
    • Remote Procedure Call (RPC) Service
    • DCOM Server Process Launcher
    • RPC Endpoint Mapper
  • After you find these services, double click on each one of them and check whether the Startup type for all is set to Automatic and the Service status is set to Running or not.
  • If the service status is not running, then click the Start button. Afterward, check if you can now run the Windows Update service.
Read More
Change date and time inside Windows 11
date and time windows 11
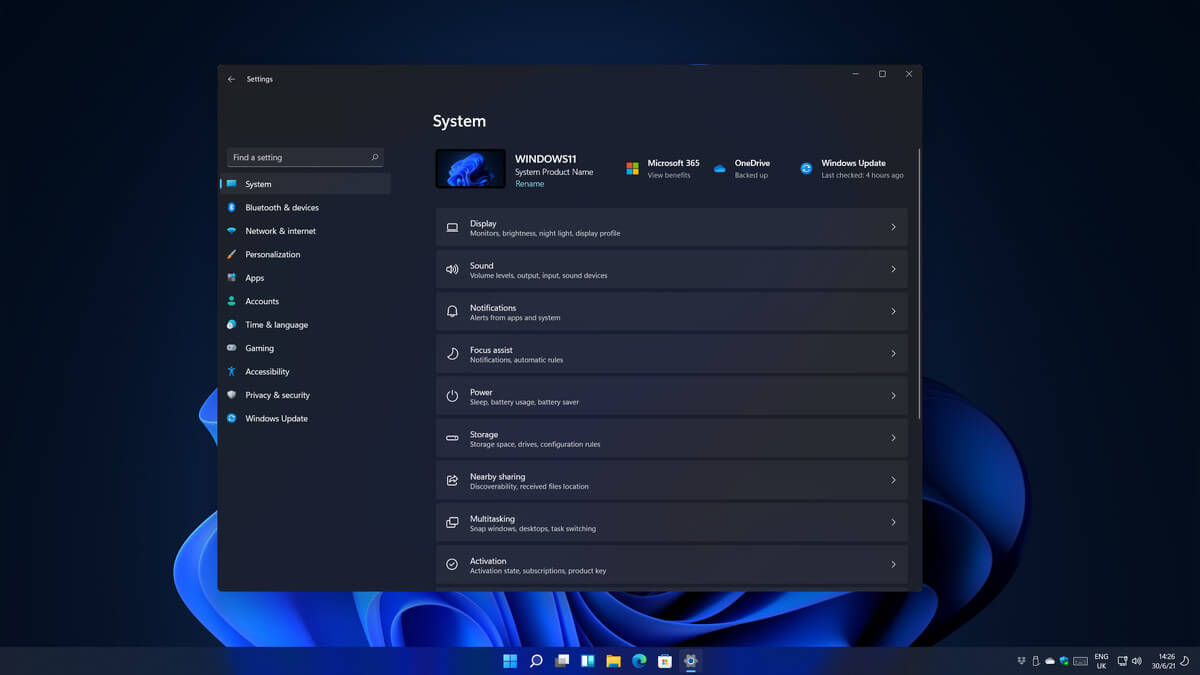
Same as Windows 10, Windows 11 also keeps track of date and time using an internet time server. But in a case that you need to change the date or time for any kind of reason here is a guide for that process:
  1. Press ⊞ WINDOWS + I to open settings
  2. Click on Time & Language in Taskbar
  3. Inside Time & Language click on Date & Time
  4. Turn off Set Time Automatically by clicking on the switch next to it
  5. Below find Set the date and time manually and click on Change
  6. Inside, Change Date and Time window use the drop-down menu to set desired date and time
Read More
How to Fix Runtime Error 339
[vc_row][vc_column][vc_column_text]

Troubleshoot Runtime Error 339

What is Runtime Error 339?

Runtime Error 339 is a common error code format that appears when a computer overloads with too much data. However, in some cases, it may occur due to the missing registry keys, DLL files, or during installation. It may lead some programs to shut down all of a sudden and may also corrupt files on the system.

Solution

Download Available to Completely Repair Runtime Error 339

Restoro box imageError Causes

This error code is alarming as it is a critical sign of an unstable system followed by improper maintenance of the computer. The potential risks associated with the Runtime Error 339 include:
  • System startup issues
  • Slow PC performance
  • System crash and failure
  • System file corruption
Therefore, to avoid these risks and system failure, it is advisable to fix the runtime error 339 immediately.

Further Information and Manual Repair

If you have a Runtime Error 339 issue on your computer, here is a great way how you can fix it right away:

Scan For Viruses

Improper maintenance of the computer indicates that your system might be exposed to viruses and malware. Viruses can modify the Windows registry and lead to Runtime Error 339. Therefore, first, it is important to scan for viruses on your PC.

Identify Software that Causes Errors

Scanning will help you identify software that produces this error on your PC. Once you identify them, either uninstall them or update the program. To uninstall the program, go to the Control Panel and then click on the Add/Remove program if you have Windows XP, if not then click on the Programs and Features item. Now delete the program from your system.

Obtain the Latest Version of the Installer and Re-install the Deleted Program

Once you get your hands on the latest version of the installer, run it on your system by following the on-screen instructions. Install the program. There is also another way to fix Runtime Error 339 and that is by downloading the Runtime Error tool.

Use a Professional Runtime Error Fixer Tool

To fix the error you can also use a professional Runtime Error fixer tool to scan for viruses on your PC. It is available for free download here. Download the tool and install it on your computer. Simply scan your PC after installation. Click the repair button once the scan is complete. This tool fixes problems in just a few minutes.[/vc_column_text][/vc_column][/vc_row]
Read More
How to Fix Error Code 0x80240001 on Your PC

How to Fix Error Code 0x80240001 on Your PC

Error Code 0x80240001- What is it?

Error Code 0x80240001 usually occurs in Windows 10 and is specific to the process of updating your system. It is similar to an error code found in previous versions of the software during the update process. There are a number of steps that can be taken to solve this error code, most of which are fairly easy for the average user to undertake.

Common symptoms for this particular error code include:

  • Inability to complete the updating process of your Windows 10 system
  • A notice that the Windows Update Agent is not able to provide appropriate services through the update module.

While it can be frustrating to have this message appear during the update process, users can resolve the error in a number of ways. However, if you are not confident in your ability to follow the steps below or if the methods listed fail to resolve the problem, contact a certified Windows 10 repair technician to assist you in the process.

Solution

Restoro box imageError Causes

Error Code 0x80240001 occurs when the Windows Update tool is unable to complete its service successfully. This error occurs most often when users attempt to update to Windows 10 from older versions of the software, including Windows 7, 8, or 8.1.

This particular error code can also occur when your system has not been updated in a regular fashion. Stacked updates make it more likely for Error Code 0x80240001 to occur.

In most cases, when Error Code 0x80240001 appears on your screen, the update process will be halted. Sometimes, the screen may display a single color background, removing the appearance of all other windows and applications.

Fortunately, there are several methods that you can use to attempt to circumvent the problem and see the update process through to completion.

Further Information and Manual Repair

While it can be frustrating to deal with an error when you attempt to update your Windows software, there are several ways that you can seek to resolve the issue that causes Error Code 0x80240001. These steps are relatively simple to complete and do not require advanced techniques to be used. However, if you are not confident in your ability to complete the steps listed below, enlist the aid of a qualified Windows technician to help you.

Here are the most common ways that Error Code 0x80240001 can be resolved for Windows 10:

Method One:  Download and Use the Windows Repair Tool

From the Windows website, you can download the Windows Repair tool, if it is not already installed on your computer. While there are other tools available through outside sites that claim that they can resolve this error, in many cases, they can be a carrier for viruses and other kinds of malware, so it is inadvisable to use non-Windows tools to fix this particular error code.

Once you have successfully added the Windows Repair tool to your computer, open it up and look for the option to run “Repair Windows Update.” Using this process, your system can search for and resolve the error, allowing you to successfully run the update tool through to completion.

Method Two:  Uninstall Recently Added Software

In some cases, software that has been recently added to a non-updated computer can cause the update process to experience issues. If you believe that this may have occurred in your case, simply uninstall the software in question, then attempt to run the Windows 10 Update process again.

The best way to prevent this error from reoccurring when you seek to update your Windows 10 system is to apply updates within a short period of time from their release date. It is recommended that users update regularly, which can allow them to avoid a number of issues that are common to the update process.

If you have any difficulty in resolving Error Code 0x80240001 after you have attempted these steps, you may need to enlist the help of a qualified technician who is familiar with the specific errors related to the Windows 10 Update process. This can especially be helpful if you have recently installed a number of new kinds of software and are unsure of whether or not any specific one may be causing your issues. If you wish to always have at your disposal a utility tool to fix these Windows 10 and other related issues when they do arise, download and install a powerful automated tool.

Read More
Fix Installer encountered an error 0x800f0905

Are you trying to update your Windows 11 OS and are receiving a 0x800f0905 error? Do not sweat and do not worry we have a couple of solutions that you can try in order to fix this issue. How this error is tied to various things like misconfigured settings, corrupt system files, and more there is no way to present one simple solution that will solve everything in one click.

error 0x800f0905Therefore we are presenting a couple of solutions that will fix your issue, it is advisable to follow them as presented since they will go from the most common to the more complex one.

Run the troubleshooter

The most common fix and one that will actually repair things most of the time is simply running the Windows Update troubleshooter.

  1. Press ⊞ WINDOWS + I to open the Settings app
  2. Click on System on the left
  3. Click on Troubleshoot in the right part
  4. Click on Other Troubleshooters
  5. Find the Windows Update section and click on Run
  6. Let troubleshooter finish

Reset Windows update components

If the previous solution did not work we will need to do things manually. Follow the steps as presented in order to reset Windows update components.

  1. Press ⊞ WINDOWS + S to open search
  2. Type in Terminal
  3. Select Run as administrator
  4. Click on Yes on the User account control (UAC) pop up
  5. Press CTRL + SHIFT + 2 to open Command prompt
  6. Inside command prompt type each line of a command followed by ENTER after each line:
    net stop bits
    net stop wuauserv
    Del “%ALLUSERSPROFILE%Application DataMicrosoftNetworkDownloaderqmgr*.dat”
    Ren %Systemroot%\SoftwareDistribution\DataStore DataStore.bak
    Ren %Systemroot%\SoftwareDistribution\Download Download.bak
    Ren %Systemroot%\System32\catroot2 catroot2.bak
    exe sdset bits D:(A;;CCLCSWRPWPDTLOCRRC;;;SY)(A;;CCDCLCSWRPWPDTLOCRSDRCWDWO;;;BA)(A;;CCLCSWLOCRRC;;;AU)(A;;CCLCSWRPWPDTLOCRRC;;;PU)
    sc.exe sdset wuauserv D:(A;;CCLCSWRPWPDTLOCRRC;;;SY)(A;;CCDCLCSWRPWPDTLOCRSDRCWDWO;;;BA)(A;;CCLCSWLOCRRC;;;AU)(A;;CCLCSWRPWPDTLOCRRC;;;PU)
    cd /d %windir%\system32
    regsvr32.exe atl.dll
    regsvr32.exe urlmon.dll
    regsvr32.exe mshtml.dll
    regsvr32.exe shdocvw.dll
    regsvr32.exe browseui.dll
    regsvr32.exe jscript.dll
    regsvr32.exe vbscript.dll
    regsvr32.exe scrrun.dll
    regsvr32.exe msxml.dll
    regsvr32.exe msxml3.dll
    regsvr32.exe msxml6.dll
    regsvr32.exe actxprxy.dll
    regsvr32.exe softpub.dll
    regsvr32.exe wintrust.dll
    regsvr32.exe dssenh.dll
    regsvr32.exe rsaenh.dll
    regsvr32.exe gpkcsp.dll
    regsvr32.exe sccbase.dll
    regsvr32.exe slbcsp.dll
    regsvr32.exe cryptdlg.dll
    regsvr32.exe oleaut32.dll
    regsvr32.exe ole32.dll
    regsvr32.exe shell32.dll
    regsvr32.exe initpki.dll
    regsvr32.exe wuapi.dll
    regsvr32.exe wuaueng.dll
    regsvr32.exe wuaueng1.dll
    regsvr32.exe wucltui.dll
    regsvr32.exe wups.dll
    regsvr32.exe wups2.dll
    regsvr32.exe wuweb.dll
    regsvr32.exe qmgr.dll
    regsvr32.exe qmgrprxy.dll
    regsvr32.exe wucltux.dll
    regsvr32.exe muweb.dll
    regsvr32.exe wuwebv.dll
    netsh winsock reset
    net start bits
    net start wuauserv

Well, that was a lot of typing or copy and pasting line by line followed by ENTER after each one but hopefully, your issue is solved. These provided solutions fixed most users' issues with this error but if for some reason this is not the case for you, move to the next step.

Run the SFC scan

If you are still having 0x800f0905 error after previous attempts do the following:

  1. Press ⊞ WINDOWS + S to open search
  2. Type in Terminal
  3. Select Run as administrator
  4. Click on Yes on the User account control (UAC) pop up
  5. Press CTRL + SHIFT + 2 to open Command prompt
  6. Type in sfc /scannow and press ENTER
  7. Wait for the scan to finish
  8. Reboot the computer

Perform a system restore

If for any reason previous solutions have not provided you with the solution we will try to fix the issue by performing system restore.

  1. Press ⊞ WINDOWS + S to open search
  2. In the text box type in Create a restore point
  3. Click on the closest match in search results, should be Create a restore point
  4. Click on System Restore or on Next if there are no points created
  5. Choose to restore a point from the list and click on next
  6. Review settings and click on Finish
  7. Wait for the process to finish and for the computer to restart

Manually install update

If for any reason Windows still cannot install the update, try installing it manually.

  1. Go to Windows 11 update history and find the Knowledge base (KB) number for the latest version
  2. Go to the official Microsoft Update Catalog
  3. Paste the KB number in the search box and press ENTER
  4. Click on DOWNLOAD
  5. Double click on the downloaded file to launch the installer
  6. Follow on-screen instructions and install the update

Perform Windows 11 reset

If nothing worked, reset your Windows 11 to its factory settings to fully repair and reset the whole operating system.

Read More
Best gifts for Gamers and PC enthusiasts
The holiday season is almost upon us and buying gifts for loved ones can sometimes present some headaches, especially if that loved one is a Gamer or PC enthusiast. We have all been there and how almost every household today has a console or PC struggles are infecting more and more people. But do not despair, we have made a nice list of potential gifts for you. giftsThe list contains some nice essential and good things but we gave our best not to break the bank so you will not find any large screens or 300$ keyboards here. Of course, you can always get expensive gifts and if you have money for it do it, it is just we want to have affordable stuff here.

A Steam gift card

For gamers, a good game is a great gift but most of the time when we are buying a game we can miss what the person wants. That is why a Steam gift card is a great gift for gamers. He can use it and buy whatever he or she wants for its value.

Xbox Game pass

This is another for those Gamers type. Xbox game pass is a great gift even if you do not own Xbox since all games will work on PC as well. Xbox Game Pass Ultimate includes the PC version, which will unlock somewhere between 300 and 350 games automatically. It’s a subscription service, so your PC gamer will have to keep up with it. The monthly price is worth it, though.

Pack of cable ties

Almost every PC user has tons of cables lying around, and most of the time they are not really tidy. Cable ties come to the rescue!!! Let us be honest, no one likes cables that are scattered all over the place, even the computer users so if they do not have this essential piece of equipment, we are sure they will like it.

Compressed air duster

Dust is enemy no.1 for computer users, it gets into the keyboard, into small spaces, etc. It is very difficult to get it out so an air duster for compressed air is a great cleaning gift for any kind of computer enthusiast. You can get it with a can of compressed air as well so everything is ready for cleaning.

New Headset

A headset is always a great gift. Over time earbuds can deteriorate and get damaged simply just by using them and when enough time passes even cables can start losing contact and overall sound quality may drop. Usually, computer users change headsets like keyboards so if your loved one has some old headsets showing their age, a new one is a perfect present.

New SSD drive

More hard disk space is always a welcome sight for any PC user and new SSD drives fueled with new technology are faster than ones of the same size in past years making them a perfect gift.

Large mouse pad

A good mouse pad can mean a lot to a gamer. Over time mouse pad deteriorates simply with its use so a new and fancy large pad is a great gift for any user. If you want a great gift, make it with RGB light.
Read More
Ways to lose your Facebook account to hackers
Facebook graphicsToday most people have Facebook accounts where they keep in touch with friends and family. But large Facebook network of users is also very interesting to another party as well, hackers. There are many ways hackers can steal your data via direct hacks, trickery, and social engineering in order to get your credentials, emails, and many other things using them to wreak further havoc. Once a hacker has needed information it is very difficult to minimize impact and all of your information could be compromised from a list of friends to credit card numbers. Keep on reading to learn how can you protect yourself against these attacks and learn about common practices that hackers use in order to steal your data.

Stealing Facebook data via email

A couple of years ago there was a lot of talk about not opening suspicious emails. Well, it still holds today. The difference is that today’s fake emails have become very difficult to differentiate from official ones since hackers put the effort into creating them copying fonts and layout, making them identical to original ones. So if emails look and feel like original ones how do you know if it is fake? Very simple, you do not click anything in it. If Facebook or for that matter any company wants to contact you they will do via their platform. Clicking inside a hacker's email will lead you probably to a fake Facebook website replica where you will have to type in your username and password providing an attacker with your login credentials, etc. If you receive this kind of mail where there are threats about terminating an account, missing payments, etc. it is always the best thing to go directly to Facebook and see if you have any kind of notifications there. Do not trust any emails that ask for account information, request money, or threaten to suspend your account.

Phishing attacks

As stated previously if you click on the link inside fake mail it will probably lead you to a website replica of the original. Although hackers can pretty much copy all things from an original website like layout, fonts, colors, etc. There is one thing that he cannot, web address. Take a good look into your browser address bar to see if there is a typo or anything strange in the address of a website. Also, make sure to check for the secure icon in the web address before signing in.

Fake Facebook buttons

If by any chance and for whatever reason, you end up on a fake Facebook site be vary careful about like and other buttons since buttons themselves behave and act like links inside your browser. IF when you click on like you get a prompt to sign in, it is almost 100% that you ended up on a phishing fake website.

Password brute force attack

Having complex and long passwords is a must. If your Facebook password is 12345 there is a very high chance that if a hacker wants he can easily guess it via trying out the most used and simple passwords via simple guessing. To avoid being hacked just for having poor passwords try to think of something longer, combine letters and numerical characters, place special characters inside it or just simply as the best solution use a password manager and create passwords with it.

Password grab outside Facebook

If you use the same password for multiple accounts which is a big no-no and you should not do it then hackers can use passwords from other services and login into your Facebook in order to steal data. Avoid these situations by having different passwords for different accounts or use a password manager to keep everything in order.

Hacking via key logger

Some time ago we have made an article which explained in detail everything you need to know about key loggers here: https://errortools.com/windows/how-to-know-if-you-have-keylogger-in-windows/ Anyway, this is a more advanced hacking technique in order for hackers to steal your data and it includes placing malicious applications into your system that records your keystrokes and sends them directly to hackers. Since this is an application best protection against this type of attack is to have a security suite installed and active on your PC or device you use to go to Facebook.

Connecting and surfing on an unsecured network

Using no password and unsecured WI FI or any other type of network is risky at least. You can have all protection installed on your device and have a strong password but hackers also logged in to the same network can track all outgoing stuff going through mentioned network leaving you again exposed to attacks. It is better to connect to your mobile operator network than on free WI FI, at least there is some level of security in your operator network while free WI FI is completely unsecured. Getting a virtual private network or VPN is also one thing you could think about for protection since almost all VPN services will encrypt your data thus providing you with a security layer even on unsecured Wi-FI.

Conclusion

Hacking and stealing have come a long way from their infant stages and in today’s world when we use a lot of gadgets and have plenty of online presence taking some steps for security is a must. I hope that you have found anything here informational and helpful so you can avoid getting your data compromised.
Read More
6 colors of Western Digital
I must admit that I am a big Western Digital fan, I have been using their hard drives really long time and I must admit that I am very happy with their products. Sometimes they could be a little more expensive than other drives on market but security and performance are on their side. If you ever wanted to purchase Western Digital or WD hard drives or you are considering getting one, no doubt that you have come across their color cryptic line of products. 1TB Hard drive can come in 6 different colors in your search products query and if you are not familiar with the WD color coding of hard drives you might be a little lost as to which one is right for you and what are the differences. This article is made to explain exactly that, what are WD colors representing so you can choose the right one for your needs. Western Digital has decided to use color codes in order to mark their series of disks which means that each color represents different hard drive series and it is made and aimed for different use, we are going to explore in detail each series below:

WD BLUE

Blue series is all around typical hard drive made and meant for daily use in desktop computers for all kinds of tasks. You can use it in casual gaming or for storage, its purpose is tailored for all-around casual daily users.

WD RED

WD Red HDD is designed for NAS and RAID systems. Its purpose is to be turned 24/7 who ever need access to it. Get this series if you need to have constant access to files or if you need a reliable RAID hard drive.

WD GREEN

Green series of the hard drive is manufactured for low power consumption and for storage, they are meant to be used for storage and not accessed regularly.

WD PURPLE

Purple line of hard drive products is designed solely for video surveillance systems. Instead of having a preference on reading data like WD RED, the PURPLE series is given preference on writing, constant writing to be more precise.

WD BLACK

The black series is made for an external storage medium with high performance. Due to the high performance, WD Black hard drives are much popular among photo editors and high-end gamers.

WD GOLD

WD Gold HDD provides a long-term cold storage medium. Therefore, this series of Western Digital hard drives are suitable for data centers. These hard drives can handle many sophisticated systems simultaneously and work well with different servers That's it, I hope that you have now a more clear understanding of the WD color-coding of its hard drive series. As always thank you for reading and I hope you will have a great day. If you would like to read more helpful articles and tips about various software and hardware visit errortools.com daily.
Read More
1 2 3 162
Logo
Copyright © 2022, ErrorTools. All Rights Reserved
Trademarks: Microsoft Windows logos are registered trademarks of Microsoft. Disclaimer: ErrorTools.com is not affiliated with Microsoft, nor claim direct affiliation.
The information on this page is provided for information purposes only.
DMCA.com Protection Status