Turn off or on Mobile Hotspot remotely

In case you don’t know, new support has been added by Microsoft to Windows 10 that now allows users to turn off or on the Mobile Hotspot remotely. The Mobile Hotspot feature, known earlier as “Virtual Networks”, was first introduced with the initial release of Windows 10. With this new feature to remotely turn on or off the Mobile Hotspot in Windows 10, users can just use the Bluetooth on their mobile phones to turn off or on the Mobile Hotspot even when their Windows 10 computers are out of their reach.

To turn off or on the Mobile Hotspot feature in your Windows 10 computer remotely, there are two options you can try. First, you can do it using the Windows 10 settings app or using the Registry Editor. To get started, refer to the following options.

Option 1 – Turn off or on the Mobile Hotspot remotely via Windows 10 Settings app

  • First, you need to open the Windows 10 Settings app and from there go to Network & Internet and then go to the Mobile Hotspot section.
  • After that, scroll down to the “Turn on remotely” section.
  • Once done, make sure that the toggle button is set to ON and that the Bluetooth of both devices is turned on and paired as well. This should enable the feature to turn on or off the mobile hotspot remotely.

Option 2 – Turn off or on the Mobile Hotspot remotely via Registry Editor

Before you get started with the second option, make sure that you create a System Restore point first. Once done, proceed to the following steps:

  • Tap the Win + R keys to open the Run dialog box and type “Regedit” in the field and then hit Enter to open the Registry Editor.
  • Next, navigate to this registry path: ComputerHKEY_LOCAL_MACHINESOFTWAREMicrosoftWcmSvcTethering
  • From there, look for the DWORD named “RemoteStartupDisabled” and set its Value data to be “0”. This will enable the feature that will allow you to remotely turn on or off the mobile hotspot in your Windows 10 computer. To disable it, just set its Value data to “1”.
If you like to learn and find out more about various Windows errors, and how to repair them go to our vast archive or use search to find articles that will explain and help you in solving your issue.
However, if you prefer to do things fast and with automatization then we are proposing to use an automated solution for your issues. The application that we are recommending is Advanced System Repair Pro
Advanced System Repair utilizes multiple tools all in one to give you a quick, simple, reliable, and very thorough diagnosis of your PC. It brings you all the tools you need in one program to clean, fix, protect, optimize and boost your PC!
1-Click Maintenance
All the tools to make it simple and easy! It's like having a professional technician at the click of a mouse.

Junk Cleaner
Keeping your computer free from unnecessary clutter also helps make your computer last longer. Like any other machine, if you keep it clean and take care of it, it will serve you better for longer!

Optimize background apps
Optimize applications background activity with the built-in Application Optimizer feature.

Disk Defrag
With a simple 1-click, Advanced System Repair speeds up your PC by assembling fragmented files on your machine and organizing them more efficiently.

Malware Removal
Finds and removes all types of harmful malware including trojans, worms, bots, adware, spyware, PUPs, and more!

Privacy Cleaner
The all-in-one privacy suite to Clean Your Tracks & Protect Your Privacy! Make your computer safe, secure, and more efficient!

System Tweak/Optimizer
ASR will analyze your complete system and settings to adjust your PC to function at its maximum performance.

Registry Cleaner
Over time, as you install and uninstall applications, the registry can become cluttered with old entries and broken settings which can result in program crashes, and annoying messages and slow the computer down.
Visit our Advanced System Repair Pro Download page to inform yourself about all the benefits of this software and get a free trial copy of it.
advanced system repair pro

Advanced System Repair Pro

One-click automated PC repair solution
ASR logo
With Advanced System Repair Pro you can easily
Replace damaged files
Restore performance
Free disk space
Remove Malware
Protects WEB browser
Remove Viruses
Stop PC freezing
DOWNLOAD
Privacy Policy | Terms of Use | Uinstall
Advanced System Repair Pro is compatible with all versions of Microsoft Windows including Windows 11

Share this article:

You might also like

How to Fix R6025 Pure Virtual Function Call

Correct R6025 Pure Virtual Function Call

What is R6025 Pure Virtual Function Call Error?

R6025 pure virtual function call’ is a runtime error that occurs suddenly on the screen and disrupts the program being run prior to it. This error display indicates that the program has been corrupted. R6025 runtime error usually occurs with the Visual C++ framework.

Solution

Restoro box imageError Causes

This error occurs when the C++ program crashes which is usually because of the malfunctioning or missing of the device driver or incomplete device driver files. It happens because your application indirectly calls a pure virtual member function in a context where a call to the function is invalid. Most of the time, the compiler detects it and reports it as an error when building the application. R6025 error is usually detected at run time.

Further Information and Manual Repair

To fix the R6025 pure virtual function call error, you need to find the call to the pure virtual function. After you find the call, you need to rewrite the code so that it is not called again. There are 2 ways to do this:

Alternative 1

One way to fix the R6025 pure virtual function call is to replace the function with an implementation that calls the Windows API function DebugBreak. The DebugBreak causes a hard-coded breakpoint. Once the code stops running at this breakpoint, it is easy for you to view the call stack. By viewing the call stack you can identify the place where the function was actually called.

Alternative 2

Another quick way to find a call to a pure virtual function to fix the R6025 error is to set a breakpoint on the _purecall function that is usually found in PureVirt.c. By breaking this function you can trace the problem occurring and rewrite the call to ensure the error does not occur and the program you are trying to develop on the Visual C++ framework is easily developed. If R6025 Error is related to Windows Registry Problem Then here’s how you can fix the problem: To fix the runtime error R6025, run registry cleaner software to scan and fix all errors.  This alternative is suitable if the R6025 error is related to the Windows registry problem and where the error has occurred due to corrupted or malicious registry entries. You can download the registry cleaner repair tool for free. Run it to scan errors and then click the fix error button to repair the problem immediately.
Read More
NVIDIA Control Panel is not opening
Users who constantly use graphic-intensive applications like games or any video-rendering software need to control how their graphics card is used. There are some who always toggle their Graphic Quality settings to get the Frames Per Second or FPS up. While some tend to adjust the size, orientation, scaling, and other display settings in order to use their PCs in a more efficient way or to simply work better. And in all of that, that’s where the NVIDIA Graphics Card comes into the picture. Take note that this software only works on PCs which has NVIDIA Graphics Card attached to them. Thus, if you use another Graphics Card then this post is not for you, otherwise, proceed reading to know what you can do if the NVIDIA Control Panel is not opening on your Windows 10 PC. Here are a couple of things you can try if the NVIDIA Control Panel is not opening, not responding, or not working:
  • Restart the process of the NVIDIA Control Panel
  • Restart the NVIDIA Display Driver Service
  • Update your NVIDIA Display Drivers
For more details, refer to the instructions provided below.

Option 1: Restart the process of the NVIDIA Control Panel.

  • Tap the Ctrl + Shift + Esc keys to open the Task Manager.
  • After opening the Task Manager, look for the process named NVIDIA Control Panel Application.
  • Once you found it, expand it and right-click on the NVIDIA Control Panel sub-process, and click on End Task.
  • Now try opening the NVIDIA Control Panel from the Start Menu and see if it now works fine or not.

Option 2: Restart the NVIDIA Display Driver Service

  • Tap the Win + R keys to open the Run dialog box.
  • Then type “services.msc” in the field and hit Enter to open the Windows Services Manager.
  • After opening the Services window, you will see a list of services. From there, look for services named “NVIDIA Display Container LS” and double click on it to open its Properties.
  • Now make sure that the service is Started. If it isn’t, you need to start it, otherwise, you need to Stop it and Start It again. You also have to make sure that the Startup Type is set to Automatic.
  • Do the same for the NVIDIA LocalSystem Container service.
  • Restart your computer and check if the problem’s fixed.

Option 3: Try updating the drivers from the official site of NVIDIA

If both the first and second given options didn’t work, you can also try updating the drivers from the official NVIDIA website. And in case you don’t know the type of Nvidia graphics card that your computer is on, follow the steps below:
  • Tap the Win + R keys to open the Run dialog box.
  • Next type in “dxdiag” in the field and click OK or hit Enter to open the DirectX Diagnostic Tool.
  • From there, you can see what type of Nvidia graphics card that your system is on.
  • Take note of your graphics card information and then look for the best drivers for your operating system. Once you’ve downloaded and installed the file, restart your PC.
Read More
Malware Guide: How to Remove Webguard

Malware Guide: How to Remove Webguard

What is Webguard?

Developed by Interesting Solutions, Webguard is a tool supposedly used for tracking those online who’ve developed a habit of tracking you. The application would provide logical analysis into a user’s website history, providing insight on what websites you’ve visited and also how persons are able to track your every move while browsing. While Webguard is unable to dispose of who specifically is tracking your computer usage, they’re able to determine what computer installed tracking codes or cookies on your computer system. In this case, it’s then left up to the user’s discretion to determine who they want to allow or block from tracking their online use.  Overall, this application allows the user some measure of freedom and control over their online experience. Like any other application, however, which has landed themselves a spot on Virus Total, Web guard has hidden agendas. At a distance, Webguard installs a service for Windows but later distributes advertisements. Technical details about Webguard include:
Product Version: 1.0.0.0 Original File Name: crss.exe Entry Point:  0x000C5AAE

Assessment of Webguard Potentially Unwanted Program

While Webguard claims to track your computer usage, information reported by the application isn’t sufficient for the common computer user. This brings us back to the ulterior motive or principal objective of developing Webguard – to advertise and generate revenue from clicks made by users on Ads displayed on Internet Browsers – namely Chrome, Internet Explorer and Firefox. Why should a computer user remove Webguard? Simply, it compromises one's Internet privacy and security and it keeps abreast of your Internet history. If you’re online for an extended period, you’ll see what Webguard does. While the publishers behind the application did not alert users to the use of web beacons, cookies for tracking, and other related tracking technology, that’s not why Webguard is considered unwanted. The program is potentially unwanted because of the unpredictable advertisements it displays. Not all sites are trusted and so it’s difficult to determine, in some cases, what websites are legit for business.

Remove Webguard with Spyhunter

In most cases, at least from what I’ve seen, Webguard is installed as a single application. After it was installed for this assessment, it could be found in ‘All Programs”. This meant that one could manually delete the application from their computer system (see manual steps below). However, is that really sufficient to completely rid your PC of Webguard’s blueprints? While you might opt to remove Webguard manually – maybe because it’s more economical – an automated process is able to completely eradicate hidden threats from Webguard. In comparison to manually removing Webguard, Spyhunter penetrates your computer system for all infections. In most cases, nasty threats are unable to be removed manually. Additionally, Spyhunter not only removes installed threats, but it detects incoming ones – hence, acting as a preventative tool. Furthermore, Spyhunter detects cookies placed on your computer by Webguard. These are all undetectable threats and so an automated tool, as Spyhunter, should be used to remove Spyhunter effectively from your computer.

Manual Steps for Removal of Webguard

I found this removal pretty simple. Depending on your Operating System, there will be slight discrepancies in the manual removal steps. Using the Windows 8 (8.1) OS on your computer:
  • Step 1: Locate the CONTROL PANEL on your computer using the SEARCH option.
  • Step 2: Once the search box appears , input 'CONTROL PANEL'.
  • Step 3: The Control Panel option will then appear. From the menu, choose the "Programs" option.
  • Step 4: Another menu will appear. Select "All Programs and Features".
  • Step 5: From the 'Programs list', search for the Webguard application.
  • Step 6: Right-click on Webguard when it's found.
  • Step 7:  Choose the "Uninstall" option.
  • Step 8:  Follow the uninstall wizard instructions until the Webguard application is fully removed.
To completely remove Bandoo from your computer, click here to download and install Spyhunter
Read More
Disable widgets menu inside Windows 11
windows 11 widgets menu
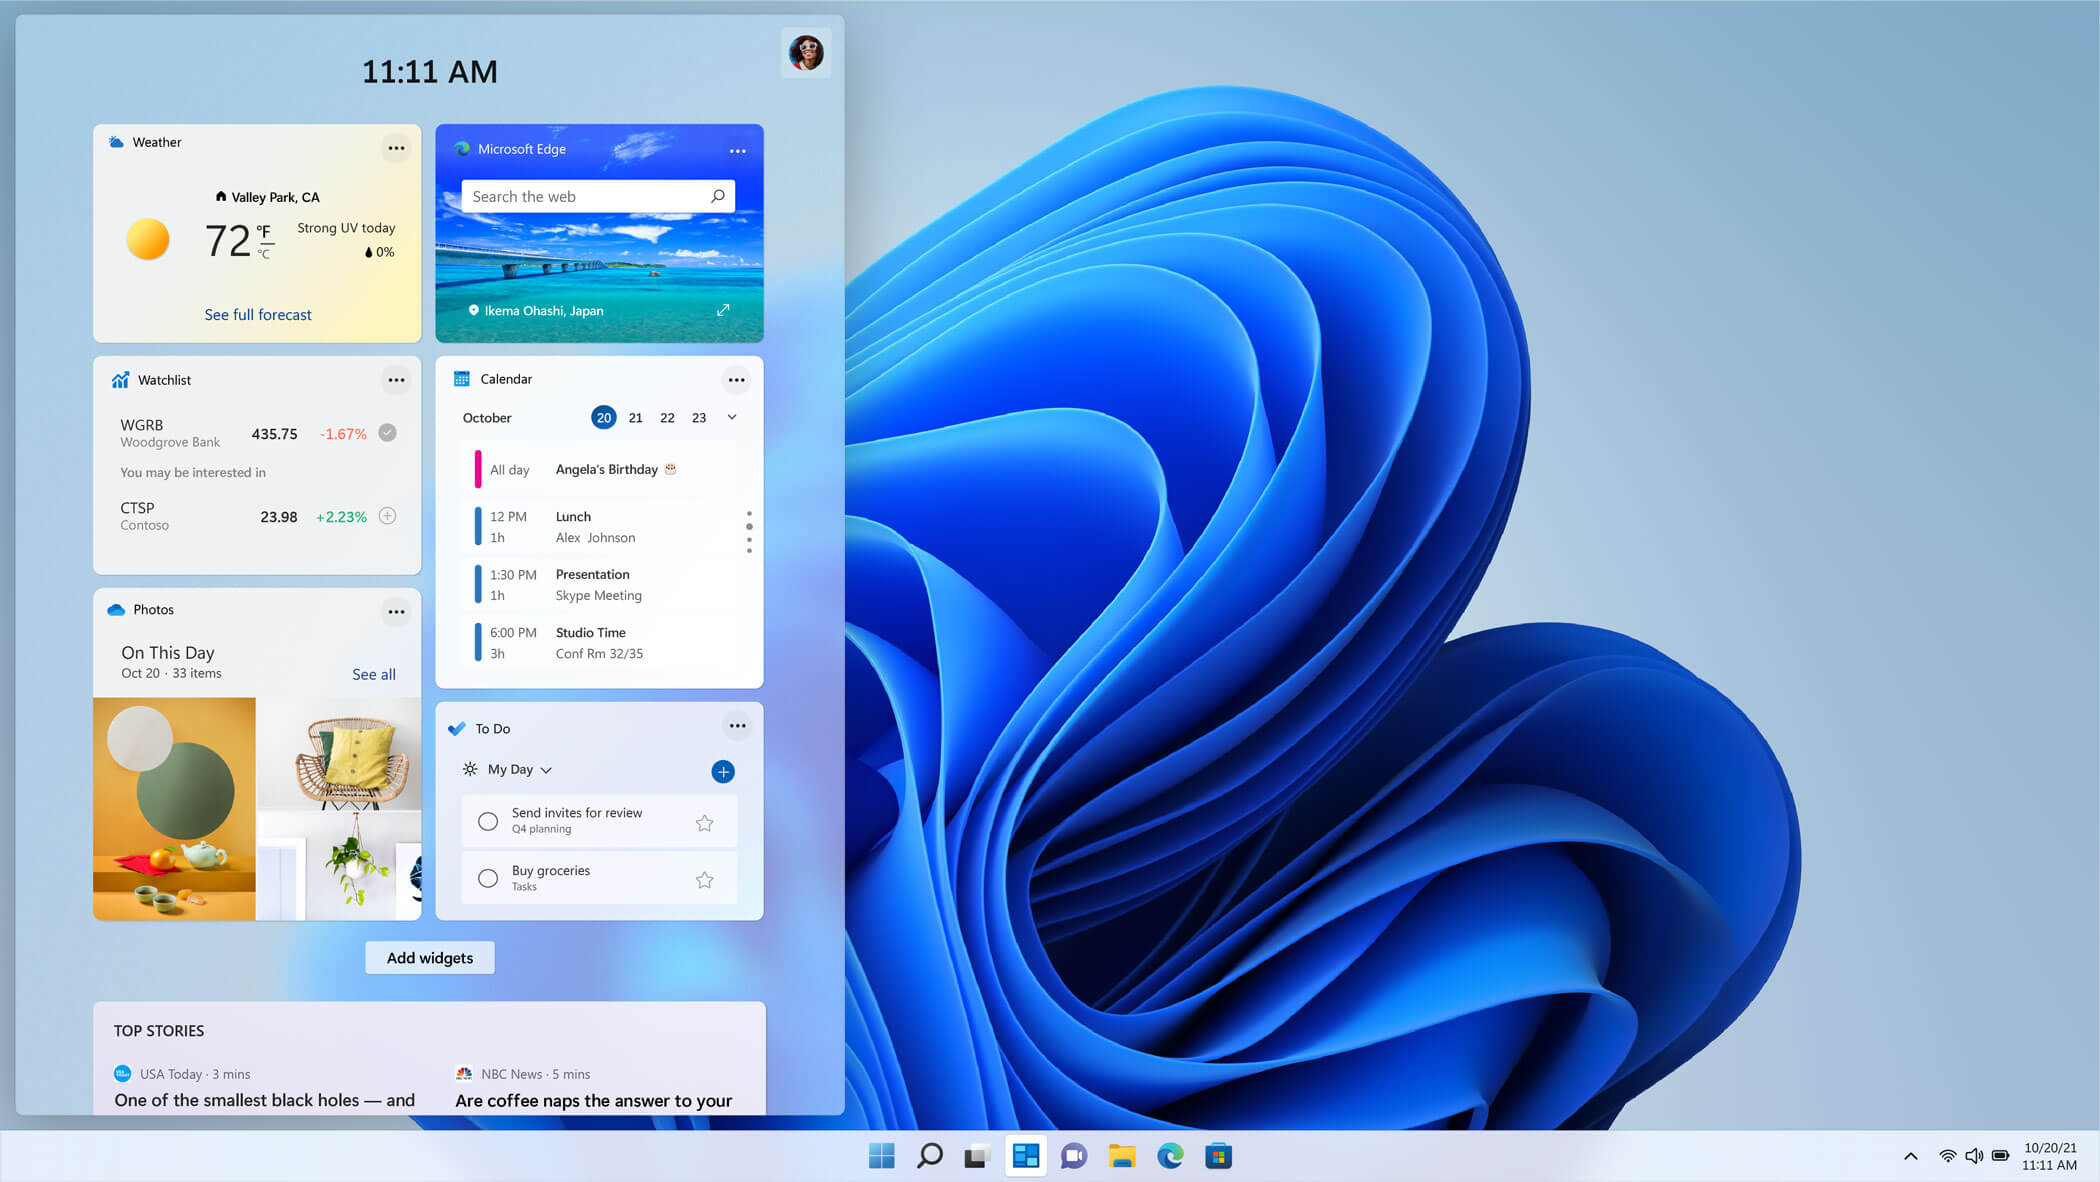
The new widget's menu inside Windows 11 is generally met with a positive attitude but there are still users which prefer not to have it. Luckily for them, Microsoft included a very easy way to turn the widgets menu on or off. Follow this easy guide to see how. Right-click on the widget button in the taskbar and click on Hide from Taskbar and that’s it Alternatively, you can also turn it off via the setting app. Go to the settings app and navigate to Personalization > Taskbar > Taskbar Items and flipping the switch beside Widgets to Off. Please note that both methods will only hide the button to toggle widgets menu, at the current state there is no really a way to actually turn it off, only hide it and make it not available to bring it up.
Read More
How to Fix the Error 103

Repair Error 103

Error 103 - What is it?

The error 103 may occur either due to issues in your Google Chrome browser or system issues. If error 103 occurs when using Chrome, this means there is a conflict between Google Chrome and the antivirus program running on your PC. It is displayed in either of the following formats: ‘Chrome error 103 connection aborted’, ‘Chrome error 103 err_connection_aborted’ or ‘Error 103 (net: ERR_CONNECTION_ABORTED): Unknown error. However, if this is a system error code, it may be displayed in the following format ‘The semaphore cannot be set again’ or as ‘ERROR_TOO_MANY_SEM_REQUESTS’ or as the value 0x67.

Solution

Restoro box imageError Causes

The error 103 is triggered due to multiple reasons such as: The conflict between Google Chrome and anti-viruses arises because when the web browser attempts to update, the anti-virus programs on your PC may view the update as a threat. Due to this, the connection to the internet is terminated and the error 103 message is displayed on your computer screen. And besides, this keeps you from upgrading your Google Chrome browser too. Other causes include:
  • Viral infection
  • Missing Windows component called ‘expand.exe’
  • Registry overlaps
  • Incompatible drivers

Further Information and Manual Repair

Here are some of the easy and efficient ways to resolve error 103. Choose a method according to the error 103 messages displayed on your screen.

Method 1: Check for the ‘Expand.exe’ Windows component

This method is workable if the error 103 is triggered due to browser issues. To get started, follow these steps. First, go to the start menu, and in the search bar type ‘expand.exe’. If you are able to find it, move it to the following directory C:\Windows\system32. However, if you are unable to locate it, then copy the file from Windows installation CD. Once you copy the file to the directory, reinstall the updated version of Google Chrome.

Method 2: Change the Location of the Temporary File

If the error still persists, try method 2. Go to the start menu and open the Run window. Now type C: and press OK. Then go to File, then New, and then Folder. Now create a temporary folder and name it ‘test’. After that go back to the start menu and open the Run window again. Now enter the following text in the text field:cmd.exe then press OK. In the command prompt type set TMP=C:\test. After that try reinstalling Google Chrome by typing the following in the command prompt: start ChromeSetup.exe.

Method 3: Update Drivers

If the error message 103 is generated due to system issues, then try updating drivers. Sometimes the error may occur due to incompatible drivers.

Method 4: Perform an Entire PC Scan for Viruses

To resolve error 103, perform an entire PC Scan for viruses. Sometimes the error may occur due to viral infection. Removing viruses may fix the error.

Method 5: Clean and Restore the Registry

If the error is triggered due to registry issues, then it is advisable to download Restoro. This is a multi-functional PC repair tool integrated with powerful utilities including an anti-virus, a registry cleaner, Active X controls, and class scanner, and a system optimizer. The registry cleaner feature wipes out all the unnecessary files including cookies, junk files, and bad registry keys that corrupt the registry. It cleans and restores the registry instantly. The anti-feature removes all viruses and spyware while the system optimizer utility ensures your system works at its optimum speed. It can be downloaded on all Windows versions. It is safe and efficient. This software is a one-stop solution for all PC-related errors. Click here to download Restoro.
Read More
NVIDIA Control Panel keeps crashing
The NVIDIA Control Panel is a useful tool for users who have NVIDIA graphics on their PCs as this tool allows users to how the graphics card is used on the computer using several controls that come with the graphics card from NVIDIA. Thus, it can be quite inconvenient when it suddenly crashes all of a sudden for some reason. This kind of problem could be due to the toggling of Output Dynamic Range is limited, or there could be some issue with the integrity of the Power Supply for the graphics card, and many more. So if you are using NVIDIA on your computer and its Control Panel keeps on crashing on your Windows 10 computer, then you’ve come to the right place as this post will guide you in sorting the problem out. For more details, refer to the guidelines laid out below.

Option 1 – Try to toggle the Output Dynamic Range

The first thing you can do to fix the problem is to toggle the Output Dynamic Range by following these steps:
  • Navigate to this path: Display > Change resolution.
  • Next, scroll a bit on the right-side panel until you see the Output Dynamic Range drop-down.
  • After that, select “Full” from the drop-down menu.
  • Apply the changes you’ve made and see if it is able to fix the problem with the NVIDIA Control Panel.

Option 2 – Try changing the Power Management and Vertical Sync settings

The next thing you can do to fix the problem is to change the Power Management, as well as the Vertical Sync settings.
  • Open the NVIDIA Control Panel and go to this path: 3D Settings > Manage 3D Settings.
  • Next, set the Power Management to be “Prefer Maximum Performance” for your processor located on the right-side panel.
  • After that, set the Vertical sync setting off and then click on the Apply button located at the bottom-right portion of the window and check if it is able to fix the problem or not.

Option 3 – Try updating the drivers from the official site of NVIDIA

If both the first and second given options didn’t work, you can also try updating the drivers from the official NVIDIA website. And in case you don’t know the type of Nvidia graphics card that your computer is on, follow the steps below:
  • Tap the Win + R keys to open the Run dialog box.
  • Next type in “dxdiag” in the field and click OK or hit Enter to open the DirectX Diagnostic Tool.
  • From there, you can see what type of Nvidia graphics card that your system is on.
  • Take note of your graphics card information and then look for the best drivers for your operating system. Once you’ve downloaded and installed the file, restart your PC.

Option 4 – Try to roll back the driver to the previous version

If updating the NVIDIA display drivers didn’t work for you, then it’s time to roll back the device drivers. It is most likely that after you updated your Windows computer that your driver also needs a refresh.
  • Tap the Win + R keys to launch the Run window and then type in the “MSC” command and hit Enter to open the Device Manager window.
  • Under the Device Manager, you will see a list of drivers. From there, look for the NVIDIA Drivers and expand it.
  • Next, select the driver entries that are labeled appropriately.
  • Then select each one of them and double click to open a new mini window.
  • After that, make sure that you’re on the Driver tab and if you are not, just navigate to it then click the Roll Back Driver button to switch back to the previous version of the NVIDIA Drivers.
  • Now restart your computer to successfully apply the changes made.
Read More
How to fix Error Code 52

Easily Repair Error Code 52

Error Code 52 – What is it?

Error Code 52 is a device driver problem that users experience on any Windows 2000 operating system and later Windows systems.

The error occurs when the operating system prevents the peripheral device connected to the computer from functioning properly and is usually displayed by the following message:

“Windows cannot verify the digital signature for the drivers required for this device. A recent hardware or software change might have installed a file that is signed incorrectly or damaged, or that might be malicious software from an unknown source. (Code 52)”

Solution

driverfix boxError Causes

Error Code 52 is triggered by the following factors:

  • An incomplete program uninstallation
  • An incomplete program installation
  • Hardware is not removed properly
  • System recovery from viruses
  • An improper system shut down

Further Information and Manual Repair

Error Code 52 can pose severe risks to the overall health of your PC and any negligence in fixing it can be disastrous for your computer.

However, since the error code is like other device driver errors, resolving the error is relatively straightforward. Here are a few methods to resolve the error code.

Method 1 – Use System Restore

You can use system restore to roll back the system to a time when there was no error to eliminate the problem. Here is how you can use it:

  1. Log in using an Administrator account
  2. Click ‘Start’ button and select All Programs > Accessories > System Tools > System Restore
  3. Click ‘Restore my computer to an earlier time’ and click ‘Next’
  4. Select the last Windows restore point from the ‘On this list, click a restore point’ list, and click ‘Next’
  5. Click ‘Next’ on the confirmation window to proceed
  6. Restart your PC after restoration is complete

By restoring the system via a last saved system checkpoint, you can obtain undamaged Windows system registry files that can help avert the error code.

Method 2 – Run the Troubleshooting Wizard

If restarting your PC does not help, you will have to find the exact nature of the problem by running the troubleshooting wizard for the device and address the problem accordingly. To do this, proceed with the following steps:

  1. Run Device Manager on your PC
  2. Click on the program under the installed programs that are creating problems for you
  3. Click on the ‘General’ Tab
  4. Click ‘Troubleshoot’
  5. Upon opening, the Troubleshooting Wizard will ask a series of questions regarding the error. Answer the questions and follow its directions for solving the error code.

After following the directions of the Troubleshooting wizard, make sure to restart your PC for the changes to take effect. Then check if your device is still causing problems.

Method 3 – Manually uninstall and reinstall the device driver

Uninstalling and then reinstalling the device driver can help solve the error.

You can do this by firstly logging in as Administrator and open Device Manager. Select the device that is causing the problem and double click it and make sure that the peripheral is connected properly to the PC.

Upon opening, click on the ‘Driver’ tab and then select ‘Update Driver’. Make sure to refer to the system documentation that you received with your PC or computer to check for the motherboard details and driver specifics.

Method 4 – Use software to automatically download the driver

Manually uninstalling and reinstalling the driver will do the trick, however, it may be time-consuming especially when you would have to resort to your hardware user manual.

Therefore, using a program such as DriverFIX can save you a lot of time and frustration in having your device work properly on your computer.

DriverFIX, with its user-friendly approach to help you fix your PC issues, comes with an integrated database that detects which drivers you need to reconfigure within just a few seconds and downloads it automatically.

It further ensures that your drivers are installed in their entirety leaving no room for any incomplete files to remain that create Error Code 52.

It also has the added advantage of being able to backup and restores your files should there be the slightest possibility of system file damage. DriverFIX is the answer to fixing your PC error codes accurately and quickly.

Click here to download DriverFIX to fix Error Code 52 quickly and effectively!

Read More
How to Fix ACPI_BIOS_ERROR in Windows 10
BSOD or Blue Screen of Death errors are one of the most common errors you can encounter on your Windows PC. One of these BSOD errors is the “ACPI_BIOS_ERROR”. If you suddenly get this error, it means that there is some problem in booting the operating system from your hard drive or Windows was not properly installed on your PC. In addition, this error could also mean that there is something wrong with the CMOS battery located in the motherboard. Unlike other BSOD errors, the workaround for this error is a bit different as these workarounds require a bit more expertise in updating the BIOS as well as setting the correct boot configuration. So if you only have a handful of knowledge about this level of troubleshooting, then you can seek a program named Restoro to fix the problem for you. However, if you know are capable enough in troubleshooting the problem, refer to the instructions laid out below to fix the BSOD “ACPI_BIOS_ERROR”.

Option 1 – Try to remove the SSD and update the BIOS

The first thing you have to do is to check the primary storage devices on your PC. If you have just installed a new hard drive or SSD recently on your computer, then it’s most likely the cause of the BSOD error. Moreover, you should also ensure that your BIOS is up-to-date to the latest available build.
  • Remove the SSD/HDD and inject a different HDD that was already preinstalled in your Windows PC.
  • After that, update the BIOS to the latest available build. After updating it, insert the old SSD/HDD and then try to boot your PC again. The problem should be fixed now. If not, refer to the next given option.

Option 2 – Try to check the CMOS battery and reset the CMOS module

As mentioned earlier, the CMOS battery might also be the one that’s causing the problem. It is a physical component of the motherboard and is a memory chip that contains all the settings configuration on your computer and is also powered by a battery. So if your battery loses power, the CMOS will be reset and as a result, all the configurations will be gone as well. It is also possible that the CMOS module is not properly working and every time things are saved, they are properly written due to the battery. That’s why you have to consider changing the CMOS battery and see if it fixes the problem. In addition, you also have to make sure that you completely reset the CMOS module and then try booting your PC again.

Option 3 – Try to check the BIOS settings

If the BIOS settings are incorrect, chances are that’s the reason why you’re getting the “ACPI_BIOS_ERROR” BSOD error. Every BIOS has different settings which you can make use of to enhance your computer experience. So make sure that your BIOS is up-to-date and that the settings are in accordance with your requirement. Another thing you can try is to disable the Legacy USB and the Legacy BIOS in the BIOS settings if you are trying to install a 64 bit Windows version. Make sure that you also enable AHCI before plugging in the installation drive on your PC. Moreover, ensure that your PC is using IDE or Integrated Drive Electronics mode instead of SATA or Serial Advanced Technology Attachment. Aside from that, try to check the extracted setup if it is in NTFS format, if it is, you should extract the ISO in FAT32 and use it to install Windows.

Option 4 – Try to reset the ACPI Compliant Control Method

ACPI or Advanced Configuration and Power Interface provide an open standard that operating systems can use to detect hardware, perform power management, as well as monitor the status of your device and provide information for other processes. Chances are, there are some misconfigurations with this module on your PC that lead to believing that there is no battery present. That’s why you need to reset it and see if it fixes the BSOD error or not.
  • Boot your PC into Safe Mode.
  • Tap the Win + R keys to open the Run dialog box.
  • Type in “devmgmt.msc” in the field and tap Enter to open the Device Manager.
  • After opening the Device Manager, go to the “Batteries” section and click it to expand it and then right-click on the “Microsoft ACPI-Complaint Control Method Battery” option and click on Uninstall.
  • After you disable the module, click on any empty space and then click the “Scan for hardware changes” option.
  • Then check if you can now boot your PC normally and without the BSOD error.
Read More
Outlook 2013 Preview

Outlook 2013 preview and sneak peek

Hello and welcome to our Outlook 2013 Preview. Everyone has heard of sneak peeks when it comes to new movies and games that are coming out soon. That is what advertisements and test reels are for to get the audience interested and excited before the piece of media even comes out. It serves to entertain the target audience in the months, maybe even years, up until the release date of this thing they want to play or see and it keeps it in the public mind. It is also great for the viewers because it is a hint to what they will expect when it comes out and it keeps them wanting more excitedly. However, did you know that sometimes computer software’s release previews and sneak peeks too?

Outlook 2013

Well, they do and Microsoft has released some sneak peeks and previews of their new Outlook, Outlook 2013! This is probably to get consumers ready for when it comes out next year; people are going to be getting excited about this new makeover that Microsoft Office, with Outlook, has given itself, people from Microsoft even saying it is ‘the most ambitious’ version of Office yet! The new orange color scheme and logo design look promising enough for the consumer without even checking the new features and special things that have been revealed about it yet!

Outlook 2013 Features

The best part of this new Outlook is that you can move widgets around in it. If you don’t like the fact that your inbox is placed over your outbox, you can move it- simple as that! It will be really handy for people who like messing around with layouts and will also be handy for people who tend to overlook things at the bottom of the pile like spam and trash if they can move them to a more noticeable location for themselves. Another great thing is that the new Microsoft Office that Outlook comes with has a cool new stylus option, allowing you to personalize things with your own handwriting or even drawings. This can then be used as your email signature on Outlook which can give a really nice and personal feel to emails you are sending. Another new thing is their labeling of drafts. Like Gmail, Google’s own email service, a red-lettered ‘draft’ will now appear over composing messages you have not yet sent.

Handy Email Tools in Outlook 2013

This is handy because you know where your message has been saved as opposed to how it could be saved in your outbox or be sent to the trash. Also, there are new links with Facebook that allow you to see what your friends are doing through Outlook. You can also converse with Facebook friends through Outlook now, which is a big step forward in this age of social media. You can get an email from a person and, at a click of a button, also read all their Facebook posts. However, there is not an option for Twitter or Tumblr or even Myspace, which is a shame I suppose, but maybe in the next update. So, I think Outlook 2013 will be worth looking at, don’t you?
Read More
How to Fix Windows 10 Error Code 0x8024001b

How to Fix Windows 10 Error Code 0x8024001b

Error Code 0x8024001b- What is it?

At its most basic level, Error Code 0x8024001b is an error that can cause problems with the installation and updates of software and operating system updates. The most common version of this error appears in Windows 10, but a similar error with a matching code number has been present in previous versions of the operating system, back through Windows 7.

Common symptoms include:

  • Programs freezing or locking up during use
  • The appearance of an error message regarding installation difficulties
  • Computer shutting down or freezing during operation
  • Difficulty in running multiple programs at the same time

Solution

Restoro box imageError Causes

There are two main causes for Error Code 0x8024001b, both of which are fairly simple:  Updates needed for the Windows Update tool itself and software that causes Windows Update to fail during installations through conflicts in system files. While these may seem like technical issues, these problems are actually easily resolved with a few simple steps. The average user can use the methods listed below to fix the problems on their own.

Further Information and Manual Repair

For users who want to address Error Code 0x8024001b for themselves, the steps below can be followed to address the two primary causes for the error. If you have difficulty in completing these steps or are not confident in your computing skills and ability to follow the listed steps, contact a Windows repair technician.

Here are the top methods to resolve Error Code 0x8024001b on your own:

Method One:  Check for Updates to Windows Update

In some cases, the Windows Update tool may need an update for itself. When you attempt to run updates or install wizards for other software, it can cause conflicts with the Windows Update process, slowing down your computer or causing it to freeze.

If you are attempting to run multiple installations or updates at the same time, it may also cause Error Code 0x8024001b to arise on your computer.

To resolve this issue, close out all programs, with the exception of the Windows Update tool. Within the tool, select “Check for Updates” and install any updates that are needed. When finished, you should restart your computer to ensure that all updates have been fully applied before attempting any other installations or updates.

Method Two:  Uninstall Conflicting Software

Another problem that can cause Error Code 0x8024001b is the presence of conflicting software. If Error Code 0x8024001b has only recently appeared on your computer, consider removing any software that has been added to your computer, running the Windows Update process, and restarting your computer before attempting to reinstall the problem software.

With any method that you use, it is important to remember to keep your Windows Updates current at all times. This is the best way to avoid the appearance of Error Code 0x8024001b and similar errors in the future, as stacked up updates are more likely to cause issues and conflicts with your other installed software and operating system.

While there are some tools out there that claim to be able to fix Error Code 0x8024001b for you, it is important to always thoroughly investigate the publisher and distributor of such software, as some of the tools available on the Internet will actually introduce malware and adware on your computer in the name of “protecting” your computer or resolving an error.

If you have tried to use both methods above and have not fully resolved Error Code 0x8024001b, get in touch with someone who is a qualified computer repair professional and is familiar with your particular version of the Windows operating system to assist you in finalizing your resolution.

Method Three: Use An Automated Tool

If you wish to always have at your disposal a utility tool to fix these Windows 10 and other related issues when they do arise, download and install a powerful automated tool.

Read More
1 2 3 162
Logo
Copyright © 2022, ErrorTools. All Rights Reserved
Trademarks: Microsoft Windows logos are registered trademarks of Microsoft. Disclaimer: ErrorTools.com is not affiliated with Microsoft, nor claim direct affiliation.
The information on this page is provided for information purposes only.
DMCA.com Protection Status