Troubleshooting Error 1722

Troubleshooting Error 1722

What is Error 1722?

Error 1722 is a type of Windows Installer error. Developed by Microsoft, Windows Installer is a software component used for the installation, maintenance, and removal of software on Windows systems.

This is basically an .MSI file that contains explicit instructions about installing and removing specific applications that are supported by this file for example JAVA and ArcGIS.

The error 1722 occurs when there is a problem with the Windows Installer package. And because of this the program supported by Windows Installer Package fails to set up and install.

This error message is displayed in the following format:

“Error 1722. There is a problem with this Windows Installer package. A program required for this install to complete could not be run. Contact your support or package vendor.”

Solution

Restoro box imageError Causes

You may encounter error 1722 due to multiple reasons such as:

  • Windows Installer Package corruption
  • Improper Windows Installer Package installation
  • Windows Script Hosting permission issues
  • Viral Infection

It is advisable to fix error 1722 to ensure the application supported by the Windows Installer Package that you are trying to set up on your PC, installs successfully.

Further Information and Manual Repair

To resolve Windows Installer Package error 1722 on your PC, try the methods given below:

Method 1

Sometimes the error 1722 may pop up if the Windows Installer Package is not installed properly. In such an event, it is advisable to uninstall Windows Installer Package and then reinstall it.

To do so, click on start, then control panel, program, and features and then choose the Add/Remove Program option to uninstall the Windows Installer Package on your system.

Once it is removed, click OK to save changes. Then reboot your PC. Now download the Installer package and reinstall. After the installation is complete, now try installing the application supported by the Installer package you wished to install.

However, first, it is suggested that you remove any traces of the failed application first. For example, if you previously received the error while installing Java, then remove all traces of failed Java installation.

Method 2

The alternative method is to change Window Script Hosting settings. To do this, go to the start menu, open Run and then type ‘Regedit’ in the command line and then press OK to continue. Check for either or both of the following registry keys

HKEY_CURRENT_USERSoftwareMicrosoftWindows Script HostSettingsEnabled

HKEY_LOCAL_MACHINESoftwareMicrosoftWindows Script HostSettingsEnabled

If either of these has a DWORD value of ‘0’, then scripting is disabled. Change the values to ‘1’ will enable scripting and resolve the issue.

Method 3

There can be two reasons for Windows Installer Package corruption, viruses or registry overloaded with bad entries and obsolete files.

If the error is triggered by viruses, then run an antivirus program to remove viruses and restore your PC. However, if the error is related to registry issues, then download Restoro.

This is an easy-to-use PC Fixer with a powerful registry cleaner. The registry cleaner wipes out all the obsolete files cluttering the registry and repairs the damaged and the corrupt important files thereby repairing all errors including error 1722 on your system.

Click here to download Restoro.

If you like to learn and find out more about various Windows errors, and how to repair them go to our vast archive or use search to find articles that will explain and help you in solving your issue.
However, if you prefer to do things fast and with automatization then we are proposing to use an automated solution for your issues. The application that we are recommending is Advanced System Repair Pro
Advanced System Repair utilizes multiple tools all in one to give you a quick, simple, reliable, and very thorough diagnosis of your PC. It brings you all the tools you need in one program to clean, fix, protect, optimize and boost your PC!
1-Click Maintenance
All the tools to make it simple and easy! It's like having a professional technician at the click of a mouse.

Junk Cleaner
Keeping your computer free from unnecessary clutter also helps make your computer last longer. Like any other machine, if you keep it clean and take care of it, it will serve you better for longer!

Optimize background apps
Optimize applications background activity with the built-in Application Optimizer feature.

Disk Defrag
With a simple 1-click, Advanced System Repair speeds up your PC by assembling fragmented files on your machine and organizing them more efficiently.

Malware Removal
Finds and removes all types of harmful malware including trojans, worms, bots, adware, spyware, PUPs, and more!

Privacy Cleaner
The all-in-one privacy suite to Clean Your Tracks & Protect Your Privacy! Make your computer safe, secure, and more efficient!

System Tweak/Optimizer
ASR will analyze your complete system and settings to adjust your PC to function at its maximum performance.

Registry Cleaner
Over time, as you install and uninstall applications, the registry can become cluttered with old entries and broken settings which can result in program crashes, and annoying messages and slow the computer down.
Visit our Advanced System Repair Pro Download page to inform yourself about all the benefits of this software and get a free trial copy of it.
advanced system repair pro

Advanced System Repair Pro

One-click automated PC repair solution
ASR logo
With Advanced System Repair Pro you can easily
Replace damaged files
Restore performance
Free disk space
Remove Malware
Protects WEB browser
Remove Viruses
Stop PC freezing
DOWNLOAD
Privacy Policy | Terms of Use | Uinstall
Advanced System Repair Pro is compatible with all versions of Microsoft Windows including Windows 11

Share this article:

You might also like

Close non responsive application in Windows
We have all been there, unfortunately, the application freezes, and sometimes it can even freeze whole windows. Well if the whole Windows freezes because of the application there is not much we can do except hard reset but if only the application freezes we can still kill it and return the PC in working condition. The first thing you can try is to press ALT + F4, this shortcut is for closing the program, if the application is frozen Windows will try to close it when using this shortcut, and if it succeeds you will find yourself on the desktop environment in Windows with non-responsive application taken care of. If however, this fails and the application is not closed, try ending it in the task manager. To open task manager press CTRL + SHIFT + ESC, locate unresponsive application select it, and click on the end task button on the bottom right.
Read More
How to get rid of My Maps Wizard

My Maps Wizard is a browser extension for Google Chrome Developed by Mindspark Inc. This extension offers users access to different websites that offer route planning, map views, and other traveling tools.

While all this might sound interesting and useful, this extension has been marked as a Browser Hijacker by several popular anti-virus applications.

When installed this extension changes your default home page and new tab page to MyWay.com or Ask.com depending on the extension version. It also monitors and records user browsing activity that it later uses to display sponsored / unwanted ads throughout your browsing sessions. While browsing the internet with this extension active and installed you will see additional pop-up ads, sponsored links, and injected ads into search results.

About Browser Hijackers

Browser hijacking is a form of unwanted software, often a browser add-on or extension, which causes modifications in the browser’s settings. There are lots of reasons why you may experience a browser hijack; however commercial, advertising, and marketing are the primary reasons for their creation. It redirects you to the sponsored websites and injects ads on your internet browser that assists its creator to generate earnings. Although it may seem naive, these tools were created by malicious people who always attempt to take full advantage of you, so that hackers can easily earn money from your naive and distraction. Browser hijackers could also allow other harmful programs without your knowledge to further damage your personal computer.

How you can know whether the web browser is hijacked?

There are numerous symptoms of web browser hijacking: 1. you notice unauthorized modifications to your web browser’s homepage 2. you find new unwanted favorites or bookmarks added, usually directed to ad-filled or pornography sites 3. the default search engine and the default web browser settings are altered 4. you find many toolbars on the internet browser 5. never-ending pop-up ads appear and/or your browser pop-up blocker is disabled 6. your browser has instability problems or exhibits frequent errors 7. you can’t visit specific websites such as homepages of anti-malware software.

So how does a PC get infected with a browser hijacker?

There are a number of ways your PC can get infected by a browser hijacker. They generally arrive by way of spam email, via file-sharing websites, or by a drive-by download. They may also originate from any BHO, browser extension, toolbar, add-on, or plug-in with malicious intent. A browser hijacker may also come bundled up with some freeware that you unwittingly download to your PC, compromising your internet security. An example of some infamous browser hijacker includes Conduit, Anyprotect, Babylon, SweetPage, DefaultTab, RocketTab, and Delta Search, however, the names are often changing. Browser hijacking can lead to severe privacy problems and even identity theft, affect your web browsing experience by taking control of outgoing traffic, drastically slows down your personal computer by consuming lots of system resources, and cause system instability as well.

Learn how to remove a browser hijacker

Certain browser hijacking can be quite easily stopped by finding and eliminating the corresponding malware software through your control panel. Having said that, the majority of hijackers are quite tenacious and need specialized tools to remove them. Furthermore, manual removals require in-depth system knowledge and therefore could be a very difficult task for novice computer users. Industry experts always suggest users eliminate any malicious software including browser hijacker by using an automatic removal tool, which is simpler, safer, and quicker than the manual removal solution. One of the best tools for correcting browser hijacker infections is SafeBytes Anti-Malware. It will help you remove any pre-existing malicious software on your system and provides you real-time monitoring and protection against new internet threats. Employ a system optimizer (such as Total System Care) along with your antivirus software to correct various registry issues, eliminate computer vulnerabilities, and boost your computer performance.

What To Do When You Cannot Install Safebytes Anti-Malware?

All malware is bad, but certain types of malware do much more damage to your computer or laptop than others. Certain malware variants modify web browser settings by adding a proxy server or change the PC’s DNS configuration settings. In these instances, you’ll be unable to visit certain or all of the sites, and thus not able to download or install the required security software to eliminate the computer virus. So what to do if malicious software keeps you from downloading or installing Anti-Malware? There are a few actions you can take to get around this issue.

Install the anti-malware in Safe Mode

Safe Mode is actually a unique, basic version of Microsoft Windows in which just bare minimum services are loaded to stop viruses as well as other troublesome applications from loading. If the virus is set to load automatically when PC boots, shifting to this mode may prevent it from doing so. To get into Safe Mode or Safe Mode with Networking, press F8 while the system is starting up or run MSConfig and find the “Safe Boot” options under the “Boot” tab. Once you are in safe mode, you can try to install your antivirus application without the hindrance of malicious software. Now, you are able to run the antivirus scan to remove computer viruses and malware without hindrance from another malicious application.

Download the security software in an alternate browser

Malicious code may exploit vulnerabilities in a particular internet browser and block access to all anti-malware software sites. The best solution to avoid this issue is to go with a browser that is well known for its security features. Firefox contains built-in Malware and Phishing Protection to keep you secure online.

Run antivirus from a pen drive

Another way is to download and transfer anti-malware software from a clean PC to run a virus scan on the affected computer. Try these simple measures to clean up your infected computer by using portable anti-malware. 1) Download Safebytes Anti-Malware or Windows Defender Offline onto a virus-free computer system. 2) Mount the USB drive onto the same computer. 3) Double-click on the downloaded file to open the installation wizard. 4) When asked, select the location of the pen drive as the place where you want to store the software files. Follow activation instructions. 5) Remove the pen drive. You can now utilize this portable antivirus on the infected computer. 6) Double click the Safebytes Anti-malware icon on the flash drive to run the application. 7) Press the “Scan Now” button to begin the malware scan.

Let's Talk About SafeBytes Anti-Malware!

If you’re looking to download an anti-malware application for your PC, there are lots of tools out there to consider however, you cannot trust blindly to anyone, regardless of whether it is paid or free software. A few are very good ones, some are decent, and some are merely fake anti-malware applications that will harm your PC themselves! You must pick one that is efficient, practical and has a good reputation for its malware protection. One of the recommended software programs is SafeBytes Anti-Malware. SafeBytes has a superb history of excellent service, and customers are very happy with it. Safebytes is among the well-established computer solutions firms, which provide this complete anti-malware software. Using its cutting-edge technology, this software will help you remove multiples types of malware like viruses, PUPs, trojans, worms, ransomware, adware, and browser hijackers.

SafeBytes anti-malware provides a plethora of advanced features which sets it aside from all others. The following are some of the features you may like in SafeBytes.

World-class AntiMalware Protection: Built upon a greatly acclaimed anti-virus engine, this malware removal application can identify and get rid of numerous obstinate malware threats such as browser hijackers, potentially unwanted programs, and ransomware that other typical anti-virus programs will miss. Live Protection: SafeBytes offers complete and real-time security for your PC. It’ll constantly monitor your pc for hacker activity and also provides users with superior firewall protection. Safe Browsing: Through its unique safety rating, SafeBytes informs you whether a site is safe or not to visit it. This will make sure that you’re always certain of your online safety when browsing the web. Light-weight Utility: SafeBytes is a lightweight and user-friendly anti-virus and anti-malware solution. As it uses minimum computer resources, this application leaves the computer power exactly where it belongs to: with you. Fantastic Tech Support Team: You can get high levels of support 24/7 if you’re using their paid version. SafeBytes can keep your personal computer safe from the latest malware threats automatically, thus keeping your internet experience secure and safe. You can be sure that your computer system will be protected in real-time once you put this tool to use. If you want advanced forms of protection features & threat detections, buying SafeBytes Anti-Malware could be worth the money!

Technical Details and Manual Removal (Advanced Users)

To remove My Maps Wizard manually, go to the Add/Remove programs list in the Windows Control Panel and select the offending program you want to get rid of. For internet browser extensions, go to your browser’s Addon/Extension manager and select the add-on you would like to remove or disable. You will additionally also want to totally reset your web browser to its default configuration settings. To ensure complete removal, find the following Windows registry entries on your computer and remove them or reset the values appropriately. But bear in mind, this can be a tricky task and only computer professionals could carry it out safely. In addition, some malicious programs are capable to defend against its removal. You’re advised to do this process in Safe Mode.
Registry: [HKEY_LOCAL_MACHINE\Software\Microsoft\Windows\CurrentVersion\explorer\Shell Folders] Common Startup = C:\windows\start menu\programs\startup [HKEY_LOCAL_MACHINE\Software\Microsoft\Windows\CurrentVersion\explorer\User Shell Folders] Common Startup = C:\windows\start menu\programs\startup [HKEY_LOCAL_MACHINE\Software\Microsoft\Windows\CurrentVersion\RunServices] Whatever = c:\runfolder\program.exe
Read More
How to Permanently Disable Active History
What is Active History? A new feature has been introduced in Windows 10 that allows users to stay connected to their tasks across their devices. This new feature is called “Windows Timeline” and using this feature, users could continue their tasks all over their Windows 10 computers as well as on devices that run Android and iOS as well. This new feature was included in Microsoft Launcher and Microsoft Edge on Android devices as well as in Microsoft Edge for iOS devices. In order for the feature to work, you have to send either Basic or Full data and diagnostics of your computer to Microsoft which would sync it all over your devices with the help of the cloud. And now since all your data is stored on your Windows 10 computer and with Microsoft under your account, it is easier for you to access the back and start where you left off. This kind of option is called Active History. In this post, you will be guided on how you can permanently disable Active History using either the Windows Registry or Group Policy. Before you go on further, it is recommended that you create a System Restore Point first in case anything goes wrong. This is a precautionary measure you must take so that you can easily undo the changes you’ve made. After creating a System Restore Point, proceed to the given instructions below.

Option 1 – Disable Active History via Registry Editor

  • Tap the Win + R keys to open the Run dialog box and type in “Regedit” in the field and hit Enter to open the Registry Editor.
  • Next, navigate to this registry key: ComputerHKEY_LOCAL_MACHINESOFTWAREPoliciesMicrosoftWindowsSystem
  • From there, check if you can find a DWORD named “PublishUserActivities”. If you can’t find this DWORD, just create one with the same name and make sure that the base is selected to Hexadecimal.
  • After that, double-click on the DWORD and change its value from 1 to 0 to disable Active History.
  • Restart your computer to apply the changes you’ve made successfully.

Option 2 – Disable Active History via Group Policy Editor

Note that this second option won’t work if you are using the Home edition of Windows 10. This is because the Group Policy Editor does not come with Windows 10 Home. So if you are not using Windows 10 Home, follow the given steps below.
  • Tap the Win + R keys to open the Run box.
  • Then type in “gpedit.msc” in the field and hit Enter to open the Group Policy Editor.
  • Next, navigate to this path: Computer ConfigurationAdministrative TemplatesSystemOS Policies
  • After that, double click on the configuration listing named “Allow publishing of User Activities” to open the configuration page which has the following description:
“This policy setting determines whether User Activities can be published. If you enable this policy setting, activities of type User Activity are allowed to be published. If you disable this policy setting, activities of type User Activity are not allowed to be published. Policy change takes effect immediately.”
  • Now you have to select Disabled or Not Configured if you want to disable Publishing of User Activities or Enabled to Enable Publishing of User Activities depending on your preferences.
  • Next, click OK and exit the Group Policy Editor and then restart your computer to successfully apply the changes made.
Read More
Fix 0xc000014C Boot Configuration Data error
If you receive the error code 0xc000014C while you boot up your computer, then this post might be of help. This kind of error usually points to the Registry of your computer that might be corrupted. As a result, the operating system was not able to read the BCD file and throws the 0xc000014C error. The error code 0xc000014C is triggered when your computer encounters an error in the first booting sector. You might receive any of these error messages:
“Info: An error occurred while attempting to read the boot configuration data.” with File: as “BootBCD” “File: Windowssystem32configsystem Info: Windows failed to load because the system registry file is missing or is corrupt” “Info: The Boot Configuration Data for your PC is missing or contains errors.”
To fix the error code 0xc000014C when booting your computer, you can check out the suggestions provided below.

Option 1 – Try running System Restore in Advanced Startup Options

Since you probably can’t boot into your Windows 10 computer, you can try to run System Restore again in the Advanced Startup Options.
  • Boot your computer into the Advanced Startup Options screen.
  • From there, you will see some options to troubleshoot when you can’t log in to Windows in the usual way.
  • Now select Troubleshoot > Advanced Options > Command Prompt.
  • After that, type “rstrui” and hit Enter to execute the command which will start the System Restore process.

Option 2 – Try to rebuild the BCD files

You can also try rebuilding the BCD files to resolve error 0xc000014C for corrupted Boot Configuration Data
  • You can start by booting into the installation environment for Windows 10 from an installation media.
  • After that, click on Repair your computer and on the blue screen, select Troubleshoot and then select the Advanced options menu.
  • From there, select Command Prompt and once you open it, enter each one of the commands given below by sequence.
    • bootrec /FixMbr
    • bootrec /FixBoot
    • bootrec /ScanOS
    • bootrec /RebuildBcd
  • Once you’re done executing the commands given above, type “exit” to close the Command Prompt window and then restart your computer and see if it fixed error code 0xc000014c.

Option 3 – Try restoring the default and uncorrupt Registry Values

This option is a bit tricky as you have to be sure about what you are doing here. However, if you are not sure, you might want to seek out a technician to fix the problem for you. But if you can handle it, then carefully follow the steps below.
  • You have to first physically remove the hard drive of the computer that’s not booting up. You can refer to it as Hard drive 1 and Computer 1, respectively.
  • After that, you need to have another computer which you can refer to as Computer 2, and refer to its hard drive as Hard drive 2. Make sure that this second computer is working properly.
  • Next, you have to attach Hard drive 1 to Computer 2 with the Hard drive 2 attached as well.
  • After that, boot Computer 2 from Hard drive 2 where Hard drive 1 will act as the second storage unit.
  • Then navigate to the following location in the System Partition of the Hard drive 2.
C:/Windows/System32/config/RegBack
  • From there, you have to replace all the files. Once you’re done, shut down your computer and then take out the Hard drive 1 from Computer 2 and put it back to Computer 1 as the only hard drive.
  • Now boot your computer normally and check if the problem is fixed.
Read More
The executable program that ...
If you are trying to start a service using the Windows Services Manager but you got an error message stating, “The executable program that this service is configured to run in does not implement the service”, then you’ve come to the right place as this post will provide you instructions on how you can fix this error. Since almost all program requires service to run on your computer, if the service is not listed in the corresponding registry key, then you will most likely encounter this error on your Windows 10 computer. Here’s the entire content of the error message:
“Windows could not start the service on Local Computer. Error 1083: The executable program that this service is configured to run in does not implement the service.”
To fix this error, you have to add the service name in the respective host in the Registry Editor, and to do that, here are some steps you need to take on. Step 1: The first thing you have to do is to take note of the service name that’s given in the error message. For instance, you get the “Windows Management Service. Step 2: Next, you need to open the Services Manager by tapping the Win + R keys and typing “services.msc” in the Run dialog box, and then tapping Enter. Step 3: After opening the Services Manager, look for the Windows Management Service and once you see it, double click on it. This will open a new mini window. Step 4: From the newly opened window, copy the Service name and the Path to executable under the General tab. If the path to the executable is displayed as “C:/Windows/system32/svchost.exe -k netsvcs –p”, you need the “netsvcs” part only. Note that it can be different for different services and you need the part that comes after “-k”. Step 5: Now tap the Win + R keys again to open Run utility and type “Regedit” in the field and click OK to open the Registry Editor. Step 6: After that, navigate to the following registry path:
ComputerHKEY_LOCAL_MACHINESOFTWAREMicrosoftWindows NTCurrentVersionSvchost
Step 7: From the given registry path, look for a key named “REG_MULTI_SZ” located on your right-hand side. This key is named after the “Path to executable” part. For instance, you should see “netsvcs”. Step 8: Double click on the REG_MULTI_SZ key and enter the Service name that you’ve copied earlier and then write it down at the end of the preset list. Step 9: Now save the changes you’ve made and try to open the program or run the service again.
Read More
Stopping automatic redirects in Browsers
As you know, the internet has changed the world immensely. Nowadays, JavaScript is pushing the modern web ahead. One of the things that make these experiences with the internet seamless and with less clutter is redirection. It is often used on web pages and there are times when a user is prompted about them and most of the time, we barely notice them. However, there are also instances when things can go wrong with redirects as they could become a loop that could mess things up. And since the browser takes a lot of system resources, redirection can result in a poor user experience. That’s why in this post, you will be guided on how you can stop these automatic redirects on browsers such as Microsoft Edge, Google Chrome, and Mozilla Firefox, on your Windows 10 computer. To get started, refer to each one of the options provided below to stop automatic redirects in Microsoft Edge, Google Chrome, and Mozilla Firefox.

Option 1 – Configure the browsers to stop pop-ups and deceptive contents

There are a lot of browsers with built-in settings that allow users to stop pop-ups and deceptive content. To configure these settings, refer to these steps:
  • Microsoft Edge:

    • Click on the three horizontal dots icon or the menu button.
    • Next, click on Settings and select Privacy & Security from the left side navigation.
    • After that, scroll down on the right-side panel and look for Block pop-ups and Windows Defender SmartScreen and then turn their toggle buttons to On.
  • Google Chrome:

    • Open Google Chrome and click on the three vertical dots icon for the menu located in the top right corner of the browser.
    • Next, click on Settings and scroll down until you see the Advanced option. Click on it to open the Advanced Settings.
    • Now scroll down until you reach the Privacy and Security section and look for the Safe browsing option and turn its toggle button to On.
  • Mozilla Firefox

    • Open Mozilla and click on the three horizontal lines icon for the menu button located in the top right corner of the browser and click on Options.
    • Next, go to the Settings section and click the Privacy & Security tab and scroll down and then click on Permissions.
    • From there, make sure that the Block pop-up windows checkbox is checked.
    • Finally, scroll down until you reach the Security section and make sure that the checkbox for the Block dangerous and deceptive content is checked.

Option 2 – Try to reset Winsock, TCP/IP & Flush DNS

To stop redirects, you can also reset Winsock and the TCP/IP as well as flush the DNS cache. To do so, follow these steps:
  • Right-click on the Start button and click on Command Prompt (administrator) so you can pull up an elevated Command Prompt.
  • After that, execute each one of the commands listed below. And after you typed in one after the other, you have to hit Enter.
  1. netsh winsock reset – type in this command to reset Winsock
  2. netsh int ip reset resettcpip.txt – type in this command to reset TCP/IP
  3. ipconfig /flushdns – type in this command to flush the DNS cache
  • Next, restart your PC and check if the problem’s fixed.

Option 3 – Edit your Hosts File

  • Tap the Win + R keys to open then type in %WinDir% and then click OK.
  • Go to System32/drivers/etc.
  • Open the host file using Notepad.
  • Delete all the suspicious entries.
  • After that, save the changes you’ve made and close the file.
Read More
Domain Users Sign in using Biometrics
The use of Biometrics is supported by Windows 10. Aside from that, it also supports PIN, password, picture password on all computers and if your computer has the proper hardware, Windows 10 also supports facial scanning, iris scanning, and even fingerprint scanning. You can see all these exciting features inside Settings > Accounts > Sign In Options. On the other hand, you can’t really expect to make use of all the above-mentioned features since it depends if the hardware is available to support them. One of the most interesting features is the use of Biometrics which is really useful in workplaces and so this post will show you how you can enable or disable the Domain Users Sign In on Windows 10 using Biometrics via Registry Editor or Group Policy Editor. But before you go on, you need to create a System Restore Point first since the modifications you’re about to do might affect the functioning of your computer. So in case something went wrong, you can always undo the changes you’ve made.

Option 1 – via Registry Editor

  • Tap the Win + R keys to open the Run dialog box.
  • Next, type “Regedit” in the field and hit Enter to open the Registry Editor.
  • After that, navigate to the following registry path:
HKEY_LOCAL_MACHINESOFTWAREPoliciesMicrosoftBiometricsCredential Provider
  • From there, right-click on the right-side panel and click on New > DWORD (32-bit) Value.
  • And then set the name of the newly created DWORD as “Domain Accounts”.
  • Afterward, click on “Domain Accounts” and set its value to “1”. This will allow the domain users to sign in to Windows 10 using Biometrics. While the value of 0 will disable the domain users sign in to Windows 10 using Biometrics.
  • Exit the Registry Editor and restart your computer for the changes to take effect.

Option 2 – via Group Policy Editor

  • Tap the Win + R keys to open the Run dialog box.
  • Next, type “gpedit.msc” in the field and hit Enter to open the Group Policy Editor.
  • After that, navigate to the following setting:
Computer Configuration > Administrative Templates > Windows Components > Biometrics
  • Then double click on the following entries located on the right-side panel and set the radio button to Enabled on all of them.
    • Allow the use of Biometrics.
    • Allow users to log on using Biometrics.
    • Allow domain users to log on using biometrics.
  • Now exit the Group Policy Editor and restart your computer to apply the changes made properly.
Read More
WeatherBlink Malware Removal Guide

WeatherBlink is an extension for google chrome, Mozilla, and internet explorer. It allows users to check out the weather anywhere in the world at any time. This might seem like a convenient feature, however, this toolbar also displays unwanted ads, hijacks your browser home page, collects personal data about your web surfing habits, visits, and clicks. From the author: Access local weather forecasts, weather radar, allergy, and pollen reports, and worldwide weather news – all in one convenient spot! This extension configures your New Tab page to WeatherBlink™ to provide these features.

Be prepared with instant weather forecasts. Access FREE and accurate weather forecasts with one click!

About Browser Hijackers

Browser hijack is a very common type of online fraud where your web browser settings are modified to make it do things you do not intend. Browser hijackers can do more than simply modifying home pages. It redirects you to the sponsored internet sites and inserts ads on the internet browser that helps its creator generate ad revenue. A lot of people assume that these kinds of websites are legitimate and harmless but that is not true. Nearly every browser hijacker poses an actual threat to your online safety and it is necessary to classify them under privacy dangers. In a worst-case scenario, your internet browser could be hi-jacked to open up your computer to a host of additional computer infections.

Indications of browser hijack

Below are some symptoms that indicate you’ve been hijacked: 1. the browser’s home page is changed 2. bookmark and the new tab are also modified 3. default online search engine is modified 4. you see unwanted new toolbars added 5. you notice a lot of pop-ups on your computer screen 6. web pages load very slowly and often incomplete 7. you’ve disallowed entry to particular web pages, for example, the website of an antimalware software firm like SafeBytes.

So how exactly does a browser hijacker infect a computer?

A browser hijacker could be installed on your PC when you go to an infected website, click an email attachment, or download something from a file-sharing website. They also come from add-on applications, also referred to as browser helper objects (BHO), browser extensions, or toolbars. Sometimes you may have mistakenly accepted a browser hijacker as part of a software program bundle (usually freeware or shareware). Typical examples of browser hijackers include CoolWebSearch, Conduit, RocketTab, OneWebSearch, Coupon Server, Searchult.com, Snap.do, and Delta Search.

Tips on how to remove browser hijackers

Certain browser hijacking can be easily stopped by discovering and eliminating the corresponding malware application from your control panel. However, certain hijackers are more difficult to find or eliminate as they might get themselves associated with certain crucial system files that enable it to work as a necessary operating-system process. You should think about carrying out manual repairs only if you’re a tech-savvy person because there are possible risks associated with fiddling around with the system registry and HOSTS file.

How One Can Eliminate Malware that is Blocking Websites or Preventing Downloads

Malware could potentially cause several different types of damage to PCs, networks, and data. Certain malware goes to great lengths to prevent you from downloading or installing anything on your PC, especially anti-malware applications. If you’re reading this, you probably have got infected by a virus that prevents you from downloading security software like Safebytes Anti-Malware. There are a few fixes you could try to get around with this issue.

Start Windows in Safe Mode

Safe Mode is actually a unique, basic version of Windows where just essential services are loaded to counteract malware as well as other problematic programs from loading. In the event the malware is blocking access to the internet and affecting your PC, launching it in Safe Mode enables you to download anti-virus and run a diagnostic scan while limiting possible damage. To start the computer into Safe Mode, hit the “F8” key on your keyboard right before the Windows logo screen comes up; Or after normal Windows boot up, run MSCONFIG, check Safe Boot under Boot tab, and click Apply. Once you restart into Safe Mode with Networking, you may download, install, as well as update anti-malware software from there. At this point, you could run the anti-malware scan to eliminate computer viruses and malware without any interference from another application.

Switch over to an alternate browser

Some malware may target vulnerabilities of a specific browser that block the downloading process. The most effective solution to avoid this problem is to pick a browser that is renowned for its security features. Firefox has built-in Phishing and Malware Protection to help keep you secure online.

Install antivirus on a thumb drive

To effectively remove the malware, you have to approach the problem of running an anti-malware software program on the affected computer from a different angle. Adopt these measures to run the anti-virus on the affected computer. 1) Download Safebytes Anti-Malware or Windows Defender Offline onto a virus-free computer system. 2) Plug the USB drive into the clean PC. 3) Double-click the Setup icon of the anti-malware program to run the Installation Wizard. 4) When asked, choose the location of the USB drive as the place in which you would like to store the software files. Follow activation instructions. 5) Unplug the flash drive. You may now utilize this portable anti-virus on the infected computer. 6) Double-click the Safebytes Anti-malware icon on the flash drive to run the program. 7) Press the “Scan Now” button to begin the virus scan.

SafeBytes Anti-Malware: Lightweight Malware Protection for Windows Computer

Do you want to install the best anti-malware software for your computer system? There are plenty of applications available in the market which comes in paid and free versions for Microsoft Windows computers. A few of them are good, some are ok types, while some will damage your computer themselves! You need to be careful not to select the wrong application, particularly if you purchase a paid application. On the list of recommended software programs is SafeBytes AntiMalware. SafeBytes has a very good track record of top-quality service, and customers seem to be very happy with it. SafeBytes can be described as a powerful, real-time anti-spyware application that is made to assist the common computer end user in safeguarding their PC from malicious internet threats. Using its cutting-edge technology, this application can assist you to get rid of multiples types of malware which include computer viruses, PUPs, trojans, worms, ransomware, adware, and browser hijackers. SafeBytes has a variety of features that can help you protect your PC from malware attacks and damage. Below are a few of the great ones: Antimalware Protection: With a critically acclaimed anti-malware engine, SafeBytes gives multi-layered protection which is intended to find and eliminate viruses and malware that are concealed deep in your computer’s operating system. Real-time Threat Response: SafeBytes provides round-the-clock protection for your PC restricting malware intrusions in real-time. It’ll regularly monitor your laptop or computer for hacker activity and also gives users sophisticated firewall protection. Quick Multi-threaded Scanning: SafeBytes’s high-speed malware scanning engine lessens scan times and extends the life of the battery. At the same time, it’ll effectively detect and get rid of infected computer files or any internet threat. Internet Security: Safebytes allots all sites a unique safety score that helps you to get an idea of whether the website you’re just about to visit is safe to browse or known to be a phishing site. Low CPU/Memory Usage: SafeBytes is well known for its minimal influence on computer resources and great detection rate of numerous threats. It works quietly and efficiently in the background so you are free to utilize your computer or laptop at full power all the time. 24/7 Customer Support: You will get 24/7 technical support to promptly resolve any problem with your security tool.

Technical Details and Manual Removal (Advanced Users)

To remove WeatherBlink manually, go to the Add or Remove programs list in the Control Panel and select the program you want to get rid of. For internet browser plug-ins, go to your browser’s Addon/Extension manager and select the plug-in you want to remove or disable. You will probably also want to reset your internet browser. Finally, examine your hard drive for all of the following and clean your registry manually to remove leftover application entries after uninstallation. Please remember that only experienced users should try to manually edit the registry because incorrect file deletion results in a major problem or perhaps a PC crash. Furthermore, certain malware is capable of replicating or preventing deletion.

Carrying out this malware-removal process in Safe Mode is recommended.

Files: C:Program FilesWeatherBlink C:ProgramDataWeatherBlink C:UsersYOUR_USERAppDataRoamingWeatherBlink Registry: Key HKLMSOFTWAREClassesWeatherBlink.DynamicBarButton Key HKLMSOFTWAREClassesWeatherBlink.FeedManager Key HKLMSOFTWAREClassesWeatherBlink.HTMLMenu Key HKLMSOFTWAREClassesWeatherBlink.HTMLPanel Key HKLMSOFTWAREClassesWeatherBlink.MultipleButton Key HKLMSOFTWAREClassesWeatherBlink.PseudoTransparentPlugin Key HKLMSOFTWAREClassesWeatherBlink.Radio Key HKLMSOFTWAREClassesWeatherBlink.RadioSettings Key HKLMSOFTWAREClassesWeatherBlink.ScriptButton Key HKLMSOFTWAREClassesWeatherBlink.SettingsPlugin Key HKLMSOFTWAREClassesWeatherBlink.SkinLauncher Key HKLMSOFTWAREClassesWeatherBlink.SkinLauncherSettings Key HKLMSOFTWAREClassesWeatherBlink.ThirdPartyInstaller Key HKLMSOFTWAREClassesWeatherBlink.ToolbarProtector Key HKLMSOFTWAREClassesWeatherBlink.UrlAlertButton Key HKLMSOFTWAREClassesWeatherBlink.XMLSessionPlugin Key HKLMSOFTWAREMicrosoftWindowsCurrentVersionExplorerBrowser Helper Objects9b9dcae3-be34-424c-8d73-75e305a9e091 Key HKLMSOFTWAREMicrosoftWindowsCurrentVersionExplorerBrowser Helper Objectsdc9051c2-8f55-479a-97a4-747980d9047f Key HKLMSOFTWAREMicrosoftWindowsCurrentVersionUninstallWeatherBlinkbar Uninstall Firefox Key HKLMSOFTWAREMicrosoftWindowsCurrentVersionUninstallWeatherBlinkbar Uninstall Internet Explorer Key [email protected]/Plugin Key HKLMSOFTWAREWeatherBlink Key HKLMSOFTWAREMicrosoftWindowsCurrentVersionRunValue: WeatherBlink Search Scope Monitor Data: C:PROGRA~1WEATHE~2bar.bingcsrchmn.exe Key HKLMSOFTWAREMicrosoftWindowsCurrentVersionRunValue: WeatherBlink Browser Plugin Loader Data: C:PROGRA~1WEATHE~2bar.bingcbrmon.exe
Read More
Removing Linkey From Windows Tutorial

Linkey is a potentially unwanted web browser search extension for the top browsers, designed to modify the user’s search and home pages in order to direct advertising. This extension changes your default search provider, redirects new tabs, and distributes information & statistics to the server. This extension will display unwanted ads, redirect you through unwanted search engines, and send your browsing information (potentially private information) back to its ad network.

From the publisher: Linkey is compatible with all the latest versions of Internet Explorer, Chrome, and Firefox. Linkey is a simple browser extension that allows you to get the best sites in one click in visualized & friendly interface.

About Browser Hijackers

Browser hijacking is actually a type of unwanted software, often a browser add-on or extension, which causes modifications in the browser’s settings. Browser hijackers could do many different things on your PC. Usually, hijackers will force hits to websites of their preference either to increase traffic producing higher advertisement revenue, or to obtain a commission for each and every user visiting there. Nonetheless, it’s not that harmless. Your online safety is compromised and it is also extremely annoying. Browser hijackers could also allow other malicious programs without your knowledge to further damage your computer.

How to know whether the web browser is hijacked?

The typical symptoms that suggest having this malicious software on your PC are: 1. your homepage has been reset to some unfamiliar site 2. your browser is constantly being redirected to adult sites 3. the essential web browser settings are modified and undesirable or insecure resources are put into the trusted sites listing 4. unsolicited new toolbars are added to your browser 5. you may notice endless pop-up ads on your screen 6. your web browser starts running sluggishly or exhibits frequent errors 7. You simply can’t access particular sites, particularly anti-malware websites.

How it infects your computer

Browser hijackers attack computers through malicious e-mail attachments, downloaded infected computer files, or by checking out infected internet sites. They could be included with toolbars, BHO, add-ons, plug-ins, or browser extensions. Also, certain freeware and shareware can put the hijacker in your PC through the “bundling” technique. Examples of well-known browser hijackers are Fireball, GoSave, Ask Toolbar, CoolWebSearch, Babylon Toolbar, and RocketTab. Browser hijackers could interrupt the user’s browsing experience severely, keep track of the websites visited by users and steal financial information, cause problems in connecting to the internet, and ultimately create stability issues, making applications and computers crash.

How you can get rid of a browser hijacker

Some hijackers can be simply removed by deleting the free software they came with or by removing any extension you have recently added to your computer. Unluckily, the majority of the software products used to hijack a browser are deliberately built to be difficult to eliminate or detect. Moreover, manual removals demand in-depth system knowledge and therefore can be an extremely difficult job for novices.

What To Do When You Cannot Download Safebytes Anti-Malware?

All malware is bad and the magnitude of the damage may vary greatly in accordance with the type of infection. Certain malware variants modify internet browser settings by including a proxy server or modify the computer’s DNS configurations. When this happens, you will be unable to visit some or all of the websites, and therefore unable to download or install the necessary security software to remove the malware. If you’re reading this, you may have infected by a virus that prevents you from downloading computer security software like Safebytes Anti-Malware. There are a few options you can attempt to get around with this obstacle.

Install in Safe Mode

The Windows-based PC has a special mode called “Safe Mode” in which just the bare minimum required programs and services are loaded. If the malware is blocking internet access and affecting your PC, running it in Safe Mode will let you download antivirus and run a diagnostic scan while limiting potential damage. In order to get into Safe Mode or Safe Mode with Networking, press F8 while the system is starting up or run MSConfig and look for the “Safe Boot” options under the “Boot” tab. After you restart into Safe Mode with Networking, you could download, install, as well as update anti-malware software from there. After installation, run the malware scanner to remove most standard infections.

Use an alternate browser to download an antivirus application

Certain viruses might target vulnerabilities of a specific web browser that obstruct the downloading process. If you appear to have a virus attached to Internet Explorer, then switch over to an alternate internet browser with built-in safety features, such as Chrome or Firefox, to download your favorite antivirus program – Safebytes.

Install security software on a thumb drive

Here’s another solution which is creating a portable USB anti-malware software that can check your system for malicious software without needing installation. Do these simple actions to clean up your affected PC using portable anti-malware. 1) Download the anti-malware program on a virus-free computer. 2) Plug the Flash drive into the clean computer. 3) Double-click on the downloaded file to open the installation wizard. 4) Choose the USB flash drive as the destination for saving the software file. Follow the on-screen instructions to finish the installation. 5) Unplug the USB drive. You may now utilize this portable anti-malware on the infected computer system. 6) Double click the Safebytes Anti-malware icon on the flash drive to run the software. 7) Click on “Scan Now” to run a complete scan on the infected computer for malware.

A Look at the Best AntiMalware Program

Want to download the very best anti-malware software for your laptop? There are several applications in the market that come in paid and free versions for Microsoft Windows systems. Some of them are excellent, some are ok types, while some will destroy your PC themselves! When searching for an anti-malware tool, choose one which provides dependable, efficient, and complete protection against all known computer viruses and malware. On the list of highly recommended software programs is SafeBytes AntiMalware. SafeBytes carries a good track record of top-quality service, and customers are very happy with it. Safebytes is one of the well-established computer solutions companies, which offer this all-inclusive anti-malware software. Using its cutting-edge technology, this application will allow you to eradicate multiples types of malware such as computer viruses, trojans, PUPs, worms, ransomware, adware, and browser hijackers. SafeBytes has got a variety of wonderful features that can help you protect your PC from malware attacks and damage. Below are some typical features present in this tool: Live Protection: SafeBytes offers a totally hands-free active protection that is set to observe, prevent and remove all threats at its very first encounter. This utility will always monitor your computer for any suspicious activity and updates itself regularly to keep current with the newest threats. Most Reliable AntiMalware Protection: This deep-cleaning anti-malware software program goes much deeper than most antivirus tools to clean your computer system. Its critically acclaimed virus engine finds and disables hard-to-remove malware that conceals deep inside your PC. Internet Security: Through its unique safety rating, SafeBytes notifies you whether a site is safe or not to access it. This will make sure that you’re always certain of your safety when browsing the net. Lightweight Utility: The program is lightweight and can run silently in the background, and that does not have an effect on your PC efficiency. 24/7 Live Professional Support: SafeBytes provides 24/7 technical support, automatic maintenance, and upgrades for the best user experience.

Technical Details and Manual Removal (Advanced Users)

If you wish to manually remove Linkey without the use of an automated tool, it may be possible to do so by removing the program from the Windows Add/Remove Programs menu, or in cases of browser extensions, going to the browsers AddOn/Extension manager and removing it. You will likely also want to reset your browser. To ensure the complete removal, manually check your hard drive and registry for all of the following and remove or reset the values accordingly. Please note that this is for advanced users only and may be difficult, with incorrect file removal causing additional PC errors. In addition, some malware is capable of replicating or preventing deletion. Doing this in Safe Mode is advised.

The following files, folders, and registry entries are created or modified by Linkey

Files: C:Users%USER%AppDataLocalTempis33084504mysearchdial.dll C:Users%USER$AppDataLocalTempis357113909833170_stpsetup.exe c:Users%USER$AppDataLocalTempMega Browsemegabrowse_setup.exe C:Program Files (x86)Linkeylog.log C:Program Files (x86)LinkeyHelper.dll C:Program Files (x86)LinkeyChromeExtensionChromeExtension.crx C:Program Files (x86)Linkey C:Program Files (x86)LinkeyChromeExtension C:Program Files (x86)LinkeyIEExtension C:Users%USER$AppDataRoamingDigitalSitesUpdateProc Registry: HKLMSOFTWARECLASSESAPPID6A7CD9EC-D8BD-4340-BCD0-77C09A282921 HKLMSOFTWAREWOW6432NODECLASSESAPPID6A7CD9EC-D8BD-4340-BCD0-77C09A282921 HKLMSOFTWARECLASSESCLSID181F2C09-56DD-4F98-86D7-59BA2BC59B5A HKLMSOFTWARECLASSESCLSID4D9101D6-5BA0-4048-BDDE-7E2DF54C8C47 HKLMSOFTWAREMICROSOFTWINDOWSCURRENTVERSIONEXPLORERBROWSER HELPER OBJECTS HKLMSOFTWARELINKEY HKLMSOFTWAREWOW6432NODELINKEY HKLMSOFTWAREWOW6432NODESYSTEMKGeneral HKUS-1-5-18-ED1FC765-E35E-4C3D-BF15-2C2B11260CE4-0SOFTWARECONDUITValueApps HKLMSOFTWAREWOW6432NODEMICROSOFTWINDOWSCURRENTVERSIONEXPLORERBROWSER HELPER OBJECTSEF5625A3-37AB-4BDB-9875-2A3D91CD0DFD HKLMSOFTWARELINKEY|ie_jsurl, http://app.linkeyproject.com/popup/IE/background.js HKLMSOFTWAREWOW6432NODELINKEY|ie_jsurl, http://app.linkeyproject.com/popup/IE/background.js
Read More
Razer Hazel, an RGB mask for max protection
Razer Hazel
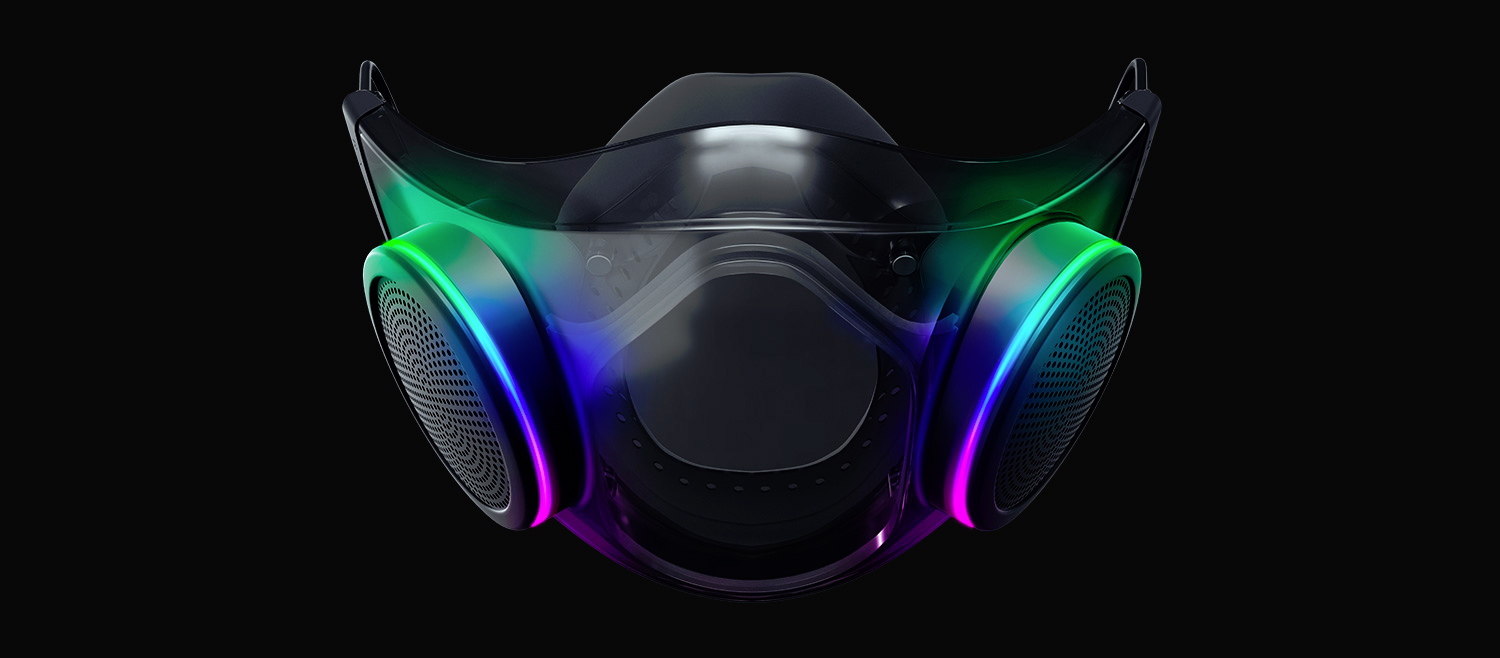
The world today is still sadly under pandemic and by the looks of it, COVID-19 is here to stay, well at least for some time in the near future. Razer seems to think so as well since their upcoming gear is not really what you would expect. Enter Hazel, a new and upcoming Razer smart mask.

Protection

Hazel mask has a high bacterial surgical N95 filter with fluid resistance that will protect you against large droplets and splashes. A detachable active ventilator regulates airflow and is capable of filtering around 95% of airborne particles. Mask comes with a special charging case that has an auto sterilization UV light that will kill bacteria and viruses inside the case interior while it charges. When the mask is recharging it will change color from red to green visually showing the level of the current charge. Mask of course has easy to replace filters inside ventilators and Razer is standing by that fully charged mask will last enough for full-day use. An active ventilation system brings cool air while releasing breathing heat at the same time drastically reducing CO2 inside the mask that could produce dizziness and headache. Silicon guard is on its edge gluing to around your face in order to prevent exterior air sneaking inside the mask and positioning it firmly so it does not rest on your lips in order for easier and clearer communication.

Hazel personalization and technical features

Hazel has a clear and transparent design making it better for social interaction since other people will be able to see your lips and smiles thus making it more natural. A low light mode that turns on automatically when it is dark outside is also aimed for easier communication. Speaking of communication, the mask comes with voice Amp technology that has a built-in mic and amplifier thus making your voice lines clear so you are not muffled when wearing the mask itself. Your friends and other people will be able to hear you like you are not wearing a mask at all. Thicker air loops apply less pressure on ears and can be adjusted for a more secure fit, while the mask itself can be custom-made to fit your face shape. And of course Hazel comes with 16.8 million colors and a suite of effects with Razer Chroma RBG
Read More
1 2 3 162
Logo
Copyright © 2022, ErrorTools. All Rights Reserved
Trademarks: Microsoft Windows logos are registered trademarks of Microsoft. Disclaimer: ErrorTools.com is not affiliated with Microsoft, nor claim direct affiliation.
The information on this page is provided for information purposes only.
DMCA.com Protection Status