"Stop Running This Script" Error - How to Fix It

Stop Running This Script Error

Stop Running This Script Error - What is it?

"Stop Running This Script" Error is a Windows Internet Explorer error message that is displayed in the following format with a yes and a no button:

Stop running this script?

A Script on this page is causing your web browser to run slowly.  If it continues to run, your computer might become unresponsive.

This occurs when some scripts take an excessive amount of time to run. To be precise, there are some websites that use JavaScript, JQuery, and Active X scripts to run.

These scripts are notorious for taking too much time to run. So, if you use the Internet Explorer as your web browser, then by default if the website takes a long time to load, the ‘Stop running this script error will be triggered.

Other than this, if you are scripting an Active X control on the web page to transfer a very heavy file or run a huge database query, this may cause delays and lead to the error display.

However, if you use Firefox, then the ‘Stop running this script error code will be promoted as ‘Unresponsive Script’ error.

Solution

Restoro box imageError Causes

The ‘Stop running this script error code’ is triggered due to multiple reasons. These include:

  • Webpage programming errors
  • Running a pop-up killer
  • Spyware and viral infection
  • Active X control errors

Further Information and Manual Repair

Here are some of the best methods that you can try to resolve Internet Explorer’s ‘stop running this script error’ on your PC:

1. Change the Internet Explorer Settings

This can be done by opening Internet Explorer and in the top menu, click on Tools, and then go to Internet Options. Now click on the Advanced Tab option. Locate where it says ‘Disable Script Debugging’.

Once you find it uncheck the box beside it. Now close the browser and restart your PC. Access the same website on your IE web browser and see if the website opens. If it does, then the error is resolved.

However, if it doesn’t, then you the underlying causes for the stop running this script error message could either be spyware or ActiveX control error.

2. Download Restoro

Whether the error occurs due to spyware invasion of Active X control error, it is advisable to download Restoro on your PC.

This is a next-generation, innovative, and multi-functional PC repair tool that has several powerful utilities deployed together in one program.

Plus you don’t have to get into the technicalities of resolving Active X control issues.

Restoro is safe, bug-free, and efficient. It has a user-friendly interface and simple navigation which makes it quite easy for all levels of users to operate. It is compatible with all Windows versions including Windows 7, 8, XP, Vista, 8.1, and 10.

This PC repair tool is a one-stop solution for all your script error repair needs. It includes the following utilities: a registry cleaner, a system stability detector, and an ActiveX control error scanner.

It simultaneously scans for ActiveX control errors too. So, if the IE script error is triggered by ActiveX control issues, it resolves them too.

To fix the ‘stop running this script’ error code on your PC, click here to download Restoro

If you like to learn and find out more about various Windows errors, and how to repair them go to our vast archive or use search to find articles that will explain and help you in solving your issue.
However, if you prefer to do things fast and with automatization then we are proposing to use an automated solution for your issues. The application that we are recommending is Advanced System Repair Pro
Advanced System Repair utilizes multiple tools all in one to give you a quick, simple, reliable, and very thorough diagnosis of your PC. It brings you all the tools you need in one program to clean, fix, protect, optimize and boost your PC!
1-Click Maintenance
All the tools to make it simple and easy! It's like having a professional technician at the click of a mouse.

Junk Cleaner
Keeping your computer free from unnecessary clutter also helps make your computer last longer. Like any other machine, if you keep it clean and take care of it, it will serve you better for longer!

Optimize background apps
Optimize applications background activity with the built-in Application Optimizer feature.

Disk Defrag
With a simple 1-click, Advanced System Repair speeds up your PC by assembling fragmented files on your machine and organizing them more efficiently.

Malware Removal
Finds and removes all types of harmful malware including trojans, worms, bots, adware, spyware, PUPs, and more!

Privacy Cleaner
The all-in-one privacy suite to Clean Your Tracks & Protect Your Privacy! Make your computer safe, secure, and more efficient!

System Tweak/Optimizer
ASR will analyze your complete system and settings to adjust your PC to function at its maximum performance.

Registry Cleaner
Over time, as you install and uninstall applications, the registry can become cluttered with old entries and broken settings which can result in program crashes, and annoying messages and slow the computer down.
Visit our Advanced System Repair Pro Download page to inform yourself about all the benefits of this software and get a free trial copy of it.
advanced system repair pro

Advanced System Repair Pro

One-click automated PC repair solution
ASR logo
With Advanced System Repair Pro you can easily
Replace damaged files
Restore performance
Free disk space
Remove Malware
Protects WEB browser
Remove Viruses
Stop PC freezing
DOWNLOAD
Privacy Policy | Terms of Use | Uinstall
Advanced System Repair Pro is compatible with all versions of Microsoft Windows including Windows 11

Share this article:

You might also like

Fix Error 0x80070057 in Windows
Hello and welcome to another problem-solving tutorial on errortools.com. Today we will be solving error 0x80070057, we could not format the selected partition which occurs during setup and installation when performing a clean install of Windows from a USB drive. So, you have backed up your files and decided to format and do clean WIndows installation, you have your USB ready, you reboot the system, plug in USB, start Windows setup, choose the hard drive on which you want to do a clean install and then this happens. error 0x80070057This error is very frustrating and it annoys pretty much anyone who encountered it but do not worry we have a solution for you. First thing is to confirm the error prompt, Click on the OK button and then on X to exit Windows 10 installation wizard. Click on yes to confirm that you want to exit the setup. You will find yourself in original installation windows. On that screen choose and click on Repair your computer. Choose an option screen that will pop up, click on Troubleshoot. In the advanced options, click on the command prompt. Once you are in command prompts type DISKPART and hit ENTER In the diskpart prompt type LIST DISK and hit ENTER again. type SELECT DISK #, where # is listed disk number where you would like to install Windows. type LIST VOLUME in order to list volumes in the selected disk and hit ENTER You need to select the volume on which you would like to place your WINDOWS, to do this type in SELECT VOLUME #, where # is the listed number of the volume Finally, type FORMAT FS=NTFS and hit ENTER You have successfully formated a given volume, you can now exit DISKPART and return to setup, to exit DISKPART simply type exit and hit ENTER. Leave command prompt as well by again typing exit and hitting ENTER You will be returned to Choose an option screen, click on Turn off your PC. Your drive has been successfully formatted and it is ready for clean Windows installation, you can now restart your Windows 10 installation and the process will complete without errors.
Read More
Removing old drivers from Windows 10
So you have just got home from that new computer store with your fancy and all-new mouse, screen, keyboard, etc. You plugged in your new component, Windows detected it, installed drivers for it and it is working like a charm. A few months later down the road and the computer starts little by little to slow down. Plug and play is a great concept, and automatic detection is even greater but how time passes old unused stuff piles in your hard drive and in Windows itself thus slowing down your computer and taxing it more and more as new components and software are added. Old drivers from old components sadly are not removed from Windows itself and over some larger period of time they can pile up and slow down your daily operations on the computer or even cause some problems in it. This guide will teach you how to manually remove old unused device drivers from your Windows so it is fresh and like new again.

Making old devices visible

In order for us to remove old drivers, the first thing we must do is make them visible in our device manager, old drivers are hidden and will not show up, we must make this happen. We do this by pressing WINDOWS + X keys on your keyboard to bring up a hidden menu in Windows. keyboard with windows and x markedOnce the menu appears, click on Command Prompt (admin) Windows menu command prompt adminOnce the command prompt with administrator privileges comes on-screen type in it following string: The device manager will open, go to view > snow hidden devices in order to show unused devices. device manager show hidden devices

Removing old device

Open any category and if there is a device that was once used and still has its drivers in the system it will be shown as faded out. device manager hidden device shownRight-click on the device and click on uninstall device to remove it completely from your system. device manager uninstall device driverPlease always be careful when removing devices so you do not remove the device which is being used by mistake and always double-check that you are removing something that you used to have on your system. This method will show all hidden devices even ones that are hidden but crucial to the system working properly.
Read More
Customize Lock Screen in Windows 11
Same as in Windows 10, Windows 11 also features a lock screen. IN this lock screen by default, you will see a clock and date above the standard Windows 11 background. Not all users will be happy with this choice but do not worry, you can choose and customize your lock screen to better suit your idea of it.

Lock Screen in Windows 11To personalize the lock screen do:

  1. Right-click on Desktop and select Personalize
  2. Click on the lock screen
  3. Choose one of three options and customize it
    • Personalize Your Lock Screen

      this option will let you set a custom image or slideshow for your lock screen. Choose either one that best suits you. Under selecting picture or pictures for the slide show you can uncheck the option to see tips, tricks, and facts on your lock screen.
    • Lock screen status

      when clicking on this option you can select the application widget that you wish to be shown on the lock screen like weather, mail, calendar, etc. Choose if you would like one by clicking on it.
    • Show the lock screen background picture on the sign-in screen

      as self-explanatory this switch will enable or disable chosen lock screen wallpaper on your login credentials screen.
  4. Close settings
All settings will be automatically saved and applied and when you wish to lock the screen easiest way is to press ⊞ WINDOWS + L shortcut on your keyboard.
Read More
Happy New Year from ErrorTools.com!!!
As we are on the last day of 2021, our team here at errortools.com would like to express their great gratitude to you all for being with us all this time and would also want to wish you error-free 2022!!! Thank you for being part of this community, we wish you all the best in the upcoming 2022 and hope that we will see you again From all members of errotools, HAPPY NEW YEAR!!! new year christmass tree
Read More
How to Manually Fix 0x8004210A Error Code on Your System

Repair 0x8004210A Error Code

Error 0x8004210A - What is it?

0x8004210A is a typical POP3 email error message. This error may sometimes occur when you try to check your Post Office Protocol 3 (POP3) email account. 0x8004210A error code hampers your ability to both send and receive e-mails on your Outlook account. Error 0x8004210A is displayed in any one of the following formats on your PC:
The operation timed out waiting for a response from the receiving (POP) server 0x8004210a Task 'SMTP server name - Sending and Receiving reported error' (0x8004210A): 'The operation timed out waiting for a response from the receiving (POP) server. If you continue to receive this message, contact your server administrator or Internet service provider (ISP).'

Error Causes

Error 0x8004210A occurs due to several reasons. However, some of the most common reasons include:
  • Wrong port number for the POP incoming server
  • Your connection to the mail server is too slow
  • Incoming and outgoing emails are being scanned and stopped by an antivirus installed on your system
  • The Outlook send and receive job is being blocked by Firewall
  • You are sending and receiving large series of emails or large email attachments
  • Registry issues
No matter what the cause of this error is, to resume email communication via Outlook and to ensure your work productivity is not affected, it is recommended that you resolve this 0x8004210A error code on your PC immediately.

Further Information and Manual Repair

To fix error 0x8004210A, here are some of the most efficient and easy manual methods that you can try:

Method 1

If the cause of the error is related to the internet connection then here’s what you need to do. Try freeing up your internet connection by closing any other online activities in progress or downloads being carried on your system.

Method 2

Try to increase your server time-out periods. To do this, go to the Outlook File menu and choose account settings. Now double click on your email account and more settings. Now click advanced and increase your server timeout period to resolve.

Method 3

If you are trying to send or receive large and heavy emails on your Outlook account, the error 0x8004210A may pop up. This happens because when transferring heavy files the email account automatically locks until the task is complete, however, if it takes more time the next Send and Receive job starts while the first one is still not complete. In such an event, the email server then times out and shows you the error. Therefore to resolve, you will have to show patience. Simply wait for the large email to be sent or received before you start sending another email.

Method 4

If the antivirus installed on your system is the reason for the error pop up, then disable it for a while until the operation is complete. Then enable it once the task is performed successfully.

Method 5

Similarly, if the Firewall installed on your system is preventing Outlook from reaching your mail server, then simply disable the Firewall to resolve. Congratulations, you have just fixed 0x8004210A Error Code in Windows 10 all by yourself. If you would like to read more helpful articles and tips about various software and hardware visit errortools.com daily. Now that’s how you fix 0x8004210A Error Code in Windows 10 on a computer. On the other hand, if your computer is going through some system-related issues that have to get fixed, there is a one-click solution known as Restoro you could check out to resolve them. This program is a useful tool that could repair corrupted registries and optimize your PC’s overall performance. Aside from that, it also cleans out your computer for any junk or corrupted files that help you eliminate any unwanted files from your system. This is basically a solution that’s within your grasp with just a click. It’s easy to use as it is user-friendly. For a complete set of instructions in downloading and using it, refer to the steps below Perform a full system scan using Restoro. To do so, follow the instructions below.
      1. Download and install Restoro from the official site.
      2. Once the installation process is completed, run Restoro to perform a full system scan restoro application screen
      3. After the scan is completed click the “Start Repair” button. restoro application screen
Read More
Fix Error 30053-4 or 30053-39, language pack
As you know, the Office Language Packs need to be installed right after installing Office. It also has to be on the correct version of Office so if any of these conditions are not met, you will most likely get error codes 30053-4 or 30053-39 when you install a language pack in Microsoft Office. If you are currently facing this error, read on as this post will help you fix the problem. Here’s the full context of the error message:
“Something went wrong, Sorry, installation cannot continue because no compatible office products are detected.”
When you have to work on two different languages, that’s where the language packs come in handy. You might have to work on one language but when it comes to proofreading or help, you need another language. Note that some language accessory packs offer partial localization which is why some parts of the Office might show the default language. If you are using Office 365 or Office 2019, 2016, 2013, or 2010, you need to go to the language accessory pack page from office.com and select your language. Once you see the download link, click on it to start downloading the pack. It includes the display in the chosen language, proofing tools for the selected language, as well as the Help in the selected language. Once the installation is complete, follow each one of the given options below to configure the language accessory pack properly.

Option 1 – Select Editing and Proofing language

  • You need to open any Office program and navigate to File > Options > Language.
  • From there, you need to make sure that the language you want to use is in the list under the Choose Editing Languages section.
  • After that, you can add or remove the language that Office uses for editing and proofing tools.

Option 2 – Configure the Display and Help languages

In this option, you can change the default display and help languages for all the Office applications so whatever you choose will be used for all the buttons, menus, and support of all the programs. After you select the language, restart all the Office applications to apply the changes made successfully. On the other hand, if you are using Office volume license versions, note that only an administrator account can install this if you are using the Volume License version of Microsoft Office 2016. You have to download the ISO image of the language packs, language interface packs, and the proofing tools from the VLSC or Volume Licensing Service Center. This process can be quite complicated so you might have to go to the docs.microsoft.com page to be guided accordingly. After you installed everything correctly, the error code 30053-4 or 30053-39 should now be fixed.
Read More
How to Fix Error Code 0xc004f034 in Windows 10

Error Code 0xc004f034 – What is it?

Error code 0xc004f034 occurs when Windows 10 users fail to activate their operating system. This activation error code affects not only Windows 10 but those using other versions of the Windows operating system including Windows 8.1. Users experiencing this problem will notice the following common symptoms which occur:

  • Inability to activate Windows 10 operating system
  • Message box with error code 0xc004f034

Solution

Restoro box imageError Causes

Error code 0xc004f034 usually results from issues related to activation servers. In such cases when servers are busy, users will not be able to complete the activation process which would result in access to their Windows 10 edition of choice. The error code may also result from issues related to your product key. For this reason, be sure to use the correct product key when you attempt to activate Windows 10.

Further Information and Manual Repair

The completion of manual repair methods can be an effective way to correct issues like error codes in Windows 10. To begin, however, ensure you follow the instructions as given as making even a slight mistake will result in unfavorable results. If, for whatever reason, you have trouble completing the steps suggested below, feel free to contact a Windows repair technician. This type of IT professional is usually equipped with knowledge and expertise to access your particular situation. Otherwise, see the manual repair methods listed below and complete at least one method to fix error code 0xc004f034.

Method One: Ensure You Enter a Valid Product Key

If there is a problem with your product key, you will need to ensure you fix it before you can resolve error code 0xc004f034. Follow the instructions below after ensuring you have a valid product key.

  • Step one: Click the Start button then select Settings
  • Step two: Select Update & security then Activation
  • Step three: Click the Change product key
  • Step four: Type in your valid product key with its 25 characters in the correct order

Your system will activate Windows 10 if the issue was related to the use of an invalid product key. However, attempt manual method two if error code 0xc004f034 reappears and you are unable to complete the activation process.

Method Two: Reattempt Windows 10 Activation Until Process Completes

In many cases, error code 0xc004f034 occurs simply due to a busy server. This was the case in 2015 in particular when Windows users first received access to editions of Windows 10 like Windows 10 Pro. To complete this process, you will need to follow the instructions below, repeating the last step until the activation occurs.

  • Step one: Click the Start button then select Settings
  • Step two: After selecting Settings, click Update & Security
  • Step three: Select Windows Update then the Check for updates tab
  • Step four: Click Activate Windows 10 update

If this method is successful, you will finally be able to update your system to the Windows 10 edition of your choice. This process may take just a few minutes – and several attempts – before you resolve the issue. Remember to be patient. However, contact a Windows repair technician to evaluate your system if the issue persists for more than a few days.

Method Three: Use an Automated Tool

If you wish to always have at your disposal a utility tool to fix these Windows 8 and other related issues when they do arise, download and install a powerful automated tool.
Read More
How to Fix Ehshell.exe Application Error Code

Repair Ehshell.exe Application Error

Ehshell.exe Application Error - What is it?

Ehshell.exe is a type of .exe (executable file). This file functions as an essential component of the Microsoft Media Center.  By default, it is located in a subfolder of C:\Windows. Ehshell.exe application error is an error code that pops up when tasks in the Media Center freezes. The Ehshell.exe application error is usually displayed on the screen in the following format:
“ehshell.exe – Common Language Runtime Debugging Services Application has generated an exception that could not be handled. Process id=0xa18 (2584), Thread id=0xa24 (2596).”

Solution

Restoro box imageError Causes

Ehshell.exe application error is triggered when PC users perform repetitive tasks in Media Center on a Windows XP Media Center Edition. The computer stops to respond and the error message is displayed. This error occurs if users perform one or more of the following repetitive tasks in the Media Center:
  • Repeated resize, restore and minimize the Media Center Window
  • Schedule TV shows to record
  • Repeatedly change the channel while Media Center is in a window
  • Ehshell.exe file corruption due to malware infection or registry issues
Though this is not a fatal error, to avoid any kind of inconvenience, it is advisable to fix the error right away.

Further Information and Manual Repair

To fix the ehshell.exe application error on your system, you don’t have to hire a professional and spend hundreds of dollars on repair. Here are some of the best and most effective do-it-yourself methods that you can try to resolve this issue on your PC immediately.

Method 1 - Install the Latest Service Pack for Microsoft Windows

To repair the issue, install the latest Windows service pack. A service pack is basically a Windows update, often combines previously released updates that help make Windows more reliable. These are offered free of charge on Microsoft’s official website.  To get started, simply log on to Microsoft’s official website and download the latest service pack compatible with your Windows version. The installation process may take 30 minutes to install. And you will be prompted to restart your PC about halfway through the installation process. Once the Windows Service Pack is installed, the ehshell.exe application error will be fixed. If the error still persists, then try method 2.

Method 2 - Scan for Malware

Ehshell.exe application error may also appear on your PC due to malware infection. Malware programs like viruses, Trojans, and worms deliberately give their malicious processes similar .exe file names, so it is hard to identify the malware. In such an event, it is advisable to download a powerful antivirus and scan your entire PC. Run it to remove all the hidden malware programs on your system. Once malware is removed, the ehshell.exe application error will be resolved.

Method 3 - Clean Registry

Sometimes .exe files can also get corrupt when the registry gets overloaded with unnecessary and obsolete files. If this is the underlying reason for the error code occurrence then it is advisable to download Restoro. This is a multi-functional and user-friendly PC Fixer deployed with a registry cleaner. It removed all the unnecessary files, cleans and repairs the registry in seconds thereby fixing all registry-related errors. Click here to download Total System Care and resolve the Ehshell.exe application error on your PC.
Read More
Parallels Desktop 17 brings Windows 11 to MAC
Parallels Desktop 17
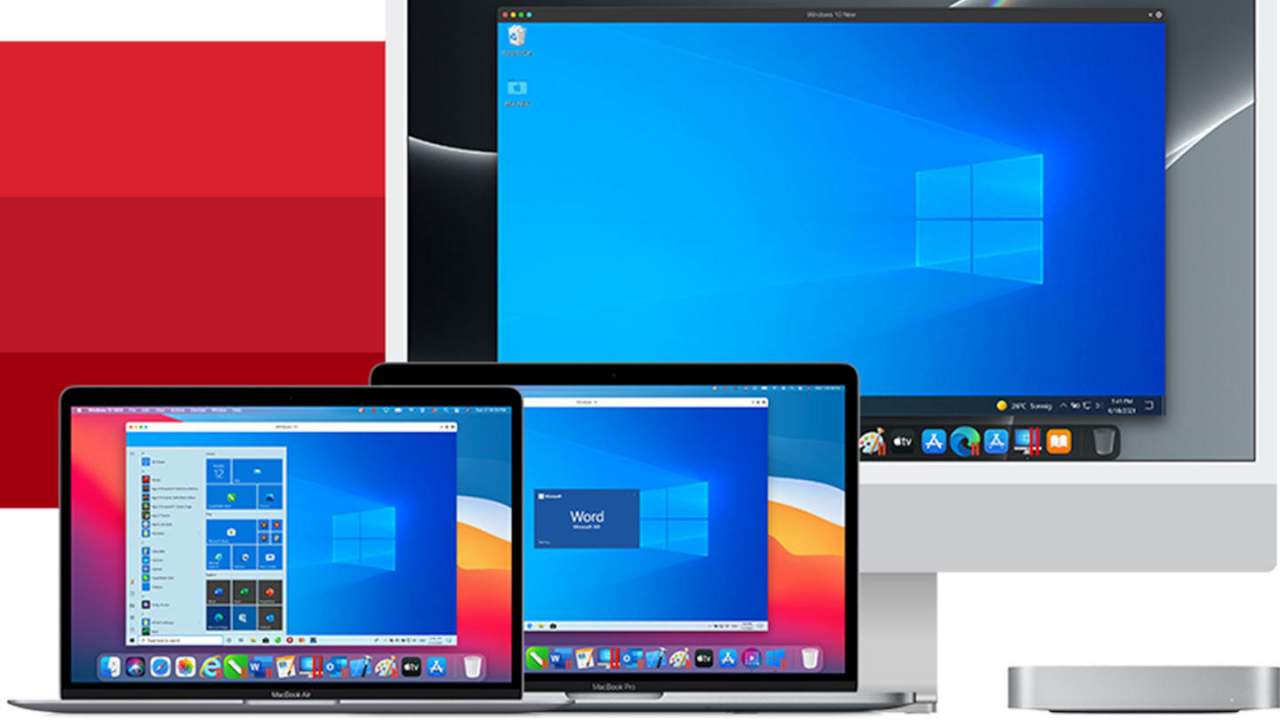
Parallels is an application developer for MAC OS mostly known for its PC virtualization software Parallels Desktop, a PC virtualization software running on Macs enabling running Windows and Linux with respective software on your MAC. With its latest Desktop 17 version, the software can run natively on both Intel-based and M1-based MACs. Thanks to this feature MAC users will be able to benefit from various speed improvements while running both Windows 10 or Windows 11 preview. On both Intel and M1 setups, Parallels resumes Windows and Linux up to 38% faster, provides an up to 25% bump in 2D graphics and a six-time increase in OpenGL graphics processing. M1-centric stats include 33% faster Windows start-up times, up to 28% faster DirectX 11 performance, and up to 20% better disk performance on Windows 10 Insider Preview. Parallels Desktop 17 delivers a set of fresh features including a new video driver that enhances video and game playback and boosts Windows UI responsiveness. An improved Coherence mode lets users run Windows apps within the Mac environment, cutting down on distracting changes in appearance during Windows sign-in, shut down, and software updates. Drag-and-drop operations are also improved, with support for text and graphics between Mac and Windows applications. This function works well with MAC OS Monterey's Quick Note feature, which can accept content from any Windows app. USB support, disk management, copy and paste unformatted text, and automatic virtual machine optimization also receive upgrades.
Read More
Some update files aren’t signed, 0x800b0109
Windows Updates are checked for their validity every time they are downloaded from Microsoft servers just like how browsers check websites for a valid certificate. And so if you got an error message saying, “ Some update files aren’t signed correctly, error code 0x800b0109 ” while trying to update your computer, it indicates that the Windows service was unable to verify the validity of the Windows Update. To fix this error, you can try out the options prepared in this post.

Option 1 – Reboot your computer and try again

Save your work and reboot your computer and then try checking for updates again. In some cases, all you need is a restart to fix errors like error code 0x800b0109.

Option 2 – Try to update Windows after an hour or so

There are times when the issue is from Microsoft’s end. It could be that there’s some issue with Microsoft’s server so it would be better if you give it an hour or so before trying to run Windows Update again.

Option 3 – Try running the Windows Update Troubleshooter

Running the built-in Windows Update troubleshooter is one of the things you can first check out as it is known to automatically resolve any Windows Update errors like Error 0x8007001E. To run it, go to Settings and then select Troubleshoot from the options. From there, click on Windows Update and then click the “Run the troubleshooter” button. After that, follow the next on-screen instructions and you should be good to go.

Option 4 – Delete the contents in the Temporary folder

You can also try deleting the contents in the Temporary folder – all the downloaded, pending, or failed Windows 10 updates. You can do that using the simple and easy steps below.
  • Tap the Win + R keys to open the Run dialog box.
  • Then type “%temp%” in the field and press Enter to open the Temporary folder.
  • After that, select all the folders and files within the Temp folder and delete all of them.

Option 5 – Clear the contents in the Software distribution and Catroot2 folders

  • Open the WinX Menu.
  • From there, open Command Prompt as admin.
  • Then type in the following command – don’t forget to hit Enter right after typing each one of them.
net stop wuauserv net start cryptSvc net start bits net start msiserver
  • After entering these commands, it will stop the Windows Update Service, Background Intelligent Transfer Service (BITS), Cryptographic, and the MSI Installer
  • Next, go to the C:/Windows/SoftwareDistribution folder and get rid of all the folders and files thereby tapping the Ctrl + A keys to select them all and then click on Delete. Note that if the files are in use, you won’t be able to delete them.
After resetting the SoftwareDistribution folder, you need to reset the Catroot2 folder to restart the services you just stopped. To do that, follow these steps:
  • Type each one of the following commands.
net start wuauserv net start cryptSvc net start bits net start msiserver
  • After that, exit Command Prompt and restart your computer, and then try to run Windows Update once more.

Option 6 – Install the updates in a Clean Boot State

You might want to try putting your computer in a Clean Boot state and then install Windows Updates again without any trouble. During this state, you can start the system with a minimum number of drivers and startup programs that will surely help you in isolating the root cause of the issue.
  • Log onto your PC as an administrator.
  • Type in MSConfig in the Start Search to open the System Configuration utility.
  • From there, go to the General tab and click “Selective startup”.
  • Clear the “Load Startup items” check box and make sure that the “Load System Services” and “Use Original boot configuration” options are checked.
  • Next, click the Services tab and select the “Hide All Microsoft Services” check box.
  • Click Disable all.
  • Click on Apply/OK and restart your PC. (This will put your PC into a Clean Boot State. And configure Windows to use the usual startup, just simply undo the changes.)
  • After that, try to install the Windows Updates or upgrade again.
Read More
1 2 3 162
Logo
Copyright © 2022, ErrorTools. All Rights Reserved
Trademarks: Microsoft Windows logos are registered trademarks of Microsoft. Disclaimer: ErrorTools.com is not affiliated with Microsoft, nor claim direct affiliation.
The information on this page is provided for information purposes only.
DMCA.com Protection Status