Should you upgrade to Windows 11

Windows 11 has been rolling out for a while now so many PC users ask the question is it wise and good to upgrade your Operating System to the latest Microsoft incarnation.

No

Thank you for reading, cya tomorrow in next article.

Windows 10 vs Windows 11Jokes aside, I truly believe that choosing to upgrade your System to Windows 11 at this point in time is a bad decision and I will explain why I do believe it.

Reasons to upgrade to the new OS

First of all, let me say what is good in Windows 11 and provide reasons why you should upgrade your computer.

  1. The new fancy look made for modern computers.
    New Windows new look, Microsoft has tried their best to bring a new modern look to its flagship operating system and I must say that they have managed it. I could argue that it is a little bit late since Apple had this kind of look in years but hey, better late than never I guess.
  2. Increased security
    This point is very valid but it will play a role only if you have all system requirements including TPM 2.0. If that is the case new security features of OS are really well done and are perhaps one thing that might nudge some people in installing W11 on their system.
  3. New settings app
    The New and redesigned settings app inside Windows 11 is really great and it provides a great workflow and easy management of system settings. This is not some radical change but it will save time and make life much easier.
  4. It is better suited to the newest hardware
    Windows 11 was made with the newest hardware in mind and its performances on it are great so if you are punching the latest tech this reason is sufficient to make a switch, however, if you are still on an older system you will not gain much by switching.

Reasons to avoid Windows 11 for now

  1. Almost just a visual update to Windows 10
    Some features of Windows 11 are great but they are not plenty of them to justify a new number and new version of OS. Considering what we really got new under the hood Windows 11 could have been just a patch and update to Windows 10 since the architecture is the same.
  2. Bugs
    Each day there are new bugs reporting for Windows 11, most of them are at the moment unsolvable and are caused because hardware manufacturers' drivers and software overall is not W11 ready. This hinders the stability of some systems and introduces headaches to others.
  3. Runs poorly on unsupported hardware
    Strange behavior has been reported on some older systems, granted systems are not officially supported but the point is OS is simply not working at the top of its game on older hardware.
  4. No updates on non supported systems
    Officially stated if you install Windows 11 on non-supported hardware you will not get any security updated on in. This is a deal-breaker as far as I am concerned.
  5. It is still under development
    When Windows 11 was released, Android native apps were not working on it, it later came with an update, this is just one example but there are more features that were promised but are not delivered on release and constant updates are fixing these things. It is obvious that Windows 11 is still under active development and not the final product that was promised.
  6. Microsoft’s edge pushing
    And not just edge, some other things as well but most notably is edge pushing to borders they are risking lawsuit similar as they did in the past pushing and disabling any other browser except internet explorer.

Conclusion

Firstly I want to point that this is my personal opinion but going through facts and taking into account the current state of Windows 11, at this point, it is not worth making a switch. I am sure that in time it will become a system that will be worth upgrading to but until that time comes, my advice would be to stay with Windows 10.

If you like to learn and find out more about various Windows errors, and how to repair them go to our vast archive or use search to find articles that will explain and help you in solving your issue.
However, if you prefer to do things fast and with automatization then we are proposing to use an automated solution for your issues. The application that we are recommending is Advanced System Repair Pro
Advanced System Repair utilizes multiple tools all in one to give you a quick, simple, reliable, and very thorough diagnosis of your PC. It brings you all the tools you need in one program to clean, fix, protect, optimize and boost your PC!
1-Click Maintenance
All the tools to make it simple and easy! It's like having a professional technician at the click of a mouse.

Junk Cleaner
Keeping your computer free from unnecessary clutter also helps make your computer last longer. Like any other machine, if you keep it clean and take care of it, it will serve you better for longer!

Optimize background apps
Optimize applications background activity with the built-in Application Optimizer feature.

Disk Defrag
With a simple 1-click, Advanced System Repair speeds up your PC by assembling fragmented files on your machine and organizing them more efficiently.

Malware Removal
Finds and removes all types of harmful malware including trojans, worms, bots, adware, spyware, PUPs, and more!

Privacy Cleaner
The all-in-one privacy suite to Clean Your Tracks & Protect Your Privacy! Make your computer safe, secure, and more efficient!

System Tweak/Optimizer
ASR will analyze your complete system and settings to adjust your PC to function at its maximum performance.

Registry Cleaner
Over time, as you install and uninstall applications, the registry can become cluttered with old entries and broken settings which can result in program crashes, and annoying messages and slow the computer down.
Visit our Advanced System Repair Pro Download page to inform yourself about all the benefits of this software and get a free trial copy of it.
advanced system repair pro

Advanced System Repair Pro

One-click automated PC repair solution
ASR logo
With Advanced System Repair Pro you can easily
Replace damaged files
Restore performance
Free disk space
Remove Malware
Protects WEB browser
Remove Viruses
Stop PC freezing
DOWNLOAD
Privacy Policy | Terms of Use | Uinstall
Advanced System Repair Pro is compatible with all versions of Microsoft Windows including Windows 11

Share this article:

You might also like

Enable Windows Sandbox on Windows
One of the most common ways cybercriminals use to inject suspicious code into devices is by tricking users into installing a malicious program on a targeted device. Oblivious users are vulnerable to such tricks, which is why Microsoft has been working hard in the background to address this issue. Recently, Microsoft announced the availability of a sandboxed version of Windows 10 that runs inside Windows 10 in order to isolate suspected software to run inside it and protect the system from potential threats. This Windows Sandbox feature is a new feature that keeps your computer secure. It is a virtual disposable environment that you can enable. So if suspect any software of being malicious, you can run this software in an environment and ensure that it won’t interfere with any normal processes and would not jeopardize files on your computer. To simply put it, “Windows Sandbox is a new lightweight desktop environment tailored for safely running applications in isolation”. So if the Sandbox is closed, all the residual files, software, and other data are deleted permanently. To enable Windows Sandbox, refer to the instructions provided below. Step 1: You have to make sure that you are running either Windows 10 Enterprise Editions or Windows 10 Pro and that your computer is running build 18305 or newer. Step 2: After that, you have to enable Virtualization to let another instance of Windows 10 running in Sandbox mode. Step 3: Next, search for Windows Features on and off in the search box and then select the appropriate entry. Step 4: From the list, go to the mini window and check the Windows Sandbox and then click on OK. Step 5: Afterwards, in the Cortana Search box, search for “Windows Sandbox” and select the related entry to run it in an elevated window. Step 6: Then from your main computer (host), copy the executable file and paste it inside the Windows Sandbox environment. Step 7: Now run the executable file in the Sandbox environment and use it as you normally do. Step 8: Once you’re done, close the Windows Sandbox application and as mentioned, every data regarding the executable file and the temporary environment will be deleted. Step 9: And for the sake of safety, ensure that there are no modifications made to the host because of the executions in the Sandbox environment. You have the option to contact Microsoft for feedback related to Windows Sandbox. You can use the traditional Feedback Hub if you have any suggestions or any issues. Just fill in the appropriate details and select Windows Sandbox for the feature category under the Security and Privacy section. And if you have any issues related to the execution of and within Windows Sandbox, simply choose “Recreate my problem” then select Start capture to reproduce the issue, and once you’re done, select Stop capture.
Read More
Easy Guide to Resolving Error Code 16

Easy Guide to Resolving Error Code 16

Error Code 16 - What is it?

Code 16 is a type of Device Manager error code. Windows XP users are most likely to encounter it. This error pops on XP systems that are running legacy or not plug-and-play hardware.

Error code 16 is displayed in the following format:

‘Windows cannot identify all the resources this device uses. (Code 16)’

Solution

driverfix boxError Causes

Error code 16 occurs when you use a peripheral device such as an external drive or a printer and that device is not properly or completely configured. Though the device may have been recognized before Windows fails to verify its configuration. Simply put, error code 16 appears when devices are partially configured.

In addition to this, another cause of error 16 is outdated or corrupt device drivers. Devices often fail to run successfully because of driver problems.

Device drivers are programs that provide instructions to control different devices attached to the computer system such as audio devices and printers to name a few.

Though error code 16 is not fatal like other PC error codes such as BSoD; however, it may hamper your ability to use certain devices installed on your system and lower your work productivity.

To avoid inconvenience, it is advisable to resolve the error immediately to avoid inconvenience.

Further Information and Manual Repair

PC error codes are often considered technical and difficult to resolve which is why many prefer to hire a professional for the repair job rather than doing it themselves.

Small repair jobs like fixing error code 16 by a professional computer programmer may cost you hundreds of dollars.

So, why incur so much cost when you can repair it easily by yourself even if you are not a technical whiz.

Error code 16 is easy to repair.

Here are some effective DIY methods that you can use for resolving error code 16 on your PC. These methods require no technical background, knowledge or expertise for that matter. Just simply follow the instructions and resolve the error code 16 issue.

Let’s get started…

Method 1 - Setup from the Disk that Came with the Hardware Device

Run setup from the disk that came with the hardware device, or you can simply copy the setup software file to your hard drive/flash drive. Refer to the vendor’s direction to set up.

If for any reason you’re unable to find the directions, simply uninstall the device. Then go to the start menu, Control Panel, and select ‘Add New Hardware’.

Now pick the appropriate hardware and follow the steps that the Wizard suggests. This is most likely to resolve the error code.

Nonetheless, if the error code still persists, then try method 2.

Method 2 - Allocate More PC Resources

Another alternative method to resolve error code 16 is to allocate more PC resources to the device. To specify additional resources:

  • Go to the start menu
  • Type Device Manager
  • Then go to the Device properties and click the resources
  • Here specify the device in the Device Manager
  • If you see a resource with a question mark, assign that resource to the device
  • However, if for any reason the resource is unable to change, then simply click ‘Change Setting’.
  • If Change Settings is not available, then click the box to the ‘Use Automatic Settings’ box. This will make the option available.

Method 3 - Install DriverFIX

As previously stated above, device manager error codes like error code 16 may also occur due to driver problems. If this is the underlying reason for error code 16 on your system, then the best way to resolve it is to install DriverFIX.

DriverFIX is user-friendly, advanced, and feature-filled software deployed with an intelligent programming system, which detects all problematic device drivers automatically in seconds.

It matches these drivers with their latest versions and updates them smoothly without any hassle, resolving error code 16 right away.

And furthermore, once you install this software on your PC, you don’t have to worry about driver problems anymore typically because it updates drivers on a regular basis with compatible and new versions, ensuring that your computer functions properly. It is easy to install and is compatible with all Windows versions.

Click here to download DriverFIX to repair error code 16

Read More
A Guide to Quickly Fixing Error 103

DIY Troubleshooting Error 103

What Is Error 103?

Error 103 is an error that is usually encountered by those who use Google Chrome. This error is usually generated because of a conflict arising between Google Chrome and the antivirus program running on the user’s computer. Primarily, error 103 is an incompatibility issue. It is not critical in nature. However, since it will disrupt the smooth functioning of the browser, it is strongly advised to rectify this error that is generated due to any temporary conflicts between the logic of the two programs namely Google Chrome and antivirus. In layman's terms, it would be only justified to say that this error has a lot to do with the way programs react to each other in real-time.

Solution

Restoro box imageError Causes

When the error is displayed to the user, it usually states something like ‘chrome error 103 connection aborted’, ‘chrome error 103 err_connection_aborted’ or ‘Error 103 (net: ERR_CONNECTION_ABORTED): Unknown error. This begs the question, what triggers this error? Here it is important to understand that Google Chrome constantly applies to upgrade. In most instances, the upgrades almost go unnoticed. In the meanwhile, there are other programs running on any system such as firewall, Antispyware, or antivirus programs. All such programs govern the functionality of the web browser. Now, when the web browser attempts to update and any programs on the system view the update as a threat, the connection to the internet will be terminated. It is also important to understand that these programs will keep you from upgrading or from doing anything with your browser.

Further Information and Manual Repair

google chrome error 103Before we move on to the discussion of fixing the underlying causes for error 103, it is important to understand all those programs that are most likely to generate this error. A list of all such programs is outlined below as follows.
  • Kaspersky Pure 3.0
  • Kaspersky ONE
  • Kaspersky small office security 2013
  • Kaspersky internet security 2013
  • Kaspersky antivirus 2013
A downside associated with error 103 is that it won’t disappear on its own. That’s why it is important to make some manual changes as there are no tools available online to rectify this error automatically. Follow the steps listed below to easily fix the problem.
  • Click on the Start button.
  • In the search box, enter ‘expand.exe’.
  • Right-click on the file that appears and select the option ‘Open Folder Location’.
  • Now, copy the file and paste it at the destination ‘C:\Windows\System32’.
  • If you are not able to find the file, it is advised you copy it from Windows Installation Disk.
  • Now, click on the ‘Start’ button again.
  • Find and select ‘Run’.
  • Now enter ‘C: ’ in the search box and press Ok.
  • Now right-click anywhere on the screen, select new, and then select folder.
  • Rename this folder. Change the name from ‘New Folder’ to ‘Temp’.
  • Now go to the Start button again.
  • Select ‘Run’ once again.
  • Type ‘cmd.exe’ in the command prompt and press Ok.
  • Now type Command. Press enter.
  • Now type this code as it is: ‘set TMP=C:temp’ and press enter.
  • Now restart the browser.
  • If it fails, install Google Chrome once again.
  • Just make sure everything is in sync to avoid any data loss.
Read More
Fix Unsupported video type/invalid file path
The MP4 MIME-type is a video type that is mainly configured in IIS or Internet Information console. It is the one that instructs a web browser to use the default video application when running MP4 files from websites. MIME which stands for Multipurpose Internet Mail Extensions which offers a way to identify files on the Internet-based on their format and nature. For example, when a content-type header value like MP4 is defined in an HTTP response, the browser can be configured to open the file with the proper plugin. However, there are some servers that don’t have an associated MIME type to support MP4 files and so they fail to play these files. In such cases, you will encounter the “Unsupported video type or invalid file path” error, especially when you use the Internet Explorer browser in Windows 10. To fix this problem, you may have to configure the MP4 MIME type in IIS but you might find that IIS is not enabled in Windows 10 which is why you need to turn it on or enable it first. For more details, refer to the following instructions below.

Step 1 – Enable IIS:

  • Open Control Panel and go to Programs > Programs and Features.
  • From there, select “Turn Windows features on or off” to mark its checkbox.
  • After that, select “Web Management Tools” and expand its menu and look for “IIS Management Console”.
  • Click the OK button and then wait for a couple of seconds to allow Windows to successfully apply the changes made.

Step 2 – Configure the MP4 MIME type in IIS:

  • Go to Control Panel and from there, access Administrative Tools.
  • Next, click “Internet Information Services Manager” from the list of given options.
  • Once confirmed, it will open the IIS console where you have to click the name of your IIS Server located on the left panel. This will enable several options in the central details section.
  • Now double click on the icon with the label “MIME Types”.
  • After that, you should see an “Add” link option on the right panel. Click on the link to open a configuration dialog box.
  • Then type “.mp4” in the File Name Extension field and enter “video/mp4” in the textbox of the MIME Type.
  • Click the OK button to save the changes made. This should fix the “Unsupported video type or invalid file path” error on your Windows 10 computer.

Step 3 – Reset your browsers:

Mozilla Firefox

  • Open Firefox and click the icon that looks like three stacked lines located at the top-right section of the browser.
  • Next, select the question mark icon from the drop-down menu.
  • Then select “Troubleshooting information” from the slide-out menu.
  • After that, click on the “Reset Firefox” button located at the top-right section of the newly opened web page.
  • Now select “Reset Firefox” in the confirmation pop-up window that appears.

Google Chrome

  • Open Google Chrome, then tap the Alt + F keys.
  • After that, click on Settings.
  • Next, scroll down until you see the Advanced option, once you see it, click on it.
  • After clicking the Advanced option, go to the “Restore and clean up option and click on the “Restore settings to their original defaults” option to reset Google Chrome.
  • Now restart Google Chrome.

Internet Explorer

  • Launch Internet Explorer.
  • Next, click the wrench icon for Settings.
  • Then click Internet Options.
  • After that, go to the Advanced tab.
  • From there, click the Reset button. This will reset Internet Explorer’s settings to their default condition.
  • Now click OK to save the changes made.
Read More
How to remove AudioToAudio (Browser Extension) from your PC

AudioToAudio is a browser extension for Google Chrome developed by Mindspark Inc. This extension allows users easy access to popular audio converting websites.

When installed, it changes the default search engine, home page, and new tab to MyWay.com. While active AudioToAudio gathers user browsing activities such as, but not limited to: visited websites, clicked links, search queries. This data is later used/sold by the Mindspark ad network to better target ads. While browsing the internet with this extension enabled, you will see additional injected ads, sponsored content (such as links to web pages, banner ads, affiliate shop links, etc), and even pop-up ads from time to time if the regular ads are blocked. AudioToAudio has been marked as a Browser Hijacker by several anti-virus applications and is marked for removal by most of them.

About Browser Hijackers

Browser hijacking is a form of unwanted software, commonly a web browser add-on or extension, which causes modifications in web browser’s settings. They are created to interfere with browser functions for various purposes. Typically, hijackers are developed for the benefit of cyber hackers often through revenue generation from forced ad clicks and website visits. However, it isn’t that innocent. Your online safety is compromised and it is also extremely annoying. Some browser hijackers are programmed to make particular modifications beyond the browsers, like changing entries in the computer registry and letting other malware further damage your computer.

How to determine if your browser has been hijacked

When your web browser is hijacked, the following might happen: 1. your web browser’s homepage is suddenly different 2. you get re-directed to sites you never meant to visit 3. The default search page of the web browser is changed 4. discover new toolbars that you simply did not add 5. you see numerous ads pop up on the web browsers or computer screen 6. webpages load slowly and often incomplete 7. Inability to navigate to certain websites, especially antivirus and also other computer security software sites.

How they infect computers

There are many ways your computer or laptop can become infected with a browser hijacker. They usually arrive by way of spam email, via file-sharing networks, or by a drive-by-download. They can also be deployed via the installation of an internet browser toolbar, extension, or add-on. A browser hijacker could also come bundled up with some free software that you unknowingly download and install the browser hijack, compromising your PC security. Some of the most well-known hijackers are AudioToAudio, Babylon Toolbar, Conduit Search, OneWebSearch, Sweet Page, and CoolWebSearch.

Removing browser hijackers

Some hijackers could be removed by just uninstalling the related freeware or add-ons through the Add or Remove Programs in the Microsoft Windows Control Panel. But, the majority of hijackers are quite tenacious and require specialized applications to eliminate them. Novice computer users shouldn’t ever attempt the manual form of removal, as it requires thorough computer knowledge to carry out repairs on the computer registry and HOSTS file. Browser hijackers can be effectively removed by installing and running anti-malware software on the affected PC. Safebytes Anti-Malware has a sophisticated anti-malware engine to help you prevent browser hijacking in the first place, and mop up any existing issues. In addition to anti-malware, a system optimizer tool, similar to Total System Care, could help you resolve Windows registry errors, eliminate unwanted toolbars, secure online privacy, and increase overall computer performance.

How To Get Rid Of Malware That Is Preventing Anti-Malware Installation?

All malware is bad, but certain types of malware do more damage to your computer than others. Some malware types alter internet browser settings by including a proxy server or change the PC’s DNS settings. In these cases, you will be unable to visit some or all internet sites, and thus not able to download or install the required security software to remove the malware. If you are reading this article, you probably have got affected by malware that prevents you from installing a computer security program like Safebytes Anti-Malware. There are a few actions you can take to get around this problem.

Install in Safe Mode

In Safe Mode, you are able to modify Windows settings, un-install or install some applications, and remove hard-to-delete viruses and malware. In the event the malware is blocking access to the internet and affecting your PC, running it in Safe Mode allows you to download anti-malware and run a diagnostic scan whilst limiting possible damage. In order to enter into Safe Mode or Safe Mode with Networking, press the F8 key while the PC is starting up or run MSCONFIG and locate the “Safe Boot” options in the “Boot” tab. Once you are in Safe Mode, you can attempt to download and install your anti-malware software without the hindrance of the malicious software. Now, you can actually run the antivirus scan to remove computer viruses and malware without any interference from another application.

Switch over to a different web browser

Malicious code could exploit vulnerabilities in a particular internet browser and block access to all anti-virus software websites. If you suspect that your Internet Explorer happens to be hijacked by a computer virus or otherwise compromised by cybercriminals, the best plan of action would be to switch to an alternate browser like Chrome, Firefox, or Safari to download your favorite computer security program – Safebytes Anti-Malware.

Install and run antivirus from your Thumb drive

Here’s another solution which is creating a portable USB anti-virus software package that can scan your computer for malicious software without needing installation. Adopt these measures to use a USB drive to fix your infected computer system. 1) Download Safebytes Anti-Malware or MS Windows Defender Offline onto a virus-free computer system. 2) Mount the USB drive on the same computer. 3) Double-click the executable file to run the installation wizard. 4) Choose the USB flash drive as the destination for saving the file. Do as instructed on the screen to finish up the installation process. 5) Transfer the USB drive from the uninfected PC to the infected computer. 6) Double-click the EXE file to open the Safebytes tool from the thumb drive. 7) Run Full System Scan to detect and clean-up up all types of malware.

Protect Your PC and Privacy With SafeBytes Anti-Malware

If you’re looking to install an anti-malware application for your computer, there are several tools in the market to consider but you should not trust blindly anyone, irrespective of whether it is paid or free software. A few of them do a good job in removing malware threats while many will damage your computer by themselves. When searching for an antivirus tool, purchase one that offers reliable, efficient, and complete protection against all known viruses and malware. When considering commercial anti-malware software options, most people choose popular brands, like SafeBytes, and are very happy with them. Safebytes is among the well-established computer solutions companies, which provide this all-inclusive anti-malware application. Through its cutting-edge technology, this software will help you protect your PC against infections brought on by various kinds of malware and other threats, including spyware, adware, computer viruses, worms, trojan horses, keyloggers, potentially unwanted program (PUPs), and ransomware.

SafeBytes anti-malware takes computer protection to a whole new level with its advanced features. Here are a few of the good ones:

Robust, Anti-malware Protection: Safebytes is built on the very best virus engine within the industry. These engines can find and eliminate threats even during the early phases of a malware outbreak. Real-Time Protection: Malware programs trying to enter the computer are identified and stopped as and when detected by the SafeBytes real-time protection shields. This software will constantly monitor your PC for any suspicious activity and updates itself regularly to keep abreast of the constantly changing threat scenarios. Internet Security: Safebytes assigns all websites a unique safety rating that helps you to get an idea of whether the webpage you’re going to visit is safe to browse or known to be a phishing site. Lightweight: SafeBytes is a lightweight application. It uses up a really small amount of processing power as it works in the background so you’re free to use your Windows-based computer the way you want. Premium Support: For any technical problems or product guidance, you may get 24/7 professional assistance via chat and e-mail. Overall, SafeBytes Anti-Malware is a solid program since it has loads of features and could detect and eliminate any potential threats. You now may realize that this tool does more than just scan and eliminate threats from your computer. So when you want advanced forms of protection features & threat detections, purchasing SafeBytes Anti-Malware will be well worth the money!

Technical Details and Manual Removal (Advanced Users)

If you’d like to carry out the removal of AudioToAudio manually rather than utilizing an automated software tool, you can follow these simple steps: Go to the Windows Control Panel, click on the “Add/Remove Programs” and there, select the offending application to uninstall. In case of suspicious versions of web browser plugins, you can easily get rid of them through your browser’s extension manager. You may also want to reset your home page and search engine providers, as well as clear your browser cache and cookies. If you decide to manually delete the system files and registry entries, utilize the following checklist to ensure that you know exactly what files to remove before undertaking any actions. However, this can be a tricky task and only computer professionals could carry it out safely. In addition, some malware is capable of replicating or preventing deletion. It is recommended that you do the removal procedure in Safe Mode. For more information and manual removal instructions visit www.ErrorTools.com Download Safebytes Anti-Malware: https://errortools.com/download/safebytes-anti-malware/ AudioToAudio is a browser extension for Google Chrome developed by Mindspark Inc. This extension allows users easy access to popular audio converting websites. When installed, it changes the default search engine, home page, and new tab to MyWay.com. While active AudioToAudio gathers user browsing activities such as, but not limited to: visited websites, clicked links, search queries. This data is later used/sold by the Mindspark ad network to better target ads. While browsing the internet with this extension enabled, you will see additional injected ads, sponsored content (such as links to web pages, banner ads, affiliate shop links, etc), and even pop-up ads from time to time if the regular ads are blocked. AudioToAudio has been marked as a Browser Hijacker by several anti-virus applications and is marked for removal by most of them.
Read More
Renaming items in the Win+X menu
As you know, the Win + X menu, which is the shortcut context menu, is a useful way to launch several utilizes in Windows such as Power Options, Windows PowerShell, Event Viewer, Device Manager, and so on. However, there are times when you might experience difficulty in identifying the required utility. This is actually a part of the Windows 10 shell that goes out of scope in the customization of Windows 10. However, there is an easy trick you can use to do that. So in this post, you will be guided on how you can rename the options in the Win + X menu in Windows 10. In case you don’t know, the context menu is divided into three groups. Microsoft has categorized the bottom-most part as Group 1, while the middle part is categorized as Group 2 and the first part as Group 3. To rename these options, you need to use File Explorer and follow the instructions laid out below. Step 1: First, tap the Win + E keys to open File Explorer. Step 2: Next, navigate to this path: %LocalAppdata%MicrosoftWindowsWinX Step 3: From there, you should see three folders as Group 1, Group 2, and Group 3. Open the appropriate folder of your choice. Step 4: After that, right-click on the shortcut option you want to rename and then select Properties. Step 5: Next, navigate to the Shortcut tab under the Properties window. Step 6: Now in the text field of Comment, enter the new name of the option you selected. Step 7: Click on the Apply and OK buttons to save the changes made. Note: You can now either Sign back in or sign out of your Windows 10 User Account to see the result of the changes you’ve made. You could also restart the process of File Explorer via Task Manager. This will close the File Explorer as well as the shell components and then only launch the shell components again. In addition, you can check the Win + X menu to see the customized name that you’ve just set for a particular option. As you can see, even though it does not add anything extra, it is still a lot better in knowing how you can customize it.
Read More
Removing Search.schooldozer.com hijacker

What is Search.schooldozer.com? And how does it function?

Search.schooldozer.com is a browser extension that functions as a search engine. It is developed and maintained by “Schooldozer”. It claims to improve users’ browsing experience by providing them with improved search results. However, it does not really do the things it claims to do. In fact, they’re quite the opposite ones – instead of improving the browsing experience, it makes users’ browsing experience unsafe and full of sponsored content. This is in contrast to what it states in its Privacy Policy:
“Install applications the easy way and without the hassle, using the Schooldozer downloader. The Schooldozer platform stems from years of experience with installing applications, resulting in a highly optimized process, yielding faster downloads, better user experience, and more successful installations.”
In addition, once installed Search.schooldozer.com is installed, it will change the default settings of a browser such as the default search engine, homepage, and new tab page. This is why security experts regard this browser extension as a browser hijacker and a potentially unwanted program. The modification of the browser's settings allows it to control users’ browsing by redirecting them to sponsored sites as well as deliver sponsored content from its affiliated sites in order to gain profit via pay-per-click marketing. And if you think that the ads it displays are harmless, think again for some of these ads can redirect you to suspicious websites that might contain harmful content. What’s more is that this browser hijacker can also keep track and monitor all your browsing activities in order to obtain your browsing data like search queries, what sites you always visit, browsing history, browser type, OS version, and so on. The information collected is then used and may even be shared with its affiliated third parties to deliver more customized and personalized advertisements.

How is Search.schooldozer.com distributed over the web?

Like a typical browser hijacker, Search.schooldozer.com is distributed using the software bundling method where several unknown and unwanted programs are bundled in a software package. Thus when you install any software bundle, make sure to always opt for the Custom or Advanced installation setup rather than the quick setup to avoid installing unwanted programs like Search.schooldozer.com. To remove Search.schooldozer.com from your computer, follow the removal guide below carefully. Step 1: Start the removal process by closing all the browsers infected with Search.schooldozer.com. If you’re having a hard time closing them, you can close them using the Task Manager just tap on Ctrl + Shift + Esc. Step 2: After you open the Task Manager, go to the Processes tab and look for the infected browser’s process and end it. Step 3: Then close the Task Manager and tap the Win + R keys to open Run and then type in appwiz.cpl to open Programs & Features in Control Panel. Step 4: From there, look for Search.schooldozer.com or any unfamiliar program that could be related to it under the list of installed programs and once you’ve found it, uninstall it. Step 5: Edit your Hosts File.
  • Tap the Win + R keys to open then type in %WinDir% and then click OK.
  • Go to System32/drivers/etc.
  • Open the host file using Notepad.
  • Delete all the entries that contain Search.schooldozer.com.
  • After that, save the changes you’ve made and close the file.
Step 6: Reset all your browsers to default to their default state.

Google Chrome

  1. Launch Google Chrome, press Alt + F, move to More tools, and click Extensions.
  2. Look for Search.schooldozer.com or any other unwanted add-ons, click the Recycle Bin button, and choose Remove.
  3. Restart Google Chrome, then tap Alt + F, and select Settings.
  4. Navigate to the On Startup section at the bottom.
  5. Select “Open a specific page or set of pages”.
  6. Click the More actions button next to the hijacker and click Remove.

Mozilla Firefox

  1. Open the browser and tap Ctrl + Shift + A to access the Add-ons Manager.
  2. In the Extensions, menu Remove the unwanted extension.
  3. Restart the browser and tap keys Alt + T.
  4. Select Options and then move to the General menu.
  5. Overwrite the URL in the Home Page section and then restart the browser.

Internet Explorer

  1. Launch Internet Explorer.
  2. Tap Alt + T and select Internet options.
  3. Click the General tab and then overwrite the URL under the homepage section.
  4. Click OK to save the changes.
Step 7: Hold down Windows + E keys simultaneously to open File Explorer. Step 8: Navigate to the following directories and look for suspicious files associated to the browser hijacker such as the software bundle it came with and delete it/them.
  • %USERPROFILE%Downloads
  • %USERPROFILE%Desktop
  • %TEMP%
Step 9: Close the File Explorer. Step 10: Empty the contents of Recycle Bin.
Read More
Permission to view object security properties
In an operating system, it is ideal for an administrator to have permission to access all the folders and files. However, there are times when you try to access the security settings or attempt to view the properties of a file, you could encounter an error saying, “You do not have permission to view this object’s security properties, even as an administrative user”. This kind of error may be caused by several reasons. For one, if your computer is infected with a virus or malware which might have caused some changes to the concerned folder or file. It could also occur if a program or service is using the folder or file simultaneously which explains why you’re not able to access the system. It could also be that the folder or file might have been owned by a user account that no longer exists or you might not have the permissions to view the targeted folder or file even though you’re logged in as administrator. To fix the “You do not have permission to view this object’s security properties, even as an administrative user” error, here are some options that might help.

Option 1 – Put your computer in a Clean Boot State

You can also troubleshoot the problem in a Clean Boot state. It could be that there are some third-party applications in your computer that’re preventing you from accessing security settings or properties of a file and to isolate this possibility, you need to boot your computer in a Clean Boot State and then try installing the program again. Putting your computer in this state can help you identify which program is the culprit and thus isolates the problem. In a Clean Boot state, your computer will start using only the pre-selected minimal set of drivers and startup programs. Note that you have to disable and enable one process at a time.
  • Log onto your PC as an administrator.
  • Type in MSConfig in the Start Search to open the System Configuration utility.
  • From there, go to the General tab and click “Selective startup”.
  • Clear the “Load Startup items” check box and make sure that the “Load System Services” and “Use Original boot configuration” options are checked.
  • Next, click the Services tab and select the “Hide All Microsoft Services” check box.
  • Click Disable all.
  • Click on Apply/OK and restart your PC. (This will put your PC into a Clean Boot State. And configure Windows to use the usual startup, just simply undo the changes.)
  • After you’ve set your computer into a Clean Boot State, try to check if the error is now fixed and that you can now view the Properties.

Option 2 – Try booting your computer into Safe Mode and delete inactive users

Aside from the Clean Boot State, you can also reboot your computer in Safe Mode and then delete all the inactive users. There are instances when the folder was created or owned by a user account that’s either deleted or inactive now and so you need to get rid of these inactive user accounts to resolve the error.
  • First, boot your computer in Safe Mode.
  • Then right-click on the concerned folder or file and select Properties.
  • Next, select Advanced in the Security tab and click on Add.
  • A new window will appear and from there, click on “Select a principal”.
  • And then type the name of the user to who you wish to give permissions in the “Enter the object name to select” box.
  • Now select Check Names and this would resolve the user name.
  • After that, click OK to save the settings. This will close the window and take you back to the previous one.
  • Next, from the drop-down menu, change the Type to Allow and select the Full Control checkbox.
  • Click OK to save the changes made and then restart your computer in a normal mode.

Option 3 – Try to take ownership of the folder or file

Another thing you can do to fix the problem is to take ownership and force the system into giving permissions to the Administrator. How? Refer to these steps:
  • Type “command prompt” in the Windows Search bar and then right-click on the relevant search result and select “Run as administrator”.
  • After that, if a User Account Control or UAC prompt appears, just click on Yes to proceed.
  • Next, type and enter this command: TAKEOWN /F <path>
  • Note that the <path> is the location of the folder or file in File Explorer.
  • Now type and enter this second command: ICACLS <path> /grant administrators:F
  • Finally, once the command has been executed, restart your computer and then see if you can now access the folder or file.

Option 4 – Try scanning your computer using Windows Defender

As mentioned, the error when accessing the security settings or properties of a folder or file might be due to a virus or malware. It could be that it had made some modifications that prevents you from accessing security settings or properties. To eliminate it, you have to scan your computer using security programs like Windows Defender.
  • Tap the Win + I keys to open Update & Security.
  • Then click on the Windows Security option and open Windows Defender Security Center.
  • Next, click on Virus & threat protection > Run a new advanced scan.
  • Now make sure that Full Scan is selected from the menu and then click the Scan Now button to get started.
Read More
Fix Printer driver issue in Windows
The printer can stop working for many various reasons, some of them are however tied to the printer driver itself. In this guide, we will address issues and provide you with advice on how to get your printer back in working order in no time. All of that being said let us fix your Printer driver issue.
  1. Check to see if the printer is plugged and that it has toner or colors and paper in the tray

    The simplest solutions are the best ones, and most of the time simplest issues are overlooked. To eliminate any basic issues check the printer cable does it has paper in the tray and check the status of toner or colors in it.
  2. Check if Windows troubleshooter will resolve the issue

    Bring up settings and choose devices, under devices click on printers and scanners. On the far right top, you have a link to start the troubleshooter, click on it. Windows built-in tools could resolve issues and fix them for you. If by any chance Windows is not able to find or resolve issues move to the next step.
  3. Check if the Device Manager is reporting an error and update the driver

    If the hardware is functioning properly then the issue might be in Windows not detecting device or driver malfunction. In any case, the Device Manager will be the one who will report this problem. In order to check to see if the driver is properly working press ⊞ WINDOWS + X to open the hidden start menu. keyboard with windows and x marked Once it opens, click on Device Manager to open it, If you have a driver device error inside Windows, you should see it immediately when entering the Device Manager, it will have a yellow exclamation mark beside it. Right-click on it and choose update driver.
  4. Reinstall driver

    If driver update failed or you already have the latest drivers, reinstalling them could fix the issue since drivers might have corrupted during installation of some update or application. Follow steps from point 3 to get to the driver in Device Manager, then right-click on it but instead of update choose to uninstall. Reboot Windows once the driver is uninstalled and Windows will install a new one automatically. If you do not want to update drivers automatically install the latest driver for your device, then reboot.
  5. Check Windows update

    Check to see if the latest Windows update is installed, update your Windows if needed
  6. Fix driver issue with DRIVERFIX

    If everything else fails, get DRIVERFIX, a premium solution for your PC issues, and fix driver errors.
Read More
Custom widgets in Windows 11 later
windows custom widgets
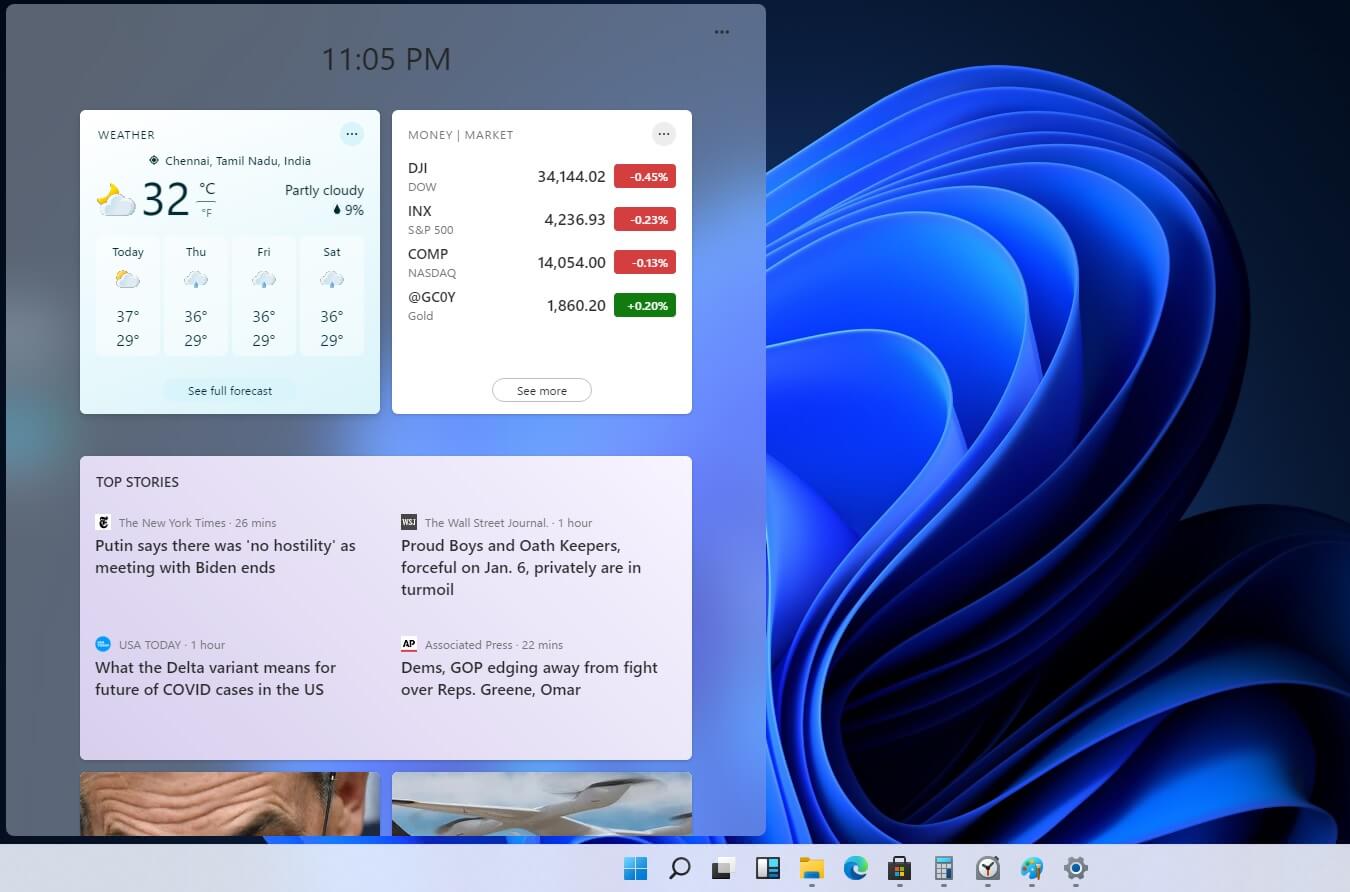
Originally Microsoft has imagined its widgets menu as Microsoft-only widgets but it seems that they have changed their mind. Due to the latest leak, it seems that Microsoft will open the widgets menu to 3rd party developers as well but at launch, it will be only official widgets. It was hinted that later widgets menu will be open to developers who want to bring their own stuff into it. Distribution, date, and technology that will need to be used in order to create your widget have not been discussed nor leaked at a given time but in some way, I am very glad that at least some customization will be in Windows 11. It is funny and amusing how some things that were in Windows Vista are getting back like glass design, round corners, and widgets. Let’s just hope Windows 11 will be a better Windows than Vista was.
Read More
1 2 3 162
Logo
Copyright © 2022, ErrorTools. All Rights Reserved
Trademarks: Microsoft Windows logos are registered trademarks of Microsoft. Disclaimer: ErrorTools.com is not affiliated with Microsoft, nor claim direct affiliation.
The information on this page is provided for information purposes only.
DMCA.com Protection Status