Setting up Logitech C922 in Windows 10

Being a streamer altho popular is a very demanding call, there is a lot of technical knowledge involved and one of this knowledge is setting your web camera equipment. On the internet, you can find how to install certain devices and register them in Windows but with little to no information on how to set everything for streaming. In this article, we will try to address as many of this as we can so you can start using your camera right away.

Features of the Logitech C922 Pro Stream Webcam

In the package of your Logitech C922 Pro Stream Webcam, you should have the camera itself with a USB hookup, tripod, and user manual. Tripod, of course, is meant to stabilize the camera for recording using high zoom values so visual shaking of the picture is eliminated.

The camera itself captures natural light without any distortion in full HD and if placed on top of the monitor it can accommodate the field of view to capture two people. Also when in a low-light room, autofocus will correct light and it will sharpen an image in order to compensate for lack of light. The camera also features a dual microphone for clarity of sound.

Assembling the Logitech C922 Webcam

Of course, the first thing when the camera is unpacked is to assemble it. Basically, there are two ways for the camera to be assembled:

  1. On top of monitor and
  2. On tripod

The next section will cover both assemblings

Mounting camera on the monitor:

The Logitech C922 Pro Stream Webcam can be used to capture up-close images or video from the top of any computer monitor or TV.

To set up your Logitech C922 Webcam on top of a monitor or TV:

  • Completely extend the mounting stand until it reaches the top width of your monitor or TV
  • Turn the bottom piece of the mounting stand, so it matches the angle of the back of your monitor or TV
  • Place the mounting stand on top of your monitor or TV and tighten the bars until they’re flush with each surface
  • Pivot the webcam up, down, or to the sides to center the camera angle

After you have securely mounted the C922 to your monitor or TV, it’s ready to be plugged in and used with any recording application on your computer.

Mounting camera on the tripod

You can set up your Logitech C922 Pro Stream Webcam to record a 78-degree view of a room for presentations or live streams by attaching it to the tripod.

To set up your Logitech C922 Webcam with a tripod:

  • Unfold and extend the legs of your tripod
  • Place the webcam on top of the tripod, aligning the swivel bolt with the webcam mounting hole
  • Swivel the bolt by turning a small knob on the tripod

Once you have assembled your Logitech C922 Pro Stream Webcam on your tripod, plug it into your computer and load up your favorite recording application.

How can you use your Logitech C922 Pro Stream Camera?

Altho this camera is designed and built to be used in a live stream environment it can also be used to record video offline to a file. In this next segment, we will explore further applications in which the camera is meant to be used.

Live video

The Logitech C922 Pro Stream Webcam allows content creators to share content in high definition with thousands of viewers in real-time. Stream full 1080p at 30 frames per second and 720p at 60 frames per second live on platforms such as Twitch or YouTube.

  • Stream video games or entertainment in real-time
  • Create live presentations for work, customers, or followers
  • Discuss matters of interest in live talk shows or podcasts
  • Video call family or friends on Skype, Facetime, or Google Hangouts
  • Capture crystal-clear, 78-degree video with the Logitech C922 autofocus lens. With two microphones attached on each end, you can stream any live video with little to no audio drops.

Offline recordings

The Logitech C922 Pro Stream Webcam can be used with desktop recording software to create professional videos or snapshots. After you’ve finished recording, you can edit specific spots in the video and add custom presentation details.

  • Product demonstrations and tutorials
  • Educational or promotional presentations
  • Video game or entertainment videos
  • Personal vlogs
  • Talk shows or podcasts
  • Desktop or laptop technical walkthroughs
  • Complete offline recording in high definition at 1080p. Use QuickTime Player (Mac) or Microsoft Camera App (Windows) to take photos or record videos offline.

Setting up Logitech C922 Pro Stream Camera using XSplit Broadcaster

XSplit Broadcaster offers live stream support for several platforms, which include Facebook Live, YouTube Live, and Twitch. After you hook up your webcam and create profiles for each platform, you can begin a live stream with XSplit Broadcaster.

Twitch Streaming

  • Enable Two-Factor Authentication on Twitch: Navigate to the settings of your profile and the Security and Privacy tab. Before you can start broadcasting with XSplit, you must set up Two-Factor Authentication.
  • Set Up Twitch Streaming Profile in XSplit: In XSplit Broadcaster, navigate to Broadcast > Set up a new output > Twitch. Select an account to authorize with XSplit and proceed.
  • XSplit automatically chooses a resolution to record based on target server connection quality.
  • A settings window opens before you complete the setup, which allows you to customize the server and video recording options. Once you have completed the setup, your Twitch profile is set up in XSplit. You can begin a stream by navigating back to Broadcast and clicking on the new Twitch profile.

YouTube Streaming

  • Enable YouTube Streaming Live: Click on your YouTube profile picture to open a dropdown and click on YouTube Studio Beta.
  • On the left side of the page, navigate to Other features and click on Live events in the dropdown.
  • Click on Enable live streaming to set up live streaming for your YouTube profile.
  • Set Up YouTube Streaming Profile in XSplit: In XSplit Broadcaster, navigate to Broadcast > Set up a new output > YouTube. Select an account to authorize with XSplit and proceed.
  • Once YouTube Live Properties window pops up, click Authorize to connect your Google account. You can also change any settings as needed before you begin a live stream. Once you’re ready to broadcast live with XSplit, navigate back to Broadcast and click your new YouTube Live profile.

Facebook Live Streaming

  • Set Up Facebook Live Streaming Profile in XSplit: In XSplit Broadcaster, navigate to Broadcast > Set up a new output > Facebook Live.
  • A prompt opens in XSplit to log in to your Facebook profile.
  • Log in and set up permissions and posting options as you’d like them to appear whenever you stream live on Facebook. After you’ve completed the permission process, your Facebook Live profile is ready to use in XSplit. You can navigate anytime back to Broadcast and select your new Facebook Live profile in XSplit to begin a live stream.

Using OBS with Logitech C922 Pro Stream Webcam

OBS live streaming application offers high-quality audio and video performance and video capturing in real-time. This application offers full control over every detail and it is a very good choice for both cases.

Setting up Logitech C922 with OBS

  • Add Logitech C922 as a Capture Device: Click the + under the Sources section. Once you are in the drop-menu, select Video Capture Device.
  • When this menu pops up, click Create New and hit OK.
  • From the Device bar, you can select your Logitech C922 as a default Video Capture Device. Set any configurations up how you want them and click OK before exiting.
  • Changing Resolution or Frames Per Second: With OBS open, click on Settings in the bottom-right portion of the screen and then on the Video tab on the next page. Here you can set up the screen resolution, downscale filter, and frames per second defaults for all videos recorded with OBS. Click Apply before exiting.
  • After you’ve finished applying the initial settings, you can begin recording or streaming in the bottom right-hand corner of the main menu.
If you like to learn and find out more about various Windows errors, and how to repair them go to our vast archive or use search to find articles that will explain and help you in solving your issue.
However, if you prefer to do things fast and with automatization then we are proposing to use an automated solution for your issues. The application that we are recommending is Advanced System Repair Pro
Advanced System Repair utilizes multiple tools all in one to give you a quick, simple, reliable, and very thorough diagnosis of your PC. It brings you all the tools you need in one program to clean, fix, protect, optimize and boost your PC!
1-Click Maintenance
All the tools to make it simple and easy! It's like having a professional technician at the click of a mouse.

Junk Cleaner
Keeping your computer free from unnecessary clutter also helps make your computer last longer. Like any other machine, if you keep it clean and take care of it, it will serve you better for longer!

Optimize background apps
Optimize applications background activity with the built-in Application Optimizer feature.

Disk Defrag
With a simple 1-click, Advanced System Repair speeds up your PC by assembling fragmented files on your machine and organizing them more efficiently.

Malware Removal
Finds and removes all types of harmful malware including trojans, worms, bots, adware, spyware, PUPs, and more!

Privacy Cleaner
The all-in-one privacy suite to Clean Your Tracks & Protect Your Privacy! Make your computer safe, secure, and more efficient!

System Tweak/Optimizer
ASR will analyze your complete system and settings to adjust your PC to function at its maximum performance.

Registry Cleaner
Over time, as you install and uninstall applications, the registry can become cluttered with old entries and broken settings which can result in program crashes, and annoying messages and slow the computer down.
Visit our Advanced System Repair Pro Download page to inform yourself about all the benefits of this software and get a free trial copy of it.
advanced system repair pro

Advanced System Repair Pro

One-click automated PC repair solution
ASR logo
With Advanced System Repair Pro you can easily
Replace damaged files
Restore performance
Free disk space
Remove Malware
Protects WEB browser
Remove Viruses
Stop PC freezing
DOWNLOAD
Privacy Policy | Terms of Use | Uinstall
Advanced System Repair Pro is compatible with all versions of Microsoft Windows including Windows 11

Share this article:

You might also like

Explanation of deep and dark WEB
Often when we connect to the internet were browsing indexed pages through some well-known search engine, usually Google. But beneath the so-called normal internet lurks deep and dark web. You might have heard of the deep web and dark web if you have some geeky friends and we are here to explain what exactly is the deep and dark web. The first thing to know is that the deep and dark web is not the same thing and they coexist separately from one another, you could say that beneath the deep web lies the dark web, yet another layer of the internet. So let us explore first the deep web. What is exactly a deep web?

Deep web, hidden web, or invisible web

as sometimes referenced are part of worldwide web not indexed by search engines, meaning that engines do not basically see and index content of deep web sites. The content of the deep web is hidden behind HTTP forms and includes many very common uses such as webmail, online banking, private or otherwise restricted access social-media pages and profiles, some web forums that require registration for viewing content, and services that users must pay for, and which are protected by paywalls, such as video on demand and some online magazines and newspapers. The content of the deep web can be located and accessed by a direct URL or IP address but may require a password or other security access to get past public website pages. While it is not always possible to directly discover a specific web server's content so that it may be indexed, a site potentially can be accessed indirectly (due to computer vulnerabilities). To discover content on the web, search engines use web crawlers that follow hyperlinks through known protocol virtual port numbers. This technique is ideal for discovering content on the surface web but is often ineffective at finding deep web content. For example, these crawlers do not attempt to find dynamic pages that are the result of database queries due to the indeterminate number of queries that are possible. It has been noted that this can be (partially) overcome by providing links to query results, but this could unintentionally inflate the popularity of a member of the deep web.

Dark WEB

The dark web is the World Wide Web content that exists on darknets: overlay networks that use the Internet but require specific software, configurations, or authorization to access. Through the dark web, private computer networks can communicate and conduct business anonymously without divulging identifying information, such as a user's location. The dark web forms a small part of the deep web, the part of the Web not indexed by web search engines, although sometimes the term deep web is mistakenly used to refer specifically to the dark web. The darknets which constitute the dark web include small, friend-to-friend peer-to-peer networks, as well as large, popular networks such as Tor, Freenet, I2P, and Riffle operated by public organizations and individuals. Users of the dark web refer to the regular web as Clearnet due to its unencrypted nature. The Tor dark web or Onionland uses the traffic anonymization technique of onion routing under the network's top-level domain suffix .onion.

Dark & Deep WEB difference

The dark web has often been conflated with the deep web, the parts of the web not indexed (searchable) by search engines. The dark web forms a small part of the deep web but requires custom software in order to access its content. This confusion dates back to at least 2009. Since then, especially in reporting on Silk Road, the two terms have often been conflated, despite recommendations that they should be distinguished. Darknet websites are accessible only through networks such as Tor ("The Onion Routing" project) and I2P ("Invisible Internet Project"). Tor browser and Tor-accessible sites are widely used among darknet users and can be identified by the domain ".onion". While Tor focuses on providing anonymous access to the Internet, I2P specializes in allowing anonymous hosting of websites. Identities and locations of darknet users stay anonymous and cannot be tracked due to the layered encryption system. The darknet encryption technology routes users' data through a large number of intermediate servers, which protects the users' identity and guarantees anonymity. The transmitted information can be decrypted only by a subsequent node in the scheme, which leads to the exit node. The complicated system makes it almost impossible to reproduce the node path and decrypt the information layer by layer. Due to the high level of encryption, websites are not able to track the geolocation and IP of their users, and users are not able to get this information about the host. Thus, communication between darknet users is highly encrypted allowing users to talk, blog, and share files confidentially.

Darknet

The darknet is also used for illegal activity such as illegal trade, forums, and media exchange for pedophiles and terrorists. At the same time, traditional websites have created alternative accessibility for the Tor browser in an effort to connect with their users. ProPublica, for example, launched a new version of its website available exclusively to Tor users.
Read More
How to Fix Windows 10 Error Code 0xc004c008

How to Fix Windows 10 Error Code 0xc004c008

Error Code 0xc004c008 - What is it?

This specific Windows 8.1 or Windows 10 error code has to do with the number of times you can use your license number to install windows programs on computers. All windows activation codes are licensed to be used one time for a device, to control piracy, but what happens when your PC crashes, or you have to change a hard drive component and are forced to re-install Windows Operating System. Luckily, there is an easy fix for this issue.

Solution

Restoro box imageError Causes

Basically, when you need to re-install the Windows operating system that you have previously bought and installed on another computer an error code will be displayed with a message telling you that the activation server determined that the specific key could not be used for activation. This occurs because the key has already been used on that computer, or a different one, to install operating systems. There are a few easy fixes for this issue, and most of them should be easily completed on your own.

Further Information and Manual Repair

There aren’t many explanatory ways to repair Error Code 0xc004c008. Below are two methods to go about addressing this issue.

Methods 1:

  1. The first step is to open the “Run” Window. You can do this in two ways. First, press the “Window” key and press the “R” key simultaneously. This will open the “Run” menu. Or you can start the “run” window by going to the Start menu and selecting Run.
  2. In the Run window type “SLUI 4” and click enter.
  3. A Phone Activation window will open up, after which you'll need to select a few options.
  4. First chose the country in which you registered the product for the first time.
  5. Choose your country and a phone number will be displayed specific to your choice. You will now need to call the number provided.
  6. After you’ve dialed you will be prompted to write your “Installation ID”. Type your “Installation ID” on the phone.
  7. After that step, you will be asked how many copies of Windows have been installed using this license. Choose “1”, should anything else be chosen but “1”, this will not work.
  8. After the process is completed, you will be given a confirmation ID and should be able to proceed as normal with installation. You will have a workable product key again.
  9. Install whatever copy of the Windows Operating System you are attempting to with the new product key.

Method 2:

If the first method did not work, the only other option is to call Microsoft and walk through the process with a technician. To do this, dial “1-800-936-5700”. Explain the error that you received and the steps in the update process during which it was displayed. The technician will be able to walk through the steps from getting a new product key to finishing the installation.

If you're not a tech-savvy individual but would like to solve this problem without the aid of a technician, download a powerful automated tool to fix error code 0xc004c008.

Read More
Fix Windows Update Error 0x80070BC9
As you know, every Windows Update is essential for every Windows operating system. They have to be regularly installed, especially since they include various security updates that are important to the system. However, there are times when Windows Update fails to execute properly and you get errors like the error code 0x80070BC9. When you encounter this particular Windows Update error, you will get the following error message on your screen:
“0x80070BC9 – ERROR_FAIL_REBOOT_REQUIRED. The requested operation failed. A system reboot is required to roll back changes made.”
This kind of Windows Update error is most likely caused by a newly installed problematic software, corrupted Windows Update files, or policies that restrict the behavior of the Windows Module Installer. The Windows Module Installer, also known as “WMIW” or “TiWorker.exe”, is the one that checks for new updates from the Windows server and installs them on your computer. This is why you need to make sure that you do not have any policies that control the start behavior of the Windows Module Installer since this service must not be hardened to any start value and should be managed by the operating system. To resolve the Windows Update error code 0x80070BC9, you can check out the options provided below.

Option 1 – Try checking the status of the Windows Modules Installer Worker Service

Since the Windows Update error code 0x80070BC9 has something to do with the Windows Module Installer Worker service, you need to check its status in the Service Manager. Refer to the following steps to do so.
  • In the Cortana search box, type “services” and click on the Services icon to open the Services Manager. Alternatively, you can also tap the Win + R keys to launch the Run prompt and then type “MSC” in the field and hit Enter to open the Services Manager.
  • After opening the Services Manager, look for the Windows Modules Installer Worker Service.
  • Once you found it, check its status and make sure that its Startup type is set to Manual.
  • Now click on the Start button and see if it fixes the Windows Update error.

Option 2 – Run the Windows Update Troubleshooter

You might want to run a built-in Windows Update troubleshooter to resolve the Windows Update error. It is one of the things you can check out as it is known to automatically resolve any Windows Update errors like error code 0x80072EE2. To run this troubleshooter, go to Settings and then select Troubleshoot from the options. From there, click on Windows Update and then click the “Run the troubleshooter” button. After that, follow the next on-screen instructions and you should be good to go.

Option 3 – Try contacting the IT administrator to modify the group policies

You could also try to contact the IT administrator to have the group policies modified. This option is applicable for company-managed systems. As mentioned, one of the possible causes of the Windows Update error 0x80072EE2 is the policies that control the start behavior of the Windows Module Installer. Thus, you need to have them removed so that the Windows Module Installer Worker service is managed by the operating system itself. And since there could be many policies, it is highly advised that you contact your company’s IT administrator to get the job done for you.

Option 4 – Try to install the Windows Updates in a Clean Boot State

There are some instances that some conflicting programs installed in your computer might be the one that’s causing Windows Update error code 0x80070BC9. To identify which program is causing the problem, you need to put your computer in a Clean Boot State. To do so, follow the steps below.
  • Log onto your PC as an administrator.
  • Type in MSConfig in the Start Search to open the System Configuration utility.
  • From there, go to the General tab and click “Selective startup”.
  • Clear the “Load Startup items” check box and make sure that the “Load System Services” and “Use Original boot configuration” options are checked.
  • Next, click the Services tab and select the “Hide All Microsoft Services” check box.
  • Click Disable all.
  • Click on Apply/OK and restart your PC. (This will put your PC into a Clean Boot State. And configure Windows to use the usual startup, just simply undo the changes.)
  • From there, start to isolate the problem by checking which one of the programs you installed recently is the root cause of the problem.
Read More
Software review series: Visual studio code
Visual Studio codeVisual studio code is a code editor available for Windows, Linux, and macOS. It is a completely free tool offering you to code in any language without the need to switch to another editor. Visual Studio Code is part of Microsoft Visual Studio which is a complete integrated development environment (IDE). Take notice that Visual studio itself has more advanced tools for developing and testing, it has 24/7 support, training, and Azure for WEB apps. Visual Studio Code is an editor lacking in some advanced features Visual Studio offers.

Visual Studio code Price and royalty

As mentioned Visual Studio code is completely free licensed under the MIT license agreement giving you the tool free to use and sell your product. How it supports Linux, Windows, and macOS, all you need it to go to its official page https://code.visualstudio.com/, download it and start using it. How this is free project backside is that there is no official support, you will have to rely on various articles and community in order to get needed information or problem solution.

Features

Syntax highlighting has become standard and norm for any editor but besides this function VS code offers us also IntelliSense option which goes a step further with code completion, code hinting, and parameter info. This means that VS code is aware of many things going on inside your code and will offer you as you type a menu with options for autocomplete along with variables referenced, function names, etc. VS code offers extensions inside its extensions marketplace where you can add extensions in order to implement new languages, add debuggers, change the layout, etc. This is one of the great features it allows you to easily switch from one project to another, one language to another not leaving your code editor. Working with version control systems like Git is easy with VS Code. You’ll be able to stage files and make commits, then push and pull changes to your remote code repository of choice, right from the editor.

Conclusion about Visual Studio code

Visual Studio Code is one of if not the most flexible and extensible code editors currently on the market that I have ever tried and used. IT has become my code editor of choice simply for reasons that there is really not much it cannot do and it is constantly updated and taken care of. You can really tune it to look and feels how you want with extensions and you really cannot beat the free price tag. I would highly recommend this editor for daily use especially since its biggest competitors like Atom and sublime text have not seen many updates lately.
Read More
How to Fix the 0x800ccc92 Error Code
[vc_row][vc_column][vc_column_text]

Effective Error 0x800ccc92 Repair

0x800ccc92 - What is it?

The 0x800ccc92 is a Microsoft Outlook error. The error restricts your ability to send and receive emails on your Outlook email address successfully. This error is very similar to 0x800cc90 and 0x800ccc91 Outlook error codes. The 0x800ccc92 error message is often displayed as:

‘Receiving reported error (0x800ccc92): Your email server rejected your login.’

This error is quite common and is faced by many Microsoft Outlook users. It is advisable to fix this error immediately because besides restricting you from sending and receiving emails via Outlook, due to this error the data on your Outlook also becomes inaccessible and unreadable, and sometimes Outlook also begins to freeze unexpectedly.

Error Causes

Some of the most common causes of the error code 0x800ccc92 are:
  • PST files get corrupt
  • Incorrect Outlook configuration settings
  • PST file crosses its fixed file size limit
  • Failure of POP3 and Protocol STMP in database server connection
  • Improper synchronization between Outlook and the server
  • Usage of invalid password or username
  • Virus Infection

Further Information and Manual Repair

Any of the above causes may result in the 0x800ccc92 error message display. If you encounter this Outlook error, you don’t need to panic and call the network personnel in your office to fix and repair the error. In fact, it is very easy to fix and you can repair it by yourself: Here are some of the best and easy ways to resolve this error in the shortest time:
  • If the error message 0x0800ccc92 is displayed as POP3: Invalid Password, then in this case it is advisable to cross-check your Outlook account ID and password. Sometimes this error message may pop up if you insert an incorrect password or ID. Therefore the best way to resolve it to check where you went wrong and then re-enter your ID and Password correctly.
If the error is not related to POP3 (Post Office Protocol) then you can try some other alternative to resolve this issue.
  • Another alternative is to install the latest available Server Service Pack for Exchange. This solution works best if compatibility is the issue.
  • However, when nothing works, then it is advisable to download PST repair tool. The PST repair software is designed to scan, detect, repair, and resolve Outlook errors like 0x800ccc92.  The PST repair software is built with special algorithms that help repair PST corrupt files in seconds. This tool works on all Windows Operating Systems including Windows 8, Windows 7, Windows Vista, Windows XP, Windows 2003, and Windows 2008.
  1. All you need to do is, download and install this software on your system.
  2. Once you download it, run it on your PC to detect errors.
  3. Press scan to get started
  4. The scanning may take about a couple of minutes to complete.
  5. Once it is complete, click on the repair tab to fix the errors.
  6. Now restart your Outlook again and now try sending emails. This solution is likely to work if the above-mentioned solutions don’t.
Congratulations, you have just fixed the 0x800ccc92 Error Code in Windows 10 all by yourself. If you would like to read more helpful articles and tips about various software and hardware visit errortools.com daily. Now that’s how you fix the 0x800ccc92 Error Code in Windows 10 on a computer. On the other hand, if your computer is going through some system-related issues that have to get fixed, there is a one-click solution known as [product-name] you could check out to resolve them. This program is a useful tool that could repair corrupted registries and optimize your PC’s overall performance. Aside from that, it also cleans out your computer for any junk or corrupted files that help you eliminate any unwanted files from your system. This is basically a solution that’s within your grasp with just a click. It’s easy to use as it is user-friendly. For a complete set of instructions in downloading and using it, refer to the steps below Perform a full system scan using [product-code]. To do so, follow the instructions below.
      1. Download and install [product-code] from the official site.
      2. Once the installation process is completed, run [product-code] to perform a full system scan. restoro application screen
      3. After the scan is completed click the “Start Repair” button. restoro application screen
[/vc_column_text][/vc_column][/vc_row]
Read More
Run File Explorer with admin privileges in W11
Typical use of file explorer will probably not need any kind of elevated privileges, but from time to time you might encounter some tasks that will require administrator rights in order to perform them. If this is the case you will need to run file explorer with these rights but inside Windows 11 that is somewhat hidden and not 1 click away. File Explorer W11
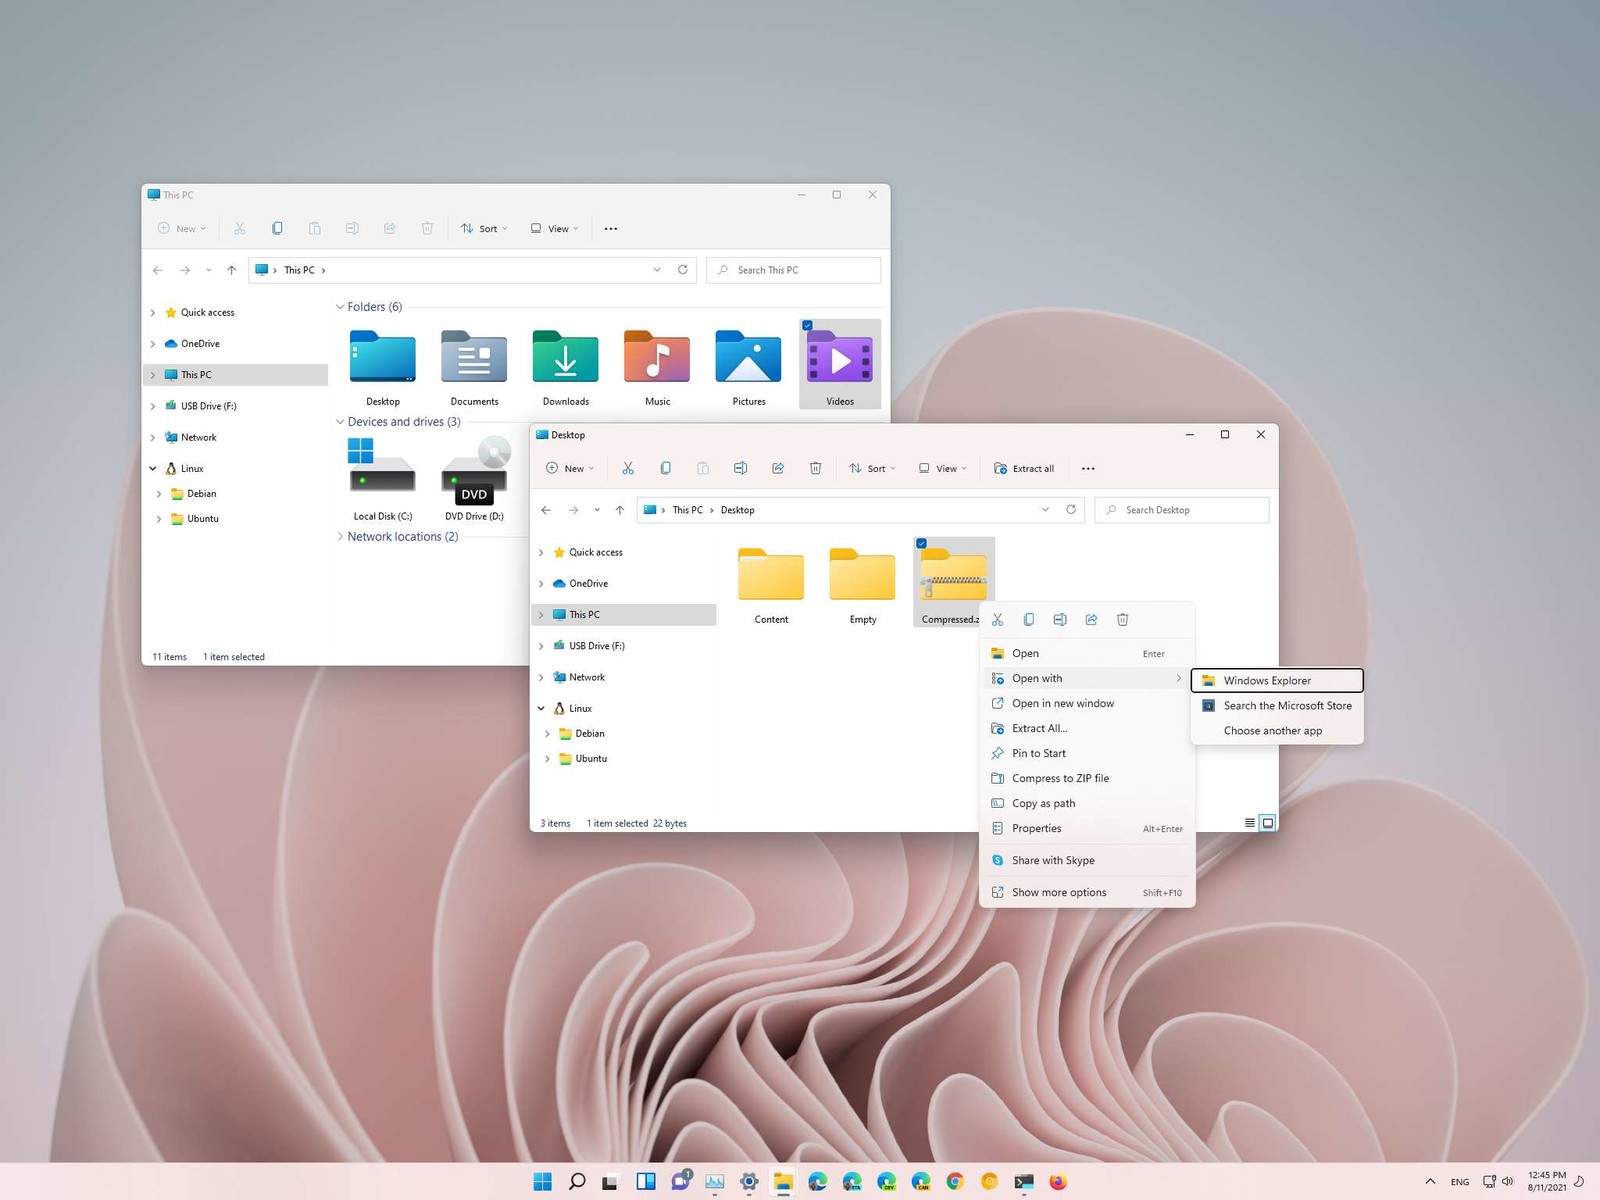
How this is the case we have decided to put a little tutorial on how to accomplish this very task and run file explorer with administrator privileges.

Open File Explorer via EXE file

  1. Open File Explorer typically
  2. Navigate to This PC > Windows (C:) > Windows
  3. Locate file explorer application
  4. Right-click on it and select Run as Administrator
  5. Run File Explorer
A new instance of file explorer will pop with elevated administrator privileges.

Run it as an administrator using the Task Manager

  1. Open the Task Manager ( CTRL + SHIFT + ESC )
  2. Click on More details (at the bottom)
  3. After the task manager expands click on the File tab
  4. Click on Run New Task
  5. Type in explorer.exe and check the box next to it that says Create this task with administrative privileges
  6. Click on OK
File Explorer will now run as administrator.
Read More
Chrome update failed error 3, 4, 7, 10, etc
If you find it hard to update Google Chrome to its latest version and each time you try to do so it keeps on failing, worry not for this post will guide you in fixing a list of Google Chrome Update errors. Even though there are a lot of error codes around Chrome, these are only caused by issues with the update. Here are some of the errors you can encounter when updating Google Chrome:
  • Update failed: You can encounter this error when the Updates are disabled by the administrator.
  • Update failed with
    • Error 3 or 11: When Chrome’s inbuilt updater fails to find the Update server to download the latest version.
    • Error 4 or 10: This happens while checking for updates with the message “Update check failed to start”
    • Error 7 or 12: This occurs when the download fails while checking for updates.
  • Windows OS version is not supported.
  • Google Chrome may not be able to keep itself updated.
  • Any other errors that mention that “Update failed”
Since these aforementioned error codes are related to “Update Failure”, then they have common solutions and here they are:

Option 1 – Restart your computer

You need to restart your computer first and then try updating Chrome again. There are times when it’s only a temporary issue that can be fixed by simply restarting your computer.

Option 2 – Try checking antivirus programs, firewall, and parental control settings

If you have antivirus programs, a firewall installed in your computer, as well as parental controls, then any of these could be blocking you to download anything, including the update for Chrome. This is why you have to double-check and make sure that software updates aren’t being blocked by these programs. On the other hand, you can also try running the Network Troubleshooter as it can help you resolve any DNS or connectivity issues. To use it, follow the steps below.
  • Open the Search bar on your computer and type in “troubleshoot” to open the Troubleshoot settings.
  • Next, scroll down and select the “Network Adapter” option from the right pane.
  • Then click on the Run Troubleshooter” button.
  • After that, your computer will check for any possible errors and will pinpoint the root cause of the problem if possible.

Option 3 – Try to remove Proxy

Removing the Proxy might also help you in fixing the Chrome Update errors. Here’s how you can do it:
  • Tap the Win + R keys to open the Run dialog box.
  • Then type “inetcpl.cpl” in the field and hit Enter to pull up the Internet Properties.
  • After that, go to the Connections tab and select the LAN settings.
  • From there. Uncheck the “Use a Proxy Server” option for your LAN and then make sure that the “Automatically detect settings” option is checked.
  • Now click the OK and the Apply buttons.
  • Restart your PC.
Note: If you are using a third-party proxy service, you have to disable it.

Option 4 – Try to reset Winsock, TCP/IP & Flush DNS cache

Resetting Winsock, TCP/IP, and flushing DNS might help in resolving the Chrome Update errors just follow these steps:
  • Right-click on the Start button and click on Command Prompt (administrator) so you can pull up an elevated Command Prompt.
  • After that, execute each one of the commands listed below. And after you typed in one after the other, you have to hit Enter.
  1. netsh winsock reset – type in this command to reset Winsock
  2. netsh int ip reset resettcpip.txt – type in this command to reset TCP/IP
  3. ipconfig /flushdns – type in this command to flush the DNS cache
  • Next, restart your PC and check if the problem’s fixed.

Option 5 – Try to run the Chrome Cleanup tool

You might want to run Google Chrome’s built-in Malware Scanner & Cleanup tool as it could also help in getting rid of any unwanted ads, pop-ups, and even malware, as well as unusual startup pages, toolbars, and anything else that might overtake the network and could affect the performance of the browser.

Option 6 – Get rid of any conflicting browser extensions

  • Open Chrome and press Alt + F keys.
  • Go to More tools and click Extensions to look for any suspicious browser extensions or toolbars.
  • Click the Recycle bin and select Remove.
  • Restart Chrome and press Alt + F keys again.
  • Proceed to On Startup and mark Open a specific page or set of pages.
  • To check if the browser hijacker is still active, click Set pages, if it is active, overwrite the URL.

Option 7 – Reset Google Chrome

Resetting Chrome can also help you get rid of the error. Resetting Chrome will restore its default settings, disabling all the extensions, add-ons, and themes. Aside from that, the content settings will be reset as well and the cookies, cache, and site data will also be deleted. To reset Chrome, here’s what you have to do:
  • Open Google Chrome, then tap the Alt + F keys.
  • After that, click on Settings.
  • Next, scroll down until you see the Advanced option, once you see it, click on it.
  • After clicking the Advanced option, go to the “Restore and clean up option and click on the “Restore settings to their original defaults” option to reset Google Chrome.
  • Now restart Google Chrome.
Read More
Delete files and folders using Command Prompt
There are times when you might find it difficult to delete folders or files in File Explorer and it could be due to many reasons. One of these reasons can be attributed to the failure that can lock down the folders or files which prevents you from deleting them. In this kind of situation, you can utilize the Command Prompt to delete the folders, sub-folders, and files on your computer, and in this post, you will be guided on how exactly you can do that. Before you proceed, keep in mind that when you use the Command Prompt incorrectly, it might affect your computer and render it inoperable, thus, you must be extra careful when executing the steps given below and it would also be better if you create a System Restore Point. After that, refer to the following instructions. Step 1: First, in the Start Search, type “command prompt” in the field and from the search results, right-click on Command Prompt and then select the “Run as administrator” option to open Command Prompt with admin privileges. Step 2: After opening Command Prompt as admin, navigate to the folder where the file you want to delete is located. Note that you have to execute the “cd” or the change directory command. Step 3: Next, execute the following command in Command Prompt:
DEL /F /A <file path with extension>
Note: In the given command, “/F” is the force delete command, while “/A” is the command that selects the files with the ready for archiving attribute. Step 4: After that, go to the location where you can find the folder you want to delete by using the “cd” command again. And then execute the following command right after:
RD /S <folder path>
Note: In the given command, “RD” is the command that removes the folder from the directory, while “/S” removes all of its sub-folders and files. On the other hand, if you also use the “/Q” parameter, you won’t see the “Y/N” confirmation but if you didn’t use it, then simply tap the Y button to proceed.
Read More
Guide for FormFetcherPro.com Removal

FormFetcherPro.com is a Browser Extension for Google Chrome developed by Mindspark Inc. This extension offers users quick and easy access to various forms required for visas and other documents. While this may seem appealing, all this extension does is point you to the most popular websites online that can easily be found by searching. When installed it hijacks your new tab page and changes it to search.myway.com, enabling it to better target ads.

While browsing the internet with this extension enabled you will see additional sponsored content, additional ads, and sometimes even pop-up ads displaying throughout your browsing sessions. Several anti-virus programs have marked this extension as Potentially Unwanted and as a Browser Hijacker and are therefore recommended to remove it from your computer.

About Browser Hijackers

Browser hijacking means a malicious code has taken control over and altered the settings of your web browser, without your permission. Browser hijackers are capable of doing more than just changing home pages. Usually, hijackers will force hits to internet sites of their preference either to increase targeted traffic generating higher ad earnings, or to obtain a commission for every user visiting there. Many people believe that these types of sites are legitimate and harmless but that is incorrect. Nearly all browser hijackers pose an actual threat to your online safety and it is necessary to classify them under privacy dangers. Browser hijackers can even let other destructive programs without your knowledge further damage your computer.

Key signs that your web browser has been highjacked

When your web browser is hijacked, the following could happen: you find unauthorized changes to your web browser’s home page; your internet browser is constantly being redirected to adult sites; the default browser configurations have been changed, and/or your default search engine is altered; you see many toolbars on your internet browser; you’ll find random pop-ups start showing regularly; your web browser starts running slowly or exhibits frequent errors; Inability to navigate to certain sites, especially antivirus and other security software websites.

How it infects the computer

Browser hijackers can enter a PC in some way or other, for example via file sharing, downloads, and email as well. They sometimes are included with toolbars, add-ons, BHO, plugins, or browser extensions. Browser hijackers sneak into your pc in addition to free software application downloads also that you unwittingly install alongside the original. Common examples of browser hijackers include CoolWebSearch, Conduit, RocketTab, OneWebSearch, Coupon Server, Delta Search, Searchult.com, and Snap.do.

How you can fix a browser hijack

Some types of browser hijackers can be removed from the computer by uninstalling malicious software or any other recently added shareware. Having said that, the majority of hijackers are really tenacious and require specialized applications to eliminate them. Also, browser hijackers might modify the Windows registry so that it can be very tough to restore all the values manually, particularly when you are not a very tech-savvy individual. Anti-malware software is very efficient when it comes to catching and removing browser hijackers that regular anti-virus software has missed. SafeBytes Anti-Malware will counter relentless browser hijackers and provide you active PC protection against all types of malware. Utilize a pc optimizer (such as Total System Care) together with your anti-malware to repair various registry issues, eliminate system vulnerabilities, and improve your computer performance.

How To Install Safebytes Anti-Malware On An Infected Computer system

Practically all malware is bad, but certain kinds of malware do more damage to your computer or laptop than others. Some malware sits in between your PC and your internet connection and blocks some or all sites that you would like to check out. It would also prevent you from the installation of anything on your PC, especially antivirus software. If you are reading this article right now, you’ve perhaps realized that a malware infection is a reason for your blocked internet traffic. So what to do if you want to install an anti-virus program like Safebytes? There are a few actions you can take to get around this issue.

Use Safe Mode to resolve the issue

In Safe Mode, you can modify Windows settings, un-install or install some software, and eradicate hard-to-delete malware. In case the malicious software is set to load automatically when the PC starts, shifting to this particular mode can prevent it from doing so. In order to get into Safe Mode or Safe Mode with Networking, press F8 while the system is booting up or run MSConfig and locate the “Safe Boot” options in the “Boot” tab. Once you restart the PC into Safe Mode with Networking, you could download, install, and update anti-malware software from there. Now, you are able to run the anti-virus scan to remove viruses and malware without interference from another malicious application.

Switch to a different internet browser

Some malware mainly targets certain web browsers. If this is your case, utilize another browser as it could circumvent the malware. If you suspect that your Internet Explorer has been hijacked by a trojan or otherwise compromised by cybercriminals, the best course of action would be to switch over to a different internet browser like Google Chrome, Mozilla Firefox, or Apple Safari to download your chosen security program – Safebytes Anti-Malware.

Make a bootable USB anti-virus drive

Another approach is to download and transfer an anti-malware application from a clean computer to run a scan on the affected computer. To run anti-virus from a USB pen drive, follow these simple steps: 1) Use another virus-free PC to download Safebytes Anti-Malware. 2) Mount the pen drive on the same computer. 3) Double-click on the downloaded file to open the installation wizard. 4) When asked, select the location of the pen drive as the place in which you would like to store the software files. Do as instructed on the screen to finish off the installation process. 5) Unplug the flash drive. Now you can use this portable anti-virus on the infected computer. 6) Double-click the EXE file to open the Safebytes tool right from the thumb drive. 7) Click on “Scan Now” to run a complete scan on the affected computer for viruses.

SafeBytes Anti-Malware Overview

If you are planning to buy anti-malware for your PC, there are many brands and utilities for you to consider. Some are very good ones, some are ok types, while some are simply just fake anti-malware software that can harm your personal computer themselves! When looking for anti-malware software, select one that gives reliable, efficient, and comprehensive protection against all known computer viruses and malware. On the list of strongly recommended software by industry, analysts are SafeBytes Anti-Malware, popular security software for Microsoft Windows. SafeBytes anti-malware is a powerful, highly effective protection software designed to help end-users of all levels of computer literacy in finding and removing harmful threats out of their computer. When you have installed this program, SafeByte's state-of-the-art protection system will ensure that no viruses or malware can seep through your PC.

SafeBytes has outstanding features when compared with other anti-malware programs. Listed below are some of the features you will like in SafeBytes.

Most effective AntiMalware Protection: This deep-cleaning antimalware program goes much deeper than most antivirus tools to clean your personal computer. Its critically acclaimed virus engine detects and disables hard to remove malware that hides deep inside your PC. Real-time Active Protection: SafeBytes provides complete and real-time security for your personal machine. This tool will continuously keep track of your computer for any suspicious activity and updates itself continuously to keep current with the constantly changing threat scenarios. Internet Security: Through its unique safety score, SafeBytes tells you whether a website is safe or not to visit it. This will ensure that you’re always certain of your safety when browsing the internet. Minimal CPU and RAM Usage: This application is not “heavy” on your computer’s resources, so you’ll not find any performance troubles when SafeBytes is working in the background. Premium Support: For any technical inquiries or product guidance, you may get 24/7 professional assistance through chat and email. SafeBytes can keep your computer protected from the latest malware threats automatically, thereby keeping your web experience safe and secure. Malware trouble can become a thing of the past once you put this tool to use. So if you’re searching for the best malware removal tool out there, and when you don’t mind spending some money for it, go for SafeBytes Anti-Malware.

Technical Details and Manual Removal (Advanced Users)

To get rid of FormFetcherPro manually, go to the Add/Remove programs list in the Control Panel and select the program you want to get rid of. For browser plug-ins, go to your browser’s Addon/Extension manager and select the add-on you intend to disable or remove. You will most probably also want to reset your web browser to its default settings. To make sure of complete removal, find the following registry entries on your computer and delete it or reset the values accordingly. However, this is a tough task and only computer professionals can carry it out safely. In addition, some malware is capable of replicating or preventing removal. Carrying out this in Safe Mode is recommended.
Files: %UserProfile%\Local Settings\Application Data\Google\Chrome\User Data\Default\Sync Extension Settings\jcohbbeconnbknaeaodohnjcelemnlfc %LOCALAPPDATA%\Google\Chrome\User Data\Default\Local Extension Settings\jcohbbeconnbknaeaodohnjcelemnlfc %UserProfile%\Local Settings\Application Data\Google\Chrome\User Data\Default\Local Extension Settings\jcohbbeconnbknaeaodohnjcelemnlfc %LOCALAPPDATA%\Google\Chrome\User Data\Default\Extensions\jcohbbeconnbknaeaodohnjcelemnlfc %UserProfile%\Local Settings\Application Data\Google\Chrome\User Data\Default\Extensions\jcohbbeconnbknaeaodohnjcelemnlfc Registry: HKEY_LOCAL_MACHINE\Software\Google\Chrome\PreferenceMACs\Default\extensions.settings, valeur: jcohbbeconnbknaeaodohnjcelemnlfc HKEY_LOCAL_MACHINE\Software\Microsoft\Internet Explorer\DOMStorage\formfetcherpro.dl.myway.com HKEY_LOCAL_MACHINE\Software\Microsoft\Internet Explorer\DOMStorage\formfetcherpro.dl.tb.ask.com HKEY_CURREN_USER\SOFTWARE\Wow6432Node\FormFetcherPro HKEY_CURREN_USER\SOFTWARE\FormFetcherPro
Read More
Remove or join a Domain from Windows
As you know, networks that are domain-based are common in organizations and companies. These domain-based networks require multiple computers to be controlled through a single node known as a server. And the one that sets certain policies and restrictions on every system that is joined to the domain is the server administrator. So if you want to add your computer to a domain, you need to have the following information available:
  • The domain name
  • A user account name that’s registered in the active directory associated with the server
  • Windows Enterprise, Pro, or education version
In this post, you will be guided on how you can join or remove a domain. To get started, follow the given instructions below.

Option 1 – Joining a domain

  • First, you need to connect your computer to the network associated with the server since your computer and the server have to be on the same network.
  • Next, click the Start button and then click on the gear-like icon for Settings to open it.
  • After that, navigate to this path: Accounts > Access work or school.
  • Then click on Connect. This will open a new dialog box and from there, select the “Join this device to a local Active Directory domain” option.
  • Afterward, you will be asked to enter the username and password of your domain account.
  • Now select your Account type and when you proceed, you have to restart your computer. Your domain account should now be created.

Option 2 – Removing a domain

  • You need to open the Windows 10 Settings app.
  • And from there, go to this path: Accounts > Access work and school.
  • Next, select the account you want to remove from the domain and then click on Disconnect.
  • A prompt will then appear that says, “Are you sure you want to remove this account? This will remove your access to resources like email, apps, network, and all content associated with it. Your organization might also remove some data stored on this device”. Just click on Yes.
  • This will give you a Disconnect from the organization prompt.
  • Now click on Disconnect and select Restart now to restart your computer. This will complete the removal process of the domain.
Read More
1 2 3 162
Logo
Copyright © 2022, ErrorTools. All Rights Reserved
Trademarks: Microsoft Windows logos are registered trademarks of Microsoft. Disclaimer: ErrorTools.com is not affiliated with Microsoft, nor claim direct affiliation.
The information on this page is provided for information purposes only.
DMCA.com Protection Status