How to Repair Error Code 8007002c in Windows 10

What is Error code 8007002c?

Users when upgrading to Windows 10 operating system from Windows 8/8.1 or Windows 7, often encounter error code 8007002c. This error occurs when there’s an attempt made in performing an overall clean boot procedure. During the installation process, it will reach a certain maximum limit, for instance, 75%, and then reverts to its original state. Sometimes, after installation, users will encounter a black screen issue and there is no cursor visible.

Solution

Restoro box imageError Causes

Misconfigured system files that create registry errors within your operating system normally cause error code 8007002c in Windows 10. This registry error happens when there are new programs being installed over old ones without the old programs uninstalled entirely. Another possible cause could be from some malicious software like spyware, adware, and viruses.

Further Information and Manual Repair

Caution: The following steps are complicated. The risk of being in a no-boot situation or data loss might be encountered. It would be best to be supervised by an experienced user, especially in using the command line.

In order to fix Error code 8007002c occurring in Windows 10 upgrade, you can follow this step-by-step manual repair method. Once the repair method is correctly executed, users will most likely quickly resolve issues such as the Error code 8007002c and be able to upgrade to Windows 10 operating system smoothly.

However, in such cases where there are complex instructions and thus need an expert, seek help from a Windows professional. You may also want to consider making use of an automated tool whenever needed.

There are several ways to fix Error code 8007002c, but here are the most effective and efficient methods:

Method One: Force Windows Update

 To be able to download and install the necessary updates, you may use the force Windows Update tool. See below for the steps:

  1. Browse to C:\Windows\Software\Distribution\Download. Afterward, delete all the files found in that folder.
  2. Press Windows key + X then click on the Command Prompt (Admin). Type exe /updatenow once the Command Prompt window appears then press Enter.
  3. Open the Control Panel. Select Windows Update. At this point, Windows 10 should now start downloading.
  4. Press again on Windows key + X to open the Command Prompt window. In the Command Prompt, Type or Copy and Paste the following commands one at a time:

NOTE: Don’t forget to hit Enter after every command.

 Dism /Online /Cleanup-Image /CheckHealth

Dism /Online /Cleanup-Image /ScanHealth

Dism /Online /Cleanup-Image /RestoreHealth

  1. Input a machine name for your computer. Make sure to use a simple name, having at least 8 characters.

Here’s how you can input a machine name:

  • Click on Start and then right-click on Computer. Afterward, select For users with Windows 8 operating system, press on Windows key + X then click on System.
  • Click on Change settings under the Computer name, domain, and workgroup settings.

Method Two: Diagnose RAM Issues

Another reason why Error code 8007002c occurs is when there’s a defective and wrongly installed memory chip. Try using the Windows Memory Diagnostic to diagnose if there are RAM Issues.

  1. Press on the Windows Key + X then select
  2. Type
  3. Select Windows Memory Diagnostic, from that window, select Restart now, and check for problems

Method Three: Use Selective Startup

One more possible cause why Error code 8007002c occurs is due to third-party software. To fix this error, you can try booting up your device with Selective Startup -- a boot type where you can load a limited set of startups and services.

  1. Open the System Configuration tool. On your Taskbar, type MSCONFIG in the Search Box then hit Enter.
  2. Select the General
  3. Select Selective startup option then tick on the Load system services
  4. Ensure that Load startup items check box is unchecked.
  5. Click Apply and

Can’t seem to put up with the long and technical manual repair process? You can still fix this error by downloading and installing a powerful automated tool that will surely get the job done in a jiffy!

If you like to learn and find out more about various Windows errors, and how to repair them go to our vast archive or use search to find articles that will explain and help you in solving your issue.
However, if you prefer to do things fast and with automatization then we are proposing to use an automated solution for your issues. The application that we are recommending is Advanced System Repair Pro
Advanced System Repair utilizes multiple tools all in one to give you a quick, simple, reliable, and very thorough diagnosis of your PC. It brings you all the tools you need in one program to clean, fix, protect, optimize and boost your PC!
1-Click Maintenance
All the tools to make it simple and easy! It's like having a professional technician at the click of a mouse.

Junk Cleaner
Keeping your computer free from unnecessary clutter also helps make your computer last longer. Like any other machine, if you keep it clean and take care of it, it will serve you better for longer!

Optimize background apps
Optimize applications background activity with the built-in Application Optimizer feature.

Disk Defrag
With a simple 1-click, Advanced System Repair speeds up your PC by assembling fragmented files on your machine and organizing them more efficiently.

Malware Removal
Finds and removes all types of harmful malware including trojans, worms, bots, adware, spyware, PUPs, and more!

Privacy Cleaner
The all-in-one privacy suite to Clean Your Tracks & Protect Your Privacy! Make your computer safe, secure, and more efficient!

System Tweak/Optimizer
ASR will analyze your complete system and settings to adjust your PC to function at its maximum performance.

Registry Cleaner
Over time, as you install and uninstall applications, the registry can become cluttered with old entries and broken settings which can result in program crashes, and annoying messages and slow the computer down.
Visit our Advanced System Repair Pro Download page to inform yourself about all the benefits of this software and get a free trial copy of it.
advanced system repair pro

Advanced System Repair Pro

One-click automated PC repair solution
ASR logo
With Advanced System Repair Pro you can easily
Replace damaged files
Restore performance
Free disk space
Remove Malware
Protects WEB browser
Remove Viruses
Stop PC freezing
DOWNLOAD
Privacy Policy | Terms of Use | Uinstall
Advanced System Repair Pro is compatible with all versions of Microsoft Windows including Windows 11

Share this article:

You might also like

Fix Installer encountered an error 0x800f0905

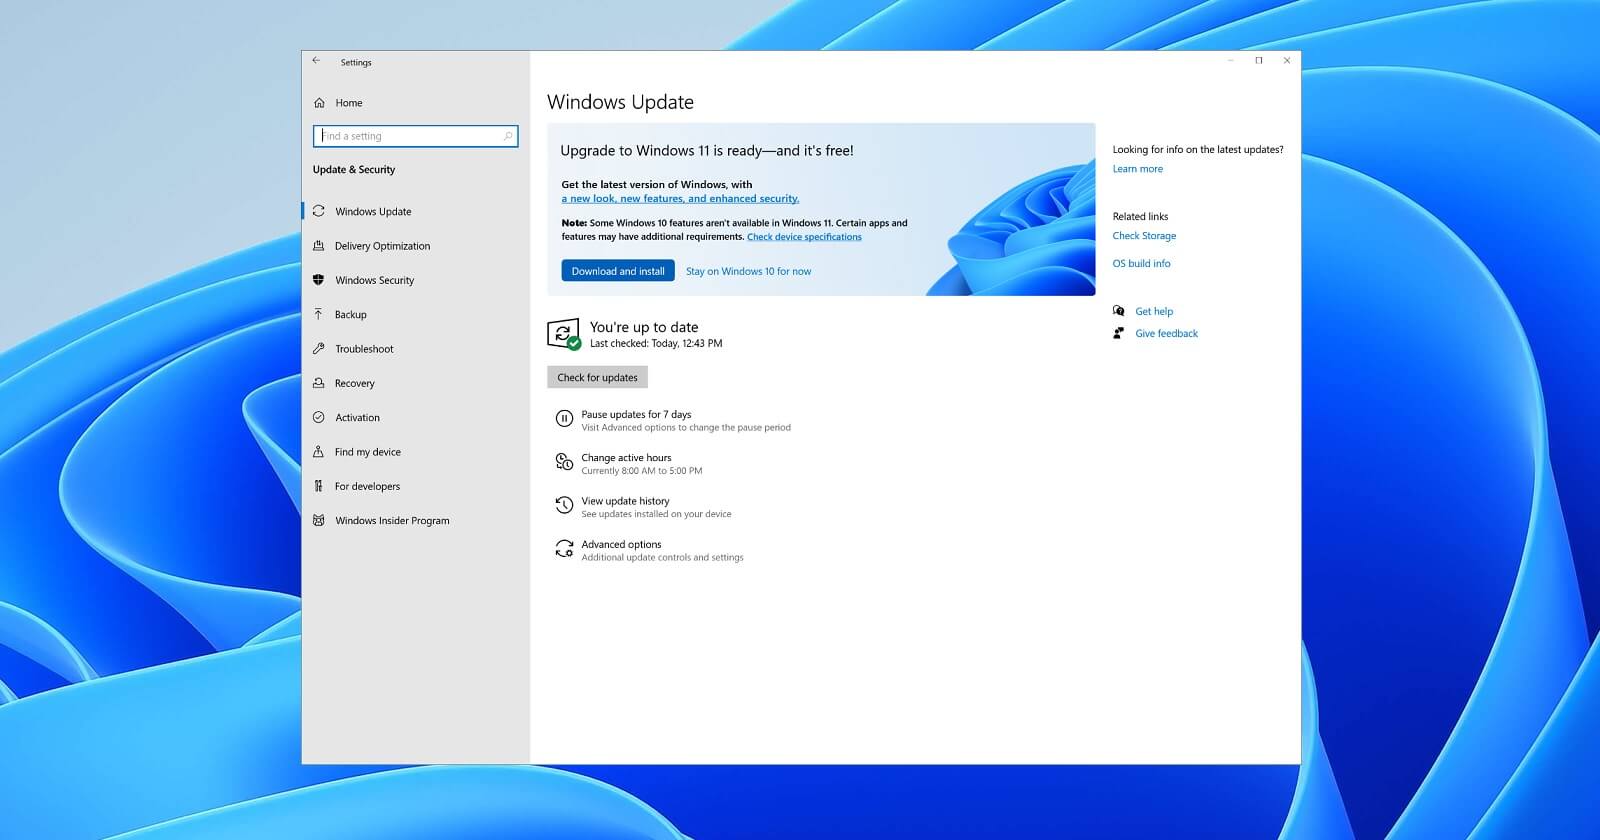
Are you trying to update your Windows 11 OS and are receiving a 0x800f0905 error? Do not sweat and do not worry we have a couple of solutions that you can try in order to fix this issue. How this error is tied to various things like misconfigured settings, corrupt system files, and more there is no way to present one simple solution that will solve everything in one click.

error 0x800f0905Therefore we are presenting a couple of solutions that will fix your issue, it is advisable to follow them as presented since they will go from the most common to the more complex one.

Run the troubleshooter

The most common fix and one that will actually repair things most of the time is simply running the Windows Update troubleshooter.

  1. Press ⊞ WINDOWS + I to open the Settings app
  2. Click on System on the left
  3. Click on Troubleshoot in the right part
  4. Click on Other Troubleshooters
  5. Find the Windows Update section and click on Run
  6. Let troubleshooter finish

Reset Windows update components

If the previous solution did not work we will need to do things manually. Follow the steps as presented in order to reset Windows update components.

  1. Press ⊞ WINDOWS + S to open search
  2. Type in Terminal
  3. Select Run as administrator
  4. Click on Yes on the User account control (UAC) pop up
  5. Press CTRL + SHIFT + 2 to open Command prompt
  6. Inside command prompt type each line of a command followed by ENTER after each line:
    net stop bits
    net stop wuauserv
    Del “%ALLUSERSPROFILE%Application DataMicrosoftNetworkDownloaderqmgr*.dat”
    Ren %Systemroot%\SoftwareDistribution\DataStore DataStore.bak
    Ren %Systemroot%\SoftwareDistribution\Download Download.bak
    Ren %Systemroot%\System32\catroot2 catroot2.bak
    exe sdset bits D:(A;;CCLCSWRPWPDTLOCRRC;;;SY)(A;;CCDCLCSWRPWPDTLOCRSDRCWDWO;;;BA)(A;;CCLCSWLOCRRC;;;AU)(A;;CCLCSWRPWPDTLOCRRC;;;PU)
    sc.exe sdset wuauserv D:(A;;CCLCSWRPWPDTLOCRRC;;;SY)(A;;CCDCLCSWRPWPDTLOCRSDRCWDWO;;;BA)(A;;CCLCSWLOCRRC;;;AU)(A;;CCLCSWRPWPDTLOCRRC;;;PU)
    cd /d %windir%\system32
    regsvr32.exe atl.dll
    regsvr32.exe urlmon.dll
    regsvr32.exe mshtml.dll
    regsvr32.exe shdocvw.dll
    regsvr32.exe browseui.dll
    regsvr32.exe jscript.dll
    regsvr32.exe vbscript.dll
    regsvr32.exe scrrun.dll
    regsvr32.exe msxml.dll
    regsvr32.exe msxml3.dll
    regsvr32.exe msxml6.dll
    regsvr32.exe actxprxy.dll
    regsvr32.exe softpub.dll
    regsvr32.exe wintrust.dll
    regsvr32.exe dssenh.dll
    regsvr32.exe rsaenh.dll
    regsvr32.exe gpkcsp.dll
    regsvr32.exe sccbase.dll
    regsvr32.exe slbcsp.dll
    regsvr32.exe cryptdlg.dll
    regsvr32.exe oleaut32.dll
    regsvr32.exe ole32.dll
    regsvr32.exe shell32.dll
    regsvr32.exe initpki.dll
    regsvr32.exe wuapi.dll
    regsvr32.exe wuaueng.dll
    regsvr32.exe wuaueng1.dll
    regsvr32.exe wucltui.dll
    regsvr32.exe wups.dll
    regsvr32.exe wups2.dll
    regsvr32.exe wuweb.dll
    regsvr32.exe qmgr.dll
    regsvr32.exe qmgrprxy.dll
    regsvr32.exe wucltux.dll
    regsvr32.exe muweb.dll
    regsvr32.exe wuwebv.dll
    netsh winsock reset
    net start bits
    net start wuauserv

Well, that was a lot of typing or copy and pasting line by line followed by ENTER after each one but hopefully, your issue is solved. These provided solutions fixed most users' issues with this error but if for some reason this is not the case for you, move to the next step.

Run the SFC scan

If you are still having 0x800f0905 error after previous attempts do the following:

  1. Press ⊞ WINDOWS + S to open search
  2. Type in Terminal
  3. Select Run as administrator
  4. Click on Yes on the User account control (UAC) pop up
  5. Press CTRL + SHIFT + 2 to open Command prompt
  6. Type in sfc /scannow and press ENTER
  7. Wait for the scan to finish
  8. Reboot the computer

Perform a system restore

If for any reason previous solutions have not provided you with the solution we will try to fix the issue by performing system restore.

  1. Press ⊞ WINDOWS + S to open search
  2. In the text box type in Create a restore point
  3. Click on the closest match in search results, should be Create a restore point
  4. Click on System Restore or on Next if there are no points created
  5. Choose to restore a point from the list and click on next
  6. Review settings and click on Finish
  7. Wait for the process to finish and for the computer to restart

Manually install update

If for any reason Windows still cannot install the update, try installing it manually.

  1. Go to Windows 11 update history and find the Knowledge base (KB) number for the latest version
  2. Go to the official Microsoft Update Catalog
  3. Paste the KB number in the search box and press ENTER
  4. Click on DOWNLOAD
  5. Double click on the downloaded file to launch the installer
  6. Follow on-screen instructions and install the update

Perform Windows 11 reset

If nothing worked, reset your Windows 11 to its factory settings to fully repair and reset the whole operating system.

Read More
How to Repair Bad_Pool_Header Error

Fix Bad_Pool_Header Error

Bad_Pool_Header Error - What is it?

Bad_Pool_Header is one of the types of BSOD (Blue Screen of Death) error codes. This error triggers a problem with Windows memory allocation. When this error message occurs, the screen turns blue and locks the user out of the application running on the system. The computer shuts down or restarts.

Solution

Restoro box imageError Causes

There is no one particular cause for the occurrence of the Bad_Pool_Header error code. It may appear on your system due to multiple reasons such as:
  • Device driver issues
  • Cluttered disk
  • Disk writing issues
  • Faulty memory hardware
Driver issues and disk writing issues occur when your try to update new driver versions. During this process, users often forget to remove the files of the uninstalled version from the registry. And due to the presence of the uninstalled driver files in the registry updating and disk writing becomes an uphill task which leads to the Bad_Pool_Header display on the computer screen. The main database of your system is the registry so you need to keep it clean to avoid disk cluttering. The hard disk clutters because the registry saves all the activities that you perform in your system. It saves junk files, internet history, invalid entries, and other unnecessary files. This occupies a lot of your disk space thus resulting in disk cluttering and faulty memory hardware issues triggering the Bad_Pool_Header. Ignoring the Bad_Pool_Header error is not wise. It is advisable to repair the Bad_Pool_Header right away as it can lead to serious threats like system failure and data loss.

Further Information and Manual Repair

The easiest, time and money-saving way to resolve the Bad_Pool_Header error on your system is to install Restoro. This is a high and multi-functional repair tool that features a powerful inbuilt registry cleaner, anti-virus, and a system optimizer. This tool is the one-stop solution for all your PC-related errors including the Bad_Pool_Header blue screen of death error. Whether it’s a driver issue, faulty memory, or cluttered disk, all the causes triggering the Bad_Pool_Header error code fall under the registry which is why it is recommended to install Restoro. Its innovative and powerful registry cleaner scans detect and repair all the errors related to the registry in one go including the Bad_Pool_Header errors. With this helper, you can easily remove all the unnecessary files cluttering your hard disk and damaging your registry. It wipes out the clutter in seconds and frees up disk space.

Why Should You Clean The Registry?

Sometimes the registry also gets cluttered by malicious software like viruses, spyware, and malware. These may also take up your disk space and prevent you to perform disk writing successfully and also corrupt the registry. The privacy error finding utility embedded in Restoro helps you scan for such malicious software on your system and removes them immediately. It lends the software anti-virus properties. When it comes to using repair tools, many users who are not technically sound often worried. They think it may be difficult to operate. If you think the same way, let us tell you that Restoro is very easy to use. It is integrated with a high-functional yet user-friendly interface complemented by simple navigation.

Restoro Special Features

This makes it simple for all levels of users to operate it regardless of whether they are technically adept or not. Restoro is compatible with all Windows versions. You can download it with ease and run it for scans on any Windows version you have installed on your system. To get started, all you have to do is:
  • Click here to install Restoro.
  • Once the installation is complete now run it to scan for errors like the Bad_Pool_Header
  • After that simply click on the ‘repair’ button to resolve
Read More
What is and how to Remove Shortcut Virus
Shortcut virus is an easily spreadable and annoying combination of Worm and Trojan that hides all of your files and folders and then replaces them with shortcuts that look identical to replaced files and folders. Shortcut virus
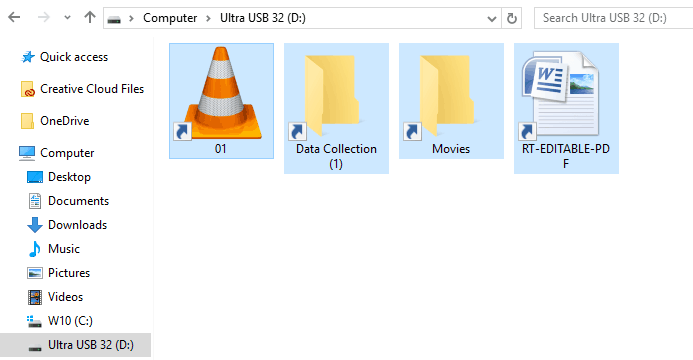
Once disguised it will wait patiently for a user's click and once that happens it will replicate itself and further infect the system. This rapid spread can lead to stolen personal data, some system hick-ups, and other system-related issues. This malware mainly affects physical file transfer devices like for example and most USB drives, hard drives, and SD memory cards and it can easily transfer itself to the computer. The advantage of this shortcut virus comparing it to others is that it is mostly undetected by a vast variety of antivirus software. So running just anti-virus software maybe not be enough to remove it from your system. Luckily for all unfortunate users that have caught this annoyance, it can be easily removed fully manually in a short time.

How to Remove Virus from USB and other removable media

Firstly plugin USB, SD, or removable drive. The infection will transfer to your computer when the infected drive is plugged in so before we go to clean the computer itself, clean each removable drive that you have. Also know that infection will spread from computers into removable devices as well if it is not cleaned. Open the File Explorer and remember under which letter is removable drive registered. Open Command prompt but with administrator privileges and go to infected rive by typing its letter followed with “:” (for example D:) and press ENTER Once you have successfully gone to infected drive type in command prompt: Attrib -s -r -h /s /d *.* This will unlock all original files back into removable storage, next copy all files to your computer, and format the removable drive. Once the format is complete, unplug the removable device. Continue to clean all devices with the same method.

How to Permanently Remove a Shortcut Virus from Your PC

Now once we have cleaned all removable devices it is time to fully clean the PC Firstly open the task manager ( CTRL + SHIFT + ESC ), in the process tab find wscript.exe or wscript.vbs, right-click on it (or both if present), and select End Task. Now close the task manager and press Start. Inside start typing in registry editor to search for it and once found open it. Find the following key inside the registry editor: HKEY_CURRENT_USER/Software/Microsoft/Windows/CurrentVersion/Run In the right panel, look for any strange-looking key names, such as odwcamszas, WXCKYz, OUzzckky, etc. For each one, run a Google search to see if it's related to shortcut viruses. If any returns a positive match, right-click on them and select Delete. !!! Accidentally deleting an important key can cause Windows to become unstable, so double-check everything !!!. Close the Registry Editor Now press ⊞ WINDOWS + R to open the run dialog and type in it Msconfig followed by ENTER. Once the System Configuration window opens go to the Startup tab. In the Startup tab, look for any strange-looking .EXE or .VBS programs, select each one and click Disable. Close the Window. Once again open the run dialog and type inside %TEMP% and press ENTER in order to open the Windows temp folder. Inside this folder delete everything. Next in the File explorer go to C:\Users\[username]\AppData\Roaming\Microsoft\Windows\Start Menu\Programs\Startup Look for any strange-looking .EXE or .VBS files and delete them.
Read More
Windows Update failed, error 0x80240034
If you got an error message saying, “Windows Update failed to install error 0x80240034” when trying to update your Windows 10 then it’s probably due to some update services that are failing at some point. In addition, you might also see Error constant WU_E_DOWNLOAD_FAILED with the description that “Update has failed to download”. The Windows Update failed to install error 0x80240034 might be caused by some connection problem or there might be a duplicate update or that installation is not allowed and so on. And so to fix the problem, we’ve prepared some options that could help. Make sure to follow them accordingly but before you proceed, you need to verify if you have a stable internet connection.

Option 1 – Restart your computer and try installing the Updates again

Restarting your computer can also help in fixing the Windows Update failed to install error 0x80240034. There are cases where the issue resolves on its own as it could just be some simple network or PC error.

Option 2 – Try to disable your antivirus program

The Windows Update failed to install error 0x80240034 might be caused by the antivirus program installed in your computer which is why disabling the antivirus program or any security software installed in your computer is always a good idea you can try when the Windows Update process does not go smoothly. So before you try updating your computer again, make sure to disable the antivirus or security program and once the Windows Update is done, don’t forget to enable the antivirus program back again.

Option 3 – Clean up temporary and junk files

  • Open Setting > System > Storage from the WinX Menu.
  • From there, you will see a list of all the local and connected storage devices along with the details on the free space.
  • Now make sure that the Storage Sense feature is turned On then go find a link that says “Free Up Space” and click it to open.
  • After that, a screen which is the built-in program in Windows 10 will appear and will scan your computer for the following junk files so you can free up disk space:
  • Windows Upgrade Log Files
  • The system created Windows Error Reporting Files
  • Thumbnails
  • Temporary Internet Files
  • Previous Windows Installation Files
  • Delivery Optimisation Files
  • DirectX Shader Cache
Note: Once you’re done freeing up space on your drive, try to run the setup file again.

Option 4 – Run the Windows Update Troubleshooter

Running the built-in Windows Update troubleshooter is one of the things you can first check out as it is known to automatically resolve any Windows Update errors like error 0x80240034. To run it, go to Settings and then select Troubleshoot from the options. From there, click on Windows Update and then click the “Run the troubleshooter” button. After that, follow the next on-screen instructions and you should be good to go.

Option 5 – Delete Files from Software Distribution Folder & Catroot2 folders

The downloaded Windows Updates are placed in a folder called “SoftwareDistribution”. The files downloaded in this folder are automatically deleted once the installation is completed. However, if the files are not clean up or if the installation is still pending, you can delete all the files in this folder after you pause the Windows Update service. For complete instructions, refer to the steps below.
  • Open the WinX Menu.
  • From there, open Command Prompt as admin.
  • Then type in the following command – don’t forget to hit Enter right after typing each one of them.
net stop wuauserv net start cryptSvc net start bits net start msiserver
  • After entering these commands, it will stop the Windows Update Service, Background Intelligent Transfer Service (BITS), Cryptographic, and the MSI Installer
  • Next, go to the C:/Windows/SoftwareDistribution folder and get rid of all the folders and files thereby tapping the Ctrl + A keys to select them all and then click on Delete. Note that if the files are in use, you won’t be able to delete them.
After resetting the SoftwareDistribution folder, you need to reset the Catroot2 folder to restart the services you just stopped. To do that, follow these steps:
  • Type each one of the following commands.
net start wuauserv net start cryptSvc net start bits net start msiserver
  • After that, exit Command Prompt and restart your computer, and then try to run Windows Update once more.

Option 6 – Run the DISM tool

If the first five options didn’t work, then running the Deployment Imaging and Servicing Management tool might help as it can repair the Windows System Image as well as the Windows Component Store in Windows 10.
  • After you access the Advanced Startup options, select Command Prompt by using the arrow keys on your keyboard.
  • Next, type in this command: DISM /Online /Cleanup-Image /RestoreHealth
  • Do not close the window if the process takes a while as it will probably take a few minutes to finish.

Option 7 – Run System File Checker

Running the SFC scan or System File Checker might also help in fixing error 0x80240034.
  • Tap Win + R to launch Run.
  • Type in cmd in the field and tap Enter.
  • After opening Command Prompt, type in sfc /scannow and hit Enter.
  • Restart your PC.

Option 8 – Try to use the Media Creation tool

The Media Creation tool in Windows allows you to use the ISO installation file to make a bootable device that you can use to install Windows on your PC. Note that this is kind of different from the usual installation process as it could erase your computer’s current settings and data on the primary drive. Thus, before you proceed, you need to backup all your data into some removable drive and then use the Media Creation Tool to make a bootable drive.
  • After making the bootable drive, you need to plug it into your computer and then reboot.
  • Next, tap the F10 or Esc key to open the boot options.
  • Now set the boot priority of the removable drive the highest. Once the setup comes forth, follow the next onscreen instructions and install Windows without any problems.
Read More
Perform System Restore when Windows won’t boot
System restore is usually the go-to tool when something goes bad in Windows, we fire it up and roll back Windows in the state when everything was working fine. But what if Windows does not want to boot? Can we use system restore in that case? The answer to that question would be yes, yes we can.
  1. Boot interrupt Windows 10 by starting your PC and as soon as you see the Windows logo; press and hold the power button to force a shutdown.
  2. Repeat this 2-4 times and Windows will open up the Advanced Startup Options menu for you.
  3. At the Advanced Startup Options screen, select Advanced Options.
  4. Select Troubleshoot.
  5. Under the Advanced options screen, select System Restore.
or if you prefer, use Windows USB installation.
  1. Boot the faulty PC using the Windows 10 installation media.
  2. The Windows Setup dialog box will appear.
  3. Set the Time and currency format, Keyboard or input method, and the language to install.
  4. Click Next.
  5. Click on Repair your computer from the lower-left corner.
  6. From the Choose an option screen, click on Troubleshoot.
  7. Click Advanced Options in the Troubleshoot screen.
  8. In the Advanced Options screen, click System Restore.
  9. Windows will take some time to prepare System Restore. It may even restart your computer or device.
  10. When System Restore is ready, you will be prompted to choose a user account to continue.
  11. Select an account that is set as administrator on your Windows 10 computer or device.
  12. At the next screen, change the keyboard layout if you want and then input the password for that account.
  13. Click the Continue button.
Read More
Fix Display driver failed to start Error
Recently, a number of users reported an error when they tried to open graphic-intensive apps like video games. According to users, when they tried to open an app, they get the “Display driver failed to start” error instead. Thus, if you encounter the same error, then you’ve come to the right place as this post will guide you on how exactly you can fix it. Here’s the full content of the error message:
“Display driver failed to start; using Microsoft Basic Display Driver instead. Check Windows Update for a newer display driver.”
This kind of error could be due to several factors. It is possible that it could be a result of a corrupted or outdated graphics driver. Aside from that, it could also be due to some issues with the system settings. Worry not though for there are potential fixes that can help you fix the problem. But before you troubleshoot the problem, you need to update your Windows 10 computer first and if it didn’t help fix the problem, then here are the potential fixes that should help resolve the “Display driver failed to start” error.

Option 1 – Try to restart the Graphics driver

Although Windows 10 can recover the graphics driver on its own when it crashes, there are times when it fails to do its job. To restart the graphics driver in your computer, simply tap the Win + Ctrl + Shift + B key combination. After that, the graphics driver will be back in less than a second.

Option 2 – Try running the Hardware and Devices troubleshooter

Running the built-in hardware and devices troubleshooter can also help you in fixing the “Display driver failed to start” error.
  • The first thing you need to do is click on Start and then on the gear-like icon to pull up the window for Settings.
  • After opening Settings, look for the Update and Security option and select it.
  • From there, go to the Troubleshoot option located on the left-hand side of the list.
  • Next, select Keyboard from the list and open the Troubleshooter and run it. Once it is doing its job, wait for it to complete the process and then restart the system.
  • After the system restarts, check if the problem’s now fixed. If not, refer to the next option given below.

Option 3 – Try to update or rollback the Graphics driver

You can try to update your Graphics card driver using the Device Manager in your computer to resolve the “Display driver failed to start” error or you can also go directly to the website of your graphics card manufacturers like NVIDIA, Intel, or AMD and go to the section called Drivers then check if there’s a new available update – if there is, download and install it. To update your Graphics driver via Device Manager, refer to these steps:
  • First, boot your computer into Safe Mode.
  • After that, tap the Win + R keys to launch Run.
  • Type in devmgmt.msc into the box and tap Enter or click OK to open the Device Manager.
  • After that, a list of device drivers will be displayed. From there, look for the Display Adapters and click on them.
  • After that, right-click on each entry under the Display Adapters and select the “Uninstall Device” option from the menu.
  • Now restart your computer.
  • After restarting your computer, go to the Settings app and Check for Updates in the Windows Update section.

Option 4 – Try setting your system for maximum performance

If the first three options didn’t fix the error, you can try setting your computer for maximum performance since Windows 10 allows you to choose the effects you want to activate your system and you can do this by adjusting the performance ratio. Adjusting the performance ratio can be done via a certain setting in your computer – and this setting should be set to “Maximum Performance” to resolve the error.
  • In the Windows Search bar, type in “performance” and from the search results that appear, select the “Adjust the appearance and performance of Windows” option.
  • Next, a mini window will appear and from there, click on the radio button that says, “Adjust for best performance”.
  • Once done, click on the Apply and OK buttons to save the changes made. This should resolve the problem.
Read More
Fix Bad Image Error Status 0xc000012f
When you run a program in Windows 10, error 0xc000012f may pop up, mentioning that the files and binaries you’re trying to run are corrupted. Error 0xc000012f means Bad Image, denoting that the program’s executable or one of the supporting modules is corrupt. Or there is probably a DLL mismatch. This error usually manifests itself after a windows update or after installation of some application, in order to fix it follow the steps below:
  1. Perform SFC scan

    Press ⊞ WINDOWS + X to open the Windows menu keyboard with windows and x markedFrom the menu choose command prompt (admin) Windows menu command prompt adminIn command prompt type sfc /scannow and press ENTER Leave the computer for the operation to be completed and Reboot your computer
  2. Run DISM

    Press ⊞ WINDOWS + X to open the Windows menu keyboard with windows and x markedFrom the menu choose command prompt (admin) Windows menu command prompt adminin command prompt type: DISM.exe /Online /Cleanup-image /Restorehealth and press ENTER wait for the process to be finished and Reboot your computer
  3. Reinstall application

    If this error has been popping up after the application install remove the installed application and install it again. There is the possibility that the application installer has by accident corrupted some files, reinstalling it might fix the issue.
  4. Uninstall Windows update

    In some cases, Windows update can introduce this issue, go to Windows updates, into advanced options, and uninstall the latest update to see if this will fix the error.
  5. Install Visual C++ Redistributable

    Go to the official Microsoft website and download C++ redistributable package and install it
  6. Install new windows update

    If there is a new Windows update install, there is a chance that in the last update something went wrong and it is very likely that it was fixed in the last one.
Read More
Intel’s GPU ARC coming aimed at AMD & Nvidia
intel ARC
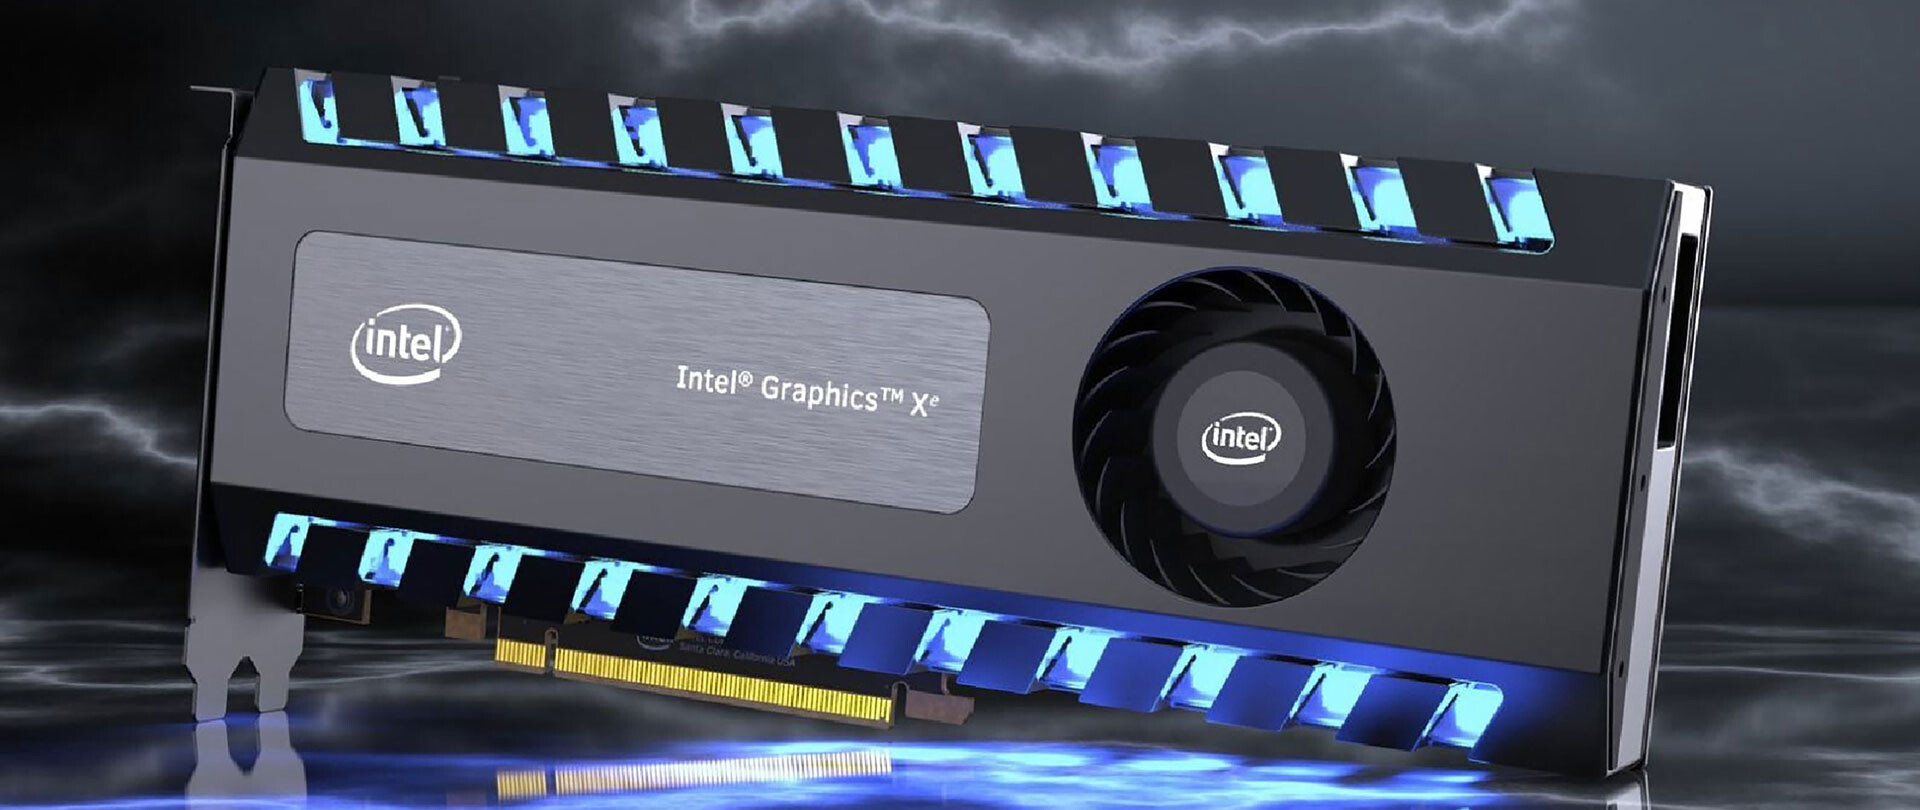
This is not the first time that Intel is trying to enter the GPU field but its adventures so far were, well let us agree not so good. All of that is hoping to be changed with the upcoming ARC GPU. The first generation of Arc graphics, code-named Alchemist and previously known as DG2, will support desktop PCs and laptops and is set to arrive in the first quarter of 2022. Alchemist will have hardware-based Ray tracing and AI-driven supersampling. This indicates that GPU is aimed to compete in the Hi-end spectrum and battle side by side with Nvidia and AMD on the market. Alchemist will also pack full DirectX 12 Ultimate support. Intel also released names for the next upcoming future generations of ARC GPUs: Battlemage, Celestial & Druid. More information about ARC products will be released later this year. “Today marks a key moment in the graphics journey we started just a few years ago. The launch of the Intel Arc brand and the reveal of future hardware generations signifies Intel’s deep and continued commitment to gamers and creators everywhere,” Roger Chandler, Intel vice president, and general manager of client graphics products and solutions.
Read More
Disabling Auto Update in Chrome & Firefox
As you know, all the web browsers come with the support of auto-updates which include both Google Chrome and Mozilla Firefox. However, with these updates, the browser comes with the support of a new web APIs and better rendering. Although there could be a lot of problems that may arise due to these updates. These problems consist of depreciation of features, incompatibility with some websites, to name a few. It includes incompatibility with some websites, depreciation of features, and more. This might push someone to stop the auto-updates of these web browsers. So, in this guide, we will be checking out how to stop auto-update in Google Chrome and Mozilla Firefox on Windows 10. Thus, if you want to be rid of these issues, then you can disable the Chrome & Firefox auto-update and you can do that by either using the Windows Services Manager and the System Configuration utility.

Option 1 – Disable Chrome & Firefox auto-update via Windows Services Manager

The first thing you can do to disable the Chrome auto-update is through the Windows Services Manager. To do so, follow these steps:
  • First, tap the Win + R keys to open the Run dialog box.
  • Next, type “services.msc” in the field and hit Enter to open the Windows Services Manager.
  • After that, you will see a list of services and from there, look for the Google Update Services (gupdate) and Google Update Service (gupdatem).
  • Once you find these services, right-click on each one of them and select Properties and then make sure that the Service Status is set to be Stopped.
  • You should also select the Startup Type to Disabled and click on the Apply and OK buttons.
  • Now restart your computer. This should stop the automatic update of the Chrome browser.

Option 2 – Disable Chrome & Firefox auto-update via System Configuration utility or MSConfig

  • Tap the Win + R keys to open the Run utility and type “msconfig” in the field and tap Enter to open the System Configuration.
  • After that, go to the Services tab and uncheck the two entries, namely Google Update Service (gupdate) and Google Update Service (gupdatem).
  • Next, click on the Apply and OK buttons to save the changes made.
  • Restart your computer.
Note: Now that you’ve stopped the auto-update in Firefox, it’s time for you to stop the auto-update in Mozilla Firefox. To get started, follow the steps below.
  • Open the Mozilla Firefox browser and click on the hamburger menu located on the top-right portion of the screen.
  • After that, select Options and under the General panel and then go to the Firefox Updates section.
  • Next, click on the radio button for updates but select the option to let you install them.
  • You also have to uncheck the options named “Use a background service to install updates” and “Automatically update search engines”.
  • Once done, restart the Firefox browser. This should stop the automatic update.
Read More
How to Fix the Error 103

Repair Error 103

Error 103 - What is it?

The error 103 may occur either due to issues in your Google Chrome browser or system issues. If error 103 occurs when using Chrome, this means there is a conflict between Google Chrome and the antivirus program running on your PC. It is displayed in either of the following formats: ‘Chrome error 103 connection aborted’, ‘Chrome error 103 err_connection_aborted’ or ‘Error 103 (net: ERR_CONNECTION_ABORTED): Unknown error. However, if this is a system error code, it may be displayed in the following format ‘The semaphore cannot be set again’ or as ‘ERROR_TOO_MANY_SEM_REQUESTS’ or as the value 0x67.

Solution

Restoro box imageError Causes

The error 103 is triggered due to multiple reasons such as: The conflict between Google Chrome and anti-viruses arises because when the web browser attempts to update, the anti-virus programs on your PC may view the update as a threat. Due to this, the connection to the internet is terminated and the error 103 message is displayed on your computer screen. And besides, this keeps you from upgrading your Google Chrome browser too. Other causes include:
  • Viral infection
  • Missing Windows component called ‘expand.exe’
  • Registry overlaps
  • Incompatible drivers

Further Information and Manual Repair

Here are some of the easy and efficient ways to resolve error 103. Choose a method according to the error 103 messages displayed on your screen.

Method 1: Check for the ‘Expand.exe’ Windows component

This method is workable if the error 103 is triggered due to browser issues. To get started, follow these steps. First, go to the start menu, and in the search bar type ‘expand.exe’. If you are able to find it, move it to the following directory C:\Windows\system32. However, if you are unable to locate it, then copy the file from Windows installation CD. Once you copy the file to the directory, reinstall the updated version of Google Chrome.

Method 2: Change the Location of the Temporary File

If the error still persists, try method 2. Go to the start menu and open the Run window. Now type C: and press OK. Then go to File, then New, and then Folder. Now create a temporary folder and name it ‘test’. After that go back to the start menu and open the Run window again. Now enter the following text in the text field:cmd.exe then press OK. In the command prompt type set TMP=C:\test. After that try reinstalling Google Chrome by typing the following in the command prompt: start ChromeSetup.exe.

Method 3: Update Drivers

If the error message 103 is generated due to system issues, then try updating drivers. Sometimes the error may occur due to incompatible drivers.

Method 4: Perform an Entire PC Scan for Viruses

To resolve error 103, perform an entire PC Scan for viruses. Sometimes the error may occur due to viral infection. Removing viruses may fix the error.

Method 5: Clean and Restore the Registry

If the error is triggered due to registry issues, then it is advisable to download Restoro. This is a multi-functional PC repair tool integrated with powerful utilities including an anti-virus, a registry cleaner, Active X controls, and class scanner, and a system optimizer. The registry cleaner feature wipes out all the unnecessary files including cookies, junk files, and bad registry keys that corrupt the registry. It cleans and restores the registry instantly. The anti-feature removes all viruses and spyware while the system optimizer utility ensures your system works at its optimum speed. It can be downloaded on all Windows versions. It is safe and efficient. This software is a one-stop solution for all PC-related errors. Click here to download Restoro.
Read More
1 2 3 162
Logo
Copyright © 2022, ErrorTools. All Rights Reserved
Trademarks: Microsoft Windows logos are registered trademarks of Microsoft. Disclaimer: ErrorTools.com is not affiliated with Microsoft, nor claim direct affiliation.
The information on this page is provided for information purposes only.
DMCA.com Protection Status