Removing Search.schooldozer.com hijacker

What is Search.schooldozer.com? And how does it function?

Search.schooldozer.com is a browser extension that functions as a search engine. It is developed and maintained by “Schooldozer”. It claims to improve users’ browsing experience by providing them with improved search results. However, it does not really do the things it claims to do. In fact, they’re quite the opposite ones – instead of improving the browsing experience, it makes users’ browsing experience unsafe and full of sponsored content. This is in contrast to what it states in its Privacy Policy:

“Install applications the easy way and without the hassle, using the Schooldozer downloader. The Schooldozer platform stems from years of experience with installing applications, resulting in a highly optimized process, yielding faster downloads, better user experience, and more successful installations.”

In addition, once installed Search.schooldozer.com is installed, it will change the default settings of a browser such as the default search engine, homepage, and new tab page. This is why security experts regard this browser extension as a browser hijacker and a potentially unwanted program. The modification of the browser's settings allows it to control users’ browsing by redirecting them to sponsored sites as well as deliver sponsored content from its affiliated sites in order to gain profit via pay-per-click marketing. And if you think that the ads it displays are harmless, think again for some of these ads can redirect you to suspicious websites that might contain harmful content. What’s more is that this browser hijacker can also keep track and monitor all your browsing activities in order to obtain your browsing data like search queries, what sites you always visit, browsing history, browser type, OS version, and so on. The information collected is then used and may even be shared with its affiliated third parties to deliver more customized and personalized advertisements.

How is Search.schooldozer.com distributed over the web?

Like a typical browser hijacker, Search.schooldozer.com is distributed using the software bundling method where several unknown and unwanted programs are bundled in a software package. Thus when you install any software bundle, make sure to always opt for the Custom or Advanced installation setup rather than the quick setup to avoid installing unwanted programs like Search.schooldozer.com.

To remove Search.schooldozer.com from your computer, follow the removal guide below carefully.

Step 1: Start the removal process by closing all the browsers infected with Search.schooldozer.com. If you’re having a hard time closing them, you can close them using the Task Manager just tap on Ctrl + Shift + Esc.

Step 2: After you open the Task Manager, go to the Processes tab and look for the infected browser’s process and end it.

Step 3: Then close the Task Manager and tap the Win + R keys to open Run and then type in appwiz.cpl to open Programs & Features in Control Panel.

Step 4: From there, look for Search.schooldozer.com or any unfamiliar program that could be related to it under the list of installed programs and once you’ve found it, uninstall it.

Step 5: Edit your Hosts File.

  • Tap the Win + R keys to open then type in %WinDir% and then click OK.
  • Go to System32/drivers/etc.
  • Open the host file using Notepad.
  • Delete all the entries that contain Search.schooldozer.com.
  • After that, save the changes you’ve made and close the file.

Step 6: Reset all your browsers to default to their default state.

Google Chrome

  1. Launch Google Chrome, press Alt + F, move to More tools, and click Extensions.
  2. Look for Search.schooldozer.com or any other unwanted add-ons, click the Recycle Bin button, and choose Remove.
  3. Restart Google Chrome, then tap Alt + F, and select Settings.
  4. Navigate to the On Startup section at the bottom.
  5. Select “Open a specific page or set of pages”.
  6. Click the More actions button next to the hijacker and click Remove.

Mozilla Firefox

  1. Open the browser and tap Ctrl + Shift + A to access the Add-ons Manager.
  2. In the Extensions, menu Remove the unwanted extension.
  3. Restart the browser and tap keys Alt + T.
  4. Select Options and then move to the General menu.
  5. Overwrite the URL in the Home Page section and then restart the browser.

Internet Explorer

  1. Launch Internet Explorer.
  2. Tap Alt + T and select Internet options.
  3. Click the General tab and then overwrite the URL under the homepage section.
  4. Click OK to save the changes.

Step 7: Hold down Windows + E keys simultaneously to open File Explorer.

Step 8: Navigate to the following directories and look for suspicious files associated to the browser hijacker such as the software bundle it came with and delete it/them.

  • %USERPROFILE%Downloads
  • %USERPROFILE%Desktop
  • %TEMP%

Step 9: Close the File Explorer.

Step 10: Empty the contents of Recycle Bin.

If you like to learn and find out more about various Windows errors, and how to repair them go to our vast archive or use search to find articles that will explain and help you in solving your issue.
However, if you prefer to do things fast and with automatization then we are proposing to use an automated solution for your issues. The application that we are recommending is Advanced System Repair Pro
Advanced System Repair utilizes multiple tools all in one to give you a quick, simple, reliable, and very thorough diagnosis of your PC. It brings you all the tools you need in one program to clean, fix, protect, optimize and boost your PC!
1-Click Maintenance
All the tools to make it simple and easy! It's like having a professional technician at the click of a mouse.

Junk Cleaner
Keeping your computer free from unnecessary clutter also helps make your computer last longer. Like any other machine, if you keep it clean and take care of it, it will serve you better for longer!

Optimize background apps
Optimize applications background activity with the built-in Application Optimizer feature.

Disk Defrag
With a simple 1-click, Advanced System Repair speeds up your PC by assembling fragmented files on your machine and organizing them more efficiently.

Malware Removal
Finds and removes all types of harmful malware including trojans, worms, bots, adware, spyware, PUPs, and more!

Privacy Cleaner
The all-in-one privacy suite to Clean Your Tracks & Protect Your Privacy! Make your computer safe, secure, and more efficient!

System Tweak/Optimizer
ASR will analyze your complete system and settings to adjust your PC to function at its maximum performance.

Registry Cleaner
Over time, as you install and uninstall applications, the registry can become cluttered with old entries and broken settings which can result in program crashes, and annoying messages and slow the computer down.
Visit our Advanced System Repair Pro Download page to inform yourself about all the benefits of this software and get a free trial copy of it.
advanced system repair pro

Advanced System Repair Pro

One-click automated PC repair solution
ASR logo
With Advanced System Repair Pro you can easily
Replace damaged files
Restore performance
Free disk space
Remove Malware
Protects WEB browser
Remove Viruses
Stop PC freezing
DOWNLOAD
Privacy Policy | Terms of Use | Uinstall
Advanced System Repair Pro is compatible with all versions of Microsoft Windows including Windows 11

Share this article:

You might also like

How to Fix Error Code 0xc004f210 in Windows 10

Error Code 0xc004f210 – What is it?

Error code 0xc004f210 is one of the many activation errors that affect Windows 10 users. Users will be able to identify error code 0xc004f210 because of the following common symptoms which occur:

  • Inability to activate Windows 10 operating system
  • Message box with error code 0xc004f210

Solution

Restoro box imageError Causes

Error code 0xc004f210 usually occurs due to issues related to one’s product key or digital entitlement. Both the product key and digital entitlement are used by Microsoft to enable customers to activate the version of Microsoft that they have legitimate access to. If you enter the wrong product key or if you upgrade to Windows 10 but the current version of Windows to which you are attempting an activation does not match the edition of your digital entitlement, error code 0xc004f210 may occur. To correct this issue, you will need to implement one or more manual repair procedures. This will depend on the problem that caused the error to occur in the first place.

Further Information and Manual Repair

The methods below are simple procedures that Windows users lacking technical knowledge will be able to successfully complete. However, do contact a Windows repair technician if you have difficulty completing the manual repair methods listed below, or if the problem persists after completing these steps.

Method One: Enter Valid Product Key

In order to successfully activate your Windows 10 operating system and resolve error code 0xc004f210, you will need to enter a valid product key. Ensure you enter the 25-character code in the order it is given as making a simple mistake while typing the product key can lead to the reoccurrence of the error code. Follow the instructions below to enter the product key.

  • Step one: Click the Start button then select Settings
  • Step two: Select Update & security then Activation
  • Step three: Click the Change product key
  • Step four: Type in your valid product key with its 25 characters in the correct order

You should be able to successfully activate Windows 10 once you complete the process. However, move to the next manual method suggested below if the problem persists as error code 0xc004f210 could be due to an issue with your digital entitlement.

Method Two: Reinstall Windows 10 Edition that Matches Your Digital Entitlement

Digital entitlement, a new form of activation that doesn’t require the use of a product key, could be the real reason you are experiencing error code 0xc004f210 on your device. To combat any issues related to your digital entitlement, ensure the version of Windows 10 installed on your system matches your digital entitlement. This will require that you reinstall your operating system as well. After reinstalling Windows 10, follow the steps below to complete the process.

  • Step one: Click the Start button then select Settings
  • Step two: After selecting Settings, click Update & Security
  • Step three: Select Windows Update then the Check for updates tab
  • Step four: Activate Windows 10 update

If this method is successful, you will no longer see the error code 0xc004f210 pop up on your screen. However, contact a Windows repair technician to evaluate your system if the issue persists.

Method Three: Use an Automated Tool

This method involves the use of a powerful automated tool. But why is this important you might ask? A third-party tool is often the best solution when all manual repair efforts fail. Automated tools come equipped to tackle the most serious PC problems including error codes which can cause frustration and result in reduces PC performance.

Read More
Driver Power State Failure Error in Windows
Driver state power failure error can be linked to three things happening in your computer. Incorrect power settings, driver issues, or incompatible hardware. Sadly when this error happens you only receive a blue screen of death with this message: Blue screen of death driver power state failureSadly receiving this blue screen does not really explain which of the three cases is the correct one and causing the unwanted issue. That being said, this article will not offer you a direct solution this time, it will be more like a guide on what to check and to do in order to remove this error, reason for this is the nature of the error itself. If your computer is booting properly and you can enter Windows without issues the first thing you can try is going into power options and set it to high performance, if you are on a laptop set high performance both ways, when plugged and when on battery. Power performance settings can reflect on some hardware and can cause mayhem. After setting reboot the computer and see if the error repeats itself. If the error persists go to the device manager and see if there is hardware that has any kind of warning beside it. If there is, update the driver or remove the driver of the device to see if this fixes the issue. If all of the previous two things fail there is another thing you could try. Turn off your computer and disconnect all hardware except the most basic one. Now, this may take a long period of time but boot your computer and then repeat this process but each time add a new piece of hardware to eliminate and find which one is causing the issue. When found try to see if it is repairable through driver updates or get a new device.
Read More
Enable or Disable Windows 10 Boot Log
Booting the Windows computer system includes loading it from the various boot devices such as drivers, network as well as USB drives when the computer is turned on. The instant the startup sequence is done loading the operating system the system hardware will be ready to perform some complex operations – in this process, the Boot Log in Windows 10 is a record that maintains the list of success or failure of many pieces of Windows 10 system during the booting process. In other words, the Boot Log is the one that keeps a record of all that has happened while loading from the computer storage system to the memory during the boot process. It is available for several devices like network, hardware devices, and the operating system which assist in detecting issues during the boot process and other issues with regards to troubleshooting. Through Boot Log, you’ll know which drivers were unloaded and loaded from the start of the system during the boot process. You have the option to either disable or enable this feature on your Windows 10 PC. Named as “ntbtlog.txt”, the log file lists all the successfully loaded processes and the unsuccessful ones during the boot process. It is saved to the drive C:Windowsntbtlog.txt. As mentioned, you can enable or disable this feature in two ways – the first one is by using the System Configuration or MSConfig while the second one is using the Command Prompt. In this post, we’ll show you how you can enable or disable Boot Log in Windows 10 either way.

Option 1 – Enable or Disable Boot Log using System Configuration

Enable Boot Log:
  • Tap the Win + R keys to open the Run dialog box.
  • Then type in “msconfig” and click OK to open System Configuration.
  • After that, go to the boot tab and check the checkbox labeled “Boot Log” under the Boot options so that you can enable the Boot Log feature.
  • Then click on OK to save the changes made.
  • Next, click on the Restart button in the prompt window to get started with the Boot Log process.
  • After restarting your PC, go to C:Windowsntbtlog.txt to open the boot log.
Note: As pointed out earlier, the log file contains a list of all the successfully loaded drivers and also the list of drivers that failed to load during the boot process and every time you restart the system, the boot log file will keep on updating and will eventually increase the list of entries. For you to locate the drivers and make your troubleshooting a lot easier, I advised disabling the boot log after troubleshooting. To disable the boot log using System Configuration, refer to the steps below. Disable Boot Log:
  • Tap the Win + R keys to open the Run dialog box.
  • Then type in “msconfig” and click OK to open System Configuration.
  • After that, go to the boot tab and unmark or uncheck the checkbox labeled “Boot Log” under the Boot options so that you can disable the Boot Log feature.
  • Then click on OK to save the changes made.

Option 2 – Enable or Disable Boot Log using Command Prompt

Enable Boot Log:
  • Go to the Start Menu and then type in “command prompt” in the search bar.
  • After that, right-click on the Command Prompt option and select the “Run as administrator” option.
  • After opening Command Prompt, type in “bcdedit” and tap Enter.
Note: You have to find the Identifier of the current operating system first to enable the Boot log. You can find it under the Windows Boot Loader section in the “Description” field and in this case, it’s Windows 10. You can also find the operating system identifier under the Windows Boot Loader section next to the field name identifier.
  • To check if the boot log entry is disabled or enabled, go check the “Bootlog” field under the Windows Boot Loader. And if it turns out that the “bootlog” entry is enabled, the entry will be “Yes”. Otherwise, the entry will be “No”.
  • Next, type in the following command with the operating system identifier to enable the boot log.
bcdedit /set {identifier} bootlog Yes
Note: In the command given above, make sure that you replace the given system identifier with your computer’s system identifier. For instance: In this example, the identifier was replaced with the actual operating system identifier as current.
bcdedit /set {current} bootlog Yes
  • Afterward, restart the system to start the Boot log process.
  • After the restart, go to C:Windowsntbtlog.txt to open the boot log.
Note: Every time you restart your computer, the boot log file will keep on updating which will increase the size of the log eventually. So if you want seamless and easier troubleshooting, it is advised to disable the Boot log after you troubleshoot. To disable it using the Command Prompt, here’s what you have to do. Disable Boot Log:
  • Go to the Start Menu and then type in “command prompt” in the search bar.
  • After that, right-click on the Command Prompt option and select the “Run as administrator” option.
  • Once the Command Prompt is opened, type in the following command and then tap Enter to disable the boot log feature.
bcdedit/ set {identifier} bootlog No
Note: In the command given above, you need to replace the given system identifier with your computer’s system identifier. For instance: In this example, the {identifier} was replaced with the actual operating system identifier as {current}.
bcdedit /set {current} bootlog No
  • Now close the Command Prompt.
Read More
Remove login screen in Windows 10
Each time we turn ON our computer or wake it from hibernation we are greeted with a Windows login screen where we need to provide login credentials in order to get into Windows itself and start working. This method of preserving data and privacy is perfectly fine and as a matter of fact, it is recommended for mobile computers but if you have a home computer in a safe environment where no one will try to look at your data or rummage through your personal stuff then removing login screen is safe enough action and can cause you a lot piece, from time-saving to less frustration on every restart or sleep action. In previous Windows versions, it was much easier to turn off this feature but it seems Microsoft has determined that our privacy and security are important and somewhat removed the ability to turn OFF the lock screen. In this guide, we will show you how you can still remove the lock screen and automatically log in with your account like in the good old days. The first thing you need to do is to press ⊞ WINDOWS + R  to bring up the Run dialog keyboard with windows and r markedIn the dialog, type in netplwiz and press ENTER. run dialog with netplwiz typed inYou will find yourself in the User Accounts window, inside deselect Users must enter a user name and password to use this computer. Press OK user accounts windowSign in the window will pop up where you will have to type in your password and confirm it in order to start the feature. automatically sign in dialogAfter typing in your password and confirming it, press OK. That's it, next time you wake your computer from hibernation or turn it ON, you will automatically be greeted with a desktop instead of a Windows login screen.
Read More
Fix 0x80070037: The specified network ...
If you are trying to copy a file but suddenly encountered an error message saying, “An unexpected error is keeping you from copying the file”, then you’ve come to the right place as this post will help you resolve the problem. This error comes along with another message that states, “Error 0x80070037: The specified network resource or device is no longer available”. This kind of error occurs when the power supply to the external device is weak and causes the device to be disconnecting and reconnecting consistently. To fix this problem, you need to check out the potential fixes provided below.

Option 1 – Try to physically check the USB ports

You need to check the USB ports as there could be some ports that are loose or damaged physically which affects the overall performance of the port. You could also try to change the USB port since modern computers have a variety of USB ports. So if your USB drive supports USB 3.0 or 3.1, make sure that you plug it inside a USB 3.0 or 3.1 ports. If you’re not sure which port, just keep in mind that the USB 3 port is usually blue or you can also use your computer’s documentation or manual as a reference to locate it.

Option 2 – Check the connected cables physically

Aside from the USB ports, you also have to check the physical status of the connected cables because if there are damaged ones, just like with USB ports, it would also affect the overall connectivity of the device with the computer. So if you notice some irregularities in the connecting cable physically, you might have to buy another one and replace it and then see if it fixes the problem or not.

Option 3 – Update or reinstall the Universal Serial Bus Controller driver

Since it could be a driver issue, you can try to update or reinstall the Universal Serial Bus Controller drivers using the Device Manager. Refer to the following steps:
  • First, click the Start button and type “device manager”.
  • Then click on the “Device Manager” from the search results to open it.
  • From there, look for the “Universal Serial Bus controllers” option and then right-click on each one of the USB drivers and select the Update Driver from the menu.
Note: If it is a regular USB drive, then it will be listed as a USB Mass Storage Device but if you have a USB 3.0 device, then look for a USB 3.0 Extensible Host Controller.
  • Restart your PC and then click the “Search automatically for updated driver software” option.
Note: If updating the USB Controller drivers didn’t work, you can try to reinstall them instead.

Option 4 – Try connecting to a slower USB port

If connecting your device to USB 3.0 or 3.1 ports didn’t work, you might want to try connecting it to a slower USB port this time. There are times when the device is not capable of supporting the higher power supply from a USB 3.0 or 3.1 port which is why the weak circuits do not work properly. Thus, try connecting your device to a USB 2.0 port and check if your device is now working.

Option 5 – Try to turn off the Power Saving option

You could also try to turn off the Power Saving option to resolve the problem. All you have to do is switch to Power Management after you select the Properties of the USB device and from there, uncheck the “Allow the computer to turn off the device to save power” option. On the other hand, if you are using a laptop and did not use the USB device for a long time, then it could be powered off. This will ensure that the system does not turn off the USB device.

Option 6 – Try to connect your device to another computer

It is also possible that your computer does not support your device. To check that possibility, you can try connecting your device to a different computer and see if it is working without any issues. If it is, then you need to get another device that’s compatible with your computer.

Option 7 – Try to use a different device

You could also try using a different device and connect it to your computer. This will help you figure out if your device is damaged or not. So if the other device you connected is working just fine, then you might have to replace your device with a new one or consult an expert and have it repaired if possible.

Option 8 – Run the Hardware and Devices Troubleshooters

  • The first thing you need to do is click on Start and then on the gear-like icon to pull up the window for Settings.
  • After opening Settings, look for the Update and Security option and select it.
  • From there, go to the Troubleshoot option located on the left-hand side of the list.
  • Next, select Hardware and Devices from the list and open the Troubleshooter and run it. Once it is doing its job, wait for it to complete the process and then restart the system.
  • After the system restarts, check if the problem’s now fixed. If not, refer to the next option given below.
Read More
How to Fix Runtime Error 339
[vc_row][vc_column][vc_column_text]

Troubleshoot Runtime Error 339

What is Runtime Error 339?

Runtime Error 339 is a common error code format that appears when a computer overloads with too much data. However, in some cases, it may occur due to the missing registry keys, DLL files, or during installation. It may lead some programs to shut down all of a sudden and may also corrupt files on the system.

Solution

Download Available to Completely Repair Runtime Error 339

Restoro box imageError Causes

This error code is alarming as it is a critical sign of an unstable system followed by improper maintenance of the computer. The potential risks associated with the Runtime Error 339 include:
  • System startup issues
  • Slow PC performance
  • System crash and failure
  • System file corruption
Therefore, to avoid these risks and system failure, it is advisable to fix the runtime error 339 immediately.

Further Information and Manual Repair

If you have a Runtime Error 339 issue on your computer, here is a great way how you can fix it right away:

Scan For Viruses

Improper maintenance of the computer indicates that your system might be exposed to viruses and malware. Viruses can modify the Windows registry and lead to Runtime Error 339. Therefore, first, it is important to scan for viruses on your PC.

Identify Software that Causes Errors

Scanning will help you identify software that produces this error on your PC. Once you identify them, either uninstall them or update the program. To uninstall the program, go to the Control Panel and then click on the Add/Remove program if you have Windows XP, if not then click on the Programs and Features item. Now delete the program from your system.

Obtain the Latest Version of the Installer and Re-install the Deleted Program

Once you get your hands on the latest version of the installer, run it on your system by following the on-screen instructions. Install the program. There is also another way to fix Runtime Error 339 and that is by downloading the Runtime Error tool.

Use a Professional Runtime Error Fixer Tool

To fix the error you can also use a professional Runtime Error fixer tool to scan for viruses on your PC. It is available for free download here. Download the tool and install it on your computer. Simply scan your PC after installation. Click the repair button once the scan is complete. This tool fixes problems in just a few minutes.[/vc_column_text][/vc_column][/vc_row]
Read More
Fix False Notifications in Action Center
There is a central location in Windows 10 that allows users to view all the notifications from its Action Center. Aside from viewing notifications, users can also manage them and take necessary actions in just one single place. Notifications in Windows 10 look similar to a message icon but can be at variance in function. However, recently, a number of users reported that even though they receive notifications about new actions but when opening them, they see nothing. In other words, the notification is false, and to fix this, read on as this post will provide you a couple of workarounds. The Windows 10 Notifications and Action Center notification messages might show a mismatch. For instance, Windows 10 may say that you have some notifications but when you open Action Center, you find it empty and there are actually no notifications there. Take the case of the following screenshot, the Windows 10 Notification says that there are 6 new notifications available for viewing but the Action Center says otherwise. Before you troubleshoot the problem, you might want to run System Restore especially if you’ve made some changes in your computer prior to this issue which might have messed with the Windows 10 Notifications and Action Center. To perform System Restore, refer to these steps:
  • First, press the Win + R keys to open the Run dialog box.
  • After that, type in “sysdm.cpl” in the field and tap Enter.
  • Next, go to the System Protection tab then click the System Restore button. This will open a new window where you have to select your preferred System Restore point.
  • After that, follow the on-screen instructions to finish the process and then restart your computer and check if the problem is fixed or not.
If the problem wasn’t fixed and you’re still getting false notifications, you might want to troubleshoot the problem further using the options given below.

Option 1 – via Windows PowerShell

  • In the Start search, type “PowerShell” in the field and hit Enter to pull up the Windows PowerShell window.
  • Next, copy and paste this command and hit Enter to execute it: Get-AppxPackage | % { Add-AppxPackage -DisableDevelopmentMode -Register “$($_.InstallLocation)AppxManifest.xml” -verbose }
  • After that, reboot your computer and check if the false notifications are now gone.

Option 2 – Try renaming the Usrclass.dat file

DAT errors like the ones that are associated with the Usrclass.dat file, most likely occur during computer startup, program startup, or while you try to use a specific function in your program. Even so, it can easily be fixed. How? Refer to the given steps below.
  • Tap the Win + R keys to open the Run dialog box.
  • Then type %localappdata%MicrosoftWindows and hit Enter to get to the location of the UsrClass.dat file.
  • After that, look for a file named UsrClass.dat and once you’ve found it, right-click on it and select the Rename option.
  • Now rename the file to UsrClass.old.dat and then restart your computer and see if the problem is now fixed or not.
Read More
Moving mouse pointer via the keypad in W11
windows 11 mouse pointer
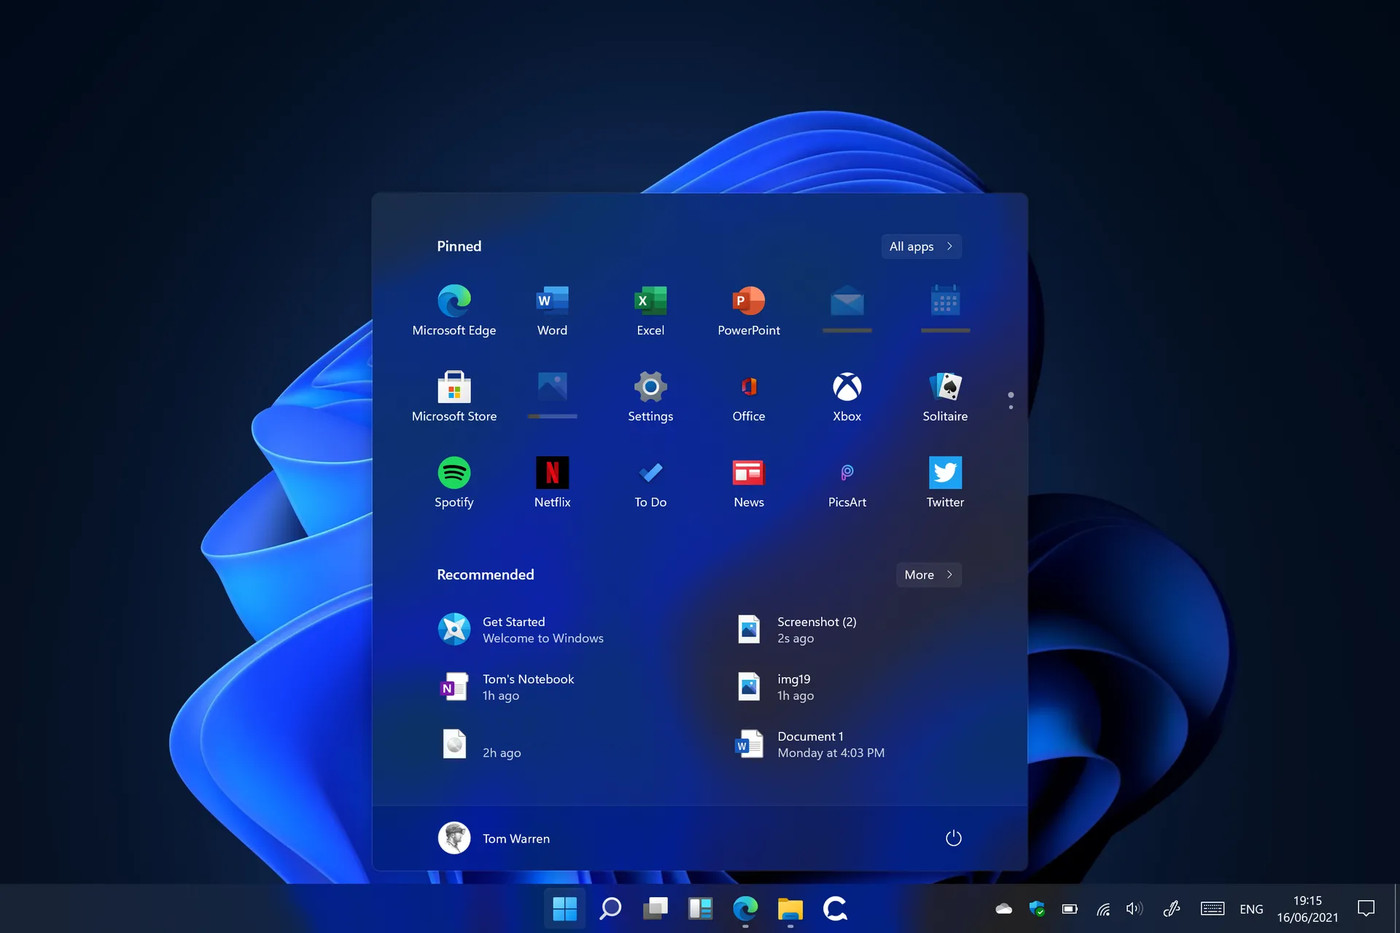
In Windows 11 if you do not own a mouse or it has suddenly malfunctioned you can still move your arrow on-screen using the numeric pad. In this guide, we will guide you on how to turn this option ON, follow this easy guide step by step.
  1. Press ⊞ WINDOWS + I to open Windows settings
  2. Click on Accessibility on left
  3. Scroll down to reach the interaction section on the right and click on Mouse
  4. Click on Switch beside Mouse keys under accessibility options
  5. Set your preferences
  6. Close settings
Settings will be as always automatically applied.
Read More
Reddit released the application in MS store
Reddit app
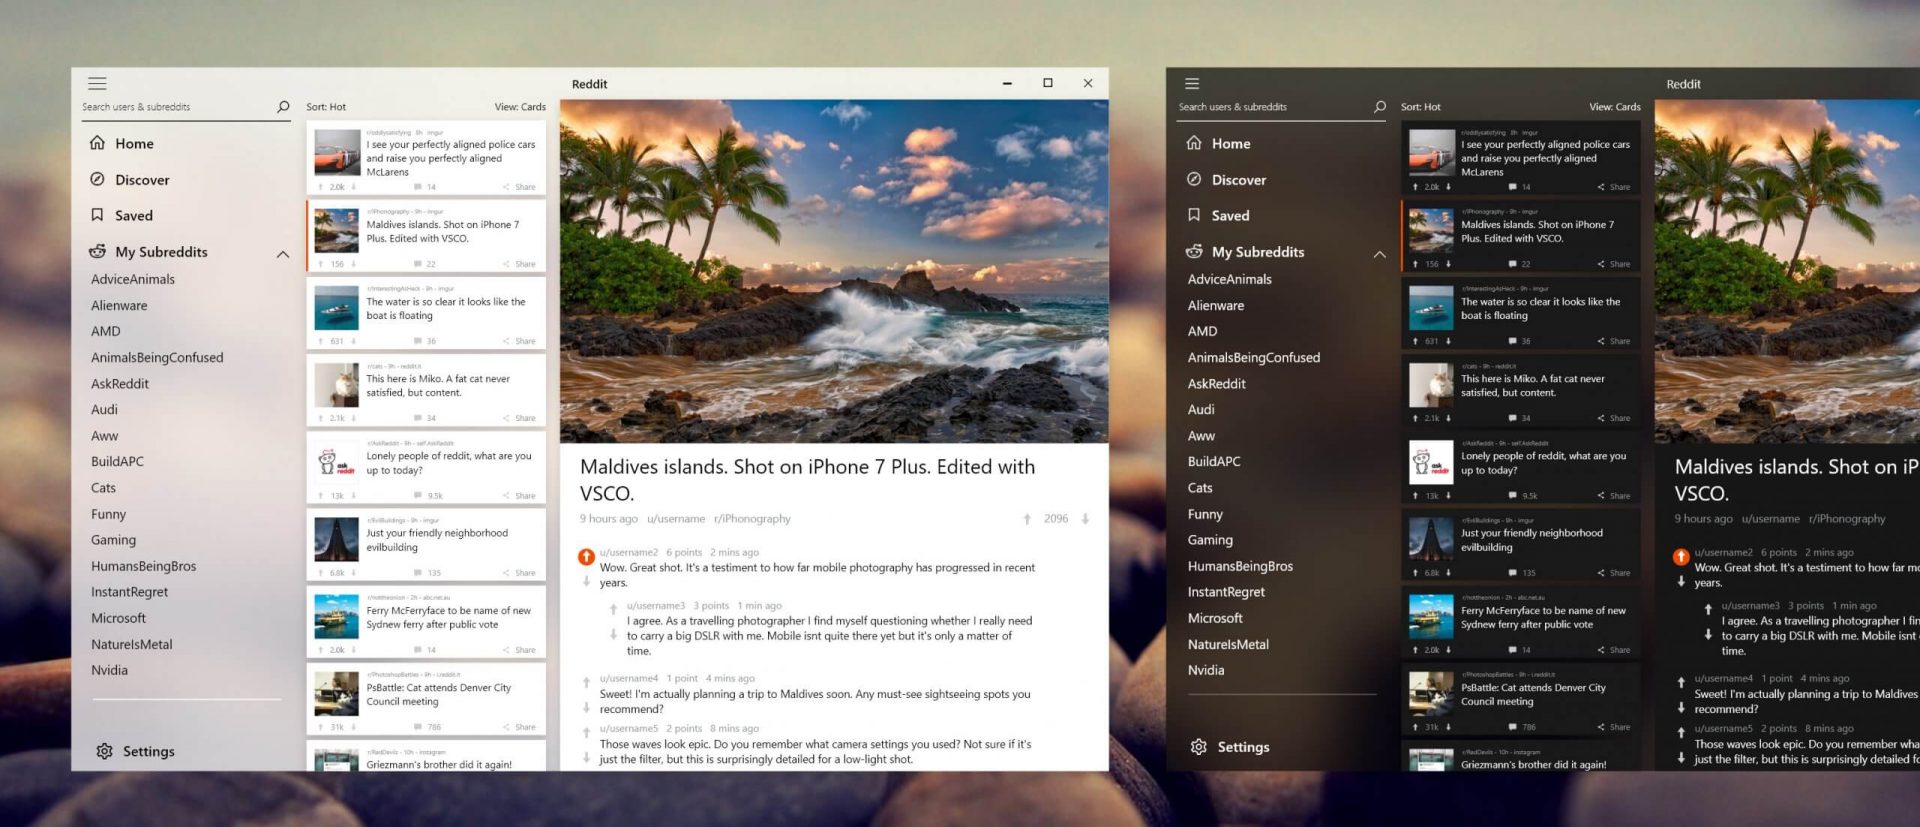
Reddit is one of the most popular websites in the world and how Microsoft is opening doors to everyone in its new store Reddit took a logical step and made a Progressive web application and placed it in it. Being a Progressive web app makes it more familiar and feels like a home experience using it for a lot of Reddit users. Reddit itself has a large community and active topics discussions all the time about anything. Bringing it to Windows as an application is, in my opinion, a great move since as an application it is independent, more light-weighted, and offering some other advantages specifically tied to being a standalone windows application. Everyone familiar with and using the Reddit website will feel right at home in this app and you can start using it right away.
Read More
Bluetooth flaw, Android and Windows in danger
bluetoothResearchers have discovered 16 vulnerabilities in Bluetooth connections that could be exploited and make from minor to some serious damage to your device. The flaw can be used on chips manufactured by Intel, Qualcomm, and Texas Instruments while connecting to external devices like speakers, headphones, keyboards, mice, etc.

Who is affected?

Mentioned chips are used by many in a vast range of devices including big players with their products like Microsoft Surface laptops, Dell desktops, Samsung Phones, Google Pixel, and OnePlus handsets. The Bluetooth bug affects a wide range of devices, including smartphones, laptops as well as smart home gadgets. In total, more than one billion devices that rely on Bluetooth are believed to be impacted.

What is the damage?

The amount of damage possible with this flaw depends on the type of device with the chipset. Some devices can only be crashed after a specially crafted packet is sent to the flawed chip. If that's the case with your gadget, it can be easily resolved with a simple restart. With other devices, hackers can take advantage of the Bluetooth Classic flaw to remotely run malicious code. That could allow malware to be installed remotely. Researchers say vendors were informed about these issues months ago before the findings were published. The good news is this should have given plenty of time for the relevant patches to be pushed out that remedy the flaws. However, you'll need to make sure that you're running the latest version of the operating system to be protected by the patch crafted by the manufacturers.

Android Bluetooth threat

The researchers emphasize the lack of basic tests in Bluetooth certification to validate the security of Bluetooth Low Energy (BLE) devices. The BrakTooth family of vulnerabilities revisits and reasserts this issue in the case of the older, but yet heavily used Bluetooth classic (BR/EDR) protocol implementations. We would also advise users to disable Bluetooth on devices that do not need it. This way you can prevent attackers from sending you malformed LMP packets. Since BrakTooth is based on the Bluetooth Classic protocol, an adversary would have to be in the radio range of the target to execute the attacks. So, in a safe environment Bluetooth can be enabled.
Read More
1 2 3 162
Logo
Copyright © 2022, ErrorTools. All Rights Reserved
Trademarks: Microsoft Windows logos are registered trademarks of Microsoft. Disclaimer: ErrorTools.com is not affiliated with Microsoft, nor claim direct affiliation.
The information on this page is provided for information purposes only.
DMCA.com Protection Status