Resume an Interrupted Download in Chrome

Where all have been there, we are downloading something and for any kind of reason chrome closes, internet breaks, etc. And our download is interrupted and gone forever, and we need to start again.

You will be glad to hear that chrome has side a download manager which tracks each download you made and you can use this manager to resume interrupted downloads.

Please note that some websites have certain scripts that will prevent you to resume interrupted downloads, in this case, using chrome's download manager will not work and you will have to start the download again.

All of this being said, if your download has been interrupted, and went away, pin Chrome press CTRL + J to open download manager, find your interrupted download, and press the resume button.

That's it, you have successfully resumed your download.

If you like to learn and find out more about various Windows errors, and how to repair them go to our vast archive or use search to find articles that will explain and help you in solving your issue.
However, if you prefer to do things fast and with automatization then we are proposing to use an automated solution for your issues. The application that we are recommending is Advanced System Repair Pro
Advanced System Repair utilizes multiple tools all in one to give you a quick, simple, reliable, and very thorough diagnosis of your PC. It brings you all the tools you need in one program to clean, fix, protect, optimize and boost your PC!
1-Click Maintenance
All the tools to make it simple and easy! It's like having a professional technician at the click of a mouse.

Junk Cleaner
Keeping your computer free from unnecessary clutter also helps make your computer last longer. Like any other machine, if you keep it clean and take care of it, it will serve you better for longer!

Optimize background apps
Optimize applications background activity with the built-in Application Optimizer feature.

Disk Defrag
With a simple 1-click, Advanced System Repair speeds up your PC by assembling fragmented files on your machine and organizing them more efficiently.

Malware Removal
Finds and removes all types of harmful malware including trojans, worms, bots, adware, spyware, PUPs, and more!

Privacy Cleaner
The all-in-one privacy suite to Clean Your Tracks & Protect Your Privacy! Make your computer safe, secure, and more efficient!

System Tweak/Optimizer
ASR will analyze your complete system and settings to adjust your PC to function at its maximum performance.

Registry Cleaner
Over time, as you install and uninstall applications, the registry can become cluttered with old entries and broken settings which can result in program crashes, and annoying messages and slow the computer down.
Visit our Advanced System Repair Pro Download page to inform yourself about all the benefits of this software and get a free trial copy of it.
advanced system repair pro

Advanced System Repair Pro

One-click automated PC repair solution
ASR logo
With Advanced System Repair Pro you can easily
Replace damaged files
Restore performance
Free disk space
Remove Malware
Protects WEB browser
Remove Viruses
Stop PC freezing
DOWNLOAD
Privacy Policy | Terms of Use | Uinstall
Advanced System Repair Pro is compatible with all versions of Microsoft Windows including Windows 11

Share this article:

You might also like

Troubleshooting Epic Games Launcher issues
If you are having trouble using the Epic Games Launcher, here are some troubleshooting steps that usually fix common problems.

Check the Epic Games server status

Check the Epic Games Server Status page to make sure all systems are operational. If the Epic Games Launcher is affected by an outage or system-wide issue, your issue may be fixed when the outage is resolved.

Clear your launcher’s webcache

Clearing the webcache often resolves display issues that may prevent you from using the launcher. Follow these steps to clear your webcache:

Windows

  1. Exit the Epic Games Launcher by right-clicking the system tray icon in the bottom-right corner, and then clicking Exit.
  2. Press Windows key + R, type “%localappdata%”, and then press Enter to open a File Explorer window.
  3. Open the Epic Games Launcher folder.
  4. Open the Saved folder.
  5. Click the webcache folder, and then delete it.
  6. Restart your computer, and then relaunch the Epic Games Launcher.

Mac

  1. Exit the Epic Games Launcher.
  2. Open Finder.
  3. Click on Go then Go to Folder...
  4. Type ~/Library/Caches/com.epicgames.EpicGamesLauncher and press Enter.
  5. Drag the webcache folder to the Trash.
  6. Press control and click on Trash.
  7. Click on Empty Trash.
  8. Relaunch the Epic Games Launcher.

Run the launcher as an administrator

Running the launcher as an administrator elevates its permissions so it can avoid problems with downloading games, for example. Follow these steps to run the launcher as an administrator:
  1. Right-click your Epic Games Launcher shortcut.
  2. Click Run as Administrator.

Update graphics card drivers

Making sure the player is using the latest graphics card drivers may resolve the launcher crashing. Review this article for steps on how to do update their graphics drivers.

Reinstall the Epic Games Launcher

Note: The following process will remove all of your installed games.

On Windows: 

Run system file checker then reinstall the Epic Games Launcher.
  1. Close the Epic Games launcher by right-clicking the system tray icon in the bottom right corner and then clicking Exit.
  2. Click Start.
  3. Type "cmd", right-click Command Prompt, and then click Run as administrator.
  4. In the window that opens, type "sfc /scannow", and then press Enter.  This may take a little while.
  5. Restart your computer.
  6. Click Start.
  7. Type "Add or Remove Programs", and then press Enter.
  8. Select Epic Games Launcher from the list of programs.
  9. Click Uninstall.
  10. Go to www.epicgames.com and click Get Epic Games in the top right corner to download the latest installer.

On Mac:

  1. Close the Epic Games Launcher.
  2. Verify there are no processes associated with the Epic Games Launcher by checking Activity Monitor.
  3. Open the Applications folder.
  4. Click and drag the Epic Games Launcher application to the Trash.
  5. Verify all the following directories no longer have any Epic Games Launcher folders or files:
    • ~/Library/Application Support
    • ~/Library/Caches
    • ~/Library/Preferences
    • ~/Library/Logs
    • ~/Library/Cookies
  6. Go to www.epicgames.com and click Get Epic Games in the top right corner to download the latest installer.

Launcher freezing on macOS 10.15.1 or earlier

If your launcher is freezing on macOS 10.15.1 or earlier, follow the steps above to reinstall the Epic Games Launcher on your Mac.

Verify system requirements

Make sure your computer meets the system requirements to run the Epic Games Launcher using this article here. The system requirements for the Epic Games Launcher are here.

Blinking Epic Games Launcher icon on the taskbar

If you can't start the Epic Games Launcher and see a blinking icon on your taskbar, use these steps to try and fix this:
  1. Right-click your Epic Games Launcher shortcut.
  2. Click Properties.
  3. Select Normal Window from the drop-down menu next to Run.
  4. Click the Compatibility tab.
  5. Uncheck any boxes, and then click Apply then OK.
  6. Click Start, then type "Graphics Settings" and press Enter.
  7. Select Classic app from the drop-down under Graphics performance preference.
  8. Click Browse.
  9. Navigate to the Epic Games Launcher installation directory. By default, this is C:/Program Files (x86)/Epic Games/Launcher/Portal/Binaries/Win64.
  10. Click the EpicGamesLauncher.exe file, and then click Add.
  11. Click Options.
  12. Select Power Saving.
  13. Click Save.
  14. Relaunch the Epic Games Launcher.
Read More
Razer is making only 1337 smartwatches
razer smartwatch
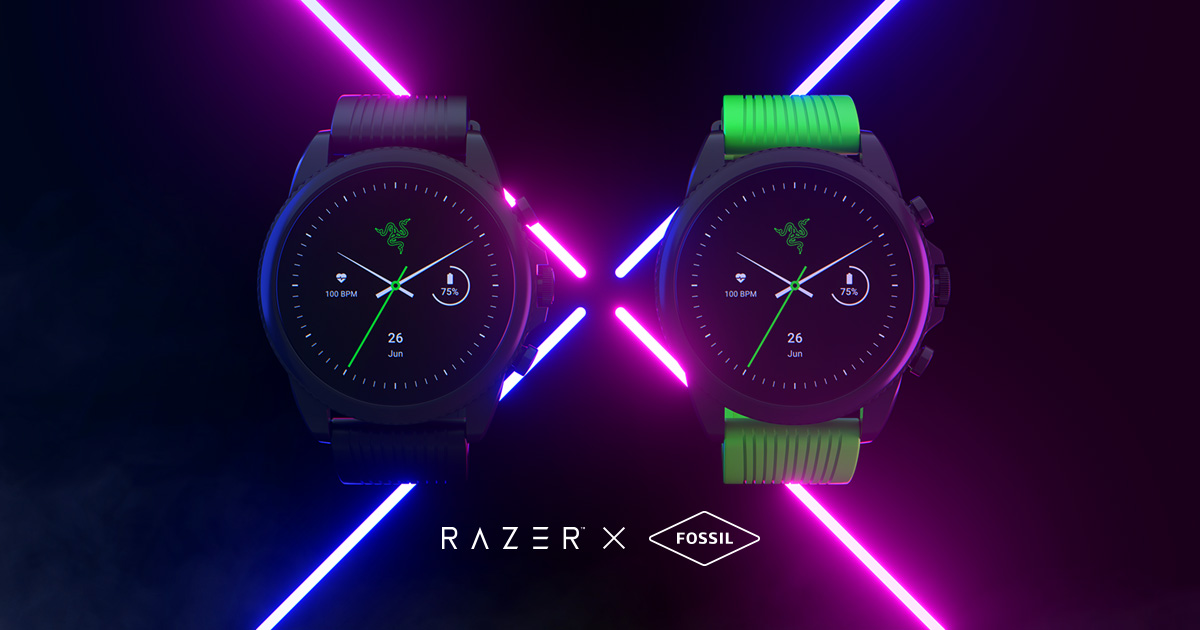
Razer had some strange dives into stuff not really aimed at gamers and the gaming community overall like its Zephir smart mask and now it is venturing into the area of smartwatches teaming up with Fossil. I am not clear if this initiative was set in motion by Razer or Fossil and I really do not know why limited production numbers. Officially named RAZER X FOSSIL GEN 6 SMARTWATCH, this watch comes with the official following text on Razer's page:
Way more. Way faster. Way ahead of the game. Get time on your side with the limited-edition Razer X Fossil Gen 6 Smartwatch—only 1,337 pieces worldwide. Designed for the next generation of gamers, supercharge your style with customizable straps, dials, Razer Chroma™ RGB effects, and more.
Now, I am a fan of Razer and I like their products, mostly keyboards and mouse altho chair is also very good and in top of the product line in that field but I can not really stand behind this product and decision, and the only reason why I can not stand behind it is this 1337 (leet, or elite) a limited number of available pieces that is nothing more than a gimmick to sell watches at a higher price. Watch itself is not really bad, as a matter of fact, it has some solid hardware statistics.

Technical characteristics

Featuring a 1.28-inch AMOLED Display with 3 unique Razer watch faces (Analog, Text, Chroma*), 4 customizable Razer Chroma™ RGB effects, and 2 custom-designed, interchangeable straps, this Razer's baby is packing 44mm, Stainless Steel case with 22mm, straps. It runs on Wear OS by Google as an operating system of a choice and under software, it is packing Qualcomm Snapdragon Wear 4100+ CPU paired with 1GB of RAM and 8GB Storage. The display is running at 416x416 resolution with 326ppi. Watch input is with 2 configurable Push buttons, One rotating Home button, touchscreen, and voice. It has in it a loudspeaker, microphone, and vibration. Connection is via Bluetooth 5.0, GPS, NFC SE, and Wi-Fi. The battery can in their word work for 24 Hr + multi-day Extended Mode **Varies based on usage and after updates install**. USB data cable with magnetic dock snaps to split rings on the watch case back and spins 360 degrees for ease of use. Approximately half an hour to reach 80%. Sensors included in the watch itself are: Accelerometer, Altimeter, Ambient Light, Compass, Gyroscope, Off-body IR, PPG Heart Rate, SPO2. Smartwatch is water-resistant up to 3 ATM & it comes with preloaded apps like: Agenda, Alarm, Battery-Optimized Activity Mode, Calendar, Cardio Level Tracking, Cardiogram, Contacts, Enhanced Phone Dialer App, Google Assistant, Google Fit (Workout, Heart Rate, Goals, Breathe), Google Maps, Google Pay™, Google Play Store, Nike Run Club, Noonlight, Smart Battery Modes, Spotify, Stopwatch, Timer, Translate, Wellness Apps with Sleep Tracking.

Conclusion

Watch is Dropping on 01.10.22, 8 AM PST which is 4 days from now and altho it is an interesting device with solid hardware I can not stand behind it due to its limited edition numbers and with $329 price tag. With the same amount of money, you can get yourself Samsung or Apple watch with more features packing. But of course, that is just my personal preference and if you want to own this limited edition Razer smartwatch, go for it.
Read More
Activision Blizzard Sued by California
blizzard hq
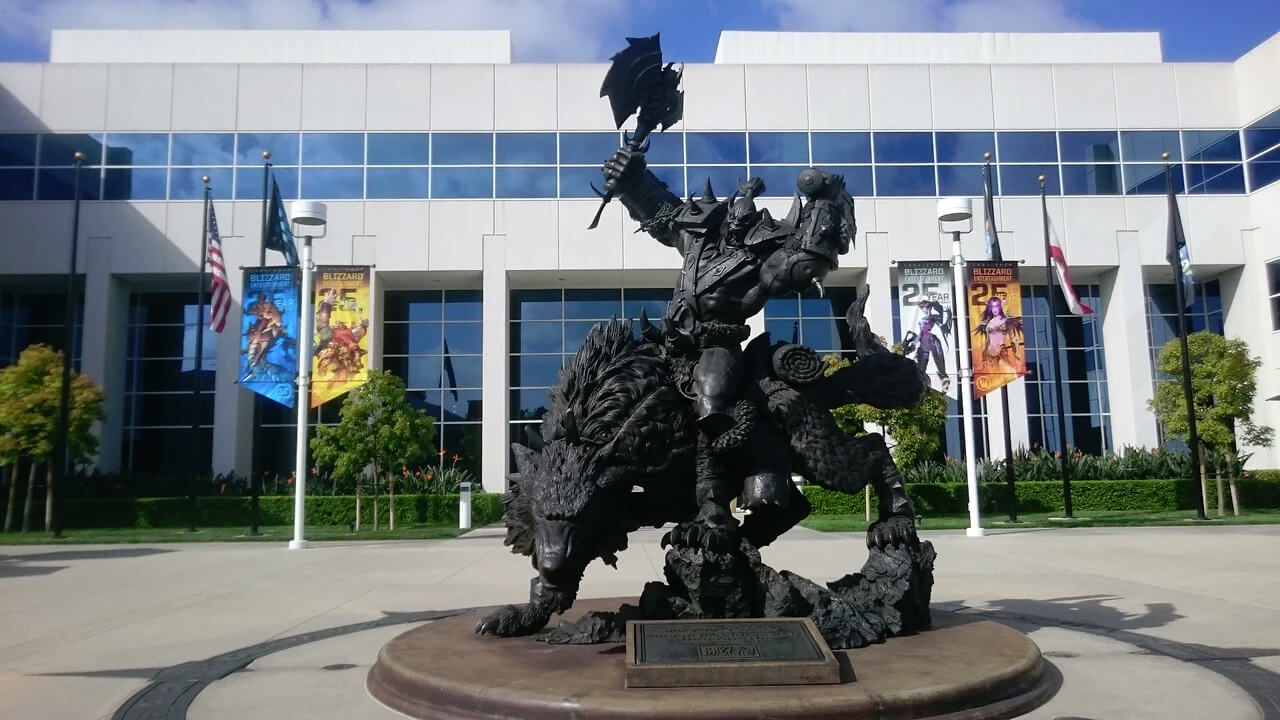
Following a two-year investigation by the California Department of Fair Employment and Housing, the state has filed a lawsuit against Activision Blizzard for fostering a "frat boy" culture in which female employees are allegedly subjected to unequal pay and sexual harassment. As reported by Bloomberg, Activision Blizzard is being accused by the state of California of discriminating against female employees at nearly all levels of employment, including in regards to compensation, promotion, assignments, and termination. The state alleges Activision Blizzard’s leadership has failed to address any of these outstanding issues or prevent them from occurring within the workplace. You can read the full details of the lawsuit here. The suit, filed Tuesday in the Los Angeles Superior Court, says Activision Blizzard, which is made up of about 20 percent women, assigns women, and women of color, to "lower paid and lower opportunity levels" with lower starting pay for similar work as their male counterparts. The documents also accuse Activision Blizzard of fostering a "pervasive 'frat boy' workplace culture in the office. Male employees are said to drink "copious amounts of alcohol" as they make their way through cubicles and "often engage in inappropriate behavior toward female employees." Male employees are said to come to work hungover, play video games during work "while delegating their responsibilities to female employees, engage in banter about their sexual encounters, talk openly about female bodies, and joke about rape." The lawsuit also cites one particular incident where a female employee, who was already subjected to intense sexual harassment at the company, committed suicide during a work trip with a male supervisor who allegedly brought inappropriate, sexual items with him on the trip. The lawsuit is asking for an injunction that will force Activision Blizzard to comply with workplace protections, as well as deliver unpaid wages, pay adjustments, back pay, and lost wages and benefits for female employees.

An Activision Blizzard spokesperson sent the following statement in response to the allegations:

We value diversity and strive to foster a workplace that offers inclusivity for everyone. There is no place in our company or industry, or any industry, for sexual misconduct or harassment of any kind. We take every allegation seriously and investigate all claims. In cases related to misconduct, the action was taken to address the issue. The DFEH includes distorted, and in many cases false, descriptions of Blizzard’s past. We have been extremely cooperative with the DFEH throughout their investigation, including providing them with extensive data and ample documentation, but they refused to inform us what issues they perceived. They were required by law to adequately investigate and to have good faith discussions with us to better understand and to resolve any claims or concerns before going to litigation, but they failed to do so. Instead, they rushed to file an inaccurate complaint, as we will demonstrate in court. We are sickened by the reprehensible conduct of the DFEH to drag into the complaint the tragic suicide of an employee whose passing has no bearing whatsoever on this case and with no regard for her grieving family. While we find this behavior to be disgraceful and unprofessional, it is, unfortunately, an example of how they have conducted themselves throughout the course of their investigation. It is this type of irresponsible behavior from unaccountable State bureaucrats that are driving many of the State’s best businesses out of California. The picture the DFEH paints is not the Blizzard workplace of today. Over the past several years and continuing since the initial investigation started, we’ve made significant changes to address company culture and reflect more diversity within our leadership teams. We’ve updated our Code of Conduct to emphasize a strict non-retaliation focus, amplified internal programs and channels for employees to report violations, including the “ASK List” with a confidential integrity hotline, and introduced an Employee Relations team dedicated to investigating employee concerns. We have strengthened our commitment to diversity, equity, and inclusion and combined our Employee Networks at a global level, to provide additional support. Employees must also undergo regular anti-harassment training and have done so for many years. We put tremendous effort into creating fair and rewarding compensation packages and policies that reflect our culture and business, and we strive to pay all employees fairly for equal or substantially similar work. We take a variety of proactive steps to ensure that pay is driven by non-discriminatory factors. For example, we reward and compensate employees based on their performance, and we conduct extensive anti-discrimination training including for those who are part of the compensation process. We are confident in our ability to demonstrate our practices as an equal opportunity employer that fosters a supportive, diverse, and inclusive workplace for our people, and we are committed to continuing this effort in the years to come. It is a shame that the DFEH did not want to engage with us on what they thought they were seeing in their investigation.

Conclusion

We will see how things work out, but I am not too optimistic for Activision Blizzard, truth to be told these reports are really bringing up some disturbing news on the sunlight. I just hope that all responsible will be brought to justice.
Read More
2 Proven Methods to Fix Regsvr32 Error

What is Regsvr32 Error? - What Is It?

Regsvr32 is basically a command-line utility.

This command is used to register and unregister OLE controls for example the digital link library files and ActiveX controls in the Windows Registry. This command appears as the Regsvr32.exe file and is installed in the Microsoft Windows system file in the %systemroot%System32 folder.

The Regsvr32 command loads the library and tries to call the DllRegister Server and DllUnregister Server. In other words, it helps to register COM-based digital link library files to run different programs on your PC.

However, when the Regsvr32.exe file gets corrupt, you get the Regsvr32 to troubleshoot the error message on your computer screen. It can be displayed in various ways including the following:

“To register a module, you must provide a binary name.”

Error Causes

Generally, Regsvr32.exe becomes corrupt because either the load library, DllRegister Server or DllUnregister Server function fails. This indicates that the dll specified path was missing, incorrect, or couldn’t be found.

Here’s how the error messages are often displayed while registering a dll using Regsvr32.exe:

  • “The command-flag "%1" is not valid. Please review the command usage and try again.”

If this error message is displayed, it typically means that you entered an invalid combination of command-line arguments or switches when calling upon the Regsvr32.exe application.

  • “To register a module, you must provide a binary name.”

The cause of this error message is that you called the Regsvr32.exe function with no modules to register located in the command line arguments.

  • “The module "%1" failed to load.nn Make sure the binary is stored at the specified path or debug it to check for problems with the binary or dependent .DLL files.nn%2.”
This Regsvr32 error message indicates that Windows had problems with loading the modules that you have identified in the command line.

Further Information and Manual Repair

Here are 2 recommended solutions to fix the Regsvr32 error on your PC:
  1. Re-run the command

    You must re-run the Regsvr32 command from an elevated command prompt. For this, go to the start menu and type Command Prompt in the search box.

    Now right-click the Command Prompt and click the option that says Run as Administrator to run the command on your PC. If it prompts you to enter an administrator password, type the password and then click Allow to run the command.

  2. Register a 32-bit Dll using a 32-bit version of Regsvr32 on a 64-bit version of Windows

    This may sound tricky but it is even simpler than the first solution discussed above. To register a 32-bit DLL using a 32-bit version of Regsvr32 on a 64-bit version of Windows, open an elevated command prompt.

    After it’s opened, if you see the 32-bit DLL is located in the following path: %systemroot%System32 folder, move it to %systemroot%SysWoW64 folder. Once you change paths, run this command: %systemroot%SysWoW64regsvr32 <full path of the DLL>

Try following these 2 recommended solutions to immediately fix and repair this error on your computer.

The solutions should eliminate the occurrence of error messages such as “To register a module, you must provide a binary name.” It is so easy and effective and you can do it on your own without calling over a professional.

Congratulations, you have just fixed the Regsvr32 Error in Windows 10 all by yourself. If you would like to read more helpful articles and tips about various software and hardware visit errortools.com daily. Now that’s how you fix Regsvr32 Error in Windows 10 on a computer. On the other hand, if your computer is going through some system-related issues that have to get fixed, there is a one-click solution known as Restoro you could check out to resolve them. This program is a useful tool that could repair corrupted registries and optimize your PC’s overall performance. Aside from that, it also cleans out your computer for any junk or corrupted files that help you eliminate any unwanted files from your system. This is basically a solution that’s within your grasp with just a click. It’s easy to use as it is user-friendly. For a complete set of instructions in downloading and using it, refer to the steps below Perform a full system scan using Restoro. To do so, follow the instructions below.
      1. Download and install Restoro from the official site.
      2. Once the installation process is completed, run Restoro to perform a full system scan.
      3. After the scan is completed click the “Start Repair” button.
Read More
Guide How to Remove PCOptimizerPro

PC Optimizer Pro is a PC optimizer utility developed by Xportsoft Technologies. It is classified as a potentially unwanted program, due to its aggressive scan and registration reminders, and that it is often distributed bundled with other programs in a manner that leads many users to not know how it got on their computer. While not inherently malicious, PC Optimizer Pro adds numerous registry keys, startup entries and while running consumes a relatively high amount of system resources, especially during its scans. The software installs from a .exe file that is around 5.20 MB or 5.453.240 Bytes (depending on the version). As of the publication of these videos, the current version of PC Optimizer Pro was detected as malicious or potentially unwanted by at least 21 AntiViruses.

About Potentially Unwanted Applications

If you have ever installed freeware or shareware, chances are high that your computer can get installed with a bunch of unwanted applications. A Potentially Unwanted Program, also called PUP, in short, is actually software that contains adware, installs toolbars, or has other hidden goals. These kinds of programs are almost always bundled up with free software which you download from the net or are also bundled within the custom installers on many download sites. PUPs did not really constitute pure “malware” in the strict sense of the term. Just like malicious software, PUPs cause problems when downloaded and installed on your PC, but what makes a PUP different is that you give consent to download it – although the truth is vastly different – the software installation package actually tricks you into accepting the installation. Irrespective of whether it is regarded as malware or not, PUPs are nearly always harmful to the user as they might bring on adware, spyware, keystroke logging, and also other bad crapware features on your computer.

What do PUPs do on your computer, exactly?

Potentially Unwanted Programs come in many forms and varieties, but in most instances, these are adware programs that show annoying pop-up adverts and advertisements on websites you check out. The PUPs also get installed into your computer in the form of web browser add-ons and toolbars. Not only they needlessly take up space on your computer screen, but toolbars may also manipulate search engine results, watch your web browsing activities, decrease your web browser’s efficiency, and decelerate your internet connection to a crawl. Potentially Unwanted Programs at times act quite similarly to viruses or spyware. Some PUPs include keyloggers, dialers, along with other software to gather your private details that may result in identity theft. These are programs that don’t do anything good for you; in addition to taking over space on your hard drive, they also slow down your computer, often modify settings without your approval, the list of bothersome features goes on.

Ways to avoid PUPs

• Always study the EULA and privacy statement. Don’t agree until you know precisely what you are acknowledging. • Choose the “custom” install whenever installing a software program. In particular, look closely at those small boxes that have been checked as default, where you may ‘agree’ to receive promotions or install software bundlers. • Use good antivirus software, like Safebytes Anti-Malware that offers real-time protection against PUPs. • Avoid adding a freeware program you do not use. Turn off or remove toolbars and web browser extensions you don’t really need. • Always download software from reliable sources like official sites as opposed to untrustworthy sharing space. Avoid file-hosting sites where/when possible.

What you can do if Malware Prevents You From Downloading Or Installing Antivirus?

Practically all malware is bad, but certain types of malware do much more damage to your computer than others. Certain malware goes to great lengths to stop you from downloading or installing anything on your personal computer, particularly antivirus applications. If you are reading this right now, you have probably recognized that a malware infection is the real cause of your blocked web connectivity. So what to do if you need to install an antivirus program like Safebytes? There are a few steps you can take to circumvent this problem.

Install in Safe Mode

The Windows OS has a special mode known as “Safe Mode” in which just the bare minimum required programs and services are loaded. In the event the malware is blocking the internet connection and affecting the computer, running it in Safe Mode will let you download antivirus and run a diagnostic scan while limiting possible damage. To start the computer into Safe Mode, press the “F8” key on your keyboard right before the Windows boot screen comes up; Or right after normal Windows boot up, run MSConfig, look over “Safe Boot” under Boot tab, and click Apply. After you reboot into Safe Mode with Networking, you can download, install, and update anti-malware software from there. Right after installation, run the malware scanner to remove standard infections.

Switch to an alternate browser

Some malware may target vulnerabilities of a specific browser that block the downloading process. If you seem to have malware attached to Internet Explorer, then switch over to an alternate web browser with built-in safety features, such as Firefox or Chrome, to download your favorite antivirus program – Safebytes.

Install and run anti-virus from the USB drive

Another solution is to create a portable anti-malware program on your USB stick. Adopt these measures to employ a thumb drive to clean your infected computer system. 1) Download Safebytes Anti-Malware or MS Windows Defender Offline onto a clean PC. 2) Plug the Thumb drive into the clean computer. 3) Run the setup program by double-clicking the executable file of the downloaded software, with a .exe file format. 4) Choose the flash drive as the location for saving the file. Do as instructed on the screen to complete the installation process. 5) Now, plug the pen drive into the corrupted computer. 6) Double-click the anti-malware software EXE file on the USB flash drive. 7) Press the “Scan” button to run a full system scan and remove viruses automatically.

SafeBytes Anti-Malware: Lightweight Malware Protection for Windows PC

These days, an anti-malware tool can protect your computer from different types of online threats. But how to choose the best one amongst numerous malware protection application that’s available out there? You may be aware, there are numerous anti-malware companies and tools for you to consider. A few are well worth your money, but many aren’t. You have to be very careful not to choose the wrong application, especially if you buy a paid application. In terms of commercial anti-malware application options, many people select well-known brands, such as SafeBytes, and are quite happy with it. SafeBytes anti-malware is a powerful, highly effective protection tool created to help end-users of all levels of IT literacy in detecting and eliminating malicious threats from their computer. Using its cutting-edge technology, this software can assist you to eliminate several types of malware such as computer viruses, trojans, PUPs, worms, ransomware, adware, and browser hijackers. SafeBytes has excellent features when compared to other anti-malware programs. Let’s have a look at a few of them below: Robust, Anti-malware Protection: Safebytes is made on the best virus engine within the industry. These engines will find and get rid of threats even during the initial phases of a malware outbreak. Active Protection: Malware programs aiming to enter the system are discovered and stopped as and when detected by the SafeBytes active protection shields. It’ll check your PC for suspicious activity at all times and safeguards your personal computer from unauthorized access. High-Speed Malware Scanning Engine: SafeBytes’s high-speed malware scanning engine minimizes scan times and extends the life of the battery. Simultaneously, it will effectively detect and eliminate infected computer files or any online threat. Website Filtering: SafeBytes checks the hyperlinks present on a webpage for possible threats and informs you whether the site is safe to explore or not, through its unique safety rating system. Lowest CPU/Memory Usage: SafeBytes is a lightweight and user-friendly antivirus and antimalware solution. Since it utilizes negligible computer resources, this tool leaves the computer’s power exactly where it belongs to: with you. Premium Support: You may get high levels of support round the clock if you’re using their paid software.

Technical Details and Manual Removal (Advanced Users)

If you wish to manually remove PCOptimizerPro without the use of an automated tool, it may be possible to do so by removing the program from the Windows Add/Remove Programs menu, or in cases of browser extensions, going to the browsers AddOn/Extension manager and removing it. You will likely also want to reset your browser. To ensure the complete removal, manually check your hard drive and registry for all of the following and remove or reset the values accordingly. Please note that this is for advanced users only and may be difficult, with incorrect file removal causing additional PC errors. In addition, some malware is capable of replicating or preventing deletion. Doing this in Safe Mode is advised.

The following files, folders, and registry entries are created or modified by PCOptimizerPro

Files: DesktopPC Optimizer Pro.lnk. %Programs%PC Optimizer ProLive Support.url. %Programs%PC Optimizer ProPC Optimizer Pro.lnk. %Programs%PC Optimizer ProUninstallation Guide.url. %Programs%PC Optimizer ProVisit Website.url. %ProgramFiles%PC Optimizer ProPCOptimizerPro.exe. %ProgramFiles%PC Optimizer ProPCOptProCtxMenu.dll. %ProgramFiles%PC Optimizer ProPCOptProTrays.exe. %ProgramFiles%PC Optimizer ProStartApps.exe. %ProgramFiles%PC Optimizer Prouninst.exe. %QuickLaunch%PC Optimizer Pro.lnk. WindowsTasksPC Optimizer Pro Idle.job. WindowsTasksPC Optimizer Pro Scan.job. WindowsTasksPC Optimizer Pro startups.job. WindowsTasksPC Optimizer Pro Updates.job. C:DOCUME1USER1LOCALS1Tempoptprosetup.exe C:WINDOWSsystem32netmsg.dll C:DOCUME1USER1LOCALS1Tempoptprosetup.exe C:DOCUME1USER1LOCALS1Tempis-SJGJ9.tmpoptprosetup.tmp C:DOCUME1USER1LOCALS1Tempis-NTRVH.tmp_isetup_shfoldr.dll C:WINDOWSsystem32shfolder.dll C:DOCUME1USER1LOCALS1Tempis-NTRVH.tmpOptProHelper.dll C:DOCUME1USER1LOCALS1Tempis-NTRVH.tmpitdownload.dll C:1e4e2d65e12311cac2c0eeb8c5c1d7bd1ddc865b367b98b56bc2330bf18436 C:WINDOWSRegistrationR000000000007.clb C:DOCUME1USER1LOCALS1Tempoptprosetup.exe C:WINDOWSsystem32shfolder.dll C:1e4e2d65e12311cac2c0eeb8c5c1d7bd1ddc865b367b98b56bc2330bf18436 C:WINDOWSRegistrationR000000000007.clb C:WINDOWSsystem32shell32.dll C:DOCUME1USER1LOCALS1Tempis-SJGJ9.tmpoptprosetup.tmp C:Program FilesOptimizer Pro 3.99OptimizerPro.exe C:Program FilesOptimizer Pro 3.99unins000.exe C:Program FilesOptimizer Pro 3.99OptProStart.exe c:autoexec.bat C:DOCUME1USER1LOCALS1Tempoptprosetup.exe C:DOCUME1USER1LOCALS1Tempis-SJGJ9.tmpoptprosetup.tmp C:DOCUME1USER1LOCALS1Tempis-NTRVH.tmp_isetup_shfoldr.dll C:DOCUME1USER1LOCALS1Tempis-NTRVH.tmpOptProHelper.dll C:DOCUME1USER1LOCALS1Tempis-NTRVH.tmpitdownload.dll C:Program FilesOptimizer Pro 3.99is-BDCDJ.tmp C:Program FilesOptimizer Pro 3.99is-DB4S5.tmp C:Program FilesOptimizer Pro 3.99is-C16E7.tmp C:Program FilesOptimizer Pro 3.99is-QE691.tmp C:Program FilesOptimizer Pro 3.99is-GQ78C.tmp Registry: Key 003B9C22-6FE0-4BCA-A73F-9AA99B9BBDAA at HKEY_CLASSES_ROOTTypeLib. Key 12AB121E-44C6-488B-8773-B0AE25E662E1 at HKEY_CLASSES_ROOTInterface. Key 203ABD21-41F1-4F1B-BAE3-D6A89A90D239 at HKEY_CLASSES_ROOTCLSID. Key PC Optimizer Pro at HKEY_CURRENT_USERSoftware. Key PC Optimizer Pro at HKEY_LOCAL_MACHINESOFTWARE. Key PC Optimizer Pro at HKEY_LOCAL_MACHINESoftwareMicrosoftWindowsCurrentVersionUninstall. Key PCOptimizerPro.exe at HKEY_LOCAL_MACHINESOFTWAREMicrosoftWindowsCurrentVersionApp Paths. Key PCProCtxMenu at HKEY_CLASSES_ROOT*shellexContextMenuHandlers. Key PCProCtxMenu at HKEY_CLASSES_ROOTlnkfileshellexContextMenuHandlers.
Read More
Increase your Internet Speed in Windows 10
If you are dissatisfied with your internet speed on your computer but do not want to shell out more money for a faster package or simply there is not a faster package, lay down and enjoy this article where we will go through some common practices and tweaks which will result in increasing your internet speed. Please note that this guide will not be able to go beyond the limits of your internet provider's physical speed, this guide is made you can squeeze the maximum from your existing plan and eliminate speed drops.
      1. Modify IRPStackSize

        Press ⊞ WINDOWS + R to open the run dialog keyboard with windows and r markedIn run dialog type RegEdit and press ENTER run dialog with regeditIn registry editor find HKEY_LOCAL_MACHINE\SYSTEM\CurrentControlSet\Services\LanmanServer\Parameters Right-click on Parameters> New> DWORD 32 Name it IRPStackSize and change the value to 32 Save and reboot your computer.
      2. Add a Default TTL

        Press ⊞ WINDOWS + R to open the run dialog keyboard with windows and r markedIn run dialog type RegEdit and press ENTER run dialog with regeditIn registry editor find a key Computer\HKEY_LOCAL_MACHINE\SYSTEM\CurrentControlSet\Services\Tcpip\Parameters Right-click on Parameters> New> DWORD 32 Name it DefaultTTL and change the value to 64 Save and Reboot
      3. Close Background Applications which are using the internet

        If some applications are running in the background that are using the internet, your speed will be much lower. CLose them to gain speed.
      4. Modify the TCP1323Opts value

        Press ⊞ WINDOWS + R to open the run dialog keyboard with windows and r markedIn run dialog type RegEdit and press ENTER run dialog with regeditIn registry editor find a key Computer\HKEY_LOCAL_MACHINE\SYSTEM\CurrentControlSet\Services\Tcpip\Parameters There should be a DWORD Value, TCP1323Opts, if not, then create it. Right-click on Parameters> New> DWORD (32-bit) Value. Double-click on it and change its value to 1 Save and reboot
      5. Scan system for Viruses and other malware

        Viruses and malware applications can not only slow your entire system, but they can also reduce your internet speed as well. Do a complete scan of your system to be sure you do not have any malicious software on it.
Read More
Fix Boot Device Not Found Error in Windows
If you encounter an error saying, “Boot Device Not Found” when you turn on your Windows 10 computer, then you’ve come to the right place as this post will guide you on how you can fix this problem. Apart from the error message, you will also see a message that states, “Please install an operating system on your hard disk, Hard Disk<xxx>”. You will then be asked to tap the F2 key to initiate the System Diagnostics. If you install the Windows operating system, it becomes the boot device, and when your computer boots, the UEFI or the BIOS looks for the operating installed on your drive and continues the process. So when you encounter the “Boot Device Not Found” error, this means that the UEFI or the BIOS wasn’t able to locate the drive where it can boot. There are several suggestions you can check out to resolve this error. You can try checking the connection with your boot drive or change the boot order. You can also fix the Boot Record from Recovery and see if the primary partition is active or not. But before you troubleshoot the problem, make sure that you have a bootable Windows USB drive ready since two of the options provided below will require you to boot into the Advanced Recovery mode. Once you have this covered, proceed to each one of the following options.

Option 1 – Try checking the connection with the boot drive

If you have a custom computer that comes with a cabinet, you might want to open it and remove any connected power supply, and then check the wires. As you know, drives are connected with the motherboard using a cable. So all you have to do is check if both ends are connected properly and make sure that the connection is not loose. You could also try to unplug the cable and plug it back in.

Option 2 – Try changing the boot order

You might also want to try changing the boot order of your computer. Each time a computer boots, the BIOS or the UEFI follows a boot order. It is the one that tells where to first look for the boot drive and if for some reason, a USB is connected to your computer and the first boot device found in the USB, then you have resolved the problem. All you have to do is to remove the USB device and boot or go into the BIOS and change the boot order yourself.

Option 3 – Try to rebuild the BCD files

The next thing you can do to resolve the issue is to Rebuild Boot Configuration Data or BCD files.
  • You can start by booting into the installation environment for Windows 10 from an installation media.
  • After that, click on Repair your computer and on the blue screen, select Troubleshoot and then select the Advanced options menu.
  • From there, select Command Prompt and once you open it, enter each one of the commands given below by sequence.
    • bootrec /FixMbr
    • bootrec /FixBoot
    • bootrec /ScanOS
    • bootrec /RebuildBcd
  • Once you’re done executing the commands given above, type “exit” to close the Command Prompt window and then restart your computer and see if it fixed the “Boot Device Not Found” error.

Option 4 – Try setting the System Partition to Active

Like the first given option, you also have to make sure that you have a bootable Windows 10 USB drive before you proceed to set the System Partition to Active. Once you have it covered, refer to these steps:
  • Boot your computer using the bootable Windows 10 USB drive.
  • Next, click Next when you get to the Welcome Screen.
  • Then click on Repair your computer located at the bottom left part of the window and select Troubleshoot > Advanced Options > Command Prompt.
  • After opening Command Prompt, type the following command and hit Enter to start the Diskpart utility. It is a command line-based utility just like Command Prompt but has a UAC prompt once you provoke it. So if you encounter a UAC prompt, just click on Yes to proceed.
diskpart
  • Now type the following command:
list disk
  • From there, select your primary disk by typing the following command:
select disk number
  • After that, list all the partitions on the selected disk by entering the following command:
list partition
  • The command you just entered will list all the partitions created on your PC including both types of partitions that are visible to a normal user in the File Explorer as well as the ones created by Windows 10 by default which helps it in storing the boot files and other important system files.
  • Now type the following command to select the partition that is usually around 100 MB in size:
select partition number
  • Finally, type the following command to mark the partition active:
active
  • Then type the “exit” command to exit the disk part utility.
Once it’s done, the primary drive should now be active and you should now be able to boot into your computer without the “Boot Device Not Found” error.
Read More
Microsoft Surface Dial fails to pair with PC
One of the most interesting innovations that were released by Microsoft is the Surface Dial. This only goes to show that Microsoft is very competent not just in hardware but in overall innovation. Although it’s quite a piece of technology and as far as the consensus is concerned, it works pretty well, there are still some issues encountered by users. One of the particular issues experienced by users is that the Surface Dial fails to pair with every Windows 10 PC. At a time of writing, it is still not clear what the cause of the problem really is. However, their possible solutions are provided in this post that might help you resolve the problem. Before you get started troubleshooting the problem, make sure that there are two AAA batteries fitted inside properly.

Option 1 – Check if your PC supports Bluetooth 4.0 LE

In case you don’t know, the Surface Dial only works with the Windows 10 Anniversary Update and later PCs that support Bluetooth 4.0 LE. Thus, you have to check if this is supported or not before you troubleshoot further.
  • Tap the Win + R keys on your keyboard to open the Run dialog box.
  • Next, type “devmgmt.msc” in the field and hit Enter to open the Device Manager.
  • From there, click on Bluetooth and select “Microsoft Bluetooth LE Enumerator” from the drop-down menu. However, if it is not there, then it simply means that your computer does not support this standard which is most likely why you were unable to pair with other Windows 10 PCs. On the other hand, if you were able to see it, then proceed to the next troubleshooting steps below.

Option 2 – Check if Bluetooth is on

The next thing you have to do is to check if Bluetooth is turned on. As you know, the Surface Dial connects to your computer using Bluetooth and so you need to check if it’s really on or not. Aside from that, you also have to verify pairing.
  • Tap the Win + I keys to open Windows Settings.
  • Next, select Devices from the menu and click on Bluetooth.
  • After that, make sure that the toggle switch for Bluetooth is turned on.
  • Now all you have to do is to verify pairing by pressing and holding the pairing button located beside the batteries and then wait for a few seconds until the Bluetooth light begins to flash.
  • Then go back to the Bluetooth section and click on Bluetooth or other devices.
  • From there, click on Add Bluetooth and select Surface Dial.
  • Follow the next instructions on the screen and click on Done once everything is completed. That should fix the problem.

Option 3 – Check if Surface Dial is connected to another PC

If you think that connecting a Bluetooth device to two different PCs at the same time is wise, then think again as it does not really bode well for the overall user experience. Thus, you need to disconnect the Surface Dial from the system that you are currently using. On the other hand, if everything fails, then it’s most likely that the Bluetooth adapter is the one at fault. So you may have to get a third-party device that connects to your system via USB and then see if it works or not.
Read More
CLR20R3 error while launching an Application
CLR20R3 error is received when you are launching an application in Windows 10. It can happen because of two reasons, a corrupted application file or missing system components. Keep on reading in order to find solutions to fix this error.
  1. Run the program in compatibility mode

    Locate problematic application executable file Right-click on executable Click on properties Go to the compatibility tab and try running the application in the previous version of Windows or as an administrator.
  2. Reset Windows media component

    Right-click on Start, then left-click on command prompt (admin) In command prompt type next command and after each line of command press ENTER regsvr32 atl.dll cd C:\WINDOWS\eHome ehSched /unregServer ehSched /service ehRecvr /unregServer ehRecvr /service ehRec.exe /unregServer ehRec.exe /regserver ehmsas.exe /unregServer ehmsas.exe /regserver
  3. Reinstall Windows media player

    Go to control panel Click on Program and Features > Turn Windows feature on or off. Expand Media Features, uncheck Windows Media Player, and click Ok. Restart your PC, go through the same steps, tick Windows Media Player, and restart your computer once again.
  4. Reinstall .NET framework

    Go to control panel Click on Program and Features > Turn Windows feature on or off. Uncheck “.NET Framework 3.5” and “.NET Framework 4.8”, and click Ok. Restart your computer, go through the same steps, check “.NET Framework 3.5” and “.NET Framework 4.8”, and restart your computer once again.
  5. Update Windows

    Go to settings and check for updates
Read More
Reliability Monitor is not updating or working
In case you don’t know, there is a built-in tool in Windows 10, known as Reliability Monitor that provides a day-to-day snapshot of the health of your system. It warns users of any looming issues or disasters before your computer breaks down finally. So obviously, Reliability Monitor is useful, however, there are times when it could behave incorrectly. For instance, it might fail to show you any updates even when they are installed. Thus, if you experience any malfunctions with the Reliability Monitor tool in Windows 10, read on as this post will guide you in updating or working in Windows 10. To fix the problem with the Reliability Monitor, there are several fixes you can check out. You can try to enable the data collection for Reliability Monitor or reset it, as well as put your computer in a Clean Boot State. For more information, refer to each one of the options given below.

Option 1 – Try to enable the Data Collection for Reliability Monitor

The Reliability Monitor tool uses data provided by the RAC Agent scheduled task and it will start to display a Stability Index rating and specific event information 24 hours after the system installation. The RACAgent scheduled task, by default, runs after the operating system is installed. And if it is disabled, it must be manually enabled from the Task Scheduler snap-in for MMC or Microsoft Management Console. Thus, you need to enable the Data Collection for Reliability Monitor to fix the problem.

Option 2 – Try to reset the Reliability Monitor

The next thing you can do to fix the issue with the Reliability Monitor might want to reset it to resolve the problem. If the Reliability Monitor is already open, you have to close it and open it again. After the reset is done, it may take up to 24 hours for the Reliability Monitor to display results again. This should fix the problem.

Option 3 – Troubleshot the problem in a Clean Boot State

There are some instances that some conflicting programs installed in your computer might be the one that’s causing the Black border issue. To identify which program is causing the problem, you need to put your computer in a Clean Boot State. To do so, follow the steps below.
  • Log onto your PC as an administrator.
  • Type in MSConfig in the Start Search to open the System Configuration utility.
  • From there, go to the General tab and click “Selective startup”.
  • Clear the “Load Startup items” check box and make sure that the “Load System Services” and “Use Original boot configuration” options are checked.
  • Next, click the Services tab and select the “Hide All Microsoft Services” check box.
  • Click Disable all.
  • Click on Apply/OK and restart your PC. (This will put your PC into a Clean Boot State. And configure Windows to use the usual startup, just simply undo the changes.)
  • From there, start to isolate the problem by checking which one of the programs you installed recently is the root cause of the problem.
Read More
1 2 3 162
Logo
Copyright © 2022, ErrorTools. All Rights Reserved
Trademarks: Microsoft Windows logos are registered trademarks of Microsoft. Disclaimer: ErrorTools.com is not affiliated with Microsoft, nor claim direct affiliation.
The information on this page is provided for information purposes only.
DMCA.com Protection Status