How to Repair Windows 10 Upgrade Error Code 0x80200056

Repair Windows 10 Upgrade Error Code 0x80200056

Code 0x80200056 – What is it?

The Error Code 0x80200056 will appear in a few different instances, though always applies to an interrupted download.   Windows 10 will quickly discover that their upgrade and/or download did not work correctly. Not every user who upgrades to Microsoft Windows 10 will face this issue, only a select few random instances will occur.

Common symptoms include:

  • A dialog box appears with the Error Code 0x80200056
  • Microsoft Windows 10 upgrade is unsuccessful
  • Users are unable to open any applications after completing the Microsoft Windows 10 install

Solution

Restoro box imageError Causes

This error can be caused by a number of common problems, the first of which is the easiest to diagnose.

  • If during the upgrade process, you accidentally restarted your PC, or inadvertently signed out of your PC, the error will occur.
  • Third-party software conflicts can cause this error message during the Microsoft Windows 10 upgrade.
  • Error Code 0x80200056 may also appear if you have corrupted system files on your PC.
  • A change in date and time during the Microsoft Windows 10 upgrade could potentially cause this error.

None of these causes should overtly affect the operation of your PC, but merely prevent the upgrade and/or download from functioning correctly. If your PC is exhibiting other operating system errors in addition to Error Code 0x80200056, it would be wise to contact Microsoft Support before the issues lead to a possible catastrophic failure.

Further Information and Manual Repair

With the very recent release of Microsoft Windows 10, we are seeing a number of users discuss Error Code 0x80200056. Luckily, there are three different methods that any home user can perform to alleviate the error and complete the Microsoft Windows 10 download successfully.

Method 1

Use if your PC restarted accidentally during the upgrade, or if you accidentally signed out of Windows during the upgrade.

  1. Make sure that your PC or Laptop is plugged in, to avoid another accidental restart.
  2. Turn your PC on, or make sure that it is running. (Close any and all unnecessary programs)
  3. Attempt the upgrade again, you should be able to run the upgrade successfully without further issue.

The following solution methods will apply if corrupted files, date/time changes, or third-party software interference is the issue causing Error Code 0x80200056.

Method 2

The following solution methods will apply if corrupted files, date/time changes, or third-party software interference is the issue causing Error Code 0x80200056.

  1. Click on your “start” icon and choose the CMD (command prompt) option.
  2. Right-click on “command prompt” and choose “run as administrator”.
  3. Paste the command “bitsadmin.exe /reset /allusers” into the command prompt and press ENTER.
  4. Restart your PC and attempt the Microsoft Windows 10 upgrade again.

Method 3

  1. Click on your “start” icon and choose the CMD (command prompt) option.
  2. Select “run as administrator” (enter a password if asked to do so).
  3. Enter the following command into the command prompt- “sfc/scannow”, press ENTER.
  4. Do not close the command prompt window until the entire process is complete.
  5. The scan will determine if you have any missing or corrupted files. You will receive a message that says either: “Windows Resource Protection did not find any integrity violations”.Or “Windows Resource Protection could not perform the requested operation”.
  6. If you received the first message, then your files are fine. The second message indicates that there are file corruption issues.
  7. To repair the disjointed files, restart your PC in SAFE MODE, and reopen the command prompt window.
  8. Enter the following command into the command prompt- “sfc/scannow”, press ENTER.
  9. After the scan is run again, you will receive a message stating that the files have been successfully repaired.
  10. Restart your PC in normal mode and start the Microsoft Windows 10 upgrade again.

To use a powerful tool to resolve Windows 10 upgrade Error Code 0x80200056 issue, download a powerful tool.

Click here to download Restoro.

If any of these methods do not allow for the successful upgrading of your Windows system, contact the Microsoft Support team. Make sure to include in your message to support what fixes you have attempted, and what the outcomes were. As Microsoft Windows 10 is so incredibly new, there are bound to be issued while the program is in its infancy. Fortunately, a majority of these issues should be worked out by Microsoft relatively quickly.

If you like to learn and find out more about various Windows errors, and how to repair them go to our vast archive or use search to find articles that will explain and help you in solving your issue.
However, if you prefer to do things fast and with automatization then we are proposing to use an automated solution for your issues. The application that we are recommending is Advanced System Repair Pro
Advanced System Repair utilizes multiple tools all in one to give you a quick, simple, reliable, and very thorough diagnosis of your PC. It brings you all the tools you need in one program to clean, fix, protect, optimize and boost your PC!
1-Click Maintenance
All the tools to make it simple and easy! It's like having a professional technician at the click of a mouse.

Junk Cleaner
Keeping your computer free from unnecessary clutter also helps make your computer last longer. Like any other machine, if you keep it clean and take care of it, it will serve you better for longer!

Optimize background apps
Optimize applications background activity with the built-in Application Optimizer feature.

Disk Defrag
With a simple 1-click, Advanced System Repair speeds up your PC by assembling fragmented files on your machine and organizing them more efficiently.

Malware Removal
Finds and removes all types of harmful malware including trojans, worms, bots, adware, spyware, PUPs, and more!

Privacy Cleaner
The all-in-one privacy suite to Clean Your Tracks & Protect Your Privacy! Make your computer safe, secure, and more efficient!

System Tweak/Optimizer
ASR will analyze your complete system and settings to adjust your PC to function at its maximum performance.

Registry Cleaner
Over time, as you install and uninstall applications, the registry can become cluttered with old entries and broken settings which can result in program crashes, and annoying messages and slow the computer down.
Visit our Advanced System Repair Pro Download page to inform yourself about all the benefits of this software and get a free trial copy of it.
advanced system repair pro

Advanced System Repair Pro

One-click automated PC repair solution
ASR logo
With Advanced System Repair Pro you can easily
Replace damaged files
Restore performance
Free disk space
Remove Malware
Protects WEB browser
Remove Viruses
Stop PC freezing
DOWNLOAD
Privacy Policy | Terms of Use | Uinstall
Advanced System Repair Pro is compatible with all versions of Microsoft Windows including Windows 11

Share this article:

You might also like

Resize icons on desktop quickly in Windows 10
Resize icons on desktop in Windows 10 in a matter of seconds! Hello everyone and welcome to today's quick tip. If you have ever been dissatisfied with icon size on your desktop and any of the default sizes like small, medium large, etc have not been appropriate know that there is a quick way to resize icons on your desktop in between sizes. All that you have to do in order to use this built-in feature is: Press and hold CTRL and scroll with the mouse. That's it! Find your appropriate size for icons and enjoy. icons on desktop
Read More
InternetSpeedTracker Removal Guide

InternetSpeedTracker is a browser extension developed by MindSpark Inc. This browser add-on offer uses tips on how to boost their “bad” internet connection speed. It displays false internet speed in order to get you to open the sponsored links listed in the toolbar.

This extension also hijacks your browser home page and replaces your default search engine with MyWay. While browsing the internet you will see additional unwanted sponsored ads and links throughout your search results, and sometimes even pop-up ads might appear. While active this extension gathers personal information, website visits, links, and clicks and uses this data to serve ads.

InternetSpeedTracker has been flagged as a Browser Hijacker by several anti-virus scanners, and due to its data mining behavior, it is not recommended to keep it on your computer, especially because it gives false data about your internet speed.

About Browser Hijackers

Browser hijack is a very common type of online fraud where your internet browser settings are modified to allow it to carry out things you don’t intend. They’re created to disrupt browser functions for several purposes. It redirects you to the sponsored sites and inserts ads on the web browser which helps its developer generate earnings. Nevertheless, it’s not that naive. Your web safety is jeopardized and it is also extremely irritating. They don’t just ruin your web browsers, but browser hijackers could also modify the computer registry, making your PC vulnerable to other attacks.

How one can know if your web browser is hijacked

Signs that an internet browser is a hi-jacked include: the browser’s home-page is modified; you find yourself regularly directed to a different site than the one you meant; the default search engine is changed; unwanted new toolbars are added to your web browser; never-ending pop-up ads show up and/or your browser pop-up blocker is disabled; your web browser starts running sluggishly or displays frequent glitches; You simply can’t access specific sites, particularly anti-virus sites.

How they infect PCs

A browser hijacker can be installed on your computer when you check out an infected website, click an e-mail attachment, or download something from a file-sharing website. They are usually included with toolbars, BHO, add-ons, plugins, or browser extensions. A browser hijacker could also be installed as a part of freeware, shareware, demoware, and fake programs. A good example of a notorious browser hijacker is the most recent Chinese malware known as “Fireball”, which has attacked 250 million computer systems worldwide. It acts as a hijacker but can be turned into a fully functioning malware downloader afterward. Browser hijackers could affect the user’s browsing experience greatly, keep track of the websites visited by users and steal private information, cause difficulty in connecting to the internet, and ultimately create stability issues, making software programs and systems freeze.

How to repair a browser hijack

Some hijackers could be removed by uninstalling the freeware they came with or by eliminating any extension you have recently added to your system. But, many hijackers are hard to get rid of manually. No matter how much you attempt to eliminate it, it can keep coming back over and over again. And there’s no denying the fact that the manual fixes and removal methods can be quite a complicated job for a rookie PC user. Furthermore, there are several risks connected with fiddling around with the system registry files.

What you can do if Virus Stops You From Downloading Anything?

Malware could cause all kinds of damage after they invade your system, ranging from stealing your private information to deleting data files on your computer system. Certain malware variants modify web browser settings by adding a proxy server or modify the computer’s DNS configuration settings. In such cases, you’ll be unable to visit some or all of the websites, and thus not able to download or install the necessary security software to remove the infection. If you’re reading this article, chances are you’re stuck with a virus infection that is preventing you to download or install the Safebytes Anti-Malware program on your PC. There are some fixes you can try to get around with this issue.

Install antivirus in Safe Mode with Networking

If the malware is set to load at Windows startup, then booting in Safe Mode should prevent it. Since only the minimal programs and services start-up in safe mode, there are rarely any reasons for issues to take place. Listed below are the steps you should follow to start your computer into the Safe Mode of your Windows XP, Vista, or 7 computers (visit Microsoft site for instructions on Windows 8 and 10 PCs). 1) At power on/start-up, tap the F8 key in one-second intervals. This will bring up the Advanced Boot Options menu. 2) Select Safe Mode with Networking with arrow keys and hit Enter. 3) As soon as this mode loads, you will have an internet connection. Now, utilize your web browser normally and navigate to https://safebytes.com/products/anti-malware/ to download and install Safebytes Anti-Malware. 4) Right after the software program is installed, let the diagnostic scan run to remove trojans and other malware automatically.

Switch to an alternate web browser

Web-based viruses can be environment-specific, aiming for a particular internet browser or attacking specific versions of the browser. The best solution to avoid this issue is to opt for a browser that is known for its security features. Firefox comprises built-in Phishing and Malware Protection to keep you safe online.

Run anti-virus from a pen drive

Another technique is to download and transfer an anti-malware application from a clean PC to run a scan on the affected computer. Follow these steps to use a flash drive to clean your infected system. 1) Download Safebytes Anti-Malware or Microsoft Windows Defender Offline onto a clean PC. 2) Insert the pen drive on the same system. 3) Double-click the Setup icon of the anti-malware software package to run the Installation Wizard. 4) Pick a USB flash drive as the place when the wizard asks you exactly where you would like to install the application. Follow the instructions on the computer screen to complete the installation process. 5) Now, transfer the pen drive to the infected computer. 6) Run the Safebytes Anti-malware directly from the thumb drive by double-clicking the icon. 7) Click the “Scan” button to run a full system scan and remove malware automatically.

Let's Talk About SafeBytes Anti-Malware!

Want to install the best anti-malware application for your laptop or computer? There are many applications available in the market which comes in free and paid versions for Windows computers. Some of them are great and some are scamware applications that pretend as legitimate anti-malware programs waiting to wreak havoc on your PC. When looking for an antimalware program, pick one which gives reliable, efficient, and total protection against all known viruses and malware. One of the recommended tools by industry leaders is SafeBytes Anti-Malware, the most dependable program for Windows computers. SafeBytes anti-malware is a reliable tool that not only secures your system permanently but is also quite user-friendly for people of all ability levels. This application could easily identify, remove, and protect your personal computer from the most advanced malware attacks such as spyware, adware, trojan horses, ransomware, worms, PUPs, and other possibly damaging software applications. SafeBytes has excellent features when compared to other anti-malware programs. Below are a few of the great ones: World-class AntiMalware Protection: Built upon a greatly acclaimed anti-virus engine, this malware removal application can identify and remove numerous obstinate malware threats such as browser hijackers, PUPs, and ransomware that other common antivirus applications will miss. Live Protection: SafeBytes gives real-time active supervision and protection from all known viruses and malware. They’re very effective in screening and eliminating different threats because they are regularly improved with new updates and alerts. Web Security: SafeBytes provides an instant safety rating on the web pages you are going to visit, automatically blocking risky sites and making sure that you are certain of your safety while browsing the internet. Very Low CPU and Memory Usage: SafeBytes provides complete protection from online threats at a fraction of the CPU load due to its enhanced detection engine and algorithms. Premium Support: SafeBytes provides 24/7 technical support, automatic maintenance, and updates for the best user experience.

Technical Details and Manual Removal (Advanced Users)

If you wish to manually remove InternetSpeedTracker without the use of an automated tool, it may be possible to do so by removing the program from the Windows Add/Remove Programs menu, or in cases of browser extensions, going to the browsers AddOn/Extension manager and removing it. You will likely also want to reset your browser. To ensure the complete removal, manually check your hard drive and registry for all of the following and remove or reset the values accordingly. Please note that this is for advanced users only and may be difficult, with incorrect file removal causing additional PC errors. In addition, some malware is capable of replicating or preventing deletion. Doing this in Safe Mode is advised.

The following files, folders, and registry entries are created or modified by InternetSpeedTracker

Files: C:DOCUME1USER1LOCALS1Tempnsk1.tmp C:b418207fbd4b466002312b66521c390947518e9a0d787e4e059af0505f607f3e C:DOCUME1USER1LOCALS1Tempnsk2.tmp C:DOCUME1USER1LOCALS1Tempnsk2.tmpnsDialogs.dll C:DOCUME1USER1LOCALS1Tempnsk2.tmpSystem.dll C:DOCUME1USER1LOCALS1Tempnsk2.tmpnsDialogs.dll C:DOCUME1USER1LOCALS1Tempnsk2.tmpSystem.dll C:Program FilesInternetSpeedTracker_9tEIInstallr.binNP9tEISb.dl_ C:PROGRA1INTERN2Installr.binNP9tEISb.dl_ C:Program FilesInternetSpeedTracker_9tEIInstallr.binNP9tEISb.dll C:Program FilesInternetSpeedTracker_9tEIInstallr.bintEIPlug.dl_ C:PROGRA1INTERN2Installr.bintEIPlug.dl_ C:Program FilesInternetSpeedTracker_9tEIInstallr.bintEIPlug.dll C:Program FilesInternetSpeedTracker_9tEIInstallr.bintEZSETP.dl_ C:PROGRA1INTERN2Installr.bintEZSETP.dl_ C:Program FilesInternetSpeedTracker_9tEIInstallr.bintEZSETP.dll C:WINDOWSsystem32rundll32.exe C:Program FilesInternetSpeedTracker_9tEIInstallr.binNP9tEISb.dl_ C:Program FilesInternetSpeedTracker_9tEIInstallr.binNP9tEISb.dll C:Program FilesInternetSpeedTracker_9tEIInstallr.bintEIPlug.dl_ C:Program FilesInternetSpeedTracker_9tEIInstallr.bintEIPlug.dll C:Program FilesInternetSpeedTracker_9tEIInstallr.bintEZSETP.dl_ C:Program FilesInternetSpeedTracker_9tEIInstallr.bintEZSETP.dll Registry: HKLMSOFTWAREClassesInternetSpeedTracker_9t.HTMLMenu HKLMSOFTWAREClassesInternetSpeedTracker_9t.HTMLPanel HKLMSOFTWAREClassesInternetSpeedTracker_9t.SettingsPlugin HKLMSOFTWAREClassesInternetSpeedTracker_9t.ToolbarProtector HKLMSOFTWAREWow6432NodeMicrosoftWindowsCurrentVersionexplorerBrowser Helper Objects9e28b297-11d4-4293-aa6f-558658ee66ae HKLMSOFTWAREWow6432NodeMicrosoftWindowsCurrentVersionexplorerBrowser Helper Objectscc28794a-99d4-4b1b-bccf-b065ce5f9feb HKLMSOFTWAREWow6432NodeInternetSpeedTracker_9t HKLMSYSTEMControlSet001servicesInternetSpeedTracker_9tService HKLMSYSTEMCurrentControlSetservicesInternetSpeedTracker_9tService HKUS-1-5-21-1633355155-4214755471-2067616181-1000SoftwareAppDataLowSoftwareInternetSpeedTracker_9t HKLMSOFTWAREWow6432NodeMicrosoftWindowsCurrentVersionRunInternet Speed Tracker EPM Support
Read More
How to Fix INTERNAL_POWER_ERROR in Windows
This post will guide you through fixing the INTERNAL_POWER_ERROR Blue Screen Error on your Windows 10 computer. If you encounter this kind of Blue Screen of Death error, this means that the policy manager experienced a fatal error which in turn means that it can happen because of Drivers or Software or even due to external hardware. And so to resolve the issue, here are some suggestions that might be of help.

Option 1 – Update the Device drivers

As mentioned, the INTERNAL_POWER_ERROR BSOD error might have something to do with the drivers. It could be that the drivers are outdated so you need to update them in order to resolve the issue.
  • Tap the Win + R keys to launch Run.
  • Type in devmgmt.msc into the box and tap Enter or click OK to open the Device Manager.
  • After that, a list of device drivers will be displayed. If you see a red or yellow sign that shows up against the driver, right-click on the driver’s name and select “Update Driver Software” or “Uninstall”. And if you find any drivers with a label saying, “Unknown device”, you need to update them as well.
  • Select the “Search automatically for updated driver software” option and then follow the instructions to complete the process.
  • Restart your PC.

Option 2 – Check the Device performance and health

You can also try checking the device's performance and health in the Windows Defender Security Center.
  • Open the Windows Defender Security Center.
  • From there, check if there is a yellow exclamation icon in the Device performance and health section.
  • After that, click on the View report option and you might see Health Report that points towards Storage Capacity, Device Drivers, or Apps and Software which should give you an idea of what the root cause of the problem really is.

Option 3 – Try to run the Chkdsk utility

Running the CHKDSK utility might also help you resolve the INTERNAL_POWER_ERROR Blue Screen error. If your hard drive has issues with integrity, the update will really fail as the system will think that it’s not healthy and that’s where the CHKDSK utility comes in. The CHKDSK utility repairs hard drive errors that might be causing the problem.
  • Open Command Prompt with admin privileges.
  • After opening Command Prompt, execute the following command and hit Enter:
chkdsk /f /r
  • Wait for the process to be completed and then restart your computer.

Option 4 – Try increasing the size of the Hibernation file

  • In the Cortana search box, type “command prompt” in the field, and from the search results that appear, right-click on Command Prompt and select “Run as administrator”.
  • Next, type in the following command and hit Enter to execute it:
powercfg /hibernate /size 100
  • Note that the default size of the Hibernation file is 75% and after executing the command, it should increase to 100%. Now exit Command Prompt and check if the problem’s now fixed or not.

Option 5 – Try to run the troubleshooters

Blue Screen Troubleshooter:

  • Tap the Win + I keys to open the Settings panel.
  • Then go to Update & Security > Troubleshoot.
  • From there, look for the option called “Blue Screen” on your right-hand side and then click the “Run the troubleshooter” button to run the Blue Screen Troubleshooter and then follow the next on-screen options. Note that you might have to boot your PC into Safe Mode.

Performance Troubleshooter:

  • Tap the Win + R keys to open the Run dialog box.
  • Type “msdt.exe /id PerformanceDiagnostic” in the field and hit Enter to open the Performance troubleshooter.
  • Then click on Next to get started. Wait until the process is completed.

System Maintenance Troubleshooter:

  • Tap the Win + R keys to open the Run dialog box.
  • Type “msdt.exe /id MaintenanceDiagnostic” in the field and hit Enter to open the System Maintenance Troubleshooter.
  • After that, click on Next to start troubleshooting the problem and wait until it’s done then check if it fixes the problem or not.

Option 6 – Uninstall the programs you installed recently

Chances are, some programs that you just installed might be the one that’s causing the BSOD error. Thus, you need to uninstall the program to resolve the problem.
  • In the search box, type in “control” and then click on Control Panel (desktop app) among the search results.
  • After that, select Programs and Features from the list which will give you a list of all the programs installed on your computer.
  • From there, look for the concerned program and select it and then uninstall it.
Note: If you have downloaded the app from the Windows Store, you can simply right-click on it from the application list and then uninstall it.

Option 7 – Run Windows Defender offline

You also have the option to run Windows Defender offline and scan your computer to see if any malware has infected the computer and the one that’s causing the INTERNAL_POWER_ERROR Blue Screen Error.
Read More
How to Fix Windows 8 Error 0x80070490

How to Fix Windows 8 Error 0x80070490

Error Code  0x80070490 - What is it?

Error code 0x80070490 occurs in versions of Windows including Windows 8 or 8.1 and Windows 7 or Windows Vista. This error often arises when users attempt to install updates via Windows Update or Microsoft Update.

The main reason for the error relates to the Component-Based Servicing (CBS) manifest which has become damaged. When the error occurs, the Windows device is unable to successfully install updates.

Solution

Restoro box imageError Causes

Error code 0x80070490 might appear for various reasons but is most prominent in the following cases:

  • Attempts to install Windows 8 or 8.1
  • A corrupted Component-Based Servicing (CBS)

Further Information and Manual Repair

The solutions for error code 0x80070490 vary so users may need to attempt each solution to find the best results.

  1. Repair Corrupted Windows Files with System File Checker

The System File Checker (SFC.exe) is a Windows-based utility that enables users to check and repair corrupted or damaged system files. It can also restore missing systems files which can be the cause of errors such as error code 0x80070490.

To repair files, begin scan by swiping the right edge of the screen then opening the search box. Type Command Prompt, right-click this option, then select Run as Administrator. Once the scan begins, wait for the process to be completed then restart your device. Check if the error is resolved by reattempting updates. If error code 0x80070490 in Windows 8 or 8.1 persists on your device, proceed to the solution below.

  1. Perform Clean Boot

A clean boot is one of the best ways to reduce conflict among files – an issue that may arise whenever users update, install or run programs on their Windows device.

To run a clean boot, your device reboots using limited drives and programs. The process allows you to identify which conflict among programs is causing errors on your Windows device.

You can access the clean boot tool by entering msconfig in the search box. Select Services, then System Configuration. Check the Hide all Microsoft services checkbox then select Disable all. Next, go to the Startup tab, click and open Task Manager. After selecting the Startup tab, make sure you right-click each startup program. Click Disable from the context menu then close Task Manager when done. Select OK on the System Configuration menu then restart your machine to clean boot Windows 8 or 8.1.

If the clean boot successfully identifies and resolves issues with corrupted files, you will be able to access updates using Windows Update or Microsoft Update. Error code 0x80070490 will no longer occur. But if that proves unsuccessful, other options are available below including running Windows Update Troubleshooter.

  1. Run Windows Update Troubleshooter

This method can provide a simple solution for users as it verifies whether your Internet connection, network adapter and Windows Update services are functioning properly. However, if you are uncertain as to whether you will be able to troubleshoot, seek assistance from a qualified Microsoft technician.

To run Windows Update Troubleshooter, simply download from Microsoft’s website. Be sure you are downloading the tool recommended for your operating system, in this case Windows 8 or 8.1. After you download Windows Update Troubleshooter, run it to enable the tool to check for and resolve update issues on your device.

  1. Use DSIM or System Update Readiness Tool

The System Readiness Tool or DSIM is another method you can use to correct issues related to error code 0x80070490. This tool checks problems on your system that might prevent your computer from performing Windows updates including issues related to damaged system files.

Once you download and install this tool, it will be able to run automatically. The process may be technical, however, requiring specialized knowledge to successfully download and run the tool. Consider getting assistance from an IT professional in this case. Also, check Microsoft's online resources to download the tool.

  1. Use an Automated Tool

Having an automated tool at hand will enable users to always be prepared. Download a powerful automated utility tool to provide solutions whenever error codes or other problems affect your Windows 8 device.

Read More
How to Fix Missing MSVCR80.dll Error

Repair Missing MSVCR80.dll

Missing MSVCR80.dll Error - What is it?

Msvcr80.dll is a runtime dynamic link library file. This file is typically required to run programs written with Visual Studio. Msvcr80.dll error messages might appear when using or installing certain programs on your PC, that are dependent on the Msvcr80.dll file to run and load. This error message may appear on your computer screen in either of the following formats:
  • "Msvcr80.dll Not Found"
  • "This application failed to start because msvcr80.dll was not found. Re-installing the application may fix this problem."
  • "The file msvcr80.dll is missing."
  • "Cannot start [APPLICATION]. A required component is missing: msvcr80.dll. Please install [APPLICATION] again.
  • "APSDaemon.exe - System Error - MSVCR80.dll is missing from your computer."
  • "Cannot find [PATH]msvcr80.dll"

Solution

Restoro box imageError Causes

Msvcr80.dll error is a common Windows PC error. This error code may occur due to multiple reasons. These include:
  • Removal and corruption of Msvcr80.dll file
  • Registry issues
  • Viral infection
  • Hardware failure
  • Improper software installation
It is advisable to resolve this error code to avoid inconvenience. This error may hamper your ability to access and run your desired program.

Further Information and Manual Repair

Here are some of the best and easiest DIY solutions to fix the Msvcr80.dll error on your PC right away:

1. Check your Recycle Bin for the Missing Msvcr80.dll file or Download the Msvcr80.dll file from a Trusted Website

If you receive the error message ‘missing Msvcr80.dll file’ then first check the recycle bin. It is possible that you may have unknowingly deleted the Msvcr80.dll file while uninstalling a program from the PC. Remember dll files are shared files. These files are used by a number of programs on your PC to run and load. There is a possibility that the program you uninstalled shared the same file to run on your PC. So, when removing that program from your PC it could have also deleted the Msvcr80.dll file. Therefore, check your recycle bin to restore the missing file. Nonetheless, if in case you are unable to locate the missing Msvcr80.dll file, then try downloading it on your PC. However, when doing so, make sure you download the file from a reliable dll download website.

2. Uninstall and Reinstall Apple iTunes Program

This error commonly pops up when running Apple iTunes on your PC. To resolve this issue, and ensure smooth access to Apple iTunes, here’s what you need to do: uninstall from Windows the following programs in this order: Apple iTunes, Software update, Apple Mobile device support, Bonjour, application support, iCloud and mobile me. Skip over software that you haven’t installed already on your system. When uninstalling the programs, if you have two entries of the same software, then uninstall the older version first and then the newer one. To do so, go to Applet in the Control Panel.  It is called programs and features in Windows 7, 8, and Vista and add/remove programs in Windows XP. Once all Apple software is uninstalled, the next step is to download the latest version of iTunes from Apple. After the software is downloaded on your system successfully, run it. This is most likely to resolve the issue.

3. Scan for Viruses

If the issue still persists, then the underlying cause could be related to malware invasion. Therefore in such circumstances, it is advisable to scan for viruses and malware with a powerful antivirus on your PC and remove them right away. Please note, using an antivirus may slow down your PC performance.

4. Perform Registry Scan and Repair

When the registry is overloaded with unnecessary and redundant files like junk files, cookies, invalid entries, and bad keys, it gets corrupted easily thereby generating errors like Msvcr80.dll errors. To resolve this issue, you must perform a registry scan and repair it with a powerful registry cleaner. Whether the cause of the issue is a viral infection or the cause is related to registry problems, the best way to resolve the issue without compromising the speed of your system is to download Restoro. This is an advanced, cutting-edge, and multi-functional PC repair tool. It is compatible with all Windows versions. This software is embedded with multiple PC repair and performance-boosting utilities such as a registry cleaner, an antivirus, and a system optimizer. It has a high functional intuitive algorithm and a user-friendly interface. The registry cleaning feature detects all registry issues, wipes unnecessary files, cleans and repairs the corrupt registry and damaged dll files. The antivirus utility scans for all types of malware, viruses, Trojans, and spyware and removes them immediately. While the system optimizer module helps boost your computer’s performance to its optimal level.  In just a few simple clicks, the Msvcr80.dll error is resolved. To get started, click here to download Restoro on your PC today!
Read More
Fixing “Could not find this item. This is no longer located in [Path]. Verify the item’s location and try again” Error in Windows 10
If you are trying to access a particular file on your Windows 10 computer either to open, rename or delete it, and you suddenly encounter an error stating, “Could not find this item. This is no longer located in [Path]. Verify the item’s location and try again”, read on for this post will help you out in resolving this issue. If you are able to find and view a file on your computer, you should have clear access to it. And since you are seeing an error message when you try to do something about this file, you are not able to do anything with the file. There are times when this error pops up with the files created by third-party services and that the file’s extension is not defined properly. On the other hand, there are also other obscure causes for this error. To fix it, here are some suggestions you can try.

Option 1 – Delete the file using Command Prompt

If you wish to delete the problematic file and weren’t to, you can use Command Prompt.
  • In the Start menu, type in “Command Prompt” to search for it or you could also click the search button right next to the Start menu and then right-click on the related result and select the option “Run as administrator”.
  • Once you’ve opened Command Prompt, copy and paste the command given below and tap Entre after you do so. You also have to make sure that you key in the correct path where the file is located as well as its name.
rd /s \?X:badfolderpath Note: In the command above, “X” is the placeholder letter so you must input the letter that corresponds to the drive’s letter where the file is located.
  • After that, you will see the “Operation completed successfully” message on your screen. If you don’t, check if you’ve really inputted the correct location of the file or its name.

Option 2 – Use a Command Prompt tweak to rename the file

If you don’t want to delete the file and only want to rename it, you can apply some tweaks using the Command Prompt. Make sure to follow the steps carefully.
  • In the Start menu, type in “Command Prompt” to search for it or you could also click the search button right next to the Start menu and then right-click on the related result and select the option “Run as administrator”.
  • After opening Command Prompt, type in “cd” followed by the path where the file is located with this format – “C:\Folder1\Folder2\Folder3”. However, you have to omit the problematic file this time. To put it simply, the last folder in the command must be the folder where the file is located.
  • After inputting the command, tap Enter on your keyboard and then use the set of commands given below. Note that each command is a new line so you need to tap Enter after copying each line.
    • DIR /A /X /P
    • RENAME (the current name of the problematic file) (a non-problematic name)
    • EXIT
Note: Make sure that you only input the current name and the new name separated by a space. You must not write the brackets in the command. If everything goes well, you will now be able to operate the file like you used to before.

Option 3 – Use Command Prompt to delete the file without any extension

This option applies to cases where the affected file does not have any viable extension which means that Windows does not really know what to do with it and it only displays the “Could not find this item. This is no longer located in [Path]. Verify the item’s location and try again” error message. It usually occurs with the files created by browser plugins that are mostly from Mozilla Firefox. To delete these kinds of files, here’s what you have to do:
  • Follow the first two steps from the previous option above so you can navigate to the location of the file accurately just be careful in inputting the folders.
  • Don’t forget to tap Enter right after each command and then use the next command below so you can delete the affected file which has no extension:
del *.*
  • After you’re done, open the File Explorer and then check if the file is now deleted or not.

Option 4 – Try using another workaround without using Command Prompt

This option is a lot like a workaround but it definitely gets the job done for you. It’s ideal for you if you do not want to deal with Command Prompt and only want to do everything in a graphical environment. To get started, follow the steps below.
  • Look for the affected file or folder on your PC using File Explorer. Once you found it, right-click on it and select the “Add to archive” option from the context menu.
  • Once the archiving options window pops up, look for the “Delete files after archiving” option and make sure that you select it then click OK to start archiving the folder or file. After that, you should now notice the file no longer exists.
  • After that, delete the archive file as well.
Read More
Cannot find a system image on this computer
If you are trying to restore your computer using a System Image that has been created by the Windows Backup and Restore tool but encountered an error message instead that says, “Windows cannot find a system image on this computer”, you’ve come to the right place as this post will walk you through in fixing this error. Here’s the complete context of the error message:
“Windows cannot find a system image on this computer, Attach the backup hard disk or insert the final DVD from a backup set and click Retry. Alternatively, close this dialog for more options.”
In the error message, you are offered two choices – to either Retry or Cancel the operation. You can try to select Retry to try again but you will most likely get the same error if you do so. This kind of error can occur if the name of the WindowsImageBackup folder or any of its sub-folders has been modified. On the other hand, this error can also pop up if this folder or any of its sub-folders have gone missing or have become corrupted. To resolve the error, you can try to move the WindowsImageBackup folder or check its sub-folders. You can also try to isolate the System Image file or rename the System Image folder or remove all the unwanted sub-folders as well as use Command Prompt in Repair mode.

Option 1 – Try to move the WindowsImageBackup folder

The WindowsImageBackup folder must be stored in the root of the volume where it is stored, in line with the functioning of the System Restore utility. For example, if the WindowsImageBackup folder is stored in the “C:/Backups/System Restore Backups/New” location, then you have to move it to the C: drive as well.

Option 2 – Try to check the subfolders of the WindowsImageBackup folder

The classification of folders and files plays an important part to restore in restoring a computer from a System Restore point. Thus, if have modified the names of any files or folders inside the WindowsImageBackup folder, then you need to set the defaults. After that, run System Restore again and check if it fixes the error.

Option 3 – Try to isolate the System Image file

If the System Image file is stored in a USB storage device along with various System Restore images, then it’s no wonder why you’re getting this error. To set things right, you have to make sure that the System Restore image you wish to restore your computer from, is the only one that’s present at the root of the USB storage device.

Option 4 – Try renaming the System Image folder

If you have renamed the System Image folder prior to running System Restore, then it is most likely the reason why you’re getting the “Windows cannot find a system image on this computer” error. This error pops up because the System Restore utility in Windows 10 looks out for the WindowsImageBackup folder so if you have renamed it, you need to change its name back to what it originally was to fix the error.

Option 5 – Try to remove all the sub-folders of the WindowsImageBackup folder

If you have stored some foreign files inside the WindowsImageBackup folder, you need to get rid of them right away and return the folder to its default state as this folder must be left alone and should not be meddled with if you want to run System Restore smoothly.

Option 6 – Try to use Command Prompt in Repair Mode

  • Open Command Prompt while your computer is in the Repair Mode.
  • Next, type and enter this command where you need to replace “<Partition Letter>” with your drive’s letter: dir <Partition Letter>
  • After you’ve found the WindowsImageBackup folder in any of the partitions, type and enter this command: dir <Parition Letter>WindowsImageBackup /s
  • The command you entered will display all the contents of the folder exceeding 10 GB in total size. You can check and confirm the integrity of the folder and if you find that the integrity is violated, then it is the reason why you’re getting the error.
Read More
Fix 0xA00F4244 or 0x200F4244 error in Windows
Error 0xA00F4244 or 0x200F4244 is when Windows can not detect the WEB camera in your system and it is usually accompanied by the message: We can’t find or start your camera. There could be several reasons for this error and in this guide, we will cover all of them in order to help you to get back on track and start using your WEB camera which is perhaps now more required than ever in this world we live in.
  1. Check privacy settings

    With the latest Microsoft Windows updates come the latest issues and it is not strange that privacy settings can become reset or changed when an update is applied. This is a quick fix to this issue and can be the sole reason why you get this error, go to Windows settings, then to privacy and check to see if the WEB camera is turned OFF, if this is the case turn it back ON and make sure that option Allow apps to access your camera is also set to ON.
  2. Check if the camera is enabled

    Sometimes it is by mistake, sometimes by an update but the web camera could be disabled in the device manager of Windows. Right-click on the Windows Start button and click on device manager to open it up, find and expand the cameras category. Right-click on your camera, if it is disabled, you will have the option to enable the camera, if it is enabled and Windows is detecting that it is working fine you will have the option to disable it.
  3. Check antivirus settings

    Antivirus and firewall applications are in today's world and life-essential piece of software but they can sometimes create more harm than good, from stopping windows updates to killing important services of applications and preventing internet access being just some examples of their paranoid behavior. Try disabling or turning your protection software OFF and see if your WEB camera will miraculously come back to life. If this is the case, somewhere in the settings of software there is an option that controls this aspect, try to locate it and set it in that way so you are able to use your camera.
  4. Reinstall camera driver

    If the previous three solutions failed to produce a satisfactory solution then reinstalling the camera driver might fix the problem. Go to your manufacturer's camera website and download the latest driver for your camera. Go to the device manager and uninstall the driver for the camera, then apply the latest driver and reboot the system.
  5. Check connections and cable

    Sometimes an issue is not due to software nature, sometimes it is hardware. Try checking connections and plug the camera in another USB port, twist and turn the cable a little to see is issue cable-related.
  6. Check to see if the application supports your camera

    If Windows has detected the camera and is not reporting any issues with it check your application to see if it can detect your camera and that it supports it fully. Sometimes newer applications tend to support only newer camera models. Try to use the camera in other software as well to see if the problem is with the application you are using.
  7. Try camera on another computer

    If everything else fails, try the camera on another computer to see if it will work there. If the camera is not working there as well it is probably malfunctioned and broken for good. If it does work there, try to find out what is different in that computer in comparison to yours, maybe it is some service running in the background, certain application configuration, Windows version itself, USB port version, or something else.
Read More
USB Security key is not working on Windows
As you know, the USB security keys are a secure medium to validate a lot of components in a computer. They can be used to log in to Windows 10. Now with the advancement of APIs, you can authenticate across the website as well using the same key. However, there are times when it may not work and it could be caused by several factors. It could be due to corrupted or incompatible drivers or it could also be due to compromised integrity of the key, and many more. So if you happen to encounter an issue with the USB security key on your Windows 10 computer, then there are several potential fixes you can try. You can try toggling the Internet Options settings or reinstall the respective USB drivers. You could also try changing the PIN of the security key or disable the antivirus program on your computer or troubleshoot the web browser. Refer to the potential fixes provided below to fix the problem.

Option 1 – Try to toggle the settings of the Internet Options

  • In the Windows Search box, search for Internet Options to open it.
  • Next, go to the Security tab and drag the security slider to the lowest possible security for all the given zones.
  • After that, click on OK to save the changes made and close the Internet Options.
Note that this option is only a temporary measure as it can make your computer vulnerable. Make sure to press the Reset all zones to default level button.

Option 2 – Try to update or reinstall the respective drivers

If updating the drivers of the device did not fix the problem with the USB security key, you can try to update or reinstall the Universal Serial Bus Controller drivers instead of using the Device Manager. Refer to the following steps:
  • First, click the Start button and type “device manager”.
  • Then click on the “Device Manager” from the search results to open it.
  • From there, look for the “Universal Serial Bus controllers” option and then right-click on each one of the USB drivers and select the Update Driver from the menu.
Note: If it is a regular USB drive, then it will be listed as a USB Mass Storage Device but if you have a USB 3.0 device, then look for a USB 3.0 Extensible Host Controller.
  • Restart your PC and then click the “Search automatically for updated driver software” option.
Note: If updating the USB Controller drivers didn’t work, you can try to reinstall them instead.

Option 3 – Try to change the PIN of the security key

If the first two options didn’t work, you can try changing the PIN of the security key. There are instances when the PIN for the security key might have been corrupted. Thus, resetting it can help you resolve the problem.

Option 4 – Temporarily disable Firewall and third-party antivirus

Firewall and antivirus programs are known to block the proper functioning of the USB security key. Thus, your antivirus or firewall programs might be the reason why you can’t download anything on your Windows 10 computer. To isolate the issue, you need to temporarily disable both the Firewall and antivirus programs and then check if you can now download anything from the internet. Do not forget to enable them again as disabling them can leave your computer vulnerable to cyber threats.

Option 5 – Try to troubleshoot the web browser

Troubleshooting your web browser can also help you fix the USB security key problem. You can do that by checking if your web browser supports the security key and you can do that by checking on the official website of your browser. You can also try to update your web browser to its latest version but if it didn’t help, you can try to reinstall it or switch to another web browser.
Read More
Stop showing browser tabs when alt+tab, Win11
windows browser tabs removed alt tab
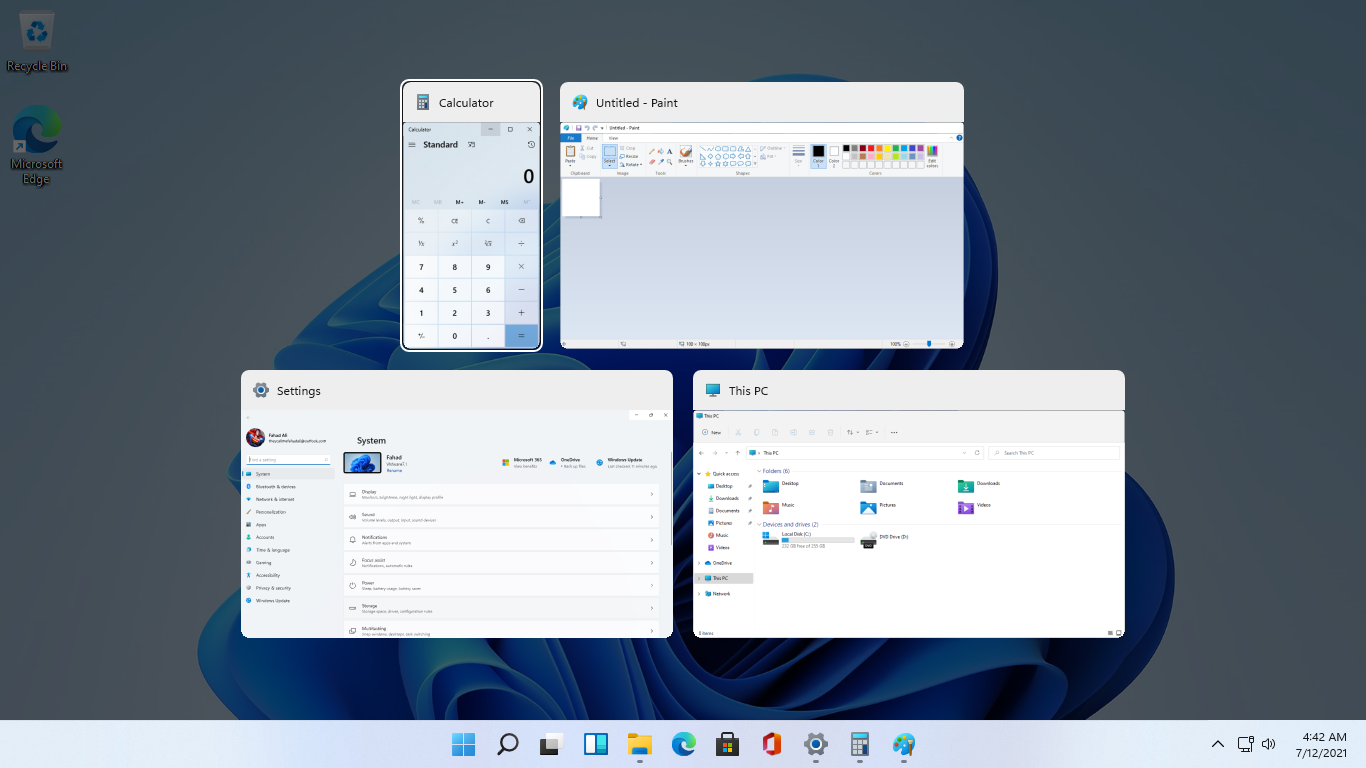
As in previous Windows 10, inside Windows 11 also when you press the ALT + TAB key combination you will get a preview of all running applications along with all Browser tabs so you can go through them and pick the one you want to switch to. Alto, I personally am a big fan of alt-tabbing, I must admit that I am not a big fan of having multiple browsers tabs on screen when I do press key combo. Luckily there is a very easy way to turn this feature off. Turning browsers tabs thumbnails off
  1. Press ⊞ WINDOWS + I to open settings
  2. Click on System in the sidebar
  3. Scroll down and select Multitasking
  4. Find Alt + Tab section and click on the drop-down menu
  5. Pick Open Windows Only
  6. Close settings
Now when you press the ALT + TAB key combination you will still see your browser but only an active tab in it instead of all tabs as different preview thumbnails.
Read More
1 2 3 162
Logo
Copyright © 2022, ErrorTools. All Rights Reserved
Trademarks: Microsoft Windows logos are registered trademarks of Microsoft. Disclaimer: ErrorTools.com is not affiliated with Microsoft, nor claim direct affiliation.
The information on this page is provided for information purposes only.
DMCA.com Protection Status