Fix Windows Update error 0x80244022

Installing Windows Updates in your Windows 10 computer does not always go smoothly as there are instances when you could encounter some errors along the way. One of these errors is error code 0x80244022 –WU_E_PT_HTTP_STATUS_SERVICE_UNAVAIL HTTP 503. This kind of error can be encountered when you check, download or install any updates. At the time of writing, it isn’t known yet what the exact cause of this error is. However, there are some potential fixes you can check out to fix it.

When this error occurs, you will see the following error message on your screen:

“There were some problems installing updates, but we’ll try again later. If you keep seeing this and want to search the web or contact support for information, this may help: (0x80244022).”

To fix error code 0x80244022, refer to the potential fixes provided below.

Option 1 – Disable the Proxy server

The first thing you can do is to try disabling the Proxy server as it might be the reason why you’re getting error 0x80244022 for Windows Updates. To disable the proxy server, refer to the steps below.

  • Tap the Win + R keys to open the Run dialog box.
  • Then type “inetcpl.cpl” in the field and hit Enter to pull up the Internet Properties.
  • After that, go to the Connections tab and select the LAN settings.
  • From there. Uncheck the “Use a Proxy Server” option for your LAN and then make sure that the “Automatically detect settings” option is checked.
  • Now click the OK and the Apply buttons.
  • Restart your PC.

Note: If you are using a third-party proxy service, you have to disable it. In addition, if you are also using a VPN, you can try to disable it as well.

Option 2 – Run the DISM tool

You can run the DISM tool as well to help fix the error code 0x80244022 during Windows Update. Using this built-in tool, you have various options such as the “/ScanHealth”, “/CheckHealth”, and “/RestoreHealth”.

  • Open the Command Prompt with admin privileges.
  • Then type in the following commands and make sure to hit Enter right after you type each one of them:
    • Dism /Online /Cleanup-Image /CheckHealth
    • Dism /Online /Cleanup-Image /ScanHealth
    • exe /Online /Cleanup-image /Restorehealth
  • Do not close the window if the process takes a while as it will probably take a few minutes to finish.

Option 3 – Perform a System File Checker scan

The SFC or System File Checker scan could detect and automatically repair damaged system files that could be causing error code 0x80244022 to appear when you try to update your Windows 10 computer. SFC is a built-in command utility that helps in restoring corrupted files as well as missing files. It replaces bad and corrupted system files with good system files. To run the SFC command, follow the steps given below.

  • Tap Win + R to launch Run.
  • Type in cmd in the field and tap Enter.
  • After opening Command Prompt, type in sfc /scannow and hit Enter.

The command will start a system scan which will take a few whiles before it finishes. Once it’s done, you could get the following results:

  1. Windows Resource Protection did not find any integrity violations.
  2. Windows Resource Protection found corrupt files and successfully repaired them.
  3. Windows Resource Protection found corrupt files but was unable to fix some of them.
  • Once done, restart your computer.

Option 4 – Try disabling the Firewall or antivirus program

Disabling the antivirus program or Firewall or any other security software installed in your computer is always a good idea you can try when the Windows Update process does not go smoothly. So before you try updating your computer again, make sure to disable the antivirus or security program and once the Windows Update is done, don’t forget to enable the antivirus program back again.

Option 5 – Try resetting the Windows Update components

  • Open Command Prompt with admin privileges.
  • After that, type each one of the following commands and hit Enter after you key in one after the other.
    • net stop wuauserv
    • net stop cryptsvc
    • net stop bits
    • net stop msiserver

Note: The commands you entered will stop the Windows Update components such as Windows Update service, Cryptographic services, BITS, and MSI Installer.

  • After disabling WU components, you need to rename both the SoftwareDistribution and Catroot2 folders. To do that, type each one of the following commands below, and don’t forget to hit Enter after you type one command after the other.
    • ren C:/Windows/SoftwareDistribution/SoftwareDistribution.old
    • ren C:/Windows/System32/catroot2/Catroot2.old
  • Next, restart the services you’ve stopped by entering another series of commands. Don’t forget to hit Enter after you key in one command after the other.
    • net start wuauserv
    • net start cryptsvc
    • net start bits
    • net start msiserver
  • Close Command Prompt and reboot your PC.

Option 6 – Run the Windows Update Troubleshooter

You might also want to run the Windows Update Troubleshooter as it could also help in fixing Windows Update Error. To run it, go to Settings and then select Troubleshoot from the options. From there, click on Windows Update and then click the “Run the troubleshooter” button. After that, follow the next on-screen instructions and you should be good to go.

If you like to learn and find out more about various Windows errors, and how to repair them go to our vast archive or use search to find articles that will explain and help you in solving your issue.
However, if you prefer to do things fast and with automatization then we are proposing to use an automated solution for your issues. The application that we are recommending is Advanced System Repair Pro
Advanced System Repair utilizes multiple tools all in one to give you a quick, simple, reliable, and very thorough diagnosis of your PC. It brings you all the tools you need in one program to clean, fix, protect, optimize and boost your PC!
1-Click Maintenance
All the tools to make it simple and easy! It's like having a professional technician at the click of a mouse.

Junk Cleaner
Keeping your computer free from unnecessary clutter also helps make your computer last longer. Like any other machine, if you keep it clean and take care of it, it will serve you better for longer!

Optimize background apps
Optimize applications background activity with the built-in Application Optimizer feature.

Disk Defrag
With a simple 1-click, Advanced System Repair speeds up your PC by assembling fragmented files on your machine and organizing them more efficiently.

Malware Removal
Finds and removes all types of harmful malware including trojans, worms, bots, adware, spyware, PUPs, and more!

Privacy Cleaner
The all-in-one privacy suite to Clean Your Tracks & Protect Your Privacy! Make your computer safe, secure, and more efficient!

System Tweak/Optimizer
ASR will analyze your complete system and settings to adjust your PC to function at its maximum performance.

Registry Cleaner
Over time, as you install and uninstall applications, the registry can become cluttered with old entries and broken settings which can result in program crashes, and annoying messages and slow the computer down.
Visit our Advanced System Repair Pro Download page to inform yourself about all the benefits of this software and get a free trial copy of it.
advanced system repair pro

Advanced System Repair Pro

One-click automated PC repair solution
ASR logo
With Advanced System Repair Pro you can easily
Replace damaged files
Restore performance
Free disk space
Remove Malware
Protects WEB browser
Remove Viruses
Stop PC freezing
DOWNLOAD
Privacy Policy | Terms of Use | Uinstall
Advanced System Repair Pro is compatible with all versions of Microsoft Windows including Windows 11

Share this article:

You might also like

A Quick Method To Fix Error Code 0x80070002

Fixing Error Code 0x80070002

What is 0x80070002 Error Code?

0x80070002 error message triggers Windows update problems. This error code pop prevents you from successfully updating Windows operating system and its installed components. Windows update is necessary to keep the system up to date and efficient. It also helps you close security holes in your system and prevents your system from being infected by viruses or hacked.

Solution

Restoro box imageError Causes for 0x80070002

This error code pops up on the screen and results in an unsuccessful Windows update, when either your system has wrong date/time settings or when Windows update temporary folder is corrupted. The latter cause is the one to be worried about as it usually results from malware, viral infection, and registry corruption and damage. If this error code is not fixed timely it can lead to system crash and failure too.

Further Information and Manual Repair of 0x80070002

The best way to fix the 0x80070002 Windows update error code is to download Restoro on your system. Restoro is a new, powerful, intuitive, and cutting-edge PC fixer that serves as both a registry cleaner and a system optimizer. It is integrated with multiple performance-boosting and highly functional utilities. With this helper, you can resolve the maximum number and types of PC issues in a few seconds. This tool spares you from the hassle of finding and detecting the underlying cause of the error 0x80070002. Its intuitive built-in technology automatically detects and identifies the error and its causes and repairs it right away. Restoro includes utilities like registry cleaner, privacy issue detector, Active X and Class cleaner, and system stability scanner. The registry cleaner feature assists users to clean up registry clutter. This includes clearing junk files, temporary files, and invalid registry entries which take up all the disk space causing the registry to get corrupted and hampering Windows updates. It repairs the corrupt registry in no time allowing you to perform successful Windows updates.

Restoro Privacy Features

Nonetheless, if the error 0x80070002 occurs due to malware, Restoro will scan and repair it too. Its advanced privacy error anti-virus built-in feature scans for all types of malware, spyware, and viruses quickly and removes them from your PC. This ensures that your PC remains safe from malicious malware that can cause unsuccessful Windows updates and error codes like 0x80070002. Restoro is compatible with all Windows versions. It has a sophisticated and easy-to-use layout making it easier for users of all levels to use it without any complexity or hassle. It is safe and efficient.  It also helps boost the speed of your PC thus lowering boot time tremendously. For user safety, Restoro advises users to create backup files. This helps retrieve valuable data and files in the event of data loss during repair which rarely happens; but in case it does, you don’t have to suffer from a big loss.

Get Restoro

To get started, all you have to do is download and install Restoro on your system. After downloading, run it on your PC for a scan. Once the scanning is complete, a comprehensive scan report will be displayed on your screen showing you the errors affecting your system including 0x80070002 errors that you’ve been experiencing when performing Windows updates. To resolve issues on your PC right away, simply click on repair.  This will repair the error 0x80070002 issues on your PC in seconds. After your PC is repaired, you can then perform a Windows update again. It will be executed successfully. Click here to download Restoro today!
Read More
Fix Microsoft Edge Error 0x80200070
As you know, any software needs sufficient CPU power when it downloads, updates and installs so if you encounter an error code 0x80200070 when you tried to install or update the Microsoft Edge browser on your Windows 10 computer, then read on as this post will guide you on how to fix it. This kind of error occurs when the Edge browser installation does not get enough CPU power to update or install and the only way to fix it is to kill programs that are consuming a lot of PC resources as well as stop or remove any unnecessary programs that are running in the background. This kind of error can also be encountered in the new Microsoft Edge Chromium. For more details, follow each one of the options provided below.

Option 1 – Try to kill applications that consume high resources

  • Tap the Ctrl + Shift + Esc keys to open the Task Manager.
  • Go to the Performance tab and sort by CPU usage.
  • Next, close a few additional programs that are consuming maximum CPU power.
  • After that, try to update or install Microsoft Edge again and check if the error is fixed. If not, try to restart your computer and then start the installation or update again.

Option 2 – Try to remove or stop unnecessary programs and services

If the applications or processes that are consuming a lot of CPU resources reappear even after you kill them or end their processes, then you can try the following suggestions to remove or stop these unnecessary programs and processes.
  • The first thing you can do is to stop the Service. If the program happens to be a service, then you have the option to disable the Windows Service. All you have to do is open the Services Manager and stop the service. How? Refer to these steps:
    • Tap the Win + R keys to launch the Run utility and type “services.msc” in the field and tap Enter to open the Services Manager.
  • After that, identify which service is consuming a lot of power and then stop it temporarily.
  • The next thing you can do is to uninstall the problematic program. If the one that consumes a lot of resources is not a service but a program, then you can try to uninstall the program for the meantime until you’ve updated or installed the Edge browser. Once you’ve uninstalled the program, try to update or install Edge again.
  • You can also try booting your computer into Safe Mode and then update or install Microsoft Edge. This will make sure that all the unnecessary programs and services won’t consume a lot of CPU resources as well as memory.
Read More
How to Fix Hal.dll Error Code

Repair the Hal.dll Error

Hal.dll Error - What is it?

Hal.dll error is a type of dynamic link library error that is common in Windows. Hal.dll is the critical file in all Windows installations and the error occurs when this file cannot be correctly loaded. Hal is the abbreviation for ‘Hardware Abstraction Layer’. Communication between Windows and different PC hardware is facilitated with this file. The error causes inconvenience and hampers your ability to use the hardware. The error message is displayed in either one of the following formats:
  • "Windows could not start because the following file is missing or corrupt: C:Windowssystem32hal.dll. Please re-install a copy of the above file."
  • "Cannot find WindowsSystem32hal.dll"
  • "C:WindowsSystem32Hal.dll missing or corrupt: Please re-install a copy of the above file."

Solution

Restoro box imageError Causes

Hal.dll error occurs due to multiple reasons. These include:
  • BIOS are not configured properly
  • Damaged hard drive
  • Hal.dll file is missing, damaged, or corrupt
  • Viral Infection

Further Information and Manual Repair

To fix and resolve the Hal.dll error code on your system, you don’t always have to hire a professional technician for the job. Though Hal.dll error is critical but easy to resolve, here are some solutions that you can try to fix it right away even if you don’t have any technical expertise.

1) Restart Your PC

Sometimes this can be a temporary error, so try restarting your PC. If the error is resolved then that’s great. However, if it still persists, then try other solutions.

2) Change the Boot Order

The underlying cause for the Hal.dll error is often not properly configured BIOS; if this is the cause, simply change the boot order of the bootable devices like your hard drive. The BIOS setup utility is used to change boot order settings. This can be done by restarting your PC. Once you restart, press F2 to enter the setup. Now go to SATA operation and change RAID AHCI to RAID ATA. Save changes and then exit. By doing so, you will be able to re-configure the BIOS and resolve the error.

3) Use BOOTMGR

Another way to resolve is to update the volume boot code to use BOOTMGR. To do this, access advanced startup options, open the command prompt and type bootsect command and then press Enter. Run the command and then you’ll get the following message: C: (\?Volume{37a450c8-2331-11e0-9019-806e6f6e6963}) Successfully updated NTFS filesystem bootcode. Bootcode was successfully updated on all targeted volumes. After that close the command prompt. This is most likely to resolve the error.

4) Repair Registry With Restoro.

In case the error is still not fixed, then this means that the problem is bigger than you thought. It may be due to hard drive failure, viral infection, or sometimes because of hal.dll file corruption. In the event of these error causes, it is recommended to download Restoro. Restoro is an advanced, next-generation, and multi-functional PC repair tool embedded with numerous utilities like a registry cleaner, an antivirus, and a system optimizer. The registry cleaner utility:
  • Scans for all registry issues
  • Wipes out the unnecessary files saved in the hard drive like the junk files, cookies, internet history, and temporary files
  • Cleans the disk
  • Repairs damaged and corrupt files
  • Restores the registry
The antivirus utility scans and removes all malicious software from your PC including viruses, Trojans, malware, adware, and spyware. Simultaneously, it also boosts the speed of your system. It is safe and efficient PC repair software. It has simple navigation and a user-friendly interface. Whether you are using Windows 7, 8 or Vista, it is compatible with all. It can also be used on Windows XP. Click here to download Restoro and resolve the Hal.dll error today!
Read More
Taskbar has disappeared from the Desktop
As you know, the Taskbar is one of the integral parts of the Windows desktop and it has been there since the release of Windows 1.0 and up until now with Windows 10. Since then, Microsoft has been modifying the Taskbar with a new design which makes it a home for new features such as Windows Search, Task View, and many more. However, there are times when you may that the Taskbar has disappeared or has stopped responding. If you experience either one of these scenarios, read on as this post will walk you through what you can do to resolve the problem. Here are some suggestions you can check out to resolve the issue with the Taskbar in Windows 10 but before you proceed, make sure that you create a System Restore point first. To do that, follow these steps:
  • In the Start search, type in “create a restore point” and click the entry “System Properties”.
  • Next, select the main system drive under Protection Settings and click on the Configure button.
  • After that, select the “Turn on system protection” option and then click on the Apply and OK buttons to save the changes made.
Once you’ve created a System Restore point, refer to the troubleshooting steps below to fix the Taskbar in Windows 10.

Option 1 – Try to restart the Explorer process

This may sound really basic but it actually is a proven method to fix the Taskbar issue. So if anything gets stuck on the system tray or the Taskbar, you can always fix it by restarting the explorer.exe. How? Refer to these steps:
  • First, right-click on the Taskbar and select the Task Manager.
  • After opening the Task Manager, go to the Processes tab and look for the process named “Windows Explorer”.
  • Then right-click on that process and select the option to Restart. Afterward, you should now be seeing the Taskbar as this will reload the whole Windows Shell.

Option 2 – Unhide the Taskbar using the Settings app

It is possible that the Taskbar could be hidden so you can try to unhide it using the Settings app.
  • Tap the Win + I keys to open Settings.
  • After that, go to Personalization > Taskbar.
  • From the main section, make sure that the “Automatically hide the task in desktop mode” is toggled to the off position. However, if it’s already off then proceed to the next options below.

Option 3 – Make sure that you are not in Tablet Mode

Since Windows 10 is designed to work on both desktop and mobile devices, it could be that your computer has slipped into Tablet Mode which explains why you’re not seeing the Taskbar. To check if your computer is really in Tablet Mode, follow these steps:
  • Go to the Start menu and select Settings.
  • Next, select the System setting and from the left pane select the Tablet Mode.
  • From there, make sure that the buttons next to the options given below are set to the off position:
    • Hide app icons on the taskbar in tablet mode
    • Automatically hide the taskbar in tablet mode

Option 4 – Try to check the Projection Settings

You might also want to check the Projection settings as it could be the reason why Taskbar has disappeared.
  • Tap the Win + P keys to open the Windows Projection settings.
  • Next, make sure that you select the “PC screen only” option and then check if your Taskbar has now appeared or not.
Read More
System Restore gets stuck or hangs up
As you know, System Restore is a useful tool in Windows operating system that helps users in fixing system issues by undoing any recent changes to the computer that may have caused the problem. However, there are times when you might encounter some issues when running this tool and one of these issues is when System Restore suddenly gets stuck or hangs up on initializing the restoration of the Registry in Windows 10. If you encounter a similar problem, read on as this post will guide you on what you can do in such cases. There are several things you can do when you face this kind of problem in System Restore. First, you can try to wait it out, give it more time to load, which should not take longer than 5 minutes. And if it’s still stuck after that time, give it another hour. However, if nothing changed after an hour, then you need to troubleshoot the problem further. Keep in mind that you must not interrupt System Restore by shutting it down abruptly, it could result in an unbootable system. To get started in troubleshooting the problem, you need to follow each one of the suggestions offered below.

Option 1 – Try to use the Windows Recovery Environment

The first troubleshooting option you need to try is to simply tap the power button for about 10 seconds. This is what you have to do when you have to interrupt System Restore or reset your Windows 10 computer. Tapping the power button for 10 seconds will perform a hard shutdown and once your computer shuts down, restart your computer again and follow the steps below but before you do that, make sure that you have a Windows bootable USB or DVD.
  • First, insert the bootable USB or DVD and boot into it, and select the “Repair your computer” option.
  • Next, once you see the manufacturer logo on your computer, tap the key to enter into Windows Recovery Environment.
  • After that, change the Boot sequence to DVD drive under the UEFI Firmware settings and restart your computer.
  • Once your computer has restarted, select the boot order and make changes accordingly as displayed in the BIOS.

Option 2 – Try to run the Automatic Repair Utility

You might also want to use Automatic Repair in fixing the error. To do so, follow the steps below.
  • You can start by creating and booting from a bootable Windows 10 USB Stick.
  • After that, click on Repair your computer located on the bottom left corner when you are on the initial Windows Startup screen.
  • Next, click on Troubleshoot, and then on the other screen, click the Startup Repair option.
  • Now select the operating system you want to repair. Once you do that, it will start to repair your operating system. Wait until the process is completed and then check if the problem’s now fixed.

Option 3 – Try to run System Restore in Safe Mode

If you can’t boot into your Windows 10 computer, you can try to run System Restore again in the Advanced Startup Options.
  • Boot your computer into Safe Mode.
  • After that, select an option > Troubleshoot > Advanced Options > Startup Settings > Restart.
  • Once your computer has restarted, tap the F6 key to enable Safe Mode with Command Prompt and to run System Restore from there.
  • Now in Command Prompt, type the “rstrui.exe” command to run System Restore in Safe Mode. This will help in fixing the problem since it would be safer to perform System Restore of the computer.
Read More
What to do when you can't format SD card
SD memory cards have surfaced as standard cards for digital cameras and microSD as phone standard memory cards. Most people have and use at least one daily, so naturally copying files and even formatting SD cards is a natural thing to do, but what if you cannot copy files or format SD cards? SD cardsFear not because we had this issue and tried several things in order to overcome the problem and after some time here is a list of what can you do if you are facing this exact issue. The list is written from most simple solutions to more complex ones and it is advisable to follow it as presented. That being said, let's dive into solving the problem.

1. Remove Write Protection on SD card

First and in my experience the most usual thing preventing deleting, copying files, and formating SD card is due to write protection. Take an SD card out of the laptop, camera, or card reader and visually inspect it. On side of almost every SD card, there is a hardware lock switch and mark where it needs to be positioned in order to be locked. Even if the switch is positioned on unlocked state, switch it to locked and then back to unlocked. Sometimes this easy moving of switch can resolve some contact issues and the card will start working normally. Another type of lock that could be turned ON is a software one. If for any kind of reason data protection has been turned ON, you will need to turn it off in order to be able to format an SD card. In order to do this follow this guide:
  1. Press ⊞ WINDOWS + R to open the Run dialog
  2. In run dialog type in diskpart and press ENTER
  3. Once diskpart is opened in command prompt type in: list disk and press ENTER
  4. Locate your SD card and type in select disk x, where x is disk number followed by ENTER
  5. After the SD card is selected type in: attributes disk clear read-only and press ENTER
This process will clear the software lock on the SD card, after following this method try to format the card again, if the problem still exists go to the next solution.

2. Format SD card using Command prompt

Command prompt is a great tool and can perform some commands that are not been able to be completed using file explorer or another tool inside Windows.
  1. In the taskbar search box, search for cmd and select the Command prompt
  2. On the right part select run as administrator
  3. If needed click on YES on UAC prompt
  4. Inside command prompt type in diskpart and press ENTER
  5. type in list disk followed by ENTER
  6. Select your SD card by locating its number in the list and typing select disk X, where is X SD cards number in list and press ENTER
  7. Once SD card is selected type in format fs=ntfs quick and press ENTER
This should format SD card but if for reason even this step is provided as unproductive, go to the next solution.

3. Format your card with the Disk Management tool

  1. Go into the taskbar and search for Disk Management and open it
  2. Select SD card partition that you wish to format
  3. Right-click on the partition and select format
  4. After the format is done, enter the volume label, file system, and allocation unit size. Confirm with OK
  5. Press OK again to confirm the formatting process.
If you have not managed to format your SD card even with this method go to the next solution.

4. Repartition card with Disk part

If all previous solutions have failed there is a chance that the SD card has bad sectors on it. If this is the case that we will need to partition cards in order to isolate bad sectors and use healthy ones.
  1. Press ⊞ WINDOWS + R to open the Run dialog
  2. In run dialog type in diskpart and press ENTER
  3. Once diskpart is opened in command prompt type in: list disk and press ENTER
  4. Locate your SD card and type in select disk x, where x is disk number followed by ENTER
  5. Type in Clean and press ENTER
  6. Type in Create partition primary and press ENTER
  7. To select a new partition type select partition 1 followed by ENTER
  8. Make partition active by typing active and pressing ENTER
  9. Format the drive by typing format fs=ntfs label=SDCard quick followed with ENTER
  10. Assign a letter to drive by typing assign letter=h followed with ENTER
  11. Type exit to close Command prompt followed again by ENTER and open File Explorer to check if the drive is active

5. Try a dedicated SD card formating fool

If anything failed so far, one last thing you could do is to download and try a dedicated SD card formatting tool. One that I would recommend is SD Memory Card Formatter, which is free software make specifically for formatting SD memory cards.
Read More
Recent Items aren't visible under Taskbar
In this post, you will be guided on what to do if the Recent Items are no longer visible in the Taskbar icons in Windows 10. This can be quite inconvenient especially if you work simultaneously on many files and documents together and would require you to visit them regularly to incorporate changes. Thus, if you find that the Recent items are not visible in the Windows Taskbar, read on. In order for the Recent Items to appear on the taskbar icons in Windows 10 again, there are four potential fixes you can check out. You can try to show the recently opened items via Settings or clear the cache of the recent items. You could also make some changes in the Windows Registry or use the Group Policy Editor. But before you proceed with these potential fixes, it’s best if you create a System Restore Point first just in case something goes wrong after you made changes in the system. The System Restore Point allows you to undo these changes and bring back the previous state of your computer. Thus, you need to create one and then carefully follow the given options below.

Option 1 – Show the recently opened items via Settings

The first thing you can do to fix the problem is to show the recently opened items through the Settings app.
  • Open the Settings app and select Personalization.
  • From there, select the Start option and scroll down until you see the “Show recently opened items in Jump Lists on Start or the taskbar” option.
  • Make sure that its toggle button is turned on.

Option 2 – Try to clear the Recent Items cache

  • Tap the Win + E keys to open File Explorer.
  • Next, copy and paste this link on the address bar: %AppData%Microsoftwindowsrecentautomaticdestinations
  • Once you’re in the given location, you should see multiple files. Now select all these files and completely delete them.
Note: These files are automatically recreated when you interact with the system like performing tasks such as opening apps or accessing files.
  • After that, go to this next location: %AppData%Microsoftwindowsrecentcustomdestinations
  • Once there, delete all of its files and restart your computer. This should resolve the problem.

Option 3 – Try making changes via Registry Editor

The next thing you can do to fix the problem is to apply some tweaks in the Registry by following these steps:
  • Tap the Win + R keys to open the Run dialog box and type “Regedit” in the field and hit Enter to open the Registry Editor.
  • Next, navigate to this registry sub-path: HKEY_CURRENT_USERSoftwareMicrosoftWindowsCurrentVersion
  • From there, select the Policies Explorer folder located in the left pane.
  • Then move to the right pane and look for the “NoRecentDocsHistory” entry and right-click on it.
  • Now delete this entry.
Note: This entry is the one that stores the Group Policy setting for “Do not keep the history of recently opened documents. The Group Policy adds this entry to the registry with a value of 1 if you enable the “Do not keep the history of recently opened documents” policy. On the other hand, if you disable the policy by setting it to “Not configured” or deleting it, the Group Policy will delete the entry from the registry, and the system will act as though the value is 0 – for instance, it keeps the history of the recently opened files in your computer.

Option 4 – Try to use the Group Policy Editor

  • Tap the Win + R keys to open the Run utility and type “gpedit.msc” in the field and tap Enter to launch the Group Policy Editor.
  • Next, navigate to User Configuration > Administrative Templates > Start Menu and Taskbar.
  • Afterward, double click on the “Do not keep a history of recently opened documents” policy located on the right panel. This is the policy that lets you enable or disable recent items and frequent places.
  • Now to enable the recent items, as well as the frequent places, feature, click on the “Disabled” or the “Not Configured” option.
  • Once you’re done, close the Group Policy Editor and restart your PC.
Note: If you choose to enable this setting, the system and Windows programs will not create shortcuts to documents opened while the setting is in effect. Aside from that, they also stay but won’t display the existing document shortcuts and the system will empty the Recent Items menu on the Start menu and the Windows programs won’t also display shortcuts in the Start Menu. In addition, the Taskbar won’t also show the recently opened or frequently used folders, files, or websites.
Read More
Personalize Windows 11 Start menu
Windows 11 is released and its adoption goes slower than Microsoft would like but nevertheless, it is slowly getting adopted, especially among new computers. Windows 11 has brought us a new modern look of OS but if you would like to personalize it a little more you can. Follow the guide on various things that you can change inside Windows 11.

windows 11 desktop iconsPersonalize list of recently added apps, opened items, folders

The recommended section that shows recently added apps and recently open items can be turned off and hidden now to be shown. In order to do this follow these steps:
  1. Open Windows Settings by pressing WINDOWS + I
  2. Click on personalization in the sidebar
  3. Click on START and go through the options
  4. Turn OFF switch beside recently accessed files
  5. Additionally, you can also change which folders appear on the Start menu.

Remove apps or change app order on the Start Menu

To remove application not to be shown in the Start menu at all follow this simple guide:
  1. Right-click on app
  2. Choose unpin
  3. To place the application on Start click on All Apps, right-click on the app and choose Pin to Start
  4. To drag and rearrange apps, simply click on them and drag them to the new place.

Change the Start Menu location

When Windows 11 was first released Start Menu could only be located in the middle of the screen but thanks to plenty of backlash from users now it is possible to move it on a more traditional left side.
  1. Press WINDOWS + I to open the settings app
  2. Click on Personalization
  3. Look for taskbar behaviors
  4. Inside taskbar behaviors look for Taskbar alignment
  5. Change alignment to left

Change the Start Menu color

In order to change the color of the Start Menu follow the next steps:
  1. Open Settings app
  2. Go to personalization settings
  3. Go to Colors
  4. Switch to custom
  5. Under accent color pick a color you like or make your custom one.
Read More
a New browser from DuckDuckGo is coming
DuckGoGo a popular private search engine is releasing its first browser soon that is focused on privacy like its search engine. duckduckgo browser
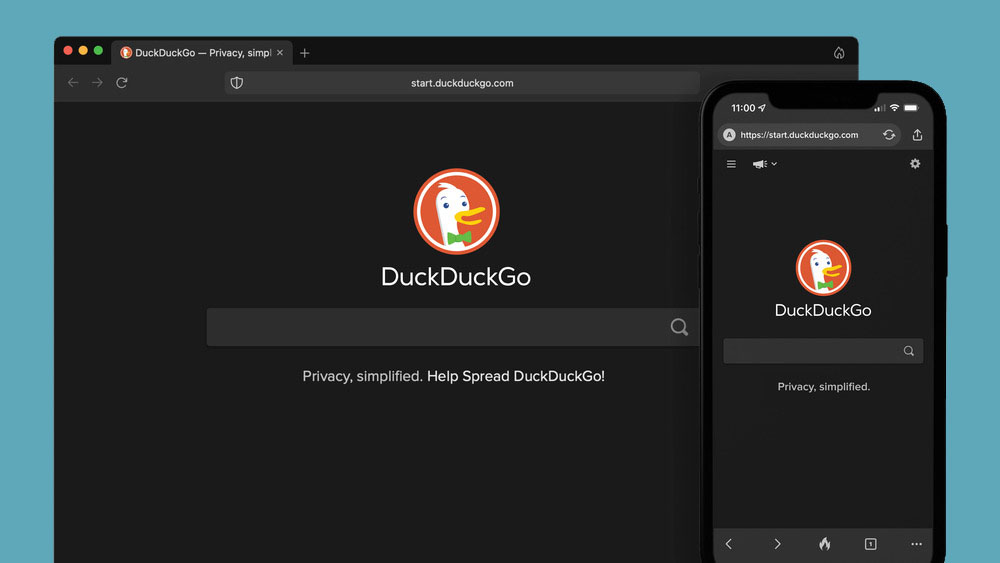
From the recent blog, Gabriel Weinberg, CEO of DuckDuckGo, has stated:
“Like we’ve done on mobile, DuckDuckGo for desktop will redefine user expectations of everyday online privacy,”
From everything that we have learned so far, the browser will be focused on making privacy super easy and simple, eliminating tons of different settings about privacy, and making the whole environment robust privacy protection all set by default. Settings will be applied in all fields, across search, browsing, email, and more. Gabriel also said that aim of the browser is not just a privacy browser, it is meant to be built and used as your everyday browser, for everyday use that protects your privacy as a bonus. One interesting thing that was stated is that browser itself is built upon OS-provided rendering engines instead of typical Chromium. DuckDuckGo says this approach will strip away a lot of the unnecessary cruft and clutter that's accumulated over the years in major browsers. Also, the company stated that when compared to Chrome, the DuckDuckGo app desktop is cleaner, way more private and that early tests have found out that it is significantly faster as well. Is this just corporate advertising or reality? We will see once the browser is released, or once it is released for public testing. Until then take care and happy holidays.
Read More
Fix Windows Update Error 0x80070652
If you encounter a Windows Update error with an error code 0x80070652 and an error message saying, “ERROR_INSTALL_ALREADY_RUNNING”, then it indicates that there was a previous Windows Update that was not installed successfully. This kind of Windows Update error typically happens when it gets stuck and so to resolve it, here are some suggestions that might help.

Option 1 – Restart your computer and try installing the Updates again

You can restart your computer and then try installing the updates once again. There are instances when a simple restart resolves Windows Update errors. Thus, after you restart your computer, check for updates once again and see if you’re still getting the error or not.

Option 2 – Try running the Windows Update troubleshooter

You might also want to run the Windows Update Troubleshooter as it could also help in fixing Windows Update error code 0x80070652. To run it, go to Settings and then select Troubleshoot from the options. From there, click on Windows Update and then click the “Run the troubleshooter” button. After that, follow the next on-screen instructions and you should be good to go.

Option 3 – Try downloading the Windows Update that failed

If the Windows Update that has failed is not a feature update and only a cumulative update, you can download the Windows Update and install it manually. But first, you need to find out which update has failed, and to do so, refer to the following steps:
  • Go to Settings and from there go to Update and Security > View Update History.
  • Next, check which particular update has failed. Note that Updates that have failed to install will be displayed under the Status column which has a label of “Failed”.
  • After that, go to the Microsoft Download Center and look for that update using its KB number and once you find it, download and then install it manually.
Note: You can also use the Microsoft Update Catalog, a service from Microsoft that provides a list of software updates that can be distributed over a corporate network. With the help of this service, it can be easier for you to find Microsoft software updates, drivers as well as fixes.

Option 4 – Try to restart the Background Intelligent Transfer Service

The Background Intelligent Transfer Service or BITS is a part of the Windows Update service and is the one that manages the background download of Windows Update, as well as scans for new updates and so on. And if Windows Update is experiencing some problems, you can try restarting BITS but make sure that you have admin privileges to do so.
  • Tap the Win + R keys to open the Run dialog box.
  • Next, type “services.msc” in the field and hit Enter to open Windows Services.
  • From the list of Services, look for the Background Intelligent Transfer Service and double-click on it to open Properties.
  • After that, you need to set the Startup type to “Automatic (Delayed Start) and click on Apply.
  • Now click the Stop button to stop BITS and then click the Start button to restart the service.
  • Click OK to save the changes made and then restart your PC.

Option 5 – Try to update Windows after a couple of minutes or an hour

There are times when the issue is from Microsoft’s end. It could be that there’s some issue with Microsoft’s server so it would be better if you give it a couple of minutes or an hour or so before trying to run Windows Update again.
Read More
1 2 3 162
Logo
Copyright © 2022, ErrorTools. All Rights Reserved
Trademarks: Microsoft Windows logos are registered trademarks of Microsoft. Disclaimer: ErrorTools.com is not affiliated with Microsoft, nor claim direct affiliation.
The information on this page is provided for information purposes only.
DMCA.com Protection Status