Fix Update components must be repaired

Recently, a lot of users reported having an issue with Windows Update. According to these users, they got an error message saying, “Windows Update components must be repaired” after they run the Windows Update troubleshooter. So if you are also facing this issue then you’ve come to the right place as this post will guide you in fixing this problem.

There are various suggestions you can check out to fix this problem – you can try running the Windows Update troubleshooter again but this time, in a Clean Boot State or you could also run System File Checker or the DISM tool to repair corrupted Windows Update files or reset the Windows Update components. For more information, refer to the given options below.

Option 1 – Run the Windows Update troubleshooter in a Clean Boot State

Repairing the “Windows Update components must be repaired” error is not that complicated. One of the things you can try is to run the Windows Update troubleshooter again but this time, in a Clean Boot State. Refer to the steps below to get started.

  • Log onto your PC as an administrator.
  • Type in MSConfig in the Start Search to open the System Configuration utility.
  • From there, go to the General tab and click “Selective startup”.
  • Clear the “Load Startup items” check box and make sure that the “Load System Services” and “Use Original boot configuration” options are checked.
  • Next, click the Services tab and select the “Hide All Microsoft Services” check box.
  • Click Disable all.
  • Click on Apply/OK and restart your PC. (This will put your PC into a Clean Boot State. And configure Windows to use the usual startup, just simply undo the changes.)
  • Now try to run the Windows Update troubleshooter again and see if the error is fixed or not.

Option 2 – Try to run System File Checker

If the Windows Update troubleshooter still failed to fix the problem, you can run System File Checker instead. It is a built-in command utility that helps in restoring corrupted files as well as missing files. It replaces bad and corrupted system files with good system files. To run the SFC command, follow the steps given below.

  • Tap Win + R to launch Run.
  • Type in cmd in the field and tap Enter.
  • After opening Command Prompt, type in sfc /scannow

The command will start a system scan which will take a few whiles before it finishes. Once it’s done, you could get the following results:

  1. Windows Resource Protection did not find any integrity violations.
  2. Windows Resource Protection found corrupt files and successfully repaired them.
  3. Windows Resource Protection found corrupt files but was unable to fix some of them.

Option 3 – Run the DISM tool

Running the DISM Tool helps in repairing the Windows System Image as well as the Windows Component Store in Windows 10. Using this built-in tool, you have various options such as the “/ScanHealth”, “/CheckHealth”, and “/RestoreHealth”.

  • Open the Command Prompt with admin privileges.
  • Then type in the following commands and make sure to hit Enter right after you type each one of them:
    • Dism /Online /Cleanup-Image /CheckHealth
    • Dism /Online /Cleanup-Image /ScanHealth
    • exe /Online /Cleanup-image /Restorehealth
  • Do not close the window if the process takes a while as it will probably take a few minutes to finish.

Note: If it happens that the Windows Update client is broken, you need to run the following command to repair it then restart your PC and click on Update once again.

DISM.exe /Online /Cleanup-Image /RestoreHealth /Source:C:RepairSourceWindows /LimitAccess

Option 4 – Delete the contents in the Software Distribution folder and Catroot2 folder

You can also delete the contents in both the Software Distribution and Catroot2 folders as it could potentially fix the “Windows Update components must be repaired” error.

  • Open the WinX Menu.
  • From there, open Command Prompt as admin.
  • Then type in the following command – don’t forget to hit Enter right after typing each one of them.

net stop wuauserv

net start cryptSvc

net start bits

net start msiserver

  • After entering these commands, it will stop the Windows Update Service, Background Intelligent Transfer Service (BITS), Cryptographic, and the MSI Installer
  • Next, go to the C:/Windows/SoftwareDistribution folder and get rid of all the folders and files thereby tapping the Ctrl + A keys to select them all and then click on Delete. Note that if the files are in use, you won’t be able to delete them.

After resetting the SoftwareDistribution folder, you need to reset the Catroot2 folder to restart the services you just stopped. To do that, follow these steps:

  • Type each one of the following commands.

net start wuauserv

net start cryptSvc

net start bits

net start msiserver

  • After that, exit Command Prompt and restart your computer, and then try to run Windows Update once more.
If you like to learn and find out more about various Windows errors, and how to repair them go to our vast archive or use search to find articles that will explain and help you in solving your issue.
However, if you prefer to do things fast and with automatization then we are proposing to use an automated solution for your issues. The application that we are recommending is Advanced System Repair Pro
Advanced System Repair utilizes multiple tools all in one to give you a quick, simple, reliable, and very thorough diagnosis of your PC. It brings you all the tools you need in one program to clean, fix, protect, optimize and boost your PC!
1-Click Maintenance
All the tools to make it simple and easy! It's like having a professional technician at the click of a mouse.

Junk Cleaner
Keeping your computer free from unnecessary clutter also helps make your computer last longer. Like any other machine, if you keep it clean and take care of it, it will serve you better for longer!

Optimize background apps
Optimize applications background activity with the built-in Application Optimizer feature.

Disk Defrag
With a simple 1-click, Advanced System Repair speeds up your PC by assembling fragmented files on your machine and organizing them more efficiently.

Malware Removal
Finds and removes all types of harmful malware including trojans, worms, bots, adware, spyware, PUPs, and more!

Privacy Cleaner
The all-in-one privacy suite to Clean Your Tracks & Protect Your Privacy! Make your computer safe, secure, and more efficient!

System Tweak/Optimizer
ASR will analyze your complete system and settings to adjust your PC to function at its maximum performance.

Registry Cleaner
Over time, as you install and uninstall applications, the registry can become cluttered with old entries and broken settings which can result in program crashes, and annoying messages and slow the computer down.
Visit our Advanced System Repair Pro Download page to inform yourself about all the benefits of this software and get a free trial copy of it.
advanced system repair pro

Advanced System Repair Pro

One-click automated PC repair solution
ASR logo
With Advanced System Repair Pro you can easily
Replace damaged files
Restore performance
Free disk space
Remove Malware
Protects WEB browser
Remove Viruses
Stop PC freezing
DOWNLOAD
Privacy Policy | Terms of Use | Uinstall
Advanced System Repair Pro is compatible with all versions of Microsoft Windows including Windows 11

Share this article:

You might also like

Windows Photo Viewer can’t display picture
There are instances when you open a picture or an image in the Windows Photo Viewer and instead of displaying the image, it displays nothing and you’ll see an error message instead that says, “Windows Photo Viewer can’t display this picture because there might not be enough memory available on your computer”. Although this may look like a clear-cut issue of less storage space or low RAM in your computer, that’s not always the case. Security experts noticed that even when your computer has enough resources and disk space, this kind of problem could still occur. So if you experience the same thing, you need to check the Color Profile of your screen. For more information, refer to the detailed instructions provided below but before you proceed, make sure that you close some processes in the Task Manager or restart your computer and see if it helps in fixing the problem. You can also try using the Disk Cleanup tool. To use it, refer to these steps:
  • Tap the Win + R keys to open the Run dialog box and then type “cleanmgr” in the field and hit Enter to open the Disk Cleanup window.
  • After that, select the drive you want to clean.
  • Now click OK to clean the disk and restart your computer.
If the Disk Cleanup tool didn’t help in resolving the issue, refer to the instructions below. Step 1: In the search box, type “color management” and then select the “Change advanced color management settings for display” option from the search results. Or you could simply go to Settings > System > Display, Advanced display settings, and from there, select display and click on the Display adapter properties of Display. Step 2: Next, switch to the Color Management tab and click on the Color Management button. Step 3: Select the monitor where you’re getting the “Windows Photo Viewer can’t display this picture because there might not be enough memory available on your computer” error in the next window. And if you have two displays, make sure that you select the primary display. You also have an option to identify the monitor. Step 4: Once confirmed, select the “Use my settings for this device” checkbox. Step 5: After that, select the Profile listed under the “Profiles associated with this device” option and then click on Remove. Step 6: Next, go to the Advanced tab and make sure that all settings are set to System default which includes a device profile, perceptual images, rendering intent, Relative Colorimetric, and many more. Step 7: Once you’re done, you have to restart your computer and then try to open the same image you were trying to open earlier and then check if you can now open it instead of seeing the error.
Read More
Epic games and many more coming in Win store
Microsoft store is ready and prepared for Windows 11 official release on October 5th and it is coming with some surprises. Windows store
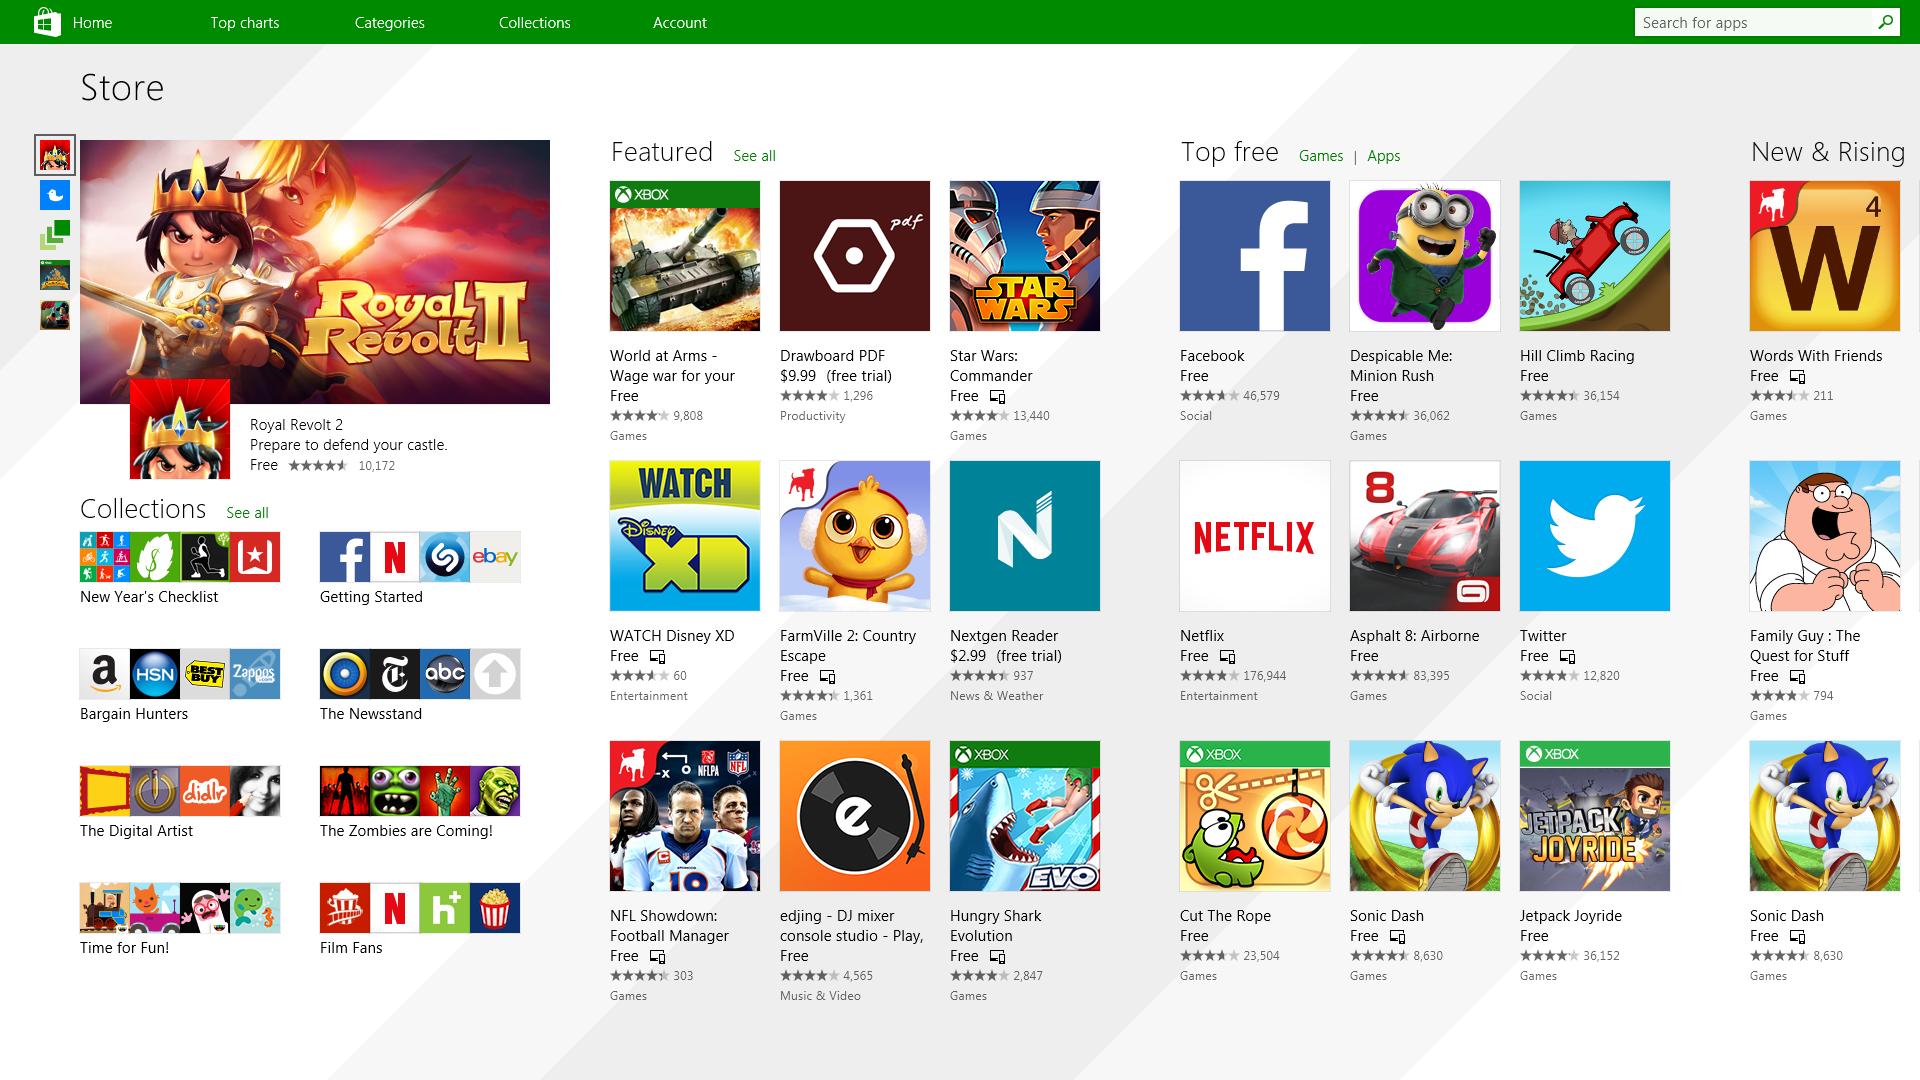
It has officially confirmed that many open source and free applications will be in it like Opera, VLC, discord, Libre office, etc. It seems that Microsoft wants to place its store as one place to go for all of your software needs. Another great surprise is the coming of Epic games store implementation. It was officially confirmed but not explained in detail, will we have Epic store opened in Windows store or we will only get installer as a package we will see but this is some great news. As for how it states now, it seems that the Windows store aims to eliminate searching the web for applications and bring them all into one environment with reviews and ratings so you know which one to install and use. It also features a great search engine to find proper applications for your needs. The new store will come to Windows 10 as well but after all Windows 11 has been mostly released and adopted. So expect it via update in two or three months' time. It would be great if some larger companies decide to join MS stores like Autodesk, Adobe, the Foundry, etc so you can install everything you need from it but one can only hope.
Read More
Yellow triangle with exclamation on Battery
Seeing a yellow triangle with an exclamation mark on the battery symbol on the System Tray of your Windows 10 laptop is not really uncommon especially if your battery is about to run out of power. However, if you just purchased your laptop recently and the first thing you’ve noticed when you first opened it is the yellow triangle with an exclamation mark in the battery, read on as this post will help you resolve this issue. Seeing this kind of icon on your computer does not necessarily mean that you have to replace your battery as there are still several potential fixes you can try to resolve the problem. So if you notice this icon, you can try running the Power troubleshooter as it will help you resolve any potential issues with the battery. Aside from that, you can also restore the default settings of the power plan manually or uninstall and reinstall the battery driver. For more information, refer to the given options below.

Option 1 – Try to run the Power troubleshooter

As pointed out, the Power troubleshooter can help you resolve any issues your battery might have automatically. It plans and detects system settings that can affect power usages like timeout and sleep settings, display settings, and screensavers and restores them to their default settings. To run this troubleshooter, follow these steps:
  • Open the Windows Settings and go to the Update and Security option.
  • Next, click on the Troubleshoot option under Update and Security and then scroll down until you see the “Power” option.
  • Under Power, click on the “Run the troubleshooter” button to start running the Power troubleshooter.
  • Wait for a couple of seconds until the Power troubleshooter is done scanning your computer for issues. Once it’s done, follow the next on-screen instructions that appear on the screen.
  • If needed, restart your computer and see if it has fixed the problem.

Option 2 – Restore the default settings of the Power plan manually

  • Open the Windows Settings again and select System.
  • Next, scroll down until you see the “Power & sleep” option.
  • After that, click on the “Additional power settings” option located in the right pane to open the Power Options.
  • Now click on the link that says, “Change Plan Settings” and select the “Restore default settings for this plan” option.

Option 3 – Try to uninstall or reinstall the Battery driver

You might also want to uninstall or reinstall the battery driver as it can also resolve the problem. But before you start, you have to shut down your computer and remove the power chord as well as the battery. Once you’re done, follow these steps:
  • Plug the power chord and restart your computer.
  • Once your computer has restarted, tap the Win + R keys to open the Run utility and type “devmgmt.msc” in the field and tap Enter to open the Device Manager.
  • After that, look for the “Batteries” driver from the list of drivers and expand it.
  • Then right-click on the “Microsoft ACPI-Compliant System” driver and click on the “Uninstall device” option.
  • Once it’s done, restart shut down your computer and remove the power chord and then attach the battery.
  • Now attach the power chord again and restart your computer to automatically install the driver.
Read More
Find out bottlenecks in your PC easily
Building a custom PC is a great feeling but it can sometimes not be ideal and we are not talking about breaking or losing parts. What we mean is that choosing the right components can be sometimes a difficult task. Of course, picking a PC case can have its issues, choosing the right power supply can be tricky but pairing all components together, especially CPU and GPU can be tricky. bottlenecks
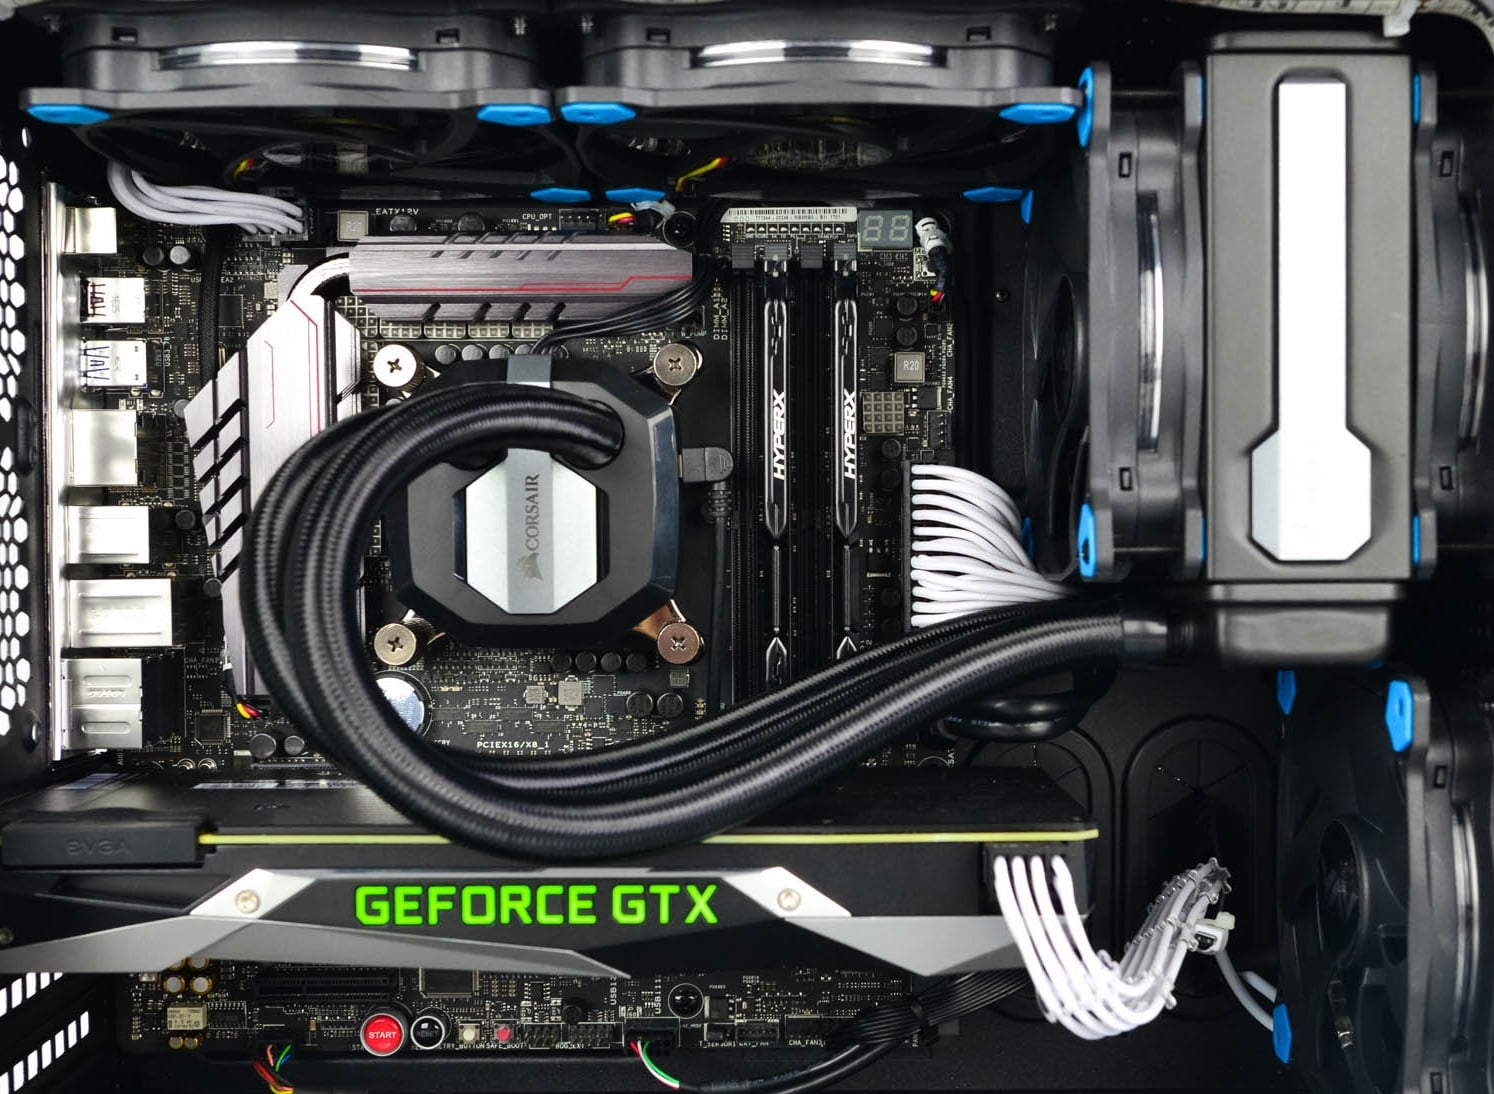
Builders with no depth knowledge and experience can sometimes choose improper CPU or GPU, picking one of them to be much more powerful than another thus not using it to its full potential because another component cannot handle stuff at the same speed. In order to not be trumped by this kind of stuff, there is a website that is completely free and you do not even need to be registered in order to use it. Bottlenet calculator link here What is even better, once you input your components you will get advice on what to change in order to tweak the system a little more to avoid bottlenecks even more. It is a very useful tool and we are advising you to use it in order to save money but not throwing it on some component that will be half used.
Read More
How to Fix DLL Errors in Windows?
A general rule of thumb, which is followed by most users, is to download the specific missing DLL file and place it within the software’s installation directory. However, this can be harmful to your system as hackers often upload popular malicious DLL files to target systems. Thus, you should avoid downloading DLLs from the internet. And follow these steps to fix the DLL error:
  • Restart your computer
  • Recover the .DLL file using the RESTORO; it helps to recover lost data
  • System restore to an earlier state
  • Run a malware/virus scan
  • Update all the hardware drivers
  • Running SFC /scannow command in command prompt
  • Then do as the error suggests, reinstall the program if it’s feasible. Game files can take several hours to install and therefore, reinstallation can be a cumbersome job. Also, frustrating if the error appears after reinstallation.
  • Update device drivers manually, such as graphics drivers, DirectX software if you see DLL missing error while running game
Read More
Solution for Error 0x000000d1

What Is 0x000000D1 Error?

Error code 0x000000D1 is a serious error that is displayed when Windows automatically shuts down to protect the system against further damage.

Usually, when this error occurs, the message displayed to the users states something like STOP 0x000000D1 DRIVER_IRQL_NOT_LESS_OR_EQUAL.

Solution

Restoro box imageWhat Causes 0x000000D1 Error?

Usually, the STOP 0x000000D1 error code is caused by issues like incompatibilities, third-party drivers, driver conflicts, outdated drivers, malicious drivers, and other related problems.

Speaking technically, the message displayed to the user actually means that the kernel-mode driver has tried to gain access to memory at an unreasonably high process IRQL.

If left unfixed, STOP 0x000000D1 error can become quite serious. Increased frequency of occurrence may not only lead to data loss but can cause system corruption as well. That’s why it is crucial to fix it and to resolve the underlying issues causing it as soon as possible.

Further Information and Manual Repair

There are different ways of quickly fixing this error, some of which are briefly listed below as follows.
  • The solution advised for advanced users is to start the system and log on to it as the administrator. Then do to Start button. Click on All Programs -> Accessories-> System Tools->  System Restore. Here you will find the option, “Restore my computer to an earlier time”. Click on it and select ‘Next’. A list of restore points will appear in front of you. Select the latest restore point and then click on ‘Next’. The confirmation window will appear again. Click on the Next button again. Restart your computer. Congratulations, you have successfully restored your computer.
  • Another way that’s more suitable for novice users goes as follows. Download a repair utility tool. Now install the program. You are most likely to come across a Scan button. Once that happens, choose the Fix/Repair button. Your scan will be completed. The error will be removed. You can then restart your computer again to ensure the error is no longer displayed.
Some other suggestions to keep your computer from encountering these problems in the future are outlined below.
  • Update all your drivers. Obsolete or old hardware or software drivers may also trigger this STOP 0x000000D1 error.
  • If you have recently installed or modified a driver or hardware and the error has occurred afterward, it is highly likely that the installation or modification has caused it. Revert back to the original settings to steer clear of this driver in the future.
Read More
Remove Task View button from Windows 11
Task ViewTask View feature inside Windows 11 is actually a great feature, letting you quickly view open windows and virtual desktops. How Task view itself could be reached with keyboard shortcut combination of ⊞ WINDOWS + TAB some users will prefer this way of using it and thus button on the taskbar is something you do not want or need. There is a very easy way to remove mentioned button and I will show you how to do it. Right-click the taskbar button itself and click on Hide From Taskbar. That’s it, you have done it. Now in order for you to bring it back if you change your mind, you will have to do some extra steps but it is nothing difficult. Right-click on the taskbar and click on Taskbar settings, you will be lead to Personalization > Taskbar. Inside locate Taskbar Items and switch Task View to ON, you will see the Task View button right away showing itself again.
Read More
Can the Adobe.Dll Error Be Fixed?

Fix Adobe.Dll Error

What Exactly Is Adobe.Dll?

Adobe.DLL is one of the numerous Dll files you are going to encounter on your Personal Computer. This isn't a system-established service and is usually the consequence of the sort of applications you install on your own Personal Computer. Because adobe.dll is a low-program process, in the event that you find it present on your pc, you can easily end it. It isn't required for the normal working of your OS but might trigger permanent harm if left unchecked. Don't forget that the Computer uses the AdobePDF.dll file for assorted tasks, and you need to make sure it's installed correctly.

Solution

Restoro box imageError Causes

When the adobe.dll is left un-fixed, you may shortly have to deal with sluggishness on your Computer. Simply put, this impedes the standard and amount of work you do while using your PC and impacts your productivity. Sometimes, adobe.dll happens because your computer experiences an overload. As a result, while resolving the malfunction, you've got to look for methods of decreasing the system overload. It's possible that lots of processes are functioning on your PC concurrently. Quit these processes. Lousy setup of the adobe.dll file causes this error too. Check and fix the files and settings that Adobe.Dll requires to run and you may not have to content with these error anymore.

Further Information and Manual Repair

Even though the adobe.dll may severely influence the functioning of your Computer, it is really a trouble or malfunction that one can fix manually.
  • Permanently Un-Installing the Adobe.dll Component is one of the better methods for repairing the malfunction.
Yes, you are able to completely eliminate the adobe.dll issue. The thing you really need to do is un-install it from your own computer fully, and for good.
  • Quit the many processes operating on your Computer and you may get rid of the adobe.dll malfunction.
Adobe.dll regularly happens due to system overload. Thus, the first thing you need to assess is if several processes are operating on the device. If they're, search for methods to stop them, and you'll not have to worry about the adobe.dll error anymore.
  • Utilize Microsoft System Configuration Utility
The MS System-Configuration Utility will settle the system overload problem, thus freeing up space for your programs to run smoothly and possibly avoid malfunctions, including adobe.dll. The Microsoft System-Configuration Utility manually locates and eliminates all running processes.
  • Perform Scans On Your Computer
Running scans on your own Computer may enhance or increase its operation. This technique may also aid in examining your Computer for adobe.dll, or such associated malfunctions, and resolve them forever.
  • Repair Adobe.Dll Files and Settings' Errors.
Considering that the adobe.dll malfunctions can be a result of the existence of malfunctions on your own PC's files and options, fix these properly. Begin by fixing the settings on the files and options utilized by your Computer to perform the adobe.dll, and you may have removed this issue completely. Finally, establish the source of the error message to effectively solve it. Once you do that and fix it, your PC will resume normal operations and even boost your work and productivity.
Read More
0x80071771, The specified file could not ...
If you are tried encrypting or decrypting a file using the default EFS engine but you receive an error message instead saying, “Error Applying Attributes, An error occurred applying attributes to the file: The specified file could not be decrypted”, read on as this post will help you sort out the problem. If you encounter this error you can use the error code in it. You will most likely get error code 0x80071771. This kind of error occurs when the File Explorer’s copy and paste feature was not able to read the source file being encrypted or decrypted. It could also occur if you try to access a file that has been on another computer previously.

To fix error code 0x80071771 when decrypting or encrypting a file, refer to the instructions provided below.

Step 1: You need to check first if you can decrypt the files encrypted by EFS. However, if you can’t, just proceed and then take full control of the file. Step 2: To take control of the file, open File Explorer and right-click on the partition, and then click on Properties. Step 3: After that, click on the Edit button under the Security tab. Step 4: Next, make sure that “Everyone” is selected under the Group or user names section. Step 5: Afterwards, the Permissions for Everyone section will be activated. Just make sure that all the checkboxes for Allow are checked and then click on the Apply button. Step 6: Once you’re done, click on the Advanced button. This will open a new window labeled Advanced Security Settings. From there, click on the Change link under the Owner section. Step 7: Now type your account name in the field and click on Check Names to verify the account name and click OK. Step 8: After that, select the “Replace owner on sub-containers and objects” option and then click OK. Step 9: Next, select Administrators in the Group or User names list and select Full Control in the Permissions for Administrators panel and click OK.
Read More
How to Fix Dxgkrnl.sys Error Code

Repair Dxgkrnl.sys Error Code

Dxgkrnl.sys Error - What is it?

To understand Dxgkrnl.sys error code, it is important to develop an understanding about Dxgkrnl.sys file. Dxgkrnl.sys is a type of system file associated with Windows 8 Consumer Preview ISO images that are developed by Microsoft for the Windows OS. System files like Dxgkrnl.sys are third-party device drivers, critical system files. These files enable attached PC hardware such as a printer to communicate with 3rd party software programs like web browsers and Windows 8 Consumer Preview ISO images. Dxgkrnl.sys error code is a blue screen of death error. It occurs when the Dxgkrnl.sys files are unable to function properly. This is a critical error. It can cause system failure, crash, and data loss. Therefore, it must be resolved immediately before the damage is done. The error may pop up in any one of the following formats
"STOP 0×00000050: PAGE_FAULT_IN_NONPAGED_AREA – dxgkrnl.sys"
A problem has been detected and Windows has been shut down to prevent damage to your computer. The problem seems to be caused by the following file: Dxgkrnl.sys."
"STOP 0x0000000A: IRQL_NOT_LESS_EQUAL – dxgkrnl.sys"
"Your PC ran into a problem and needs to restart. We’re just collecting some info, and then we’ll restart for you. If you would like to know more, you can search online later for this error: dxgkrnl.sys."
"STOP 0x0000001E: KMODE_EXCEPTION_NOT_HANDLED – dxgkrnl.sys"
Some of the common symptoms of this error code include
  • Blue screen
  • System freeze
  • And sudden shutdown

Solution

Restoro box imageError Causes

Dxgkrnl.sys error code may be triggered due to several reasons. These include:
  • Incorrectly configured or corrupted Windows 8 Consumer Preview ISO images device drivers
  • Windows registry issues
  • Malware infection
  • Hardware conflict
  • Damaged hard disk

Further Information and Manual Repair

To resolve Dxgkrnl.sys error code on your PC, here are some effective and easy DIY methods that you can try:

Method 1 - Scan and Remove Viruses

Dxgkrnl.sys error may occur due to malware and viral infection. If this is the cause, then it is advisable to download a powerful antivirus and scan your entire PC. Remove all viruses from your system to resolve the error.

Method 2 - Utilize Windows System Restore to Undo Recent System Changes

Windows System Restore is an in-built powerful tool that enables Windows Operating System users to restore previous your PC to its former state. To repair Dxgkrnl.sys error, use this tool. It can help you avoid hours of troubleshooting headaches associated with SYS errors. To get started, simply go to the start menu, type System Restore in the search box and press Enter. Now click on System Restore to proceed. If you are prompted for an administrator password, insert it to move to the next step. Now to bring your computer to its former state, simply choose a restore point. To activate these changes, reboot the PC. This is most likely to resolve the issue.

Method 3 - Clean the Registry

The registry is a collection of databases. It stores much of the information and activities you perform on your system including unnecessary and obsolete files like junk files, cookies, internet history, bad and invalid registry entries. These files accumulate in the registry and damages and corrupt the registry itself. Due to this runtime and BSoD errors are triggered. To repair and clean the registry manually can be time consuming and technical, therefore it is advisable to download Restoro. This is a user-friendly PC Fixer embedded with a powerful registry cleaner. The registry cleaner scans your entire PC, wipes out all bad entries, cookies and unnecessary files, cleans the registry and repairs the damaged system files in seconds. Click here to download Restoro and resolve Dxgkrnl.sys error today!
Read More
1 2 3 162
Logo
Copyright © 2022, ErrorTools. All Rights Reserved
Trademarks: Microsoft Windows logos are registered trademarks of Microsoft. Disclaimer: ErrorTools.com is not affiliated with Microsoft, nor claim direct affiliation.
The information on this page is provided for information purposes only.
DMCA.com Protection Status