Fix Sandbox failed to start, 0x80070057

As you already know, the Windows Sandbox is one of the new features in Windows 10. However, just like other new features, it also throws up errors and one of them is the error that states,

“Windows Sandbox failed to start, Error 0x80070057, The parameter is incorrect”.

This particular error in Windows Sandbox occurs due to its dependence on numerous components of Windows 10 that are related to Hyper-V and Virtualization mainly.

To fix this error, there are several options you can check out. You can try to install any pending updates on your Windows 10 computer, as well as make sure that all the services related to Windows Sandbox are enabled.

Option 1 – Try to run the Windows Updates to install pending updates

The first thing you can do to resolve the “Windows Sandbox failed to start, Error 0x80070057” is to check Windows Updates in your computer and see if there are any pending Windows Updates you have to install. All you have to do is go to the Windows 10 Settings app and then go to the Windows Updates section and click on the “Check for updates” button to check if there are any pending updates that are needed to be installed. This could fix the Windows Sandbox error.

Option 2 – Ensure that all the supporting processes and services are running properly

If running Windows Sandbox as an administrator didn’t fix the error, you have to ensure that all related processes for Windows Sandbox are running properly. To do that, follow these steps:

  • Tap the Win + R keys to launch the Run utility and type “services.msc” in the field and hit Enter to open the Windows Services Manager.
  • Next, from the list of services, look for the following services in the given order:
    • Network Virtualization Service
    • Virtual Disk
    • Hyper – V Virtual Machine
    • Hyper – V Host Computer Service
    • Container Manager Services
  • After you find the aforementioned services, make sure to check if they are enabled or not and then restart each one of them.
  • Once done, try to open the Windows Sandbox again and see if the error is fixed or not.
If you like to learn and find out more about various Windows errors, and how to repair them go to our vast archive or use search to find articles that will explain and help you in solving your issue.
However, if you prefer to do things fast and with automatization then we are proposing to use an automated solution for your issues. The application that we are recommending is Advanced System Repair Pro
Advanced System Repair utilizes multiple tools all in one to give you a quick, simple, reliable, and very thorough diagnosis of your PC. It brings you all the tools you need in one program to clean, fix, protect, optimize and boost your PC!
1-Click Maintenance
All the tools to make it simple and easy! It's like having a professional technician at the click of a mouse.

Junk Cleaner
Keeping your computer free from unnecessary clutter also helps make your computer last longer. Like any other machine, if you keep it clean and take care of it, it will serve you better for longer!

Optimize background apps
Optimize applications background activity with the built-in Application Optimizer feature.

Disk Defrag
With a simple 1-click, Advanced System Repair speeds up your PC by assembling fragmented files on your machine and organizing them more efficiently.

Malware Removal
Finds and removes all types of harmful malware including trojans, worms, bots, adware, spyware, PUPs, and more!

Privacy Cleaner
The all-in-one privacy suite to Clean Your Tracks & Protect Your Privacy! Make your computer safe, secure, and more efficient!

System Tweak/Optimizer
ASR will analyze your complete system and settings to adjust your PC to function at its maximum performance.

Registry Cleaner
Over time, as you install and uninstall applications, the registry can become cluttered with old entries and broken settings which can result in program crashes, and annoying messages and slow the computer down.
Visit our Advanced System Repair Pro Download page to inform yourself about all the benefits of this software and get a free trial copy of it.
advanced system repair pro

Advanced System Repair Pro

One-click automated PC repair solution
ASR logo
With Advanced System Repair Pro you can easily
Replace damaged files
Restore performance
Free disk space
Remove Malware
Protects WEB browser
Remove Viruses
Stop PC freezing
DOWNLOAD
Privacy Policy | Terms of Use | Uinstall
Advanced System Repair Pro is compatible with all versions of Microsoft Windows including Windows 11

Share this article:

You might also like

Change position of Taskbar in Windows 10
Changing Taskbar location in your Windows 10 is an easy task but lately, Microsoft has removed the option to just drag it to one side of the screen and place it there, now in order to change location we need to do a little more work but do not worry it is not difficult at all. Right-click on the taskbar to open its properties menu taskbar settings menuin the menu, on the bottom choose taskbar settings. Once the settings dialog opens, on the right side locate the taskbar location on screen. taskbar location chooserClick on the dropdown menu and choose the desired location for the taskbar.
Read More
How to Fix Error Code 0xc004f034 in Windows 10

Error Code 0xc004f034 – What is it?

Error code 0xc004f034 occurs when Windows 10 users fail to activate their operating system. This activation error code affects not only Windows 10 but those using other versions of the Windows operating system including Windows 8.1. Users experiencing this problem will notice the following common symptoms which occur:

  • Inability to activate Windows 10 operating system
  • Message box with error code 0xc004f034

Solution

Restoro box imageError Causes

Error code 0xc004f034 usually results from issues related to activation servers. In such cases when servers are busy, users will not be able to complete the activation process which would result in access to their Windows 10 edition of choice. The error code may also result from issues related to your product key. For this reason, be sure to use the correct product key when you attempt to activate Windows 10.

Further Information and Manual Repair

The completion of manual repair methods can be an effective way to correct issues like error codes in Windows 10. To begin, however, ensure you follow the instructions as given as making even a slight mistake will result in unfavorable results. If, for whatever reason, you have trouble completing the steps suggested below, feel free to contact a Windows repair technician. This type of IT professional is usually equipped with knowledge and expertise to access your particular situation. Otherwise, see the manual repair methods listed below and complete at least one method to fix error code 0xc004f034.

Method One: Ensure You Enter a Valid Product Key

If there is a problem with your product key, you will need to ensure you fix it before you can resolve error code 0xc004f034. Follow the instructions below after ensuring you have a valid product key.

  • Step one: Click the Start button then select Settings
  • Step two: Select Update & security then Activation
  • Step three: Click the Change product key
  • Step four: Type in your valid product key with its 25 characters in the correct order

Your system will activate Windows 10 if the issue was related to the use of an invalid product key. However, attempt manual method two if error code 0xc004f034 reappears and you are unable to complete the activation process.

Method Two: Reattempt Windows 10 Activation Until Process Completes

In many cases, error code 0xc004f034 occurs simply due to a busy server. This was the case in 2015 in particular when Windows users first received access to editions of Windows 10 like Windows 10 Pro. To complete this process, you will need to follow the instructions below, repeating the last step until the activation occurs.

  • Step one: Click the Start button then select Settings
  • Step two: After selecting Settings, click Update & Security
  • Step three: Select Windows Update then the Check for updates tab
  • Step four: Click Activate Windows 10 update

If this method is successful, you will finally be able to update your system to the Windows 10 edition of your choice. This process may take just a few minutes – and several attempts – before you resolve the issue. Remember to be patient. However, contact a Windows repair technician to evaluate your system if the issue persists for more than a few days.

Method Three: Use an Automated Tool

If you wish to always have at your disposal a utility tool to fix these Windows 8 and other related issues when they do arise, download and install a powerful automated tool.
Read More
DDR5 what we know so far about it
DDR5 memory module
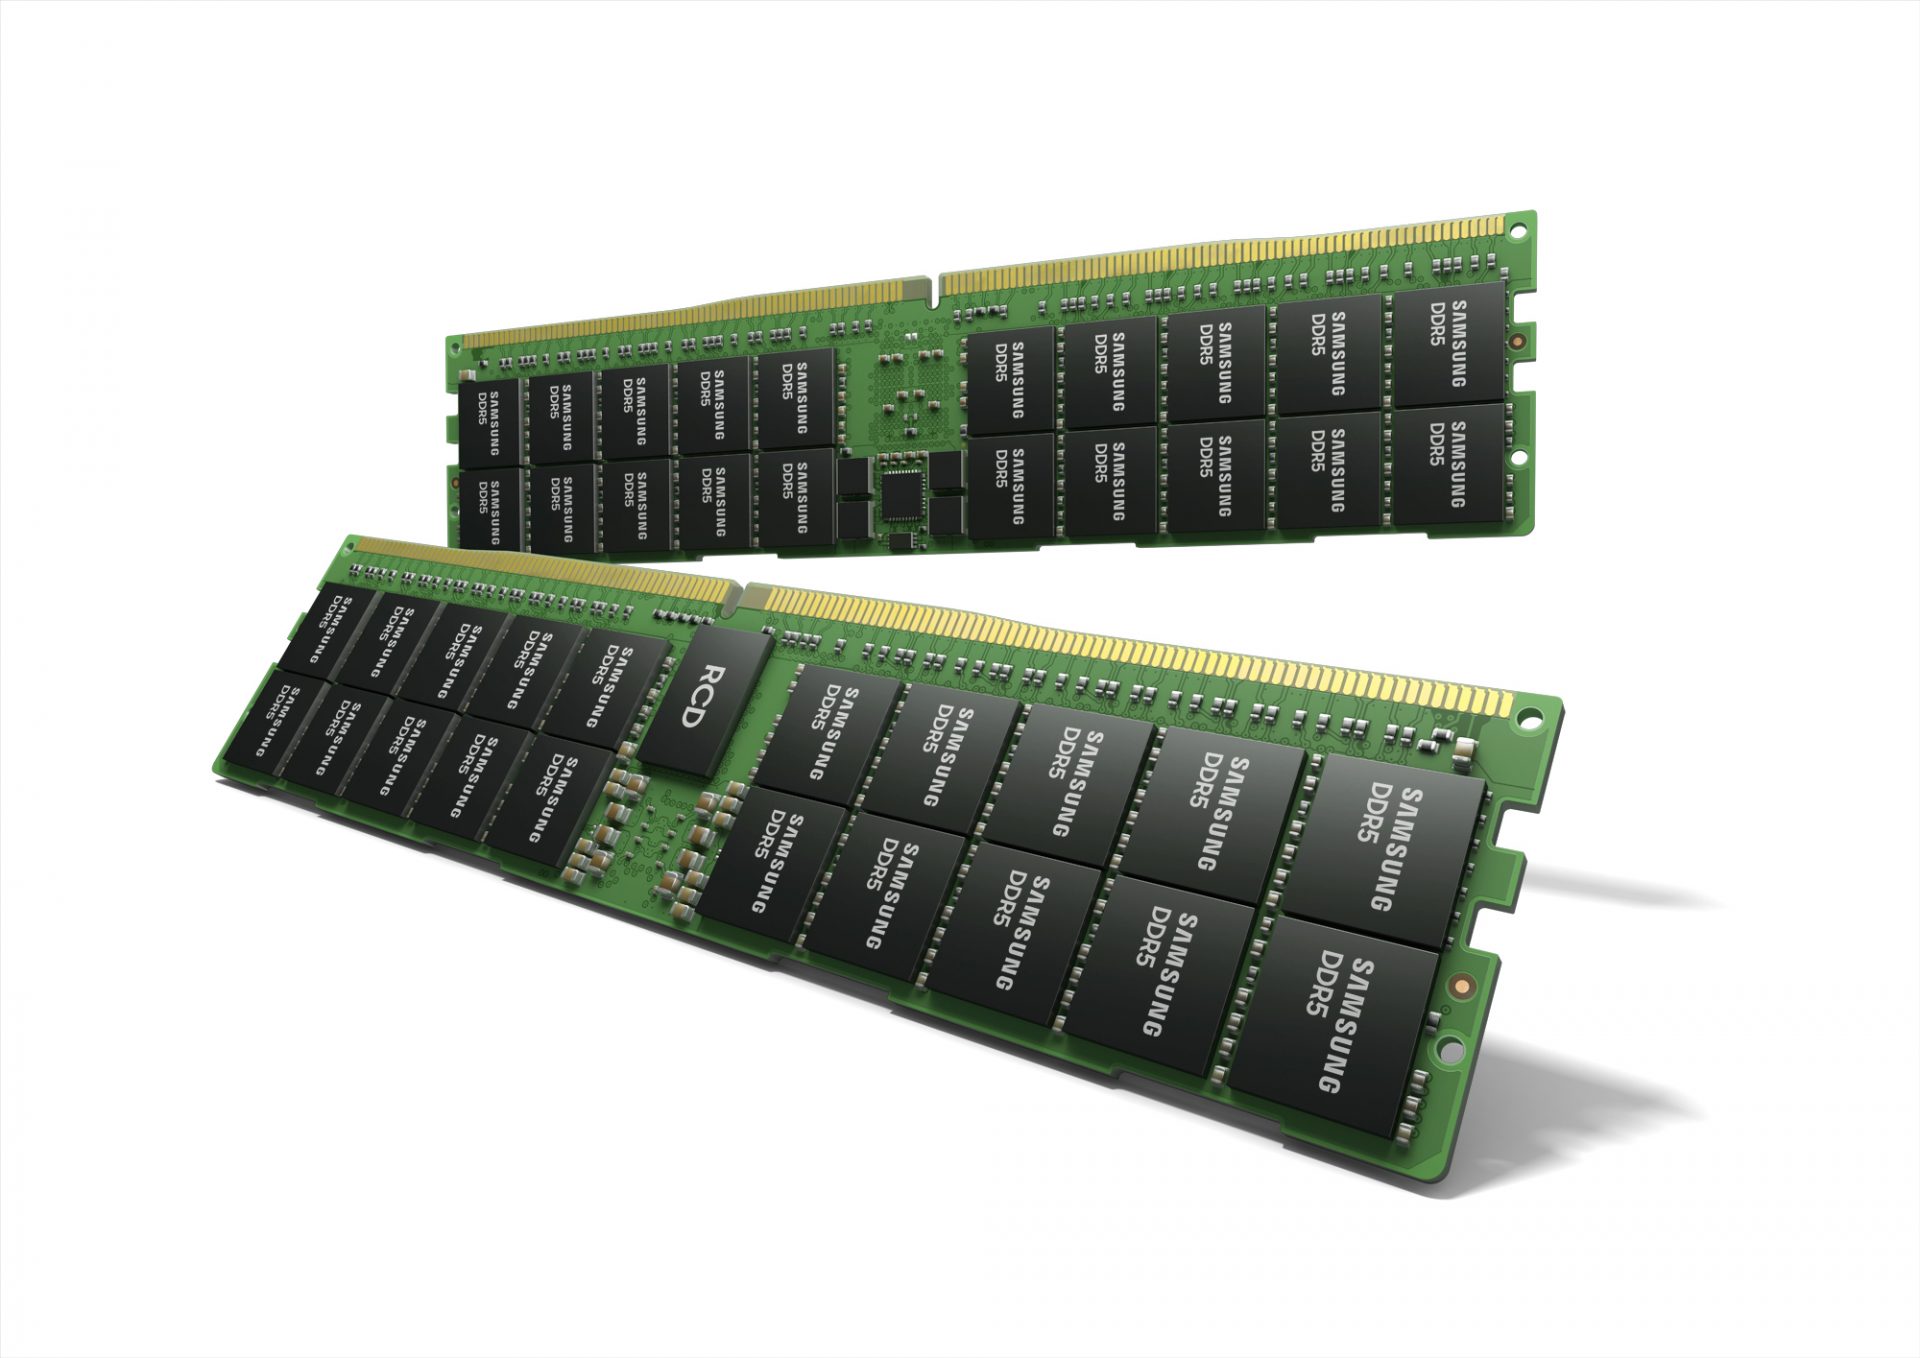
Next-generation of RAM, DDR5 supposed to hit shelves around late summer or fall in 2021if everything goes as planned. Its goal is to increase speed and efficiency, wants to pack more memory in a single stick, and have better power management.

Hardware requirements for DDR5

Using the latest memory technology will require other hardware to follow certain standards and the first ones that will need to follow are CPUs and Motherboards. Intel is already prepared with its Alder Lake CPUs that suppose to come out also later this year. AMD on other hand has not stated anything at the time of this writing but it is a bet that their next generation that will come in 2022 will have full support. It is speculated that bot companies and their respective CPUs will have both support for DDR4 and DDR5. A story about motherboards is a little different. Motherboards will support DDR4 or DDR5 memory banks, not both, so make sure that your motherboard will support the memory you plan on getting.

Capacity of memory

The goal and aim for the DDR5 memory stick are to reach a whopping 126GB per stack. This will be done by using a dual in-line module or DIMM enabling larger capacity. That being said, the first modules that we will see are more likely to be 16GB as standard and 8GB as low entry ones.

Power consumption of DDR5 memory

The standard voltage that DDR4 operates under is 1.2V. DDR5 wants to lower this to 1.1V without sacrificing speed. Voltage regulation on modules themselves will be now integrated on memory banks instead of leaving that to motherboards which will help to detect memory errors directly on the memory bank.

Speed of memory

The most common speed of DD4 memory banks is 2,666MHz, more expansive ones go from 3,600 to 4,000MHz. DD5 aims to raise this bar to 4,800MHz and offers greater speed.

Should you get it right away?

Hardware is ever-evolving, we have PCIe 3.0 to PCIe 4.0, and taking into account that sometimes the newest tech can cause some unexpected behavior it is always the best strategy to wait for a little. Price for the newest tech has also been in its heist just when it is released and seeing how DDR5 will benefit mostly servers mostly since even today memory, processors, and other available equipment can tackle all daily tasks.
Read More
How to Fix (1058) ERROR_SERVICE_DISABLED Error in Windows 10
This post will guide you in fixing the (1058) ERROR_SERVICE_DISABLED error you can encounter when trying to launch various games. Usually, this error pops up during startup and prevents you from running the game. In fact, this error has become quite a headache for many users. Some of the games it affects are Smite, Paladins, Far Cry, and many more. In most cases, this error is caused by missing or corrupted game files. It could also be caused by the anti-cheat utility you might have installed along with your games. Whichever the cause is, you can try to check out the possible fixes given below to resolve the (1058) ERROR_SERVICE_DISABLED error.

Option 1 – Verify the Integrity of the Game files

This is the first option you can try no matter what kind of issues you are having with Steam games.
  • Double click on the game’s icon located on your Desktop and then go to the Library tab in the Steam window.
  • From there, look for GTA V from the list of games installed in your library.
  • Next, right-click on its entry and select Properties.
  • After that, navigate to the Local Files tab and click the “Verify Integrity of Game Files” button.
  • Now, wait for the tool to complete checking the game’s integrity. You should see that some of the files may have been downloaded.
  • Reopen the game and see if it now runs properly without crashing.

Option 2 – Apply some tweaks in the Service’s startup settings

As pointed out earlier, the error can also occur due to the anti-cheat tools that were installed alongside the game. These tools are usually used by games to check if you are running something which might give you an unfair advantage over other players. These anti-cheat tools include but are not limited to BattlEye, EasyAntiCheat, and PunkBuster. The error might occur if the service’s startup settings are not correctly configured which is why you can apply some tweaks in order to resolve the problem.
  • Tap the Win + R keys to open the Run dialog box.
  • Next, type “services.msc” in the field and hit Enter or click OK to open Services.
  • From the list of Services, look for any of the services mentioned above such as BattlEye, EasyAntiCheat Service, or PunkBuster Service. Then right-click on the service and select Properties from the context menu.
  • After that, check if the service is started by checking the Service status. If it is started, click on the Stop button to stop the service and if it is already stopped, leave it as it is, at least for now.
  • Next, make sure that the Startup type menu in the Service’s properties is set to Automatic before you go on.
  • Now confirm any dialog boxes that may appear as you set the Startup type and then click on the Start button located in the middle before you exit Properties.
Note: You might get the following error message when you click on the Start button:
“Windows could not start the service on Local Computer. Error 1079: The account specified for this service differs from the account specified for other services running in the same process.”
If you got the error message above, then here’s how you can fix it:
  • Tap the Win + R keys to open the Run dialog box.
  • Next, type “services.msc” in the field and hit Enter or click OK to open Services.
  • From the list of Services, look for any of the services mentioned above such as BattlEye, EasyAntiCheat Service, or PunkBuster Service. Then right-click on the service and select Properties from the context menu.
  • Now go to the Log On tab and click on the “Browse…” button.
  • After that, type in your account’s name under the “Enter the object name to select” box and click on Check Names then wait for the name to be recognized.
  • Then click OK once you’re done and type in the password in the Password field when you are prompted to do so. This should resolve the issue.

Option 3 – Try reinstalling the Anti-cheat program

If the first two options did not work out, you can try reinstalling the anti-cheat program.
  • Open Steam from your Desktop or by searching for it in the Start menu.
  • After opening the Steam client, go to the Library tab in the Steam window and then look for the Rust entry from the list.
  • Next, right-click on the game’s icon in the library and select Properties.
  • Now go to the Local Files tab under Properties and click the Browse Local Files button.
  • From there, look for BattlEye, EasyAntiCheat, or PunkBuster folder depending on the game, and then double click on it to open the folder.
  • Then right-click on EasyAntiCheat_setup.exe or the BattlEye installed file in the folder or PunkBuster and select the Run as administrator option.
  • Exit the Steam client by clicking Steam > Exit from the menu located at the top.
Read More
How to send your PDF file to amazon Kindle
Kindle is, without doubt, a great piece of hardware, perhaps it is the closest thing to a book within the domain of digital devices. With its low price and usability, it has found itself in many homes and within the grasp of many readers in the world. You can buy digital books in the Amazon store for fraction of a regular price if it digital Kindle edition. You keep your library in the cloud and download just books you want to read on your device. In this article, we will explore how you can send your existing PDF or any other supported file that you already have to your kindle device so you can read it on it.

Before we begin, you should make sure the file you're trying to convert is compatible with the Kindle:

HTML RTF JPEG GIF PNG BMP or PDF The compatible file types cover most formats you're likely using, but if you find the document you want on your Kindle isn't compatible, there are a few ways to convert it. In the program it typically opens into, like Microsoft Word for .doc files or an image editing apps for .PNG ones, select 'Save As', and in the drop-down menu, see if any of the compatible options are available. If not, you could try a PDF converter tool. There are plenty of great paid options and a few good free ones too.

Transfering PDF

To get a PDF on a Kindle, you're going to need to know your Kindle's email address. You'll need to head over to the Amazon website and sign in first. Select 'Your devices and content', click 'Manage Devices'. You should see a list of the books you have assigned to your Kindle account, above this list, in a toolbar should be some options - you'll currently be on 'Content', which should be followed by 'Devices', 'Preferences' and 'Privacy Settings'. Click on 'Devices', and in the next menu, select the option for the Kindle you want the document on. You'll be brought to a Device Summary page which tells you your Kindle email as well as the type of device it is. You now need to approve your personal email, so that when the Kindle receives your PDF, it knows to download this. Make sure the email you approve is the one you're planning to send documents to your Kindle from otherwise it won't work. To approve your email address follow the steps for finding your Kindle email address but instead of selecting 'Devices' in the top bar, click 'Preferences'. Scroll down this list until you find Personal Document Settings, and select this option so it expands into more options. From here, scroll down until you find 'Approved Personal Document E-mail List'. This list will show people who can email stuff to your Kindle, Below the emails is an option to 'Add a new approved e-mail address', which you should select. Enter your email address and click 'Add address' to get yourself approved. Head over to your email client of choice, attach the file to an email, and send the email to your Kindle email address. You're able to send multiple documents at once, so if you have loads of files you want on your Kindle, you don't need to send separate emails. If you're sending over a PDF file, you can ask Amazon to automatically convert the file into a Kindle one, which lets you annotate the sections and change the font size. Simply put the word 'convert' as the subject line and the rest will be handled for you. 'Sync Your Kindle'.
Read More
Disable Windows insider in Windows 10
In their search for making Windows, a better operating system Microsoft has come up with an insider program that will collect telemetry and send it to Microsoft in order to provide enough information to make a better OS. Being in an insider program is per choice basis and it is not forced to anyone. This guide will cover how to turn off the insider program since its constant updates and telemetry can slow down the internet. So if you decided that you no longer want to be part of this program here is how to turn it off.
  • Press ⊞ WINDOWS + R to open the run dialog keyboard with windows and r marked
  • Type in dialog gpedit.msc and press ENTER
  • You will find yourself in the Local Group Policy Editor Window. Inside windows find: Computer Configuration > Administrative Templates > Windows Component > Windows Update > Windows Update for Business
  • Move to the right pane and double-click on the Manage Preview Builds option
  • Inside the Manage Preview Builds window, check the Enabled radio button
  • Go to the Options section, and using the drop-down menu, set the preferred release channel
  • Select Apply and then OK
Read More
Fix Network driver issue in Windows
The network driver error is a not serious Windows issue.  It happens from time to time and luckily it can be solved with a little effort and in a short time period. Today in this article we will explore the most common solutions for driver malfunction for Network adapter inside Windows 10. If you have this particular problem, go from step 1 to the last step since all steps are meant to go from simplest to the most complex. All of that being said let us fix your Network driver issue.
  1. Check to see if the cable is plugged in and not malfunctioned

    The first common issue of the network now working can be cable malfunction or bad contact in your network adapter or in HUB/SWITCH. There are various tools to check the quality and working order of cable but you could also make sure that it is not a cable issue by trying connection with the correct working cable. If the network is restored with another cable then change the malfunctioning cable and your issue is resolved if the problem persists move to the next step.
  2. Check if Windows troubleshooter will resolve the issue

    Righ-click on the network icon in the taskbar and choose to troubleshoot problems. Windows built-in tools could resolve issues and fix them for you. If by any chance Windows is not able to find or resolve issues move to the next step.
  3. Check if the Device Manager is reporting an error and update the driver

    If the hardware is functioning properly then the issue might be in Windows not detecting device or driver malfunction. In any case, the Device Manager will be the one who will report this problem. In order to check to see if the driver is properly working press ⊞ WINDOWS + X to open the hidden start menu. keyboard with windows and x marked Once it opens, click on Device Manager to open it, If you have a driver device error inside Windows, you should see it immediately when entering the Device Manager, it will have a yellow exclamation mark beside it. Right-click on it and choose update driver.
  4. Reinstall driver

    If driver update failed or you already have the latest drivers, reinstalling them could fix the issue since drivers might have corrupted during installation of some update or application. Follow steps from point 3 to get to the driver in Device Manager, then right-click on it but instead of update choose to uninstall. Reboot Windows once the driver is uninstalled and Windows will install a new one automatically. If you do not want to update drivers automatically, do not restart your system, instead install the latest driver for your device, then reboot. Since this is a network error, you will have to get drivers on another computer and transfer them via USB to malfunctioning one.
  5. Check Windows update

    Check to see if the latest Windows update is installed, update your Windows if needed
  6. Fix driver issue with DRIVERFIX

    If everything else fails, get DRIVERFIX, a premium solution for your PC issues, and fix driver errors.
Read More
Fix Errors 0x80070001, 0x81000037, 0x80070003
Windows has a built-in Backup and Restore system so if the Windows Backup or Restore fails and you receive any of the errors 0x80070001, 0x81000037, 0x80070003, worry not for this post will guide you in fixing the problem. You might not be able to browse to the folders and files that you want to restore in the File Restore Wizard. The cause of the error could vary depending on what error code you receive:
  • 0x80070001 – If you got this particular error code when trying to back up a specific library or when you accept the default settings in Windows Backup and Restore.
  • 0x81000037 – If you got this kind of error code when you try to read from the shadow copy on one of the volumes being backed up.
  • 0x80070003 – If you got this error code when trying to restore the folders or files in a library by using the Windows Backup and Restore.
  • On the other hand, you cannot use the Browse for files or the Browse for folders functionality.
Note that the Windows Backup or Restore failed, Errors 0x80070001, 0x81000037, 0x80070003 Error code 0x80070001, 0x81000037 occurs during backup while Error code 0x80070003 and “Browse for Files” issue occurs when you try to restore files. Whichever error codes you got, here are some possible fixes that might help.

Option 1 – Fix Windows Backup error codes 0x80070001, 0x81000037

The reason for the Windows Backup error codes 0x80070001, 0x81000037, as mentioned above, is when there is a volume that uses a FAT file system (0x80070001) and when a volume contains compressed files (0x81000037). To fix these errors, you need to remove the “reparse point” also known as SYMBOLIC LINK, and select the absolute path of this location in the Windows Backup configuration user interface. Refer to these steps to remove the reparse point.
  • Tap the Win + R keys to open the Run dialog box.
  • Then type “cmd” in the field and hit Enter to open Command Prompt.
  • Next, type the following command and hit Enter:
DIR /AL /S
  • After you enter the command, it will display the JUNCTION list.
  • Now to delete the mounted volume reparse point, you have to locate the reparse point you found and right-click on the reparse point icon, and click on Properties.
  • Confirm that the folder Type is Mounted Volume in the General tab and then delete this folder.

Option 2 – Fix the Windows Restore Error 0x81000037

When you try to restore a deleted backed-up directory, it fails and the Error code 0x81000037 pops up. You can also encounter this error when you select to restore the files to their original subfolders check box in the File Restore Wizard and you try to restore folders or files to an alternative location, then you will encounter error code 0x81000037 which will be displayed in an error message as shown below: To fix this error, you need to re-create the missing directory using the following steps:
  • Take note of the path for which the error occurs.
  • Then create the corresponding folder.
  • Now perform the restore operation again.
And since you might have subfolders in the deleted folder, click to clear the “Restore the files to their original subfolders” checkbox when you run the File Restore Wizard.

Option 3 – Cannot use the Browse for files or the Browse for folders functionality

There is no proper fix for this particular error but if you remember the name of the files, you can just search for them. Click on the Search button when using the File Restore functionality and then type the name of the file and when that file appears, select and click on it to restore it.
Read More
Always show scrollbars in Windows 11

windows 11 scrollbarsMost scrollbars are hidden by default if they are not used in Windows 11. If you are not ok with this feature and want scrollbars to be always visible and available do not worry, turning them ON is very easy.

  • Press ⊞ WINDOWS + I to open Windows settings
  • Click on Accessibility in the sidebar
  • Select Visual Effects
  • Inside visual effects settings find Always show scrollbars and switch it ON

Windows 11 will save settings automatically and apply setting right away. Close settings and continue with work.

Read More
How to Fix Jp2klib.dll Error Code

How to Fix Jp2klib.dll Error Code

Jp2klib.dll Error - What is it?

Jp2klib.dll is a type of Dynamic Link Library. This file is developed by Adobe Systems Inc and associated with CS2 (Creative Suite 2 Premium). Like all DLL files, this file also contains small programs that support programs developed by Adobe Systems on your PC. The function of Jp2klib.dll is to load and run programs. Jp2klib.dll error occurs when it fails to do so. It occurs during program startup. Jp2klib.dll error is displayed in several different formats depending on the cause of the error. Here are some common error messages that you may come across:
  • "JP2KLib.dll not found."
  • "Cannot find C:\WindowsSystem32\JP2KLib.dll."
  • "Cannot start Creative Suite 2 Premium. A required component is missing: JP2KLib.dll. Please install Creative Suite 2 Premium again."
  • "Cannot register JP2KLib.dll."
  • "The file JP2KLib.dll is missing."
  • "This application failed to start because JP2KLib.dll was not found. Re-installing the application may fix this problem."
  • JP2KLib.dll Access Violation."

Solution

Restoro box imageError Causes

There are several causes for the Jp2klib.dll error code pop-up. These include:
  • Hardware failure
  • Jp2klib.dll file not properly registered
  • Viral infection
  • Deleted, missing, or corrupted Jp2klib.dll file
  • Registry problems
  • Another program overwrote the Jp2klib.dll file
The good news is that this is not a fatal error code like the blue screen of death errors. However, it is still advisable to resolve it right away to avoid inconvenience.  This error may limit your ability to access your desired program.

Further Information and Manual Repair

Follow these methods to resolve Jp2klib.dll error code on your PC in a few minutes without any professional assistance or technical know-how:

Method 1 - Re-register the Jp2klib.dll file

Sometimes Jp2klib.dll error may occur if the DLL file is not registered properly. In such a situation "JP2KLib.dll not registered" error message will pop on your computer screen. To resolve, all you need to do is register this file. Follow these steps to register the Jp2klib.dll file on your PC:
  1. Go to the start menu, type the command in the search box. Don’t press enter yet.
  2. First, hold CTRL-SHIFT and then press it. This action will prompt a permission dialog box. Click yes to proceed.
  3. You will be asked to enter a command, here simply type regsvr32 /u JP2KLib.dll and then press enter.
  4. This will first unregister the previous Jp2klib.dll file. Now type regsvr32 /i JP2KLib.dll and press enter to re-register the same file.
  5. After this, close the command window and reboot your PC to activate changes.

Method 2 - Check the Recycle Bin and Restore the Jp2klib.dll file

If you come across this error message "JP2KLib.dll not found”, this indicates a missing Jp2klib.dll file. This usually happens if you recently uninstalled a program on your system which was also supported by the Jp2klib.dll file due to which the file was also deleted. But don’t worry! Check your recycle bin to retrieve the accidentally deleted file on your system. If you find it restore, but if you don’t then simply download it from a reliable DLL website.

Method 3 - Scan for Viruses

Install and run an antivirus to detect viruses. Viruses are malicious programs that damage and corrupt DLL files like the Jp2klib.dll file. Scan for all viruses on your PC and remove them to fix the problem.

Method 4 - Repair the Registry

If you don’t clean the registry often it becomes accumulated with obsolete files like bad and broken entries, cookies, and junk files. These files corrupt the registry and damage system and DLL files also stored in the same location. It then leads to such error message pop-ups. To resolve, download Restoro. This is an advanced PC Fixer deployed with a registry cleaner. It is easy to use and in just a few clicks can repair the Jp2klib.dll error on your PC. The registry cleaner scans and removes all obsolete files. It cleans the registry and repairs the damaged system and DLL files. Click here to download Total System Care and fix the Jp2klib.dll error.
Read More
1 2 3 162
Logo
Copyright © 2022, ErrorTools. All Rights Reserved
Trademarks: Microsoft Windows logos are registered trademarks of Microsoft. Disclaimer: ErrorTools.com is not affiliated with Microsoft, nor claim direct affiliation.
The information on this page is provided for information purposes only.
DMCA.com Protection Status