Fix Windows Cannot Find a System Image

If you have encountered the “Windows Cannot Find a System Image on This Computer” error while you are trying to restore a system image, then read on as this post will guide you in resolving this problem.

A system image is basically a backup of your whole data in the system. For instance, it can be the backup data of your hard disk or the whole hard disk itself, or one of the volumes. This is really useful in some cases like when you are not able to get back into your system for some reason or when your system has been corrupted. In such cases, you can utilize this feature and get going safe and sound. However, not all things go the way as expected like when you make a system image of a drive for instance, or use that backup to restore data and you suddenly encounter the “Windows Cannot Find a System Image on This Computer” error. This kind of error occurs due to a number of reasons but worry not for your data is safe and you can fix this error easily.

This error is most likely triggered by changing the name of the “WindowsImageBackup” folder. Renaming this folder will certainly be an issue since it is the one that stores all your data. Aside from renaming the WindowsImageBackup folder, renaming the sub-folders can also cause this error which means that renaming the sub-folders of the WindowsImageBackup folder can trigger the error.

To fix this error, here are some suggestions that might help:

Option 1 – Try putting the WindowsImageBackup folder in the Root directory

Windows will have issues finding the WindowsImageBackup folder if it isn’t in the root directory of the drive so if it is not there, the “Windows Cannot Find a System Image on This Computer” error will pop up. When a folder is in a root directory, it means that it shouldn’t be stored within a folder but in the main directory instead.  Thus, you need to put the WindowsImageBackup folder in the root directory to fix the error.

Option 2 – Don’t add any sub-folders in the WindowsImageBackup folder

Another cause of the error is when you add sub-folders in the WindowsImage Backup folder. Adding any sub-folders in this folder will only trigger the error so you should leave the folder as it is and you must not make any modifications to it. So if you have added sub-folders in it, make sure to remove them right away.

Option 3 – Make sure that there is one system image per USB drive

The error can also appear if you’ve stored multiple images inside a single USB drive as it could confuse Windows and will trigger the “Windows Cannot Find a System Image on This Computer” error. Note that storing system images of different volumes of your hard disk in a single USB will prevent you from restoring your data.

Option 4 – Try renaming the System Image folder

If you’ve just changed the name of the System Image folder after you store it on a USB stick or other external device, then it’s no wonder why you’re getting the “Windows Cannot Find a System Image on This Computer” error. Windows search for the default name, “WindowsImage Backup” folder when restoring your data so if it is not able to find it, it throws up this error instead. To fix the error, you need to change the folder back to its default name which is “WindowsImageBackup”.

Option 5 – Check the WindowsImageBackup sub-folders

As mentioned earlier, renaming sub-folders in the WindowsImageBackup folder can trigger the error so if you have renamed sub-folders in this folder, you need to change them back to their default names so that you can restore your data peacefully.

If you like to learn and find out more about various Windows errors, and how to repair them go to our vast archive or use search to find articles that will explain and help you in solving your issue.
However, if you prefer to do things fast and with automatization then we are proposing to use an automated solution for your issues. The application that we are recommending is Advanced System Repair Pro
Advanced System Repair utilizes multiple tools all in one to give you a quick, simple, reliable, and very thorough diagnosis of your PC. It brings you all the tools you need in one program to clean, fix, protect, optimize and boost your PC!
1-Click Maintenance
All the tools to make it simple and easy! It's like having a professional technician at the click of a mouse.

Junk Cleaner
Keeping your computer free from unnecessary clutter also helps make your computer last longer. Like any other machine, if you keep it clean and take care of it, it will serve you better for longer!

Optimize background apps
Optimize applications background activity with the built-in Application Optimizer feature.

Disk Defrag
With a simple 1-click, Advanced System Repair speeds up your PC by assembling fragmented files on your machine and organizing them more efficiently.

Malware Removal
Finds and removes all types of harmful malware including trojans, worms, bots, adware, spyware, PUPs, and more!

Privacy Cleaner
The all-in-one privacy suite to Clean Your Tracks & Protect Your Privacy! Make your computer safe, secure, and more efficient!

System Tweak/Optimizer
ASR will analyze your complete system and settings to adjust your PC to function at its maximum performance.

Registry Cleaner
Over time, as you install and uninstall applications, the registry can become cluttered with old entries and broken settings which can result in program crashes, and annoying messages and slow the computer down.
Visit our Advanced System Repair Pro Download page to inform yourself about all the benefits of this software and get a free trial copy of it.
advanced system repair pro

Advanced System Repair Pro

One-click automated PC repair solution
ASR logo
With Advanced System Repair Pro you can easily
Replace damaged files
Restore performance
Free disk space
Remove Malware
Protects WEB browser
Remove Viruses
Stop PC freezing
DOWNLOAD
Privacy Policy | Terms of Use | Uinstall
Advanced System Repair Pro is compatible with all versions of Microsoft Windows including Windows 11

Share this article:

You might also like

KFConsole enters the console competition
Yes, you read that right, KFC is making a console partnered with Cooler Master. Bizzare at it sounds, it is even more bizarre that the console is designed to keep your food warm!!! You can pull out the drawer from the console out on its top and place some food there in order to keep it warm. kfconsole drawerThe console itself is coming in cylindrical shape powered by Intel CPU and ASUS GPU of the unknown chipset. It has Seagate Baraccuda 1TB SSD and it is VR-ready. The console will have raytracing and will be 4K ready.

My thoughts

Well, my thoughts are somewhat strange, on one side I am not really sold on food heating gimmicks and without specific hardware specifications, it is difficult to say how much power the console will have. Price is also not leaked so that is also a stumbling stone for making an informed opinion. I am a little puzzled and concerned about this whole heating food thing because personally, I can see 2 issues: Console overheating and fat dripping on inside hardware, I am sure they have somehow eliminated this but I would be very interested to see how.
Read More
Couldn’t open PDF in Edge Error in Windows
As you know, Microsoft Edge is the default web browser in Windows 10 operating system. It is a built-in browser that replaced the ancient Internet Explorer for its performance and features. Aside from being the default web browser, it is also set as a default PDF viewer in Windows 10. So if you open a PDF file, it will be automatically opened in the Edge browser even if you have installed a PDF reader on your computer. However, some users recently reported getting an error that says, “Couldn’t open PDF in Edge, Something’s keeping this PDF from the opening” when they tried to open a PDF file or view an internet link that has a downloadable PDF file in the Edge browser. If you are one of these users, read on as this post will help you troubleshoot the problem and fix it. This kind of error mostly occurs if you have installed other PDF viewers on your computer. They could be interrupting Edge while it tries to open the PDF documents. To fix it, check if Microsoft Edge is set as the default PDF viewer or you could also try to clear its browsing cache. In addition, you could also reset or repair Edge. For detailed instructions, refer to the given options below.

Option 1 – Check if Microsoft Edge is set as the default PDF viewer

The first thing you can do is to check if Edge is set as the default PDF viewer. If it’s not, you have to set it as one to fix the problem.
  • Open Control Panel and go to Default Programs.
  • Then click on the “Associate a file type or protocol with a program” option.
  • Next, select the PDF file option and click on Change program.
  • After that, select Microsoft Edge in the pop-up window and then select the “Always use this app to open .pdf” option.
  • Now click the OK button to set Edge as the default PDF viewer and then check if you can now open the PDF file in the Edge browser.

Option 2 – Clear the browser cache of Microsoft Edge

  • Open Microsoft Edge.
  • Then click on the three horizontal dots to open the menu.
  • From there, click on Settings. And under Settings, click the “Choose what to clear” button under the Clear browsing data section.
  • Next, check all the checkboxes and then click the Clear button to clear the browsing data in the Edge browser.
  • Restart Edge.

Option 3 – Reset, repair or reinstall Microsoft Edge via Settings

You can reset, repair or reinstall the Edge browser through Settings. If none of it helped, you can try the following:
  • Open File Explorer and then go to this path – C:/Users/YourUsername/AppData/Local/Packages
Note: Before you type in the path in the Address bar, make sure that you put your user account name in place with the “YourUsername”.
  • Tap Enter to proceed.
  • Next, look for the folder named “MicrosoftEdge_8wekyb3d8bbwe” then right-click on it.
  • Click on Properties and uncheck the option “Read-only” under the General tab in the Properties window.
  • Click on Apply and then OK to save the changes made.
  • After that, look for the MicrosoftEdge_8wekyb3d8bbwe folder again and delete it. And if a prompt stating “Folder Access Denied” appears on your screen, just click on the Continue button to proceed – doing so will delete most of the content inside the folder except for the folder named “AC”.
  • Restart your PC.
  • Now all you have to do is to re-register Microsoft Edge using PowerShell. In the Start Menu, search “Windows PowerShell”.
  • Right-click on Windows PowerShell from the search results and select the “Run as administrator” option.
  • Type in this command in the PowerShell windows and tap Enter – Cd C:/Users/YourUsername
Note: Once again, make sure that you key in your user account name in place of “YourUsername.
  • After that, type in this command and tap Enter – Get-AppXPackage -AllUsers -Name Microsoft.MicrosoftEdge | Foreach {Add-AppxPackage -DisableDevelopmentMode -Register "$($_.InstallLocation)AppXManifest.xml" -Verbose}
  • Restart your PC.
Read More
Make FLASH content available in your browser
FLASH icon Hello and welcome everyone, just a few years ago we had FLASH video content on the internet, we had FLASH games, full FLASH website experiences, and more, but then flash was shut down mostly due to security reasons meaning that in just a few months we have lost most of FLASH web content. However, there is still FLASH content on the internet even today, there are still FLASH videos and flash games, but we can not play any of that content since browsers do not support FLASH and you can not get the FLASH plugin for browsers. So what might be the solution for this situation?

Ruffle and FLASH emulation

Emulation of course. We will not be able to get the flash player working, well at least not the original and official one, but we can make flash content playable again inside our browsers. The first thing is first, we need to get an emulator package from the internet in order for this trick to work, one we will be using is RUFFLE. It is lightweight, it is free, it is open source and it is reliable, everything we need. Download RUFFLE from its official website here. For Chrome and Edge download the ZIP package, for Firefox, go to the Firefox section of the tutorial. There is also a desktop version of RUFFLE there so if you are keen on playing your flash content on your desktop computer you might well grab that as well, but for the sake of this tutorial where we are enabling flash in our browsers, we will not focus on that part since it is pretty straightforward. Now once you have downloaded the RUFFLE emulator, please extract it to the desired folder somewhere on your computer. Once it is extracted, start your browser of choice and follow instructions.

FOR CHROME:

  1. Navigate to: chrome://extensions/
  2. Turn ON developer mode in the top right corner
  3. Click on Load unpacked
  4. Navigate to the folder where you have extracted RUFFLE
chrome extensions

FOR EDGE:

  1. Navigate to: edge://extensions/
  2. Turn ON developer mode on the bottom left corner
  3. Navigate to the folder where you have extracted RUFFLE
  4. Turn RUFFLE ON
edge extensions

FOR FIREFOX:

  1. Go to the RUFFLE download page, we can not use the zip package we were using for Chrome and Edge
  2. Right-click on the Firefox download link
  3. Save link by clicking on Save link as...
  4. Navigate to about: debugging
  5. Click on this Firefox
  6. Click Load Temporary Add-on
  7. Select the .xpi that you have downloaded

BONUS:

If you want to enable FLASH content live on your website use:  <script src="path_to_ruffle/ruffle.js"></script>
Read More
How to Fix Ehshell.exe Application Error Code

Repair Ehshell.exe Application Error

Ehshell.exe Application Error - What is it?

Ehshell.exe is a type of .exe (executable file). This file functions as an essential component of the Microsoft Media Center.  By default, it is located in a subfolder of C:\Windows. Ehshell.exe application error is an error code that pops up when tasks in the Media Center freezes. The Ehshell.exe application error is usually displayed on the screen in the following format:
“ehshell.exe – Common Language Runtime Debugging Services Application has generated an exception that could not be handled. Process id=0xa18 (2584), Thread id=0xa24 (2596).”

Solution

Restoro box imageError Causes

Ehshell.exe application error is triggered when PC users perform repetitive tasks in Media Center on a Windows XP Media Center Edition. The computer stops to respond and the error message is displayed. This error occurs if users perform one or more of the following repetitive tasks in the Media Center:
  • Repeated resize, restore and minimize the Media Center Window
  • Schedule TV shows to record
  • Repeatedly change the channel while Media Center is in a window
  • Ehshell.exe file corruption due to malware infection or registry issues
Though this is not a fatal error, to avoid any kind of inconvenience, it is advisable to fix the error right away.

Further Information and Manual Repair

To fix the ehshell.exe application error on your system, you don’t have to hire a professional and spend hundreds of dollars on repair. Here are some of the best and most effective do-it-yourself methods that you can try to resolve this issue on your PC immediately.

Method 1 - Install the Latest Service Pack for Microsoft Windows

To repair the issue, install the latest Windows service pack. A service pack is basically a Windows update, often combines previously released updates that help make Windows more reliable. These are offered free of charge on Microsoft’s official website.  To get started, simply log on to Microsoft’s official website and download the latest service pack compatible with your Windows version. The installation process may take 30 minutes to install. And you will be prompted to restart your PC about halfway through the installation process. Once the Windows Service Pack is installed, the ehshell.exe application error will be fixed. If the error still persists, then try method 2.

Method 2 - Scan for Malware

Ehshell.exe application error may also appear on your PC due to malware infection. Malware programs like viruses, Trojans, and worms deliberately give their malicious processes similar .exe file names, so it is hard to identify the malware. In such an event, it is advisable to download a powerful antivirus and scan your entire PC. Run it to remove all the hidden malware programs on your system. Once malware is removed, the ehshell.exe application error will be resolved.

Method 3 - Clean Registry

Sometimes .exe files can also get corrupt when the registry gets overloaded with unnecessary and obsolete files. If this is the underlying reason for the error code occurrence then it is advisable to download Restoro. This is a multi-functional and user-friendly PC Fixer deployed with a registry cleaner. It removed all the unnecessary files, cleans and repairs the registry in seconds thereby fixing all registry-related errors. Click here to download Total System Care and resolve the Ehshell.exe application error on your PC.
Read More
Install Windows 11 on any computer officially
Windows 11 system requirements
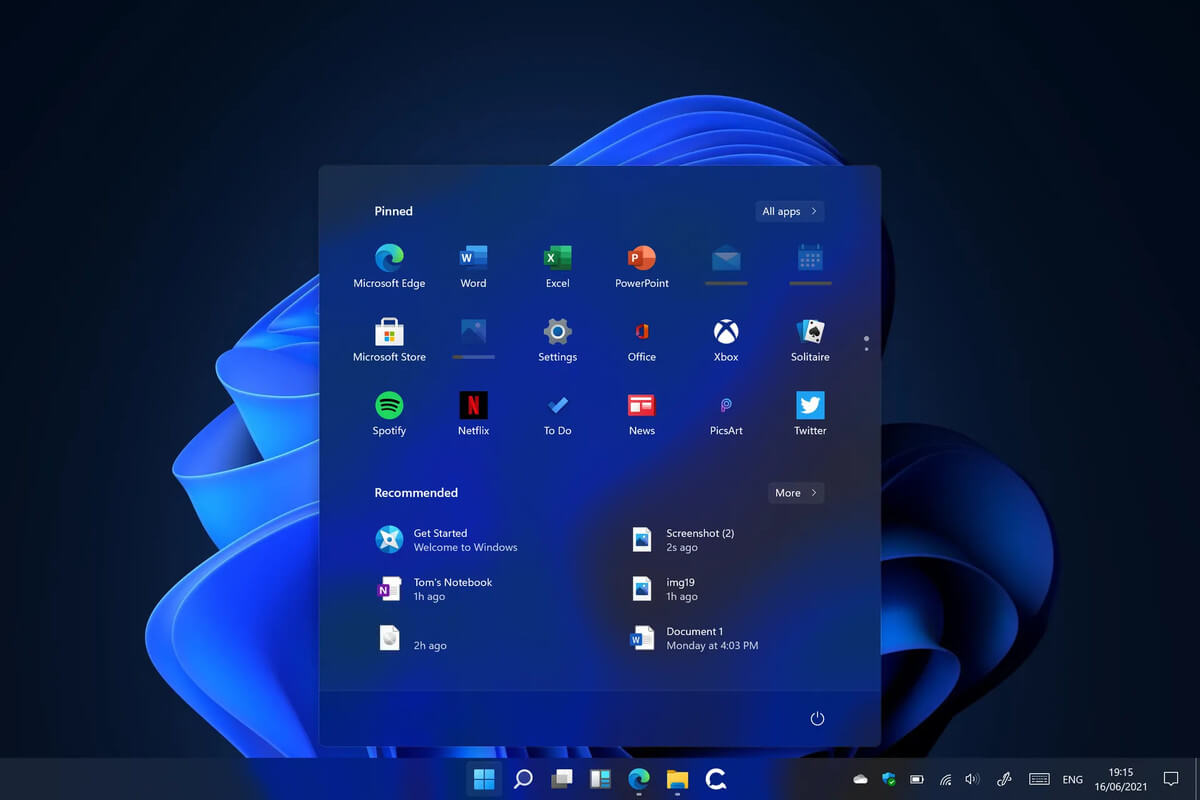
Microsoft’s initial Windows 11 hardware requirements were not really well received by users and they were not really clearly represented from the start making a lot of potential customers slowly drift away from the hype. It seems that Microsoft has acknowledged this since they have changed their tune about system hardware requirements for the upcoming Windows 11. It seems that Windows 11 will be able to be officially installed on unsupported computers but with a little inconvenience.

What is a catch?

Windows 11 will still have the same hardware requirements and if the PC meets them, that computer will be officially supported, other ones (any that can run Windows 10) that do not meet system requirements can still run Windows 11 but the system will have to be clean installed. So no upgrade option for old computer users, just a clean install. This means of course that you will need to download the ISO image and make a bootable USB in order to install it. Also since you will be doing a clean install do a backup of the hard drive since it will need to be formatted. Also, Microsoft has stated that with unofficially supported PC some driver updates might not be delivered leaving you with either older driver versions or relying on your hardware manufacturer on them. This is still not confirmed by Microsoft, just stated as an option. We will see how it goes.

Conclusion

It is very good that Microsoft has reconsidered its system requirements and will not stubbornly push its initiatives over the top requirements allowing even older computers to install new OS. I am sure over time lot of users will upgrade their hardware and drive into officially supported waters, but it is good that they will be able to use new OS on their current hardware.
Read More
Fix An unspecified error 0x800700b7
If you receive an error that says, “An unspecified error occurred during System Restore (0x800700b7)” when you tried to restore your Windows 10 PC, worry not, for this post will help you resolve the problem. This kind of error typically occurs when System Restore was not completed successfully and fails instead with this error. Before you start, you must not abruptly shut down your computer and wait for the error to occur. You may receive this error due to many possible reasons. It could be caused by your antivirus program that’s not letting the process complete or corrupted system files which causes the failure or it could also be caused by an unsuccessful installation of a Windows Update. Here are some fixes you can check out if you can still boot into your computer:

Option 1 – Try to disable your antivirus program

Disabling the antivirus program or any security software installed in your computer is always a good idea you can try when the System Restore process does not go smoothly. So before you try updating your computer again, make sure to disable the antivirus or security program and then run System Restore again, don’t forget to enable the antivirus program back again.

Option 2 – Run the DISM tool

The next thing you can do is run the DISM tool. This tool is known to repair potentially corrupted files in your system as having them could also system issues like the blank dialog boxes. To repair these corrupted system files, you can run the DISM commands:
  • Tap the Win + X keys and click on the “Command Prompt (Admin)” option.
  • After that, input each one of the commands listed below sequentially to execute them:
    • Dism /Online /Cleanup-Image /CheckHealth
    • Dism /Online /Cleanup-Image /ScanHealth
    • Dism /Online /Cleanup-Image /RestoreHealth
  • Once you’ve executed the commands given above, restart your computer and check if the problem is now fixed.

Option 3 – Run the System File Checker

System File Checker or SFC is a built-in command utility that helps in restoring corrupted files as well as missing files. It replaces bad and corrupted system files to good system files that might be the cause why you’re getting the errors 0x8024a11a and 0x8024a112. To run the SFC command, follow the steps given below.
  • Type “cmd” in the Start search and then right-click on the appropriate search result.
  • Next, select “Run as administrator” to open Command Prompt with admin privileges.
  • After opening Command Prompt, type in sfc /scannow
The command will start a system scan which will take a few whiles before it finishes. Once it’s done, you could get the following results:
  1. Windows Resource Protection did not find any integrity violations.
  2. Windows Resource Protection found corrupt files and successfully repaired them.
  3. Windows Resource Protection found corrupt files but was unable to fix some of them.
  • Now restart your computer and see if the problem is fixed or not.

Option 4 – Try to run the System Restore in a Clean Boot State

If the first three given options didn’t work and the service still keeps on failing even though the service is running, you can try putting your computer in a Clean Boot State and then try to run System Restore again.
  • Log onto your PC as an administrator.
  • Type in MSConfig in the Start Search to open the System Configuration utility.
  • From there, go to the General tab and click “Selective startup”.
  • Clear the “Load Startup items” check box and make sure that the “Load System Services” and “Use Original boot configuration” options are checked.
  • Next, click the Services tab and select the “Hide All Microsoft Services” check box.
  • Click Disable all.
  • Click on Apply/OK and restart your PC. (This will put your PC into a Clean Boot State. And configure Windows to use the usual startup, just simply undo the changes.)
  • Now try to run System Restore again and see if the process goes smoothly.

Option 5 – Run the Windows Update Troubleshooter

You might also want to run the Windows Update Troubleshooter as it could also help in fixing the problem with System Restore. To run it, go to Settings and then select Troubleshoot from the options. From there, click on Windows Update and then click the “Run the troubleshooter” button. After that, follow the next on-screen instructions and you should be good to go. On the other hand, if you can’t boot into your Windows 10 computer, here are some fixes you can try instead:

Option 6 – Try running System Restore in Advanced Startup Options

If you cannot boot into your Windows 10 computer, you can try to run System Restore again in the Advanced Startup Options.
  • Boot your computer into the Advanced Startup Options screen.
  • From there, you will see some options to troubleshoot when you can’t log in to Windows in the usual way.
  • Now select Troubleshoot > Advanced Options > Command Prompt.
  • After that, type “rstrui” and hit Enter to execute the command which will start the System Restore process.

Option 7 – Run the SFC scan and DISM via Advanced Startup Options

Like what you did in the first given option, you can use the Advanced Startup Options to run both System File Checker and DISM. All you have to do is boot into the Advanced Startup Options and from there select Troubleshoot > Advanced Options > Command Prompt. After accessing Command Prompt, you can run the System File Checker scan first by entering the “sfc /scannow”. As for DISM, you can run the “Dism /Online /Cleanup-Image /RestoreHealth” command.

Option 8 – Try to run the Automatic Repair Utility

You might also want to use Automatic Repair in fixing the error. To do so, follow the steps below.
  • You can start by creating and booting from a bootable Windows 10 USB Stick.
  • After that, click on Repair your computer located in the bottom left corner when you are on the initial Windows Startup screen.
  • Next, click on Troubleshoot, and then on the other screen, click the Startup Repair option.
  • Now select the operating system you want to repair. Once you do that, it will start to repair your operating system. Wait until the process is completed and then check if the problem’s now fixed.
Read More
Fix AMD driver crashing Windows 10
Graphic cards are essential to our computers but from time to time in the race to make better GPU and to grab a large portion of the market bad drivers get released and can create really unwanted and unpleasant experiences, from Windows freezes to the black screen of death, to AMD driver Windows crashing down and many more. This article will cover basic troubleshooting with AMD drivers and offer you solutions on how to fix them.
  1. Rollback the previous version of the driver.

    Installing the new driver version is the reason for this particular error, so naturally rolling back the previous version which was stable and did not cause issues will solve the problem. To roll back the previous version of drivers follow the next steps: Open Start menu and click on settings, go to system and choose Apps and features Find: AMD Catalyst Install Manager, right-click on it, and choose to uninstall Go to AMD official website and download the previous driver version, install it on your computer Turn off automatic driver updates and reboot your system
  2. Reinstall the driver

    Sometimes it is not a bug in the released driver, it is a corruption of files because of file transfer or any other specific reason. The reinstalling driver will fix an issue if this is the case. To reinstall the driver Press ⊞ WINDOWS + X and choose Device Manager Expand Display adapters, right-click on AMD device and choose to uninstall Go to the official AMD website, download the latest driver and install it Reboot your system
  3. Disable browser extensions

    Some users have reported that error occurs only when they are watching videos online, if this is your case, go to your browser options and disable extensions to see if this will remove the problem.
  4. Remove Lucid Virty MVP

    If by any chance have this relic installed on your system, go to Applications and remove it. It is an old program shipped with old drivers and it is usually present in your Windows that was upgraded from 8.1 to 10. Uninstall it and see if this fixes your issue.
  5. Clean your graphic card

    Sometimes this error can happen due to excessive dust on your GPU, if you have the expertise, clean it or take it somewhere to be cleaned.
Read More
Fix Windows Update Error 0x80240034
There are cases when you encounter some issues while updating your Windows 10 computer. One of these issues is the error 0x80240034. This particular error is a Windows Update Error that appears on the Windows Update pane every time an update fails to install. When this happens, your Windows Update will only get stuck at 1% and nothing happens afterward and eventually fails. If you click on the View Installed Update History, you will see the error code 0x80240034 for the failed updates. You will see this error each time you try to update your Windows PC. Take note that this issue doesn’t only happen to a specific version of the Windows Update but on various different Windows builds based on many users. What’s more, is that some users are also seeing a different error code when their Windows Update fails but they still end up seeing the error code 0x80240034 when they check the Windows Update history. At the time of writing, it isn’t determined yet what really causes this error but it’s most likely due to some corrupted files in the computer which is why the most common solution you can try is resetting the Windows Update cache. On the other hand, other users also resolved the issue by using the ISO and selecting the “Do not keep previous settings” option during the Windows Update so it might be something to do with transferring the previous settings through the update client. For clear instructions in fixing this issue, refer to the two options provided below.

Option 1 – Try to clear the Windows Update Cache/Distribution Folder

As mentioned earlier, a lot of users tried clearing the Windows Update cache to fix the problem and so far it has worked. Like them, you can try clearing the Windows Update cache by simply deleting the contents of the folder named “SoftwareDistribution” since Windows apparently can’t clear and re-download the update contents once they are corrupted. Thus, deleting the contents of this folder will make Windows download the contents again which will fix the problem. To do that, follow the steps below.
  • Step 1: Tap the Windows key once.
  • Step 2: Next, type in “command prompt” in the Windows Start Search, and from the search results that appear, right-click on Command Prompt and select the “Run as administrator” option from the context menu.
  • Step 3: After opening Command Prompt, type in “net start wuauserv” and hit Enter.
  • Step 4: Then type in “rmdir %windir%SoftwareDistribution /S /Q” and hit Enter.
  • Step 5: Now type in “net start wuauserv” and hit Enter. Once it’s done, try updating your Windows PC again, it should now work just fine.

Option 2 – Update Windows via ISO file

If option 1 didn’t work for you, you can try this second option of updating your Windows 10 computer using an ISO file which means that you will have to create a Windows 10 bootable media and use it to install the latest Windows 10 version. The most user reported that this option works and the reason why it does have something to do with the Windows Update client since the Windows Updates downloaded from the regular Windows Update client seems to create issues such as the error 0x80240034. However, issues like this one don’t occur when the very same Windows Updates are downloaded and installed via an ISO file. Take note that when using a Windows ISO file, you will be asked to choose what you want to do with the previous settings and apps. A lot of users opted for the “Not to keep the old Windows settings” option which has resolved the issue. So if you want to keep the previous settings then you must try to update Windows first while keeping the old settings. However, if it doesn’t work, you have to try installing the latest version of Windows without keeping the previous settings.
  • Step 1: Click this link and then click the Download Tool Now button.
  • Step 2: Next, click the “Use the tool to create installation media (USB flash drive, DVD, or ISO file)…” option and follow the next given instructions on the screen.
  • Step 3: Now select the ISO file option in step 5.
  • Step 4: After that, you should now have an ISO file.
  • Step 5: Next, go to the location where you’ve downloaded the ISO file.
  • Step 6: Then right-click on the Windows 10 ISO file and select the Open with an option and then select File Explorer.
  • Step 7: Now click on “setup.exe” and follow the next instructions that appear on the screen. When asked, you have to select either: Nothing (clean install) or Keep personal files only option. Take note that you must not select the “Keep personal files, apps, and Windows settings since it doesn’t really work.
Read More
Fix Error 0x80200056 during Windows Update
You might have experienced a situation where your Windows computer was interrupted due to some battery issues or power failure. It could be that the upgrade process was interrupted because you’ve signed out of your computer or you restarted it by accident. In this case, you will most likely get a Windows Update or Upgrade error 0x80200056. If you are getting this error, read on as this post will guide you in fixing it. This kind of error pops up when the upgrade process was interrupted and could be caused by anything but the baseline here is that your computer was restarted accidentally or someone could have signed out your PC. To resolve the problem, here are some fixes you ought to try:

Option 1 – Try updating or upgrading your computer again

This is the basic thing to do since the process was suddenly interrupted. Just log in to your account and restart the Windows Update or Upgrade process but make sure that your internet connection is stable and that you don’t touch anything so as not to interrupt the upgrade/update process again.

Option 2 – Check if your PC is plugged in or if the battery is full

It is always best to update your computer always when you’re really sure that the power won’t fail. If you’re using a desktop computer, make sure that everything is plugged in. And if you’re using a laptop when this error occurred, make sure that its battery is at 100% but it’s better if you just plug it into power just in case as there are times when the Windows update or upgrade gets stuck for too long like for hours so it will really help if your device is connected to power.

Option 3 – Try running the Windows Update Troubleshooter

Running the built-in Windows Update troubleshooter could also help you resolve the Windows Update errors as well as the error 0x80200056. To run it, go to Settings and then select Troubleshoot from the options. From there, click on Windows Update and then click the “Run the troubleshooter” button.

Option 4 – Delete the contents in the SoftwareDistribution folder

The Software Distribution folder in the Windows operating system is a folder that can be found in the Windows directory and is used to store files temporarily which might be required to install the Windows Update on your PC. Thus, it is required by the Windows Update and maintained by WUAgent. A lot of users tried deleting the files in this folder to fix the problem and so far it has worked. Like them, you can try clearing the Windows Update cache by simply deleting the contents of the folder named “SoftwareDistribution” since Windows apparently can’t clear and re-download the update contents once they are corrupted. Thus, deleting the contents of this folder will make Windows download the contents again which will fix the problem. To do that, follow the steps below.
  • Open the WinX Menu.
  • From there, open Command Prompt as admin.
  • Then type in the following command – don’t forget to hit Enter right after typing each one of them.
net stop wuauserv net stop bits
  • After entering these commands, it will stop the Windows Update Service and the Background Intelligent Transfer Service.
  • Next, got to the C:\Windows\Software\Distribution folder and get rid of all the folders and files thereby tapping the Ctrl + A keys to select them all and then click on Delete. Note that if the files are in use, you won’t be able to delete them.
  • Once all the contents in the Software Distribution folder are deleted, restart your PC and then go back to Command Prompt and input the following commands again.
net start wuauserv net start bits
Since the folder has already been flushed, it will be populated afresh the instant your restart your computer and open Windows Update.

Option 5 – Try running the System File Checker scan

System File Checker or SFC is a built-in command utility that helps in restoring corrupted files as well as missing files. It replaces bad and corrupted system files to good system files that might be causing the error 0x80200056. To run the SFC command, follow the steps given below.
  • Tap Win + R to launch Run.
  • Type in cmd in the field and tap Enter.
  • After opening Command Prompt, type in sfc /scannow
The command will start a system scan which will take a few whiles before it finishes. Once it’s done, you could get the following results:
  1. Windows Resource Protection did not find any integrity violations.
  2. Windows Resource Protection found corrupt files and successfully repaired them.
  3. Windows Resource Protection found corrupt files but was unable to fix some of them.

Option 6 – Run the Chkdsk utility to repair hard disk errors

You can also run the Chkdsk utility to resolve the Windows Update error 0x80200056. If your hard drive has issues with integrity, the update will really fail as the system will think that it’s not healthy and that’s where the Chkdsk utility comes in. The Chkdsk utility repairs hard drive errors that might be causing the problem.
  • Open Command Prompt with admin privileges.
  • After opening Command Prompt, execute the commands listed below, and don’t forget to hit Enter right after you type in each one of them and if you have installed Windows to some different directory, you must replace “C” with the name of the drive you’ve installed Windows with.
  • chkdsk C: /r /x
  • chkdsk C: /f

Option 7 – Run the DISM tool to repair the Windows Update client

The Windows update/upgrade error 0x80200056 might be caused by some issues in the Windows Update client so you need to run the DISM tool to repair it. Note that you have to use another computer or another Windows from a shared network to fix it.
Read More
NVIDIA Control Panel keeps crashing
The NVIDIA Control Panel is a useful tool for users who have NVIDIA graphics on their PCs as this tool allows users to how the graphics card is used on the computer using several controls that come with the graphics card from NVIDIA. Thus, it can be quite inconvenient when it suddenly crashes all of a sudden for some reason. This kind of problem could be due to the toggling of Output Dynamic Range is limited, or there could be some issue with the integrity of the Power Supply for the graphics card, and many more. So if you are using NVIDIA on your computer and its Control Panel keeps on crashing on your Windows 10 computer, then you’ve come to the right place as this post will guide you in sorting the problem out. For more details, refer to the guidelines laid out below.

Option 1 – Try to toggle the Output Dynamic Range

The first thing you can do to fix the problem is to toggle the Output Dynamic Range by following these steps:
  • Navigate to this path: Display > Change resolution.
  • Next, scroll a bit on the right-side panel until you see the Output Dynamic Range drop-down.
  • After that, select “Full” from the drop-down menu.
  • Apply the changes you’ve made and see if it is able to fix the problem with the NVIDIA Control Panel.

Option 2 – Try changing the Power Management and Vertical Sync settings

The next thing you can do to fix the problem is to change the Power Management, as well as the Vertical Sync settings.
  • Open the NVIDIA Control Panel and go to this path: 3D Settings > Manage 3D Settings.
  • Next, set the Power Management to be “Prefer Maximum Performance” for your processor located on the right-side panel.
  • After that, set the Vertical sync setting off and then click on the Apply button located at the bottom-right portion of the window and check if it is able to fix the problem or not.

Option 3 – Try updating the drivers from the official site of NVIDIA

If both the first and second given options didn’t work, you can also try updating the drivers from the official NVIDIA website. And in case you don’t know the type of Nvidia graphics card that your computer is on, follow the steps below:
  • Tap the Win + R keys to open the Run dialog box.
  • Next type in “dxdiag” in the field and click OK or hit Enter to open the DirectX Diagnostic Tool.
  • From there, you can see what type of Nvidia graphics card that your system is on.
  • Take note of your graphics card information and then look for the best drivers for your operating system. Once you’ve downloaded and installed the file, restart your PC.

Option 4 – Try to roll back the driver to the previous version

If updating the NVIDIA display drivers didn’t work for you, then it’s time to roll back the device drivers. It is most likely that after you updated your Windows computer that your driver also needs a refresh.
  • Tap the Win + R keys to launch the Run window and then type in the “MSC” command and hit Enter to open the Device Manager window.
  • Under the Device Manager, you will see a list of drivers. From there, look for the NVIDIA Drivers and expand it.
  • Next, select the driver entries that are labeled appropriately.
  • Then select each one of them and double click to open a new mini window.
  • After that, make sure that you’re on the Driver tab and if you are not, just navigate to it then click the Roll Back Driver button to switch back to the previous version of the NVIDIA Drivers.
  • Now restart your computer to successfully apply the changes made.
Read More
1 2 3 162
Logo
Copyright © 2022, ErrorTools. All Rights Reserved
Trademarks: Microsoft Windows logos are registered trademarks of Microsoft. Disclaimer: ErrorTools.com is not affiliated with Microsoft, nor claim direct affiliation.
The information on this page is provided for information purposes only.
DMCA.com Protection Status