Fix Windows Activation Error 0xC004F211

If you got an Activation Error 0xC004F211 after having installed or upgraded your Windows 10 PC, then this indicates that some hardware in your computer has changed which’s causing the error to pop up. Windows might not be able to determine if the key is used on a new computer or if it’s still the same one if you have just removed or upgraded old hardware. But worry not for this post will guide you in fixing the Windows Activation Error 0xC004F211 on your Windows 10 computer.

When you encounter this error, you will see the following error message on your screen:

“Cannot activate Windows 10. Try activating again later. If that doesn’t work, contact support. Error code: 0xC004F211.”

Note that although hardware changes cause this error, the minor ones don’t really cause any issues with activation, however, if you have made any significant hardware change such as replacing your motherboard, it will most likely cause the activation error. In such cases, the Windows Activation system will treat this as new hardware and you will need a new license for that.

Even if your Windows 10 computer has a genuine key, it might still fail to get activated which results in the Windows Activation Error 0xC004F211. Thus, before you do other troubleshooting steps, you need to run the Windows 10 Activation Troubleshooter first. To do so, follow these steps:

  • Go to Settings and then select Activation.
  • After that, click on the Windows Activation and then troubleshoot. This will help you address most of the commonly found activation issues in Windows devices.

In addition, there is an exception offered by Microsoft – if you are connected to a Microsoft account prior to the hardware change, then you can most certainly use the same license key to reactivate Windows 10 again. Microsoft calls this an “Exception path” which should be fixed easily by the Windows Activation Troubleshooter as pointed out earlier. However, if the Windows Activation Troubleshooter isn’t able to resolve the error you can try purchasing a new license. In such rate case, even if you do have a Microsoft account available on your Windows 10 computer, and if Windows was never activated, this solution will not work. And if you haven’t connected your Microsoft account with your Windows 10 computer prior to the major hardware change, then your only option left is to purchase a new license. For you to do that here are some steps you can follow.

  • To purchase a new Windows license, the first thing you have to do is click on the Start button > Settings > Update & Security.
  • From there, go to Activation and select the “Go to Microsoft Store” option.
  • After receiving your new license, you need to go back to Update & Security then go to Activation and select the “Change product key” option.
  • Now update your Windows 10 computer using the new key and it should automatically activate your computer.
  • Next, you have to create a Microsoft account or connect your existing local account to your online account.
  • Once the system links the key and the account, you need not buy a new license in case something like this happens again.

Note: If you are an IT administrator, you need to keep in mind that there is a limit to the number of times you can reactivate Windows on your computer. Moreover, if you don’t see any option to reactivate the license, and it is a work computer, you need to contact your organization’s tech support.

If you like to learn and find out more about various Windows errors, and how to repair them go to our vast archive or use search to find articles that will explain and help you in solving your issue.
However, if you prefer to do things fast and with automatization then we are proposing to use an automated solution for your issues. The application that we are recommending is Advanced System Repair Pro
Advanced System Repair utilizes multiple tools all in one to give you a quick, simple, reliable, and very thorough diagnosis of your PC. It brings you all the tools you need in one program to clean, fix, protect, optimize and boost your PC!
1-Click Maintenance
All the tools to make it simple and easy! It's like having a professional technician at the click of a mouse.

Junk Cleaner
Keeping your computer free from unnecessary clutter also helps make your computer last longer. Like any other machine, if you keep it clean and take care of it, it will serve you better for longer!

Optimize background apps
Optimize applications background activity with the built-in Application Optimizer feature.

Disk Defrag
With a simple 1-click, Advanced System Repair speeds up your PC by assembling fragmented files on your machine and organizing them more efficiently.

Malware Removal
Finds and removes all types of harmful malware including trojans, worms, bots, adware, spyware, PUPs, and more!

Privacy Cleaner
The all-in-one privacy suite to Clean Your Tracks & Protect Your Privacy! Make your computer safe, secure, and more efficient!

System Tweak/Optimizer
ASR will analyze your complete system and settings to adjust your PC to function at its maximum performance.

Registry Cleaner
Over time, as you install and uninstall applications, the registry can become cluttered with old entries and broken settings which can result in program crashes, and annoying messages and slow the computer down.
Visit our Advanced System Repair Pro Download page to inform yourself about all the benefits of this software and get a free trial copy of it.
advanced system repair pro

Advanced System Repair Pro

One-click automated PC repair solution
ASR logo
With Advanced System Repair Pro you can easily
Replace damaged files
Restore performance
Free disk space
Remove Malware
Protects WEB browser
Remove Viruses
Stop PC freezing
DOWNLOAD
Privacy Policy | Terms of Use | Uinstall
Advanced System Repair Pro is compatible with all versions of Microsoft Windows including Windows 11

Share this article:

You might also like

The quick demise of the BRAVE browser
Brave browser has gained popularity very rapidly and many websites have gone into the territory of recommending it. Sadly although the browser kind of offered better performance, it seems that so much advertised privacy and security was a lie. Several months ago, Brave was involved in a “scandal”. Unfortunately, this incident did not get much media attention, and it’s hard to search for and discover as of today. There is an article on the Android police website explaining this issue in detail, you can check it here: https://www.androidpolice.com/2020/06/07/brave-browser-caught-adding-its-own-referral-codes-to-some-cryptcurrency-trading-sites/ But to sum things up and keep them short if you do not want to go through the full article, Brave had been injecting their affiliate codes into popular crypto-currency websites. This means that they had been intercepting your traffic, which they promised was secure by the way, and modifying it. This means Brave Software has access to all of your information on those crypto-currency sites as well. They can see your payments/purchases, and your activity on the websites (through affiliate statistics). Now some people might point out that they are not interested in crypto or have been visiting some of the sites but the issue still remains and that is they did all of this, without telling the user. They intentionally didn’t tell the user because they knew it would cause backlash and disruption. They knew one hundred percent what they were doing, and they knew it was unethical. And the point remains if something like this was already done, who knows what will come up in the future. Personal recommendation is to avoid Brave and go back to other browsers.
Read More
How to hide taskbar inside Windows 11
windows 11 taskbarWindows 11 has brought some bad reviews for its inability to change the taskbar location to the screen. Luckily we can still hide it if needed. In order to hide the taskbar from the screen follow these simple instructions:
  1. Right-click the taskbar itself and select “Taskbar Settings” in the tiny menu that pops up or open Windows Settings and navigate to Personalization > Taskbar
  2. Click on Taskbar Behaviors
  3. Check the box next to Automatically hide the Taskbar
  4. Close settings
As soon as you click on the box to hide the taskbar Windows 11 will apply your settings and hide the taskbar, you will get one line at the very bottom of the screen indicating that the taskbar is still present, just hidden. When you reach the bottom of your screen with the mouse it will pop up and be visible again, just like in all Windows so far.
Read More
Fixing the No Audio Output Device is Installed
If you suddenly encountered an error that says, “No Audio Output Device is installed” on your Windows 10 computer, worry not for this post will guide you on how exactly you can fix the problem. There are several possible reasons why this error pops up. It could be due to a recent Windows 10 update you’ve installed, or it could be due to a corrupted or outdated audio driver, and so on. There are several potential solutions to this error. You can try running the built-in Audio Playing troubleshooter or update or uninstall the Audio driver. You could also try to update the Intel Smart Sound Technology Audio Control driver, as well as contact support for your laptop or computer. For more details, refer to each one of the provided options below.

Option 1 – Try to run the Playing Audio Troubleshooter

Since the Windows 10 operating system has the Playing Audio Troubleshooter, you can use this troubleshooter to try and fix the problem with the “No Audio Output Device is installed” error. You can access this tool in the Control Panel or in the Taskbar Search and even on the Troubleshooters page of Windows 10. Run this troubleshooter and see if it can fix the issue or not.

Option 2 – Try to update the Audio driver

If the error has something to do with software, chances are it might be related to the audio driver – it could be that the newest version of your Windows 10 does not work well with the old version of the driver. This is why you have to update your audio driver to the newest available version.
  • Tap the Win + R keys to open the Run dialog box and then type in MSC and tap Enter or click OK to open the Device Manager.
  • Expand the section of the Sound, video, and Game Controllers.
  • And then from the drop-down menu, select the Update Driver option and follow the on-screen instructions to install the latest version of the driver.
  • Then also click on the option, “Search automatically for updated driver software.
  • Restart your PC after the installation.
Note: If updating the Audio driver didn’t work, you can go to the website of your PC manufacturer and look for the support section where you can download the drivers for your computer. You just need to take note of your PC’s correct model and model number so you can find the appropriate driver.

Option 3 – Try removing and reinstalling the sound card

If option 1 didn’t work, you can also try to remove and reinstall the sound card of your computer to fix the high-pitched sound coming from your computer’s speakers.
  • To get started, tap on the Windows key + R to pull up the Run box.
  • Next, type in “MSC” in the box to open the Device Manager.
  • After opening the Device Manager, go to the “Sound, video, and game controllers” option then right-click on the sound card.
  • Finally, click on Uninstall and tick the box with a label that says, “Delete the driver software for this device” and close the Device Manager.
  • Restart your computer and check if the problem’s fixed or not.
Note: After you restart your computer, the system should reinstall the speaker automatically. But if it does not reinstall, you can follow the aforementioned steps again to go to the Device Manager. From there, go back to “Sound, video, and Game Controllers” and right-click on the sound card. After that, enabling the sound card and restart your computer once more. That should fix the problem.

Option 4 – Try updating the Intel Smart Sound Technology Audio Control driver

If the three options given above didn’t fix the error, you might want to try updating the Intel Smart Sound Technology Audio Control driver. To do so, follow these steps:
  • Tap the Win + X keys and select the Device Manager option from the menu.
  • Next, scroll down and click on the System Devices option and select the “Intel Smart Sound Technology Audio Control” option.
  • Then right-click on it and select the “Update driver” option.
  • After a couple of seconds, the wizard will look for an available driver and will automatically update it.
  • Restart your computer and see if the error is now fixed.
Read More
Fix ndis.sys failed BSOD error on Windows 10
NDIS or Network Driver Interface Specification is a programming interface for the network interface cards that aids in the proper functioning of a system driver in a computer network. The NDIS helps the computer system in order to communicate with other connected devices and hardware components on a computer network. In relation, the ndis.sys file is a critical system file developed by Microsoft for the Windows operating system. As you know, sys files or system files are important parts of the Windows operating system as well as a repository of system driver settings used by Windows to communicate with the connected hardware and devices. The ndis.sys files are stored mostly in a driver folder at C:/Windows/System32/drivers and as mentioned, these files are essential for the system to function properly. Although the presence of ndis.sys system file is not yet known to affect the normal functioning of the Windows OS, some of the Windows 10 users reported that they encountered ndis.sys blue screen errors on their PCs. Blue Screen of Death errors or Stop errors usually occurs when you open a program or a function. Moreover, it could also occur when the driver gets loaded during the system startup or during system shutdown. It isn’t yet clear what really causes the ndis.sys blue screen error. However, like other Stop errors, it may occur due to corrupted files, misconfigured device drivers, bad drivers, corrupted Windows Registry, missing or damaged system files, and malicious programs. Aside from the aforementioned reasons, the ndis.sys blue screen error might also occur if your hard disk is damaged and if the RAM is corrupted. In such cases, a lot of users usually disable the ndis.sys file. However, it won’t really resolve the issue since the file is required for the normal functioning of the operating system and even when you disable the file, it’s pretty useless as the file will start all over again. In addition, you might want to disable security programs or firewalls and antivirus programs in the meantime to check if these programs are the ones that are causing the error. And if you’ve determined that none of the security programs or firewalls and antivirus programs are to blame, refer to the options below that might help you resolve the DRIVER_IRQL_NOT_LESS_OR_EQUAL or ndis.sys Blue Screen of Death error.

Option 1 – Try to update or reinstall the PC device driver

The Ndis.sys Blue screen error can occur when the device driver in your computer is outdated or corrupted. Thus, you either have to update or reinstall it to fix the issue.
  • Tap the Win + R keys to launch Run.
  • Type in devmgmt.msc into the box and tap Enter or click OK to open the Device Manager.
  • After that, a list of device drivers will be displayed. If you see a red or yellow sign that shows up against the driver, right-click on the driver’s name and select “Update Driver Software” or “Uninstall”. And if you find any “Unknown device”, you need to update it as well.
  • Select the “Search automatically for updated driver software” option and then follow the instructions to complete the process.
  • Restart your PC.

Option 2 – Rollback your Network drivers

If you have updated the driver software as of late and you suddenly got this BSOD error, you might have to roll back the device driver – in other words, switch back to the previous working version. To do that, follow these steps:
  • Tap the Win + R keys to launch the Run window and then type in the “devmgmt.msc” command and hit Enter to open the Device Manager window.
  • Under the Device Manager, you will see a list of drivers. From there, look for the Network Adapters and expand it.
  • Next, select the driver entries that are labeled appropriately other than anything in the context of the WAN Miniport.
  • Then select each one of them and double-click to open a new mini window.
  • After that, make sure that you’re on the Driver tab and if you are not, just navigate to it then click the Roll Back Driver button to switch back to the previous version of your Network adapters.
  • Now restart your computer to successfully apply the changes made.

Option 3 – Try running the System File Checker

The SFC or System File Checker scan could detect and automatically repair damaged system files that could be causing the ndis.sys Blue Screen of Death error. SFC is a built-in command utility that helps in restoring corrupted files as well as missing files. It replaces bad and corrupted system files with good system files. To run the SFC command, follow the steps given below.
  • Tap Win + R to launch Run.
  • Type in cmd in the field and tap Enter.
  • After opening Command Prompt, type in sfc /scannow and hit Enter.
The command will start a system scan which will take a few whiles before it finishes. Once it’s done, you could get the following results:
  1. Windows Resource Protection did not find any integrity violations.
  2. Windows Resource Protection found corrupt files and successfully repaired them.
  3. Windows Resource Protection found corrupt files but was unable to fix some of them.

Option 4 – Try running the CHKDSK utility

Running the CHKDSK utility might also help you resolve the Netwtw04.sys failed BSOD error. If your hard drive has issues with integrity, the update will really fail as the system will think that it’s not healthy and that’s where the CHKDSK utility comes in. The CHKDSK utility repairs hard drive errors that might be causing the problem.
  • Open Command Prompt with admin privileges.
  • After opening Command Prompt, execute the following command and hit Enter:
chkdsk /f /r
  • Wait for the process to be completed and then restart your computer.

Option 5 – Run the DISM Tool

The DISM tool is another command-line tool in the Windows operating system that could help users fix various corrupted system files. To use it, follow these steps:
  • Open the Command Prompt as admin.
  • Then type in this command: DISM /Online /Cleanup-Image /RestoreHealth
  • The DISM command you entered will repair the corrupted system image. Do not close the window if the process takes a while as it will probably take a few minutes to finish.
  • Restart your PC.

Option 6 – Perform a System Restore

Performing a System Restore on your computer can also help you fix the ndis.sys Blue Screen of Death error. You can do this option either by booting into Safe Mode or in System Restore. If you are already in the Advanced Startup Options, just directly select System Restore and proceed with the next steps. And if you have just booted your PC into Safe Mode, refer to the steps below.
  • Tap the Win + R keys to open the Run dialog box.
  • After that, type in “sysdm.cpl” in the field and tap Enter.
  • Next, go to the System Protection tab then click the System Restore button. This will open a new window where you have to select your preferred System Restore point.
  • After that, follow the on-screen instructions to finish the process and then restart your computer and check if the problem is fixed or not.
Read More
NVIDIA GameStream is not working
The GameStream is an NVIDIA service that allows users to stream games from their Windows 10 computers to other supported devices which includes the NVIDIA SHIELD devices. However, a number of users reported that the NVIDIA GameStream is not working on their Windows 10 computers. This kind of issue is most likely caused by improper installation, some glitches with the network, and many more. To fix this issue in the NVIDIA GameStream, there are several options you need to check out to fix the problem. You can try to lo logout of GameStream and try logging back in again. You could also try to update or uninstall and reinstall the drivers related to NVIDIA or fix some network glitches or update the NVIDIA SHIELD device. For more details, you can refer to each one of the given potential fixes below.

Option 1 – Try to logout and log back into NVIDIA GameStream

The first thing you can do is to log out and then log back into NVIDIA GameStream. Some users claimed that by doing this simple task, they were able to resolve the problem. This is probably because with the re-login, the entire cache of the system and service is rebuilt and any bad sectors of that data will be replaced with the fresh one so this should resolve the problem with the NVIDIA GameStream, if not, refer to the other given options below.

Option 2 – Try updating the drivers from the official site of NVIDIA

If both the first and second given options didn’t work, you can also try updating the drivers from the official NVIDIA website. And in case you don’t know the type of Nvidia graphics card that your computer is on, follow the steps below:
  • Tap the Win + R keys to open the Run dialog box.
  • Next type in “dxdiag” in the field and click OK or hit Enter to open the DirectX Diagnostic Tool.
  • From there, you can see what type of Nvidia graphics card that your system is on.
  • Take note of your graphics card information and then look for the best drivers for your operating system. Once you’ve downloaded and installed the file, restart your PC.

Option 3 – Try to roll back the driver to the previous version

If updating the NVIDIA display drivers didn’t work for you, then it’s time to roll back the device drivers. It is most likely that after you updated your Windows computer that your driver also needs a refresh.
  • Tap the Win + R keys to launch the Run window and then type in the “MSC” command and hit Enter to open the Device Manager window.
  • Under the Device Manager, you will see a list of drivers. From there, look for the NVIDIA Drivers and expand it.
  • Next, select the driver entries that are labeled appropriately.
  • Then select each one of them and double click to open a new mini window.
  • After that, make sure that you’re on the Driver tab and if you are not, just navigate to it then click the Roll Back Driver button to switch back to the previous version of the NVIDIA Drivers.
  • Now restart your computer to successfully apply the changes made.

Option 4 – Try fixing your network

The next thing you can do to fix the problem with the NVIDIA GameStream is to fix the glitches in your network. Make sure that you connect both of your devices to a 5 GHz Wi-Fi network and you also have to ensure that the Wi-Fi connection you’re connected to is strong enough for both the devices for the latency to go down. Once you’ve covered all of these things with your network, restart your computer and change the Wi-Fi channel both devices are connected to. This should resolve the problem.

Option 5 – Try to update the NVIDIA SHIELD device

You might also want to update the NVIDIA SHIELD device. There are times when an outdated NVIDIA SHIELD device can result to several issues like the problem with the NVIDIA GameStream. Thus, you need to update NVIDIA SHIELD and check if it fixes the problem or not.
Read More
Disable Privacy Settings Experience at sign-in
Creating a new Windows 10 account comes with options related to privacy. For instance, you will see the options to disable or enable Speech recognition, Find my device, Location service, Inking & typing, and many more. And if you often have to create a test account in Windows 10 v1809 and you don’t want to give this option, you can just disable the Privacy Settings Experience at sign-in on your Windows 10 PC using a couple of instructions given in this guide. To disable the Privacy Settings Experience, you can use the Registry Editor and the Group Policy Editor. But before you get started, you need to log in as an administrator. Moreover, it would also be better if you create a backup copy of the Registry files as well as create a System Restore Point before you make any changes. After you have those things covered, refer to the steps given below to disable the Privacy Settings Experience at sign-in on your Windows 10 PC. Since there are two ways to get things done, choose one option that you prefer.

Option 1 – via Registry Editor

  • Tap the Win + R keys to open the Run dialog box and type “Regedit” in the field and hit Enter to open the Registry Editor.
  • Next, navigate to this path: HKEY_LOCAL_MACHINESOFTWAREPoliciesMicrosoftWindowsOOBE
  • From there, look for the OOBE value and if you can’t find it there, you can just create it. To do so, right-click on the Windows key and select New > Key, and then name it “OOBE”.
  • After that, right-click on the OOBE value and select New > DWORD (32-bit) value, and name it “DisablePrivacyExperience”.
  • Then double click on DisablePrivacyExperience and set its value to “1”.
  • Now exit the Registry Editor and restart your PC for the changes to take effect.

Option 2 – via the Group Policy Editor

  • Tap the Win + R keys to open the Run dialog box.
  • Then type “gpedit.msc” in the field and hit Enter to open the Group Policy Editor.
  • After that, navigate to this path: Computer Configuration > Administrative Templates > Windows Components > OOBE
  • Next, look for a setting named “Don’t launch privacy settings experience on user login” located on your right-hand side and then double click on it and select Enabled.
  • Now click on the Apply and OK buttons to save the changes made.
  • Restart your PC.
Read More
How to map a network drive in Windows 11
windows 11 network drive
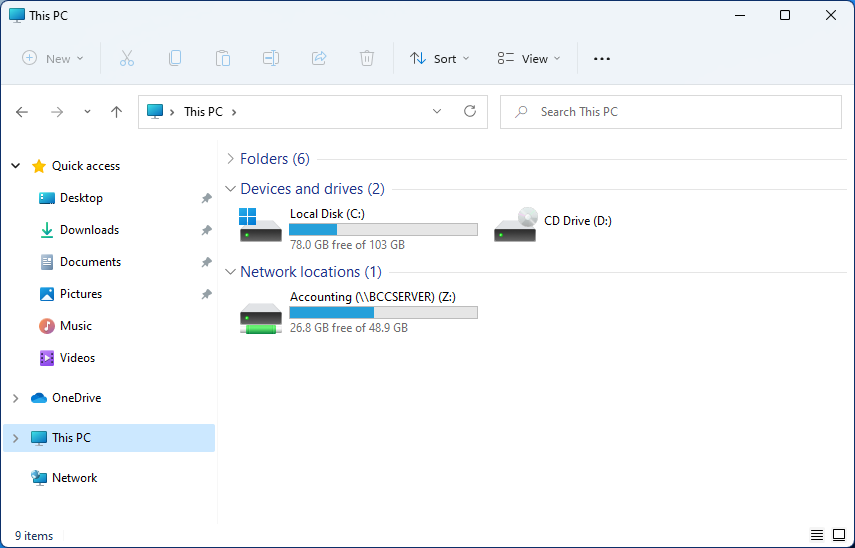
Mapping network drive has many benefits in terms of speed and ease of access of files via network. It lets you access the hard drive over the whole network like it was the hard drive inside your PC case. In order to easily and quickly map a folder as a network drive follow the guide below.
  1. Open File Explorer
  2. Click on the three dots icon in the Toolbar
  3. Select Map Network Drive
  4. Click the Drive drop-down menu
  5. Select a driver letter that you wish to assign as a network drive
  6. In the folder field enter network device and share name (click on browse to see all devices on local network)
  7. Check the box beside Reconnect at sign-in if you wish to automatically connect to a network drive on Windows startup
  8. Check Connect Using Different Credentials if you wish to connect to a network drive using different credentials that one used to login into Windows.
  9. Click Finish
After finishing setting Windows 11 will try to connect to the network drive and if successful drive icon will appear inside File Explorer and the drive will open up to see its content. If for any reason it cannot connect try checking user credentials, cables, network adapters, etc.
Read More
How to Fix Black Screen During Installation Windows 10

Black Screen During Installation - What Is It?

Many are upgrading their OS to Windows 10, however, it’s not always smooth sailing because users have been reportedly experiencing different bugs including Black Screen after a successful update.

One common issue in installing Windows 10 is the appearance of a black screen after installation. This usually occurs when the user restarts the computer. Initially, there will be a black screen only appearing on the monitor. There are also cases where a mouse cursor is present, while some cases have no cursor at all.

Not only that, it seemed that you’ve lost all your desktop icons when experiencing this bug.

Solution

Restoro box imageError Causes

Just like the other bugs experienced by Windows 10 users, booting to a black screen has reasons. Before you even try to look for the solution, you first have to determine the cause of the error, in this case, the error would be black screen when booting.

  • Error on external devices such as printer or mouse.
  • Having outdated display/video drivers that normally result in black screen when OS is updated.
If error messages are left unsolved, you may encounter other Windows 10 related issues such as error code 0xc0000142

Further Information and Manual Repair

Before you even think of upgrading your OS to Windows 10, you need to know that there are specific system requirements and specifications to be able to successfully update your operating system.

  • Minimum of 1 gigahertz (GHz) Processor
  • Either 1 (GB) (32-bit) or 2 GB (64-bit) Ram
  • You need at least 16 GB of free hard disk space
  • A Microsoft DirectX 9 graphics device or later with WDDM 1.0 driver graphics card
  • 800 x 600 display
  • A Microsoft account and Internet access.

There are more system requirements in order to use other certain Windows 10 features, but we’ll focus on solving your black screen problem in this article.

IMPORTANT NOTE: While it’s possible that you’ll be able to find the solution for your black screen during Windows 10 update, contacting the service of a professional technician or using an automated tool is advisable if you’re not confident in performing the methods to be discussed.

Method 1: Windows 10 DVD Boot

  1. Hit Repair your computer at the Install Now screen.
  2. Press Advanced Options
  3. When you’re in the Advanced Options find Troubleshoot and click it.
  4. Proceed to pressing Startup Repair
  5. Simply follow the instructions of the screen and check if that helps solve the black screen problem.

Method 2: Safe Mode from Windows 10 DVD Boot

  1. Go to Install Now screen
  2. Hit Repair your computer button
  3. Go to Advanced Options
  4. Click Safe Mode option

There’s a chance that you’ll get an error prompt saying, “installation cannot be completed in safe mode.” If this happens, simply press Shift + F10. This command will redirect you to the Command Prompt. You just open Device Manager by keying in devmgmt.msc then disable the display adapters, now check if you’ll be able to successfully boot in normal mode.

This process will normally allow you to complete the Windows 10 installation, if that’s the case you can just update the display adapter drivers from the manufacturer’s website. Restart your computer and see if this solves the problem.

Method 3: Driver Roll Back

  1. Hit Windows Key + X then press the Device Manager
  2. Expand the Display Adapters option
  3. Right-click the listed Display Adapter and press on properties
  4. Find the Driver Tab and click on it, then press Roll Back Driver

Do take note, however, that the Roll Back Driver option is not available if there was no previous version installed.

Method 4: Check External Devices

Since one common cause of black screen during a Windows 10 update is the external devices you use in your computer, you might want to consider these steps as well.

  1. Simply unplug all of the external devices you currently use
  2. Restart your computer
  3. If in case this solved your black screen problem, carefully plug back the devices one at a time to determine which of the device is the culprit.
  4. Update the drivers for the outdated hardware using a reliable third party tool.

Method 5: Fast Startup Disabled

Some Windows 10 users had success in solving their black screen problem by disabling the fast startup.

  1. Go to the Control Panel, find Power Options and press “Choose what the power button does,” which is located in the left pane of the panel.
  2. Hit the “Change settings that are currently unavailable.”
  3. Make sure to unmark the checkbox button saying, “Turn on fast startup.”
Read More
Changing the Primary and Secondary monitor
If you are using a dual monitor setup on your computer and you wish to change the Primary and Secondary monitor in Windows 10, then you’ve come to the right place as this post will guide you on how exactly you can do that. A lot of users use more than one monitor to be more productive so having dual monitors helps a lot. So if you have more than one monitor, know that you can actually select any monitor as the primary monitor after installing Windows. Changing the primary and secondary monitor in Windows 10 does not really require you to install any third-party application since you can get the job done by simply making some alterations in the Windows 10 Settings panel. You won’t have any problem in making such alterations since it is quite simple – from modifying the wallpaper to scaling and so on.

To get started, follow the instructions given below carefully.

Step 1: First, tap the Win + I key combination to open the Windows 10 Settings app and go to System and click the Display tab. Step 2: Next, look for the Identify button located on your right-hand side and then click on it. This button will help you check which one is the primary and the secondary monitor. Step 3: After that, select the desired monitor that you want to set as the primary one from the drop-down menu. Step 4: After that, mark the checkbox for the “Make this my main display” option. Step 5: After choosing the primary monitor, this will automatically set the other monitor as the secondary monitor. Restart your computer. So that’s how you change the primary and secondary monitor on your Windows 10 computer. Note that you can always go back to the previous setting of your monitor by following the same instructions provided above.
Read More
A Quick Guide to Fixing JavaScript Void 0 Error

Correct JavaScript Void 0 Error

JavaScript Void 0 Error - What is it?

JavaScript is a computer programming language used to make a website work smoothly with the internet. It helps to display visual effects, animations, and other web page functions. You may come across the JavaScript Void (0) error message when there is a problem in loading JavaScript from a web page or the internet browser.

Error Causes

JavaScript Void (0) error is triggered by multiple reasons such as:
  • It can be due to a simple random Windows application glitch.
  • You are visiting an unsafe website that contains malware
  • JavaScript’s web browser implementation  is broken due to poor program installation
  • Active X controls, Java applets, and active scripting, the key components of JavaScript are disabled
  • Registry issues like invalid or misconfigured registry keys

Further Information and Manual Repair

For JavaScript Void (0) error-free web surfing, it is advisable to repair the issue without any delays. Let’s take a look at different methods to resolve this error on your system.

Cause: Simple Random Glitch

Solution: If the cause for the JavaScript Void 0 error is a simple glitch, then it is advisable to restart your system and then run the program again.

Cause: JavaScript’s web browser implementation is broken

Solution: If you experience the JavaScript Void 0 error message after the installation of the new browser on your system, then poor installation of the program or program conflict is most likely to be the deep-rooted cause of this error code. To resolve it, uninstall the program and undo the recent changes.

Cause: Active X controls, Java applets, and active scripting, the key components of JavaScript are disabled

Solution: You should know that components including Active X controls, Java applets, and active scripting are all essential to JavaScript in order to make your browsers run properly. If these are disabled, you may come across the JavaScript Void (0). To fix it open your browser and select the Tools tab. Then click the options button and select content. Here check the ‘enable JavaScript’ check box and click Ok to enable these components.

Cause:  Registry Issues

Solution: If after performing all the solutions discussed above, you still come across JavaScript Void (0) error code, then you should know that the problem is bigger than what you expected. It triggers registry issues. Either the cause of the error is misconfigured or invalid registry keys. To reconfigure the registry keys setting may be a challenging task and complex if you are not a computer programmer. Congratulations, you have just fixed JavaScript Void 0 Error in Windows 10 all by yourself. If you would like to read more helpful articles and tips about various software and hardware visit errortools.com daily. Now that’s how you fix JavaScript Void 0 Error in Windows 10 on a computer. On the other hand, if your computer is going through some system-related issues that have to get fixed, there is a one-click solution known as Restoro you could check out to resolve them. This program is a useful tool that could repair corrupted registries and optimize your PC’s overall performance. Aside from that, it also cleans out your computer for any junk or corrupted files that help you eliminate any unwanted files from your system. This is basically a solution that’s within your grasp with just a click. It’s easy to use as it is user-friendly. For a complete set of instructions in downloading and using it, refer to the steps below Perform a full system scan using Restoro. To do so, follow the instructions below.
      1. Download and install Restoro from the official site.
      2. Once the installation process is completed, run Restoro to perform a full system scan. restoro application screen
      3. After the scan is completed click the “Start Repair” button. restoro application screen
Read More
1 2 3 162
Logo
Copyright © 2022, ErrorTools. All Rights Reserved
Trademarks: Microsoft Windows logos are registered trademarks of Microsoft. Disclaimer: ErrorTools.com is not affiliated with Microsoft, nor claim direct affiliation.
The information on this page is provided for information purposes only.
DMCA.com Protection Status