How to Fix Windows 10 Error C1900107

How to Fix Windows 10 Error C1900107

Error Code C1900107 – What is it?

Error code C1900107 is associated with an issue with upgrading to Windows 10. If you are trying to upgrade your Windows 7, Windows 8, or Windows 8.1 to Windows 10, you might have trouble doing it and you might come across this error C1900107. The error prevents you from upgrading to Windows 10 no matter what you do.

Common symptoms of this error:

  • The update process continues for a long time and never ends.
  • The update process ends suddenly and a message says “Failed: 1 update. Errors found: Code C1900107. Windows Update encountered an unknown error.”
  • The update process fails after trying multiple times.

Solution

Restoro box imageError Causes

Following reasons may be responsible for this error:

  • There is not enough space for Windows 10 files in the primary drive
  • There is not enough space in System Reserved Partition
  • Windows 10 files are faulty or corrupt

More Information and Manual Repair

Method 1:

Clean boot Windows 8 and Windows 8.1:

Whenever you get some unexpected behavior on your Windows 8, the first thing you should do is try to resolve the issue by taking a diagnostic approach. Plenty of factors can be the cause for issues like slowdowns, BSODs, computer freezes, sudden reboots, etc. The best way to detect the problem is to perform a clean boot. Using a clean boot, you can find out if the Operating System is damaged by some third-party app or bad driver. You can exclude the influence of these factors and prevent them from loading.

You should do 2 things before you proceed with the clean boot.

First, check if any third-party application is causing the problem. If you disable all third-party apps from startup, it will help eliminate software conflicts.

  • Press the Windows + R on the keyboard. The Run dialog box will pop up.
  • Type MSConfig in the dialog box and click "OK".
  • The System Configuration utility will appear on the screen.
  • On the services tab of the System Configuration dialog box, tap or click to select the Hide all Microsoft services check box, and then tap or click Disable all.
  • On the startup tab of the System Configuration dialog box, tap or click Open Task Manager.
  • On the startup tab in Task Manager, for each startup item, select the item and then click Disable.
  • On the startup tab of the System Configuration dialog box, tap or click OK, and then restart the computer.

Now, close MSConfig.

Method 2:

The second step is a Safe boot. Follow the steps below for a safe boot:

  • Press Win + R shortcut keys on your keyboard. The Run dialog will appear on the screen. Type MSConfig and press Enter.
  • The 'System Configuration' application will appear on the screen.
  • Switch to the 'Boot' tab, select your Windows 8.1 entry and tick the 'Safe mode' checkbox.
  • Reboot your PC to enter the Safe mode of Windows 8.1.
  • After you finish troubleshooting in Safe Mode, run MSConfig again from Safe Mode and uncheck the checkbox from step 2.

Method 3:

For this method, you will need to find the $Windows.~BT Folder in your primary drive which is C:. This folder might contain corrupt files which are preventing you from installing Windows 10. The folder is hidden and we need to unhide it. Follow the steps below:

  1. Open File Explorer or alternatively double click on This PC or My Computer.
  2. Now from the top option click on View, The Check the Box that says Hidden items.
  3. Now you will be able to see hidden files and folders. Navigate to C:$Windows.~BT and Rename the folder to something like $Windows.~BT1.
  4. Now, try downloading Windows 10 again. The installation process should go through this time without any errors like code C1900107.

Method 4:

If the above methods fail, try this method:

  1. Go to C:\Windows\Software Distribution\Download. Now delete all the files from this download folder. Remember, do not delete the folder itself, and just delete the files.
  2. Now, delete the $Windows.~BT Folder. This might ask you for administrator permission. Simply click yes.
  3. Now try to install or upgrade to Windows 10. This method should work fine and there should be no error code C1900107.

If you do not possess the technical expertise required to accomplish this yourself or do not feel comfortable doing so, download and install a powerful automated tool to get the job done.

If you like to learn and find out more about various Windows errors, and how to repair them go to our vast archive or use search to find articles that will explain and help you in solving your issue.
However, if you prefer to do things fast and with automatization then we are proposing to use an automated solution for your issues. The application that we are recommending is Advanced System Repair Pro
Advanced System Repair utilizes multiple tools all in one to give you a quick, simple, reliable, and very thorough diagnosis of your PC. It brings you all the tools you need in one program to clean, fix, protect, optimize and boost your PC!
1-Click Maintenance
All the tools to make it simple and easy! It's like having a professional technician at the click of a mouse.

Junk Cleaner
Keeping your computer free from unnecessary clutter also helps make your computer last longer. Like any other machine, if you keep it clean and take care of it, it will serve you better for longer!

Optimize background apps
Optimize applications background activity with the built-in Application Optimizer feature.

Disk Defrag
With a simple 1-click, Advanced System Repair speeds up your PC by assembling fragmented files on your machine and organizing them more efficiently.

Malware Removal
Finds and removes all types of harmful malware including trojans, worms, bots, adware, spyware, PUPs, and more!

Privacy Cleaner
The all-in-one privacy suite to Clean Your Tracks & Protect Your Privacy! Make your computer safe, secure, and more efficient!

System Tweak/Optimizer
ASR will analyze your complete system and settings to adjust your PC to function at its maximum performance.

Registry Cleaner
Over time, as you install and uninstall applications, the registry can become cluttered with old entries and broken settings which can result in program crashes, and annoying messages and slow the computer down.
Visit our Advanced System Repair Pro Download page to inform yourself about all the benefits of this software and get a free trial copy of it.
advanced system repair pro

Advanced System Repair Pro

One-click automated PC repair solution
ASR logo
With Advanced System Repair Pro you can easily
Replace damaged files
Restore performance
Free disk space
Remove Malware
Protects WEB browser
Remove Viruses
Stop PC freezing
DOWNLOAD
Privacy Policy | Terms of Use | Uinstall
Advanced System Repair Pro is compatible with all versions of Microsoft Windows including Windows 11

Share this article:

You might also like

Create BlueTooth shortcut on desktop
If you have a BlueTooth device on your computer, you know that each time you need to receive or transfer the file you need to find the icon in the system tray, right-click on it and choose the desired option. But there is a simpler solution, create a Bluetooth icon on the desktop so it is always easy to access. Open File Explorer by pressing ⊞ WINDOWS + E Go to C:\Windows\System32 Find fsquirt.exe Right-click on it and choose copy Go to the desktop and right-click, choose paste Rename the file to Bluetooth And, you are done!
Read More
How to Repair BSOD Stop Error code 0xc000021a in Windows 10

Error code 0xc000021a - What is it?

Error code 0xc000021a occurs when the system is unable to start or there’s a failure in critical system processes. Normally, it would take about several seconds for the system to boot and while on the startup process, error code 0xc000021a may take place to block the system to boot up. Users will get a blue screen of death (BOSD) when this error occurs. When upgrading to Windows 10, be careful; you might encounter other error messages such as error code 8007002c

Solution

Restoro box imageError Causes

There are several reasons why error code 0xc000021a occurs. It is important to have a full understanding of what caused the blue screen of death before attempting to fix the error by yourself. See below for a few common causes:

Computer malware has infiltrated your device.

• Important files such as Winlogon.exe and Csrss.exe are damaged. Winlogon.exe file is responsible for handling the login and logout processes while Csrss.exe is a vital part of Microsoft Client or Server ‘Runtime Server Subsystem’. Once one of these files is damaged or deleted, a stop error will occur.

• When there are mismatched system files installed or system upgrading process failed or still incomplete.

• Premature unloading of Wbemprox.dll

• Newly installed third-party software is not compatible with the operating system.

• There are corrupted, outdated, or incorrectly configured device drivers.

• There’s insufficient space in the system partition. Once the system partition is full, certain errors such as error code 0xc000021a will manifest.

• Windows registry is corrupted or damaged due to a software or system change. This means there are registry entries that are not cleared after uninstalling an application.

Further Information and Manual Repair

In fixing error code 0xc000021a, you might want to try and manually do so. Manual repair methods can give users effective and efficient solutions, addressing the root problems in relation to Windows error codes. Once the manual repair method is correctly implemented, users will be able to resolve issues immediately. However, there might be instances when a Windows professional is needed. In such cases, seek help from a certified Windows expert or you might want to consider using an automated tool whenever necessary.

Method One: Convert the Drive or Partition from NTFS to GPT

In order to fix Error code 0xc000021a in Windows 10, you might need to convert the partition or drive from NTFS to GPT. See below for the procedure: 1. Shut down your device then put in the Windows installation USB key or DVD. 2. Boot your device to the USB key or DVD in UEFI mode. 3. Inside the Windows Setup, open a Command Prompt window by pressing Shift + F10. 4. Type diskpart in the Command Prompt window to open the diskpart tool. 5. Type list disk to identify which drive to reformat. 6. Select which drive to reformat by typing select disk in the command prompt. Afterward, type clean then hit Enter. Once done, type convert gpt to be able to convert the drive from NTFS to GPT. Finally, type exit and press Enter. You can now close the Command Prompt window. 7. Once the partition or drive is converted from NTFS to GPT, the user can now continue the Windows Setup installation. NOTE: Select Custom in choosing which installation type to use. The drive will then appear as a single area of unallocated space. Choose that unallocated space then select Next. At this point, Windows will now begin the installation.

Method Two: Fix System File Errors

There are times when system files get corrupted or damaged which will result in system failure. If this is the case, you can use a Windows free tool to repair corrupted or damaged system files. 1. Right-click on the Start button then selects Command Prompt (Admin) from the list to open a Command Prompt window. 2. Once the Command Prompt appears, type sfc /scannow then hit Enter. Wait until the process completes. If the process is completed and it doesn’t report any error or issues that remain unsolved, you might want to employ the next method.

Method Three: Reset Windows 10

Resetting Windows will delete all software and user accounts installed in the operating system and will reinstall a fresh Windows. 1. Boot your device using a Windows installation USB key or DVD. Select Repair your computer to locate the Troubleshoot option. Afterward, choose Reset this PC. NOTE: If the device is able to boot the system, you can reset Windows without using a Windows installation USB key or DVD. You just have to boot the device then navigate to Settings in the Start button. Choose Update & Recovery then select Recovery found on the left pane. Choose Reset this PC option then select Go back to an earlier build and Advanced startup. Select Get Started button found in the Reset this PC tab. 2. Depending on your device’s condition, you can either select Keep my files or Remove everything. Both options will remove all applications installed in the device and will revert to default settings. 3. Choose either Just remove my files or Remove files and clean the drive depending on the situation. If you choose the Remove files and clean the drive option, the procedure will take longer as it will erase all the files permanently. In this case, deleted files cannot be recovered. However, if you don’t want to remove files permanently, select Just remove my files. 4. Once you’ve decided how to reset your system, click on Next once the Warning screen appears. Afterward, choose Reset once prompted. When the process completed, click on Continue.

Method Four: Download an Automated Tool

Can’t seem to put up with the long and technical manual repair process? You can still fix this error by downloading and installing a powerful automated tool that will surely get the job done in a jiffy!
Read More
Experiencing Error Code 36, We Have A Solution!

The solution to Error Code 36

Error Code 36 – What is it?

This is a common Device Manager Error Code that users encounter. It is commonly found on all Windows 2000 and later versions of Windows operating systems. Error Code 36 is usually prompted by the following message:

"This device is requesting a PCI interrupt but is configured for an ISA interrupt (or vice versa). Please use the computer's system setup program to reconfigure the interrupt for this device. (Code 36)"

Solution

driverfix boxError Causes

Error Code 36 occurs when there is a failure in IRQ translation due to your Windows operating system getting corrupted. This is caused due to a number of triggers, such as:

  • An excess of startup entries
  • Errors in registries
  • RAM or hardware failure
  • Excessive unnecessary installed programs
  • Malware or spyware

When programs are removed excessively, some programs are not removed completely and create problems in your computer’s registry.

Also, due to the presence of malware and spyware and other causes mentioned above, your computer registry builds up errors with the time that leads to slowing your PC, time lags, and even result in crashes and freezes.

Error Code 36 can cause internal and external components to malfunction or experience time lags such as DVD drive or printer and hence can severely affect your entire PC.

Further Information and Manual Repair

Error Code 36 is a severe PC error and any attempt at fixing the error must be approached with extreme caution for your PC to start functioning properly again. Here are two methods to fixing your PC.

Method 1 – Change IRQ reservation settings

Changing the IRQ reservation settings is the best way you can rely on to fix the error code. You can do this by changing the BIOS settings of your PC.

The BIOS stands for ‘Basic Input/Output System’ and is the program of your PC’s microprocessor that allows your PC to boot after you switch it on.

Caution needs to be exercised before changing the BIOS settings of your PC. This is because every PC’s BIOS version differs from another and any wrong attempt to change the settings may make matters worse.

It is therefore recommended to refer to hardware documentation that you received with your PC or motherboard and check for the model number and details of your PC’s motherboard.

Only after you have checked and confirmed all the details, should you use the specific BIOS settings required to configure your IRQ reservations?

Method 2 – Install DriverFIX

Error Code 36 isn’t an easy error to remove.

While changing the BIOS settings can work to restore your PC, it may create a whole lot of inconvenience for finding the time and effort to check the hardware documentation details and attempting to change the specific settings and especially, if your PC does not support the options to change IRQ reservations.

Given the high risks of fixing such an error, you can also install software that enables you to fix your slow PC at the click of a few buttons.

Programs such as DriverFIX can enable you to download and replace your outdated drivers with new updated ones without you having to look for them. It will detect which drivers to download based on your PC’s motherboard version from the program’s database and can get rid of error code 36.

Click here to download DriverFIX and remove error code 36 and any other type of Device Manager error from your PC.

Read More
How to get rid of FunPopularGames.com

FunPopularGames is a browser extension developed by Mindspark Inc. that lets you play popular, best-rated, and other games via popular websites, it also allows you to bookmark your favorite games for faster and easier access.

When installed it changes your default new tab page and default search engine to Search by MyWay. While browsing the internet with this extension enabled you will see additional injected ads, sponsored content, and pop-up ads throughout your browsing sessions.

While active this extension monitors user activity and browsing sessions, enabling it to track visited websites, clicked links, and other useful information that it later forwards to Mindspark to be used/sold for better ad placement.

About Browser Hijackers

Browser hijacking is amongst the internet’s constant risks that target internet browsers. It’s a kind of malicious software that alters your web browser’s configuration settings so that you are redirected to sites or web pages you had no intention of visiting. Browser hijackers could do a variety of things on your PC. These are generally used to force hits to predetermined sites, manipulating web traffic to generate ad revenue. Although it may seem naive, all browser hijackers are harmful and therefore always classified as security threats. Browser hijackers could also allow other destructive programs without your knowledge to further damage your PC.

How to determine if your internet browser has been hijacked

The following are some signs and symptoms that indicate you’ve been hijacked: 1. the home page of your browser is changed suddenly 2. you find new unwanted bookmarks or favorites added, usually directed to ad-filled or porn sites 3. the default online search engine and the default browser settings are altered 4. you see unsolicited new toolbars added 5. unstoppable flurries of popup ads show up on your computer screen 6. your browser has become unstable or starts running sluggishly 7. you can’t navigate to certain web pages, such as security software-related sites.

Exactly how browser hijacker finds its way onto your PC

There are several ways your computer or laptop can become infected with a browser hijacker. They typically arrive by way of spam email, via file sharing websites, or by a drive-by download. They can also originate from any BHO, extension, add-on, toolbar, or plug-in with malicious intent. Sometimes you might have accidentally accepted a browser hijacker as part of an application bundle (usually freeware or shareware). Browser hijacking can cause serious privacy problems and also identity theft, disrupt your browsing experience by taking control of outbound traffic, drastically slows down your computer by consuming lots of resources, and lead to system instability at the same time.

Browser Hijacker Malware – Removal

Certain browser hijacking can be simply reversed by discovering and removing the corresponding malware application from your control panel. But, the majority of hijacking codes are not easy to get rid of manually, since they go deeper into the operating system. Moreover, manual removals require in-depth system understanding and therefore could be a very difficult job for beginner computer users. Anti-malware software is really effective with regards to discovering and removing browser hijackers that standard anti-virus program has overlooked. To eradicate any type of browser hijacker from your personal computer, you should download this certified malware removal application – SafeBytes Anti-Malware.

What To Do When You Cannot Install Any Anti-virus?

Malware can cause all sorts of damage if they invade your PC, ranging from stealing your private information to deleting data files on your computer. Some malware is created to interfere with or prevent things that you want to do on your computer system. It may not allow you to download anything from the web or it will stop you from accessing a few or all internet sites, especially the anti-malware websites. If you’re reading this, you may have got affected by malware that stops you from downloading a security program such as Safebytes Anti-Malware. Although this type of issue will be difficult to circumvent, there are a few steps you can take.

Get rid of malware in Safe Mode

In Safe Mode, you are able to modify Windows settings, un-install or install some software, and eradicate hard-to-delete viruses. In the event the malware is obstructing internet access and affecting your PC, launching it in Safe Mode allows you to download antivirus and run a scan while limiting potential damage. To start the computer into Safe Mode, press the “F8” key on the keyboard just before the Windows logo screen comes up; Or right after normal Windows boot up, run MSConfig, look over “Safe Boot” under the Boot tab, and then click Apply. As soon as you reboot into Safe Mode with Networking, you can download, install, as well as update the anti-malware program from there. At this point, you can run the anti-malware scan to get rid of computer viruses and malware without any hindrance from another application.

Switch over to an alternate browser

Malicious program code may exploit vulnerabilities in a particular web browser and block access to all anti-malware software sites. If you are not able to download the security program using Internet Explorer, this means malware is targeting IE’s vulnerabilities. Here, you must switch to a different web browser like Chrome or Firefox to download the Safebytes application.

Create a portable antivirus for removing malware

Another method is to download and transfer anti-malware software from a clean PC to run a scan on the affected computer. Follow these steps to employ a flash drive to clean your corrupted system. 1) On a clean PC, install Safebytes Anti-Malware. 2) Plug the Thumb drive into the clean computer. 3) Double-click the Setup icon of the anti-malware software to run the Installation Wizard. 4) Choose the flash drive as the location for saving the file. Follow the directions to finish the installation process. 5) Remove the USB drive. You can now use this portable antivirus on the infected computer system. 6) Double-click the antivirus program EXE file on the USB flash drive. 7) Run Full System Scan to identify and clean-up up all kinds of malware.

SafeBytes Security Suite Benefits

In order to protect your laptop or computer from a variety of internet-based threats, it’s very important to install an anti-malware program on your PC. But with so many anti-malware companies out there, nowadays it’s difficult to decide which one you should obtain for your computer. A few of them do a good job in removing malware threats while some will ruin your computer by themselves. You have to pick one that is dependable, practical, and has a good reputation for its malware protection. Among few good applications, SafeBytes Anti-Malware is the strongly recommended software program for the security-conscious end user. SafeBytes anti-malware is a powerful, highly effective protection tool designed to help end-users of all levels of IT literacy in finding and removing harmful threats out of their personal computers. With its cutting-edge technology, this application will allow you to eradicate several types of malware which include viruses, PUPs, trojans, worms, ransomware, adware, and browser hijackers.

SafeBytes has got a plethora of wonderful features that can help you protect your computer from malware attacks and damage. A few of them are listed as below:

World-class AntiMalware Protection: With its advanced and sophisticated algorithm, this malware elimination tool can detect and remove the malware threats hiding in the computer effectively. Real-time Active Protection: SafeBytes offers an entirely hands-free active protection that is set to check, block and destroy all computer threats at its first encounter. They’re very efficient in screening and removing various threats since they’re continuously revised with new updates and safety measures. Internet Security: SafeBytes gives an instant safety rating to the pages you’re about to visit, automatically blocking dangerous sites and ensuring that you are certain of your online safety while browsing the web. Lowest CPU and Memory Usage: SafeBytes is a lightweight and easy-of-use anti-virus and antimalware solution. Since it utilizes minimum computer resources, this software leaves the computer’s power exactly where it belongs: with you. 24/7 Online Support: For any technical concerns or product assistance, you could get 24/7 professional assistance via chat and email. SafeBytes has come up with an excellent anti-malware solution that can help you conquer the latest malware threats and virus attacks. Malware trouble can become a thing of the past when you put this software program to use. You will get the very best all-around protection for the money you pay on SafeBytes Anti-Malware subscription, there isn’t any doubt about it.

Technical Details and Manual Removal (Advanced Users)

If you do not wish to use an automated tool and like to get rid of FunPopularGames manually, you could possibly do so by going to the Windows Add/Remove Programs menu in the Control Panel and delete the offending program; in cases of browser extensions, you may remove it by going to the browser’s Add-on/Extension manager. You will probably also want to reset your web browser to its default configuration settings. To be certain of complete removal, find the following registry entries on your computer and remove them or reset the values accordingly. However, editing the registry is usually a hard task that only advanced users and professionals should try to fix the problem. Moreover, some malicious programs have the capability to defend against its removal. Completing this task in Safe Mode is advised.
Files: Search and delete: AppIntegrator.exe AppIntegrator64.exe AppIntegratorStub.dll AppIntegratorStub64.dll AssistMonitor.dll AssistMonitor64.dll BAT.dll CrExt.dll CrExtPdu.exe DpnMngr.dll dubar.dll dubarsvc.exe dubprtct.dll dudatact.dll dudlghk.dll dudlghk64.dll dufeedmg.dll duhighin.exe duhtmlmu.dll duhttpct.dll duidle.dll dumedint.exe dumlbtn.dll duPlugin.dll duregiet.dll duscript.dll duskin.dll duskplay.exe duSrcAs.dll HiddenToolbarReminder.dll HkFxMgr.dll HkFxMgr64.dll InstallEnabler.dll t8EPMSup.dll T8EXTEX.DLL T8EXTPEX.DLL T8HTML.DLL t8Res.dll T8TICKER.DLL ToolbarGuard.dll ToolbarGuard64.dll Verify.dll TPIManagerConsole.exe
Read More
Uninstalling the Weather App in Windows
Windows 10 has a pre-installed Weather app that offers the local weather information, forecast, temperature gradient, historical data, multiple locations, and many more. It can be handy especially if you tend to check on the weather. However, if you are one of those users who barely use this app, you have the option to uninstall it from your computer and that’s exactly what we’re going to do in this post. There are several methods to uninstall the Weather app in Windows 10. You can uninstall it via Settings or Start Menu or even using a command in Windows PowerShell. Note that uninstalling the Weather app does not affect the functionality of your Windows 10 computer by any means so you shouldn’t worry about uninstalling it. To get started, follow the instructions provided below.

Option 1 – Uninstall the Weather app through Settings

The first option you can try to uninstall the Weather app is through Settings. It’s a very simple process so you wouldn’t have any trouble following it.
  • First, click on the Start menu and go to Settings.
  • From there, select System > Apps & Features.
  • After that, wait until the list of apps is opened, and then look for the Weather app and click on it.
  • Next, click on Uninstall in the given menu to uninstall the Weather app from your computer.

Option 2 – Uninstall the Weather app through the Start Menu

Another simple way to uninstall the Weather app is through the Start Menu. It only takes a right click and there are actually two ways to go about this – one is new with the recent feature update of Windows. How? Refer to these steps:
  • Click on the Start button and type in “weather” and right-click on the Weather app which appears in the list.
  • Next, click on the Uninstall option. This will uninstall the Weather app.
  • You can also use the other uninstall option which you can find on the right side of the list that also shows other quick action for the app.

Option 3 – Uninstall the Weather app through a command in Windows PowerShell

  • Tap the Win + X key combination and click on the “Windows PowerShell (Admin)” option to open PowerShell with admin privileges.
  • After that, execute the following Remove App package command for the Weather app to uninstall it.
Get-AppxPackage Microsoft.BingWeather | Remove-AppxPackage
  • Once done, it will remove the Weather app from your computer.
Read More
MS Edge Can’t connect to the proxy server
If you are trying to connect to the internet using the Microsoft Edge browser but encountered an error message instead that says, “Can’t connect to the proxy server”, read on as this post will show you how you can fix this error. This kind of error in Microsoft Edge could be caused by incorrect proxy settings or worse, malware. To fix this error, here are some suggestions you need to check out:

Option 1 – Try to check your internet connection

The first thing you can do to resolve the “Can’t connect to the proxy server” error in Microsoft Edge is to check your internet connection. There are times when your internet connection or Wi-Fi router can cause such problems. In such cases, you have to ensure that you have a valid internet source and if you are using a Wi-Fi router, you can try to use another connection and then see if the error is gone or not.

Option 2 – Try to disable the manual proxy set up from the Settings

In case you miss it, there is actually an option in the Settings panel that you can use to set up proxy in your Windows 10 computer. So if you encounter the “Can’t connect to the proxy server” error, you should disable manual proxy for the meantime and check if it fixed the error or not.
  • Tap the Win + I keys to open the Windows Settings.
  • Then go to Network & Internet > Proxy.
  • And on your right-hand side, ensure that the Automatically detect settings are enabled and that the Use a proxy server option under the Manual proxy setup is disabled.
  • Now try to open any website again and see if the problem’s fixed.

Option 3 – Try disabling the VPN

Like pointed out earlier, if you are using VPN, this could be the reason why you’re getting the “Can’t connect to the proxy server” error so the most obvious thing to do is for you to turn off the VPN and try to load a website in Edge again. And if you use a VPN software that works using their software, you can just completely exit or log-off from its account. On the other hand, if you are using a built-in Windows 10 VPN, you can simply turn it off or delete all the settings you have created there.

Option 4 – Disable the proxy server for your LAN

If your PC was just attacked by some adware or malware as of late, it is possible that it has changed the network settings in the system and might display spam advertisements. Thus, you have to disable the proxy server for your LAN. To do that, refer to these steps:
  • Tap the Win + R keys to open the Run dialog box.
  • Then type “inetcpl.cpl” in the field and hit Enter to pull up the Internet Properties.
  • After that, go to the Connections tab and select the LAN settings.
  • From there. Uncheck the “Use a Proxy Server” option for your LAN and then make sure that the “Automatically detect settings” option is checked.
  • Now click the OK and the Apply buttons.
  • Restart your PC.
Note: If you are using a third-party proxy service, you have to disable it.

Option 5 – Temporarily disable Firewall and third-party antivirus

Firewall and antivirus programs are known to block files the instant it detects a threat to the system. However, there are some cases when it can also block a file even when it’s a safe one. Thus, your antivirus or firewall programs might be the reason why you can’t download anything on your Windows 10 computer. To isolate the issue, you need to temporarily disable both the Firewall and antivirus programs and then check if you can now download anything from the internet. Do not forget to enable them again as disabling them can leave your computer vulnerable to cyber threats.

Option 6 – Clear the browsing data of Microsoft Edge

  • Open Microsoft Edge.
  • Then click on the three horizontal dots to open the menu.
  • From there, click on Settings. And under Settings, click the “Choose what to clear” button under the Clear browsing data section.
  • Next, check all the checkboxes and then click the Clear button to clear the browsing data in the Edge browser.
  • Restart Edge.

Option 7 – Try to reset, repair or reinstall Edge via Settings

You can reset, repair or reinstall the Edge browser through Settings. If none of it helped, you can try the following:
  • Open File Explorer and then go to this path – C:/Users/YourUsername/AppData/Local/Packages
Note: Before you type in the path in the Address bar, make sure that you put your user account name in place with the “YourUsername”.
  • Tap Enter to proceed.
  • Next, look for the folder named “MicrosoftEdge_8wekyb3d8bbwe” then right-click on it.
  • Click on Properties and uncheck the option “Read-only” under the General tab in the Properties window.
  • Click on Apply and then OK to save the changes made.
  • After that, look for the MicrosoftEdge_8wekyb3d8bbwe folder again and delete it. And if a prompt stating “Folder Access Denied” appears on your screen, just click on the Continue button to proceed – doing so will delete most of the content inside the folder except for the folder named “AC”.
  • Restart your PC.
  • Now all you have to do is to re-register Microsoft Edge using PowerShell. In the Start Menu, search “Windows PowerShell”.
  • Right-click on Windows PowerShell from the search results and select the “Run as administrator” option.
  • Type in this command in the PowerShell windows and tap Enter – Cd C:/Users/YourUsername
Note: Once again, make sure that you key in your user account name in place of “YourUsername.
  • After that, type in this command and tap Enter – Get-AppXPackage -AllUsers -Name Microsoft.MicrosoftEdge | Foreach {Add-AppxPackage -DisableDevelopmentMode -Register "$($_.InstallLocation)AppXManifest.xml" -Verbose}
  • Restart your PC.

Option 8 – Scan your computer for malware using Windows Defender

Your computer could be infected with malware which might have triggered the “Can’t connect to the proxy server” error. To fix this, you need to scan your computer using a reliable program like Windows Defender.
  • Tap the Win + I keys to open Update & Security.
  • Then click on the Windows Security option and open Windows Defender Security Center.
  • Next, click on Virus & threat protection > Run a new advanced scan.
  • Now make sure that Full Scan is selected from the menu and then click the Scan Now button to get started.
Read More
Fix Windows Update Error 0x8024A10A
The Windows Update service, just like other services in Windows 10 may sometimes experience some issues and stop behaving properly. One of the issues you might encounter as you use the Windows Update service is the Windows Update error 0x8024A10A. This kind of error code signifies that the Windows Update service is shutting down. So if you encounter this error, read on as this post will guide you on how you can fix it. When you receive the Windows Update error 0x8024A10A, you may see this error message on your screen: “USO_E_SERVICE_SHUTTING_DOWN indicates that the WU Service is shutting down. This may happen due to a very long period of time of inactivity, a system hang leading to the service being idle and leading to the shutdown of the service. Ensure that the system remains active and the connections remain established to complete the upgrade.” You could try to restart your computer to resolve the problem since there are instances when a simple restart can fix errors. However, if it does not work, you might find the options provided below useful.

Option 1 – Try to restart the Windows Update Service

The first thing you can do to fix Windows Update error 0x8024A10A is to restart the Windows Update Service from the Services Manager. To do so, follow these steps:
  • In the Cortana search box, type “services” and click on the Services icon to open the Services Manager. Alternatively, you can also tap the Win + R keys to launch the Run prompt and then type “services.msc” in the field and hit Enter to open the Services Manager.
  • After opening the Services Manager, look for the Windows Update Service.
  • Once you found it, right-click on it and check if the Service is stopped. If it is, then select the Start option. On the other hand, if the Windows Update Service is already started, just select the Restart option.
  • After that, try to run the Windows Update again and see if the error 0x8024A10A is now fixed.

Option 2 – Run the Windows Update Troubleshooter

Since the Windows Update troubleshooter reviews the status of the services that support the process, it would prompt and fix it if there is anything that’s not right. Thus, you might want to run a built-in Windows Update troubleshooter to resolve the Windows Update error. It is one of the things you can check out as it is known to automatically resolve any Windows Update errors like error 0x8024A10A. To run this troubleshooter, go to Settings and then select Troubleshoot from the options. From there, click on Windows Update and then click the “Run the troubleshooter” button. After that, follow the next on-screen instructions and you should be good to go.

Option 3 – Run Microsoft’s online troubleshooter

Aside from the Windows Update troubleshooter, running Microsoft’s online troubleshooter might also help you fix the Windows Update Error 0x8024A10A. This online troubleshooter is known to help in fixing Windows Update errors, it scans your computer for issues that might be causing the problem and then fixes them automatically.

Option 4 – Try to run the Windows Update Service in a Clean Boot State

There are some instances that some conflicting programs installed in your computer might be the one that’s causing Windows Update error code 0x8024A10A. To identify which program is causing the problem, you need to put your computer in a Clean Boot State. To do so, follow the steps below.
  • Log onto your PC as an administrator.
  • Type in MSConfig in the Start Search to open the System Configuration utility.
  • From there, go to the General tab and click “Selective startup”.
  • Clear the “Load Startup items” check box and make sure that the “Load System Services” and “Use Original boot configuration” options are checked.
  • Next, click the Services tab and select the “Hide All Microsoft Services” check box.
  • Click Disable all.
  • Click on Apply/OK and restart your PC. (This will put your PC into a Clean Boot State. And configure Windows to use the usual startup, just simply undo the changes.)
  • Now try to run the Windows Update Service again and see if Windows Update error 0x8024A10A is now gone.
Read More
Computer gets stuck on Preparing to configure
If you suddenly find your Windows 10 computer stuck on the “Preparing to configure” screen for quite a long time now after you run Windows Update, read on as you will be guided on how you can fix that issue in this post. During an update process, there’s a lot of things that go on in the background which is why Windows Updates take quite a while before it finishes. It can be at 25%, 50%, or even 100% but the only message you’re going to see on your screen is the “Preparing to configure Windows, Don’t turn off your computer”. However, if you notice that the Windows Update is taking a longer time than it’s supposed to, the first option is to wait some more but if it’s still the same, then there’s definitely something wrong. This kind of issue occurs when Windows Update fails to configure in short correctly download and install the update. When this happens, it will revert all the changes which are why you were advised to wait for a couple of hours. There are two possibilities why your computer is stuck on the “Preparing to configure Windows, Don’t turn off your computer” screen. The first one is that the Windows 10 operating system is installing any updates. The second one is when the user profile takes time to load or encounters an error. There are several options you can try to fix the problem. You can try running System Restore or boot your computer in Safe Mode or repair the corrupted profile via Registry Editor. You might also want to try using installation media to boot and repair your computer if the other options didn’t work.

Option 1 – Perform System Restore

  • Tap the Win + R keys to open the Run dialog box.
  • After that, type in “sysdm.cpl” in the field and tap Enter.
  • Next, go to the System Protection tab then click the System Restore button. This will open a new window where you have to select your preferred System Restore point.
  • After that, follow the on-screen instructions to finish the process and then restart your computer and check if the problem is fixed or not.
Note: If you can’t boot into the desktop of your computer, you can run System Restore in the Advanced Startup Options by following these steps:
  • Boot your computer into the Advanced Startup Options screen.
  • From there, you will see some options to troubleshoot when you can’t log in to Windows in the usual way.
  • Now select Troubleshoot > Advanced Options > Command Prompt.
  • After that, type “rstrui” and hit Enter to execute the command which will start the System Restore process.
  • Once it’s done, restart your computer.

Option 2 – Boot your computer in Safe Mode

You can try to tap the F8 key if you have it enabled in your Windows 10 computer, as you start your system to boot into Safe Mode. Once your computer is in Safe Mode, you can access the Start Menu and the Mouse and Keyboard. Aside from that, you can also access your files and other built-in tools in Windows such as Command Prompt, PowerShell, Computer Manager, Device Manager, Event Log Viewer, and many more. On the other hand, if you haven’t enabled the F8 key, you can just go to the Advanced Startup options to boot your computer into Safe Mode. Once you’re there, select Troubleshoot > Advanced Options > Startup Settings > Restart > Tap the number 4 key. After that, your computer will restart in Safe Mode. If you want to reboot into Safe Mode with Networking instead, you can tap the number 5 key and for Safe Mode with Command Prompt, tap the number 6 key. Once your computer is in Safe Mode, you can use any of the built-in tools to restore your computer or troubleshoot the problem that’s causing your computer to get stuck at the “Preparing to configure” screen.

Option 3 – Try to repair your corrupted profile via Registry

In this third option, you can try to repair the corrupted profile using the Registry but before you proceed, take note that you can only try this if you can boot into your desktop and if you can, make sure to create a System Restore Point and then follow the steps below.
  • Tap the Win + R keys to open the Run dialog box.
  • Then type “Regedit” in the field and hit Enter or click OK to open the Registry Editor.
  • Next, go to this registry key: ComputerHKEY_LOCAL_MACHINESOFTWAREMicrosoftWindows NTCurrentVersionProfileList
  • Once you’ve opened the registry key, you should see a list of all the user profiles on your computer. Now click on each S-1-5 folder and look for the “ProfileImagePath” entry and double click on it to check which user account it is related to. You will see a path like “CUsersACK” where “ACK” is the username.
  • You should know which of the user account is corrupted. Just look for a key named “RefCount” and change its Value data to “0” and click OK. And if it isn’t available, simply right-click on the right pane and create it.
  • After that, double click on the key named “State” and make sure that the Value data is “0” and click OK.
  • Exit the Registry Editor and restart your computer to apply the changes made.

Option 4 – Try to use installation media to boot and repair your computer

Another thing you can try to resolve the issue is to use the Windows installation bootable media so you can boot and repair the operating system. To use it, follow these steps:
  • You need to first create an installation media which has the dame version of the operating system installed in your computer.
  • After that, once you reach the Install Windows screen, click on the “Repair your computer” link.
  • Wait until the repair is completed and then shut down your computer
  • Now once your computer has restarted, check if it can now boot properly.
Read More
Intel to reveal roadmap during July 26 webcast
intel graphics
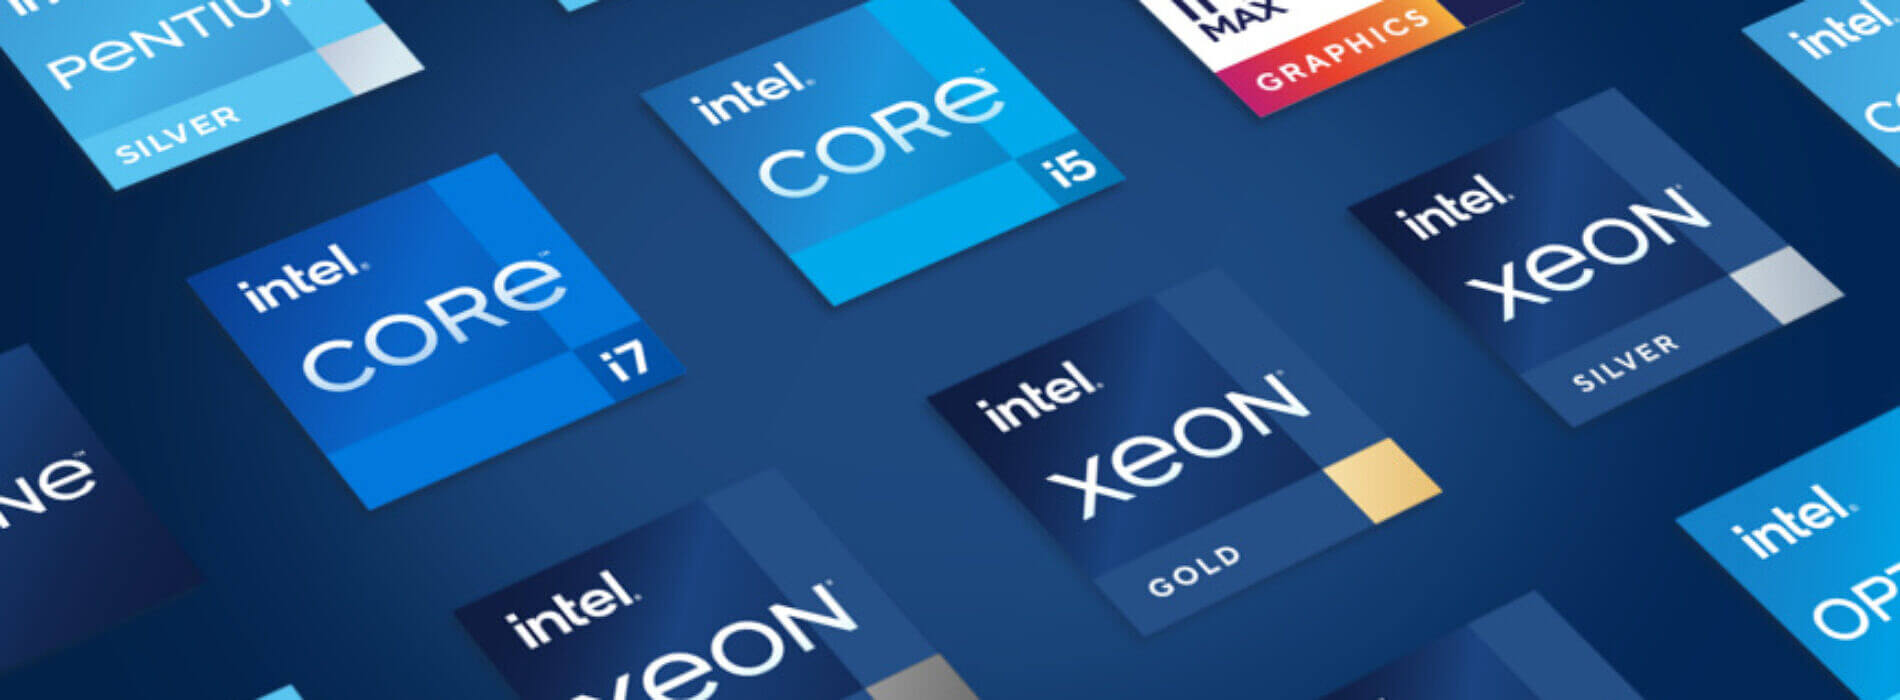
Intel announced that Pat Gelsinger (CEO) and Dr. Ann Kelleher  (technology Department head) will discuss Intel’s process and packaging innovations on an upcoming webcast that will happen on July 26th. The spokesman will talk and provide a deeper look at the process and packaging roadmaps for Intel. As we know Intel is planning to expand its production capabilities, outsource some of its technologies and offer foundry services to other chip design companies. The strategy will also include a shift to a 7nm process and Intel’s effort to set itself again as leader of CPU performance by 2024. There is also a chance that we will hear exact plans for Intel in the next three or four years. Intel didn't reveal much else about what Gelsinger and Kelleher plan to discuss during the webcast. The event will be streamed on July 26 at 2 pm PT via the Intel Newsroom; it will also be available to watch on-demand after the stream ends.
Read More
Guide How to Remove PCOptimizerPro

PC Optimizer Pro is a PC optimizer utility developed by Xportsoft Technologies. It is classified as a potentially unwanted program, due to its aggressive scan and registration reminders, and that it is often distributed bundled with other programs in a manner that leads many users to not know how it got on their computer. While not inherently malicious, PC Optimizer Pro adds numerous registry keys, startup entries and while running consumes a relatively high amount of system resources, especially during its scans. The software installs from a .exe file that is around 5.20 MB or 5.453.240 Bytes (depending on the version). As of the publication of these videos, the current version of PC Optimizer Pro was detected as malicious or potentially unwanted by at least 21 AntiViruses.

About Potentially Unwanted Applications

If you have ever installed freeware or shareware, chances are high that your computer can get installed with a bunch of unwanted applications. A Potentially Unwanted Program, also called PUP, in short, is actually software that contains adware, installs toolbars, or has other hidden goals. These kinds of programs are almost always bundled up with free software which you download from the net or are also bundled within the custom installers on many download sites. PUPs did not really constitute pure “malware” in the strict sense of the term. Just like malicious software, PUPs cause problems when downloaded and installed on your PC, but what makes a PUP different is that you give consent to download it – although the truth is vastly different – the software installation package actually tricks you into accepting the installation. Irrespective of whether it is regarded as malware or not, PUPs are nearly always harmful to the user as they might bring on adware, spyware, keystroke logging, and also other bad crapware features on your computer.

What do PUPs do on your computer, exactly?

Potentially Unwanted Programs come in many forms and varieties, but in most instances, these are adware programs that show annoying pop-up adverts and advertisements on websites you check out. The PUPs also get installed into your computer in the form of web browser add-ons and toolbars. Not only they needlessly take up space on your computer screen, but toolbars may also manipulate search engine results, watch your web browsing activities, decrease your web browser’s efficiency, and decelerate your internet connection to a crawl. Potentially Unwanted Programs at times act quite similarly to viruses or spyware. Some PUPs include keyloggers, dialers, along with other software to gather your private details that may result in identity theft. These are programs that don’t do anything good for you; in addition to taking over space on your hard drive, they also slow down your computer, often modify settings without your approval, the list of bothersome features goes on.

Ways to avoid PUPs

• Always study the EULA and privacy statement. Don’t agree until you know precisely what you are acknowledging. • Choose the “custom” install whenever installing a software program. In particular, look closely at those small boxes that have been checked as default, where you may ‘agree’ to receive promotions or install software bundlers. • Use good antivirus software, like Safebytes Anti-Malware that offers real-time protection against PUPs. • Avoid adding a freeware program you do not use. Turn off or remove toolbars and web browser extensions you don’t really need. • Always download software from reliable sources like official sites as opposed to untrustworthy sharing space. Avoid file-hosting sites where/when possible.

What you can do if Malware Prevents You From Downloading Or Installing Antivirus?

Practically all malware is bad, but certain types of malware do much more damage to your computer than others. Certain malware goes to great lengths to stop you from downloading or installing anything on your personal computer, particularly antivirus applications. If you are reading this right now, you have probably recognized that a malware infection is the real cause of your blocked web connectivity. So what to do if you need to install an antivirus program like Safebytes? There are a few steps you can take to circumvent this problem.

Install in Safe Mode

The Windows OS has a special mode known as “Safe Mode” in which just the bare minimum required programs and services are loaded. In the event the malware is blocking the internet connection and affecting the computer, running it in Safe Mode will let you download antivirus and run a diagnostic scan while limiting possible damage. To start the computer into Safe Mode, press the “F8” key on your keyboard right before the Windows boot screen comes up; Or right after normal Windows boot up, run MSConfig, look over “Safe Boot” under Boot tab, and click Apply. After you reboot into Safe Mode with Networking, you can download, install, and update anti-malware software from there. Right after installation, run the malware scanner to remove standard infections.

Switch to an alternate browser

Some malware may target vulnerabilities of a specific browser that block the downloading process. If you seem to have malware attached to Internet Explorer, then switch over to an alternate web browser with built-in safety features, such as Firefox or Chrome, to download your favorite antivirus program – Safebytes.

Install and run anti-virus from the USB drive

Another solution is to create a portable anti-malware program on your USB stick. Adopt these measures to employ a thumb drive to clean your infected computer system. 1) Download Safebytes Anti-Malware or MS Windows Defender Offline onto a clean PC. 2) Plug the Thumb drive into the clean computer. 3) Run the setup program by double-clicking the executable file of the downloaded software, with a .exe file format. 4) Choose the flash drive as the location for saving the file. Do as instructed on the screen to complete the installation process. 5) Now, plug the pen drive into the corrupted computer. 6) Double-click the anti-malware software EXE file on the USB flash drive. 7) Press the “Scan” button to run a full system scan and remove viruses automatically.

SafeBytes Anti-Malware: Lightweight Malware Protection for Windows PC

These days, an anti-malware tool can protect your computer from different types of online threats. But how to choose the best one amongst numerous malware protection application that’s available out there? You may be aware, there are numerous anti-malware companies and tools for you to consider. A few are well worth your money, but many aren’t. You have to be very careful not to choose the wrong application, especially if you buy a paid application. In terms of commercial anti-malware application options, many people select well-known brands, such as SafeBytes, and are quite happy with it. SafeBytes anti-malware is a powerful, highly effective protection tool created to help end-users of all levels of IT literacy in detecting and eliminating malicious threats from their computer. Using its cutting-edge technology, this software can assist you to eliminate several types of malware such as computer viruses, trojans, PUPs, worms, ransomware, adware, and browser hijackers. SafeBytes has excellent features when compared to other anti-malware programs. Let’s have a look at a few of them below: Robust, Anti-malware Protection: Safebytes is made on the best virus engine within the industry. These engines will find and get rid of threats even during the initial phases of a malware outbreak. Active Protection: Malware programs aiming to enter the system are discovered and stopped as and when detected by the SafeBytes active protection shields. It’ll check your PC for suspicious activity at all times and safeguards your personal computer from unauthorized access. High-Speed Malware Scanning Engine: SafeBytes’s high-speed malware scanning engine minimizes scan times and extends the life of the battery. Simultaneously, it will effectively detect and eliminate infected computer files or any online threat. Website Filtering: SafeBytes checks the hyperlinks present on a webpage for possible threats and informs you whether the site is safe to explore or not, through its unique safety rating system. Lowest CPU/Memory Usage: SafeBytes is a lightweight and user-friendly antivirus and antimalware solution. Since it utilizes negligible computer resources, this tool leaves the computer’s power exactly where it belongs to: with you. Premium Support: You may get high levels of support round the clock if you’re using their paid software.

Technical Details and Manual Removal (Advanced Users)

If you wish to manually remove PCOptimizerPro without the use of an automated tool, it may be possible to do so by removing the program from the Windows Add/Remove Programs menu, or in cases of browser extensions, going to the browsers AddOn/Extension manager and removing it. You will likely also want to reset your browser. To ensure the complete removal, manually check your hard drive and registry for all of the following and remove or reset the values accordingly. Please note that this is for advanced users only and may be difficult, with incorrect file removal causing additional PC errors. In addition, some malware is capable of replicating or preventing deletion. Doing this in Safe Mode is advised.

The following files, folders, and registry entries are created or modified by PCOptimizerPro

Files: DesktopPC Optimizer Pro.lnk. %Programs%PC Optimizer ProLive Support.url. %Programs%PC Optimizer ProPC Optimizer Pro.lnk. %Programs%PC Optimizer ProUninstallation Guide.url. %Programs%PC Optimizer ProVisit Website.url. %ProgramFiles%PC Optimizer ProPCOptimizerPro.exe. %ProgramFiles%PC Optimizer ProPCOptProCtxMenu.dll. %ProgramFiles%PC Optimizer ProPCOptProTrays.exe. %ProgramFiles%PC Optimizer ProStartApps.exe. %ProgramFiles%PC Optimizer Prouninst.exe. %QuickLaunch%PC Optimizer Pro.lnk. WindowsTasksPC Optimizer Pro Idle.job. WindowsTasksPC Optimizer Pro Scan.job. WindowsTasksPC Optimizer Pro startups.job. WindowsTasksPC Optimizer Pro Updates.job. C:DOCUME1USER1LOCALS1Tempoptprosetup.exe C:WINDOWSsystem32netmsg.dll C:DOCUME1USER1LOCALS1Tempoptprosetup.exe C:DOCUME1USER1LOCALS1Tempis-SJGJ9.tmpoptprosetup.tmp C:DOCUME1USER1LOCALS1Tempis-NTRVH.tmp_isetup_shfoldr.dll C:WINDOWSsystem32shfolder.dll C:DOCUME1USER1LOCALS1Tempis-NTRVH.tmpOptProHelper.dll C:DOCUME1USER1LOCALS1Tempis-NTRVH.tmpitdownload.dll C:1e4e2d65e12311cac2c0eeb8c5c1d7bd1ddc865b367b98b56bc2330bf18436 C:WINDOWSRegistrationR000000000007.clb C:DOCUME1USER1LOCALS1Tempoptprosetup.exe C:WINDOWSsystem32shfolder.dll C:1e4e2d65e12311cac2c0eeb8c5c1d7bd1ddc865b367b98b56bc2330bf18436 C:WINDOWSRegistrationR000000000007.clb C:WINDOWSsystem32shell32.dll C:DOCUME1USER1LOCALS1Tempis-SJGJ9.tmpoptprosetup.tmp C:Program FilesOptimizer Pro 3.99OptimizerPro.exe C:Program FilesOptimizer Pro 3.99unins000.exe C:Program FilesOptimizer Pro 3.99OptProStart.exe c:autoexec.bat C:DOCUME1USER1LOCALS1Tempoptprosetup.exe C:DOCUME1USER1LOCALS1Tempis-SJGJ9.tmpoptprosetup.tmp C:DOCUME1USER1LOCALS1Tempis-NTRVH.tmp_isetup_shfoldr.dll C:DOCUME1USER1LOCALS1Tempis-NTRVH.tmpOptProHelper.dll C:DOCUME1USER1LOCALS1Tempis-NTRVH.tmpitdownload.dll C:Program FilesOptimizer Pro 3.99is-BDCDJ.tmp C:Program FilesOptimizer Pro 3.99is-DB4S5.tmp C:Program FilesOptimizer Pro 3.99is-C16E7.tmp C:Program FilesOptimizer Pro 3.99is-QE691.tmp C:Program FilesOptimizer Pro 3.99is-GQ78C.tmp Registry: Key 003B9C22-6FE0-4BCA-A73F-9AA99B9BBDAA at HKEY_CLASSES_ROOTTypeLib. Key 12AB121E-44C6-488B-8773-B0AE25E662E1 at HKEY_CLASSES_ROOTInterface. Key 203ABD21-41F1-4F1B-BAE3-D6A89A90D239 at HKEY_CLASSES_ROOTCLSID. Key PC Optimizer Pro at HKEY_CURRENT_USERSoftware. Key PC Optimizer Pro at HKEY_LOCAL_MACHINESOFTWARE. Key PC Optimizer Pro at HKEY_LOCAL_MACHINESoftwareMicrosoftWindowsCurrentVersionUninstall. Key PCOptimizerPro.exe at HKEY_LOCAL_MACHINESOFTWAREMicrosoftWindowsCurrentVersionApp Paths. Key PCProCtxMenu at HKEY_CLASSES_ROOT*shellexContextMenuHandlers. Key PCProCtxMenu at HKEY_CLASSES_ROOTlnkfileshellexContextMenuHandlers.
Read More
1 2 3 162
Logo
Copyright © 2022, ErrorTools. All Rights Reserved
Trademarks: Microsoft Windows logos are registered trademarks of Microsoft. Disclaimer: ErrorTools.com is not affiliated with Microsoft, nor claim direct affiliation.
The information on this page is provided for information purposes only.
DMCA.com Protection Status