How to Fix Windows 10 Error 80240020

How to Fix Windows 10 Error 80240020

Error Code 80240020 – What is it?

Users who receive Error Code 80240020 when attempting to install and/or upgrade to Microsoft Windows 10, are receiving the error because the Windows 10 installation folder is either corrupted or unfinished. As a result of this error code, your download and the subsequent update will not process correctly.

Users who receive this code do not have to do anything specific, as it might mean that they are attempting to update before their system is ready. These users can simply wait for their computer to prompt them for the update, and then follow the on-screen instructions for the update. However, if a user is seriously wanting to update to Microsoft Windows 10 prior to the prompt, there are ways around error code 80240020.

Common symptoms include:

  • A dialog box appears with the Error Code 80240020
  • Microsoft Windows 10 upgrade is unsuccessful or freezes in the process of updating and displays the error code message.

Solution

Restoro box imageError Causes

This error is only caused by one type of issue, and that is unfinished or corrupted files being present in the Windows 10 installation folder.

  • Files that are unfinished in the Windows 10 installation folder are a result of the download not processing correctly, therefore the update is not successful because your computer does not have the files that it needs.
  • Files that are corrupted in the Windows 10 installation folder are a result of either a faulty download or preexisting corrupted files that need to be purged.

Until your system is ready to download the new Microsoft Windows 10 upgrade, you will be unable to install the upgrade. As stated, you have the option of waiting for your system to prompt you to download (which means that your system has made the necessary changes to its own files and is ready for the upgrade), or you can use the following steps to correct the issue yourself.

Further Information and Manual Repair

Users and Microsoft Tech Support personnel have discovered three methods to correct error code 80240020. Each of these methods should be attempted by someone who is comfortable with computer software and programs. Anyone who is not comfortable with software should either contact Microsoft Support or wait for their computer to prompt them for the Microsoft Windows 10 upgrade.

Method 1:

  1. Back up the Registry of your operating system.
  2. Find the Registry Key: [HKEY_LOCAL_MACHINESOFTWAREMicrosoftWindowsCurrentVersionWindowsUpdateOSUpgrade]
  3. Note: this Registry Key should already exist, if it does not exist, create it.
  4. Create a brand new DWORD Value that is named AllowOsUpdate
  5. Set the Value to 0x00000001.
  6. Close and reopen your Control Panel.
  7. Restart the Microsoft Windows 10 upgrade.

Method 2:

  1. Download the Microsoft Windows 10 ISO (installation device) from the following website: http://www.microsoft.com/en-us/software-download/windows10
  2. Users must select the appropriate ISO, either 32 bit or 64 bit, depending upon their individual computer.
  3. Extract the ISO file to a separate USB device or burn the program to a compact disc.
  4. Run the Microsoft Windows 10 upgrade directly from the software that you have thus created.

Method 3:

  1. Access the files on your computer via MY COMPUTER
  2. Under the C: drive, access the WINDOWS folder
  3. Select the SOFTWARE DISTRIBUTION folder, followed by the DOWNLOAD folder.
  4. Delete any files within this download folder.
  5. If you are unable to delete these files, open the command prompt (CMD) as the administrator, and type “net stop wuauserv” into the CMD prompt window. Press ENTER. This should allow you to delete the files from step 4.
  6. Once the files are deleted, open and run the CMD as the administrator and type “wuauclt.exe /updatenow”. Press ENTER.
  7. Access the WINDOWS UPDATE folder from your control panel, the update and download should resume without further interference from the user.

As with any other error codes, if the above methods do not rectify the issue, it may be necessary to download and install a powerful automated tool to rectify error code 80240020.

If you like to learn and find out more about various Windows errors, and how to repair them go to our vast archive or use search to find articles that will explain and help you in solving your issue.
However, if you prefer to do things fast and with automatization then we are proposing to use an automated solution for your issues. The application that we are recommending is Advanced System Repair Pro
Advanced System Repair utilizes multiple tools all in one to give you a quick, simple, reliable, and very thorough diagnosis of your PC. It brings you all the tools you need in one program to clean, fix, protect, optimize and boost your PC!
1-Click Maintenance
All the tools to make it simple and easy! It's like having a professional technician at the click of a mouse.

Junk Cleaner
Keeping your computer free from unnecessary clutter also helps make your computer last longer. Like any other machine, if you keep it clean and take care of it, it will serve you better for longer!

Optimize background apps
Optimize applications background activity with the built-in Application Optimizer feature.

Disk Defrag
With a simple 1-click, Advanced System Repair speeds up your PC by assembling fragmented files on your machine and organizing them more efficiently.

Malware Removal
Finds and removes all types of harmful malware including trojans, worms, bots, adware, spyware, PUPs, and more!

Privacy Cleaner
The all-in-one privacy suite to Clean Your Tracks & Protect Your Privacy! Make your computer safe, secure, and more efficient!

System Tweak/Optimizer
ASR will analyze your complete system and settings to adjust your PC to function at its maximum performance.

Registry Cleaner
Over time, as you install and uninstall applications, the registry can become cluttered with old entries and broken settings which can result in program crashes, and annoying messages and slow the computer down.
Visit our Advanced System Repair Pro Download page to inform yourself about all the benefits of this software and get a free trial copy of it.
advanced system repair pro

Advanced System Repair Pro

One-click automated PC repair solution
ASR logo
With Advanced System Repair Pro you can easily
Replace damaged files
Restore performance
Free disk space
Remove Malware
Protects WEB browser
Remove Viruses
Stop PC freezing
DOWNLOAD
Privacy Policy | Terms of Use | Uinstall
Advanced System Repair Pro is compatible with all versions of Microsoft Windows including Windows 11

Share this article:

You might also like

How to Fix Windows 10 Error 0xc00000fd

How to Fix Windows 10 Error 0xc00000fd

Error Code 0xc00000fd - What is it?

In its most basic essence, Error Code 0xc00000fd appears when a program can not be initiated. It can occur when a file or program is corrupted, incompatible with the current version of the operating system, or out of date.

This error code occurs primarily in Windows but is also present in previous editions of the operating system. The symptoms of this error and the resolution methods for each of these systems are essentially resolved in the same way.

Common symptoms include:

  • Failure of programs to open properly, even if they were able to be opened in the past
  • The appearance of an error message stating that the application couldn’t be started correctly

There are several different things that Windows 10 users can do to try to fix the appearance of Error Code 0xc00000fd on their machine. Some of these methods are fairly simple for the average user, while others may require advanced knowledge and comfort with diving into the deeper tools and settings of the Windows operating system. If you have difficulty in implementing the methods below, contact a qualified Windows repair technician to assist you in the resolution of the error code.

Solution

Restoro box imageError Causes

Error Code 0xc00000fd can arise when program files are not recognized properly by the operating system, when the operating system is no longer compatible with the program being run, when files are missing or corrupted, or when the program has been changed in a substantial way. Each of these causes requires a different method of resolution.

Further Information and Manual Repair

Several methods can be used to attempt to resolve Error Code 0xc00000fd on your computer. Basic users can use some of these methods, while others require familiarity with advanced tools and options in Windows. If you have trouble implementing the steps below, contact a qualified professional to assist you. Here are the top ways to deal with Error Code 0xc00000fd on your machine:

Method One:  Check for Updates using the Windows Update Tool

In some cases, compatibility issues can be resolved through updates and patches available directly from Microsoft via the Windows Update tool. This is most likely the case if you have not kept up with regular updates on your machine over time. In your settings, open up the Windows Update tool and run a scan to see if there are any required updates available for your programs or for the operating system itself. If there are updates, install them, then reboot your computer to make sure that all updates are able to be fully applied to your operating system. Attempt to open the program that caused the error after you are finished to see if this method addressed the problem fully or if an additional method needs to be used.

Method Two:  Roll Back to an Earlier Version of the Updates

Sometimes, an update can cause a compatibility issue. If you have previously been able to open the program in question without any problems, but have recently installed an update on your computer, that update may have been the source of the problem. If this is the case, roll your system back to an earlier stage of updates to see if that fixes the problem. If so, you may need to wait to reinstall the updates until Microsoft corrects the issue.

Method Three:  Run Scans on Your Registry, Antivirus Software, Drivers, and Update Troubleshooters

If there truly is a corrupted or missing file within the program that you are trying to run, you can open up several tools to scan for the file that may be causing the trouble and attempt to fix it. Run the following tools to try to fix the problems:
  • Windows Registry Repair Tool (this particular tool may take some time to complete)
  • Windows Update Troubleshooting Wizard
  • Windows Drivers Updates
  • Antivirus software or Microsoft Security Essentials
After running each of these tools, restart your computer to allow any necessary changes to be applied to your system. If the above methods do not fix error Code 0xc00000fd on your particular device or if you do not have the confidence and knowledge to implement these steps on your own, get in touch with a Windows repair professional who can help you to resolve the problem.

Method 4: Use An Automated Tool

If you wish to always have at your disposal a utility tool to fix these Windows 10 and other related issues when they do arise, download and install a powerful automated tool.
Read More
Fix Device not migrated on Windows 10
Hello everyone, in today's tips and tricks we will focus on providing you with various solutions on how to solve the Device not migrated error that appears after the Windows update has been performed. Sometimes sadly updates to our operating systems can introduce us to various issues that look scary but in reality, they are solvable and not so scary at all. After all who would not find this message concerning, especially when it happens in the middle of work. device error messageThe first thing that would pop into my mind is that I have lost tons of work and that something in my hardware has gone very wrong and it is dead. Luckily that is not the case and this error means that due to Windows update drivers were not properly transferred due to some compatibility issues, maybe it was a corrupt update file, etc. Of course, the reason could be hardware malfunction as well, but if everything was working fine before the update, it is a software issue, and I must say it is a common one and fixable. Please keep reading this guide in order to fix the Device not migrated error.
  1. Update the Driver

    You should always try this first, if the device is not recognizable, try updating its driver and see if the problem vanishes. In order to update the driver, we will need first to locate which device has not been migrated properly, we will do this with help of a search engine on the internet like google for example. So open your browser of choice, go to a search engine (google for example) and type in the search box first line from your error message, yes, that scary one. You will be given which device has malfunctioned and was not migrated properly, now we will locate the device and update its drivers. To do this press WINDOWS + X on your keyboard to bring up Windows secret menu and choose device manager. keyboard with windows and x marked Find device inside device manager, right-click on it, and choose properties. Go to the events tab and make sure that the device has migration issues. device not migrates status You have now 3 options for updating the driver, you can do it manually, automatically, or with the driver installer. We will cover all 3 options so you choose which one best suits you. OPTION 1: Manually. Close the Properties tab, go to the device manufacturer website and download the latest driver, if there are no drivers there, the only executable installer for the device skip this step and try the other 2. After you have downloaded the driver package from the website, right-click on the device and choose update driver. device update driver Now navigate to the folder where you have downloaded your driver package and update the driver. Reboot your system. OPTION 2: Automatic update. Close the Properties tab, right-click on the device and choose to uninstall. device manager uninstall device Once the device is uninstalled, restart your system, and Windows will automatically search and install the latest driver for the device. OPTION 3: Via driver installer. If you have downloaded .EXE or executable driver installer from device manufacturers web site try installing it, if the installation fails, try using compatibility mode for the installer. Navigate where the installer is located, right-click on it, and choose properties. Go to compatibility TAB and try installing it with administrator privileges in Windows 8 mode. device run compatibility troubleshooterReboot your system after this step. This should solve the issues, however, if the issue still persists, follow the next steps.
  2. Verify the Corrupted System Files

    Press WINDOWS + X on the keyboard to open the hidden system menu and choose Command prompt (administrator) keyboard with windows and x marked In the command prompt type in: sfc /scannow and press ENTER. command prompt SFC scan The scanning process and repair of files will take around 15 min. Leave it to finish completely, do not restart, work on the computer or shut it down while the process is active, and only after it is finished reboot your system.
  3. Update Windows.

    If your Windows is not updated sometimes this issue can be resolved by updating it on the latest version. Click on start and then on settings. Windows 10 Star menu with marked settings icon Once the settings screen is opened, find and click on Update and Security. Windows settings update and security section marked Go to the Windows update tab and click on DOWNLOAD or click on check for updates for the latest Windows fix. windows settings windows update selected
  4. Reset BIOS to factory settings.

    Sometimes BIOS not being properly configured can cause issues in Windows itself and prevent it from detecting PnP devices thus creating this error. Restoring BIOS back to the factory setting can help. Turn off your computer and turn it back on. Press delete, f12, f11, or any other key which will take you to BIOS (default key is delete but sometimes manufacturers map this to another one. Once your screen turns ON you will see in the bottom message which key needs to be pressed in order to enter BIOS). Sadly since every BIOS could be different we can not cover step by step guide for each but you need to find the option where you load BIOS defaults, click on it save, and exit. Your computer will restart and boot into Windows, check to see if the problem still persists. BIOSD load defaults
  5. Update BIOS

    BIOS can cause issues with certain PnP devices when the newest Windows update is rolled. If reverting BIOS to the factory setting has not been successful try update. Go to your motherboard manufacturer website, find the update and read step by step guide there since updating BIOS differs from version to version and from manufacturer to manufacturer. After the update is done, restart the computer and hopefully, the error is gone.
  6. Perform a System Restore

    If everything else fails, perform a system restore to get Windows back into the state before the update was installed and when everything was working fine. Press WINDOWS + R on the keyboard to open the run dialog. keyboard with windows and r marked In the run dialog, type control panel and press enter to enter control panel, locate recovery and click on it. control panel recovery selected Inside the recovery screen click on Open System Restore. advanced recovery tools Choose a date when everything was working in order, the best bet is the date before Windows update and roll it back. system restore latest backup restore Click on date, and then on next.
Read More
Disabling Security Questions in Windows
We’ve already covered disabling Security Questions If you want to disable Security Questions on your Windows 10 computer then you’ve come to the right place as this post will guide you in doing exactly that. In this post, you will be disabling Security Questions using a PowerShell script. This PowerShell script is called “Update-AllUsersQA”. It is designed to remove or disable the security questions and answers for local users on a Windows 10 computer. It lets administrators take control of the security questions in the environment and at the same time minimizes the risk that comes with them. If a user has a Microsoft account that’s configured to sign in to Windows 10 then he will not probably notice the Password Recovery questions. On the other hand, if he has a chosen local account for installing Windows, he will e prompted to create three security questions that can be used to reset the password and log into the Windows 10 account in case there is any misfortune. However, if you do not have much use for these Security Questions, then you can definitely have them disabled using a simple PowerShell script which you can download from GitHub. For more details on how to disable security questions in a Windows 10 machine, refer to the steps provided below. Step 1: You need to first download the .ps1 file from the GitHub repository. Step 2: Once you’ve downloaded the file, open the PowerShell window with admin privileges. Step 3: After that, navigate to the folder where you had saved the .ps1 file. Then copy the address of the folder location. Step 4: Next, change the directory by using the following command:
cd "folder location address"
Step 5: After that, enter the following script to disable the security questions:
Update-AllUsersQA
Once you’ve completed the steps above, the Security Questions should be disabled and you will be notified with a message stating that the feature has been disabled. On the other hand, if you have a change of heart and you want to enable the Security Questions back, here are some steps you need to take: Step 1: First, open the PowerShell window as admin. Step 2: Next, run the same script with one more parameter such as:
Update-AllUsersQA -answer SecretAnswer
Step 3: And that’s about it. Do not forget to replace the Secret Answer with your preferred one and once you’re done, it will be set as the answer for all the Security Questions. Step 4: Now all that’s left to do is go to the Settings app to change the answer to the questions and you should be good to go.
Read More
Fixing the We can’t find a USB flash drive
One of the preferred ways to upgrade Windows 10 is by creating a bootable USB drive. However, you might change your mind when you encounter an error during the Windows 10 Setup that says, “We can’t find a USB flash drive”. Worry not for this error can be fixed using some suggestions that will be provided in this post. The funning thing about this error in Windows setup is that the computer says it’s not there when it’s clearly there. To fix this problem, you need to check if the USB device is accessible on your computer or you can also try a different USB device. In addition, you could check if there are any issues with both the USB 3.0 and USB 2.0 ports as it could be the reason why you’re getting the error or fix the bad sectors in the USB drive as well as see if the USB drive is set as the primary drive.

Option 1 – Try to check if the USB is accessible on your PC

The first thing you can do to resolve the problem is to check if you can access your USB device from your computer. All you have to do is open File Explorer and check if the USB device is listed there or not.

Option 2 – Try to connect a different USB device

The next thing you can do to fix the error is to try connecting a different USB device, specifically the one that has more significant storage space. You also have to make sure that it’s working on a different PC.

Option 3 – Fix any issues with the USB 3.0 and 2.0 ports

Although the USB 3.0 ports are compatible with the USB 2.0 ports, it does not necessarily mean that there wouldn’t be any problem when you use them which is why it’s best to fix any issues in them or better yet, use a compatible drive.

Option 4 – Try to fix the bad sectors in the USB drive via CHKDSK

When it comes to some issues concerning the hard drive or removable devices, there is a utility in Windows that might help which is called “chkdsk”. To use it, follow the steps below.
  • Tap the Win + S keys to open the Search box.
  • Then type “command prompt” in the field and from the search results that appear, right-click on Command Prompt and select “Run as administrator”.
  • After opening an elevated command prompt, copy and paste the following command and hit Enter:
CHKDSK [volume [[path] filename]] [/F] [/V] [/R] [/X] [/C] [: size]]
Note: In the command given above, “[/F]” will try to fix the system errors while “[/R]” will be the one to fix the bad sectors.
  • Now if you are prompted to run CHKDSK after your reboot your PC, just tap Y and reboot your PC.
  • If CHKDSK is not able to find any errors, tap the Win + E keys and navigate the access window. From there, right-click on the concerned drive and click on Properties.
  • After opening Properties, click on the tab Tools and then click on the “Check” button under the Error-checking section.
  • Wait until the process is completed and then restart your computer.

Option 5 – Try checking if the USB is set as the primary drive

You might also want to check if the USB drive is set as the primary drive because if it is, then it won’t appear on the list. It could also be that the USB drive has a primary disk in it. To undo it, you need to use the DISKPART utility.
  • In the Start Search, type “command prompt” and right-click on Command Prompt from the search results, and then select the “Run as administrator” option.
  • Next, execute the “diskpart” command to initiate the DISKPART utility.
  • After that, type the “list disk” command and tap Enter to display the list of disks on the computer. You have to take note of the drive number or letter of the concerned USB drive.
  • Once done, type the “select disk <X>” command where X is the drive letter or number and tap Enter.
  • Then execute the “list partition” command to see the list of all the partitions in your computer. It should be listed as 0, 1, or 2. 0 is the primary partition.
  • Now type the “select partition 0” command and tap Enter and then type “delete partition” to delete the selected partition.
  • You can do the same to the other partitions as well and when you’re done, execute the format command to turn the USB drive into a standard one.
Read More
Run Windows Updates from Command Line
As you know, one of the most highlighted features of Windows 10 is Windows Updates. It was offered to the customers as a service rather than a product with the release of Windows 10 under the scenario of Software as a Service which led to Windows Updates being set by default on Windows 10 and without an option for any users to disable it. Although not all users are happy with what Microsoft did, this is an ultimate step towards the greater good of all its customers since Windows Updates helps users in keeping their computers secured against all kinds of threats as well as provide them with the greatest and latest updates from Microsoft. So if you are one of those users who approved of the Windows Updates service, then read on as this post will guide you in running Windows Updates from Command Line either via Command Prompt or Windows PowerShell. For the complete set of instructions, refer to the options given below.

Option 1 – Run Windows Update via Command Prompt

Command Prompt in the Windows operating system exists for a very long time now compared to the comparatively new Windows PowerShell. That’s why it has similar capabilities to run Windows Updates. However, the highlighting point here is that you don’t have to download any module for Windows Updates. To get started running Windows Updates using Command Prompt, refer to the steps below.
  • First, type “cmd” in the Cortana search box, and from the search results, right-click on Command Prompt and select the Run as Administrator option to open it with Administrator privileges.
  • If a User Account or UAC prompt appears, just click on Yes to proceed.
  • Next, type in the commands listed below, and don’t forget to tap Enter right after you type each one of them.
    • UsoClient StartScan – use this command to start checking for updates.
    • UsoClient StartDownload – use this command to start downloading updates.
    • UsoClient StartInstall – use this command to start installing the downloaded updates.
    • UsoClient RestartDevice – use this command to restart your computer after you install.
    • UsoClient ScanInstallWait – use this command to check, download and install updates.
Note: Keep in mind that the commands in Command Prompt listed above are only meant for Windows 10. On the other hand, if you are using an older Windows version, you can try using the following commands instead:
  • wuauclt /detectnow – use this command to start checking for updates.
  • wuauclt /updatenow – use this command to start installing the updates detected.
  • wuauclt /detectnow /updatenow – use this command to check, download and install updates.

Option 2 – Run Windows Updates via Windows PowerShell

If you run Windows Updates in the Windows PowerShell, it will require you to install the Windows Update module manually. Hence, you have to get the Windows Updates downloaded and install Windows Updates.
  • Search for PowerShell in the Cortana search box and then run it with administrator privileges.
  • Once you’ve opened the Windows PowerShell, type the following command and hit Enter.
    • Install-Module PSWindowsUpdate – use this command to install the Windows Update module for Windows PowerShell.
    • Get-WindowsUpdate – use this command to connect to the servers of Windows Update and download the updates if found.
    • Install-WindowsUpdate – use this command to install the Windows Updates you’ve downloaded to your computer.
Read More
How to Fix Backup Error 0x80070002
[vc_row][vc_column][vc_column_text]

Backup Error 0x80070002

What is Backup Error 0x80070002?

Error 0x80070002 shows once you’re done backing up files through the Windows Backup program on a system running Windows 7, you see a notification that pops up with a message that reads something like: “Check your backup results. The backup completed but some files were skipped.” You try finding out the reason and you hover over to the Options button beside the message, then you get to read the following lines: “Check your backup results. The backup completed but some files were skipped. View skipped files.” Upon clicking the “View Skipped Files” option, the backup error 0x80070002 pops up on your screen and you’re left scratching your head, wondering what you’re going to do now.

Solution

Restoro box imageError Causes

There are multiple error logs that you will encounter in backup error 0x80070002 as per different conditions. The two most common cases in which this error shows up are stated below:

Case 1

You will see the following message when you press “View skipped files”: “Backup encountered a problem while backing up file C: Windows/System32/config/systemprofile. Error: (The system cannot find the file specified. (0x80070002))” You will face this case if you have backed up a library that included custom folders that were located in your user profile.

Case 2

Upon pressing “View Skipped files” you will encounter the below-mentioned messages: “Backup encountered a problem while backing up file C:/Users<User>AppDataLocalLow. Error: (The system cannot find the file specified. (0x80070002))” “Backup encountered a problem while backing up file C:/Users<User>Contacts. Error: (The system cannot find the file specified. (0x80070002))” “Backup encountered a problem while backing up file C:/Users<User>Searches. Error:(The system cannot find the file specified. (0x80070002))” You are likely to encounter any of these messages in case:
  • The Windows Backup program is trying to back up your files in either one or all of these folders (LocalLow, Searches, Contacts).
  • All three of these folders don’t exist in your system.
Keep in mind that all three of these folders exist due to the installation of certain programs and applications on your system.

Notes

The backup error 0x80070002 is also found to occur while using USB devices instead of storage devices. Other occurrences include the times when input/output (I/O) operations are performed on the USB device, which results in failure.

Further Information and Manual Repair

To make sure this issue is resolved, you will have to follow either one of the following solutions as appropriate to your situation:

Solution for Case 1

  1. Ignore the error. The store files of the custom library in your user profile will not be created as backups.
  2. Transfer the library folder from where it currently exists to a place outside its current folder (user profile). For instance, you can move the library folder to an entirely new destination such as “C: My Folders”
  3. Remove the library folder from the list of files that you are backing up using the Windows Backup program. Then, add the original place of the library’s content in the list.
  4. Go back and check step two. If carried out successfully then add a link to the folder you moved from the library. Check to see if the backup includes the library folder. To make sure, you have to do as follows:
  • Go to Start and select your username.
  • Hover across to the folder you wish to move, right-click on it and select “Cut”.
  • Head to the navigation pane and search for the area you will store the folder in, right-click and select “Paste” so that the folder is moved to that location.
  • Right-click on the folder that you just moved and select “Copy”.
  • Go back to Start, select your username, right-click any vacant space in your folder and select “Paste Shortcut”.
Note: If you want to store the folder in a different place other than the folder in which it currently exists (user profile), you will need to create a new folder. In order to do so, go to the Windows Explorer menu and look up the root of the drive. Hit “New Folder” and then choose edit to change its name. You can set it as any name for instance, “My Folders”.

Solution for Case 2

You can ignore this error safely. However, if you wish not to see this error in the future during your backup operations then you will need to carry out the following steps:
  1. Create all the folders listed in the error message including LocalLow, Contacts, and Searches.
  2. Remove all of these folders from the Backup settings to make sure they aren’t being backed up then add the folders which are in their original place. To carry out this procedure, you will have to follow the below-mentioned steps:
  • Head over to the Control Panel and open “Backup & Restore”.
  • Go to the Backup section and select “Change Settings”.
  • Click Next in the Setup backup dialog box.
  • Select “Let me choose” in the dialog box termed “What do you want to back up” then proceed by clicking Next.
  • Expand Data Files, expand <user> Libraries, expand Additional Locations then proceed by clearing out the AppData Folder, searches, and Contacts check boxes.
  • Expand Computer as well as the item for your system drive (expand Local Disk (D:)), expand users, expand <user>, then go to AppData, Searches and Contacts and mark them if they are present.
  • Proceed by clicking next and select “Save Settings” then exit.
  • Back to Backup & Restore, select Back up now and your new backup will begin proceeding. The entire process will complete without any errors now.
[/vc_column_text][/vc_column][/vc_row]
Read More
USB keep disconnecting and reconnecting
If your USB keeps disconnecting and reconnecting after you connect your USB device on its own randomly, then the problem might have something to do with a hardware or driver issue. The first thing you have to do in such a case is to make sure that the device is working on another computer. This will help you isolate the problem and if it turns out that it works, then the problem lies in your computer and not your USB device. To fix this connection problem between your USB device and Windows 10 computer, you can use the options given below as a reference.

Option 1 – Update or reinstall the Universal Serial Bus Controller driver

Since it could be a driver issue, you can try to update or reinstall the Universal Serial Bus Controller drivers using the Device Manager. Refer to the following steps:
  • First, click the Start button and type “device manager”.
  • Then click on the “Device Manager” from the search results to open it.
  • From there, look for the “Universal Serial Bus controllers” option and then right-click on each one of the USB drivers and select the Update Driver from the menu.
Note: If it is a regular USB drive, then it will be listed as a USB Mass Storage Device but if you have a USB 3.0 device, then look for a USB 3.0 Extensible Host Controller.
  • Restart your PC and then click the “Search automatically for updated driver software” option.
Note: If updating the USB Controller drivers didn’t work, you can try to reinstall them instead.

Option 2 – Try to change the USB port

You might want to change the USB port since modern computers have a variety of USB ports. So if your USB drive supports USB 3.0 or 3.1, make sure that you plug it inside a USB 3.0 or 3.1 ports. If you’re not sure which port, just keep in mind that the USB 3 port is usually blue or you can also use your computer’s documentation or manual as a reference to locate it.

Option 3 – Try to turn off the Power Saving option

You could also try to turn off the Power Saving option to resolve the problem. All you have to do is switch to Power Management after you select the Properties of the USB device and from there, uncheck the “Allow the computer to turn off the device to save power” option. On the other hand, if you are using a laptop and did not use the USB device for a long time, then it could be powered off. This will ensure that the system does not turn off the USB device.

Option 4 – Try to reinstall the latest Universal Serial Bus controller drivers in Compatibility Mode

If you were unable to install the Universal Serial Bus controller drivers you’ve downloaded, you can try installing them again but this time using Compatibility mode. Follow the steps below to do so:
  • You need to download the driver and place it on your desktop.
  • After that, right-click on it and select Properties.
  • Next, switch to the Compatibility tab where you should see two options:
    • Compatibility troubleshooter, and let Windows figure out what works best for you. If it fails, follow the next.
    • Manually choose the version of Windows it was correctly working.
  • Now right-click on the file and select the “Run as administrator” option to install. After that, you should now be able to change your screen aspect ratio to what you were using early on.
Note: If you have other programs that won’t work on the existing version of Windows, then make sure to run the program in a Compatibility mode.

Option 5 – Run the Hardware and Devices Troubleshooters

  • The first thing you need to do is click on Start and then on the gear-like icon to pull up the window for Settings.
  • After opening Settings, look for the Update and Security option and select it.
  • From there, go to the Troubleshoot option located on the left-hand side of the list.
  • Next, select Hardware and Devices from the list and open the Troubleshooter and run it. Once it is doing its job, wait for it to complete the process and then restart the system.
  • After the system restarts, check if the problem’s now fixed. If not, refer to the next option given below.
Read More
Nearby Sharing is not working in Windows
Windows 10 has a lot of several useful features and one of them is the Nearby Sharing feature. You can access this feature by going to Start > Settings > System > Shared experiences. From there, switch on the Nearby Sharing option and select the folder where you want to download the files to. This feature is really useful as it allows you to share files. However, there were reports from a number of users recently stating that Nearby Sharing is not working on their Windows 10 computers. If you are one of the users facing this problem, you might want to try checking if the Windows 10 v1803 Update is installed on your computer or not. You could also try to check if Bluetooth supports low energy mode or you could also try bringing the device closer or check if the adapter has Bluetooth version 4.0 or later. For more information, refer to each one of the given options below.

Option 1 – Try checking if Windows 10 v1803 Update is installed

To check if the Windows 10 v1803 Update is installed on your computer, go to Start > Settings > System > About. From there, scroll down to the Windows specifications and check the Version. If it is 1803 or above, then the Nearby Sharing feature should be active on your computer. However, if you find that Windows 10 v1803 Update is not installed yet, then you need to update your computer to its latest version and then see if it fixes the problem or not.

Option 2 – Verify if Bluetooth supports low energy mode

Although low energy mode is not really necessary in using Nearby Sharing, there are some Bluetooth terminals that support low energy mode which makes a lot of difference. Thus, you need to check if Bluetooth in your computer supports low energy mode by following these steps:
  • Tap the Win + R keys to open the Run dialog box.
  • Next, type “devmgmt.msc” in the field and tap Enter to open the Device Manager.
  • After that, expand the list of Bluetooth adapters, and then right-click on your adapter and select Properties.
  • Go to the Details tab and select Bluetooth radio supports Low Energy Central Role from the drop-down menu and if its value says “<true>”, it means that your Bluetooth supports low energy mode, otherwise, it doesn’t.
  • If your Bluetooth does not support low energy mode, then you might want to consider purchasing an external one.

Option 3 – Try bringing the devices closer

Nearby Sharing might not work if your devices are not close enough. Thus, you need to bring your devices closer together and see if it fixes the problem. And when you do, make sure that Network Sharing is switched on for all the concerned devices.

Option 4 – Make sure that you’re using Bluetooth version 4.0 or later

For you to use the Nearby Sharing feature, you have to make sure that the adapter for all the concerned devices is using Bluetooth version 4.0 or later. So if one of the devices or if all the devices are not using this version or later versions, then you must buy an external Bluetooth adapter for you to enjoy the Nearby Sharing feature.
Read More
Intel's open-source Clear Linux* Project
clear linux project
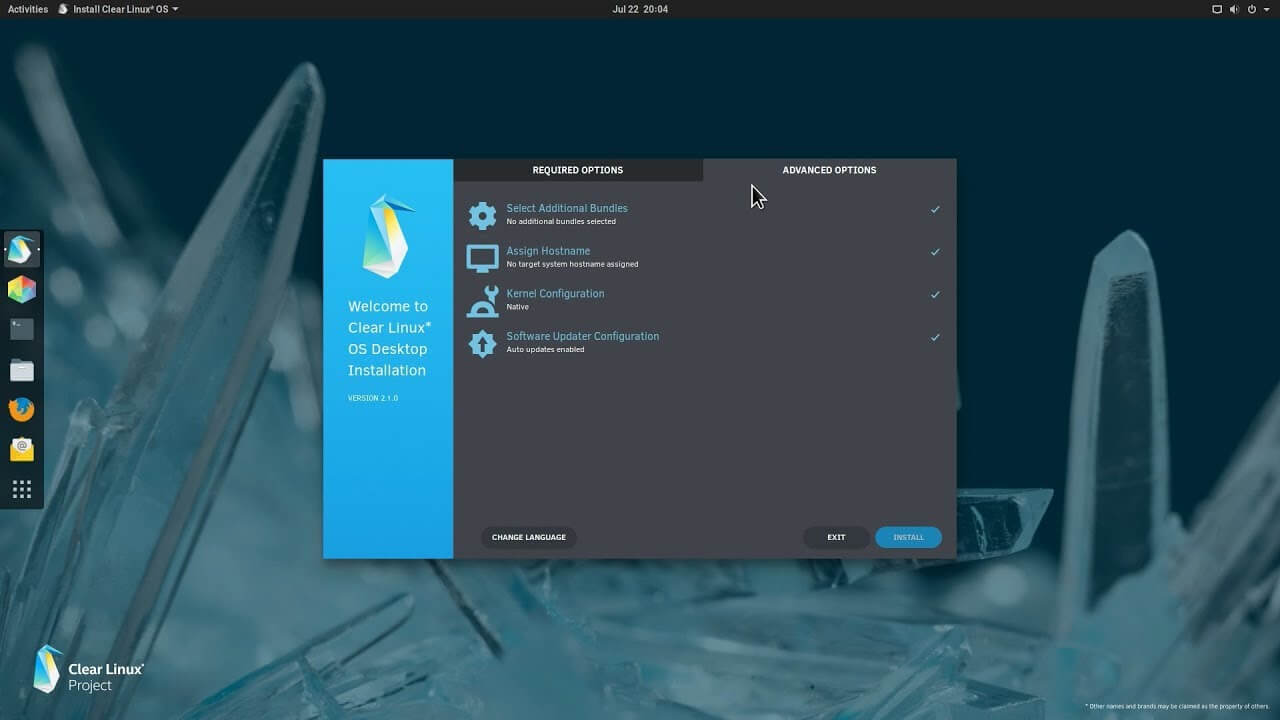
The Clear Linux Project creates an operating system and software stack that offers highly optimized performance, security, versatility, and manageability. Clearly optimized for Intel CPUs and based on GNOME it will offer you incredible speeds if you are on Intel CPU. The big news, though, is that Clear Linux sports the shiny new Gnome 40. This is a fresher Gnome than you'll find even on Ubuntu's more experimental 21.04 release. The only big names that let you test drive Gnome 40 are Fedora and Arch Linux.

Packages only when you need them

Installation of packages is used by Swupd, a Clear Linux* package management tool. It is easy to use and pretty straightforward.
  • "bundle-list" for showing what's installed
  • "bundle-info" for details on installed bundles (such as owned files via the "‑‑files" flag)
  • "search" for repository searching
  • "bundle-add" for installation
  • "bundle-remove" for uninstallation
The only problem here is the packages themselves. Clean Linux* has been imagined as a developer distro focusing mostly on well-development tolls. In intel’s words: “A Linux OS built for Linux developers”, so some things will be left out. Strangely enough some things as FFmpeg which if you want to have and blast some youtube videos while you work will have to complete manually by yourself.

Clear Linux* modular philosophy

Everything in Clear Linux* is based on a modular philosophy approach. There is no /etc/fstab file, the /boot directory is totally empty. Every partition to be mounted is enabled as a systemd "mount unit." Intel reaping the benefits of systemd's modular philosophy, where everything is a unit. If you know your way around systemd, intermediate-level configuration tasks should be straightforward. Any advanced configuration likely demands deep systemd knowledge.

Clear Linux* performance

As stated earlier this is Intel’s distro, optimized for Intel hardware meaning that Intel as the developer has every possible tool at its disposal to make use of hardware to its maximum potential and it shows. Distro almost leaves other ones two times in speed performance. So if you are looking for a distribution that will deliver you speed and it is aimed for developer Clear Linux* is for you.

Conclusion

Clear Linux* is a really interesting distro and seeing how Intel is adding new software packages on its official website it might have a bright future. But as always, be the judge for yourself and see if it can fit your needs. Go get it at: https://clearlinux.org/
Read More
How to Resolve the Sqlite3.dll Error Code

Fix the Sqlite3.dll Error

Sqlite3.dll Error - What is it?

Sqlite3.dll error is a typical example of DLL errors. This error message occurs when the system fails to access Sqlite3.dLL (Dynamic Link Library) files shared by certain programs to run on the PC. The error is displayed in the following format:

"Cannot find the file sqlite3.dll (or one of its components)"

Followed by:

"Error starting program.. A required .DLL file sqlite3.dll was not found."

Solution

Restoro box imageError Causes

The sqlite3.dll error message may pop up on your computer screen due to the following reasons:
  • Missing sqlite3.dll files
  • DLL files affected due to viruses and malware on your system
  • Registry overloaded with invalid entries
  • Disk fragmentation
Whether the cause for the sqlite3.dll error code on your PC is malware invasion or registry issues, it is recommended to resolve it immediately before the damage sets in. Such errors can expose your PC to serious threats like privacy errors, data breaches, identity thefts, cybercrime, system failure, crashes, and valuable data loss.

Further Information and Manual Repair

When it comes to fixing sqlite3.dll error code, you don’t always need to hire a professional and spend hundreds of dollars on the repair. Here are some simple and do it yourself solutions that you can try and resolve the error on your system for free.

1. Check inside recycle bin and restore the deleted file

If this error popped on your computer screen after installing a certain program, then you need to check your recycle bin. This is because DLL files are shared by multiple programs, it might be possible that the program you just deleted also used the sqlite3.dll file to run on your system. And so when you uninstalled the program, the sqlite3.dll file also got removed. To resolve this, check your recycle bin for the file. If you find it, restore it. Once the files is restored, try running the application that was generating the sqlite3.dll error message. If the error still persists, then this means the cause of the sqlite3.dll error is deeper. It could be due to malware or the registry.

2. Remove Malware

To remove malware, run an antivirus. This will help scan for such malicious software on your system affecting DLL files and remove them. However, the drawback is that it may slow down the speed of your PC significantly. And when running it, you may have to stop all other activities on your system.

3. Repair and Restore the Registry

If the cause of the sqlite3.dll error is the registry corrupted with invalid entries and disk fragmentation, then you need to repair and restore the registry. The best way to do this is to download Restoro. Restoro is a powerful and highly functional registry cleaner. It scans your entire PC and detects all registry issues in seconds. It wipes out all the unnecessary and obsolete files including the junk files, invalid registry entries, bad registry keys, temporary internet files, cookies, and browser history. It clears up hard disk space and frees it of clutter. Furthermore, this registry cleaner also repairs the damaged DLL files and restores the registry. Restoro is not only a registry cleaner but is also a system optimizer. This means you can also run it to scan and remove malware on your PC and system instability issues. It boosts your PC’s speed and performance. It runs smoothly on all Windows versions. It is safe, efficient and user-friendly. The layout is neat and the interface is easy to use and intuitive. In just a few clicks you can resolve the sqlite3.dll error and resume using your desired programs. Click here to download Total System Care on your PC to resolve sqlite3.dll error pop-ups.
Read More
1 2 3 162
Logo
Copyright © 2022, ErrorTools. All Rights Reserved
Trademarks: Microsoft Windows logos are registered trademarks of Microsoft. Disclaimer: ErrorTools.com is not affiliated with Microsoft, nor claim direct affiliation.
The information on this page is provided for information purposes only.
DMCA.com Protection Status