Fix WHEA_UNCORRECTABLE_ERROR, 0x00000124

Any modifications in a computer, either big ones or small ones can definitely trigger some errors which is why you have to be careful when you modify the system setting. One of the errors you might encounter when you’ve modified your computer is the WHEA_UNCORRECTABLE_ERROR 0x00000124 Blue Screen Error. According to the error data provided by the Windows Hardware Error Architecture or WHEA, aside from system modifications, you could also encounter this error if your computer has a hardware failure which could be due to a hard drive, RAM, or any other hardware component. In most cases, it is related to physical hardware failures which might have something to do with defective hardware, heat-related, memory as well as a processor that is starting to fail or has already failed.

To fix the WHEA_UNCORRECTABLE_ERROR 0x00000124 Blue Screen error, here are some suggestions you have to check out.

Option 1 – Try to perform System Restore

Before you further troubleshoot the problem, you might want to perform System Restore first as the BSOD error might be caused by system modifications. Thus, to undo them, you can use System Restore. Run it using these steps:

  • First, tap the Win + R keys to open the Run dialog box.
  • After that, type in “sysdm.cpl” in the field and tap Enter.
  • Next, go to the System Protection tab then click the System Restore button. This will open a new window where you have to select your preferred System Restore point.
  • After that, follow the on-screen instructions to finish the process and then restart your computer and check if the problem is fixed or not.

Option 2 – Try disabling Overclocking

If overclocking is enabled, you might have to disable it as some users reported that the WHEA_UNCORRECTABLE_ERROR 0x00000124 error started to appear right after overclocking. To disable it, follow the steps below.

  • Go to the Start Menu and open Settings.
  • Next, select Update and Security and go to the Recover tab.
  • From there, click on Restart now in Advanced startup. This will restart your computer.
  • Once you’re in the Advanced startup, go to Troubleshoot and then select the Advanced Options.
  • From there, select the UEFU Firmware Settings.
  • Now click on Restart. Once your computer has restarted, it will automatically open BIOS.
  • From the BIOS, go to the Advanced tab and navigate to Performance and then look for Overclocking.
  • Once you’ve found Overclocking, make sure that it is disabled. If it’s not, then disable it and then save the changes made by tapping the F10 key.
  • Start your computer normally and check if the WHEA_UNCORRECTABLE_ERROR 0x00000124 error is now fixed.

Option 3 – Check your computer’s cooling components and make sure that they are working

It is a known fact that an overheated PC causes system slowdowns and even Blue Screen errors like WHEA_UNCORRECTABLE_ERROR 0x00000124. To fix it, you need to check your computer’s cooling components to see whether they’re properly working or not. Then make sure that you clean them up including the fan and other hardware from dust and other debris.

Option 4 – Use the Windows Memory Diagnostics

Since the problem has something to do with the physical RAM, you need to use Windows Memory Diagnostics. To run it, refer to these steps:

  • Tap the Win + R keys to open Run and type exe and hit Enter to open the Windows Memory Diagnostic Tool.
  • After that, it will give two options such as:
    • Restart now and check for problems (Recommended)
    • Check for problems the next time I start my computer
  • Once your computer has restarted, perform a basic scan or you could also go for the “Advanced” options such as “Test mix” or “Pass count”. Simply tap the F10 key to start the test.

Note: After you select the option, your PC will restart and check for memory-based issues. If it finds any issues, it will automatically fix them.

Option 5 – Update or rollback or disable concerned device drivers

To fix the WHEA_UNCORRECTABLE_ERROR 0x00000124 error, you can also try to roll back, or update, or disable the concerned device drivers.

  • Open the Devices Manager from the Win X Menu.
  • Then locate the device drivers particularly the ones that are under the sections of Keyboard, Mouse, USB, and HID Drivers.
  • Next, right-click on them to open the Properties.
  • After that, switch to the Driver tab and click on the Uninstall Device button.
  • Follow the screen option to completely uninstall it.
  • Finally, restart your computer. It will just reinstall the device drivers automatically.

Note: You can install a dedicated driver on your computer in case you have it or you could also look for it directly from the website of the manufacturer. On the other hand, if you have just updated your device drivers then you need to roll back the drivers to their previous versions or disable them.

Option 6 – Try running System File Checker or SFC scan

You could also run System File Checker or SFC scan to fix the BSOD error. It is a built-in command utility that helps in restoring corrupted files as well as missing files. It replaces bad and corrupted system files with good system files. To run the SFC command, follow the steps given below.

  • Tap Win + R to launch Run.
  • Type in cmd in the field and tap Enter.
  • After opening Command Prompt, type in sfc /scannow

The command will start a system scan which will take a few whiles before it finishes. Once it’s done, you could get the following results:

  1. Windows Resource Protection did not find any integrity violations.
  2. Windows Resource Protection found corrupt files and successfully repaired them.
  3. Windows Resource Protection found corrupt files but was unable to fix some of them.
  • Reboot your PC.

Option 7 – Try to disable the Digital Driver Signature Enforcement

  • Reboot your computer from the Start menu.
  • Then select the option while pressing the Shift key. This will open the Advanced Boot menu.
  • From there, click on Troubleshoot and select Startup Settings.
  • Now select the “Disable driver signature enforcement” option using the arrow keys on your keyboard and then restart your computer normally.
If you like to learn and find out more about various Windows errors, and how to repair them go to our vast archive or use search to find articles that will explain and help you in solving your issue.
However, if you prefer to do things fast and with automatization then we are proposing to use an automated solution for your issues. The application that we are recommending is Advanced System Repair Pro
Advanced System Repair utilizes multiple tools all in one to give you a quick, simple, reliable, and very thorough diagnosis of your PC. It brings you all the tools you need in one program to clean, fix, protect, optimize and boost your PC!
1-Click Maintenance
All the tools to make it simple and easy! It's like having a professional technician at the click of a mouse.

Junk Cleaner
Keeping your computer free from unnecessary clutter also helps make your computer last longer. Like any other machine, if you keep it clean and take care of it, it will serve you better for longer!

Optimize background apps
Optimize applications background activity with the built-in Application Optimizer feature.

Disk Defrag
With a simple 1-click, Advanced System Repair speeds up your PC by assembling fragmented files on your machine and organizing them more efficiently.

Malware Removal
Finds and removes all types of harmful malware including trojans, worms, bots, adware, spyware, PUPs, and more!

Privacy Cleaner
The all-in-one privacy suite to Clean Your Tracks & Protect Your Privacy! Make your computer safe, secure, and more efficient!

System Tweak/Optimizer
ASR will analyze your complete system and settings to adjust your PC to function at its maximum performance.

Registry Cleaner
Over time, as you install and uninstall applications, the registry can become cluttered with old entries and broken settings which can result in program crashes, and annoying messages and slow the computer down.
Visit our Advanced System Repair Pro Download page to inform yourself about all the benefits of this software and get a free trial copy of it.
advanced system repair pro

Advanced System Repair Pro

One-click automated PC repair solution
ASR logo
With Advanced System Repair Pro you can easily
Replace damaged files
Restore performance
Free disk space
Remove Malware
Protects WEB browser
Remove Viruses
Stop PC freezing
DOWNLOAD
Privacy Policy | Terms of Use | Uinstall
Advanced System Repair Pro is compatible with all versions of Microsoft Windows including Windows 11

Share this article:

You might also like

Prevent screen from shutting down in Windows
You left your computer to go to the bathroom or to fetch something to eat, maybe you have to answer the phone or open door to a friend and after some time you get back to your computer see the black screen, you move the mouse and it starts to come from sleep slowly. I am the kind of person who gets annoyed by this kind of behavior, I like my PC to be ON all time when I want it to be ON and my power plan on best performance so naturally, I have turned this sleep feature OFF. If you are interested to see how you to can turn off your screen sleeping follow this easy guide.
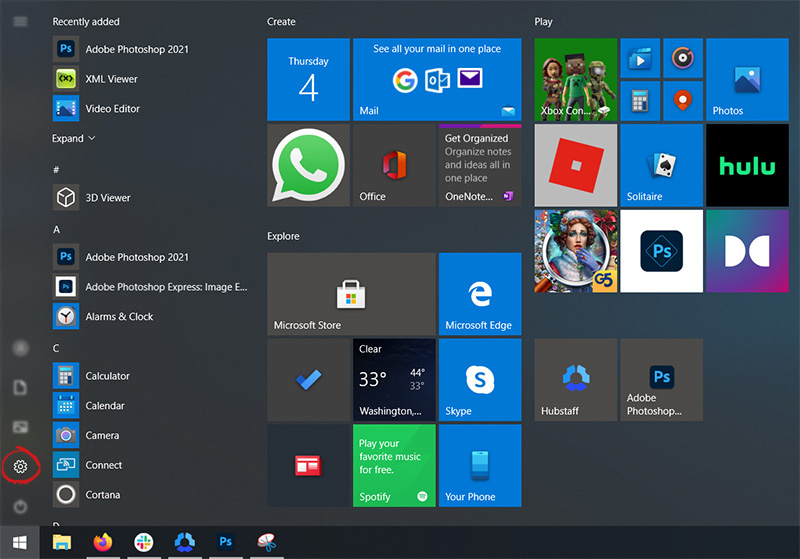
  1. Press ⊞ WINDOWS to open the start menu and click on the settings Windows 10 Start menu with marked settings icon
  2. On settings, screen click on system Windows settings with System section selected
  3. When the system dialog opens go to Power & Sleep and on the right side change all values to never. windows settings power and sleep
Please note that after each update Windows tend to reset these settings so you will sadly have to return to this after each major update.
Read More
Fix An unspecified error 0x800700b7
If you receive an error that says, “An unspecified error occurred during System Restore (0x800700b7)” when you tried to restore your Windows 10 PC, worry not, for this post will help you resolve the problem. This kind of error typically occurs when System Restore was not completed successfully and fails instead with this error. Before you start, you must not abruptly shut down your computer and wait for the error to occur. You may receive this error due to many possible reasons. It could be caused by your antivirus program that’s not letting the process complete or corrupted system files which causes the failure or it could also be caused by an unsuccessful installation of a Windows Update. Here are some fixes you can check out if you can still boot into your computer:

Option 1 – Try to disable your antivirus program

Disabling the antivirus program or any security software installed in your computer is always a good idea you can try when the System Restore process does not go smoothly. So before you try updating your computer again, make sure to disable the antivirus or security program and then run System Restore again, don’t forget to enable the antivirus program back again.

Option 2 – Run the DISM tool

The next thing you can do is run the DISM tool. This tool is known to repair potentially corrupted files in your system as having them could also system issues like the blank dialog boxes. To repair these corrupted system files, you can run the DISM commands:
  • Tap the Win + X keys and click on the “Command Prompt (Admin)” option.
  • After that, input each one of the commands listed below sequentially to execute them:
    • Dism /Online /Cleanup-Image /CheckHealth
    • Dism /Online /Cleanup-Image /ScanHealth
    • Dism /Online /Cleanup-Image /RestoreHealth
  • Once you’ve executed the commands given above, restart your computer and check if the problem is now fixed.

Option 3 – Run the System File Checker

System File Checker or SFC is a built-in command utility that helps in restoring corrupted files as well as missing files. It replaces bad and corrupted system files to good system files that might be the cause why you’re getting the errors 0x8024a11a and 0x8024a112. To run the SFC command, follow the steps given below.
  • Type “cmd” in the Start search and then right-click on the appropriate search result.
  • Next, select “Run as administrator” to open Command Prompt with admin privileges.
  • After opening Command Prompt, type in sfc /scannow
The command will start a system scan which will take a few whiles before it finishes. Once it’s done, you could get the following results:
  1. Windows Resource Protection did not find any integrity violations.
  2. Windows Resource Protection found corrupt files and successfully repaired them.
  3. Windows Resource Protection found corrupt files but was unable to fix some of them.
  • Now restart your computer and see if the problem is fixed or not.

Option 4 – Try to run the System Restore in a Clean Boot State

If the first three given options didn’t work and the service still keeps on failing even though the service is running, you can try putting your computer in a Clean Boot State and then try to run System Restore again.
  • Log onto your PC as an administrator.
  • Type in MSConfig in the Start Search to open the System Configuration utility.
  • From there, go to the General tab and click “Selective startup”.
  • Clear the “Load Startup items” check box and make sure that the “Load System Services” and “Use Original boot configuration” options are checked.
  • Next, click the Services tab and select the “Hide All Microsoft Services” check box.
  • Click Disable all.
  • Click on Apply/OK and restart your PC. (This will put your PC into a Clean Boot State. And configure Windows to use the usual startup, just simply undo the changes.)
  • Now try to run System Restore again and see if the process goes smoothly.

Option 5 – Run the Windows Update Troubleshooter

You might also want to run the Windows Update Troubleshooter as it could also help in fixing the problem with System Restore. To run it, go to Settings and then select Troubleshoot from the options. From there, click on Windows Update and then click the “Run the troubleshooter” button. After that, follow the next on-screen instructions and you should be good to go. On the other hand, if you can’t boot into your Windows 10 computer, here are some fixes you can try instead:

Option 6 – Try running System Restore in Advanced Startup Options

If you cannot boot into your Windows 10 computer, you can try to run System Restore again in the Advanced Startup Options.
  • Boot your computer into the Advanced Startup Options screen.
  • From there, you will see some options to troubleshoot when you can’t log in to Windows in the usual way.
  • Now select Troubleshoot > Advanced Options > Command Prompt.
  • After that, type “rstrui” and hit Enter to execute the command which will start the System Restore process.

Option 7 – Run the SFC scan and DISM via Advanced Startup Options

Like what you did in the first given option, you can use the Advanced Startup Options to run both System File Checker and DISM. All you have to do is boot into the Advanced Startup Options and from there select Troubleshoot > Advanced Options > Command Prompt. After accessing Command Prompt, you can run the System File Checker scan first by entering the “sfc /scannow”. As for DISM, you can run the “Dism /Online /Cleanup-Image /RestoreHealth” command.

Option 8 – Try to run the Automatic Repair Utility

You might also want to use Automatic Repair in fixing the error. To do so, follow the steps below.
  • You can start by creating and booting from a bootable Windows 10 USB Stick.
  • After that, click on Repair your computer located in the bottom left corner when you are on the initial Windows Startup screen.
  • Next, click on Troubleshoot, and then on the other screen, click the Startup Repair option.
  • Now select the operating system you want to repair. Once you do that, it will start to repair your operating system. Wait until the process is completed and then check if the problem’s now fixed.
Read More
What to do if Cortana Search Box turned white
A lot of Windows 10 users prefer the black theme on their computers and when you see anything but black it can get quite annoying. Such as is the case of the Taskbar which, as you know, is usually dark, however, when you take a look at the Cortana search bar, instead of seeing black, you’ll see that it has turned white. To fix this issue, read on as we will provide you some options you can try to set the Cortana search bar back to black. Before you proceed, take note that the options provided below will change all white search boxes to black and that one of these options needs administrative privileges.

Option 1 – Try changing the default App mode

As you know, Windows 10 has two modes, namely the Light and the Dark. Thus, you can switch to the Dark mode so that your Cortana search bar will be black as well. However, remember that it will completely change everything into dark mode so there will be no more Light mode elsewhere.
  • First, you need to click on the Start button and then click on the cog icon to open the Windows 10 Settings.
  • Next, from the Settings Menu, select Personalization and then select Colours from the left pane.
  • Then scroll down until you see the “Choose your default app mode” option and select “Dark”.
After you apply the changes, it will change the Cortana search bar into black instantly. Aside from that, you will also see the User Interface changing into dark mode.

Option 2 – Try changing the Registry value

If you are well-versed in editing registry keys, then you need to try this option. But before you go over the steps below, make sure that you create a System Restore point first so that if anything goes wrong, you can always go back to how it was before the changes were applied.
  • Tap the Win + R keys to open the Run prompt.
  • Then in the field, type in “regedit” and hit Enter to open the Registry Editor. If a User Account Control prompt appears, just click Yes.
  • Now that you’ve opened the Registry Editor, navigate to the following key:
HKEY_CURRENT_USERSoftwareMicrosoftWindowsCurrentVersionSearchFlightingWhiteSearchBox
  • After that, double-click on the “Value” key located on the right pane and set the value to “0” instead of “1” and then click Ok to save the changes made. You should now see a black or grey text box color instead of white.

Option 3 – Try changing the Region

In some forums, a lot of users stated that changing the Region also worked out for them in changing the white Cortana search bar to white. Thus, you need to change the region settings of your computer temporarily. To do so, follow the steps below.
  • Type in “Regional Settings” in the box and then click it as soon as it appears from the search results.
  • Next, make sure to select a region where Cortana is not available.
  • Then select apply to that region. After that, it will change the Cortana search bar color to black.
  • Now sign out and sign back in and revert to the original settings. But the changes you made earlier in Cortana will still remain.
Read More
Fix Could not find the Recovery Environment
If you suddenly find the Windows Recovery Environment not working and you see an error message saying, “Could not find the recovery environment”, then you’ve come to the right place as this post will guide you on how you can fix it. In times when you can’t boot into the Windows Recovery Environment, there could be several reasons behind it. However, have you ever wondered where exactly the Windows Recovery Environment is in your computer? Windows initially places the Windows RE Image file in the installation partition during Windows Setup so if you have installed Windows in the C drive, you can find the Windows RE at the C:/Windows/System32/Recovery or C:/Recovery folder. Keep in mind that this folder is hidden and later on, the system copies the image file into the recovery tools partition to make sure that one can boot into recovery if there are any issues with the drive partition. The “Could not find the recovery environment” error mostly occurs if the Windows Recovery Environment is disabled or if the “Winre.wim” file is corrupted. Thus, to fix this error, you need to refer to the given suggestions below.

Option 1 – Try to enable Windows Recovery Environment

  • In the Windows Start Search, type “PowerShell” and from the search results that appear, right-click on Windows PowerShell and then select the “Run as administrator” option to open it with admin privileges.
  • Next, type the “reagentc /info” command and tap Enter to execute it.
  • After that, if the output states that Status is enabled, then you’re all set.
  • Now type the “reagentc /enable” command and tap Enter to enable the Windows Recovery Environment. You will see a success message at the end signifying that Windows RE is available.

Option 2 – Try to fix the corrupted or missing “Winre.wim” file

If the Winre.wim file is either corrupted or missing, you need to get a new copy of this file from another computer where the Windows RE is working. Once you’re able to get a new copy of the Winre.wim file, you have to set the image path to a new location. For more details, refer to these steps:
  • First, type “Powershell” in Windows Start Search and right-click on Windows PowerShell from the results, and select Run as administrator.
  • Next, execute the given command below to change the path of the WIM file to the new location. Note that the steps should be used when the file path of the Windows Recovery Environment is different from the usual spot.
Reagentc /setreimage /path C:RecoveryWindowsRE
  • As mentioned, if the file is corrupted, you just have to get a new copy from another PC but before you do that, make sure that the WINRE on that computer is disabled (just enable it later on) and then place it in the C:/Recovery path and then set its path again using the command given above and then verify its path by executing the following command.
reagentc /info command
Note: Since the Recovery folder is hidden as well as the WINRE folder in it and you won’t be able to access them using the Windows File Explorer, you need to use the Windows PowerShell or Command Prompt so that you can access them.

Option 3 – Try checking and fixing the WinRE Reference in the Windows Boot Loader

The Windows Boot Loader is the one that determines if it has to load the Windows Recovery Environment. It could be that the boot loader is pointing to an incorrect location which is why you’re getting the error. To resolve it, you have to check and fix the WinRE Reference in the boot loader. How? Follow these steps:
  • In the Windows Start Search, type “PowerShell” and from the search results that appear, right-click on Windows PowerShell and then select the “Run as administrator” option to open it with admin privileges.
  • After that, execute the “bcdedit /enum all” command.
  • Next, look for an entry in the Windows Boot Loader identifier set as Current and look for “recoverysequence” in that section and take note of the GUID.
  • Ensure that the device and the osdevice items show the path for the Winre.wim file and that they are the same. If not, you need to point the current identifier to the one which has the same.
  • Once you’ve found the new GUID, execute this command: bcdedit /set {current} recoverysequence {GUID_which_has_same_path_of_device_and_device}
  • Now check if the error in the Recovery Environment is fixed or not.

Option 4 – Try creating a Recovery Media

You could also try creating a Recovery Media to resolve the error in the Windows RE. All you have to do is download the Windows 10 ISO file using the Media Creation tool and then create a recovery drive. Once you’re done, check if it fixes the problem or not.
Read More
Easy PrivateSearchPlus Removal Guide

PrivateSearchPlus is a browser extension that redirects all your searches through yonto. This way the extension claims you are browsing privately.

From the author: Search the web without tracking your search history or any personally identifiable information Access quickly to popular websites with icons sliding from this homepage is easy speedy and accessed ..Google Search, Yahoo, Aol, Facebook, Amazon, eBay, and more from all world without login However, PrivateSearchPlus monitors your browsing activity, the websites you visit, the links you click, and stores personal information that is later sent to server ads. This extension changes your default search engine to Yonto, it displays additional unwanted ads, may display pop-up ads, and hijacks your home page. Several anti-virus scanners have classified this extension as a Browser Hijacker and are therefore not recommended to keep on your computer.

About Browser Hijackers

Browser hijacking is actually a type of unwanted program, commonly a web browser add-on or extension, which causes modifications in web browser’s settings. There are several reasons why you might have a browser hijack; but commercial, marketing, and advertising are the main purposes for their creation. In general, hijackers are made for the benefit of internet hackers often through income generation from forced ad clicks and site visits. Nonetheless, it’s not that innocent. Your web safety is compromised and it is also very irritating. Browser hijackers could also allow other vicious programs without your knowledge to further damage your computer.

How to know if your browser has been hijacked

When your web browser is hijacked, the following might happen: your browser’s homepage is suddenly different; you see new unwanted favorites or bookmarks added, usually directed to advertisement-filled or pornography websites; the default browser settings have been changed, and/or your default search engine is altered; you see unsolicited new toolbars added; you notice numerous ads show up on your web browsers or display screen; webpages load slowly and at times incomplete; Inability to navigate to particular sites, especially antivirus and also other security software websites.

So how does a browser hijacker infect a computer?

Browser hijackers might use drive-by downloads or file-sharing websites or an e-mail attachment in order to reach a targeted computer. They could also come from add-on applications, also referred to as browser helper objects (BHO), web browser extensions, or toolbars. Other times you may have unintentionally accepted a browser hijacker as part of a software program bundle (usually freeware or shareware). Some of the most well-known hijackers are EasySearchPlus, Babylon Toolbar, Conduit Search, OneWebSearch, Sweet Page, and CoolWebSearch. The presence of any browser hijacker malware on your system might drastically diminish the web browsing experience, monitor your internet activities that lead to major privacy concerns, produce system stability problems and ultimately cause your PC to slow down or to a nearly unusable state.

Browser Hijacker Malware – Removal

Some browser hijacking could be quite easily stopped by finding and eliminating the corresponding malware program from your control panel. Sadly, many of the software programs used to hijack an internet browser are intentionally created to be hard to detect or remove. Inexperienced PC users shouldn’t ever try for the manual form of removal methods, as it demands thorough computer knowledge to do repairs on the computer registry and HOSTS file.

What to Do if Virus Stops You From Downloading Or Installing Anything?

Malware can cause all sorts of damage once they invade your PC, ranging from stealing your personal details to erasing data files on your computer. Certain malware types alter internet browser settings by adding a proxy server or modify the computer’s DNS configuration settings. In these instances, you will be unable to visit certain or all websites, and therefore unable to download or install the necessary security software to get rid of the computer virus. So what to do if malware keeps you from downloading or installing Safebytes Anti-Malware? There are some options you can try to get around with this particular problem.

Install in Safe Mode with Networking

If the malware is set to load at Windows startup, then booting in Safe Mode should avoid it. Since only the minimal applications and services start-up in “Safe Mode”, there are rarely any reasons for issues to take place. You will need to do the following to eliminate malware in Safe mode. 1) Press the F8 key repeatedly as soon as your PC boots, however, before the big Windows logo appears. This will conjure up the Advanced Boot Options menu. 2) Use the arrow keys to choose Safe Mode with Networking and press ENTER. 3) Once this mode loads, you should have the internet. Now, make use of your web browser to download and install Safebytes. 4) After installation, run a complete scan and let the software program get rid of the threats it detects.

Obtain the antivirus program using an alternate web browser

Web-based viruses could be environment-specific, aiming for a specific browser or attacking particular versions of the browser. The best way to overcome this problem is to pick a browser that is well known for its security measures. Firefox contains built-in Phishing and Malware Protection to help keep you secure online.

Create a portable USB antivirus for eliminating malware

Another method is to download and transfer an antivirus application from a clean computer to run a scan on the affected computer. Follow these steps to employ a flash drive to fix your corrupted computer. 1) Download Safebytes Anti-Malware or Microsoft Windows Defender Offline onto a clean computer. 2) Plug the Thumb drive into the uninfected computer. 3) Double click on the downloaded file to open the installation wizard. 4) Choose a thumb drive as the place when the wizard asks you where you wish to install the software. Do as instructed on the screen to finish off the installation process. 5) Now, plug the pen drive into the infected system. 6) Double-click the anti-malware program EXE file on the thumb drive. 7) Press the “Scan” button to run a full computer scan and remove malware automatically.

A Look at the Best Anti-Malware Program

To help protect your computer from various internet-based threats, it is very important to install an anti-malware program on your computer system. However, with so many anti-malware companies in the market, these days it is tough to decide which one you should obtain for your personal computer. A few are very good ones, some are ok types, while some are just fake anti-malware programs that can ruin your PC themselves! You have to pick a product that has got a good reputation and detects not only computer viruses but other sorts of malware as well. While considering the reliable applications, Safebytes Anti-Malware is certainly the strongly recommended one. SafeBytes is a highly effective, real-time anti-spyware application that is created to assist regular computer users in safeguarding their computers from malicious internet threats. With its cutting-edge technology, this software will allow you to get rid of several types of malware like computer viruses, PUPs, trojans, worms, adware, ransomware, and browser hijackers. SafeBytes anti-malware takes computer protection to a totally new level with its advanced features. Some of them are given as below: Real-Time Protection: SafeBytes provides an entirely hands-free live protection that is set to check, prevent and get rid of all computer threats at its very first encounter. It will continuously monitor your computer for hacker activity and also gives users advanced firewall protection. Anti-Malware Protection: Safebytes is based on the best virus engine within the industry. These engines can detect and eliminate threats even during the initial phases of a malware outbreak. Web Security: SafeBytes checks the links present on a webpage for possible threats and notifies you whether the website is safe to view or not, through its unique safety rating system. “Fast Scan” Abilities: Safebytes Anti-Malware, using its enhanced scanning engine, offers extremely fast scanning which can promptly target any active online threat. Light-weight: SafeBytes is a lightweight and easy-to-use anti-virus and antimalware solution. As it uses very low computer resources, this tool leaves the computer power exactly where it belongs to: with you actually. 24/7 Live Expert Support: For any technical questions or product support, you may get 24/7 professional assistance via chat and e-mail.

Technical Details and Manual Removal (Advanced Users)

If you wish to manually remove PrivateSearchPlus without the use of an automated tool, it may be possible to do so by removing the program from the Windows Add/Remove Programs menu, or in cases of browser extensions, going to the browsers AddOn/Extension manager and removing it. You will likely also want to reset your browser. To ensure the complete removal, manually check your hard drive and registry for all of the following and remove or reset the values accordingly. Please note that this is for advanced users only and may be difficult, with incorrect file removal causing additional PC errors. In addition, some malware is capable of replicating or preventing deletion. Doing this in Safe Mode is advised.

The following files, folders, and registry entries are created or modified by PrivateSearchPlus

Registry: HKEY_LOCAL_MACHINESOFTWAREsupWPM HKEY_LOCAL_MACHINESYSTEMCurrentControlSetServicesWpm HKEY_CURRENT_USERSoftwareMicrosoftInternet ExplorerMain Default_Page_URL HKEY_LOCAL_MachineSoftwareClasses[PUP.Private Search Plus] HKEY_CURRENT_USERSoftwareMicrosoftWindowsCurrentVersionUninstall[PUP.Private Search Plus]
Read More
What is Windows Terminal and should you use it
Windows Terminal
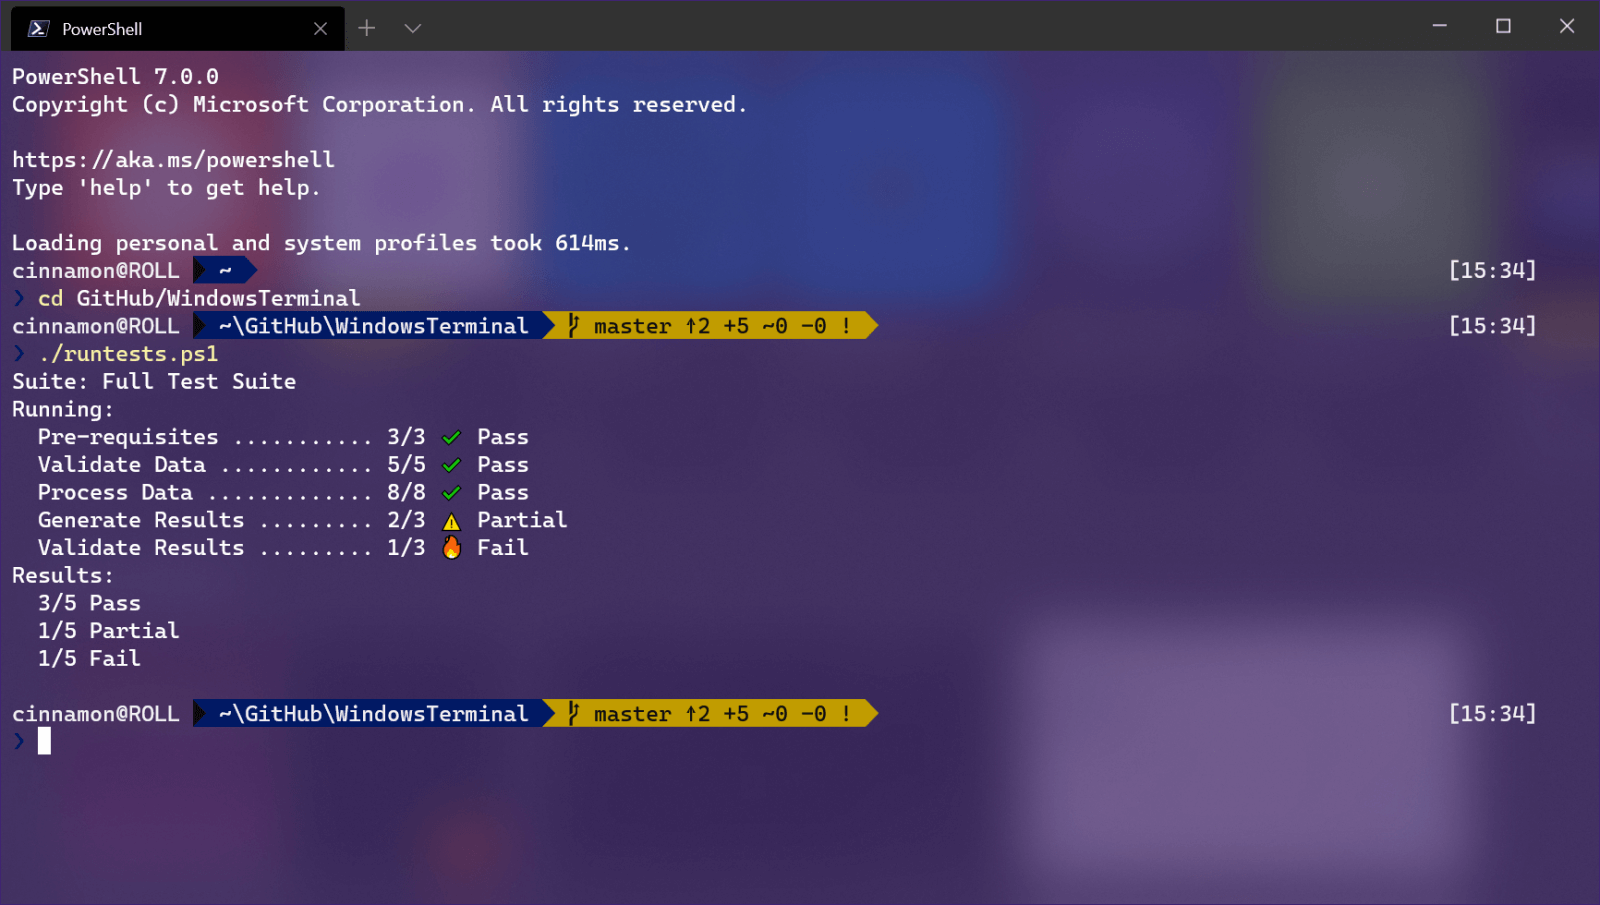
Windows Terminal is a new free Microsoft terminal sort of application. When you open either Power Shell or Command Prompt in Windows they will be opened in different windows, and if you want several of each you will have several windows of each on your screen. Windows Terminal fixes this by opening each of the Instances of Command Prompt and Power Shell as separate tabs inside itself making it much easier to manage multiple instances of named applications. You can also run both Power Shell and Command prompt tabs in the same Windows Terminal. Luckily running command prompt and power shell in different tabs is not the only thing you can do. Windows Terminal lets you choose your own theme, it has emoji support, GPU rendering, split panes, and many more customizable options. Windows 11 will have Terminal as the default command-line environment for opening Power Shell or Command prompt, even Windows Subsystem for Linux (WSL)

Setting Windows Terminal as the default application

If I was successful I have managed to show you that Windows Terminal is something that you should use even if you do not or cannot upgrade to Windows 11. You can use it inside Windows 10 also. First thing is to download and install it. You can get Windows Terminal from the official Microsoft website here: Windows Terminal page After download and installation are completed, open the Terminal app and select the down arrow menu, click Settings. Alternatively, you can use CTRL + + shortcut. Inside Settings by default Default Terminal application would be set to Windows Console Host Click on the Default Terminal application to bring a drop-down menu and choose Windows Terminal from the list. Now by default once opened Windows Terminal will use Power Shell as the default profile, however, you can change this by clicking on the drop-down for the default profile where you can choose between Command Prompt, Power Shell, Windows Power Shell, or Azure Cloud Shell. Pick one that you prefer, click on Save and it will be opened as default on the next run.
Read More
Change Legacy to UEFI without reinstalling
There are some new generation motherboards for laptops and PCs that bring in support for both the Unified Extensible Firmware Interface or UEFI as well as the Basic Input Output System or BIOS. The main advantage of UEFI over the traditional BIOS is the fact that UEFI supports a hard drive that has a capacity of more than 2 terabytes. However, the disadvantage of UEFI is that it only supports the x64 Windows operating system versions and that the hard drive is supposed to use the GPT structure. So if your PC is compatible with and supports UEFI and you want to change from Legacy to UEFI, then you’ve come to the right place as this post will guide you on how you can exactly do that without having to reinstall it. There are two ways to change Legacy to UEFI. You can convert MBR to GPT using either the built-in utilities in Windows or using the Recovery Environment. Before you proceed, make sure that your computer fulfills the following prerequisites:
  • Your PC’s motherboard should support both Legacy and UEFI.
  • Your PC should be running at least the 1703 Windows 10 version or newer on an MBR partition.
Once you’ve made sure that your computer covers the aforementioned prerequisites, refer to the given options below.

Option 1 – Convert MBR to GPT via Windows built-in utilities

  • In the Windows Search box, type “command prompt” and from the search results that appear, right-click on Command Prompt and select the “Run as administrator” option.
  • After that, execute this command: exe /convert /allowfullOS
  • Now, wait until the process is completed since you can track its process on your screen.
  • Once it’s done, go to Settings > Update & Security > Advanced Startup options and from there, click on Restart Now. This will restart your computer and give you advanced options.
  • Next, select Troubleshoot > Advanced Options where you will see further options including System Restore, Startup Repair, Go back to the previous version, Command Prompt, System Image Recovery, and UEFI Firmware Settings.
  • Now select the UEFI Firmware Settings. This will take you to the BIOS. Boot Mode is typically available under Boot > Boot Configuration. Once you’re there, set it to UEFI and then save the changes you’ve made. After that, your computer will restart.

Option 2 – Convert MBR to GPT via the Recovery Environment

  • When the message appears on your screen while running Windows Setup, you need to tap the Shift + F10 keys to open Command Prompt.
  • Make sure to run Command Prompt as admin and then execute this command: exe /convert
  • After that, wait until the process is completed. When it’s done, you have to go to the BIOS just like in the first given option above.
  • As mentioned, you can usually find the Boot Mode under Boot > Boot Configuration. Once you’re there, set it to UEFI.
  • Now save the changes made and exit as your computer will restart.
Read More
Change default audio output for Narrator
For PC users that are blind or have low vision, the Narrator accessibility feature in Windows 10, lets you use your PC without a display or mouse to complete common tasks – it reads and interacts with things on the screen, like text and buttons. The narrator can be used to read and write an email, browse the internet, and work with documents. In Windows 10, there are a lot of options for Narrator that you can customize. You can change its keyboard shortcuts, personalize Narrator’s voice, enable Caps Lock warnings, and more. You can choose the voice for the Narrator, adjust the speaking rate, pitch, and volume. To change the default audio output device used to play the voice of the Narrator in Windows 10:
  • Press the ⊞ WINDOWS + I
  • From the Settings menu, click Ease of Access.
  • Click Narrator on the left pane.
  • In the Narrator window, on the right pane, toggle the button to On to enable Narrator if required.
  • Scroll down to the Personalize Narrator’s voice section.
  • For the Select where you hear Narrator’s voice option, click the drop-down and select the audio output device you want from the list. Please know that you will not be able to choose if you do not have multiple audio output devices connected to your Windows 10 computer.
  • Exit Settings when done.
If you would like to read more helpful articles and tips about various software and hardware visit errortools.com daily.
Read More
Fix Windows Activation error code 0xC004F078
As you know, Windows 10 has a complicated mechanism for Activation which helps in the verification of a genuine copy of Windows 10. However, there are times when you might encounter some errors during the activation process. One of these errors is the error code 0xc000f074. This kind of error could be due to the Key Management Service or KMS which is unreachable by the client computer or if the key used in the SLSetAuthenticationData function call is incorrect. This kind of error mostly affects surfaces on computers that are upgraded from either Windows 7 or Windows 8.1 to Windows 10. In such cases, you may encounter any of the following error messages:
“Windows is unable to reach your company’s activation service. Please connect to your corporate network. If you are connected and continue to see the error, contact your system administrator. You can also click on the error detail to find the exact error. Error code: 0xC004F074.” “Activating Windows(R), (Key hash)… Error: 0xC004F074 The Software Licensing Service reported that the computer could not be activated. No Key Management Service (KMS) could be contacted. Please see the Application Event Log for additional information.” “Error 0xC004F074, SL_E_AUTHN_MISMATCHED_KEY, The Software Licensing Service reported that the key is mismatched.”
To fix the Windows 10 Activation error 0xC004F078, you have to use the correct key for your type of Windows copy or use Command Prompt to reinstall the key or you could also try running the Activation troubleshooter.

Option 1 – Try running the Windows 10 Activation Troubleshooter

The first thing you can do to resolve the Activation error code 0xc000f074 is to run the Windows 10 Activation Troubleshooter. To do so, follow these steps:
  • Go to Settings and then select Activation.
  • After that, click on the Windows Activation and then troubleshoot. This will help you address most of the commonly found activation issues in Windows devices.
The Windows 10 Activation Troubleshooter will determine if your license key is a valid Windows 10 digital license for an edition that is not currently installed. If it turns out that it’s not, then the troubleshooter will show you how to install the correct edition.

Option 2 – Try to use the correct key for the type of Windows version you have

If the Windows Activation troubleshooter wasn’t able to resolve the error, then you can try using the correct key for your type of Windows version. All you have to do so is check the type of your Windows copy if it’s OEM, retail, or volume. And make sure that you have the correct, valid product key for your operating system.

Option 3 – Try to use Command Prompt to reinstall the key

  • In the Start Search, type “command prompt” and right-click on Command Prompt from the search results, and then select “Run as administrator”.
  • After that, execute this command to uninstall the existing key: vbs /upk
  • Next, you need to install the KMS product key by executing this command: vbs /ipk <The KMS Product Key>
  • Once you’re done, you will see a prompt that’ll tell you whether the operation was either successful or not.
  • To active, the KMS product key online, use this command: vbs /ato
  • Use this command to activate the key using the telephone: exe 4
  • After you’ve activated the KMS product key, restart the Software Protection Service. You can also verify the Activation Status to check if your fix was successful or not.

Option 4 – Contact Microsoft Support for assistance

If you’re at your wits’ end in trying to upgrade your computer, you should consider contacting Microsoft Support for help as they can offer you various options that would make fixing Windows Activation error code 0xc000f074 a lot easier and faster.
Read More
How To Fix the D3dx9_43.dll Error Code

Repair D3dx9_43.dll Error Code

D3dx9_43.dll – What is it?

D3dx9_43.dll is a type of dynamic link library. This is one of the many files contained in the DirectX software collection which is used to load and run most of the Windows PC based games and advanced graphics programs. D3dx9_43.dll error message is displayed when any one of the Microsoft games fails to load. The error message is displayed in either of the following formats:
“D3dx9_43.DLL Not Found" "The file d3dx9_43.dll is missing" "File d3dx9_43.dll not found" "D3dx9_43.dll not found. Reinstalling might help fix this."

Solution

Restoro box imageError Causes

D3dx9_43.dll error may occur due to multiple reasons. These include:
  • D3dx9_43.dll files get corrupt or damaged
  • Missing Microsoft DirectX file
  • Viruses and malware on your system
  • Driver issues
  • Registry overloaded with invalid entries
If the D3dx9_43.dll error is not fixed timely, it not only causes you a great deal of inconvenience as it hampers your ability to play Microsoft games but since the underlying causes of the error are critical, it can result in serious PC damages like system failure, system crash, and data loss. Therefore to avoid it, it is advisable to resolve the error code immediately.

Further Information and Manual Repair

Though this is a critical PC error but the good thing is that it is easy to resolve. To fix it, you don’t always have to pay hundreds of dollars to a professional technician or be technically sound. Here are some of the best ways to repair and resolve D3dx9_43.dll error on your system:

Check the Recycle Bin

If you get the error message "The file d3dx9_43.dll is missing" then the best method to resolve this error from your system is to check your recycle bin. The Microsoft Direct X file could be there especially if you recently uninstalled a gaming program. Here’s why: dll files are shared by multiple programs. So, it is possible that the program you deleted from your PC also shared the same file to load and run. And because of this reason, the file also got removed from your PC when you uninstalled that particular program. Therefore, check your recycle bin. If you find the d3dx9_43.dll in there, restore it and try running the desired Microsoft game again. See if it works.

Re-Download DirectX

Nonetheless, if you can’t relocate it, try installing the latest version of DirectX on your system. This can be done by downloading the DirectX End-User Runtimes Web Installer on your system from the official Microsoft website.

Update Your Drivers

If the error is related to video card driver, then it is advisable to update the driver. By updating the driver for your video card you can fix the D3dx9_43.dll error instantly.

Repair the Registry

Other reasons for the D3dx9_43.dll error could be corrupt and damaged dll files. It triggers registry issues and sometimes even malware infections. DLL files often get corrupt when the registry overloads with too many files these include mostly unnecessary and obsolete files like junk files, cookies, temporary internet history, invalid and bad registry entries. As the clutter and overload the registry, the important files like dynamic link libraries get damaged. Here cleaning and restoring of the registry is the best way to resolve the error pop-ups like D3dx9_43.dll. You can repair the registry manually however, it is time consuming and somewhat technical. But if you are looking for a simple and a quick fix, then download Restoro.

Try Restoro.

Restoro is a next-generation and multi-functional PC repair tool. It is embedded with a variety of PC fixing and performance-boosting utilities all in one. It includes a registry cleaner with an intuitive algorithm that detects all types of registry issues on your system and resolves them in seconds. It cleans the registry, restores the damaged D3dx9_43.dll files, and repairs the registry. Furthermore, Restoro also includes utilities like an antivirus, Active X controls and class detector. With the help of the in-built antivirus you can scan for viruses and malware infecting your system and remove them right away. It also functions as a system optimizer boosting the speed of your PC dramatically. It is safe, efficient, and compatible with all Windows versions. Click here to download Restoro, resolve the D3dx9_43.dll error, and resume enjoying Microsoft games on your PC.
Read More
1 2 3 162
Logo
Copyright © 2022, ErrorTools. All Rights Reserved
Trademarks: Microsoft Windows logos are registered trademarks of Microsoft. Disclaimer: ErrorTools.com is not affiliated with Microsoft, nor claim direct affiliation.
The information on this page is provided for information purposes only.
DMCA.com Protection Status