Fix The backup application could not start

Windows comes with a built-in backup solution. However, if it failed because of an internal error, you will encounter an error message saying, “The backup application could not start due to an internal error, Server execution failed (0x80080005)”. When you get this kind of error, it means that it did not start and the process failed with a Server execution error. If you got this kind of error worries not for this post will guide you in fixing the problem in your Windows 10 computer.

The Windows Backup service is an excellent feature in Windows that only works on the NTFS file system and if you want to use this make sure that you have formatted your files system to NTFS. It is performed by the Volume Shadow Copy, all you have to do is right-click on any folder and if you see the “Previous versions” option, this means that a backup process runs from time to time and can bring back old files when needed.

To resolve the “The backup application could not start due to an internal error”, here are two suggestions you can check out.

Option 1 – Check if the Volume Shadow Copy service is running and restart it

The first thing you need to do is check if the Volume Shadow Copy service. To do that, refer to the following steps:

  • Click on Start and type “cmd” and right-click on Command Prompt from the search results.
  • Then select the “Run as administrator” option to open Command Prompt with admin privileges.
  • After that, type “net stop sdrsvc” and hit Enter to execute the command in stopping the Volume Shadow Copy service.
  • Next, type the “net start sdrsvc” command and hit Enter to start the service again.

Note: You can also restart the service using the Windows Services Manager.

  • In the Cortana search box, type “services” and click on the Services icon to open the Services Manager. Alternatively, you can also tap the Win + R keys to launch the Run prompt and then type “services.msc” in the field and hit Enter to open the Services Manager.
  • From there, look for the Volume Shadow Service (sdrsv) from the list of services. Its Startup type should be set to Manual by default.
  • Restart the service and if you don’t encounter any error while you turn it on, re-run the backup service and see if the backup process runs successfully.

Option 2 – Try to run the Volume Shadow Copy Service in a Clean Boot State

If the first option didn’t work and the service still keeps on failing even though the service is running, you can try putting your computer in a Clean Boot State and then try to run Windows Backup again.

  • Log onto your PC as an administrator.
  • Type in MSConfig in the Start Search to open the System Configuration utility.
  • From there, go to the General tab and click “Selective startup”.
  • Clear the “Load Startup items” check box and make sure that the “Load System Services” and “Use Original boot configuration” options are checked.
  • Next, click the Services tab and select the “Hide All Microsoft Services” check box.
  • Click Disable all.
  • Click on Apply/OK and restart your PC. (This will put your PC into a Clean Boot State. And configure Windows to use the usual startup, just simply undo the changes.)
  • Now try to run the Volume Shadow Copy service again and see if the process goes smoothly.

Note: You might also want to delete all the files in the backup solution if you want to start fresh with the backup solution. Just go to C:/System/Volume/Information/Windows Backup and take ownership of the folder. After that, make sure to stop the Volume Shadow Copy service and then delete all the files inside it.

If you like to learn and find out more about various Windows errors, and how to repair them go to our vast archive or use search to find articles that will explain and help you in solving your issue.
However, if you prefer to do things fast and with automatization then we are proposing to use an automated solution for your issues. The application that we are recommending is Advanced System Repair Pro
Advanced System Repair utilizes multiple tools all in one to give you a quick, simple, reliable, and very thorough diagnosis of your PC. It brings you all the tools you need in one program to clean, fix, protect, optimize and boost your PC!
1-Click Maintenance
All the tools to make it simple and easy! It's like having a professional technician at the click of a mouse.

Junk Cleaner
Keeping your computer free from unnecessary clutter also helps make your computer last longer. Like any other machine, if you keep it clean and take care of it, it will serve you better for longer!

Optimize background apps
Optimize applications background activity with the built-in Application Optimizer feature.

Disk Defrag
With a simple 1-click, Advanced System Repair speeds up your PC by assembling fragmented files on your machine and organizing them more efficiently.

Malware Removal
Finds and removes all types of harmful malware including trojans, worms, bots, adware, spyware, PUPs, and more!

Privacy Cleaner
The all-in-one privacy suite to Clean Your Tracks & Protect Your Privacy! Make your computer safe, secure, and more efficient!

System Tweak/Optimizer
ASR will analyze your complete system and settings to adjust your PC to function at its maximum performance.

Registry Cleaner
Over time, as you install and uninstall applications, the registry can become cluttered with old entries and broken settings which can result in program crashes, and annoying messages and slow the computer down.
Visit our Advanced System Repair Pro Download page to inform yourself about all the benefits of this software and get a free trial copy of it.
advanced system repair pro

Advanced System Repair Pro

One-click automated PC repair solution
ASR logo
With Advanced System Repair Pro you can easily
Replace damaged files
Restore performance
Free disk space
Remove Malware
Protects WEB browser
Remove Viruses
Stop PC freezing
DOWNLOAD
Privacy Policy | Terms of Use | Uinstall
Advanced System Repair Pro is compatible with all versions of Microsoft Windows including Windows 11

Share this article:

You might also like

Restore default Display Color settings in Windows 10
The color settings in a Windows computer certainly matter a lot especially when it comes to printing pictures. Users who are found or edit photos for a living change their computer’s color settings in order to ensure that the printout looks like the actual colors. However, those settings might not be appropriate for computer display and you can really tell right away that there something’s not right in the display. You might also notice some weird tint which isn’t easy to get rid of. You can’t actually tell the difference at first, not until you look at some other computers and then wonder what’s wrong with yours so, in this guide, you will know how to restore the display color settings back to their default state on your Windows 10 PC. Make sure to follow each one of the steps laid out below carefully to restore the default Display Color settings.

Step 1: Set the Color Management Settings to default.

  • In the Start search box, type in “color management”. Once you see it in the search results, open it.
  • Once you’ve pulled up the Color Management window, go to the Advanced tab. From there, make sure that every single option is set to default – from all the options in both the “Windows Color System” and “ICC rendering intent to WCS gamut mapping”.
Note: You also have the option to reset it for everyone by simply clicking on the “Change system defaults” button.
  • Finally, you can also try to calibrate your display.

Step 2: Set the Graphics Properties to default.

After making changes in the Color Management settings, you need to also set the Graphics Properties to default.
  • Start by right-clicking on any empty space on your desktop.
  • Then select the Graphics properties from the context menu. From the Graphics properties window, you will see that most sections have to restore defaults.

Step 3: Try using Nvidia Color Settings for Desktop

The next thing you can try is using the Nvidia Color Settings if you have Nvidia graphics installed on your Windows 10 PC. Just the Control Panel to reset the color settings.
  • From the system tray, launch the Nvidia control panel.
  • Next, go to Display > adjust desktop color settings.
  • From there, select the display and then select the Nvidia Settings.
  • After that, change the options accordingly in order to get the correct combination though you can always leave them to default.
Read More
Videos folder missing from File Explorer
As you know, the Videos folder can be found under “This PC” by default on your Windows 10 computer. However, as per the reports of some users, there are a few occasions where it somehow gets replaced by the Documents folder. In other words, the Videos folders are replaced by a duplicated copy of the Documents folder. Out of the two Documents folder, one Document folder will contain all the usual files and subfolders while the second one is empty. Although when you click the Documents icon on your Desktop (if you have a shortcut), it will still take you to the right Documents folder. To fix this particular issue and get the Videos folder back in the File Explorer, here are some potential fixes that should help.

Option 1 – Run System Restore

The first thing you can try to do to resolve the problem is to run System Restore. This can help you go back to the previous state of your computer before the issue with the Videos and Documents folder.
  • Tap the Win + R keys to open the Run dialog box.
  • After that, type in “sysdm.cpl” in the field and tap Enter.
  • Next, go to the System Protection tab then click the System Restore button. This will open a new window where you have to select your preferred System Restore point.
  • After that, follow the on-screen instructions to finish the process and then restart your computer and check if the problem is fixed or not.

Option 2 – Try to restore Defaults

The next thing you can do is to restore Defaults. How? Refer to these steps:
  • Open File Explorer and then right-click on any of the two Documents folders.
  • After that, select the Properties option from the context menu and switch to the Location tab and click on Find target.
  • Next, copy the address and paste it in the field above the “Find target” option, and then click the “Restore Default” button.

Option 3 – Try to change the Registry Path

  • Tap the Win + R keys to open the Run dialog box.
  • Then type “Regedit” in the field and tap Enter to open the Registry Editor.
  • Next, navigate to this registry path: HKEY_CURRENT_USERSoftwareMicrosoftWindowsCurrentVersionExplorerUser Shell Folders
  • After that, edit the path for {35286A68-3C57-41A1-BBB1-0EAE73d76C95} under the “User Shell Folders” key to match the path shown for My Videos: %USERPROFILE%Videos.
  • Once you’re done, open the folder under “This PC” that has the Documents icon and tap Shift + right-click in the folder background, and then select the “Open PowerShell window here” option to fix the naming of the Documents folder. The path should read: “C:users<UserName>Documents.
  • Next, execute this command: ri desktop.ini –force
  • The command you entered will delete the files and folders and so when added for Documents, it will get rid of the empty Documents folder.
  • Now all you that’s left to do is to find where the target location is going to be for both folders and check if anyone foes to the user name location.
  • Then delete the one which goes to the incorrect location.
Read More
How to Fix Low FPS in Apex Legends
  • In your Graphics Settings, select r5apex.exe and change the Graphics performance preference to Classic App, set it to High Performance, and then launch the game as an administrator when you want to play.
  • Inside the Nvidia Control Panel, click “Manage 3D Settings”, and select Apex Legends and change it to “Prefer Maximum Power”
  • You can also change “pre-rendered frames” to 1, but it will make you lag just a tiny, tiny bit.
  • Turning the shader cache on can help improve FPS, but on some systems, it may cause additional negative performance changes.
  • If you have the ability to use G-Sync, use that as well (Only available on some monitors and graphics cards)
  • From the task manager, change the priority of r5apex.exe to “High” and close out of other applications.
  • Update your graphics drivers.
  • Ensure your PC complies with the games minimum system requirements:
    • OS: 64-bit Windows 10
    • CPU: Intel Core i3-6300 3.8GHz / AMD FX-4350 4.2 GHz Quad-Core Processor
    • RAM: 6GB
    • GPU: NVIDIA GeForce GT 640 / Radeon HD 7700
    • GPU RAM: 1 GB
    • HARD DRIVE: Minimum 30 GB of free space
  • Check to see if your system has the game’s recommended hardware requirements:
    • OS: 64-bit Windows 10
    • CPU: Intel i5 3570K or equivalent
    • RAM: 8GB
    • GPU: Nvidia GeForce GTX 970 / AMD Radeon R9 290
    • GPU RAM: 8GB
    • HARD DRIVE: Minimum 30 GB of free space
  • Within the game, try to set the settings to:
    • Full Screen
    • Disable V-Sync
    • Anti-Aliasing to Disabled/TSAA (slight performance difference)
    • Use Native Resolution
    • Keep Field of View at around 80-100
    • Texture Streaming Budget to High
    • Texture filtering as low as possible while still being playable
    • Ambient occlusion as low as possible
    • Shadow all to Low / Lowest
    • Model detail low
    • Effects detail low
    • Volumetric lighting / Dynamic spot shadows Disabled
    • Ragdolls low
    • Impact marks the lowest
  • Make sure other applications are not placing overlays (Discord, GeForce, Xbox Gaming)
  • Clean your temporary files and uninstall other games to give your PC room to have the game run.
  • Don’t use products like CCleaner as they may remove necessary files from your computer.
  • Closeout of Chrome when you’re playing the game or follow our guide on Optimizing Chrome Performance
Read More
What is Windows Terminal and should you use it
Windows Terminal
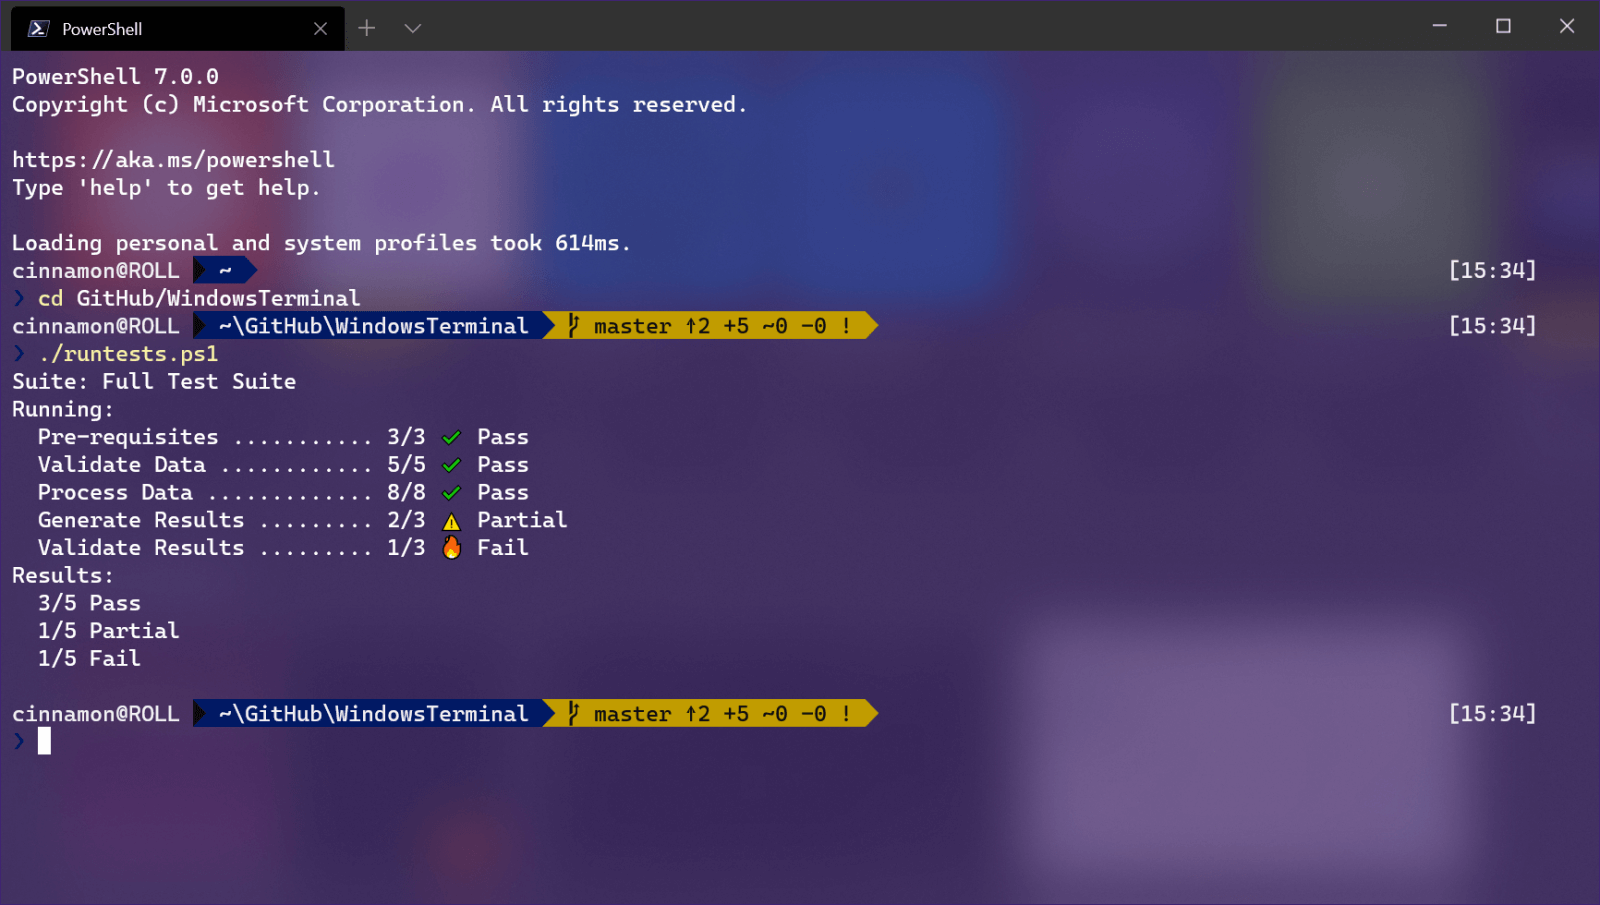
Windows Terminal is a new free Microsoft terminal sort of application. When you open either Power Shell or Command Prompt in Windows they will be opened in different windows, and if you want several of each you will have several windows of each on your screen. Windows Terminal fixes this by opening each of the Instances of Command Prompt and Power Shell as separate tabs inside itself making it much easier to manage multiple instances of named applications. You can also run both Power Shell and Command prompt tabs in the same Windows Terminal. Luckily running command prompt and power shell in different tabs is not the only thing you can do. Windows Terminal lets you choose your own theme, it has emoji support, GPU rendering, split panes, and many more customizable options. Windows 11 will have Terminal as the default command-line environment for opening Power Shell or Command prompt, even Windows Subsystem for Linux (WSL)

Setting Windows Terminal as the default application

If I was successful I have managed to show you that Windows Terminal is something that you should use even if you do not or cannot upgrade to Windows 11. You can use it inside Windows 10 also. First thing is to download and install it. You can get Windows Terminal from the official Microsoft website here: Windows Terminal page After download and installation are completed, open the Terminal app and select the down arrow menu, click Settings. Alternatively, you can use CTRL + + shortcut. Inside Settings by default Default Terminal application would be set to Windows Console Host Click on the Default Terminal application to bring a drop-down menu and choose Windows Terminal from the list. Now by default once opened Windows Terminal will use Power Shell as the default profile, however, you can change this by clicking on the drop-down for the default profile where you can choose between Command Prompt, Power Shell, Windows Power Shell, or Azure Cloud Shell. Pick one that you prefer, click on Save and it will be opened as default on the next run.
Read More
A Quick Guide to Fixing Error 577

How to Correct Error 577

Error 577 - What is it?

This is a typical system error code. It stops your ability to run or load programs on your PC. The error message is displayed in the following format:
‘Windows cannot verify the digital signature for this file.
A recent hardware or software change might have installed a file that is signed incorrectly or damaged, or that might be malicious software from an unknown source.’

Solution

Restoro box imageError Causes

Error 577 may be triggered due to several reasons. However, the most common causes of this error include:
  • Device Driver Conflicts
  • Hardware Malfunction
  • Viral Infection
  • Windows Registry Corruption or Damage
  • Software File Corruption or Damage
Error 577 can prove to be fatal if the underlying causes are related to viral infection or registry corruption.

Further Information and Manual Repair

To resolve error 577 on your PC, you don’t have to hire a professional and spend hundreds of dollars on repair. The process for fixing this error is simple and easy. Here are some of the best and efficient methods to repair error 577 - no technical expertise is required.

Method 1 - Check and Update Device Drivers

If the problem is triggered by the outdated or corrupted driver for the device reporting the error then it is advisable to update the driver. To do this, first, uninstall the corrupted driver and then reinstall the latest version. For this simply click the start menu, go to the control panel and then click Performance and Maintenance, and then System. In the new window, you will then see a tab called Hardware and the Device Manager. Double click on the device whose driver you need to uninstall. Click on the properties window with a tab marked driver. Then click on the driver you want to uninstall. To activate changes reboot your PC. Now reinstall the latest and updated version of the driver uninstalled using the Plug and Play feature.

Method 2 - Scan For Viruses

System error codes like 577 can also pop up if your PC is infected by viruses. Viruses enter through phishing emails and downloadable files from unreliable websites. If the reason for error 577 is a viral infection, then simply install a powerful antivirus, run it to scan your entire PC. Remove all the viruses and malicious programs immediately to resolve. If the issue still persists, then try method 3.

Method 3 - Repair the Registry

Sometimes registry corruption can be the underlying cause for error 577. The registry is the part that saves all activities performed on the system. It stores both important and unnecessary files like junk files, cookies, and bad registry entries. If these files are not removed from the registry frequently, they accumulate and corrupt the registry which then generates system error codes. To resolve and repair the registry in seconds, simply download Restoro. This is a user-friendly PC Repair Tool embedded with a registry cleaner. It wipes away all unnecessary files corrupting the registry and repairs it. Click here to download Restoro.
Read More
Can’t pair Bluetooth keyboard, Check the PIN
If you have suddenly run into a problem when trying to connect or pair your Bluetooth keyboard with your Windows 10 computer, read on as this post will guide you on how exactly you can resolve the problem. This kind of problem typically occurs when you’ve disabled the Bluetooth option. However, this option is already enabled and you still encountered the same error message saying, “Check the PIN and try connecting again”, then you need to troubleshoot the problem further. In most cases, this kind of issue can be fixed when you restart your computer and go to the Windows Settings and select the “Add Bluetooth or other devices” option and then put the keyboard into pairing mode. And when the keyboard appears in the “Add a device” dialog box, just select it. On the other hand, if your Bluetooth keyboard won’t get connected to your Windows 10 computer and you encounter an error that says, “Can’t pair Bluetooth keyboard, Check the PIN and try connecting again”, then you need to check out the options provided below but before you do so, make sure that you create a System Restore point first as some of the troubleshooting options provided involves the Windows Registry.

Option 1 – Try to use the Device Pairing Wizard

The Device Pairing Wizard is the one that allows your computer to look for any new devices and display them underneath it. All you have to do to use this wizard is to follow its instructions to connect your Bluetooth device to Windows 10. To get started, follow these steps:
  • First, tap the Win + R keys to launch the Run utility and type “devicepairingwizard” in the field, and then hit Enter to run the Device Pairing Wizard.
  • After that, wait for a couple of seconds until the devices appear. Once they do, select the Bluetooth device you wish to add.
  • A new screen with a passcode should appear instantly. You need to take note of the given passcode and type them on your Bluetooth keyboard.
  • Once done, tap Enter. This should help in pairing your computer to your Bluetooth keyboard.

Option 2 – Try to use the Registry Editor

The next thing you can do to resolve the pairing issue with your Bluetooth keyboard is to use the Registry Editor by following these steps:
  • Tap the Win + R keys to open the Run utility and type “Regedit” in the field and then hit Enter to open the Registry Editor.
  • Next, navigate to this registry path: HKEY_USERS/.DEFAULT/Software/Microsoft/Windows/CurrentVersion/Bluetooth/ExceptionDB
  • From there, look for the folder named “Addrs” and expand it. If you see any folders or keys under it, select them and delete them. These keys represent the MAC address of your Bluetooth devices.
  • Once you’re done, restart your computer and try to pair your Bluetooth keyboard once more.

Option 3 – Try running the Bluetooth Troubleshooter

As you know, Windows 10 has various troubleshooters with user-friendly interfaces where you can utilize them to fix issues in your PC. And since you’re dealing with some Bluetooth problem, you have to run the Bluetooth Troubleshooter.
  • Open the Windows 10 Settings.
  • Then go to Update & Security > Troubleshoot.
  • You should find the option for Bluetooth on your right-hand side – click on it then click on the “Run the troubleshooter” option.
  • Now follow the next screen options.

Option 4 – Try to reinstall or update the Bluetooth driver

The issue might have something to do with the Bluetooth drivers. It could be that it is outdated and needs to be updated or that you recently updated it and since you have trouble pairing your Bluetooth keyboard, you can update, rollback, or uninstall the Bluetooth drivers. How? Follow the steps below.
  • Tap the Win + X keys to open the Device Manager.
  • Next, look for the Bluetooth device and right-click on it.
  • Select the option “Update driver”.
  • After that, a new popup window will appear. In there, select the option, “Search automatically for updated driver software”.
Note: Checking the update may take a few minutes so you’ll have to wait until it finishes. If it is able to find an update, you must install it.
Read More
Fix error 0x00000709 when connecting a Printer
One of the most common and bothersome issues with a printer is when it refuses to get configured or set up on your computer. Thus when your printer has some configuration issues, you will most likely encounter the error 0x00000709. This occurs if there is already a default printer set and configured or Windows does not want to configure the new printer at all. The operation could not be completed (error 0x00000709), Double check the printer name and make sure that the printer is connected to the network. Today, we will try two fixes that may help you get rid of this error.

Option 1 – Run the Printer Troubleshooter

One of the first basic troubleshooting you can perform to resolve the printer issue is running the Printer Troubleshooter. This built-in troubleshooter can detect and automatically fix the problem for you. To use it, follow these steps:
  • Tap the Win + R keys to open the Run dialog box.
  • Next, type “exe /id PrinterDiagnostic” in the field and click OK or hit Enter to open the Printer Troubleshooter.
  • Then click the Next button and follow the next on-screen instructions to fix the issue with the printer.

Option 2 – Try to use some Registry tweaks to add the Printer

You might want to use some tweaks to add the Printer but before you proceed, make sure to create a System Restore Point so that if anything goes out of hand, you can always undo the changes you’ve made.
  • Tap the Win + R keys to open the Run dialog box.
  • Next, type “Regedit” in the field and hit Enter to open the Registry Editor.
  • When a UAC or User Account Control prompt appears, click Yes.
  • Once you’ve opened the Registry Editor, go to the following key location:
HKEY_CURRENT_USERSoftwareMicrosoftWindows NTCurrentVersionWindows
  • From there, double click on the file named “Device on the right side pane under the Windows folder.
  • Now add the name of your printer in the Value Data field as you can see below and then click the OK button.
Note: As you can see on the image above, you must not change the “.winspool.Ne02:” part and only the first one which is the name of your printer.
  • After that, you will get a message that says, “Cannot edit Device: Error writing the value’s new contents, simply click on OK again. You have to take note of the existing permissions before you proceed to the next step. Once you’ve added the Printer, make sure to reverse the changes you’ve made to the Permissions.
  • Now right click on the Windows folder located on the left pane and click on Permission.
  • Select Restricted under the Group or user names section.
  • Then check the checkboxes for “Full Control”, “Read” and “Special Permissions” under the Permissions for RESTRICTED section.
  • After that click the Apply button and then OK to save the changes made.
  • Next, right-click on the file named “UserSelectdDefault” and select Rename to rename it to your printer’s name.
  • Now restart your computer to successfully apply the changes made.
  • After the printer is added, don’t forget to reverse the Permission changes you’ve made early on.

Option 3 – Try updating the Printer drivers

You might also want to try updating your printer drivers. All you have to do is locate the USB Composite Device. For complete details, follow the steps below.
  • First, click the Start button and type “device manager”.
  • Then click on the “Device Manager” from the search results to open it.
  • From there, look for the USB Composite Device option and right-click on it, and select the Update Driver from the options.
  • Restart your PC and then click the “Search automatically for updated driver software” option.
Note: You also have the option to download the latest version of your Printer from the manufacturer’s website.
Read More
How to fix Windows 10 Store Error 0x801901F7

How to fix Windows 10 Store Error 0x801901F7

Error Code 0x801901F7 – What is it?

Error code 0x801901F7, also known as “The Server Stumbled” error because it shows a message saying “The Server Stumbled. We all have bad days” is associated with Windows Store. Server Stumbled Error 0x801901F7 is an error related to the MS server. The error occurs due to damaged registry files, malware, virus, and corrupted data. You should fix this error to prevent a system crash or a BSOD error. There are some things you can do to fix it. These are not so complex. So, anyone can try these methods to fix error 0x801901F7. Common Symptoms for error 0x801901F7:
  • Problems with Windows startup
  • System becomes very slow or the system freezes
  • Blue screen of death appears
  • Windows fails to start some process due to Stop error code 0x801901f7

Solution

Restoro box imageError Causes

  • This error is generally caused by corrupt registry files.
  • Virus infection can cause this problem.
  • Outdated driver, missing .DLL files may also cause this error.
  • Microsoft server overload may cause this problem as well.
  • Incorrect configuration may cause this problem.

Further Information and Manual Repair

To fix error 0x801901f7, there are four methods listed below. Some might work for you and some might not. Please try all of them to fix this error.

Method 1:

Basic method to fix error code 0x801901F7: Resetting Windows Store Cache Most of the time clearing or resetting the cache helps. It doesn't always work, but you should try this first before moving on to some advanced methods which are mentioned below. To reset the Windows Store cache please follow the simple steps below
  • Open RUN by searching or pressing "Windows Key + R"
  • Type "wsreset.exe" and press Enter or click on OK.
  • Windows Store will open automatically along with a command prompt.
  • This will reset Windows Store and you might see it loading as it should.
This method might work but if it fails to solve Error 0x801901F7 then follow the method below.

Method 2:

Advanced method of fixing error code 0x801901F7: Deleting Windows Store database file. By using this method, you will be deleting the database file for Windows Store. This file is located on your C drive or the drive where you installed your Operating System. Follow the steps below.
  1. Navigate to C:WindowsSoftwareDistributionDataStoreDataStore.edb.
  2. Delete DataStore.edb file from there.
  3. Now Open Windows Store and see if you still get error code 0x801901F7.
The Datastore.edb file that you deleted will be automatically created once you perform Step 3 which is launching Windows Store. If you still cannot get this error away then Close Windows Store and Reboot your PC then Launch Windows Store Again.

Method 3:

Modifying Windows update properties: Perform the steps below only if the above-mentioned methods fail. You will be tweaking a few things in the Windows update to see if it helps.
  1. Open Task Manager by right-clicking on Taskbar, then click on Task Manager.
  2. Go to Services Tab. Click on Open Services at the very bottom of the Window.
  3. Now a new window will pop up. Scroll down & find "Windows Update" from the list.
  4. Double click on Windows update to open up its Properties.
  5. Now from the Startup Type drop-down list, select Automatic. Click on Apply, Start, and then Ok.
Now you need to perform just one more step. Reset Windows Store again (Refer to method 1 for Steps). This should fix your Windows Store error that shows The Server Stumbled with 0x801901F7 Error Code.

Method 4: 

If the error is due to a problem with a driver, then follow the method below to uninstall the current driver:
  1. Open the Run command and type “sysdm.cpl” in the text box.
  2. Click Enter.
  3. Open the Hardware tab on the system properties dialog box.
  4. Then press on Device Manager.
  5. Double press on Device type and then press on the hardware device that is reporting error code 0x801901F7.
  6. Go to the Driver tab and press on Uninstall button to uninstall the device driver completely.
  7. Now, install the new driver on your computer.
  8. Restart your computer.
  9. Run virus scan of your PC
  10. Try using a different USB port.
If you do not possess the technical expertise required to accomplish this yourself or do not feel comfortable doing so, download and install a powerful automated tool to get the job done.
Read More
Enable or disable Console Mode Sign-in
Microsoft has been bringing new lock-screen features with every iterative feature release of Windows 10 in order to improve user experience. However, Windows 10 users have different opinions regarding it. Some users are pleased with it while some users simply do not like it. So if you are one of the users who seem to not approve of this feature, read on as this post will be about enabling or disabling the Console Mode sign-in feature in Windows 10. Before you proceed, take note that you will not be able to use your mouse pointer in this Consol Mode login screen and you can only use your keyboard to navigate around various options. You might also want to create a System Restore point just in case. To enable or disable the Console Mode sign-in in your Windows 10 computer, refer to the given steps below. Step 1: Tap the Win + R keys to open the Run dialog box. Step 2: Then type in “Regedit” in the field and tap Enter to open the Registry Editor. Step 3: Next, navigate to the following registry path:
ComputerHKEY_LOCAL_MACHINESOFTWAREMicrosoftWindowsCurrentVersionAuthenticationLogonUITestHooks
Step 4: From there, look for a DWORD named “ConsoleMode”. If you don’t see this DWORD, you can just create a new DWORD and name it as “ConsoleMode” and make sure that its base is set to Hexadecimal. Step 5: After that, double click on ConsoleMode and change its value to “0” to disable it and “1” to enable it. Step 6: Now restart your computer to apply the changes made. Like pointed out, you can only use your keyboard when you’re in the Console Mode login window or screen. You can just use the ESC button to go back to the menu while you can utilize the arrow keys so you can go through the options that are mostly vertically arranged and the Enter key to select an option. In the Console Mode, sign-in using the Passwords and PINs worked efficiently.
Read More
Bluetooth flaw, Android and Windows in danger
bluetoothResearchers have discovered 16 vulnerabilities in Bluetooth connections that could be exploited and make from minor to some serious damage to your device. The flaw can be used on chips manufactured by Intel, Qualcomm, and Texas Instruments while connecting to external devices like speakers, headphones, keyboards, mice, etc.

Who is affected?

Mentioned chips are used by many in a vast range of devices including big players with their products like Microsoft Surface laptops, Dell desktops, Samsung Phones, Google Pixel, and OnePlus handsets. The Bluetooth bug affects a wide range of devices, including smartphones, laptops as well as smart home gadgets. In total, more than one billion devices that rely on Bluetooth are believed to be impacted.

What is the damage?

The amount of damage possible with this flaw depends on the type of device with the chipset. Some devices can only be crashed after a specially crafted packet is sent to the flawed chip. If that's the case with your gadget, it can be easily resolved with a simple restart. With other devices, hackers can take advantage of the Bluetooth Classic flaw to remotely run malicious code. That could allow malware to be installed remotely. Researchers say vendors were informed about these issues months ago before the findings were published. The good news is this should have given plenty of time for the relevant patches to be pushed out that remedy the flaws. However, you'll need to make sure that you're running the latest version of the operating system to be protected by the patch crafted by the manufacturers.

Android Bluetooth threat

The researchers emphasize the lack of basic tests in Bluetooth certification to validate the security of Bluetooth Low Energy (BLE) devices. The BrakTooth family of vulnerabilities revisits and reasserts this issue in the case of the older, but yet heavily used Bluetooth classic (BR/EDR) protocol implementations. We would also advise users to disable Bluetooth on devices that do not need it. This way you can prevent attackers from sending you malformed LMP packets. Since BrakTooth is based on the Bluetooth Classic protocol, an adversary would have to be in the radio range of the target to execute the attacks. So, in a safe environment Bluetooth can be enabled.
Read More
1 2 3 162
Logo
Copyright © 2022, ErrorTools. All Rights Reserved
Trademarks: Microsoft Windows logos are registered trademarks of Microsoft. Disclaimer: ErrorTools.com is not affiliated with Microsoft, nor claim direct affiliation.
The information on this page is provided for information purposes only.
DMCA.com Protection Status