Fix STOP 0XC000021A, error in Windows 10

Upgrading your Windows computer may not always go as expected as you could end up getting some error messages along the way. One of the error messages you can encounter is the “STOP 0XC000021A or STATUS_SYSTEM_PROCESS_TERMINATED” error. This error indicates that is some security issue within the Windows operating system. It could be that the system files have an issue and they have been modified incorrectly. Although this does not necessarily mean that malware is behind the modification, one of the applications you installed recently might have something to do with the problem. The application might have modified or corrupted some of the core system files. When you encounter this error, you will see a blue screen along with the following error message:

“Your PC ran into a problem and needs to restart. We’re just collecting some error info, and then we’ll restart for you. (0% complete)

If you’d like to know more, you can search online later for this error: 0xc000021a”

This error pops up when a user-mode subsystem like the WinLogon or the Client Server Run-Time Subsystem or CSRSS has been compromised fatally and security can no longer be guaranteed in the system. Thus, the operating system switches to kernel mode, and Windows won’t be able to run without the WinLogon or the Client Server Run-Time Subsystem. This is why it’s one of the few cases where the failure of a user-mode service can shut down the system. To resolve the issue, here are some fixes that might help.

Option 1 – Uninstall programs you installed lately

  • In the search box, type in “control” and then click on Control Panel (desktop app) among the search results.
  • After that, select Programs and Features from the list which will give you a list of all the programs installed on your computer.
  • From there, look for the concerned program and select it and then uninstall it.

Note: If you have downloaded the app from the Windows Store, you can simply right-click on it from the application list and then uninstall it.

Option 2 – Perform System Restore

Performing System Restore can also help you fix the “STOP 0XC000021A or STATUS_SYSTEM_PROCESS_TERMINATED” error. You can do this option either by booting into Safe Mode or in System Restore. If you are already in the Advanced Startup Options, just directly select System Restore and proceed with the next steps. And if you have just booted your PC into Safe Mode, refer to the steps below.

  • Tap the Win + R keys to open the Run dialog box.
  • After that, type in “sysdm.cpl” in the field and tap Enter.
  • Next, go to the System Protection tab then click the System Restore button. This will open a new window where you have to select your preferred System Restore point.
  • After that, follow the on-screen instructions to finish the process and then restart your computer and check if the problem is fixed or not.

Option 3 – Run the System File Checker or SFC scan

System File Checker or SFC is a built-in command utility that helps in restoring corrupted files as well as missing files. It replaces bad and corrupted system files to good system files that might be the cause why you’re getting the “STOP 0XC000021A or STATUS_SYSTEM_PROCESS_TERMINATED” error. To run the SFC command, follow the steps given below.

  • Tap Win + R to launch Run.
  • Type in cmd in the field and tap Enter.
  • After opening Command Prompt, type in sfc /scannow

The command will start a system scan which will take a few whiles before it finishes. Once it’s done, you could get the following results:

  1. Windows Resource Protection did not find any integrity violations.
  2. Windows Resource Protection found corrupt files and successfully repaired them.
  3. Windows Resource Protection found corrupt files but was unable to fix some of them.

Option 4 – Rebuild the BCD and fix MBR

Rebuilding the BCD can help you in fixing the “STOP 0XC000021A or STATUS_SYSTEM_PROCESS_TERMINATED” error.

  • You can start by booting into the installation environment for Windows 10 from an installation media.
  • After that, click on Repair your computer and on the blue screen, select Troubleshoot and then select the Advanced options menu.
  • Next, select Command Prompt and type in the commands below one by one, and tap Enter right after you do so.
  • exe /FixMbr
  • exe /FixBoot
    • exe /RebuildBcd

The commands you entered should rebuild the BCD and repair MBR.

Option 5 – Run the CHKDSK utility

You can also run the Chkdsk utility to resolve the problem. If your hard drive has issues with integrity, the update will really fail as the system will think that it’s not healthy and that’s where the Chkdsk utility comes in. The Chkdsk utility repairs hard drive errors that might be causing the problem.

  • Open Command Prompt with admin privileges.
  • After opening Command Prompt, execute the commands listed below, and don’t forget to hit Enter right after you type in each one of them.
  • chkntfs /t
  • chkntfs /t:10
If you like to learn and find out more about various Windows errors, and how to repair them go to our vast archive or use search to find articles that will explain and help you in solving your issue.
However, if you prefer to do things fast and with automatization then we are proposing to use an automated solution for your issues. The application that we are recommending is Advanced System Repair Pro
Advanced System Repair utilizes multiple tools all in one to give you a quick, simple, reliable, and very thorough diagnosis of your PC. It brings you all the tools you need in one program to clean, fix, protect, optimize and boost your PC!
1-Click Maintenance
All the tools to make it simple and easy! It's like having a professional technician at the click of a mouse.

Junk Cleaner
Keeping your computer free from unnecessary clutter also helps make your computer last longer. Like any other machine, if you keep it clean and take care of it, it will serve you better for longer!

Optimize background apps
Optimize applications background activity with the built-in Application Optimizer feature.

Disk Defrag
With a simple 1-click, Advanced System Repair speeds up your PC by assembling fragmented files on your machine and organizing them more efficiently.

Malware Removal
Finds and removes all types of harmful malware including trojans, worms, bots, adware, spyware, PUPs, and more!

Privacy Cleaner
The all-in-one privacy suite to Clean Your Tracks & Protect Your Privacy! Make your computer safe, secure, and more efficient!

System Tweak/Optimizer
ASR will analyze your complete system and settings to adjust your PC to function at its maximum performance.

Registry Cleaner
Over time, as you install and uninstall applications, the registry can become cluttered with old entries and broken settings which can result in program crashes, and annoying messages and slow the computer down.
Visit our Advanced System Repair Pro Download page to inform yourself about all the benefits of this software and get a free trial copy of it.
advanced system repair pro

Advanced System Repair Pro

One-click automated PC repair solution
ASR logo
With Advanced System Repair Pro you can easily
Replace damaged files
Restore performance
Free disk space
Remove Malware
Protects WEB browser
Remove Viruses
Stop PC freezing
DOWNLOAD
Privacy Policy | Terms of Use | Uinstall
Advanced System Repair Pro is compatible with all versions of Microsoft Windows including Windows 11

Share this article:

You might also like

Remove recommended icons from the start menu
windows 11 start menuIn Windows 11 by default inside the Start menu, there is recommended section that contains recently opened folders, documents, and files. If you do not wish this section and do not want recent items in your Start menu there is an easy way to turn it off.
  1. Press ⊞ WINDOWS + I to open settings
  2. Click on Personalization
  3. On the right side scroll down and click on Start
  4. Click on the switch beside Show recently opened items in Start, Jump lists, and File Explorer
  5. Close settings
Settings will be automatically applied and there will be no more recommended items inside your Start menu to create clutter, it will be nice and clean.
Read More
Best Browsers in 2021 with browser description
In today's digital life, when we access the internet daily, browsers are essential almost as our operating system, after all, we do access all of the internet data via them, and having a good, reliable, and personal browser tailored for our needs can make all the difference in the world. In today's article, we will introduce you to the five greatest browsers of today, we will point their advantages and disadvantages and why should you pick one or another. As with each piece of software, there is not an ultimate browser, better than anything else and we will not favor anyone on this list, the decision which you should use is solely up to you, we are here to provide you with an objective opinion on each one. All of this being said, let's begin with the countdown in no particular order.
  1. Mozilla firefox.

    firefox browser If you consider yourself a power user or you value your privacy then firefox is the browser for you. It is open source and is packed with great features like reporting when your email has been used for a known data breach, it stops annoying pop-up notifications, stops browser fingerprinting, and many more. Firefox is also a cross-platform browser making it a great choice if you want to transfer and use your data across multiple devices with one account. The downside of firefox however is its speed, this browser is the slowest on this list, I guess features and advantages took their tool in the speed department, but if that is not a concern for you and you feel like the positives outweigh some slower speed, grab it here.
  2. Google Chrome

    chrome browser Chrome browser has been a game-changer when it was released and even today some of its features are still great and needed. It is packed with some great features like tab freezing, for example, it is cross-platform meaning that also as firefox you can change data between browsers on different devices. it is a very expandable browser with tons of extensions and its speed performance is very very good. The downside of Chrome are two things sadly, one of them is its hunger for RAM, the browser takes a big chunk of RAM once it is active and on some older computer with limited RAM it performs slowly, another is telemetry which its sending, in other words, other browsers don’t come with the lingering fear that Google’s just a little bit too involved in all of our lives. But if downsides do not trouble you and you have a decent amount of RAM in your system chrome might be the best solution for you, grab it here and check it out.
  3. Microsoft Edge

    edge browser Or should I say Microsoft edge 2.0 since this new Edge is completely recoded and rethought, a completely new browser based on chromium. The first version of the edge was an inhouse attempt from Microsoft and it was a disaster, I guess the lesson was learned, and this new edge we have today is a great Browser, it is lightning fast and packed with some great features with one among them standing out I just love, that is the ability to save web pages as applications and truth to be told you have to try this in order to see al great advantages it offers. A very interesting feature is that edge itself wins the speed race from all of the 5 contestants here which is a great surprise. Of course, the downside of annoying Microsoft pushing it to be your default is, well it's Microsoft, as chrome is tied to Google so is edge tied to Microsoft, and the same dreaded feeling that big MS is watching you. If however, you do not concern yourself with these kinds of things, since it is already part of Windows 10, give it a spin and try it, I am sure you will at least love its blazing speed.
  4. Vivaldi

    vivaldi browser A new kid on the block, relatively unknown Browser Vivaldi offers some great customizable features no other one on this list offers, a very unique and down to each detail customization option, you can literally tweak each and every aspect of this browser making it best customizable and personal browser ever. How it is also based o chromium, every chrome extension works in it naturally. It is very good in speed and constantly updated and developed. The downside, well if you are anything like me, you could spend ages trying to customize it, ages, it has tons of features, and making it really feel and tick as you want can consume a really lot of time. If this thing does not bother you at all, grab Vivaldi here.
  5. Opera

    opera browser Last but not least, we have another relic of the old browser age, the Opera browser. Packed with great security and great in-house features like a built-in VPN, built-in ad blocker, built-in crypto wallet, etc this browser seems like a swiss army knife. Opera is full of features and it shows once you start using it. The downside of opera is that its look and feel are specifically tailored to a certain type of user and not everyone will find that appealing or attractive, add some great but hidden and hard to come by features and it may go unnoticed. However, I think you should really give it a go since it definitely deserves more attention than it gets. Grab it here and check it out.
That's it, 5 great browsers to look up, I hope that you have enjoyed the read and I hope to see you again here for more articles. If you would like to read more helpful articles and tips about various software and hardware visit errortools.com daily.
Read More
Troubleshooting Epic Games Launcher issues
If you are having trouble using the Epic Games Launcher, here are some troubleshooting steps that usually fix common problems.

Check the Epic Games server status

Check the Epic Games Server Status page to make sure all systems are operational. If the Epic Games Launcher is affected by an outage or system-wide issue, your issue may be fixed when the outage is resolved.

Clear your launcher’s webcache

Clearing the webcache often resolves display issues that may prevent you from using the launcher. Follow these steps to clear your webcache:

Windows

  1. Exit the Epic Games Launcher by right-clicking the system tray icon in the bottom-right corner, and then clicking Exit.
  2. Press Windows key + R, type “%localappdata%”, and then press Enter to open a File Explorer window.
  3. Open the Epic Games Launcher folder.
  4. Open the Saved folder.
  5. Click the webcache folder, and then delete it.
  6. Restart your computer, and then relaunch the Epic Games Launcher.

Mac

  1. Exit the Epic Games Launcher.
  2. Open Finder.
  3. Click on Go then Go to Folder...
  4. Type ~/Library/Caches/com.epicgames.EpicGamesLauncher and press Enter.
  5. Drag the webcache folder to the Trash.
  6. Press control and click on Trash.
  7. Click on Empty Trash.
  8. Relaunch the Epic Games Launcher.

Run the launcher as an administrator

Running the launcher as an administrator elevates its permissions so it can avoid problems with downloading games, for example. Follow these steps to run the launcher as an administrator:
  1. Right-click your Epic Games Launcher shortcut.
  2. Click Run as Administrator.

Update graphics card drivers

Making sure the player is using the latest graphics card drivers may resolve the launcher crashing. Review this article for steps on how to do update their graphics drivers.

Reinstall the Epic Games Launcher

Note: The following process will remove all of your installed games.

On Windows: 

Run system file checker then reinstall the Epic Games Launcher.
  1. Close the Epic Games launcher by right-clicking the system tray icon in the bottom right corner and then clicking Exit.
  2. Click Start.
  3. Type "cmd", right-click Command Prompt, and then click Run as administrator.
  4. In the window that opens, type "sfc /scannow", and then press Enter.  This may take a little while.
  5. Restart your computer.
  6. Click Start.
  7. Type "Add or Remove Programs", and then press Enter.
  8. Select Epic Games Launcher from the list of programs.
  9. Click Uninstall.
  10. Go to www.epicgames.com and click Get Epic Games in the top right corner to download the latest installer.

On Mac:

  1. Close the Epic Games Launcher.
  2. Verify there are no processes associated with the Epic Games Launcher by checking Activity Monitor.
  3. Open the Applications folder.
  4. Click and drag the Epic Games Launcher application to the Trash.
  5. Verify all the following directories no longer have any Epic Games Launcher folders or files:
    • ~/Library/Application Support
    • ~/Library/Caches
    • ~/Library/Preferences
    • ~/Library/Logs
    • ~/Library/Cookies
  6. Go to www.epicgames.com and click Get Epic Games in the top right corner to download the latest installer.

Launcher freezing on macOS 10.15.1 or earlier

If your launcher is freezing on macOS 10.15.1 or earlier, follow the steps above to reinstall the Epic Games Launcher on your Mac.

Verify system requirements

Make sure your computer meets the system requirements to run the Epic Games Launcher using this article here. The system requirements for the Epic Games Launcher are here.

Blinking Epic Games Launcher icon on the taskbar

If you can't start the Epic Games Launcher and see a blinking icon on your taskbar, use these steps to try and fix this:
  1. Right-click your Epic Games Launcher shortcut.
  2. Click Properties.
  3. Select Normal Window from the drop-down menu next to Run.
  4. Click the Compatibility tab.
  5. Uncheck any boxes, and then click Apply then OK.
  6. Click Start, then type "Graphics Settings" and press Enter.
  7. Select Classic app from the drop-down under Graphics performance preference.
  8. Click Browse.
  9. Navigate to the Epic Games Launcher installation directory. By default, this is C:/Program Files (x86)/Epic Games/Launcher/Portal/Binaries/Win64.
  10. Click the EpicGamesLauncher.exe file, and then click Add.
  11. Click Options.
  12. Select Power Saving.
  13. Click Save.
  14. Relaunch the Epic Games Launcher.
Read More
Razer is making only 1337 smartwatches
razer smartwatch
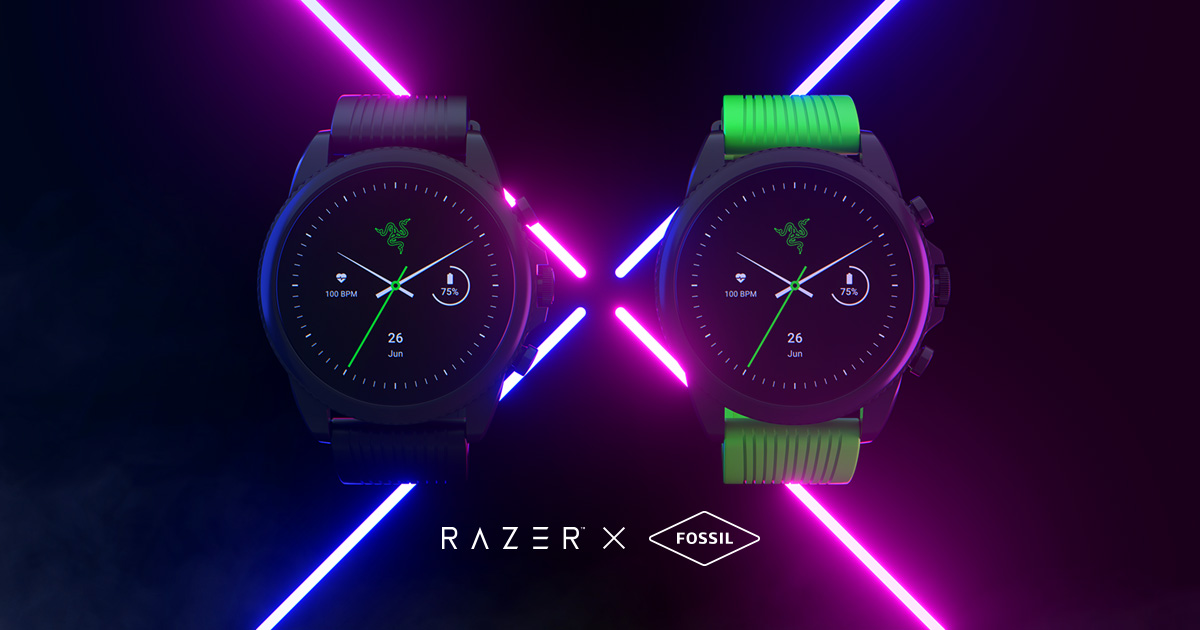
Razer had some strange dives into stuff not really aimed at gamers and the gaming community overall like its Zephir smart mask and now it is venturing into the area of smartwatches teaming up with Fossil. I am not clear if this initiative was set in motion by Razer or Fossil and I really do not know why limited production numbers. Officially named RAZER X FOSSIL GEN 6 SMARTWATCH, this watch comes with the official following text on Razer's page:
Way more. Way faster. Way ahead of the game. Get time on your side with the limited-edition Razer X Fossil Gen 6 Smartwatch—only 1,337 pieces worldwide. Designed for the next generation of gamers, supercharge your style with customizable straps, dials, Razer Chroma™ RGB effects, and more.
Now, I am a fan of Razer and I like their products, mostly keyboards and mouse altho chair is also very good and in top of the product line in that field but I can not really stand behind this product and decision, and the only reason why I can not stand behind it is this 1337 (leet, or elite) a limited number of available pieces that is nothing more than a gimmick to sell watches at a higher price. Watch itself is not really bad, as a matter of fact, it has some solid hardware statistics.

Technical characteristics

Featuring a 1.28-inch AMOLED Display with 3 unique Razer watch faces (Analog, Text, Chroma*), 4 customizable Razer Chroma™ RGB effects, and 2 custom-designed, interchangeable straps, this Razer's baby is packing 44mm, Stainless Steel case with 22mm, straps. It runs on Wear OS by Google as an operating system of a choice and under software, it is packing Qualcomm Snapdragon Wear 4100+ CPU paired with 1GB of RAM and 8GB Storage. The display is running at 416x416 resolution with 326ppi. Watch input is with 2 configurable Push buttons, One rotating Home button, touchscreen, and voice. It has in it a loudspeaker, microphone, and vibration. Connection is via Bluetooth 5.0, GPS, NFC SE, and Wi-Fi. The battery can in their word work for 24 Hr + multi-day Extended Mode **Varies based on usage and after updates install**. USB data cable with magnetic dock snaps to split rings on the watch case back and spins 360 degrees for ease of use. Approximately half an hour to reach 80%. Sensors included in the watch itself are: Accelerometer, Altimeter, Ambient Light, Compass, Gyroscope, Off-body IR, PPG Heart Rate, SPO2. Smartwatch is water-resistant up to 3 ATM & it comes with preloaded apps like: Agenda, Alarm, Battery-Optimized Activity Mode, Calendar, Cardio Level Tracking, Cardiogram, Contacts, Enhanced Phone Dialer App, Google Assistant, Google Fit (Workout, Heart Rate, Goals, Breathe), Google Maps, Google Pay™, Google Play Store, Nike Run Club, Noonlight, Smart Battery Modes, Spotify, Stopwatch, Timer, Translate, Wellness Apps with Sleep Tracking.

Conclusion

Watch is Dropping on 01.10.22, 8 AM PST which is 4 days from now and altho it is an interesting device with solid hardware I can not stand behind it due to its limited edition numbers and with $329 price tag. With the same amount of money, you can get yourself Samsung or Apple watch with more features packing. But of course, that is just my personal preference and if you want to own this limited edition Razer smartwatch, go for it.
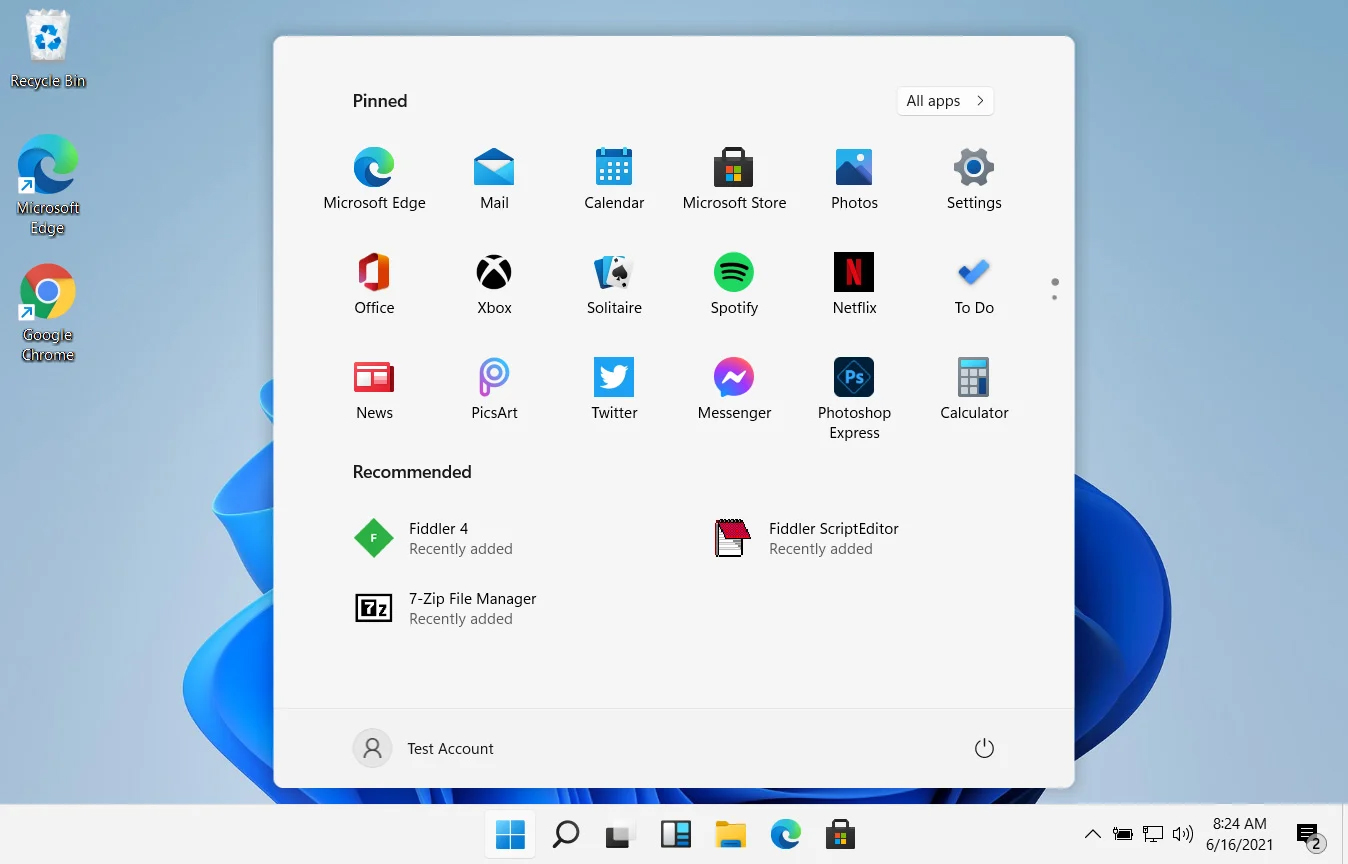
Read More
A Quick Fix Guide to Error 0x8004060c

A Quick Fix Guide to Error 0x8004060c

What's Error 0x8004060c?

If you use Ms-Outlook. You may experience the malfunction 0x8004060c sooner or later. This malfunction was proven to arise in nearly every MS Outlook variation be it 2010 or 2,000, 2007. The malfunction 0x8004060c hinders your capacity to deliver and get e-mails from and your MS-Outlook account and happens without any forewarning. The error happens when the PST file grows too big and there's almost no memory to handle the increase (Which is rather rare nowadays). Generally, the PST file has about 2 gigabytes upper limit and when you reach that, this error is unavoidable. This error happens when you attempt incorporating data that is fresh into your MS-OUTLOOK Account.

Solution

Restoro box imageError Causes

This malfunction might generate difficulties for you personally as your e-mails vanish and can happen suddenly. The system could also crash at times unpredictably. You may not be able to see fresh notifications and attachments in your e-mail. Also, it's also possible to drop significant contact details. What's more, this malfunction could stop e-mails that are fresh to arrive in your inbox. Therefore, it is undoubtedly a significant issue that has to be repaired immediately. The following may be some of the causes for error 0x8004060c:-
  • This error might occur when OST/PST file got corrupt.
  • OST file becomes inaccessible due to Exchange connectivity or synchronization issue.
  • OST/PST file exceeded its default maximum file size.

Further Information and Manual Repair

In the event that you find the malfunction 0x8004060c at any stage, you should do the repair instead of risking dropping connections and all the significant data in your account. The easiest way to repair this malfunction and to handle this issue would be to download the Restoro. Click here to obtain this fix tool on your computer. After installing, click your mouse's left button after which can use the application. It repairs the error code 0x8004060c in the least period and walks you through the entire repair procedure quickly.
Read More
How to Fix Installer Error 1603

Correct Installer Error 1603

Installer Error 1603 - What is it?

Installer Error 1603 message occurs during the installation of the Microsoft Windows installer Package. The error message is often displayed as the following:
'Error 1603: A fatal error occurred during installation.'
It indicates a problem occurred during the installation process and unsuccessful installation.

Solution

Restoro box imageError Causes

The installer error 1603 may occur if:
  • The folder you are trying to install the Windows Installer package to is encrypted
  • The system account does not have full control permissions
  • Incorrect installation
  • Registry issues

Further Information and Manual Repair

To resolve this error on your system, try the solutions listed below:

Solution 1: Install-Package in an Un-Encrypted Folder

Try installing the package to a folder that is not encrypted. However, if the error still persists, try other solutions listed below.

Solution 2: Enable Full System Control Permissions

Sometimes the error may occur when you don’t have system full control permissions. To enjoy full control permissions here’s what you need to do, go to my computer and right-click the drive that you wish to install the Windows Installer Package to. After that click properties and the security tab. If you can’t locate the security tab, this means your Simple File Sharing feature is turned on. You need to turn it off to continue. For that go to my computer, tools, and then click folder options. Now here press the view tab and check the Simple File Sharing box to turn it off. Press OK to save changes. Now you will be able to locate the security tab. Click on the Security tab and verify the name box that contains the system user account. If the system user account is empty then insert the account name. To insert, click Add, and then select user's dialog box, add a name, and close. Now go to the permissions section and check the box ‘Allow’ under full control. After that go to the ‘Advanced’ tab and do the following: If you are an XP user, select ‘Replace permission entries on all child objects with entries shown here that apply to child objects’ and then press OK to confirm. If you are not an XP user, then follow the same instructions but select the check box that says ‘Reset permissions on all child objects and enable propagation of inheritable permissions’ for the system account. Now click OK to confirm. To activate changes you will have to wait for a while. Once the changes are activated, try installing the Windows Installer package again.

Solution 3: Clean and Repair Registry

The Installer error 1630 can occur due to registry problems as well. To resolve registry-related issues download Restoro. This is a cutting-edge and advanced registry cleaner that scans your entire PC for registry-related errors in seconds and resolves them spontaneously. It removes all the unnecessary junk files, bad keys, invalid registry entries, cookies, and internet history cluttering and corrupting the registry. It repairs the damaged system files and repairs the registry right away thereby resolving Installer Error 1630 on your PC. It is safe and efficient. It is embedded with an intuitive algorithm and a sophisticated user-friendly interface. It is easy to use and operate. You can download it on any Windows version. Besides functioning as a registry cleaner, it also functions as an antivirus and a system optimizer. Click here to download Restoro on your PC to resolve all registry issues generating the installer error 1603 on your system.
Read More
Assigning Multiple IP Addresses to Adapter
There are times when an IT admin has to set up multiple IP addresses to the same network adapter. Setting up multiple IP addresses in scenarios like hosting various SSL sites, speed up traffic exchanges can help in avoiding being blacklisted in the SPAM filters, and so on. So in this post, you will be guided on how exactly you can assign multiple IP addresses to the network adapter in your Windows 10 computer. There are several ways to assign multiple IP addresses in a network adapter. You can do it using the Network Adapter settings or using the Netsh utility, as well as the Windows PowerShell utility. To get started, refer to each one of the options provided below.

Option 1 – Assign multiple IP addresses via Network Adapter settings

  • Go to Settings first and from there, select Network & Internet, and then click on the Change adapter options. This will show you a list of both the physical and virtual network adapters in your computer.
  • Next, double click on the Ethernet adapter where you want to assign the multiple IP addresses and then click on the Properties button.
  • After that, you should see the Ethernet properties where you have to select the “TCP/IPv4” or “TCP/IPv6”.
  • Once done, click on the Properties button and then select the “Use the following IP address” option under the General tab.
  • Now you have to add an IP address, subnet, and default gateway to the network adapter and then click on the Advanced button.
  • This will open the Advanced TCP/IP settings where you have to click on the Add button so you can add an IP address. From here, you can keep adding multiple IP addresses to the network adapter. You also have the option to add multiple gateways or DNS IP addresses.
  • Once done, if you execute the “ipconfig” command, you should see all the secondary IP addresses listed.

Option 2 – Assign multiple IP addresses using the Netsh command

Another way to assign multiple IP addresses to your network adapter is via the Netsh command.
  • In the Start Search, type “command prompt” and from the search results that appear, right-click on Command Prompt and then select the “Run as administrator” to open it with admin privileges.
  • If a User Account Control or UAC prompt pops up, just click on Yes.
  • After that, run this command: Netsh int ipv4 add address name="Local Area Connection" 192.168.100.100 255.255.255.0 SkipAsSource=True
Note: You have the option to set “SkepAsSource” since it depends on your needs using the Netsh command. When it is configured as true, the IP address won’t be used by the OS for outbound connections.

Option 3 – Assign multiple IP addresses via Windows PowerShell

  • Tap the Win + X key combination and click on the “Windows PowerShell (Admin)” option.
  • After opening Windows PowerShell as admin, use the NetIPAddress command so you can add more IP addresses. Execute this command: Get-NetIPAddress | ft IPAddress, InterfaceAlias, SkipAsSource
  • Next, assign an IP address to a network adapter by executing this command: New-NetIPAddress –IPAddress 192.168.100.100 –PrefixLength 24 –InterfaceAlias “vEthernet” –SkipAsSource $True
  • Now to modify the “SkipAsSource” parameter, use this command: Get-NetIPAddress 192.168.100.100 | Set-NetIPAddress -SkipAsSource $False
Read More
Software review series: Visual studio code
Visual Studio codeVisual studio code is a code editor available for Windows, Linux, and macOS. It is a completely free tool offering you to code in any language without the need to switch to another editor. Visual Studio Code is part of Microsoft Visual Studio which is a complete integrated development environment (IDE). Take notice that Visual studio itself has more advanced tools for developing and testing, it has 24/7 support, training, and Azure for WEB apps. Visual Studio Code is an editor lacking in some advanced features Visual Studio offers.

Visual Studio code Price and royalty

As mentioned Visual Studio code is completely free licensed under the MIT license agreement giving you the tool free to use and sell your product. How it supports Linux, Windows, and macOS, all you need it to go to its official page https://code.visualstudio.com/, download it and start using it. How this is free project backside is that there is no official support, you will have to rely on various articles and community in order to get needed information or problem solution.

Features

Syntax highlighting has become standard and norm for any editor but besides this function VS code offers us also IntelliSense option which goes a step further with code completion, code hinting, and parameter info. This means that VS code is aware of many things going on inside your code and will offer you as you type a menu with options for autocomplete along with variables referenced, function names, etc. VS code offers extensions inside its extensions marketplace where you can add extensions in order to implement new languages, add debuggers, change the layout, etc. This is one of the great features it allows you to easily switch from one project to another, one language to another not leaving your code editor. Working with version control systems like Git is easy with VS Code. You’ll be able to stage files and make commits, then push and pull changes to your remote code repository of choice, right from the editor.

Conclusion about Visual Studio code

Visual Studio Code is one of if not the most flexible and extensible code editors currently on the market that I have ever tried and used. IT has become my code editor of choice simply for reasons that there is really not much it cannot do and it is constantly updated and taken care of. You can really tune it to look and feels how you want with extensions and you really cannot beat the free price tag. I would highly recommend this editor for daily use especially since its biggest competitors like Atom and sublime text have not seen many updates lately.
Read More
Fix Kernel Power Blue Screen in Windows
To function properly and as intended, Windows 10 depends on a number of resources and software components. Even with a simple task as powering the machine, there are already several smaller software components supporting it. However, if any of these resources or components experience issues, it will affect the overall function of the computer. One of the errors reported is the Kernel Power Blue Screen error which is triggered by the Windows Kernel that mostly comes with a Windows Kernel Event ID 41 error. This kind of error can turn off and reboot the computer randomly. Here’s an example of a Bugcheck code entry with the same event:
 “EventData BugcheckCode 159 BugcheckParameter1 0x3 BugcheckParameter2 0xfffffa80029c5060 BugcheckParameter3 0xfffff8000403d518 BugcheckParameter4 0xfffffa800208c010 SleepInProgress false PowerButtonTimestamp 0Converts to 0x9f (0x3, 0xfffffa80029c5060, 0xfffff8000403d518, 0xfffffa800208c010)”
This kind of BSOD error is caused by an issue with the Power Supply components in both the software and hardware parts of your computer. In such cases, if your computer is stuck in a reboot loop, you need to troubleshoot the problem via Safe Mode or in the Advanced Startup options screen.

Option 1 – Try disabling Overclocking

If you have enabled Overclocking, you might have to disable it as some users reported that the Kernel-Power Blue Screen error started to appear right after overclocking. To disable it, follow the steps below.
  • Go to the Start Menu and open Settings.
  • Next, select Update and Security and go to the Recover tab.
  • From there, click on Restart now in Advanced startup. This will restart your computer.
  • Once you’re in the Advanced startup, go to Troubleshoot and then select Advanced Options.
  • From there, select the UEFU Firmware Settings.
  • Now click on Restart. Once your computer has restarted, it will automatically open BIOS.
  • From the BIOS, go to the Advanced tab and navigate to Performance and then look for Overclocking.
  • Once you’ve found Overclocking, make sure that it is disabled. If it’s not, then disable it and then save the changes made by tapping the F10 key.
  • Start your computer normally and check if the Kernel-Power Blue Screen error is now fixed.

Option 2 – Try to run the Power troubleshooter

The next thing you can do is to run the Power troubleshooter. To do so, follow these steps:
  • Go to Settings and navigate to Update & Security > Troubleshoot.
  • After that, look for the “Power” option from the given list of built-in troubleshooters and click on it.
  • Next, click on the “Run the troubleshooter” button to run the Power troubleshooter.
  • Once the troubleshooter is done identifying the problems, follow the next on-screen instructions to resolve the problem.
Note: You could also try to run the Blue Screen troubleshooter to fix the Kernel-Power BSOD error. You can find it under the same page as the Power troubleshooter.

Option 3 – Try to replace the Power Supply Unit

You could also try to consider physically replacing the Power Supply Unit or PSU of your computer and see if that helps or not.

Option 4 – Run the Windows Memory Diagnostic tool

Since this error could be caused by some issues in the memory, you can try running the Windows Memory Diagnostic tool and see if it helps.
  • Tap the Win + R keys to open Run and type exe and hit Enter to open the Windows Memory Diagnostic Tool.
  • After that, it will give two options such as:
    • Restart now and check for problems (Recommended)
    • Check for problems the next time I start my computer
  • Once your computer has restarted, perform a basic scan or you could also go for the “Advanced” options such as “Test mix” or “Pass count”. Simply tap the F10 key to start the test.
Note: After you select the option, your PC will restart and check for memory-based issues. If it finds any issues, it will automatically fix them and if there’s no issue found, then it’s most likely not a memory-based issue so you should try the other options given below.

Option 5 – Try to check physically check your RAM

In this option, you have to check your RAM physically especially if you tend to use multiple physical RAMs on your computer so it can be quite tricky and technical. You have to check first if they are of the same frequency and then verify if the chip is compatible or not. You also have to check if the sockets are attached using some adapter or non-recommended apparatus as it can cause some problems while giving performance hit to your computer.

Option 6 – Try to update the BIOS

Updating the BIOS can help you fix the Kernel-Power BSOD error but as you know, BIOS is a sensitive part of a computer. Even though it is a software component, the functioning of the hardware depends on it largely. Thus, you must be careful when modifying something in the BIOS. So if you don’t know much about it, it’s best if you skip on this option and try the other ones instead. However, if you are well-versed in navigating the BIOS, then follow the steps below.
  • Tap the Win + R keys to open the Run dialog box.
  • Next, type “msinfo32” in the field and press Enter to open System Information.
  • From there, you should find a search field on the bottom where you have to search for the BIOS version and then press Enter.
  • After that, you should see the developer and version of the BIOS installed on your PC.
  • Go to your manufacturer’s website and then download the latest version of BIOS on your computer.
  • If you are using a laptop, make sure that you keep it plugged in until you have updated the BIOS.
  • Now double click on the downloaded file and install the new BIOS version on your computer.
  • Now restart your computer to apply the changes made.
Note: If updating the BIOS didn’t help, you might want to consider resetting it instead.

Option 7 – Disable Fast Start-up

If you want your computer to boot faster, then you might have enabled Fast Start-up. This feature is ideal for computers that are using a hard disk drive. However, turning on this feature also means that when the computer boots, it might lag some drivers that are loaded when it initially boots up. Thus, it might be the potential cause of the Kernel-Power BSOD error. Thus, you need to disable Fast Start-up. To do that, follow these steps:
  • Boot your PC into Safe Mode.
  • Then tap the Win + R keys to open the Run dialog box.
  • Next, type in “control” to open Control Panel.
  • After that, select Hardware and Sound and click on Power Options.
  • Select “Choose what the power buttons do” from the left side menu pane and click on Change settings that are currently unavailable.
  • Afterward, uncheck the “Turn on fast startup (Recommended)” entry and click on Save Changes.
  • Now restart your PC for the changes to take effect and then check if the problem’s fixed afterward.
Read More
Fix Remote Desktop: Your credentials ...
Experiencing issues while using Remote Desktop connections is not uncommon. One of the issues that users encountered recently while trying to connect to their Remote Desktop network is the error saying, “Your credentials did not work, The login attempt failed”. If you are one of these users, then you’ve come to the right place as this post will walk you through fixing the problem. When facing this kind of problem, the first thing you can try before you do some troubleshooting steps is to verify the credentials. But if you are certain that you’ve entered the correct credentials just like what other users reported, then it’s completely a different matter. Based on the reports, this error is common on newly installed versions of Windows 10 or after reinstalling the operating system which could mean that the problem might be due to the Windows security policies or the username might have been recently modified. The latter case is a possibility especially if you’ve reinstalled Windows 10 and had entered a new username. In such a case, you will really have a difficult time connecting to your Remote Desktop connection since its credentials do not really automatically change. If you’ve verified that your credentials are correct, then now’s the time you troubleshoot the problem with the help of the potential fixes provided below. Just make sure that you follow each one of them in sequence.

Option 1 –Try to run the Network Adapter troubleshooter

To run the Network Troubleshooter, refer to these steps:
  • Open the Search bar on your computer and type in “troubleshoot” to open the Troubleshoot settings.
  • Next, scroll down and select the “Network Adapter” option from the right pane.
  • Then click on the Run Troubleshooter” button.
  • After that, your computer will check for any possible errors and will pinpoint the root cause of the problem if possible.
  • Restart your computer.

Option 2 – Try to change the network profile from public to private

According to some reports, this error occurs on systems where the network profile was set to public. Thus, you need to change the network profile to private to resolve the problem. How? Refer to these steps:
  • Go to Start and from there click on Settings > Network & Internet > Status.
  • Next, click on the “Change connection properties” option.
  • After that, set the radio button of Network Profile from Public to Private.
  • Wait for a couple of seconds until the system is done applying the changes you’ve made and then see if you can now connect to the Remote Desktop connection.

Option 3 – Try changing the account username

As mentioned, one of the possible causes for this error is the reinstallation of the operating system. You might have changed the username for the system but it does not really change the username of the Remote Desktop connection as well. Thus, you have to change the username back to what it was before you’ve reinstalled Windows 10.

Option 4 – Try modifying the Windows Security Policy

You can also try to edit the Windows Security Policy as it could help in resolving the error. This Windows Security Policy, when enabled, will not allow non-admin users to log on to the Remote Desktop connection. So if you want to allow non-admin users to use the Remote Desktop connection, then you need to modify this policy. Note that you can only do that if you are the admin of the system yourself.
  • Tap the Win + R keys to open the Run utility.
  • Then type “secpol.msc” in the field and tap Enter or click OK to open the Local Security Policy.
  • After opening the Local Security Policy window, select Local Policies > User Rights Agreement located on the left pane.
  • Next, double click on “Allow log on through Remote Desktop Services” located in the right pane.
  • And in the next window that appears, select Add user or group.
  • After that, type in the username of the intended non-admin user under the “Enter the object names to select” column.
  • Once done, click on the Check Names button to fix the username and then click OK to save the changes made.
  • Restart your computer.

Option 5 – Use the Group Policy Editor

  • Tap the Win + R keys to open the Run dialog box and then type “gpedit.msc” in the field and tap Enter to open the Group Policy Editor.
  • Next, navigate to this path: Computer Configuration > Administrative Templates > System > Credentials Delegation.
  • Double click on the “Allow delegating default credentials with NTLM-only server authentication” policy setting located on the right pane to edit it.
  • After that, shift its radio button to Enabled and click on Show.
  • Then type “TERMSRV/*” in the Value box and click OK.
  • Now repeat the same for the following policy settings:
    • “Allow delegating default credentials”
    • “Allow delegating saved credentials”
    • “Allow delegating saved credentials with NTLM-only server authentication”
  • Once you’re done, restart your computer and see if the problem is fixed.
Read More
1 2 3 162
Logo
Copyright © 2022, ErrorTools. All Rights Reserved
Trademarks: Microsoft Windows logos are registered trademarks of Microsoft. Disclaimer: ErrorTools.com is not affiliated with Microsoft, nor claim direct affiliation.
The information on this page is provided for information purposes only.
DMCA.com Protection Status