Fix Setup has failed Error in Windows

If you encounter the “Setup has failed to determine supported install choices” error when trying to downgrade or upgrade your Windows 10 computer, this signifies that there are some compatibility issues with the installation process and that Windows was not able to either downgrade or upgrade to another version.

Usually, this error occurs when you are using the built-in options in Windows 10 upgrade or downgrade to another version of Windows. This option is mostly used as it keeps the user settings as well as data intact. Thus, you need to keep in mind a lot of parameters before you proceed with the installation because if there is any conflict in the process, you certainly won’t be able to downgrade or upgrade your Windows computer. To resolve the issue, here are some suggestions that might help.

Option 1 – Try running in Compatibility mode

This is the first thing you can try to resolve the issue instead of going right ahead on making a bootable device. So if you are downgrading Windows, you can try to run the installer in the compatibility mode for that specific Windows version.

  • Look for the setup file.
  • Once you find it, right-click on it and select Properties from the context menu.
  • After that, go to the Compatibility tab and mark the checkbox for “Run this program in compatibility mode for:” and from the drop-down list, select either Windows 7 or Windows 8.
  • You also have to check the “Run as administrator” option.
  • Now click the Apply button and then click OK to save the changes made and check if it has resolved the issue or not.

Option 2 – Option 2 – Try troubleshooting compatibility

This option is almost the same as the first one except it is an alternative way of fixing the “Setup has failed to determine supported install choices” error in case the first one didn’t work. In this option, you will troubleshoot the compatibility issue.

  • Look for the setup file.
  • Then right-click on it and select the “Troubleshoot compatibility” from the context menu.
  • After that, click on the “Try recommended setting” option. Once the process is done, the error message should be gone.

Option 3 – Try to use the setup file instead of an image

If you are running the Windows ISO image for the installation, you can try running the setup file instead. This is because when you try to install Windows from an image file directly, it has to be loaded into a virtual CD drive first, and then from there, further operations are carried out. And so, you can just bypass this mechanism to avoid getting the “Setup has failed to determine supported install choices” error.

  • First, you need to extract the disk file to an accessible location.
  • After that, go to Sources > Setup.exe.
  • Now run the setup file to upgrade or downgrade the Windows version. Just make sure that you do run the setup file as an administrator.

Option 4 – Try to do the upgrade or downgrade in a Clean Boot state

Putting your PC in a Clean Boot state can also help when you want to upgrade or downgrade your version of Windows without any trouble because, during this state, you can start the system with a minimum number of drivers and startup programs that will surely help you in isolating the root cause of the issue.

  • Log onto your PC as an administrator.
  • Type in MSConfig in the Start Search to open the System Configuration utility.
  • From there, go to the General tab and click “Selective startup”.
  • Clear the “Load Startup items” checkbox and make sure that the “Load System Services” and “Use Original boot configuration” options are checked.
  • Next, click the Services tab and select the “Hide All Microsoft Services” checkbox.
  • Click Disable all.
  • Click on Apply/OK and restart your PC. (This will put your PC into a Clean Boot State. And configure Windows to use the usual startup, just simply undo the changes.)
  • After that, try to install the Windows Updates or upgrade again.

Option 5 – Try to use the Media Creation tool

The Media Creation tool in Windows allows you to use the ISO installation file to make a bootable device that you can use to install Windows on your PC. Note that this is kind of different from the usual installation process as it could erase your computer’s current settings and data on the primary drive. Thus, before you proceed, you need to backup all your data into some removable drive and then use the Media Creation Tool to make a bootable drive.

  • After making the bootable drive, you need to plug it into your computer and then reboot.
  • Next, tap the F10 or Esc key to open the boot options.
  • Now set the boot priority of the removable drive the highest. Once the setup comes forth, follow the next onscreen instructions and install Windows without any problems.
If you like to learn and find out more about various Windows errors, and how to repair them go to our vast archive or use search to find articles that will explain and help you in solving your issue.
However, if you prefer to do things fast and with automatization then we are proposing to use an automated solution for your issues. The application that we are recommending is Advanced System Repair Pro
Advanced System Repair utilizes multiple tools all in one to give you a quick, simple, reliable, and very thorough diagnosis of your PC. It brings you all the tools you need in one program to clean, fix, protect, optimize and boost your PC!
1-Click Maintenance
All the tools to make it simple and easy! It's like having a professional technician at the click of a mouse.

Junk Cleaner
Keeping your computer free from unnecessary clutter also helps make your computer last longer. Like any other machine, if you keep it clean and take care of it, it will serve you better for longer!

Optimize background apps
Optimize applications background activity with the built-in Application Optimizer feature.

Disk Defrag
With a simple 1-click, Advanced System Repair speeds up your PC by assembling fragmented files on your machine and organizing them more efficiently.

Malware Removal
Finds and removes all types of harmful malware including trojans, worms, bots, adware, spyware, PUPs, and more!

Privacy Cleaner
The all-in-one privacy suite to Clean Your Tracks & Protect Your Privacy! Make your computer safe, secure, and more efficient!

System Tweak/Optimizer
ASR will analyze your complete system and settings to adjust your PC to function at its maximum performance.

Registry Cleaner
Over time, as you install and uninstall applications, the registry can become cluttered with old entries and broken settings which can result in program crashes, and annoying messages and slow the computer down.
Visit our Advanced System Repair Pro Download page to inform yourself about all the benefits of this software and get a free trial copy of it.
advanced system repair pro

Advanced System Repair Pro

One-click automated PC repair solution
ASR logo
With Advanced System Repair Pro you can easily
Replace damaged files
Restore performance
Free disk space
Remove Malware
Protects WEB browser
Remove Viruses
Stop PC freezing
DOWNLOAD
Privacy Policy | Terms of Use | Uinstall
Advanced System Repair Pro is compatible with all versions of Microsoft Windows including Windows 11

Share this article:

You might also like

Repair Windows 10 Error Code C19000101 - 2000B

Error Code C19000101 - 2000B on Windows 10– What is it?

Error Code C19000101 - 2000B is a Blue Screen of Death (BSOD) error encountered by Windows users in an attempt to upgrade their operating system from Windows 7 or Windows 8/8.1 to Windows 10. The system upgrade does not successfully finish and when the installation is resurrected, it fails then reverts back to the original operating system. More and more Windows users come across this error that may have been triggered by a few reasons to be discussed in this article.

Solution

Restoro box imageError Causes

Microsoft users can experience the BSOD error C19000101-2000B due to the following reasons:

  • There’s an incompatibility with the drivers
  • Antivirus software

Further Information and Manual Repair

In fixing error code C19000101-2000B, you can try doing it manually. Manual repair methods can offer users solutions effectively and efficiently, having to address the root causes and issues in relation to a number of Windows error codes. If properly implemented, these manual repair methods can help Windows users resolve problems at hand immediately. However, there are cases where the help of a Windows professional is necessary. In such instances, it would be best to consult a certified Windows expert or you can also try using a powerful automated tool whenever needed.

To be able to fix error code C19000101-2000B, implement the first method used in resolving error code 0xc000021a, then you can proceed with this first method:

Method One: Perform Clean-Boot

  1. Prior to performing an upgrade, you need to disable your antivirus. Or, better yet, uninstall it.
  2. Ensure that your PC name is simple without hyphens, periods, or dashes.
  3. Restart your device several times, then try again.
  4. Disable all USB devices such as a smart card reader.
  5. If you are using a SCSI hard disk, be sure to have the drivers ready and available for a storage device like a thumb drive to be connected. While on the Windows 10 setup, select the Custom Advanced Option then use the Load Driver command to load the right driver for the SCSI drive. If the setup still fails, try switching to an IDE-based hard disk.
  6. Launch a clean boot, restart your device, then try again.
  7. If you are upgrading to Windows 10 using the .ISO file, make sure to disconnect from your internet connection during setup. If your device is connected by Wi-Fi or through LAN, you need to disable both before attempting to run a  system upgrade again.
  8. Switch to a local account if you are connected to a domain.
  9. Ensure that all external devices such as USB keys, external hard drives, gaming controllers, or printers are not attached to your device.

If you are upgrading to Windows 10 using Windows Update, you can perform a manual repair using the next method.

Method Two: Upgrading Via Windows Update

  1. Make sure to disconnect from the Wi-Fi or LAN once the download reaches 100% before you proceed with the system upgrade.
  2. Press Windows + X to open the command prompt window as an administrator.
  3. Stop the Windows Update service, BITS, MSI Installer, and Cryptographic by inputting the following commands one by one, hitting Enter after every command:

Net stop wuauserv

Net stop bits Net stop msiserver Net stop cryptSvc
  1. Restart both Software Distribution and Catroot2 folders. You can do this by typing Ren C: WindowsSoftwareDistribution SoftwareDistribution.old and Ren C: WindowsSystem32catroot2 Catroot2.old in the command prompt to change the names of both Software Distribution and Catroot2 files.
  2. Restart the Windows Update service, BITS, MSI Installer, and Cryptographic by inputting the following commands one by one, hitting Enter after every command:

Net start wuauserv

Net start bits Net start msiserver Net start cryptSvc
  1. Exit the command prompt then restart your device. You can now try to proceed with the system upgrade again.

Method Three: Disable or Uninstall Antivirus

  1. If you opt to just disable your antivirus, you just have to right-click on the antivirus’ icon from your toolbar then choose Disable.
  2. Press Ctrl + Alt + Del to open the Task Manager.
  3. Check if all the files or services linking to your antivirus are turned off.
  4. If you choose to uninstall your antivirus (which is recommended), open Control Panel.
  5. Once the Control Panel window is open, select Programs then Uninstall a Program.
  6. Look for your antivirus on the list, right-click it then choose Uninstall.
Read More
MS will release single office apps in MS Store
It seems that Microsoft is going to offer subscription and sales of individual office applications in the Windows Store. The office package will still be available as a package but for the first time, we will get single applications as standalone ones available for purchase. ms officeThis is a very interesting decision by Microsoft and I fully support it, this time users will be able to pay less and to choose only applications that they need instead of paying for the whole package and not using it.
Read More
Fix Mic not working in DOTA2
DOTA2 involves teams of five players each, where each player chooses a “hero” character. Each game has two teams pitted against each other, on opposite sides of a map. Once you start, you and your teammates try to level up by fighting and defeating heroes from other teams as well as non-player characters who exist within the game universe. Once you have a strong enough team, you would then try to attack an opposing team’s base. If you destroy their “ancient,” your team wins. The teamwork and interactivity required to play the game are some of its biggest attractions. You can text and voice chat as part of the Dota 2 gameplay, enabling you and your team to come up with strategies to take over your opponents’ base and fortifications. For this reason, a properly working microphone and headset are important if you are to get the most out of this exciting online game. However, there are many times when you find that there are audio dropouts when you try to speak into your microphone. The question “How do I get my mic to work on Dota 2?” is one of the most commonly asked on gaming forums related to this game. Here are solutions for why this can happen:
  1. You are logged in to another computer that is running the STEAM client

    While entirely rare, there are cases where the microphone in Steam is disabled because the same account is active and in use on a different computer. It may not notify you that your account is in use elsewhere. If this is the error, try to log out on other devices and then test it on only one system. If you cannot access the other computer that has access to your account, then change your password. This will automatically disconnect your Steam account from the other computer and let you enjoy voice chat in Dota 2 and other Steam games.
  2. Your microphone is not properly set up in Dota 2

    From the main Dota 2 menu, before you start a match, you can set up your microphone for voice chat. At the top, left-hand corner, click the gear icon to open Settings Select the AUDIO tab and ensure that the Sound Device and Speaker Configuration are set to default. On the same tab, activate Voice (Party) and set your Push to Talk shortcut key for your team. Select the appropriate Open Mic Threshold using the slider at the bottom of this tab to get your microphone recorded at a comfortable level.
  3. The Windows Audio Enhancements setting is turned on

    If you still cannot get your microphone to work properly, then your problem could be Windows Audio Enhancement. It is possible to get your microphone to work with Dota 2 by disabling these features. Right-click your volume icon on the system tray and select Recording Devices. Choose your active microphone then click its Properties button. On the Microphone Enhancements tab, make sure the checkboxes marked Voice enhancements and Acoustic Echo cancellation is unchecked Reboot your PC and retry using your microphone to chat.
  4. Your audio drivers need to be updated

    If you try all of the steps above and still have Dota 2 not recognizing your mic input update mic drivers by going in device manager and choosing update driver.
Read More
How to Fix QTCF.dll Error

QTCF.dll Error - Easy Fix

What is QTCF.dll Error?

Sometimes you may experience QTCF.dll error on your computer either during installation or while upgrading applications like iTunes and QuickTime. This error indicates that the installation or the upgrading of the desired application was unsuccessful. The QTCF.dll error is recognized by the Apple Support Community and they have provided a solution to fix this error easily.

Solution

Restoro box imageError Causes

QTCF.dll error occurs because the computer overloads with too much data which corrupts and damages registry files. And therefore the desired program fails to download and start on your PC. When this happens you see a pop up on your screen and the QTCF.dll error message that is usually displayed as:
  • QTCF.dll not found
  • QTCF.dll file is missing
Such message display hinders your ability to use iTunes or QuickTime applications on your PC. Furthermore, it also slows the performance of your system and you may encounter startup and shutdown problems. Therefore, it is advisable to repair the problem and fix the QTCF.dll error right away.

Further Information and Manual Repair

The good news is that you don’t need to go to a professional or be an IT expert in order to fix the QTCF.dll error. Since this error means that the installation or the attempt to upgrade the system was unsuccessful therefore you need to reinstall the fresh copy of the application. Here’s how you can easily fix the problem by yourself and install a fresh copy of the application: Step 1: First close all the applications running on your computer. Step 2: Now uninstall the application that you were trying to install such as iTunes or QuickTime.  To do this, go to the start menu, click on settings, control panel, and programs. Now click on the application you want to remove. Step 3: Once the application is uninstalled and removed from your computer, then restart it again. Step 4: Now download a fresh version of the application (iTunes or QuickTime) from Apple’s official website http://www.apple.com/quicktime/download/. Step 5: Run the installer. If reinstalling doesn’t work, then it is advisable to download the QTCF.dll repair tool. This repair tool will scan your PC for errors in seconds. Once the scanning is complete, click on the ‘fix all’ button to repair your computer. Once the error is fixed, restart your computer and then try reinstalling the desired application one more time.

A Word of Advice

For regular PC users, it is advisable to install an anti-virus and malware scanner and run it every time you use your computer. This helps you keep informed about the viruses or errors that your computer might be exposed to. And you can take timely actions before you experience file corruption and damage.
Read More
Setting a Static IP Address in Windows 10
If you are having issues with your network connection and you have it configured to DHCP, then you shouldn’t have any issues in figuring your IP address out. If you want to prevent conflicts between network devices and enable their easy management, then you have to set a static IP address in your Windows 10 computer, worry not for this post will show you how it’s done. The IP addresses for computers are usually configured to the Dynamic Host Configuration Protocol or DHCP automatically by the respective router. This is really convenient since the devices instantly connect to your network and through this, you can save yourself the trouble of configuring the IP address for each new device manually. However, there’s a shortfall in the process – the computer’s IP address can change every now and then. Moreover, you might also find it a lot easier to share a printer or configure a Port forwarding when you set a static IP address. There are three ways to do it – you can set it via Control Panel or Windows Settings or using Windows PowerShell. For more details, follow the options provided below.

Option 1 – Set a static IP address via Control Panel

  • Right-click on the network or Wi-Fi icon located in the Taskbar.
  • Then select the “Open Network and Internet settings” option from the given list of options.
  • Next, go to Wi-Fi settings and scroll down until you see the “Related Settings” section. Here, click on the “Change adapter options” link which will open a new window that will direct you to the Network Connections section of the Control Panel.
  • After that, right-click on the network connection you want to set a static IP address for and then select the Properties option.
  • Then select Internet Protocol Version 4 (TCP/IPv4) under the Networking tab and click the Properties button.
  • Now switch the selector to the “Use the following IP address” option and make the entry for the following fields that correspond to your network setup.
    • IP address (Find it using the “ipconfig /all” command)
    • Subnet Mask (On a home network, it is 255.255.255.0)
    • Default Gateway (It is your router’s IP address.)
  • Then check the “Validate settings upon exit” option to help Windows check your new IP address quickly as well as the other relevant information to make sure that it’s working.
  • Once you’re done, click the OK button and close the network adapter’s properties window.

Option 2 – Assign Static IP address using Settings

  • First, click on the gear icon for Settings and select the Network & Internet tab.
  • Next, select Wi-Fi > Current connection where you’ll have to select the network connection your computer is connected to.
  • After that, scroll down until you reach the IP settings section and then click the Edit button.
  • Now click the drop-down arrow when the IP settings window pops up and select the Manual option.
  • Now turn on the IPv4 toggle switch and set the static IP address. You also have to set the Subnet prefix length (subnet mask). For instance, if your subnet mask is “255.255.255.0”, then the subnet prefix length in bits should be 24.
  • Afterward, configure the Default Gateway address and the Preferred DNS address and then save the changes you’ve made.

Option 3 – Assign the static IP address using Windows PowerShell

  • In the Start Search, type “PowerShell” and right-click on Windows PowerShell from the search results to open PowerShell with admin privileges.
  • After that, enter this command to view your computer’s current network configuration: Get-NetIPConfiguration
  • Next, take note of the following information:
    • InterfaceIndex
    • IPv4Address
    • IPv4DefaultGateway
    • DNSServer
  • Once you’re done, execute this command to set a static IP address: New-NetIPAddress -InterfaceIndex 15 -IPAddress 192.168.29.34 -PrefixLength 24 -DefaultGateway 192.168.29.1
  • Afterward, change the default gateway with the default gateway address of your network and make sure that you change the InterfaceIndex number with the one that corresponds to your adapter and IPAddress with the IP address you want to assign to your computer.
  • Now execute this command to assign a DNS server address: Set-DnsClientServerAddress -InterfaceIndex 4 -ServerAddresses 10.1.2.1
  • Finally, save the changes you’ve made and restart your computer.
Read More
Fix System Interrupts high CPU usage
System Interrupts are operating system processes that function as an alert system for the CPU. So whenever a scenario needs the attention of the CPU, it alerts the CPU about it. In turn, the CPU suspends what it is doing, saves it, and then takes care of that important job and once that job is completed, it resumes back to what it was doing. This indicates that although System Interrupts appears as a process, it’s actually not. As a matter of fact, it is like a manager that reports to the CPU about all interrupts that happen on a hardware level, e.g. hardware interrupts. And if there are lots of interrupts, this means that there might be various errors occurring on a hardware level. As a result, it may take a lot of system resources. And if you consider disabling System Interrupts, stop right there as your computer will almost become useless without it. So if you see System Interrupts consuming high CPU usage in your Windows 10 computer, you can fix it without having to disable it and cause more problems. If System Interrupts takes up more than 5 to 10% of CPU, then you definitely have a problem. This could be happening due to some hardware or driver issue. The first thing you can do is to try rebooting your computer once and see if the issue comes back or not. High CPU usage of System Interrupts is a huge backlog for the CPU and it stays in the loop. If a simple system restart didn’t fix this issue, here are some suggestions you can try.

Option 1 – Try to update the hardware drivers

As stated, the problem might have something to do with hardware drivers so you can try to update these drivers and see if it works.
  • Reboot your computer into Safe Mode with networking support.
  • Tap the Win + R keys on your keyboard to open the Run dialog box.
  • After that, type “devmgmt.msc” in the field and hit Enter or click OK to open the Device Manager.
  • After opening the Device Manager, update all the outdated Hardware drivers on your computer.
  • Next, right-click on all the driver entries that are appropriately labeled, and then click the Update driver option.
  • Now restart your PC and check if the BSOD error is fixed or not.
Note: On the other hand, if a recent update has caused the System Interrupts high CPU usage, then you might want to roll back your hardware drivers to their previous versions. You can check with the Windows Update History to check out any recent updates as well as the previous ones.

Option 2 – Try to disconnect and reconnect all hardware and cables

A lot of users reported that they were able to fix the problem by disconnecting and reconnecting cables and hardware like scanners, printers, cameras can help in fixing the problem. In addition, you can also boot your computer in a Clean Boot State so that you can find the problematic hardware by hit and trial method. Refer to the steps below to do so:
  • Log onto your PC as an administrator.
  • Type in MSConfig in the Start Search to open the System Configuration utility.
  • From there, go to the General tab and click “Selective startup”.
  • Clear the “Load Startup items” check box and make sure that the “Load System Services” and “Use Original boot configuration” options are checked.
  • Next, click the Services tab and select the “Hide All Microsoft Services” check box.
  • Click Disable all.
  • Click on Apply/OK and restart your PC. (This will put your PC into a Clean Boot State. And configure Windows to use the usual startup, just simply undo the changes.)

Option 3 – Try to enable or disable Hardware

If you do not want to remove hardware, you can just disable them using the Device Manager. Note that this can also be applied to the internal hardware.
  • Tap the Win + X + M keys to open the Device Manager.
  • Next, navigate to the device you want to disable.
  • Then right-click on it and choose to disable the device.
Note: Make sure that you disable one device at a time and then give it a couple of minutes and check if there are any changes in the CPU usage to pinpoint the hardware. And if there is no change, you need to enable the device you’ve just disabled and then proceed to disable the next hardware device. If there are changes, then it’s probably the culprit. Just keep in mind that you must no disable any device that is needed to keep your system up and running.

Option 4 – Try to update the BIOS/UEFI

Updating the BIOS/UEFI can help you fix the high CPU usage of System Interrupts but as you know, BIOS is a sensitive part of a computer. Even though it is a software component, the functioning of the hardware depends on it largely. Thus, you must be careful when modifying something in the BIOS. So if you don’t know much about it, it’s best if you skip on this option and try the other ones instead. However, if you are well-versed in navigating the BIOS, then follow the steps below.
  • Tap the Win + R keys to open the Run dialog box.
  • Next, type “msinfo32” in the field and press Enter to open System Information.
  • From there, you should find a search field on the bottom where you have to search for the BIOS version and then press Enter.
  • After that, you should see the developer and version of the BIOS installed on your PC.
  • Go to your manufacturer’s website and then download the latest version of BIOS on your computer.
  • If you are using a laptop, make sure that you keep it plugged in until you have updated the BIOS.
  • Now double click on the downloaded file and install the new BIOS version on your computer.
  • Restart your computer to apply the changes made.

Option 5 – Run the Hardware and Devices Troubleshooter or the Performance Troubleshooter

Hardware and Devices Troubleshooter:
  • The first thing you need to do is click on Start and then on the gear-like icon to pull up the window for Settings.
  • After opening Settings, look for the Update and Security option and select it.
  • From there, go to the Troubleshoot option located on the left-hand side of the list.
  • Next, select Hardware and Devices from the list and open the Troubleshooter and run it. Once it is doing its job, wait for it to complete the process and then restart the system.
  • After the system restarts, check if the problem’s now fixed. If not, refer to the next option given below.
Performance Troubleshooter:
  • Tap the Win + R keys to open the Run dialog box.
  • Type “exe /id PerformanceDiagnostic” in the field and hit Enter to open the Performance troubleshooter.
  • Then click on Next to get started. Wait until the process is completed.
Read More
Repair Error Code 0x80070715 in 3 Simple Steps

How To Repair Error 0x80070715

What is Error Code 0x80070715?

Seeing obscure error codes like 0x80070715 on the screen again and again can be annoying simply because you have no idea why it keeps popping up? What does it mean? Well, for beginners you don’t have to decode it, we’ll make it simple for you. This error code indicates missing .dll files in the system or a corrupt registry. Due to this, you get locked from accessing and running applications on your system.

Solution

Restoro box imageError Causes

This error occurs largely because of two reasons:
  1. Disk damage due to cluttered registry
  2. The system gets infected by malware or a virus(es)
The error code 0x80070715 creates hurdles in the functioning of the applications. If this error is not repaired immediately it can result in serious damages like system crash and failure.

Further Information and Manual Repair

Many people pay hundreds of dollars to technicians to resolve this issue on their systems. Is it worth it? Not exactly!

How about we tell you a time and a money-saving way to fix the error code 0x80070715 on your PC?

The best way to resolve this issue on your system in seconds and also for free is to install Restoro. This is an advanced, powerful, and multi-functional system repair and a PC optimizer tool. It is smoothly integrated with numerous performance-driven utilities like registry cleaner, privacy error detector (anti-virus), Active X and Class error, and system stability detector. With this helper, you can resolve not only the error code 0x80070715 but also other types of PC-related errors. Whether the cause of the error code 0x80070715 on your PC is malware or cluttering cluttered disk, Restoro can be used to resolve them all. Its powerful and intuitive registry cleaner scans the registry and repairs it successfully. It removes junk files, internet history, temporary internet files, invalid entries, and also the files from the uninstalled programs still saved in the system’s registry. It wipes out all the clutter on your hard disk and cleans it in seconds freeing up plenty of space. It repairs the registry resolving the error 0x80070715 quickly. Nonetheless, if the error 0x80070715 is triggered due to viral infection or malware it removes them too. By downloading unknown files, accessing malicious websites, and opening phishing emails viruses can enter your PC. You may not be aware of these until error code 0x80070715 pops on your screen. It is wise to remove viruses right away because these give hackers access to your system which often results in data breaches and exposes users to system security threats. Restoro also works as a powerful antivirus. All malware, spyware, and viruses affecting your PC are scanned with the help of the advanced built-in privacy error detector utility. This utility embedded in the system detects viruses and malware in your system and removes them from your system successfully. Restoro is an easy-to-use repair tool. It has a simple layout and a user-friendly interface. It is easy to navigate through the repair tool, scan for errors and repair them without any hassle. Users of all levels, novice and experienced can use this tool with ease. You don’t need to be technically sound to work around this tool. Here's how to Install and run Restoro PC Fixer: In addition to this, you can run it on any Windows version. It is compatible with practically all versions. No matter what the cause for error code 0x80070715 maybe, you don’t need to get into the nitty-gritty of it and find a specific tool to resolve the issue. All you have to do is install this multi-functional Restoro on your system. Here are the 3 simple steps that you need to follow for successful repair:
  1. Click here to install Restoro.
  2. Scan your PC
  3. Press the Repair Tab to fix the issue right away
To ensure your PC is error-free, registry clean and your system runs at its optimum speed, scan your PC with Restoro regularly.
Read More
How to Fix Kernel_Data_Inpage_Error

Kernel_Data_Inpage_Error

Kernel_Data_Inpage_Error - What is it?

Kernel_Data_Inpage_Error is a BSOD (blue screen of death) error. Also, know as a 0x0000007A Stop error. This bug check indicates that the requested page of kernel data from the paging file failed to be read into memory. In simple words, this means that Windows has trouble reading from the memory. This can apply to both kinds of memory: stored memory on your hard drive and also the dynamic memory in your RAM. The Kernel_Data_Inpage_Error turns your computer screen all blue, stops the program being executed, and sometimes even leads to abrupt system shut down.

Error Causes

Kernel_Data_Inpage_Error may occur due to numerous reasons. The exact cause of this error can easily be found by going through the code displayed in the parameter of 0x00000007A. Let’s take a look at Kernel_Data_Inpage_Error parameter codes and the underlying causes of its occurrence:
  • 0xC0000009A- This parameter code triggers missing nonpaged pool resources
  • 0xC0000009C- This represents the installed hard disk drive has bad sectors.
  • 0xC0000000E- This indicates a hardware failure or an incorrect drive configuration

Further Information and Manual Repair

No matter what the cause for Kernel_Data_Inpage_Error may be, it is advisable to fix it immediately as blue screen of death error codes are considered to be critical PC errors that can cause serious damages and even result in valuable data loss. Here are a couple of ways to repair this issue on your system:

1. Call the ‘Chkdsk’ (check disk) command on your system.

Windows XP, Vista, and 7 users can call this command, by pressing Windows Key +F and type in ‘chkdsk’ and run. However, you can’t run it while actively using Windows but you can always schedule it to start automatically the next time your computer turns on. Wrap up what you need and then reboot. Chkdsk disk checking process can take a long time, especially on large and slow hard drives. To run this command on Windows 8, open Windows search by pressing Windows Key+ F and then type ‘cmd’. Then right-click on the command prompt and choose the option ‘Run as Administrator’. To continue with the disk checking process, here you will be prompted to provide your administrator authentication. Once you insert the administrator authentication, type the command ‘Chkdsk C:/f/r/x” where the letter ‘C’ indicates the drive you want to examine and repair. Run it to scan for Kernel_Data_Inpage_Errors on your system. Chkdsk command will detect and repair errors on the hard drive and then automatically reboot.

Limitations to this Solution:

‘Chkdsk’ is a value-adding inbuilt disk checking tool in PC new Window versions; nonetheless, this command has certain limitations. It is time-consuming. You may have to wait for a long time for it to scan your system. Also when disk check is running, you will have to stop all other activities on your system. Furthermore, Chkdsk does not scan and fix all registry errors and other PC-related errors. So, you can’t be 100% sure that it will resolve all the Kernel_Data_Inpage_Errors on your PC. Congratulations, you have just fixed Kernel_Data_Inpage_Error in Windows 10 all by yourself. If you would like to read more helpful articles and tips about various software and hardware visit errortools.com daily. Now that’s how you fix Kernel_Data_Inpage_Error in Windows 10 on a computer. On the other hand, if your computer is going through some system-related issues that have to get fixed, there is a one-click solution known as Restoro you could check out to resolve them. This program is a useful tool that could repair corrupted registries and optimize your PC’s overall performance. Aside from that, it also cleans out your computer for any junk or corrupted files that help you eliminate any unwanted files from your system. This is basically a solution that’s within your grasp with just a click. It’s easy to use as it is user-friendly. For a complete set of instructions in downloading and using it, refer to the steps below Perform a full system scan using Restoro. To do so, follow the instructions below.
      1. Download and install Restoro from the official site.
      2. Once the installation process is completed, run Restoro to perform a full system scan. restoro application screen
      3. After the scan is completed click the “Start Repair” button. restoro application screen
Read More
Epic games and many more coming in Win store
Microsoft store is ready and prepared for Windows 11 official release on October 5th and it is coming with some surprises. Windows storeIt has officially confirmed that many open source and free applications will be in it like Opera, VLC, discord, Libre office, etc. It seems that Microsoft wants to place its store as one place to go for all of your software needs. Another great surprise is the coming of Epic games store implementation. It was officially confirmed but not explained in detail, will we have Epic store opened in Windows store or we will only get installer as a package we will see but this is some great news. 
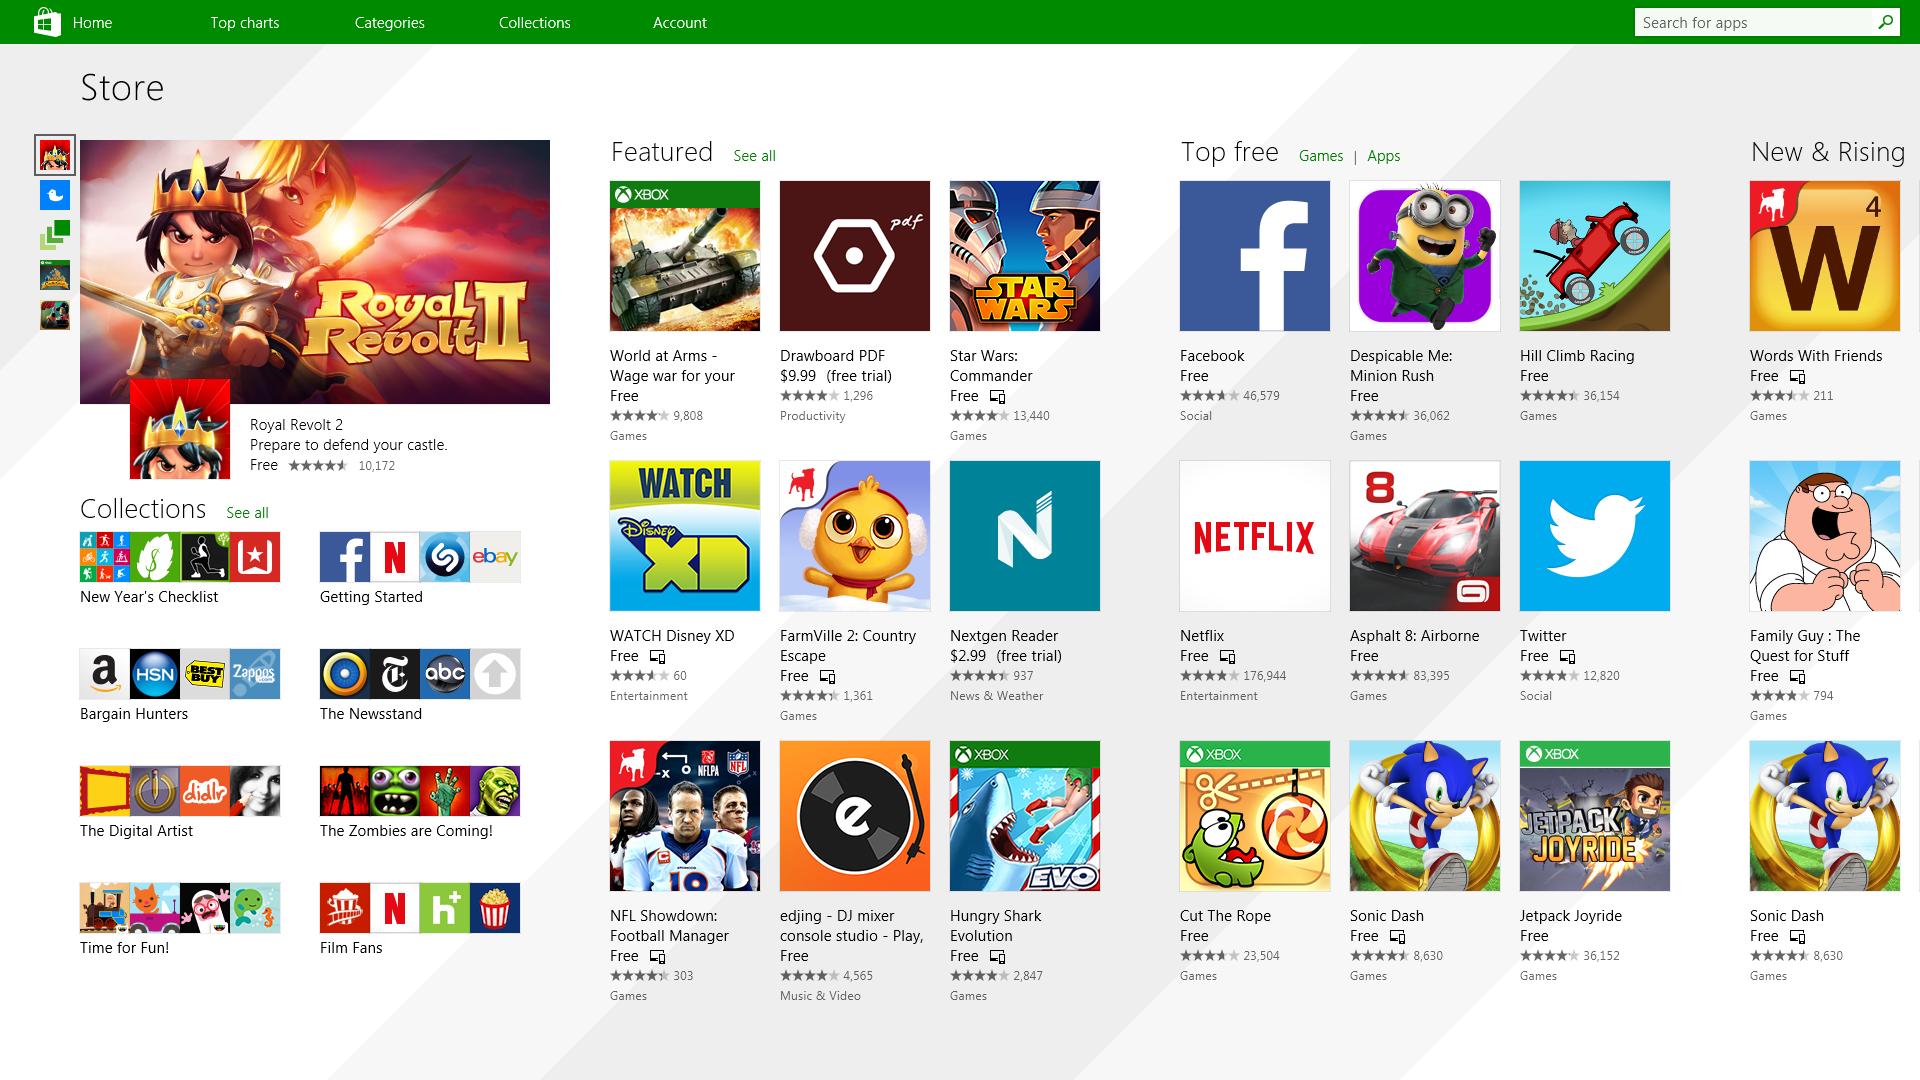
As for how it states now, it seems that the Windows store aims to eliminate searching the web for applications and bring them all into one environment with reviews and ratings so you know which one to install and use. It also features a great search engine to find proper applications for your needs. The new store will come to Windows 10 as well but after all Windows 11 has been mostly released and adopted. So expect it via update in two or three months' time. It would be great if some larger companies decide to join MS stores like Autodesk, Adobe, the Foundry, etc so you can install everything you need from it but one can only hope.
Read More
Combine Hard drives with storage spaces
Why combining hard drives with storage spaces? Ok, I will admit it, I am a modern digital hamster when it comes to digital goods. I like to collect stuff and more than anything else I like to have all of that at the tip of my fingers. And how digital goods grow in size themselves (movies on Blu-ray are like 50GB each) and the collection grows in size single hard drive is starting to be completely obsolete when it comes to storage. Sometimes we will need large storage for these kinds of personal collections, sometimes we will need it for work reasons. Whatever your reason might be Windows 10 is offering us a solution via Storage spaces. Storage spaces is an integral part of Windows and it is meant as a tool to provide you with a RAID environment without a RAID controller. Of course, combining multiple hard drives via storage paces instead of RAID will not be so fast or stable but for home use of storing a large quantity of data is perfectly enough. With Storage Spaces you will also have an option to reduce some space for increased security of data loss if by any chance one of your HDD fails.

How to Create a Storage Space

To create storage space in Windows, press ⊞ WINDOWS + R to open the run dialog. keyboard with windows and r markedIn the run box type in Control Panel and press ENTER run dialog with control panel typed inIn Control Panel find Storage Spaces and left-click on it. Control panel with storage spaces markedOnce storage spaces open, left-click on Create a new pool and storage space storage spaces manage storage spacesOnce you click on create new, you will be greeted with a list of hard drives you can use for this operation. storage spaces select drivesPlease note that all hard drives you choose will be completely erased and formatted and then assign a single drive letter. Click on Create pool. storage spaces resiliency type optionsYou will find yourself in new storage options where you can assign a drive letter, give storage space a name, etc.

Storage spaces types

One thing I would like to focus on here is resiliency type, when you expand the resiliency type drop-down menu you will see 4 options inside. Simple, Two-way mirror, Three-way mirrors, and Parity. Simple: If you choose Simple as an option, you will have maximum hard drive space but no resiliency at all, meaning that if by any chance any of your hard drives malfunction, you are losing your data from that drive completely. Two-way mirror: This option will save your data if one of your drives fails but you need at least 2 drives and storage space will be limited since some of it will be a safe backup option for the case of a drive failure. However if one of your drives fails, you can replace it in a second and keep on working as nothing happened. Three-way mirror: This option similar to the previous one will offer you safe data-keeping from a hard drive failure. this option will save your data even if 2 hard drives malfunction but it will require having 5 of them connected in order to be able to choose this option. Parity: Maybe the most popular option among people who want to have 2 or 3 drives merged but do not want to lose too much space of the two-way mirror option. It offers some protection and it does not take so much space as two-way does, let us say it is a kind of win-win situation.

Conclusion

I personally go for simple and have an important backup on optical drives but only for reason I could use more space, know that this way is requiring from me to always have a backup in optical media and that I will need to restore all of it back if even one HDD fails which could take time. But if this way is ok with you, go for it, you will have more space to use.
Read More
1 2 3 162
Logo
Copyright © 2022, ErrorTools. All Rights Reserved
Trademarks: Microsoft Windows logos are registered trademarks of Microsoft. Disclaimer: ErrorTools.com is not affiliated with Microsoft, nor claim direct affiliation.
The information on this page is provided for information purposes only.
DMCA.com Protection Status