How to Fix REGISTRY_ERROR in Windows

As you know, you can encounter Blue Screen errors at any given point after your computer boots up and can just reboot it randomly which results in loss of unsaved work. One of these Blue Screen errors is the “REGISTRY_ERROR”. This kind of Stop error has a bug check value of 0x00000051 which indicates your computer’s registry has encountered a severe error. There could be a number of causes for this error but at the time of writing, it is quite difficult to narrow them down to one component. If you face this kind of Blue Screen error, worry not as this post will guide you in fixing it.

As mentioned, this error indicates that there is something wrong with the registry, particularly an I/O error while it tried to read one of its files. This may be caused by hardware issues or file system corruption. It could also be due to failure in a refresh operation which is only used by the security system and only when resource limits are encountered. To fix the Registry_Error Blue Screen, you can try to use the CHKDSK utility or the System File Checker, or the DISM tool or run the Blue Screen troubleshooter. You may also try to reset your computer or repair Windows by using installation media.

Option 1 – Run the Check Disk utility

The first thing you can do to fix the REGISTRY_ERROR Blue Screen error is to run the Check Disk utility. How? Follow these steps:

  • In the Windows Search box, type “command prompt” and from the search results, right-click on Command Prompt and select “Run as administrator”.
  • After opening Command Prompt, type this command and tap Enter: chkdsk <Drive Letter>: /f /r /x /b
  • The command you entered will start to check for errors and fix them automatically. Else, it will throw an error message saying, “Chkdsk cannot run because the volume is in use by another process. Would you like the schedule this volume to be checked the next time the system restarts? (Y/N)”.
  • Tap the Y key to schedule Disk Check the next time your computer restarts.

Option 2 – Run the Blue Screen Troubleshooter

The Blue Screen troubleshooter is a built-in tool in Windows 10 that helps users in fixing BSOD errors like REGISTRY_ERROR. It can be found in the Settings Troubleshooters page. To use it, refer to these steps:

  • Tap the Win + I keys to open the Settings panel.
  • Then go to Update & Security > Troubleshoot.
  • From there, look for the option called “Blue Screen” on your right-hand side and then click the “Run the troubleshooter” button to run the Blue Screen Troubleshooter and then follow the next on-screen options. Note that you might have to boot your PC into Safe Mode.

Option 3 – Run System File Checker

  • Open Command Prompt with admin privileges.
  • After that, execute this command: sfc /scannow
  • Once the scan is completed, restart your computer and then check if the REGISTRY_ERROR is now fixed.

Option 4 – Run the DISM tool

You can try running the Deployment Imaging and Servicing Management or DISM tool to fix the REGISTRY_ERROR Blue Screen error. Using this built-in tool, you have various options such as the “/ScanHealth”, “/CheckHealth”, and “/RestoreHealth”.

  • Open the Command Prompt with admin privileges.
  • Then type in the following commands and make sure to hit Enter right after you type each one of them:
    • Dism /Online /Cleanup-Image /CheckHealth
    • Dism /Online /Cleanup-Image /ScanHealth
    • exe /Online /Cleanup-image /Restorehealth
  • Do not close the window if the process takes a while as it will probably take a few minutes to finish. Once it’s done, restart your computer.

Option 5 – Reset your computer

  • Tap the Win key or click on the Start button located in the Taskbar.
  • Then click on the Power button at the bottom right portion of the screen.
  • Next, press and hold the Shift key on your keyboard and then click on Restart. This will restart your Pc into the Advanced Startup options.

Note: Once you have access to the Advanced Startup options, you have to go to the setting which allows you to Reset your Windows 10 PC. All you have to do is select Troubleshoot > Reset this PC to reach the following screen

Afterward, select either the “Keep my files” option and then proceed to the next on-screen instructions that follow to reset your Windows 10 computer without losing your files.

Option 6 – Try to perform repair install by creating a Windows 10 installation media

  • Click this link and then click the Download Tool Now button.
  • Next, click the “Use the tool to create installation media (USB flash drive, DVD, or ISO file)…” option and follow the next given instructions on the screen.
  • Now select the ISO file option in step 5.
  • After that, you should now have an ISO file.
  • Next, go to the location where you’ve downloaded the ISO file.
  • Then right-click on the Windows 10 ISO file and select the Open with option and then select File Explorer.
  • Now click on “setup.exe” and follow the next instructions that appear on the screen. When asked, you have to select either Nothing (clean install) or Keep personal files only option. Take note that you must not select the “Keep personal files, apps, and Windows settings”.
If you like to learn and find out more about various Windows errors, and how to repair them go to our vast archive or use search to find articles that will explain and help you in solving your issue.
However, if you prefer to do things fast and with automatization then we are proposing to use an automated solution for your issues. The application that we are recommending is Advanced System Repair Pro
Advanced System Repair utilizes multiple tools all in one to give you a quick, simple, reliable, and very thorough diagnosis of your PC. It brings you all the tools you need in one program to clean, fix, protect, optimize and boost your PC!
1-Click Maintenance
All the tools to make it simple and easy! It's like having a professional technician at the click of a mouse.

Junk Cleaner
Keeping your computer free from unnecessary clutter also helps make your computer last longer. Like any other machine, if you keep it clean and take care of it, it will serve you better for longer!

Optimize background apps
Optimize applications background activity with the built-in Application Optimizer feature.

Disk Defrag
With a simple 1-click, Advanced System Repair speeds up your PC by assembling fragmented files on your machine and organizing them more efficiently.

Malware Removal
Finds and removes all types of harmful malware including trojans, worms, bots, adware, spyware, PUPs, and more!

Privacy Cleaner
The all-in-one privacy suite to Clean Your Tracks & Protect Your Privacy! Make your computer safe, secure, and more efficient!

System Tweak/Optimizer
ASR will analyze your complete system and settings to adjust your PC to function at its maximum performance.

Registry Cleaner
Over time, as you install and uninstall applications, the registry can become cluttered with old entries and broken settings which can result in program crashes, and annoying messages and slow the computer down.
Visit our Advanced System Repair Pro Download page to inform yourself about all the benefits of this software and get a free trial copy of it.
advanced system repair pro

Advanced System Repair Pro

One-click automated PC repair solution
ASR logo
With Advanced System Repair Pro you can easily
Replace damaged files
Restore performance
Free disk space
Remove Malware
Protects WEB browser
Remove Viruses
Stop PC freezing
DOWNLOAD
Privacy Policy | Terms of Use | Uinstall
Advanced System Repair Pro is compatible with all versions of Microsoft Windows including Windows 11

Share this article:

You might also like

Fix NETWORK_FAILED error in Chrome
Although the Google Chrome browser is one of the most used browsers, a lot of things could still go wrong when browsing the web using it. One of the errors you might encounter is the “ NETWORK_FAILED ” error. This kind of error in Chrome indicates that Chrome wasn’t able to send your request through the network connection. It could be that your computer has trouble connecting to a stable internet connection or there is some plugin in your Chrome browser that is causing the issue. The worst-case would be malware. But worry not for this post will guide you on what you can do when you encounter the NETWORK_FAILED error in Google Chrome. Make sure to follow each one of the options given below and see which one of them worked best for you.

Option 1 – Disable or remove any unwanted extensions in Chrome

As you know, browser extensions help in enhancing the browsing experience but there are also times when it does exactly the opposite, and such is the case with the NETWORK_FAILED error in Chrome. It could be that one of the extensions in your browser is the one that’s causing the trouble. To disable or remove these unwanted extensions, here’s what you have to do:
  • Launch Google Chrome, press Alt + F, move to More tools, and click Extensions.
  • Look for Search.tb.ask.com or any other unwanted add-ons, click the Recycle Bin button, and choose Remove.
  • Restart Google Chrome, then tap Alt + F, and select Settings.
  • Navigate to the On Startup section at the bottom.
  • Select “Open a specific page or set of pages”.
  • Click the More actions button next to the hijacker and click Remove.

Option 2 – Run the Malware Scanner and Cleanup tool in Chrome

If removing or disabling the unwanted extension didn’t help in fixing the error, you can try using the built-in malware scanner and cleanup tool in Google Chrome. These tools help you get rid of any unwanted pop-ups, ads, unusual Startup pages, toolbars, and even malware.

Option 2 – Run the Malware Scanner and Cleanup tool in Chrome

  • Launch Google Chrome and then tap the Alt + F keys.
  • After that, click on Settings.
  • Next, scroll down until you see the Advanced option, once you see it, click on it.
  • After clicking the Advanced option, go to the “Restore and clean up the option and click on the “Restore settings to their original defaults” option to reset Google Chrome.
  • Now restart Google Chrome.

Option 3 – Try to disable the Proxy

If you are using a proxy, you might want to consider disabling it as it could have something to do with the NETWORK_FAILED error.
  • Tap the Win + R keys to open the Run dialog box.
  • Then type “cpl” and hit Enter or click OK to open the Internet Properties.
  • After that, go to the Connections tab where you should see the LAN settings. Click on it.
  • Next, uncheck the “Use a Proxy Server for your LAN” and ensure that the “Automatically detect settings” option is checked as well.
  • Then click Ok and then Apply to save the changes made.
  • Restart your PC.

Option 4 – Flush DNS and reset TCP/IP

  • Click the Start button and type in “command prompt” in the field.
  • From the search results that appear, right click on Command Prompt and select the “Run as administrator” option.
  • After opening Command Prompt, you have to type each one of the commands listed below. Just make sure that after you type each command, you hit Enter
    • ipconfig /release
    • ipconfig /all
    • ipconfig /flushdns
    • ipconfig /renew
    • netsh int ip set dns
    • netsh winsock reset
After you key in the commands listed above, the DNS cache will be flushed and the Winsock, as well as the TCP/IP, will reset.
  • Now restart your computer and open Google Chrome then try opening the website you were trying to open earlier.

Option 5 – Delete the WLAN Profiles

Deleting the WLAN Profiles might be a good idea if you are not able to connect to the internet on your computer and if you’re using Wi-Fi. It could be that the networks that were connected previously have gone rogue which is why it is not connecting properly. And so deleting the WLAN profiles would be for the best. That should do it.
Read More
Fix Windows Activation error code 0xC004F078
As you know, Windows 10 has a complicated mechanism for Activation which helps in the verification of a genuine copy of Windows 10. However, there are times when you might encounter some errors during the activation process. One of these errors is the error code 0xc000f074. This kind of error could be due to the Key Management Service or KMS which is unreachable by the client computer or if the key used in the SLSetAuthenticationData function call is incorrect. This kind of error mostly affects surfaces on computers that are upgraded from either Windows 7 or Windows 8.1 to Windows 10. In such cases, you may encounter any of the following error messages:
“Windows is unable to reach your company’s activation service. Please connect to your corporate network. If you are connected and continue to see the error, contact your system administrator. You can also click on the error detail to find the exact error. Error code: 0xC004F074.” “Activating Windows(R), (Key hash)… Error: 0xC004F074 The Software Licensing Service reported that the computer could not be activated. No Key Management Service (KMS) could be contacted. Please see the Application Event Log for additional information.” “Error 0xC004F074, SL_E_AUTHN_MISMATCHED_KEY, The Software Licensing Service reported that the key is mismatched.”
To fix the Windows 10 Activation error 0xC004F078, you have to use the correct key for your type of Windows copy or use Command Prompt to reinstall the key or you could also try running the Activation troubleshooter.

Option 1 – Try running the Windows 10 Activation Troubleshooter

The first thing you can do to resolve the Activation error code 0xc000f074 is to run the Windows 10 Activation Troubleshooter. To do so, follow these steps:
  • Go to Settings and then select Activation.
  • After that, click on the Windows Activation and then troubleshoot. This will help you address most of the commonly found activation issues in Windows devices.
The Windows 10 Activation Troubleshooter will determine if your license key is a valid Windows 10 digital license for an edition that is not currently installed. If it turns out that it’s not, then the troubleshooter will show you how to install the correct edition.

Option 2 – Try to use the correct key for the type of Windows version you have

If the Windows Activation troubleshooter wasn’t able to resolve the error, then you can try using the correct key for your type of Windows version. All you have to do so is check the type of your Windows copy if it’s OEM, retail, or volume. And make sure that you have the correct, valid product key for your operating system.

Option 3 – Try to use Command Prompt to reinstall the key

  • In the Start Search, type “command prompt” and right-click on Command Prompt from the search results, and then select “Run as administrator”.
  • After that, execute this command to uninstall the existing key: vbs /upk
  • Next, you need to install the KMS product key by executing this command: vbs /ipk <The KMS Product Key>
  • Once you’re done, you will see a prompt that’ll tell you whether the operation was either successful or not.
  • To active, the KMS product key online, use this command: vbs /ato
  • Use this command to activate the key using the telephone: exe 4
  • After you’ve activated the KMS product key, restart the Software Protection Service. You can also verify the Activation Status to check if your fix was successful or not.

Option 4 – Contact Microsoft Support for assistance

If you’re at your wits’ end in trying to upgrade your computer, you should consider contacting Microsoft Support for help as they can offer you various options that would make fixing Windows Activation error code 0xc000f074 a lot easier and faster.
Read More
Make START menu full screen in Windows 10
Hello and welcome to another great tutorial from errortools.com. Today we will be making Windows START menu full screen. First introduced in Windows 8.1, the start menu has been shifted from full screen to gadget like in Windows 10 but if you prefer to have it over the entire screen with all of its glory and large icons you can do so and we will be happy to show you how. Press ⊞ WINDOWS and choose settings. Windows 10 Star menu with marked settings iconFrom the settings screen, choose Personalization. Windows 10 settings menu with marked Personalization groupUnder personalization options click on START. windows settings start screen sectionAnd then on the right part click on the button under Use Start full screen to turn it ON windows settings start screen switch for full screenThat's it, your start menu is now full screen.
Read More
Delete last 15 min of browsing history on phone
google browsing 15min history delete
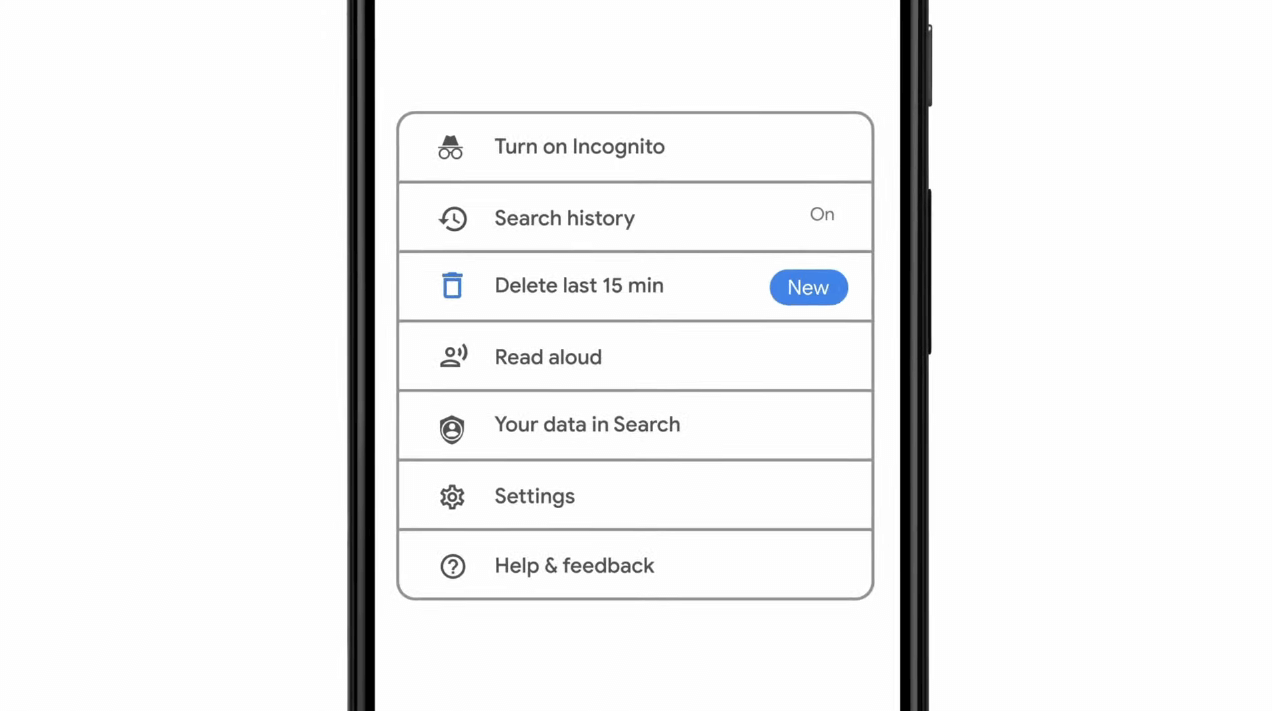
As previously announced by Google feature to quickly delete the last 15min of browsing history via one button is rolling out now. For now, only Apple users will be available to use this feature but the Android update is scheduled for later this year, a strange move by Google but it is what it is. For anyone who is unfamiliar with this feature, basically, Google wants a quick way to remove the last 15min of browsing history as a supposedly stated request to make deleting browsing history much easier. Google came up with this idea so you can keep the previous history intact but remove just 15min time frame, no additional explanation was given on why 15 but I presume it is some round number that came up as the middle one with research, read telemetry info. Using quick delete requires being signed into Search with a Google account. Users can access the option by simply tapping on the avatar icon to access the settings then choosing "Delete last 15 minutes."
Read More
Diablo 2 is trending after launch looking good
Finally, some good news for Blizzard entertainment after tons of bad stuff happening around it regarding lawsuits and people layoffs. Diablo 2 has become the most-watched game on Twitch after its official release and sold copies are on a satisfactory level. Diablo 2 resurrected
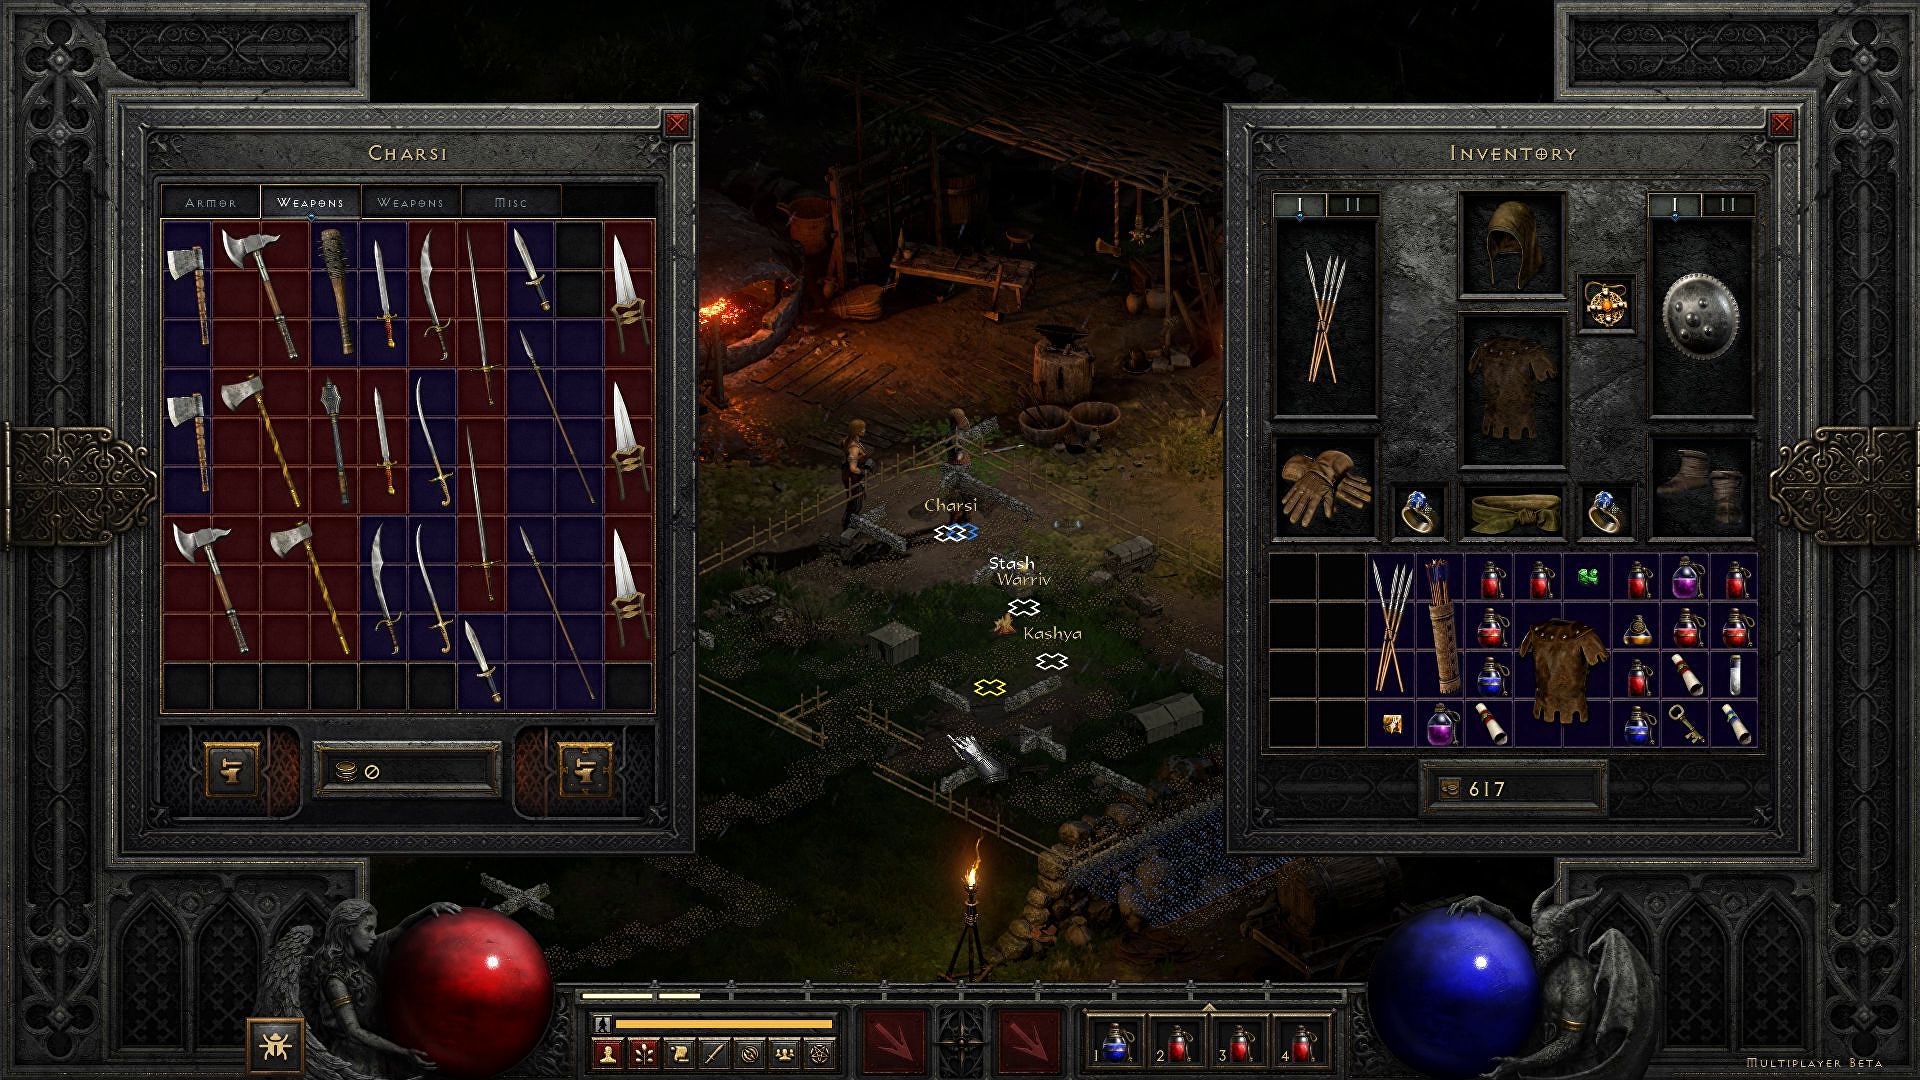
For people not familiar with recent events, the state of California has sued Blizzard for various things including discrimination and offensive behavior. Later Blizzard executives were caught shredding some evidence and things just started to go to worse from there. After much drama, many people believed that this is the end for Blizzard entertainment and that they would not be able to recover from this since the community has sided with California and Blizzard has received a large punch as many subscribed WOW players have left the game. Things are not so grim as they were looking as their Diablo 2 remake has made moderate success despite being released in these troubling times and there are rumors of Overwatch 2 planned release date as of the first quarter of 2022. overwatch 2
Read More
How to Enable Last Active Click feature
Microsoft has started to use group along with every open window in the Taskbar ever since the release of Windows 10. Early on, they used to show an individual entry for each one of the windows after grouping them which makes the taskbar look cleaner and organized. However, the main issue lies in the fact that you have to hover on your desired window to get on to them. At the time of writing, you need to tap the Ctrl key and click on the taskbar icon to open the last active window but you have to only click on the program’s taskbar icon after you apply the tweak given in this post for the last active window to open. Take note that the “Last Active” windows feature will only work if the taskbar buttons are combined. Before you get started doing the instructions given below, you need to create a System Restore Point first since you will be dealing with registry files and modifying some of the critical settings in Windows 10. Once you’ve done this, proceed to the given steps below. Step 1: Tap the Win + R keys to open the Run dialog box and then type “Regedit” in the field and hit Enter to open the Registry Editor. Step 2: If a User Account Control or UAC prompt appears, just click on Yes to proceed to open the Registry Editor. Step 3: Next, navigate to the following registry path:
HKEY_CURRENT_USERSoftwareMicrosoftWindowsCurrentVersionExplorerAdvanced
Step 4: From there, right-click on the right side of the panel and select New > DWORD (32-bit) and then name it “LastActiveClick”. Step 5: After that, double click on the newly created DWORd to modify its value. Put “1” as its value data. Step 6: Then click OK and close the Registry Editor. Step 7: Now restart your computer to successfully apply the changes made. Note: In case you want to revert back to the default configuration, all you have to do is set the value data of LastActiveClick to “0” or simply delete that DWORD and restart your computer to successfully apply the changes made.
Read More
Should you buy used GPU in current market?
Things have stirred lately with Chinas ban on crypto mining and many used GPUs will flow the market probably. But should you buy a used GPU? Short answer: NO, long answer: keep on reading to find out why.

GPU 1080tiGPU shortage and its cause

As you all know by now, we live sadly in a world struck by a global Pandemic. Due to this awful disease and measures taken against it, many people are either working from home or are at home making the manufacturing of new chips problematic while demand on the market has raised. Throw into that mix crypto mining which has raised in popularity and you have, well today's market where we have GPU shortage. Now with the latest news that China has banned the mining of cryptocurrency, there is to be expected that at some point in time mining cards used there will fit the market in the whole world. Sadly even with a large quantity of GPUs that will become available, the overall price of cards will not be much lowered I am afraid since demand is still very high and many people would not want to purchase used mining cards and neither should you.

Be prepared for the worst scenario

Although this sounds very pessimistic and in most cases, it will not turn out to be true, you should always prepare yourself mentally that you might be in that lower percentage that will end up with a really bad GPU. What has come up to be absolutely true when considering GPU that were mining is that if anything at all can be done to GPU in order to increase performance, it has been done. Miners want to optimize and almost every GPU if could be overclocked, it was overclocked. Extensive mining also means that thermal paste has been dried and it is pretty useless at this point and there is a very high chance that fans and heat sinks will need much cleaning or even replacement raising the price of the card itself for mentioned paste, fans, and heat sinks. There's no way to tell what the previous owner might have done with a graphics card when you're shopping online, so our advice is to assume the worst. Don't trust the seller to give truthful information. Any listing that says it was "never used for mining" at this point is probably a lie.

Age of the GPU matters

Date when GPU itself has manufactured really matters. Newer cards even if used extensively have been used for a much shorter period of time and are not so damaged were ones produced a few years ago have seen a lot of action. Let’s say that you get RTX 3060, In the worst-case scenario it has been mining since late February of 2021 and basically, it is still under warranty so it should behave OK and put some good work in gaming even in that state. On another hand, if we take for example GTX 1080Ti which is 4 years old GPU things start to change drastically. 4 years GPU could be worn out even if it was used just for extensive gaming sessions let alone for mining.

No return policy and seller rating

Most of the time you will run into a product that cannot be returned or no refunds policy. This should bring a red flag right away and deter you from purchase. Sellers with the highest ratings are more trustworthy since many of them will not want to destroy their reputation but these will probably not even have these kinds of merchandise in their store. Buying with a poor rating seller and no return policy on a product is just asking for trouble. And although some stores do have arbitration and will stand on the customer side there is no guarantee for that and it will take too much time to process.

If you really must buy a second-hand GPU

Of course in these troubled times sometimes due to malfunction or any other reason, there would not be another choice than to buy a second-hand GPU. In this case, if there is no other option consider sellers with many positive ratings. If you can buy locally that would even be better or the best-case scenario would be if you could visually see and inspect GPU itself in order to see in what state it is. Look for warranty stickers to see if they are thorn and the card has been tampered with. Also take a good look at screws, if they have scratches card has been opened, probably to replace fan or heating sinks which means that it has worked a lot.

Conclusion

It is very difficult to give the best possible advice on this situation since of GPU shortage, but I would much prefer a new GPU with lower performance than a hi-performance one which was mining.
Read More
How to Fix the Socket Error 10060

Repair Socket Error 10060

Socket Error 10060 - What is it?

Socket Error 10060 is a typical Outlook Express error. This error often occurs when the connection to the server fails. It specifically refers to a timeout while communicating with the email providers servers. The vast majority of all emails use SMTP for outgoing mail. Socket error 10060 in most instances is related to the SMTP settings for the user’s email. The error message is sometimes displayed in the following format:
Outlook Express Socket Error10060 - The connection to the server failed Account:’ your account’
Another thing you must know about this error is that it only stops the user from sending emails. This means that you can only receive emails, not send them.

Solution

Restoro box imageError Causes

The cause of this error code is hard to narrow down typically because there are many causes that can trigger the socket error code 10060. Some of the most common causes of this error code are:
  • Issues in email settings
  • Authentication settings
  • Firewall settings
  • Malware
Though this is not a critical error code it is advisable to fix it immediately without any delays. This error can hamper your communication via email and slow down your work productivity especially if you use Outlook for communication across the organization.

Further Information and Manual Repair

Here are some of the many methods to fix and resolve this error code. To help you resolve this issue, we have selected and listed down the best, quick, and easy do-it-yourself methods. Try them and repair Socket error code 10060 all by yourself without any professional assistance.

Method 1 - Check the Names of POP3 and SMTP Servers

To begin with, first check the names of the POP3 and SMTP servers to ensure that they are correct. Then check the outgoing SMTP port. Contact your email provider to determine the correct settings. Sometimes email providers change this value more than any other in their individual settings. Get it verified. Change the settings if needed.

Method 2 - Outgoing SMTP Server Requires Authentication

Sometimes the error code may occur due to authentication issues. If this is the reason then, don’t worry it is easy to fix. Simply go to the settings options and check the box ‘My server requires authentication’. Once you check the box, try sending the email again. This is most likely to resolve the socket error 10060 on your PC.

Method 3 - Disable Firewall

Your Firewall security may sometimes be the reason for socket error 10060 too. Therefore if after trying method 1 and 2, the error still persists, then it is advisable to disable firewall. Once you disable it, try sending an email using your Outlook account. If it works, the error is resolved.

Method 4 - Scan for Malware

There is a possibility that the Socket error 10060 is popping on your PC due to malware infection. If so, then it is advisable to download Restoro. This is a highly functional and a user-friendly PC fixer deployed with a powerful antivirus and several other scanners. Run it on your PC to scan for malware. It detects and removes all types of malware including Trojans, viruses, adware, spyware, and more in seconds. Click here to download Restoro to resolve socket error 10060 on your system today.
Read More
This operation failed as no adapter ...
If you have set a static IP address manually in your Windows 10 computer and you encounter an error saying, “This operation failed as no adapter is in the state permissible for this operation”, then you won’t be able to connect to any network. Many users have reported that they were unable to connect to any network after they set their IP addresses manually and all they see is a red cross symbol on the network icon located at the left-hand side of the taskbar. And upon trying to release the IP configuration and renew the address using Command Prompt or Windows PowerShell, they are getting the error instead. Users also noted that their internet connection is fine since they were able to connect to their Wi-Fi connection on their mobile devices. However, they find it hard to connect to the internet using their PCs. To fix this issue, here are some possible fixes you can check out. Make sure to follow each one of the instructions carefully.

Option 1 – Try to run the Internet Connections troubleshooter

As you were not able to connect to your internet connection using your PC, you can try to run the Internet Connections troubleshooter as it might resolve the problem. Refer to the following steps to run this troubleshooter:
  • Tap the Win + I keys to open Settings.
  • After opening Settings, go to Update and Security.
  • Next, navigate to the Troubleshoot pane and select the Internet Connections section and click the Run Troubleshooter button to get started.
  • Wait until the troubleshooter is finished doing its job and then try connecting to your network again.

Option 2 – Try to perform Network Reset

As pointed out, the “This operation failed as no adapter is in the state permissible for this operation” error occurs due to the static IP you’ve set. Thus, to fix it, you can try to perform a Network Reset. This will reset the entire network configuration including your IP address. To perform Network Reset, follow these steps:
  • Tap the Win + I keys to open Settings.
  • From there, go to the Network and Internet section.
  • Next, scroll down and look for “Network Reset” under the status pane.
  • After that, click on Network Reset and then on Reset now to start resetting the network configuration. Once done, check if it is able to fix the error or not.

Option 3 – Try to update or rollback or uninstall the Network drivers

You might also want to update, roll back, or disable your Network drivers to fix the “This operation failed as no adapter is in the state permissible for this operation” error.
  • Tap the Win + R keys to launch the Run window and then type in the “MSC” command and hit Enter to open the Device Manager window.
  • Under the Device Manager, you will see a list of drivers. From there, look for the Network Adapters and expand it.
  • Then right-click on each one of the Network drivers and depending on your preference, you can either select “Update driver”, “Disable device” or “Uninstall device”.
  • After that, restart your PC and see if it helped in fixing the netio.sys Blue Screen error.

Option 4 – Try to reset Winsock, TCP/IP & Flush DNS

You might also want to try resetting Winsock, TCP/IP, and flushing DNS might help you resolve errors. To do so, follow these steps:
  • Right-click on the Start button and click on Command Prompt (administrator) so you can pull up an elevated Command Prompt.
  • After that, execute each one of the commands listed below. And after you typed in one after the other, you have to hit Enter.
  1. netsh winsock reset – type in this command to reset Winsock
  2. netsh int ip reset resettcpip.txt – type in this command to reset TCP/IP
  3. ipconfig /flushdns – type in this command to flush the DNS cache
  • Next, restart your PC and check if the problem’s fixed.
Option 5 – Temporarily disable Firewall and third-party antivirus Firewall and antivirus programs are known to block files the instant it detects a threat to the system. However, there are some cases when it can also block a file even when it’s a safe one. Thus, your antivirus or firewall programs might be the reason why you can’t download anything on your Windows 10 computer. To isolate the issue, you need to temporarily disable both the Firewall and antivirus programs and then check if you can now download anything from the internet. Do not forget to enable them again as disabling them can leave your computer vulnerable to cyber threats.
Read More
Fixing the “Failed to register a VB Script dll” Error in Windows 10
If you open any program in your Windows 10 PC such as Outlook and suddenly get an error message saying, “Failed to register a VB Script dll. Reinstall or run Regsvr32.exe Vbscript.dll to self-register”, read on, as this post will guide you on what you can do to fix it. The obvious solution to this problem is by re-registering the “vbscript.dll” file on your computer. Refer to the instructions given below to re-register the VB Script DLL file and to fix the error.
  • Step 1: Open the Command Prompt as an administrator from the WinX Menu.
  • Step 2: After opening Command Prompt, type in the following command and tap Enter on your keyboard.
regsvr32.exe vbscript.dll
  • Step 3: Once you enter the command, it will re-register the VB Script DLL file using the Windows OS tool called Regsvr32 or regsvr32.exe. This tool is a command-line utility used to register and unregister OLE controls such as DLL and ActiveX (OCX) controls in the Windows environment. After the execution of the command, you should see the following pop-up on your screen which means the re-registering of the concerned DLL file has succeeded.
On the other hand, if re-registering the DLL file didn’t work, then you can try logging in using an administrator account and then register the DLL file again or you could also use the System File Checker to figure out what the problem really is and automatically fix it. System File Checker or SFC is a built-in command utility that helps in restoring corrupted files as well as missing files. It replaces bad and corrupted system files with good system files. To run the SFC command, follow the steps given below.
  • Tap Win + R to launch Run.
  • Type in cmd in the field and tap Enter.
  • After opening Command Prompt, type in sfc /scannow
The command will start a system scan which will take a few whiles before it finishes. Once it’s done, you could get the following results:
  1. Windows Resource Protection did not find any integrity violations.
  2. Windows Resource Protection found corrupt files and successfully repaired them.
  3. Windows Resource Protection found corrupt files but was unable to fix some of them.
Read More
1 2 3 162
Logo
Copyright © 2022, ErrorTools. All Rights Reserved
Trademarks: Microsoft Windows logos are registered trademarks of Microsoft. Disclaimer: ErrorTools.com is not affiliated with Microsoft, nor claim direct affiliation.
The information on this page is provided for information purposes only.
DMCA.com Protection Status