How to Fix Plugin.dll Error

Repair Plugin.dll Error

Plugin.dll Error - What is it?

Plugin.dll is a dynamic link library file associated with Adobe Photoshop CC powered by Adobe Systems Incorporated for the Windows Operating System.

DLL are small programs similar to ‘exe’ files which allow multiple software programs to share the same functionality. It is used to call commands, load applications, and successfully execute applications.

Plugin.dll error messages may appear during program installation, while a plugin.dll related software program (Adobe Photoshop CC) is running, during startup and shutdown.

Solution

Restoro box imageError Causes

Plugin.dll errors may occur due to multiple reasons such as:

  • Missing or corrupt Plugin.dll files
  • Viral infection
  • Issues in the Windows registry
  • Broken registry keys

Plugin.dll errors may appear on a Windows-based computer as the following:

  1. “Plugin.dll not found."
  2. “The file Plugin.dll is missing."
  3. “Cannot register Plugin.dll."
  4. "Cannot start Adobe Photoshop CC. A required component is missing: Plugin.dll. Please install Adobe Photoshop CC again."

All the causes of the plugin.dll error code are associated with the registry. It is advisable to repair this error before it causes serious damages to your system.

Further Information and Manual Repair

To repair the plugin.dll error on you system, you don’t have to hire a technician or be adept at computer programming.

The best way to resolve this error code is to download Restoro. This is a new, innovative, high and multi-functional PC fixer integrated with powerful and performance-driven multiple utilities. It includes a registry cleaner, and system stability scanner.

So, whether the cause of the error code Plugin.dll error on your system is missing DLL files or even broken registry keys, Restoro can help you repair all these issues in no time. It is user-friendly and can be operated by users of all levels.

Dll files go missing and registry gets corrupt because of the data overload in the RAM/the hard disk.

This happens due to poor PC maintenance. The registry tends to save all the activities performed on the PC this includes even the junk files, invalid registry entries and files from uninstalled programs. If the registry is not cleaned regularly, such files accumulate a lot of disk space which leads to registry malfunctioning.

It damages .dll files and eventually corrupts the registry.

By scanning your PC with a powerful registry cleaner, you can easily wipe out the files cluttering your PC and clear your disk space.

Additionally, it also repairs the damaged plugin.dll files, fragmented disk and corrupt registry.  Thereby restoring your PC to its normal condition and resolving the plugin.dll error code on your system.

Besides this, you can also run Restoro on your PC to resolve speed issues and Active X and class errors. It is safe, efficient and compatible with all Windows versions.

Click here to download Restoro and resolve the plugin.dll error.

If you like to learn and find out more about various Windows errors, and how to repair them go to our vast archive or use search to find articles that will explain and help you in solving your issue.
However, if you prefer to do things fast and with automatization then we are proposing to use an automated solution for your issues. The application that we are recommending is Advanced System Repair Pro
Advanced System Repair utilizes multiple tools all in one to give you a quick, simple, reliable, and very thorough diagnosis of your PC. It brings you all the tools you need in one program to clean, fix, protect, optimize and boost your PC!
1-Click Maintenance
All the tools to make it simple and easy! It's like having a professional technician at the click of a mouse.

Junk Cleaner
Keeping your computer free from unnecessary clutter also helps make your computer last longer. Like any other machine, if you keep it clean and take care of it, it will serve you better for longer!

Optimize background apps
Optimize applications background activity with the built-in Application Optimizer feature.

Disk Defrag
With a simple 1-click, Advanced System Repair speeds up your PC by assembling fragmented files on your machine and organizing them more efficiently.

Malware Removal
Finds and removes all types of harmful malware including trojans, worms, bots, adware, spyware, PUPs, and more!

Privacy Cleaner
The all-in-one privacy suite to Clean Your Tracks & Protect Your Privacy! Make your computer safe, secure, and more efficient!

System Tweak/Optimizer
ASR will analyze your complete system and settings to adjust your PC to function at its maximum performance.

Registry Cleaner
Over time, as you install and uninstall applications, the registry can become cluttered with old entries and broken settings which can result in program crashes, and annoying messages and slow the computer down.
Visit our Advanced System Repair Pro Download page to inform yourself about all the benefits of this software and get a free trial copy of it.
advanced system repair pro

Advanced System Repair Pro

One-click automated PC repair solution
ASR logo
With Advanced System Repair Pro you can easily
Replace damaged files
Restore performance
Free disk space
Remove Malware
Protects WEB browser
Remove Viruses
Stop PC freezing
DOWNLOAD
Privacy Policy | Terms of Use | Uinstall
Advanced System Repair Pro is compatible with all versions of Microsoft Windows including Windows 11

Share this article:

You might also like

Computer makes a beeping noise when you turn it on
Recently, a few users reported that they were unable to turn on their computers for some reason and at the same time their computers Computer makes a beeping noise couple of times or continuously whenever they try to turn them on. The sounds the computers are making can be quite annoying and it also signifies that there is something wrong with them. The problem might have something to do with the hardware inside of the computer system rather than Windows 10 itself. As you know, a computer is designed to deliver audible error sounds every time some part of the hardware is not properly working. For instance, if you hear a single beep, this indicates that your GPU is having some issues and if you’re hearing two beeps, it indicates that your RAM is not working properly, whereas three beeps that repeat after a pause when you turn on your computer means that there is something wrong with the system memory. On the other hand, if your computer is beeping continuously, this means that the problem lies with the processor. To fix this issue, here are some suggestions that might help but before you proceed, make sure that you know how to manage your computer’s hardware, if not, better have some expert do it for you.

Option 1 – Try checking the RAM

One of the basic things you can do in this kind of case is to check the RAM. Prepare some screwdrivers and dig into your PC and then look for the RAM slots and ensure that they are attached firmly. There are times when moving around your computer daily can cause certain components in your computer to become loose. Worst case scenario is that the RAM might be broken so really have to replace it.

Option 2 – Try checking the graphics card

After digging into your computer, check the graphics card and give it some good cleaning. As you know, you have to remove certain components like the graphics card regularly and clean them to help increase their lifespan and avoid errors in a startup. And if it turns out that the graphics card is broken, you have to replace it with a new one to fix the problem.

Option 3 – Try checking the processor

The processor is the brain of every computer so if it ends up not working, everything else is useless. Thus, you need to check it to see if it’s firmly attached and see if it needs some cleaning of dust and other debris. After that, try turning on your computer again. If it doesn’t work, then you might have to take your system to a technician to resolve the problem for you.
Read More
0x800703EE when copying to external storage
If you are trying to copy or move files to and from your external storage device but you suddenly encounter the error 0x800703EE, then you’ve come to the right place as this post will guide you on how you can fix this error in your Windows 10 computer. This kind of error when copying files may be accompanied by an error message that says, “The volume for a file has been externally altered so that the opened file is no longer valid”. This error prevents you from copying or moving the files to and from the external storage device. This kind of issue might be caused by a service that belongs to a backup program that could be blocking the operation or a conflict with your third-party antivirus program. In addition, the error could also be due to corrupted or outdated USB drivers or it could be caused by a disabled Windows Backup and Volume Shadow copy service. It is also possible that some system files are corrupted or that the drivers for the external device are also corrupted. Whatever the cause is, here are some options you need to check out to fix the error. Before you troubleshoot the error, you might want to try moving the files to another location on your local drive and remove the USB drive and insert it back again. After that, try to move or copy the file to the USB drive and see if it still throws an error. If it does, then you need to troubleshoot the problem further by following each one of the suggestions given below.

Option 1 – Update or reinstall the Universal Serial Bus Controller driver

Since it could be a driver issue, you can try to update or reinstall the Universal Serial Bus Controller drivers using the Device Manager. Refer to the following steps:
  • First, click the Start button and type “device manager”.
  • Then click on the “Device Manager” from the search results to open it.
  • From there, look for the “Universal Serial Bus controllers” option and then right-click on each one of the USB drivers and select the Update Driver from the menu.
Note: If it is a regular USB drive, then it will be listed as a USB Mass Storage Device but if you have a USB 3.0 device, then look for a USB 3.0 Extensible Host Controller.
  • Restart your PC and then click the “Search automatically for updated driver software” option.
Note: If updating the USB Controller drivers didn’t work, you can try to reinstall them instead.

Option 2 – Try checking the Volume Shadow Copy and Windows Backup services

The next thing you can do to fix error 0x800703EE is to check the Volume Shadow Copy and Windows Backup service.
  • First, tap the Win + R keys to open the Run dialog box and type “services.msc” in the field, and hit Enter to open the Services Manager.
  • From there, look for the Volume Shadow Copy service and right-click on it, and then select Properties.
  • After that, make sure that its Startup type is set to Manual and that its status is “Started” so if it isn’t, you need to click on the Start button and then on the Apply and OK buttons to save the changes made.
  • Once done, look for the Windows Backup Service and repeat the same process you did with the Volume Shadow Copy service.
  • After you complete the steps, restart your computer and see if the error is now fixed.

Option 3 – Restart your computer in a Clean Boot State

If a third party program like antivirus is the one that’s causing the problem, you can try to put your computer in a Clean Boot State to isolate the issue by following these steps:
  • Log onto your PC as an administrator.
  • Type in MSConfig in the Start Search to open the System Configuration utility.
  • From there, go to the General tab and click “Selective startup”.
  • Clear the “Load Startup items” check box and make sure that the “Load System Services” and “Use Original boot configuration” options are checked.
  • Next, click the Services tab and select the “Hide All Microsoft Services” check box.
  • Click Disable all.
  • Click on Apply/OK and restart your PC. (This will put your PC into a Clean Boot State. And configure Windows to use the usual startup, just simply undo the changes.)
  • Now try to copy the files to your external storage device again and check if the error is now gone.

Option 4 – Try to run System File Checker or SFC scan

  • Tap Win + R to launch Run.
  • Type in cmd in the field and tap Enter.
  • After opening Command Prompt, type in sfc /scannow and hit Enter.
  • Once done, restart your computer.

Option 5 – Try to delete the Filter drivers

Note that this option is only applicable if you see the error 0x800703EE accompanied with the “The volume for a file has been externally altered so that the opened file is no longer valid” error message. Before you start, create a System Restore Point first.
  • Open the Registry Editor and navigate to this registry path: HKEY_LOCAL_MACHINESYSTEMCurrentControlSetControlClass{4D36E965-E325-11CE-BFC1-08002BE10318}
  • After that, select the “{4D36E965-E325-11CE-BFC1-08002BE10318}” key and check if you can find the “Upperfilters” and “Lowerfilters” value in the right pane. If you can find them, right-click on them and select Delete.
  • Once done, exit the Registry Editor and restart your computer.
Read More
How to Fix PFN_LIST_CORRUPT Error on Windows
If you suddenly encounter PFN_LIST_CORRUPT Blue Screen of Death error while using your computer then it means that the Page Frame Number or PFN list is corrupted. Page Frame Number is an indexing number used by the hard drive to find out the location of every single file on the physical disk. This kind of Blue Screen error is usually caused by a driver that’s passing a bad memory descriptor list and it can either be temporary or permanent. And so to fix this particular BSOD error, read on as this post contains a couple of suggestions that could help. Keep in mind that when you get a Blue Screen error like PFN_LIST_CORRUPT, the power connection to your PC must not be interrupted and so if you are using a laptop, it’s best if you connect it to a power source. On the other hand, if creating a dump from 0% to 100% takes up more than 5-10 minutes, then you have to force shut down your computer by pressing and holding the Power Key for 10 seconds or at least until the CPU lights turn off. After you do that, proceed to the troubleshooting tips prepared below.

Option 1 – Run the Blue Screen Troubleshooter

The Blue Screen troubleshooter is a built-in tool in Windows 10 that helps users in fixing BSOD errors like PFN_LIST_CORRUPT. It can be found on the Settings Troubleshooters page. To use it, refer to these steps:
  • Tap the Win + I keys to open the Settings panel.
  • Then go to Update & Security > Troubleshoot.
  • From there, look for the option called “Blue Screen” on your right-hand side and then click the “Run the troubleshooter” button to run the Blue Screen Troubleshooter and then follow the next on-screen options. Note that you might have to boot your PC into Safe Mode.

Option 2 – Run a System File Checker scan

You can also try to run a System File Checker or SFC scan in order to scan your computer for corrupted files that might be the cause behind the PFN_LIST_CORRUPT error. Once it finds any corrupted system files, it will automatically fix them. To run System File Checker, here’s what you have to do:
  • Tap Win + R to launch Run.
  • Type in cmd in the field and tap Enter.
  • After opening Command Prompt, type in sfc /scannow
The command will start a system scan which will take a few whiles before it finishes. Once it’s done, you could get the following results:
  1. Windows Resource Protection did not find any integrity violations.
  2. Windows Resource Protection found corrupt files and successfully repaired them.
  3. Windows Resource Protection found corrupt files but was unable to fix some of them.
  • Restart your computer after the scan is completed.

Option 3 – Check for any hard disk errors

  • On your desktop, right-click on the “This PC” or computer icon and then select Manage to open the Disk Management. Here you get to check your drive’s health.
  • Next, click on Disk Management on the left side panel.
  • From there, check the state of your drives. If it shows that all your partitions are healthy then it means all is good and that the problem may have something to do with some physical issues with your hard drive.
You might also want to run the CHKDSK utility to help you fix any issues with your hard disk. If your hard drive has issues with integrity, the update will really fail as the system will think that it’s not healthy and that’s where the CHKDSK utility comes in. The CHKDSK utility repairs hard drive errors that might be causing the problem.
  • Open Command Prompt with admin privileges.
  • After opening Command Prompt, execute the following command and hit Enter:
chkdsk /f /r
  • Wait for the process to be completed and then restart your computer.

Option 4 – Update the Device drivers

Updating the Device drivers can also help you fix the PFN_LIST_CORRUPT Blue Screen error. To do so, follow the steps below.
  • Tap the Win + R keys to launch Run.
  • Type in devmgmt.msc into the box and tap Enter or click OK to open the Device Manager.
  • After that, a list of device drivers will be displayed. If you see a red or yellow sign that shows up against the driver, right-click on the driver and select “Update Driver Software”.
  • Select the “Search automatically for updated driver software” option and then follow the instructions to complete the process.
  • Restart your PC and then check if the Blue Screen error is now fixed or not.

Option 5 – Disable OneDrive

The PFN_LIST_CORRUPT error might also be caused by OneDrive. Thus, you have to try disabling this program to resolve the problem.
  • Tap the Ctrl + Shift + Esc keys to open the Task Manager.
  • Once the Task Manager is open, click on More Details located at the bottom left portion of the window.
  • Then go to the Startup tab and select Microsoft OneDrive and then click Disable.
Read More
Easy PrivateSearchPlus Removal Guide

PrivateSearchPlus is a browser extension that redirects all your searches through yonto. This way the extension claims you are browsing privately.

From the author: Search the web without tracking your search history or any personally identifiable information Access quickly to popular websites with icons sliding from this homepage is easy speedy and accessed ..Google Search, Yahoo, Aol, Facebook, Amazon, eBay, and more from all world without login However, PrivateSearchPlus monitors your browsing activity, the websites you visit, the links you click, and stores personal information that is later sent to server ads. This extension changes your default search engine to Yonto, it displays additional unwanted ads, may display pop-up ads, and hijacks your home page. Several anti-virus scanners have classified this extension as a Browser Hijacker and are therefore not recommended to keep on your computer.

About Browser Hijackers

Browser hijacking is actually a type of unwanted program, commonly a web browser add-on or extension, which causes modifications in web browser’s settings. There are several reasons why you might have a browser hijack; but commercial, marketing, and advertising are the main purposes for their creation. In general, hijackers are made for the benefit of internet hackers often through income generation from forced ad clicks and site visits. Nonetheless, it’s not that innocent. Your web safety is compromised and it is also very irritating. Browser hijackers could also allow other vicious programs without your knowledge to further damage your computer.

How to know if your browser has been hijacked

When your web browser is hijacked, the following might happen: your browser’s homepage is suddenly different; you see new unwanted favorites or bookmarks added, usually directed to advertisement-filled or pornography websites; the default browser settings have been changed, and/or your default search engine is altered; you see unsolicited new toolbars added; you notice numerous ads show up on your web browsers or display screen; webpages load slowly and at times incomplete; Inability to navigate to particular sites, especially antivirus and also other security software websites.

So how does a browser hijacker infect a computer?

Browser hijackers might use drive-by downloads or file-sharing websites or an e-mail attachment in order to reach a targeted computer. They could also come from add-on applications, also referred to as browser helper objects (BHO), web browser extensions, or toolbars. Other times you may have unintentionally accepted a browser hijacker as part of a software program bundle (usually freeware or shareware). Some of the most well-known hijackers are EasySearchPlus, Babylon Toolbar, Conduit Search, OneWebSearch, Sweet Page, and CoolWebSearch. The presence of any browser hijacker malware on your system might drastically diminish the web browsing experience, monitor your internet activities that lead to major privacy concerns, produce system stability problems and ultimately cause your PC to slow down or to a nearly unusable state.

Browser Hijacker Malware – Removal

Some browser hijacking could be quite easily stopped by finding and eliminating the corresponding malware program from your control panel. Sadly, many of the software programs used to hijack an internet browser are intentionally created to be hard to detect or remove. Inexperienced PC users shouldn’t ever try for the manual form of removal methods, as it demands thorough computer knowledge to do repairs on the computer registry and HOSTS file.

What to Do if Virus Stops You From Downloading Or Installing Anything?

Malware can cause all sorts of damage once they invade your PC, ranging from stealing your personal details to erasing data files on your computer. Certain malware types alter internet browser settings by adding a proxy server or modify the computer’s DNS configuration settings. In these instances, you will be unable to visit certain or all websites, and therefore unable to download or install the necessary security software to get rid of the computer virus. So what to do if malware keeps you from downloading or installing Safebytes Anti-Malware? There are some options you can try to get around with this particular problem.

Install in Safe Mode with Networking

If the malware is set to load at Windows startup, then booting in Safe Mode should avoid it. Since only the minimal applications and services start-up in “Safe Mode”, there are rarely any reasons for issues to take place. You will need to do the following to eliminate malware in Safe mode. 1) Press the F8 key repeatedly as soon as your PC boots, however, before the big Windows logo appears. This will conjure up the Advanced Boot Options menu. 2) Use the arrow keys to choose Safe Mode with Networking and press ENTER. 3) Once this mode loads, you should have the internet. Now, make use of your web browser to download and install Safebytes. 4) After installation, run a complete scan and let the software program get rid of the threats it detects.

Obtain the antivirus program using an alternate web browser

Web-based viruses could be environment-specific, aiming for a specific browser or attacking particular versions of the browser. The best way to overcome this problem is to pick a browser that is well known for its security measures. Firefox contains built-in Phishing and Malware Protection to help keep you secure online.

Create a portable USB antivirus for eliminating malware

Another method is to download and transfer an antivirus application from a clean computer to run a scan on the affected computer. Follow these steps to employ a flash drive to fix your corrupted computer. 1) Download Safebytes Anti-Malware or Microsoft Windows Defender Offline onto a clean computer. 2) Plug the Thumb drive into the uninfected computer. 3) Double click on the downloaded file to open the installation wizard. 4) Choose a thumb drive as the place when the wizard asks you where you wish to install the software. Do as instructed on the screen to finish off the installation process. 5) Now, plug the pen drive into the infected system. 6) Double-click the anti-malware program EXE file on the thumb drive. 7) Press the “Scan” button to run a full computer scan and remove malware automatically.

A Look at the Best Anti-Malware Program

To help protect your computer from various internet-based threats, it is very important to install an anti-malware program on your computer system. However, with so many anti-malware companies in the market, these days it is tough to decide which one you should obtain for your personal computer. A few are very good ones, some are ok types, while some are just fake anti-malware programs that can ruin your PC themselves! You have to pick a product that has got a good reputation and detects not only computer viruses but other sorts of malware as well. While considering the reliable applications, Safebytes Anti-Malware is certainly the strongly recommended one. SafeBytes is a highly effective, real-time anti-spyware application that is created to assist regular computer users in safeguarding their computers from malicious internet threats. With its cutting-edge technology, this software will allow you to get rid of several types of malware like computer viruses, PUPs, trojans, worms, adware, ransomware, and browser hijackers. SafeBytes anti-malware takes computer protection to a totally new level with its advanced features. Some of them are given as below: Real-Time Protection: SafeBytes provides an entirely hands-free live protection that is set to check, prevent and get rid of all computer threats at its very first encounter. It will continuously monitor your computer for hacker activity and also gives users advanced firewall protection. Anti-Malware Protection: Safebytes is based on the best virus engine within the industry. These engines can detect and eliminate threats even during the initial phases of a malware outbreak. Web Security: SafeBytes checks the links present on a webpage for possible threats and notifies you whether the website is safe to view or not, through its unique safety rating system. “Fast Scan” Abilities: Safebytes Anti-Malware, using its enhanced scanning engine, offers extremely fast scanning which can promptly target any active online threat. Light-weight: SafeBytes is a lightweight and easy-to-use anti-virus and antimalware solution. As it uses very low computer resources, this tool leaves the computer power exactly where it belongs to: with you actually. 24/7 Live Expert Support: For any technical questions or product support, you may get 24/7 professional assistance via chat and e-mail.

Technical Details and Manual Removal (Advanced Users)

If you wish to manually remove PrivateSearchPlus without the use of an automated tool, it may be possible to do so by removing the program from the Windows Add/Remove Programs menu, or in cases of browser extensions, going to the browsers AddOn/Extension manager and removing it. You will likely also want to reset your browser. To ensure the complete removal, manually check your hard drive and registry for all of the following and remove or reset the values accordingly. Please note that this is for advanced users only and may be difficult, with incorrect file removal causing additional PC errors. In addition, some malware is capable of replicating or preventing deletion. Doing this in Safe Mode is advised.

The following files, folders, and registry entries are created or modified by PrivateSearchPlus

Registry: HKEY_LOCAL_MACHINESOFTWAREsupWPM HKEY_LOCAL_MACHINESYSTEMCurrentControlSetServicesWpm HKEY_CURRENT_USERSoftwareMicrosoftInternet ExplorerMain Default_Page_URL HKEY_LOCAL_MachineSoftwareClasses[PUP.Private Search Plus] HKEY_CURRENT_USERSoftwareMicrosoftWindowsCurrentVersionUninstall[PUP.Private Search Plus]
Read More
Activision Blizzard Sued by California
blizzard hq
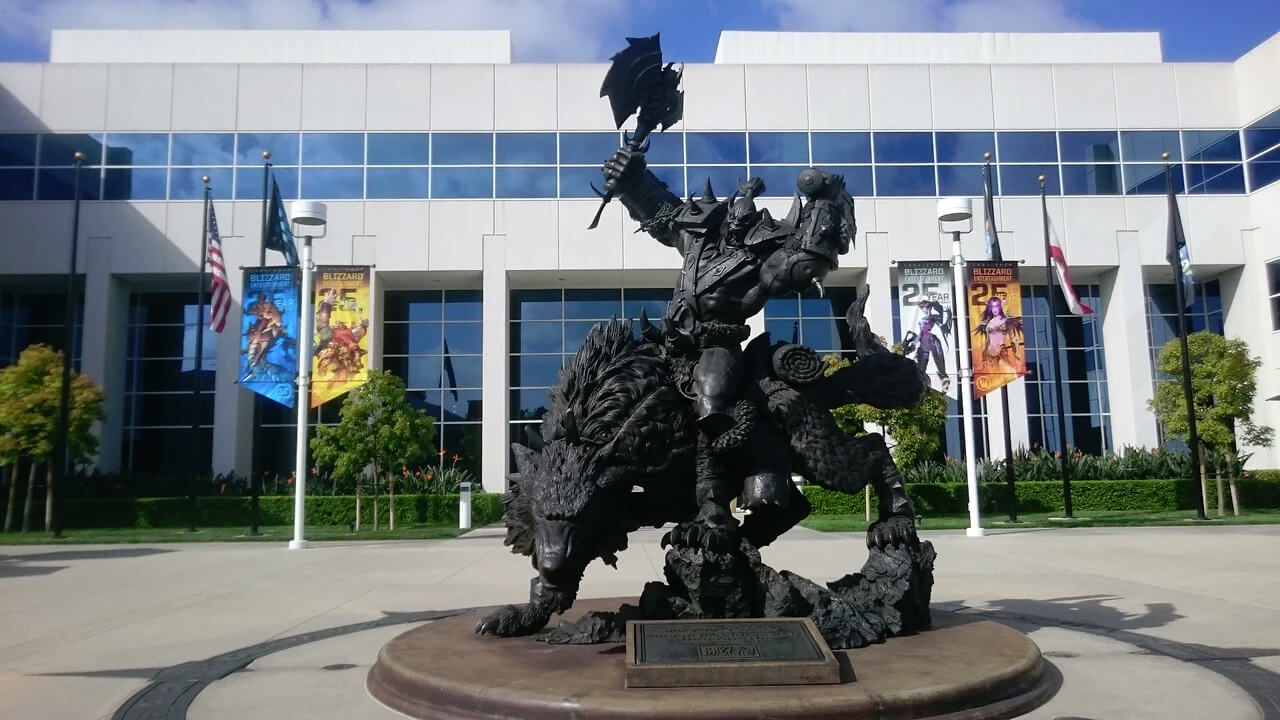
Following a two-year investigation by the California Department of Fair Employment and Housing, the state has filed a lawsuit against Activision Blizzard for fostering a "frat boy" culture in which female employees are allegedly subjected to unequal pay and sexual harassment. As reported by Bloomberg, Activision Blizzard is being accused by the state of California of discriminating against female employees at nearly all levels of employment, including in regards to compensation, promotion, assignments, and termination. The state alleges Activision Blizzard’s leadership has failed to address any of these outstanding issues or prevent them from occurring within the workplace. You can read the full details of the lawsuit here. The suit, filed Tuesday in the Los Angeles Superior Court, says Activision Blizzard, which is made up of about 20 percent women, assigns women, and women of color, to "lower paid and lower opportunity levels" with lower starting pay for similar work as their male counterparts. The documents also accuse Activision Blizzard of fostering a "pervasive 'frat boy' workplace culture in the office. Male employees are said to drink "copious amounts of alcohol" as they make their way through cubicles and "often engage in inappropriate behavior toward female employees." Male employees are said to come to work hungover, play video games during work "while delegating their responsibilities to female employees, engage in banter about their sexual encounters, talk openly about female bodies, and joke about rape." The lawsuit also cites one particular incident where a female employee, who was already subjected to intense sexual harassment at the company, committed suicide during a work trip with a male supervisor who allegedly brought inappropriate, sexual items with him on the trip. The lawsuit is asking for an injunction that will force Activision Blizzard to comply with workplace protections, as well as deliver unpaid wages, pay adjustments, back pay, and lost wages and benefits for female employees.

An Activision Blizzard spokesperson sent the following statement in response to the allegations:

We value diversity and strive to foster a workplace that offers inclusivity for everyone. There is no place in our company or industry, or any industry, for sexual misconduct or harassment of any kind. We take every allegation seriously and investigate all claims. In cases related to misconduct, the action was taken to address the issue. The DFEH includes distorted, and in many cases false, descriptions of Blizzard’s past. We have been extremely cooperative with the DFEH throughout their investigation, including providing them with extensive data and ample documentation, but they refused to inform us what issues they perceived. They were required by law to adequately investigate and to have good faith discussions with us to better understand and to resolve any claims or concerns before going to litigation, but they failed to do so. Instead, they rushed to file an inaccurate complaint, as we will demonstrate in court. We are sickened by the reprehensible conduct of the DFEH to drag into the complaint the tragic suicide of an employee whose passing has no bearing whatsoever on this case and with no regard for her grieving family. While we find this behavior to be disgraceful and unprofessional, it is, unfortunately, an example of how they have conducted themselves throughout the course of their investigation. It is this type of irresponsible behavior from unaccountable State bureaucrats that are driving many of the State’s best businesses out of California. The picture the DFEH paints is not the Blizzard workplace of today. Over the past several years and continuing since the initial investigation started, we’ve made significant changes to address company culture and reflect more diversity within our leadership teams. We’ve updated our Code of Conduct to emphasize a strict non-retaliation focus, amplified internal programs and channels for employees to report violations, including the “ASK List” with a confidential integrity hotline, and introduced an Employee Relations team dedicated to investigating employee concerns. We have strengthened our commitment to diversity, equity, and inclusion and combined our Employee Networks at a global level, to provide additional support. Employees must also undergo regular anti-harassment training and have done so for many years. We put tremendous effort into creating fair and rewarding compensation packages and policies that reflect our culture and business, and we strive to pay all employees fairly for equal or substantially similar work. We take a variety of proactive steps to ensure that pay is driven by non-discriminatory factors. For example, we reward and compensate employees based on their performance, and we conduct extensive anti-discrimination training including for those who are part of the compensation process. We are confident in our ability to demonstrate our practices as an equal opportunity employer that fosters a supportive, diverse, and inclusive workplace for our people, and we are committed to continuing this effort in the years to come. It is a shame that the DFEH did not want to engage with us on what they thought they were seeing in their investigation.

Conclusion

We will see how things work out, but I am not too optimistic for Activision Blizzard, truth to be told these reports are really bringing up some disturbing news on the sunlight. I just hope that all responsible will be brought to justice.
Read More
Disable or Enable App Launch Tracking
The Windows 10 operating system utilizes a variety of measures in order to track your app launches so that it can boost both your start and search results. It can personalize the start menu based on the apps that you use the most on the Start menu as well as the search results. This way, the App Launch Tracking is definitely useful especially when you want to access your favorite and frequently used apps quickly in the Start menu and search results on your Windows 10 computer. On the other hand, Windows 10 provides users with the ability to control their privacy settings in order to protect the privacy of users. Windows 10 users can either opt to enable the app launch tracking to improve the start menu and search menu or opt to disable the app launch tracking in order to prevent the Windows operating system from tracking that you open if you really value your privacy that much. Whichever setting you prefer, you need to change the privacy control settings as well as make some tweaks in the Windows Registry in order to turn on or turn off the app launch tracking feature.

Option 1 – Turn off or turn on app launch tracking via Settings

  • Go to Settings and click on Privacy.
  • After that, toggle On the “Let Windows track app launches to improve Start and search results” option on the right side of the page under the General Settings to enable the app launch tracking feature.
  • And of course, if you wish to disable the app launch tracking feature, simply toggle Off the “Let Windows track app launches to improve Start and search results” option on the very same page under General Settings.
  • After that, close the Settings window.
Note: Keep in mind that when you disable the app launch tracking feature, the “Show most used app” setting will either be grayed out or labeled as “Disable” on your Windows 10 computer. Thus, if you want to keep viewing the most used apps, just re-enable the app launch tracking feature if you have disabled it.

Option 2 – Turn off or turn on app launch tracking via Windows Registry

Before you proceed, make sure to create a System Restore point
  • Tap the Win + R keys to open the Run dialog box.
  • Then type “Regedit” in the field and hit Enter or click OK to open the Registry Editor.
  • Next, navigate to the following path:
HKEY_CURRENT_USERSOFTWAREMicrosoftWindowsCurrentVersionExplorerAdvanced
  • After that, right-click on the Advanced folder and then click on New to create a new 32-bit DWORD value.
  • Name the newly created DWORD as “Start TrackProgs” and set its value to “1” to enable the app launch tracking feature.
  • If you want to disable the app launch feature, set “0” as the value instead of 1.
  • Now click OK and restart your computer.
Take note that you still have to create a 32-bit DWORD value even if you are using a 64-bit Windows computer.
Read More
How to Repair BSOD Stop Error code 0xc000021a in Windows 10

Error code 0xc000021a - What is it?

Error code 0xc000021a occurs when the system is unable to start or there’s a failure in critical system processes. Normally, it would take about several seconds for the system to boot and while on the startup process, error code 0xc000021a may take place to block the system to boot up. Users will get a blue screen of death (BOSD) when this error occurs. When upgrading to Windows 10, be careful; you might encounter other error messages such as error code 8007002c

Solution

Restoro box imageError Causes

There are several reasons why error code 0xc000021a occurs. It is important to have a full understanding of what caused the blue screen of death before attempting to fix the error by yourself. See below for a few common causes:

Computer malware has infiltrated your device.

• Important files such as Winlogon.exe and Csrss.exe are damaged. Winlogon.exe file is responsible for handling the login and logout processes while Csrss.exe is a vital part of Microsoft Client or Server ‘Runtime Server Subsystem’. Once one of these files is damaged or deleted, a stop error will occur.

• When there are mismatched system files installed or system upgrading process failed or still incomplete.

• Premature unloading of Wbemprox.dll

• Newly installed third-party software is not compatible with the operating system.

• There are corrupted, outdated, or incorrectly configured device drivers.

• There’s insufficient space in the system partition. Once the system partition is full, certain errors such as error code 0xc000021a will manifest.

• Windows registry is corrupted or damaged due to a software or system change. This means there are registry entries that are not cleared after uninstalling an application.

Further Information and Manual Repair

In fixing error code 0xc000021a, you might want to try and manually do so. Manual repair methods can give users effective and efficient solutions, addressing the root problems in relation to Windows error codes. Once the manual repair method is correctly implemented, users will be able to resolve issues immediately. However, there might be instances when a Windows professional is needed. In such cases, seek help from a certified Windows expert or you might want to consider using an automated tool whenever necessary.

Method One: Convert the Drive or Partition from NTFS to GPT

In order to fix Error code 0xc000021a in Windows 10, you might need to convert the partition or drive from NTFS to GPT. See below for the procedure: 1. Shut down your device then put in the Windows installation USB key or DVD. 2. Boot your device to the USB key or DVD in UEFI mode. 3. Inside the Windows Setup, open a Command Prompt window by pressing Shift + F10. 4. Type diskpart in the Command Prompt window to open the diskpart tool. 5. Type list disk to identify which drive to reformat. 6. Select which drive to reformat by typing select disk in the command prompt. Afterward, type clean then hit Enter. Once done, type convert gpt to be able to convert the drive from NTFS to GPT. Finally, type exit and press Enter. You can now close the Command Prompt window. 7. Once the partition or drive is converted from NTFS to GPT, the user can now continue the Windows Setup installation. NOTE: Select Custom in choosing which installation type to use. The drive will then appear as a single area of unallocated space. Choose that unallocated space then select Next. At this point, Windows will now begin the installation.

Method Two: Fix System File Errors

There are times when system files get corrupted or damaged which will result in system failure. If this is the case, you can use a Windows free tool to repair corrupted or damaged system files. 1. Right-click on the Start button then selects Command Prompt (Admin) from the list to open a Command Prompt window. 2. Once the Command Prompt appears, type sfc /scannow then hit Enter. Wait until the process completes. If the process is completed and it doesn’t report any error or issues that remain unsolved, you might want to employ the next method.

Method Three: Reset Windows 10

Resetting Windows will delete all software and user accounts installed in the operating system and will reinstall a fresh Windows. 1. Boot your device using a Windows installation USB key or DVD. Select Repair your computer to locate the Troubleshoot option. Afterward, choose Reset this PC. NOTE: If the device is able to boot the system, you can reset Windows without using a Windows installation USB key or DVD. You just have to boot the device then navigate to Settings in the Start button. Choose Update & Recovery then select Recovery found on the left pane. Choose Reset this PC option then select Go back to an earlier build and Advanced startup. Select Get Started button found in the Reset this PC tab. 2. Depending on your device’s condition, you can either select Keep my files or Remove everything. Both options will remove all applications installed in the device and will revert to default settings. 3. Choose either Just remove my files or Remove files and clean the drive depending on the situation. If you choose the Remove files and clean the drive option, the procedure will take longer as it will erase all the files permanently. In this case, deleted files cannot be recovered. However, if you don’t want to remove files permanently, select Just remove my files. 4. Once you’ve decided how to reset your system, click on Next once the Warning screen appears. Afterward, choose Reset once prompted. When the process completed, click on Continue.

Method Four: Download an Automated Tool

Can’t seem to put up with the long and technical manual repair process? You can still fix this error by downloading and installing a powerful automated tool that will surely get the job done in a jiffy!
Read More
Wallpapers by MyWay (wallpapers.myway.com) removal Guide

Wallpapers by MyWay is a browser hijacker, also known as Wallpaper Homepage adware. It was developed by Mindspark Interactive Network, Inc and it is widely promoted on the Internet as a genuine search engine powered by Google with an ability to customize homepage background and add some quick access links. This hijacker can be found in the most popular web browsers including Mozilla Firefox, Google Chrome, and IE. Generally Wallpaper by MyWay hijacker appears on the user’s computer without the user being fully aware of its modification.

While installed users will experience additional ads showing up in their search results, as well as sponsored content and pop-up ads. This extension has been flagged by several anti-virus scanners and it is recommended to remove it from your computer.

About Browser Hijackers

Browser hijack is a very common type of online fraud where your web browser settings are altered to allow it to do things you never intend. Browser hijacker malware is designed for many different reasons. These are generally used to force visitors to predetermined sites, manipulating web traffic to generate ad revenue. Nevertheless, it’s not that harmless. Your internet safety is jeopardized and it is also really irritating. Additionally, hijackers can make the entire infected system fragile – other harmful malware and viruses would take hold of these opportunities to get into your system very easily.

Signs of browser hijacker infection

Symptoms that your browser is hi-jacked include: 1. you see unauthorized modifications to your web browser’s home-page 2. you find yourself regularly directed to a different site than the one you meant 3. the default web engine and the default browser settings is modified 4. find new toolbars which you did not add 5. you notice lots of pop-up ads on your computer screen 6. your internet browser has instability issues or displays frequent errors 7. you’re blocked to access those sites of anti-malware solution providers.

Exactly how browser hijacker finds its way onto your computer

Browser hijackers can enter a computer by some means or other, for instance via file sharing, downloads, and e-mail also. Many internet browser hijackings come from add-on programs, i.e., browser helper objects (BHO), toolbars, or plug-ins added to web browsers to provide them additional functionality. A browser hijacker can be installed as a part of freeware, shareware, demoware and fake programs. An example of some popular browser hijackers includes Babylon, Anyprotect, Conduit, DefaultTab, SweetPage, RocketTab, and Delta Search, however, the names are often changing. Browser hijackers could record user keystrokes to collect potentially valuable information that leads to privacy issues, cause instability on systems, significantly disrupt user’s browsing experience, and finally slow down the system to a point where it will become unusable.

Browser hijacker removal methods

Certain types of browser hijackers can be quickly removed from your computer by deleting malicious programs or any other recently installed shareware. However, the majority of hijacking codes are certainly not easy to get rid of manually, as they go deeper into the operating system. Furthermore, manual removals require in-depth system knowledge and therefore can be a very difficult job for novices. Installing and running anti-malware programs on the affected computer can automatically delete browser hijackers and other malicious programs. One of the top tools for repairing browser hijacker infections is SafeBytes Anti-Malware. It helps you get rid of any pre-existing malicious software on your computer and gives you real-time monitoring and protection against new threats. Use a system optimizer (such as Total System Care) along with your anti-malware to fix various registry issues, remove computer vulnerabilities, and improve your computer overall performance.

How To Get Remove Malware That Is Preventing Antivirus Installation?

All malware is detrimental and the consequences of the damage will vary according to the specific type of malicious software. Some malware goes to great lengths to stop you from downloading or installing anything on your computer, especially anti-virus software programs. If you are reading this article, you may have infected by a virus that stops you from downloading a security software such as Safebytes Antimalware on your PC. Refer to the instructions below to remove malware in alternative ways.

Use Safe Mode to fix the issue

If the malware is set to run at Windows start-up, then booting in safe mode should avoid it. Only the minimum required applications and services are loaded when you boot your laptop or computer into Safe Mode. To launch your Windows XP, Vista, or 7 computers in Safe Mode with Networking, follow the instructions below. 1) After switching on the computer, press the F8 key before the Windows splash screen starts to load. This would conjure up the Advanced Boot Options menu. 2) Select Safe Mode with Networking with arrow keys and hit ENTER. 3) When this mode loads, you should have an internet connection. Now, make use of your web browser normally and navigate to https://safebytes.com/products/anti-malware/ to download and install Safebytes Anti-Malware. 4) After installation, do a complete scan and allow the program to remove the threats it discovers.

Switch to some other internet browser

Malicious code might exploit vulnerabilities in a specific internet browser and block access to all anti-malware software websites. When you suspect that your Internet Explorer happens to be hijacked by a trojan or otherwise compromised by online hackers, the most effective course of action would be to switch over to a different internet browser such as Google Chrome, Mozilla Firefox, or Apple Safari to download your chosen computer security software – Safebytes Anti-Malware.

Install anti-malware on a flash drive

Here’s another solution which is creating a portable USB anti-malware software package that can scan your computer for malware without needing installation. Adopt these measures to employ a flash drive to fix your corrupted PC. 1) On a clean PC, download and install Safebytes Anti-Malware. 2) Plug in the pen drive into the uninfected computer. 3) Run the setup program by double-clicking the executable file of the downloaded software, with a .exe file format. 4) Choose the flash drive as the destination for saving the software file. Follow the activation instructions. 5) Now, transfer the thumb drive to the infected computer. 6) Double-click the antivirus software EXE file on the thumb drive. 7) Click on the “Scan Now” button to start the malware scan.

How SafeBytes Anti-Malware Keep your Machine Virus Free

If you are looking to download an anti-malware application for your computer, there are plenty of tools on the market to consider but you just cannot trust blindly anyone, no matter whether it is a free or paid program. A few of them do a good job in eliminating threats while many will ruin your computer themselves. You must select one that is dependable, practical, and has a good reputation for its malware source protection. When considering commercial anti-malware application options, many people select well-known brands, like SafeBytes, and they are quite happy with it. SafeBytes is a powerful, real-time antivirus application that is designed to assist everyday computer user in safeguarding their PC from malicious threats. With its most advanced virus detection and repair technology, this software will help you protect your personal computer against infections caused by different types of malware and other internet threats, including adware, spyware, viruses, worms, trojans, keyloggers, ransomware, and potentially unwanted program (PUPs).

There are lots of wonderful features you’ll get with this security product. Some of them are listed as below:

Robust Anti-malware Protection: Using its advanced and sophisticated algorithm, this malware elimination tool can detect and remove the malware threats hiding within your computer system effectively. Active Protection: SafeBytes gives you round-the-clock protection for your PC limiting malware attacks in real-time. It will check your personal computer for suspicious activity at all times and safeguards your PC from unauthorized access. Fast Scan: This computer software has one of the fastest and most efficient virus scanning engines in the industry. The scans are very accurate and take a short amount of time to complete. Web Protection: Safebytes allots all sites a unique safety score that helps you to have an idea of whether the website you’re about to visit is safe to view or known to be a phishing site. Light-weight: SafeBytes gives complete protection from online threats at a fraction of the CPU load due to its enhanced detection engine and algorithms. 24/7 Customer Service: Expert technicians are at your disposal 24/7! They will quickly resolve any technical issues you may be experiencing with your security software. To conclude, SafeBytes Anti-Malware is really great for securing your PC against all kinds of malware threats. Malware problems will become a thing of the past once you put this software program to use. So if you’re looking for the best anti-malware subscription for your Windows-based PC, we highly recommend SafeBytes Anti-Malware software

Technical Details and Manual Removal (Advanced Users)

If you’d like to manually remove Wallpapers by MyWay without using an automated tool, it may be possible to do so by removing the application from the Microsoft Windows Add/Remove Programs menu, or in cases of web browser extensions, going to the browsers AddOn/Extension manager and removing it. You will probably also want to reset your internet browser to its default configuration settings. If you opt to manually delete the system files and registry entries, use the following checklist to make sure you know exactly what files to remove before performing any actions. Please keep in mind that this is for professional users only and might be difficult, with wrong file removal leading to additional system errors. In addition, some malware is capable of replicating or preventing deletion. Carrying out this malware-removal process in Safe Mode is recommended.
Files: %UserProfile%\Local Settings\Application Data\WallpapersMyWayTooltab %LOCALAPPDATA%\WallpapersMyWayTooltab %LOCALAPPDATA%\Google\Chrome\User Data\Default\Extensions\glhahjphgpghoefihgllamaapanabkmp %UserProfile%\Local Settings\Application Data\Google\Chrome\User Data\Default\Extensions\glhahjphgpghoefihgllamaapanabkmp Registry: HKEY_CURRENT_USER\Software\WallpapersMyWay
Read More
Fixing corrupted bootres.dll file in Windows 10
In this post, we will discuss what the “ bootres.dll ” file is in the Windows 10 operating system and where it’s also located. In addition, you will also be guided on how you can replace or fix a corrupt bootres.dll file which may prevent you from booting to your Windows desktop and will display an error message instead saying, “Boot critical file resourcescustombootres.dll is corrupt”. There are times when this error might also boot your PC to the Automatic Repair screen. DLL files, also known as Dynamic Link Libraries are external parts of applications that run on Windows as well as other operating systems. Almost all applications are not complete in themselves and store code in different files so if there is a need for the code, the related file being called by a certain application is loaded into memory and used. If the software or the operating system is unable to find the concerned DLL file or if the DLL file ends up getting corrupted, you will most likely get an error message. In case you don’t know, the bootres.dll file is a critical system OS file, size 90KB, and can be found in the Windows folder. It is a part of the Boot Resource Library and portrays an important role in making sure that your PC boots properly. So if it ends up getting corrupted, your PC may fail to boot correctly and you’ll get an error message instead. To resolve this problem, here are some suggestions that might help. If your PC automatically boots to the Automatic Repair screen, you need to click on that option to run the Automatic Repair. If it doesn’t work, you have to boot into the Advanced Startup options to manually access and run the Automatic Repair. Once you’re in the Advanced Options, you will be able to:
  • Run Automatic Repair
  • Use System Restore
  • Start Windows from an external device
  • Access Command Prompt
  • And use the System Image Recovery to restore Windows from a Factory image.
If the Automatic Repair fails to fix the problem, you may have to use System Restore or the Command Prompt to carry out further troubleshooting steps. Refer to the guide below to use these tools.

Option 1 – Try running the System File Checker in Safe Mode

Running the System File Checker is the safest way to fix DLL file missing or corrupted errors are thrown up by the Windows operating system as it could give you better results. System File Checker or SFC is a built-in command utility that helps in restoring corrupted files as well as missing files. It replaces bad and corrupted system files with good system files that might be causing the Machine Check Exception BSOD error. To run the SFC command, follow the steps given below.
  • Boot your PC into Safe Mode.
  • Tap Win + R to launch Run.
  • Type in cmd in the field and tap Enter.
  • After opening Command Prompt, type in sfc /scannow
The command will start a system scan which will take a few whiles before it finishes. Once it’s done, you could get the following results:
  1. Windows Resource Protection did not find any integrity violations.
  2. Windows Resource Protection found corrupt files and successfully repaired them.
  3. Windows Resource Protection found corrupt files but was unable to fix some of them.

Option 2 – Try running the DISM tool to repair the System Image

To repair the System Image, you need to use the DISM or Deployment Imaging and Servicing Management tool. The DISM tool is another command-line tool in the Windows operating system that could help users fix various corrupted system files. To use it, follow these steps:
  • Open the Command Prompt as admin.
  • Then type in this command: Dism /Online /Cleanup-Image /RestoreHealth
  • Do not close the window if the process takes a while as it will probably take a few minutes to finish.
Note: The command you executed will check for Windows component store corruption and will restore its good health. The scan might take up to 15 minutes. Once it is done, you have to restart your computer.

Option 3 – Try to repair the MBR and rebuild BCD

To repair the MBR and rebuild BCD, follow these steps: The problem might boil down to the Master Boot Records since the previous case has already been isolated. There are times when the Master Boot Records can get corrupted and even though it is a serious issue, it can still be rectified by repairing the Master Boot Record.
  • Tao the F8 key while booting the system to go into the Windows Recovery Menu.
  • Next, click on Troubleshoot.
  • Then click on the Advanced options to get into the Automatic Repair menu.
  • After that, you have to use the bootrex.exe tool, so click on the command prompt and type in the following commands, one after the other:
  • bootrec /RebuildBcd
  • bootrec /fixMbr
  • bootrec /fixboot
  • Exit and then go ahead and restart your PC.

Option 4 – Try running the ChkDsk utility

One of the best options you must try is running chkdsk as it will check the disk for any errors and repair them automatically. To use it, follow these steps:
  • Boot your PC to the Advanced Options menu and click on Command Prompt.
  • Once you’ve opened an elevated Command Prompt, type in the following command and tap Enter to execute it:
chkdsk C: /f /x /r
Note: “C” is the drive root drive so it could be changed if you’re using a different one.

Option 5 – Try resetting your PC

Go to the Advanced Options > Troubleshoot > and select the Reset This PC option from the menu and then select Keep my files.
Read More
Copy & Paste text between devices
If you have multiple products with Windows on them, Copy & Paste text between them is easy as 1,2,3 and we will be happy to tell you how can you do it. Hello and welcome everyone, today we will see how can we share text information between 2 devices using Windows 10 in instant. In order for you to be able to share text information between devices, there are two prerequisites that you must meet. The first is that all devices must be connected to the internet, the second is that you must have a Microsoft account. If you have both of these things continue with the tutorial, if you do not have a Microsoft account go to Microsoft website and create one for free. Also, know that this option needs to be turned ON on all devices in order to work. So steps we will explain will have to be done on each device, if you already have some device logged in and connected to Microsoft account, you can skip setting it up. Click on ⊞ WINDOWS and click on settings. Windows 10 Star menu with marked settings iconThen click on System. Windows settings system markedOnce you are in the system, on the left tabs find and click on Clipboard. windows settings clipboardIf you are not logged in to your Microsoft account do so on the right panel by locating Sync across devices and click on sign in. clipboard sign inWhen you are signed in click on the option to turn it on. sync across devicesOne option is turned ON, you will be greeted with two choices, to copy everything from the clipboard automatically or to choose text which you want to sync and paste it with ⊞ WINDOWS + V. Choose whatever better suits your needs, and you are done. Repeat these steps for other devices and you are done.
Read More
1 2 3 162
Logo
Copyright © 2022, ErrorTools. All Rights Reserved
Trademarks: Microsoft Windows logos are registered trademarks of Microsoft. Disclaimer: ErrorTools.com is not affiliated with Microsoft, nor claim direct affiliation.
The information on this page is provided for information purposes only.
DMCA.com Protection Status