Fix PDC WATCHDOG TIMEOUT BSOD

If you suddenly encountered the PDC WATCHDOG TIMEOUT BSOD Blue Screen stop error with a bug check value of 0x0000014F, then it’s probably due to a system component that has failed to respond with the allocated period which prevents the system from exiting connected standby.

This kind of Blue Screen error could be caused by both hardware and software components. To fix this Stop error, here are some possible fixes you can try that might help but before you proceed, make sure that you create a System Restore point first and boot your computer into Safe Mode with Networking.

Option 1 – Try to rollback, update or disable drivers

The next thing you can do to fix the PDC_WATCHDOG_TIMEOUT Stop error is to roll back, or update, or disable device drivers. It is most likely that after you updated your Windows computer that your driver also needs a refresh. On the other hand, if you have just updated your device drivers then you need to roll back the drivers to their previous versions. Whichever applies to you, refer to the steps below.

  • Open the Devices Manager from the Win X Menu.
  • After opening the Device Manager, look for the device driver named “IDE ATA/ATAPI controllers” and expand it.
  • Then look for the SATA AHCI Controller entry and right-click on it. If you haven’t updated this driver in a while, select the “Update Driver” option. On the other hand, if you’ve just updated this driver, then select the Uninstall Device option.
  • Next, follow the screen option to update or uninstall it.
  • Finally, restart your computer. It will just reinstall the device drivers automatically if you have chosen to uninstall them.

Note: You can install a dedicated driver on your computer in case you have it or you could also look for it directly from the website of the manufacturer.

Option 2 – Try to disconnect or disable newly installed hardware

In this option, you will have to disable or remove the hardware you’ve just installed recently since external devices could be the one that’s causing the Blue Screen of Death error to appear. To do that, just disconnect any external device that’s connected to your computer physically and then check if it fixes the PDC_WATCHDOG_TIMEOUT Blue Screen error.

Option 3 – Try running the Memory Diagnostic Tool

The Memory Diagnostic tool in windows can help resolve the PDC_WATCHDOG_TIMEOUT Blue Screen error by checking and automatically fixing any memory-based issues. To run it, refer to these steps:

  • Tap the Win + R keys to open Run and type mdsched.exe and hit Enter to open the Windows Memory Diagnostic Tool.
  • After that, it will give two options such as:
    • Restart now and check for problems (Recommended)
    • Check for problems the next time I start my computer
  • Once your computer has restarted, perform a basic scan or you could also go for the “Advanced” options such as “Test mix” or “Pass count”. Simply tap the F10 key to start the test.

Option 4 – Try to update the BIOS

Updating the BIOS can help you fix the PDC_WATCHDOG_TIMEOUT BSOD error but as you know, BIOS is a sensitive part of a computer. Even though it is a software component, the functioning of the hardware depends on it largely. Thus, you must be careful when modifying something in the BIOS. So if you don’t know much about it, it’s best if you skip on this option and try the other ones instead. However, if you are well-versed in navigating the BIOS, then follow the steps below.

  • Tap the Win + R keys to open the Run dialog box.
  • Next, type “msinfo32” in the field and press Enter to open System Information.
  • From there, you should find a search field on the bottom where you have to search for the BIOS version and then press Enter.
  • After that, you should see the developer and version of the BIOS installed on your PC.
  • Go to your manufacturer’s website and then download the latest version of BIOS on your computer.
  • If you are using a laptop, make sure that you keep it plugged in until you have updated the BIOS.
  • Now double click on the downloaded file and install the new BIOS version on your computer.
  • Now restart your computer to apply the changes made.

Option 5 – Try running the Blue Screen Troubleshooter

The Blue Screen troubleshooter is a built-in tool in Windows 10 that helps users in fixing BSOD errors like PDC_WATCHDOG_TIMEOUT. It can be found in the Settings Troubleshooters page. To use it, refer to these steps:

  • Tap the Win + I keys to open the Settings panel.
  • Then go to Update & Security > Troubleshoot.
  • From there, look for the option called “Blue Screen” on your right-hand side and then click the “Run the troubleshooter” button to run the Blue Screen Troubleshooter and then follow the next on-screen options. Note that you might have to boot your PC into Safe Mode.
If you like to learn and find out more about various Windows errors, and how to repair them go to our vast archive or use search to find articles that will explain and help you in solving your issue.
However, if you prefer to do things fast and with automatization then we are proposing to use an automated solution for your issues. The application that we are recommending is Advanced System Repair Pro
Advanced System Repair utilizes multiple tools all in one to give you a quick, simple, reliable, and very thorough diagnosis of your PC. It brings you all the tools you need in one program to clean, fix, protect, optimize and boost your PC!
1-Click Maintenance
All the tools to make it simple and easy! It's like having a professional technician at the click of a mouse.

Junk Cleaner
Keeping your computer free from unnecessary clutter also helps make your computer last longer. Like any other machine, if you keep it clean and take care of it, it will serve you better for longer!

Optimize background apps
Optimize applications background activity with the built-in Application Optimizer feature.

Disk Defrag
With a simple 1-click, Advanced System Repair speeds up your PC by assembling fragmented files on your machine and organizing them more efficiently.

Malware Removal
Finds and removes all types of harmful malware including trojans, worms, bots, adware, spyware, PUPs, and more!

Privacy Cleaner
The all-in-one privacy suite to Clean Your Tracks & Protect Your Privacy! Make your computer safe, secure, and more efficient!

System Tweak/Optimizer
ASR will analyze your complete system and settings to adjust your PC to function at its maximum performance.

Registry Cleaner
Over time, as you install and uninstall applications, the registry can become cluttered with old entries and broken settings which can result in program crashes, and annoying messages and slow the computer down.
Visit our Advanced System Repair Pro Download page to inform yourself about all the benefits of this software and get a free trial copy of it.
advanced system repair pro

Advanced System Repair Pro

One-click automated PC repair solution
ASR logo
With Advanced System Repair Pro you can easily
Replace damaged files
Restore performance
Free disk space
Remove Malware
Protects WEB browser
Remove Viruses
Stop PC freezing
DOWNLOAD
Privacy Policy | Terms of Use | Uinstall
Advanced System Repair Pro is compatible with all versions of Microsoft Windows including Windows 11

Share this article:

You might also like

WEB sites for cheap game purchases
Gaming can be sometimes a very cheap hobby, sometimes can be really expensive. It really depends on your preferences or gaming habits. So for all of you game spenders, we have compiled a little list of WEB sites where you can find games cheap. Provided sites are checked ones and not scam. You can purchase without concern. Also, note that some of these sites will require you to create an account in order to be able to make a purchase.

List of WEB sites for cheap purchases

is there any deal cheap gamesIs There Any Deal

https://isthereanydeal.com/ Is there any deal really behaves as it sounds, it is basically a search engine tailored to find existing deals on required games. Type in the desired game and see if anywhere you can find a deal on it. The site also features wait for better price options as well as the price history of the game and the trend of its sales.

cheap shark dealsCheap Shark

https://www.cheapshark.com/ On cheap shark by typing game name, you will get its listing on different online retailers, like Steam, EPIC, etc. so you can compare prices among them and pick the best deal. Site packs are also the cheapest ever feature so you can check the lowest price ever on the wished title and you can get alerts and notifications on prices.

humble bundleHumble Bundle

https://www.humblebundle.com/ Humble bundle got famous for its pay what you want approach due to its origins where it was selling games and donate money to charities. Even today they go by this logic once they decide to place great games on sale for charity purposes and you can donate any amount you wish (there is the minimum amount, but it is very cheap). And regular cheap bundles make this site one of the best out there.

fanatical cheap gamesFanatical

https://www.fanatical.com/ Fanatical is a site that will offer you to get titles in a bundle with a discount, the good stuff is that you can create your own bundle and get a discount on bulk purchases. And the site also offers flash deals and holds sales where you can buy stuff cheaper.

sick dealsSlick Deals

https://slickdeals.net/deals/games/ If you are looking for the best deals on daily basis slick deals is the site for you. We could not found a better website that offers cheaper deals on a daily basis and you can subscribe to get notified in email about daily discounts.

green man gamingGreen Man Gaming

https://www.greenmangaming.com/ Green Man Gaming is one of the best stores and game discount sites out there, it might not be the cheapest but one very important thing about it is that keys for Stream and Xbox come directly from the game publisher so you can rest assured that they are all 100% legal and do not come from some third party benefits and resellers. And that's it for now. We hope to see you again on our site for more articles and error fixing tips.
Read More
How to Fix Unable to contact your DHCP Server
If your IP address expires, you will most likely experience interruptions when browsing the web. In such cases, you have to release and renew the IP address by executing the following commands:
  • ipconfig /release
  • ipconfig /renew
So if you are trying to renew the IP address of your Windows 10 computer using the commands given above but you encounter an error message instead that says, “Unable to contact your DHCP Server”, then you’ve come to the right place as this post will guide you in fixing this error. This kind of error indicates that the NIC can’t communicate with the DHCP server which is why it’s not able to release new IP addresses. It could be due to many reasons. To fix this error, you can try to roll back, update or reinstall the Network Adapter drivers. You could also run the built-in Network Adapter troubleshooter, as well as start or restart the DHCP client service.

Option 1 – Try to rollback your Network driver

If you have updated the driver software as of late and you suddenly got this error, you might have to roll back the device driver – in other words, switch back to the previous working version. To do that, follow these steps:
  • Tap the Win + R keys to launch the Run window and then type in the “devmgmt.msc” command and hit Enter to open the Device Manager window.
  • Under the Device Manager, you will see a list of drivers. From there, look for the Network Adapters and expand it.
  • Next, select the driver entries that are labeled appropriately other than anything in the context of the WAN Miniport.
  • Then select each one of them and double click to open a new mini window.
  • After that, make sure that you’re on the Driver tab and if you are not, just navigate to it then click the Roll Back Driver button to switch back to the previous version of your Network adapters.
  • Now restart your computer to successfully apply the changes made.

Option 2 – Try to update the Network drivers

If rolling back to the previous version of the Network adapter drivers didn’t help, then you need to update them instead. To do so, here’s what you have to do:
  • Tap the Win + R keys to launch the Run window and then type in the “devmgmt.msc” command and hit Enter to open the Device Manager window.
  • Under the Device Manager, you will see a list of drivers. From there, look for the Network Adapters and expand them.
  • Then right-click on each one of the Network drivers and update them all.
  • Restart your PC and see if it helped in fixing the BSOD error.
Note: If updating the network drivers didn’t help in fixing the problem, you can also try to uninstall the very same drivers and restart your Windows 10 PC. After that, the system itself will reinstall the drivers you just uninstalled. Alternatively, you can also download and install the drivers from the manufacturer’s website directly.

Option 3 – Run the Network Adapter troubleshooter

Running the built-in Network Adapter troubleshooter can also help in fixing the “Unable to contact your DHCP Server” error. To run the Network Adapter Troubleshooter, refer to these steps:
  • Open the Search bar on your computer and type in “troubleshoot” to open the Troubleshoot settings.
  • Next, scroll down and select the “Network Adapter” option from the right pane.
  • Then click on the Run Troubleshooter” button.
  • After that, your computer will check for any possible errors and will pinpoint the root cause of the problem if possible.
  • Restart your computer.

Option 4 – Try disabling the IPv6 in the Network Center

  • Tap the Win + X key combination and click on Network Connections.
  • This will open the Settings app on a specific page. Now on the right-side panel, click on the Network and Sharing Center link.
  • After that, it will open the Control Panel and from there, click on the network that your computer is connected to and then click on Properties.
  • Next, uncheck the entry that says, “Internet Protocol Version 6 (TCP/IPv6)” in the list that populates.
  • Now click on OK and close all other windows.
  • Restart your computer and see if the error is now fixed.

Option 5 – Start or restart the DHCP client service

If the DHCP client service is either inactive or stopped, you can try to start or restart it to resolve the error. You can do this via the Services Manager.
  • Tap the Win + R keys to open the Run utility.
  • Then type “services.msc” in the field and tap Enter or click OK to open the Services Manager.
  • After that, look for the DHCP client service from the list of services displayed.
  • Once you found it, right-click on it and select the Start or Restart option.
Read More
Shift Key is not working in Windows
A lot of users rely on keyboard shortcuts to carry out tasks on their PCs. One of the most common keyboard shortcuts used is the Ctrl + Shift + Esc which opens the Task Manager. As you can see, the Shift key is not just used to capitalize a text as it can also be used for other functions and plays an essential role in operating a computer. However, if you suddenly find it not working, read on as this post will help you fix the problem. If your Shift key is not working, there are several potential fixes you can check out to fix it. These are the different ways to get rid of the Shift key not working issue on Windows 10:
  1. Physically clean the key and keyboard
  2. Disable Sticky Keys.
  3. Update, Reinstall, or Rollback Keyboard driver.
  4. Test the keyboard on another system.
  5. Check your connections
  6. Run the Hardware troubleshooter
  7. Troubleshoot in Clean Boot State.

Option 1 – Clean the keyboard keys physically

Your keyboard might not be working properly due to some dirt or other corrosion. Thus, you need to clean your keyboard, especially the Shift key. First, you need to shut down your computer and then unplug the keyboard if you are using a desktop computer and then prepare it for cleaning. After that, use a small cotton ear cleaning tool to get between the creases and clean them. You can dip it slightly in alcohol to make it more efficient in cleaning dust and dirt. And if you can, you have the option to pull apart the keyboard completely and then wipe away all the corrosion from the inside. Once you’re done, put the keyboard back together and then plug it back into your PC. Now turn your PC on and check if the Shift key is now working.

Option 2 – Try to disable the Sticky keys

Another thing you can try is to disable the Stick keys. How? Refer to these steps:
  • Tap the Win + I keys to open the Settings app.
  • After that, navigate to the Ease of Access section, and here, select Keyboard.
  • Next, make sure that the option for Press one key at a time under the Sticky Keys is toggled off.

Option 3 – Reinstall, update or rollback your keyboard driver

Once you’ve determined that the problem is in the software part of the keyboard, it is now time to try to reinstall, update or roll back your keyboard drivers. To reinstall the driver for your keyboard, refer to these steps:
  • From the WinX Menu, open the Device Manager.
  • In the Device Manager, you should find your laptop’s keyboard under the “Keyboards” option. Right-click on it and select the “Uninstall” option.
Note: If you’re not quite certain about your laptop’s keyboard, you can uninstall all the keyboards if there’s more than one.
  • After that, restart your PC and see if the keyboard driver is installing automatically. If not, open the Device Manager again and right-click on Keyboards, and select the option “Scan for hardware changes” to install it.
Once the keyboard driver is installed again, check if your keyboard is now working properly or not.

Option 4 – Try connecting the keyboard to a different USB port or another computer

The problem might have something to do with the USB port that’s currently in use by your keyboard. It could be that it’s not working so it makes sense to unplug it and attach it to another USB port. You can also clean the USB port on both ends to ensure that they are not affected by corrosion. In addition, you can also try connecting the keyboard to a different computer and see if the Shift key works there or not.

Option 5 – Try to check your connections

You can also try checking if the connection mode you are using for your keyboard is functioning properly. For instance, if you are using a Surface 2-in-device, you can clean the connection pins and see if it resolves the problem.

Option 6 – Run the Hardware and Devices Troubleshooters

  • The first thing you need to do is click on Start and then on the gear-like icon to pull up the window for Settings.
  • After opening Settings, look for the Update and Security option and select it.
  • From there, go to the Troubleshoot option located on the left-hand side of the list.
  • Next, select Hardware and Devices from the list and open the Troubleshooter and run it. Once it is doing its job, wait for it to complete the process and then restart the system.
  • After the system restarts, check if the problem’s now fixed. If not, refer to the next option given below.

Option 7 – Put your PC in a Clean Boot State

You might also want to put your computer in a Clean Boot State to fix the problem with the Shift key. It could be that there is a third-party program that’s preventing the Shift key from functioning. To isolate this possibility, you need to put your computer in a Clean Boot State.
  • Log onto your PC as an administrator.
  • Type in MSConfig in the Start Search to open the System Configuration utility.
  • From there, go to the General tab and click “Selective startup”.
  • Clear the “Load Startup items” check box and make sure that the “Load System Services” and “Use Original boot configuration” options are checked.
  • Next, click the Services tab and select the “Hide All Microsoft Services” check box.
  • Click Disable all.
  • Click on Apply/OK and restart your PC. (This will put your PC into a Clean Boot State. And configure Windows to use the usual startup, just simply undo the changes.)
  • Now try to connect the external devices and check if the error is now gone.
Read More
Changing color of START menu in Windows 10
The new Windows 10 update has brought some fixes, improvements, and little things to personalize our computer more. One of these personalization updates we have received is that we can now finally change the color of our START menu and taskbar and it is easy as 1,2,3. In order to change and personalize your START menu and/or title bars all you have to do is click on your windows icon to bring the start menu up and then click on settings. Windows 10 Start menu with marked settings iconOnce you are in setting windows go to personalization settings. Windows 10 settings menu with marked Personalization groupWhen the personalization setting opens go-to color tab on left and scroll down until you find 2 checkboxes under "show accent color on the following surfaces:" Windows 10 Color settings marked with optionscheck ones you wish to apply the effect to and you are done. Now your START menu and/or title bars are using the color scheme of your choice.
Read More
Free Wifi Hotspot Removal Guide for Windows

The Free Wifi Hotspot is offered to users that own a laptop and a desktop PC that has a wired connection to the Internet and no WiFi modem. The Free Wifi Hotspot is said to help users share their Internet connection with mobile devices that support the 2G/3G/4G/USB tethering connectivity. However, users will need a 2G/3G/4G modem attached to the computer/laptop with access to the Internet if they intend to benefit from the Free Wifi Hotspot software. Additionally, the Free Wifi Hotspot may collect data like your Internet history, downloads log, and software configuration for product placement optimization. PC users that run the Free Wifi Hotspot software may be shown pop-up windows with marketing materials from time to time and maybe redirected to promotional offers.

Several anti-virus applications have flagged Free Wifi Hotspot as a Potentially Unwanted Applications and may come bundled with other PUP-s that may harm your computer or steal some information, due to these risks it is marked for optional removal.

About Potentially Unwanted Applications

Everybody has experienced it – you download a piece of free application, then you see some unwanted applications on your computer or find a strange toolbar has been included with your browser. You didn’t install them, so how did they appear? These unwanted applications, which are referred to as Potentially Unwanted Programs, or PUPs in short, typically tag along as a software package when downloading the application and can ruin your PC or cause major annoyances. PUP does not involve malware in the traditional sense. The reason is, the majority of PUPs end up in a computer not because they slip through the security holes, for example, but because the users have got installed them themselves – totally unintentionally needless to say. A PUP might not be regarded as malicious or harmful but nonetheless, it is a standard reason for clunky OSs; some PUPs are a lot more aggressive by deliberately slowing down your computer or laptop.

How does unwanted software impact you?

Unwanted programs come in many forms. Usually, they can be seen in adware bundlers that are known to utilize aggressive and misleading advertising. The majority of bundlers install many adware programs from several vendors, each of which has its own EULA policy. Safebytes Anti-malware totally eliminates this threat and safeguards your machine against PUP or adware infection. The PUPs likewise get installed into your computer in the form of browser add-ons and toolbars. They will modify web browser settings, change the default search engine, substitute the default home page with their very own websites, slow down browsing speed, and also will ruin your system also. Potentially unwanted programs apply aggressive distribution methods to get onto your personal computer. The worst part of installing a PUP is the spyware, adware, and keystroke loggers that may hide inside. These are software programs that don’t do anything good for you; in addition to occupying space on the hard disk, they will also slow down your PC, often change settings without your approval, the list of troublesome features goes on and on.

Tips on avoiding PUPs

• When installing anything on your desktop, always read the fine print, like the license agreement. Do not accept terms of use that are for bundled programs. • Don’t accept standard, express, default, or any other installation settings which are recommended. Always opt for “custom” installation. • Make use of an antivirus program to boost your protection. Anti-malware programs like Safebytes Anti-malware has got real-time features that will block PUPs before they harm your computer. • Avoid adding freeware software you won’t make use of. Nowadays ‘freeware’ isn’t actually freeware – but ‘crapware’ bundling nonsense. • Always download programs from the original website. Most PUPs find their way onto your PC is through download portals, so avoid it entirely. Comply with these tips and you will almost never get potentially unwanted programs on your computer.

How To Get Rid Of Malware That Is Blocking Antivirus Downloads?

Every malware is bad and the level of the damage can vary greatly depending on the type of malware. Some malware sits in between the computer and the internet connection and blocks some or all websites that you really want to check out. It will also block you from adding anything to your PC, especially the anti-virus program. If you’re reading this, you may have affected by a virus that prevents you from downloading a security application such as Safebytes Anti-Malware. There are some options you could try to get around with this particular issue.

Use Safe Mode to resolve the problem

In the event the malware is set to run at Windows startup, then booting in safe mode should avoid it. Since just the bare minimum programs and services launch in “Safe Mode”, there are rarely any reasons for conflicts to happen. Listed here are the steps you need to follow to boot into the Safe Mode of your Windows XP, Vista, or 7 computers (check out Microsoft site for directions on Windows 8 and 10 PCs). 1) At power on, press the F8 key before the Windows splash screen starts to load. This will conjure up the “Advanced Boot Options” menu. 2) Make use of the arrow keys to select Safe Mode with Networking and hit ENTER. 3) When you are into this mode, you should have access to the internet once again. Now, use your browser normally and navigate to https://safebytes.com/products/anti-malware/ to download and install Safebytes Anti-Malware. 4) Following installation, run a complete scan and allow the program to delete the threats it detects.

Switch over to some other internet browser

Certain malware might target vulnerabilities of a particular web browser that obstruct the downloading process. If you suspect that your Internet Explorer happens to be hijacked by a trojan or otherwise compromised by cybercriminals, the most effective thing to do is to switch to an alternate browser such as Chrome, Firefox, or Safari to download your chosen security application – Safebytes Anti-Malware.

Install security software on a USB drive

Another solution is to download and transfer antivirus software from a clean PC to run a scan on the affected computer. Abide by these steps to run the antivirus on the infected computer. 1) On a virus-free PC, install Safebytes Anti-Malware. 2) Plug in the pen drive to a USB slot on the uninfected computer. 3) Double-click the Setup icon of the antivirus software to run the Installation Wizard. 4) Select the flash drive as the destination for saving the software file. Follow activation instructions. 5) Now, insert the thumb drive into the infected system. 6) Double click the Safebytes Anti-malware icon on the pen drive to run the application. 7) Click “Scan Now” to run a complete scan on the infected computer for viruses.

SafeBytes Anti-Malware Benefits

If you are looking to download anti-malware software for your PC, there are lots of tools on the market to consider however, you should not trust blindly anyone, regardless of whether it is free or paid software. Some are very good ones, some are decent, and some are just bogus anti-malware software that will harm your computer themselves! You should opt for a tool that has gained a good reputation and detects not only viruses but other kinds of malware too. On the list of recommended software by industry leaders is SafeBytes Anti-Malware, a popular security application for Microsoft Windows. Safebytes is one of the well-established PC solutions companies, which provide this complete anti-malware software program. When you have installed this software, SafeByte's state-of-the-art protection system will ensure that no viruses or malware can seep through your computer.

SafeBytes anti-malware provides a plethora of enhanced features which set it apart from all others. Below are some of the best ones:

Live Protection: SafeBytes offers an entirely hands-free active protection and is set to monitor, block, and get rid of all computer threats at its first encounter. They’re very efficient in screening and getting rid of different threats because they are continuously revised with new updates and safety measures. World-class AntiMalware Protection: This deep-cleaning anti-malware program goes much deeper than most anti-virus tools to clean out your computer. Its critically acclaimed virus engine finds and disables hard-to-remove malware that conceals deep inside your personal computer. Safe Web Browsing: SafeBytes checks and provides a unique safety rating to every single website you visit and block access to webpages considered to be phishing sites, thus safeguarding you from identity theft, or known to contain malware. Lightweight Tool: SafeBytes is a lightweight and easy-of-use antivirus and antimalware solution. As it uses minimum computer resources, this program leaves the computer power exactly where it belongs to: with you actually. Fantastic Technical Support: Expert technicians are at your disposal 24/7! They will promptly resolve any technical issues you may be encountering with your security software. SafeBytes can keep your PC protected from most advanced malware threats automatically with almost no input needed from you again. Once you’ve downloaded and installed SafeBytes Anti-Malware, you will no longer need to bother about malware or other security worries. If you want sophisticated forms of protection features & threat detections, buying SafeBytes Anti-Malware could be worth the dollars!

Technical Details and Manual Removal (Advanced Users)

If you’d like to perform the removal of Free Wifi Hotspot manually instead of using an automated software tool, you may follow these steps: Go to the Windows Control Panel, click the “Add or Remove Programs” and there, select the offending application to uninstall. In case of suspicious versions of browser extensions, you can actually remove them via your web browser’s extension manager. You’ll probably also want to totally reset your internet browser to its default configuration settings. To ensure the complete removal, manually examine your hard drive and Windows registry for all of the following and eliminate or reset the values accordingly. Please remember that only professional users should attempt to manually edit the registry because incorrect file removal leads to a major problem or even a computer crash. Furthermore, certain malware is capable of replicating itself or preventing deletion. It is advisable that you carry out the removal procedure in Windows Safe Mode.
Files: %APPDATA%\Microsoft\Windows\Start Menu\Programs\Free WiFi Hotspot %ALLUSERSPROFILE%\Microsoft\Windows\Start Menu\Programs\Free WiFi Hotspot %ALLUSERSPROFILE%\Application Data\Start Menu\Programs\Free WiFi Hotspot %Appdata%\Free WiFi Hotspot New Version Available Registry: HKEY_LOCAL_MACHINE\Software\[APPLICATION]\Microsoft\Windows\CurrentVersion\Uninstall..Uninstaller Free WiFi Hotspot_is1
Read More
New Windows vulnerability discovered
The latest security vulnerability was discovered inside both Windows 10 and Windows 11 letting any user access admin privileges inside the operating system. This can, of course, be used by a potential attacker to get full control of the system. The problem lies in Microsoft's security rules assigned to the Windows Registry and the Security Account Manager. Both for some reason have reduced restrictions allowing any local user to fully access the files without administrator privileges. The problem is even more amplified if we think about Security Account Manager which includes all account data including the passwords of all users using the same PC. This can provide a potential attacker with all information and let them log on into the administrator account for full control. Microsoft is aware of the matter and is tracking it with code CVE-2021-36934, and includes a complete workaround for the issue, which includes restricting access to  %windir%\system32\config and deleting any restore points or Shadow volumes that were created before that point until the hole is plugged with an official security patch.
Read More
Fix ERR_SSL_VERSION_INTERFERENCE on Chrome
If you encounter the ERR_SSL_VERSION_INTERFERENCE error on your Google Chrome browser then this means that the browser is trying to load a website with SSL protocol but is not able to do so. This error can occur for many reasons and in this post, you will be given potential fixes that could help you in resolving the problem. But bear in mind that these potential fixes are not that straightforward forward so if you encounter an option you don’t understand much, just skip to the options you have the knowledge of. There is no direct fault in the browser for the ERR_SSL_VERSION_INTERFERENCE error as there are issues with caching the website data locally on your computer. Moreover, this kind of error can also appear when a website is coded incorrectly or if there are conflicting browser extensions installed in the browser that prevents the website to function properly. Refer to the suggestions given below to fix the ERR_SSL_VERSION_INTERFERENCE error in Chrome on Windows 10.

Option 1 – Try clearing browser data

There are times when some data in the browser is conflicting with the loading of the website and triggers errors like ERR_CACHE_MISS. And so you can try to clear your browser’s data. This might be a very basic solution but oftentimes it works in fixing this kind of error in Google Chrome. Follow the steps below to clear the data in your browser.
  • Open your Google Chrome browser.
  • After that, tap the Ctrl + H keys. Doing so will open a new panel that allows you to delete the browsing history and other data in your browser.
  • Now select every checkbox that you see and click on the Clear browsing data button.
  • Then restart your Chrome browser and check if you can now open any website or not.

Option 2 – Try disabling TSL 1.3

If clearing the browser data didn’t fix the problem, you can also try to disable TSL 1.3 in Chrome. To do so, refer to these steps:
  • Open Google Chrome.
  • Next, type in “chrome://flags/#tls13-variant” in the address bar and tap Enter.
  • After that, you should see the experimental features page for Google Chrome where you can set TSL 1.3 to disabled.
  • After disabling TSL 1.3, restart your computer and check if the problem is fixed or not.

Option 3 – Reset Winsock, TCP/IP & Flush DNS cache

Resetting Winsock, TCP/IP, and flushing DNS might help in resolving the ERR_SSL_VERSION_INTERFERENCE error just follow these steps:
  • Right-click on the Start button and click on Command Prompt (administrator) so you can pull up an elevated Command Prompt.
  • After that, execute each one of the commands listed below. And after you typed in one after the other, you have to hit Enter.
  1. netsh winsock reset – type in this command to reset Winsock
  2. netsh int ip reset resettcpip.txt – type in this command to reset TCP/IP
  3. ipconfig /flushdns – type in this command to flush the DNS cache
  • Next, restart your PC and check if the problem’s fixed.

Option 4 – Get rid of any conflicting browser extensions

  • Open Chrome and press Alt + F keys.
  • Go to More tools and click Extensions to look for any suspicious browser extensions or toolbars.
  • Click the Recycle bin and select Remove.
  • Restart Chrome and press Alt + F keys again.
  • Proceed to On Startup and mark Open a specific page or set of pages.
  • To check if the browser hijacker is still active, click Set pages, if it is active, overwrite the URL.

Option 5 – Reset Google Chrome

Resetting Chrome can also help you get rid of the error. Resetting Chrome will restore its default settings, disabling all the extensions, add-ons, and themes. Aside from that, the content settings will be reset as well and the cookies, cache, and site data will also be deleted. To reset Chrome, here’s what you have to do:
  • Open Google Chrome, then tap the Alt + F keys.
  • After that, click on Settings.
  • Next, scroll down until you see the Advanced option, once you see it, click on it.
  • After clicking the Advanced option, go to the “Restore and clean up option and click on the “Restore settings to their original defaults” option to reset Google Chrome.
  • Now restart Google Chrome.
Read More
A Guide to Fixing Error Code 39

Easy Guide on how to Fix Error Code 39

Code 39 - What is it?

Code 39 is a device driver error code that pops up when the Windows operating system cannot load the driver for the hardware you want to use.

This hampers your ability to use the hardware properly. The error code is almost always presented in the following format:

“Windows cannot load the device driver for this hardware. The driver may be corrupted or missing.” Code 39

Error Causes

A device driver is a software program that tells the operating system how to control a particular hardware device. Each hardware device has a different driver.

There are separate device drivers for printers, CD-ROM readers, and keyboards, to name a few.

Many device drivers are already built into the operating system. But sometimes you will need to install a new device driver when you want to use a new piece of hardware device that the operating system is not familiar with, or does not anticipate.

Regardless of whether or not the drivers are already integrated into the operating system, you may still experience code 39, typically because of the corrupted or outdated drivers.

Outdated and corrupted drivers cause hardware malfunction and failure, which trigger device driver error codes like code 39. Other causes include incorrect registry values.

Further Information and Manual Repair

Below are some of the easiest and most effective methods to resolve Device Manager error code 39 on your PC.

To follow and implement these methods, you don’t require any technical knowledge or expertise. Simply follow these instructions to fix the error right away.

Method 1 - Fix with a Simple Reboot

There is a possibility that the error code 39 is caused by some fluke within the Device Manager or your BIOS.

If that’s the reason, then a simple PC reboot can resolve the issue immediately. Therefore, before you try anything, it is advisable to restart your system.

If it works, then that is great, but if it doesn’t, then don’t worry, try other methods given below to fix this problem successfully.

Method 2 - Uninstall and Reinstall Drivers

If the error code 39 is generated due to faulty or outdated drivers, then simply uninstall and remove them and then reinstall new driver versions. There are two ways to remove faulty drivers.

Method One

  • One is, to go to the start menu, click on Control Panel, and then Add/Remove Programs.
  • Remove the program and the driver you think is causing problems. This will thoroughly remove all traces of the faulty driver.
  • To reinstall, follow the same steps but this time install the new device driver version.

Method Two

  • The other way is to go to the start menu, type Device Manager in the search bar, and then press enter to continue.
  • In the Device Manager, find and locate the problematic device.
  • After that, double-click the category of device that you wish to uninstall. Let’s say, Windows is unable to load the graphics card driver.
  • This means you will have to click on the Display Adapter category in the Device Manager to uninstall the graphics card.
  • After you have successfully uninstalled, Windows will prompt you to confirm device removal.
  • Simply click OK to confirm and proceed. To activate the changes, restart your PC.
  • To reinstall, go to the Device Manager, click on the Action tab and then select the option ‘Scan for Hardware Changes.’

This method, although effective in resolving error code 39,  can be time-consuming. To avoid the hassle and save time, try method 3.

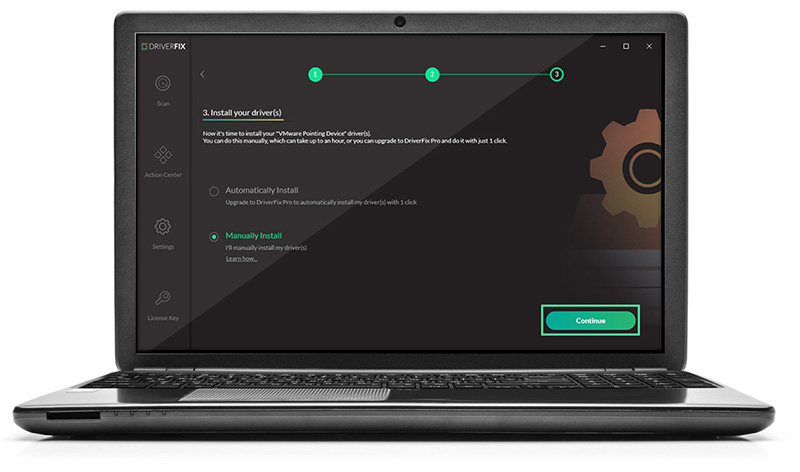
Method 3 - Update Drivers Automatically with DRIVERFIX

If you would like to read more helpful articles and tips about various software and hardware visit errortools.com daily. On the other hand, if your computer is going through some driver-related issues that have to get fixed, there is a one-click solution known as DRIVERFIX you could check out to resolve them. This program is a useful tool that could repair corrupted drivers and optimize your PC’s overall performance. This is basically a solution that’s within your grasp with just a click. It’s easy to use as it is user-friendly. For a complete set of instructions in downloading and using it, refer to the steps below Perform a full system scan using DRIVERFIX. To do so, follow the instructions below.
  1. Download and install DRIVERFIX. from the official site.
  2. Once the installation process is completed, run DRIVERFIX. to perform a full system scan.
  3. After the scan is completed click the “Update All” button.
Read More
Repair Windows 10 Error Code 0xC1900208, 0x4000C

Repair Windows 10 Error Code 0xC1900208, 0x4000C

Code 0xC1900208 0x4000C, What is it?

The Error Code 0xC1900208 – 0x4000C is an error that is caused by an installed application or program on your computer that is not compatible with Microsoft Windows 10. The incompatible application prevents you from being able to complete the upgrade to Microsoft Windows 10 and will continue to do so until the issue is resolved. Common symptoms include:
  • You receive a dialog box displaying Error Code 0xC1900208 – 0x4000C
  • You are unable to successfully complete the Microsoft Windows 10 upgrade process.

Solution

Restoro box imageError Causes

Error Code 0xC1900208 – 0x4000C is caused by a non-compatible application or program that is currently installed on your computer, and is not allowing the Microsoft Windows 10 upgrade to finish the installation and update process.
  • The upgrade is stopped due to an incompatible app or program.
  • Out of date or no longer supported software can cause this error to occur.
  • Device drivers that are not up to date or no longer compatible.
  • The computer might pick up malware along the way and might be preventing the upgrade. If error code 0xC1900208 – 0x4000C is not rectified, you’ll not be able to proceed with your Windows 10 upgrade.

Further Information and Manual Repair

The good news is, error code 0xC1900208 – 0x4000C is a relatively common problem that is usually easily fixed by the user at home, though it can be a little time-consuming. To elude this time-consuming process, use a powerful tool to rectify the issue in no time (TSC). Before making any attempts to repair this error, ensure to perform a compatibility test.
  • Check the compatibility of applications and programs installed on your computer to locate and remove, or fix the one that is incompatible. (Don't stop at the first one you find, there could be multiple incompatibility issues.)
  • Check to ensure all programs and software are not outdated or no longer supported, and remove or fix any outdated or unused, unnecessary programs or software. (This is also a great way to free up space and clean your computer up a bit.)
  • Check to ensure that all of your device drivers are current, up to date, and compatible with Microsoft Windows 10, and replace or update where necessary.

Method 1:

Use the get Microsoft Windows 10 application on your computer to check its compatibility, follow the steps below to run the check.
  1. Look at the taskbar, to the right; you will see an icon for Microsoft Windows 10, right-click the icon. Locate the option in the menu to check the status of your upgrade. This will open an app for getting Microsoft Windows 10.
  2. Next, you will see 3 lines on top of one another on the upper left side, this will open a drop-down menu, once you have this menu open, locate the option to check the compatibility of your computer.
  3. Microsoft Windows will then run a check of your entire computer to check for compatibility with Microsoft Windows 10. Once it has finished its check, a pop-up window will display whether or not your computer will work with Microsoft Windows 10, and will also display a list of any hardware and software that are not compatible with the upgrade.
  4. This may not catch everything and there may still be incompatible programs so the previous steps, though time-consuming may still be necessary.

Method 2:

Once the incompatible applications are discovered, use the control panel to remove/uninstall them. The steps are below:
  1. Locate your computer’s Control Panel.
  2. Choose the option that says “Programs”
  3. From the options available, select the ‘Programs and Features’ link.
  4. Locate the app in the queue or menu.
  5. Right-click and choose the uninstall option.
… another option
You can also locate the app on the ‘app homepage’, right-click and choose the ‘uninstall’ option. If after following these steps the problem is still not corrected, download and install an automated tool for a quick fix.
Read More
How to Fix Error Code 0xC004C4AE on Your PC

How to Fix Error Code 0xC004C4AE on Your PC

Error Code 0xC004C4AE - What is it?

Activation errors in Windows 10 can interfere with your ability to fully use the system. When Error Code 0xC004C4AE appears on your computer, you may see a message that shows that the validation process has been stalled due to binaries that appear to have been tampered with.  

While the text of this message may sound intimidating to people who are not familiar with the inner workings of the Windows 10 system, the basic meaning of the error message is that something has been introduced to the system that is not natively supported in Windows 10. During the Activation process, Windows checks to ensure that all of the Windows elements that are currently on the computer are valid and authentic to the Windows system. Usually, this particular error code refers to a language package that has been downloaded into the system using an outside application, which the Windows 10 operating system does not support. 

Common symptoms include: 

  • An error message when the activation is attempted 
  • Inability to complete the Windows 10 Activation process 
  • Inability to fully use apps in Windows 10 until the issue is resolved 

This particular error can easily be resolved with a few simple steps. However, if you are not confident in your ability to use the methods below or they do not fully remove the issue on your computer, you may want to seek the assistance of a qualified repair technician who is well versed in the Windows 10 Activation process.

Solution

Restoro box imageError Causes

The most basic cause of Error Code 0xC004C4AE is that an unsupported language package has been enabled in the computer. This most often occurs when third-party applications have been used to introduce additional display languages to your system. While third-party applications that provide language packs are acceptable in some versions of the Windows operating system, the Windows 10 Activation process will not be able to complete if the system detects that one of these unofficial language packs exists on your machine.

Further Information and Manual Repair

There are several methods that may be helpful in resolving the basic issue in the display languages that causes Error Code 0xC004C4AE to appear: 

Method 1: Restore Your System to an Earlier Point to Revert Changes 

Use a backup copy to restore your computer to an earlier date, in effect undoing the changes that caused the error. When your system has been restored, you will be able to go through any language packs that are not native to the Windows operating system and remove them before re-attempting the installation and activation of the Windows 10 system. 

This method is most useful if you keep a regular backup of your system and files. If you do not regularly back up the information on your computer, attempt one of the other methods instead. If you are unsure of how to use a backup to revert your changes or are not comfortable completing this step on your own, contact a certified Windows technician to assist you in the process. 

Method 2:  Revert to an Earlier System to Remove the Language Pack 

If you are unable to restore your system using a backup, the other option to resolve Error Code 0xC004C4AE is to halt your installation of Windows 10 and go back to Windows 7 or Windows 8.1, from which you will be able to remove the language pack in question. Once the offending language pack has been completely removed from your computer, the Windows 10 Activation process should be able to proceed normally. 

Several versions of windows don’t support language packages, so the best way to prevent this error from occurring is to avoid using any kind of third-party tool to install additional languages onto your Windows system. Activities Language You may be able to use third-party tools to instead complete alternative language actions without installing these languages as language packs. 

If the above solutions do not help you to resolve Error Code 0xC004C4AE on your machine, get in touch with a qualified Windows repair technician, who may be able to perform the operations needed to remove the problematic language pack from your computer and allow the Windows 10 Activation process to continue to completion. 

Read More
1 2 3 162
Logo
Copyright © 2022, ErrorTools. All Rights Reserved
Trademarks: Microsoft Windows logos are registered trademarks of Microsoft. Disclaimer: ErrorTools.com is not affiliated with Microsoft, nor claim direct affiliation.
The information on this page is provided for information purposes only.
DMCA.com Protection Status