How to Fix ntdll.dll crash Error on Windows

DLL files, also known as Dynamic Link Libraries are external parts of applications that run on Windows as well as other operating systems. Almost all applications are not complete in themselves and store code in different files. In this post, we will be discussing one DLL file called ntdll.dll. It is described as “NT Layer DLL” which means that it contains some Kernel functions that help in the normal functioning of the Windows operating system. It is created by Windows in the System32 folder when the OS gets installed. This file can serve different programs simultaneously by providing them with different Kernel functions which support the programs’ performance. However, if you encounter the ntdll.dll file error on your Windows 10 computer, read on as this post will guide you in fixing the problem.

Option 1 – Try to re-register the ntdll.dll file

You may have to re-register the ntdll.dll file using the regsvr32.exe before you can successfully install the program and fix ntdll.dll file crash error. The Regsvr32 tool is a command-line utility that can be used to register and un-register the OLE controls like DLL and ActiveX (OCX) control in the Windows operating system. Follow the steps below to use it.

  • Open Command Prompt as admin from the WinX menu.
  • Next, type the following commands in the elevated Command Prompt and hit Enter to execute the command. This will re-register the affected DLL file using the Windows operating system tool, regsvr32.exe.
    • exe /u ntdll.dll
    • exe ntdll.dll
  • You should see a message saying, “DllRegisterServer in vbscript.dll succeeded” if the Regsvr32 tool was able to run successfully. After that, try to install the program again and see if it now works.

Option 2 – Disable problematic Internet Explorer add-ons

There are instances when some add-ons in the Internet Explorer browser can cause the ntdll.dll file crash error. Thus, you need to disable some add-ons in Internet Explorer and then check if it fixes the problem.

Option 3 – Try running the DISM tool

You might want to repair potentially corrupted files in your system as having them could also trigger the ntdll.dll file crash error. To repair these corrupted system files, you can run the DISM commands:

  • Tap the Win + X keys and click on the “Command Prompt (Admin)” option.
  • After that, input each one of the commands listed below sequentially to execute them:
    • Dism /Online /Cleanup-Image /CheckHealth
    • Dism /Online /Cleanup-Image /ScanHealth
    • Dism /Online /Cleanup-Image /RestoreHealth
  • Once you’ve executed the commands given above, restart your computer and check if the DCOM error is now fixed.

Option 4 – Try to run the Program Compatibility Troubleshooter

You might also want to run the Program Compatibility Troubleshooter. This built-in troubleshooter is available in the Windows Update & Security section. From there, select Troubleshoot. This will find a list of programs for you and since you have already downloaded the driver files, just click on Not Listed located at the top of the program list. After that, browse and select the driver files and then let the program do its job.

Option 5 – Try to replace the DLL file with a trusted source

  • First, you need to get the new DLL file from another computer with preferably the same file version number.
  • After that, you need to boot your PC into Safe Mode and navigate to the paths listed below and then replace the file using a USB drive or other external storage devices.
    • x86: This PC > C:WindowsSystem32
    • x64: This PC > C:WindowsSysWOW64
  • Next, type “cmd” in the Cortana search box and right-click on Command Prompt, and select “Run as administrator” to open it with administrator privileges.
  • Now type the “regsvr32 ntdll.dll” command and hit Enter.
  • Restart your PC and check if the error is now fixed.

Option 6 – Try scanning your computer using Windows Defender

The ntdll.dll file crash error might also be infected with malware or virus and to eliminate it, you have to scan your computer using security programs like Windows Defender.

  • Tap the Win + I keys to open Update & Security.
  • Then click on the Windows Security option and open Windows Defender Security Center.
  • Next, click on Virus & threat protection > Run a new advanced scan.
  • Now make sure that Full Scan is selected from the menu and then click the Scan Now button to get started.
If you like to learn and find out more about various Windows errors, and how to repair them go to our vast archive or use search to find articles that will explain and help you in solving your issue.
However, if you prefer to do things fast and with automatization then we are proposing to use an automated solution for your issues. The application that we are recommending is Advanced System Repair Pro
Advanced System Repair utilizes multiple tools all in one to give you a quick, simple, reliable, and very thorough diagnosis of your PC. It brings you all the tools you need in one program to clean, fix, protect, optimize and boost your PC!
1-Click Maintenance
All the tools to make it simple and easy! It's like having a professional technician at the click of a mouse.

Junk Cleaner
Keeping your computer free from unnecessary clutter also helps make your computer last longer. Like any other machine, if you keep it clean and take care of it, it will serve you better for longer!

Optimize background apps
Optimize applications background activity with the built-in Application Optimizer feature.

Disk Defrag
With a simple 1-click, Advanced System Repair speeds up your PC by assembling fragmented files on your machine and organizing them more efficiently.

Malware Removal
Finds and removes all types of harmful malware including trojans, worms, bots, adware, spyware, PUPs, and more!

Privacy Cleaner
The all-in-one privacy suite to Clean Your Tracks & Protect Your Privacy! Make your computer safe, secure, and more efficient!

System Tweak/Optimizer
ASR will analyze your complete system and settings to adjust your PC to function at its maximum performance.

Registry Cleaner
Over time, as you install and uninstall applications, the registry can become cluttered with old entries and broken settings which can result in program crashes, and annoying messages and slow the computer down.
Visit our Advanced System Repair Pro Download page to inform yourself about all the benefits of this software and get a free trial copy of it.
advanced system repair pro

Advanced System Repair Pro

One-click automated PC repair solution
ASR logo
With Advanced System Repair Pro you can easily
Replace damaged files
Restore performance
Free disk space
Remove Malware
Protects WEB browser
Remove Viruses
Stop PC freezing
DOWNLOAD
Privacy Policy | Terms of Use | Uinstall
Advanced System Repair Pro is compatible with all versions of Microsoft Windows including Windows 11

Share this article:

You might also like

A Quick Guide to Resolving Missing Dciman32.dll Error

How to Repair Missing Dciman32.dll Error

Missing Dciman32.dll Error – What is it?

Dciman32.dll is a type of dynamic link library. Just like any other dll file, it includes instructions and is called to load and run different programs. The Missing Dciman32 dll error code occurs when the program dependent on this dll file type is unable to load the file. This error can occur while using or installing certain programs on your system.
  • "Dciman32.dll Not Found"
  • "Cannot find [PATH]dciman32.dll"
  • "This application failed to start because dciman32.dll was not found. Re-installing the application may fix this problem."
  • "The file dciman32.dll is missing."
  • "Cannot start [APPLICATION]. A required component is missing: dciman32.dll. Please install [APPLICATION] again."

Solution

Restoro box imageError Causes

The Dciman32.dll error causes include:
  • Dciman32.dll file corruption or removal
  • Poor program installation that uses Dciman32.dll file
  • Registry issues
  • Hardware failure
  • Malware infection

Further Information and Manual Repair

Here are some of the easiest and effective ways to fix the Dciman32 dll error on your PC:

Method 1 - Restore Dciman32 dll file Back on your PC

Remember DLL files are shared files. You might have deleted this file while uninstalling some other program on your PC. Therefore to restore Dciman32.dll file, first check your recycle bin. If you locate it, then that’s great however if you don’t, then another way to restore the Dciman32.dll file is to download it from the internet.

Method 2 - Update Drivers for Hardware Devices

To update the driver first download the latest drivers from the hardware manufacturer’s website. Now go to the start menu, then the control panel and then click the device manager. Once you open the device manager, locate the hardware device you want to update the driver for. For example, if you experience a Dciman32 dll error when you play a 3D video game, then this indicates that you need to update the drivers for your video card. Navigate through different categories of hardware devices by clicking the icon to find the hardware you want to update. After finding the hardware you’re updating the driver for, right-click on the hardware’s name and then choose properties and then the driver tab. Click update driver button. This method will take approximately 10 to 12 minutes. To activate the changes you will have to restart your PC.

Method 3 - Reinstall the Program that Uses Dciman32.dll File

Another way to resolve the Dciman32.dll error code on your system is to reinstall the program showing the error message. Poor program installation can also be the reason for the error occurrence. To reinstall the program, first, you will have to uninstall the program showing the error message, and then restart your PC to activate changes. Once your computer restarts, reinstall the deleted program. Make sure that the disc or the CD you are reinstalling the program from is bug-free and not scratched.

Method 4 - Scan your PC for Registry Issues and Viruses

If the dll error still persists, then this means either the error is triggered by viruses or registry issues. To resolve these issues you will have to install and run programs on your PC antivirus and a registry cleaner. However, you should note that installing too many programs can slow down your system’s performance.

Restoro

The best way to scan for viruses and registry issues without compromising your PC performance is to download Restoro. This is a multi-functional PC Fixer embedded with 4 powerful and unique PC repair utilities including an antivirus that scans all kinds of viruses, Trojans, and malware. It also features a registry cleaner that removes all unwanted files saved in the registry, cleans the registry, repairs the damaged dll and system files including the Dciman32.dll file, and restores them back to normal. Furthermore, to ensure your system performance at its optimum level, it is also embedded with a system optimizer. And forth utility it features is Active X controls and class scanner. This is a safe and a user-friendly program compatible with all Windows versions. Click here to download Restoro now.
Read More
Disable Windows 11 animations for fast work
windows 11 animations
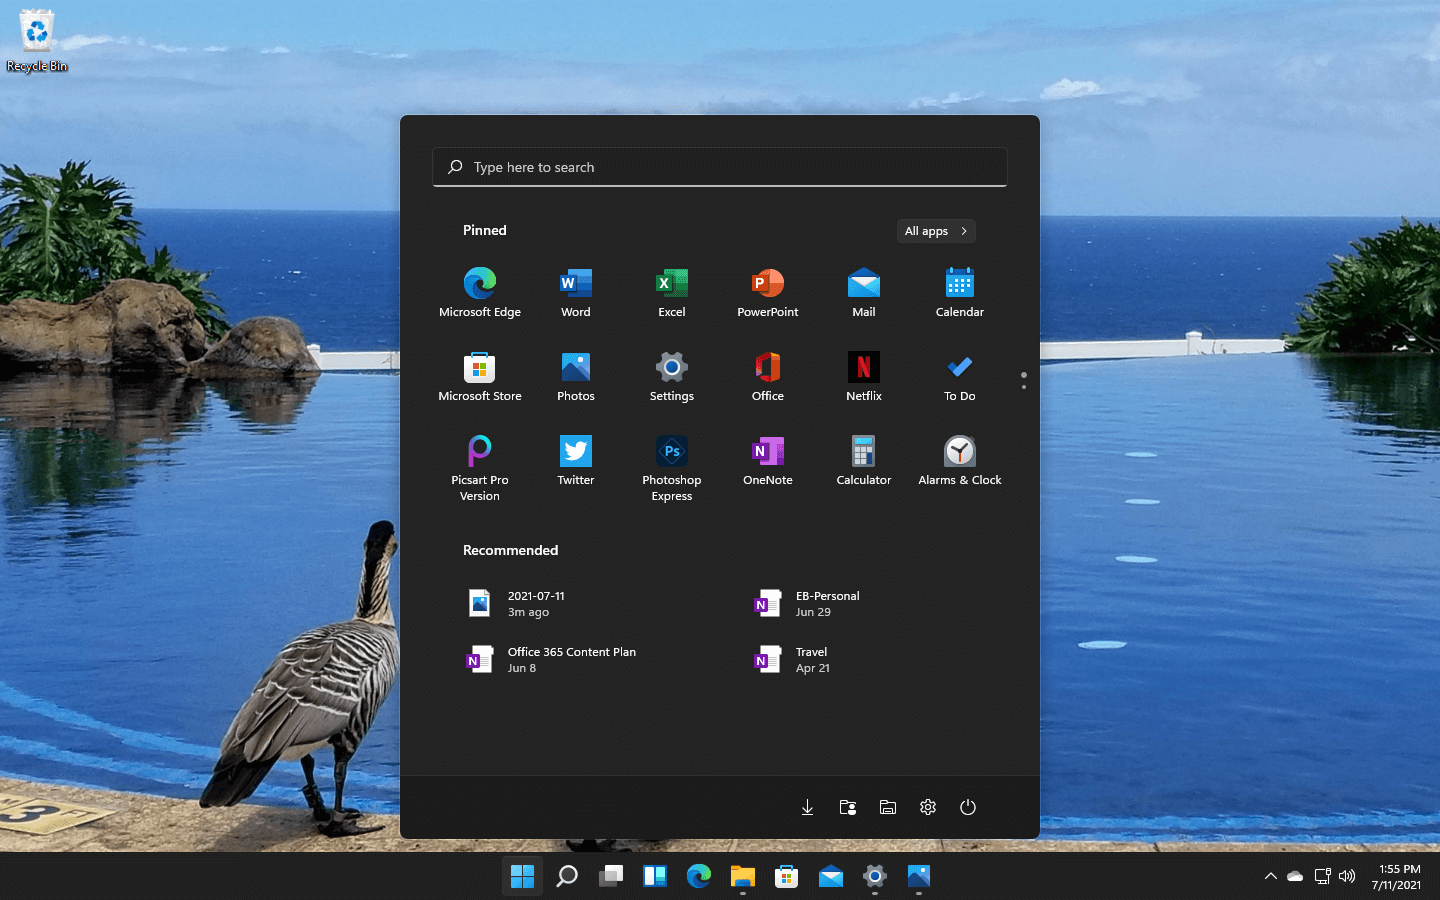
Windows 11 has some cool animations including fading effects which make working in it feels nice and futuristic but the cost of this is that there is a slight delay to certain actions performed. If you want the snap fast feature in Windows 11 and do not care about this eye candy there is an easy way to turn animations off inside it.
  • First, open Windows Settings by pressing ⊞ Windows + I on your keyboard
  • Alternatively, click on Start, search for Settings, and then click its icon.
  • When Settings appears, look in the sidebar and select Accessibility.
  • In Accessibility settings, click on Visual Effects.
  • In Visual Effects, switch Animation Effects to Off.
That’s it, changes will be applied automatically, you can close settings and continue working inside Windows 11 without animations and fades. You can always switch animations back On via settings if you change your mind.
Read More
New Snipping tool redesigned in Windows 11
Windows 11 Snipping tool
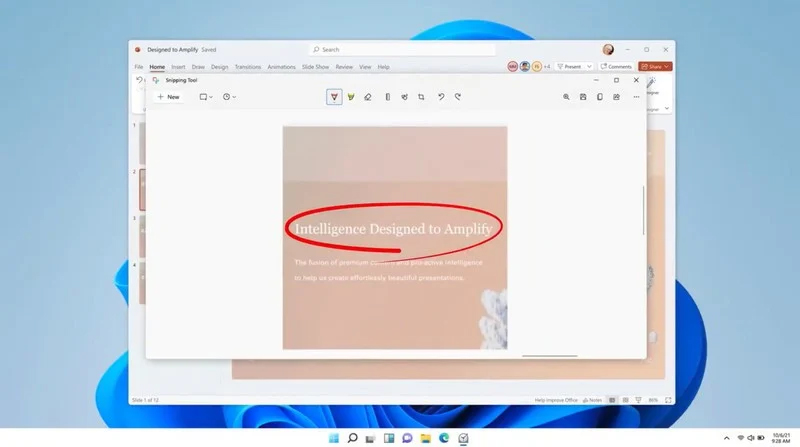
The latest update from Panos Panay on Twitter is including New and redesigned Snipping tool inside Windows 11. From the shared video, we can see that it includes modern Windows 11 UI redesign and it looks and feels like a part of Windows 11. More things that can be seen from the shared video is that it looks like the new snipping tool is a merged version of the old with snip & sketch. It is good to see that it is still possible to capture screen with easier way natively inside Windows 11 but some more functionality would be more welcome I guess. Users were asking for added functions for a long time like adding simple text for example but from shared video, no new features were presented so for some users 3rd party solutions will still be the way to go. The new and redesigned Snipping tool will roll out with the next update and we will see then about all new features inside it firsthand. Until then, take care.
Read More
The new Windows 11 dev build will be buggy
windows 11 dev build channelMicrosoft sent an email to users on the Dev build channel saying that the company intends to push some builds that don’t represent what consumers will receive with Windows 11 when it officially releases. In other words, these are going to be some rather buggy builds that won’t be too enjoyable to use. The company recommends users switch from the Dev to the beta channel if they aren’t prepared to deal with the instability. We’ll have to wait and see just how buggy these builds are, but if Microsoft is actually sending out a warning about them it is very likely that builds will be plagued with issues and maybe even stability problems.

Back to Windows 10

How we can expect some buggy build of Windows 11 if you prefer a stable system over new features maybe best decision would be to switch back to Windows 10 until the new OS hits official release.

Switching from dev build channel to beta channel

Another solution, if you do not want to deal with too many issues, is to switch from Dev build channel to beta where things will be more stable. Follow the guide below in order to quickly switch to the beta channel. Following instructions only apply to Windows 11 installations that are linked up to the Windows Insider program, not clean installation of OS.
  1. Press ⊞ WINDOWS + I to open settings
  2. Inside settings click on Windows update
  3. In Windows Update click on Windows Insider Program
  4. Inside click on Choose your Insider Settings
  5. Click on the button next to Beta Channel to select it (you can switch back to the Dev channel here if you change your mind)
The setting will be saved automatically and from now on you will only receive beta channel updates.
Read More
Change default name for New Folder in Windows
Anytime when a new folder is created in Windows name "New Folder" is offered and set as the default name. If by any chance you would like to change this and set your own default name instead of the standard one, follow this guide. Please be aware that this guide will require you to change the registry of Windows, it is common practice to make a backup of your registry each time you want to manually change any values in it, just in case something goes wrong.
  • In order to change the default new folder name first press ⊞ WINDOWS + R to open the run dialog, type in it RegEdit, and press ENTER run dialog with regedit
  • In registry editor find the key:
HKEY_CURRENT_USER\SOFTWARE\Microsoft\Windows\CurrentVersion\Explorer
  • Select the NamingTemplates key. If it is not present, you’ll need to create one.
  • Right-click the NamingTemplates key to add a String Value.
  • Assign it the following name: RenameNameTemplate.
  • Double-click on the RenameNameTemplate data value to open the Edit String dialog box.
  • In the Value Data field enter the new text you want to appear when you create a new folder. You have to make sure you are not using any of the following characters: \ / ? : * " > < |
  • Close the Registry Editor and Exit.
  • Now, when you create a new folder, it will be named Whatever you chose instead of the New folder.
And that is all to it, you now have your own personal new folder naming template.
Read More
How to Fix Error 0x0000007E
[vc_row][vc_column][vc_column_text]

Repair Error 0x0000007E

What is 0x0000007E?

 Error 0x0000007E is a Windows Stop error message that is displayed on a blue screen. This may appear when browsing the internet, listening to music on some media player application or while working on an important document on MS Word or Excel.  This message strikes terror as the screen goes blue without any warning.

Solution

Restoro box imageError Causes

The error code 0x0000007E is triggered because of:

Further Information and Manual Repair

If you experience this error on your PC, you don’t have to panic and call a professional. This error is rated as an easy fix. And you can easily resolve the issue even if you don’t have a piece of strong technical knowledge about computers. Here are some quick fixes to repair the error 0x0000007E on your PC in the shortest time and without any hassle:
  • Cause: Faulty Hard Drive

Solution: In the event of a faulty hard drive, it is best to create a backup of all your data and get a new hard drive. However, first, it is advisable to use the Windows tool called Chkdsk (Check Disk) to identify and determine if the hard drive is faulty or not. To do so, click on the start menu and type CMD into the search box. Click on it to run. Now a black box will be displayed on the screen, simply type the command Chkdsk and run it to find out if your hard drive is faulty and damaged. If so, then get a new hard drive.
  • Cause: Hard Drive is full

Solution: Error 0x0000007E may also occur if the hard drive is full. To check the storage space on your hard drive, go to My Computer. If the space is full, then it is advisable to delete some files or uninstall heavy and recently installed programs to free up some space.
  • Cause:  BIOS not updated

Solution: You may come across this blue screen error if your BIOS is not updated. To update your BIOS, restart your computer and press F2 to enter setup.  Now go to SATA Operation and change RAID AHCI to RAID ATA. Save changes and then exit. By doing so, you can update your BIOS and fix the error 0x0000007E immediately. It’s that easy![/vc_column_text][/vc_column][/vc_row]
Read More
Fix Error 0x8004230F when creating Restore
Creating a System Restore point is definitely a must especially when you are about to make some changes to your computer. This will help make sure that the system settings and files can go back to an earlier point, should something go wrong, without affecting any personal files. However, there are cases when creating a System Restore Point does not go smoothly and you encounter an error that says, “The shadow copy provider had an unexpected error while trying to process the specified operation ( ox8004230F )”. Aside from creating System Restore Point, you can also encounter this error when you create a system image or backup. According to reports, this error pops up when the required services are not running or not properly responding. And to fix it, there are several recommendations that will be provided in this post to fix the Error 0x8004230F when creating System Restore point in Windows 10. You can try to check the Volume Shadow Copy Services status or run the VSSADMIN tool. You could also check the status of the Microsoft Software Shadow Copy Provider Service or create System Restore Point in a Clean Boot State. For more details, refer to the provided options below.

Option 1 – Try checking the status of the Volume Shadow Copy Service

  • Tap the Win + R keys to launch the Run utility and type “services.msc” in the field and hit Enter to open the Windows Services Manager.
  • From the list of services, look for the Volume Shadow Copy service and double-click on it.
  • After that, this will open the Properties where you have to make sure that the Startup type is set to Automatic (Delayed Start) and then click on the Start button underneath it.
  • Once done, click on Apply and then OK to save the changes made.
  • Now try creating a System Restore Point again and see if the error is already fixed or not.

Option 2 – Try to run the VSSADMIN tool

In case you don’t know, the shadow copy provider is sensitive and some other backup, disk cloning, etc. can make it malfunction. To fix this, you can run the VSSADMIN tool by following these steps:
  • Tap the Win + R keys to open the Run dialog box and type “cmd” and hit Enter to open Command Prompt.
  • Next, execute this command to check if you have other third party VSS admin providers: vssadmin list providers
  • After that, if it finds any, you need to disable them but if it does not find anything, then proceed.

Option 3 – Try to check the Microsoft Software Shadow Copy Provider Service status

  • Tap the Win + R keys to launch the Run utility and type “services.msc” in the field and hit Enter to open the Windows Services Manager.
  • From the list of services, look for the Microsoft Software Shadow Copy Provider Service and double click on it.
  • After that, this will open the Properties where you have to make sure that the Startup type is set to Automatic (Delayed Start).
  • Once done, click Apply and OK to save the changes and then try creating System Restore Point again.

Option 4 – Troubleshot the problem in a Clean Boot State

It is possible that some third-party program installed in your computer might be the one that’s causing the ox8004230F when you try to create a System Restore point. Thus, you can try to boot your computer in a Clean Boot State and then try to perform the task again.
  • Log onto your PC as an administrator.
  • Type in MSConfig in the Start Search to open the System Configuration utility.
  • From there, go to the General tab and click “Selective startup”.
  • Clear the “Load Startup items” check box and make sure that the “Load System Services” and “Use Original boot configuration” options are checked.
  • Next, click the Services tab and select “Hide All Microsoft Services” check box.
  • Click Disable all.
  • Click on Apply/OK and restart your PC. (This will put your PC into a Clean Boot State. And to configure Windows to use the usual startup, just simply undo the changes.)
  • Once your computer has restarted try to create a System Restore Point again and if it now works, start to isolate the problem by checking which one of the programs you installed recently is the root cause of the problem.
Read More
Fix Windows Script Host in Windows startup
In case you don’t know, the Windows Script Host provides capabilities such as batch files but it also includes many other features like it can be used by a user manual as well as created by the operating system to automate the flow of operations in the system. However, there are a lot of errors that could take place in such a process. One of them is the following error:
“Script: <PATH of the VBS Script> Line: x Char: x Error: The description of the error. Code: xxxxxxxx Source: (Source of the error)”
At the time of writing, it isn’t clear yet what the root cause of the error really is but there are several potential fixes you can check out to fix it. You can try to run the System File Checker or set the default value for the .vbs key, or troubleshoot the problem in a Clean Boot State. You could also try to repair Install Windows 10 or scan your computer for malware. For more detailed instructions refer to the following options.

Option 1 – Try to run a System File Checker scan

  • In the Windows Start Search, type “command prompt” and right-click on Command Prompt from the search results, and then select the “Run as administrator” option.
  • After opening Command Prompt with admin privileges, type the “sfc /scannow” and tap Enter to execute it.
  • Once the scan is finished, restart your computer and see if the Windows Script Host error.

Option 2 – Try setting the default value for the .vbs key

  • Tap the Win + R keys to open the Run dialog box and type “Regedit” in the field and tap Enter to open the Registry Editor.
  • Next, navigate to this registry path: ComputerHKEY_CLASSES_ROOT.vbs
  • From there, double click on the default string and change its Value data to “VBSFile”.
  • Exit the Registry Editor and restart your computer for the changes to take effect.

Option 3 – Try troubleshooting the problem in a Clean Boot State

Setting your computer in a Clean Boot State can help you diagnose and later troubleshoot the problems in your computer. During this state, the system will start with a minimal number of drivers and startup programs that help in isolating the problem with the interfering software. To put your computer in a Clean Boot State, follow the given steps below.
  • Log onto your computer as an administrator.
  • Type in MSConfig in the Start Search to open the System Configuration utility.
  • From there, go to the General tab and click “Selective startup”.
  • Clear the “Load Startup items” check box and make sure that the “Load System Services” and “Use Original boot configuration” options are checked.
  • Next, click the Services tab and select the “Hide All Microsoft Services” check box.
  • Click Disable all.
  • Click on Apply/OK and restart your PC. (This will put your PC into a Clean Boot State. And configure Windows to use the usual startup, just simply undo the changes.)
  • From there, start to isolate the problem by checking which one of the programs you installed recently is the root cause of the problem.

Option 4 – Try to repair install Windows 10

  • First, you have to click this link and then click the Download Tool Now button.
  • Next, click the “Use the tool to create installation media (USB flash drive, DVD, or ISO file)…” option and follow the next given instructions on the screen.
  • Now select the ISO file option in step 5.
  • After that, you should now have an ISO file.
  • Next, go to the location where you’ve downloaded the ISO file.
  • Then right-click on the Windows 10 ISO file and select the Open with option and then select File Explorer.
  • Now click on “setup.exe” and follow the next instructions that appear on the screen. When asked, you have to select either Nothing (clean install) or Keep personal files only option. Take note that you must not select the “Keep personal files, apps, and Windows settings”.

Option 5 – Try scanning your computer using Windows Defender

It is possible that your computer is infected with malware which could be why you’re getting the Windows Host Script error. Thus, you need to scan your computer using Windows Defender.
  • Tap the Win + I keys to open Update & Security.
  • Then click on the Windows Security option and open Windows Defender Security Center.
  • Next, click on Virus & threat protection > Run a new advanced scan.
  • Now make sure that Full Scan is selected from the menu and then click the Scan Now button to get started.
Read More
Setup has failed to determine install choices
Running the Windows Setup does not always go smoothly as you could encounter some errors along the way. One of these errors is the “Something happened, Setup has failed to determine supported install choices” error. The only given option in such cases is to click the Close button and exit the setup. This kind of error in Windows setup can occur when you try to downgrade to the previous version of Windows using the built-in mechanism. This error could be caused by a corrupted image or it is also possible that the set of files are incomplete. Aside from that, it could also be due to compatibility issues or that the module used to downgrade the Windows operating system is not configured properly. To fix this error, you have to run the Windows Setup program in compatibility mode so that you can downgrade Windows. You could also use the image for the lower version of Windows that’s available on the official site of Microsoft. But before you do any of these, make sure that you’re logged in as an administrator. To fix the “Something happened, Setup has failed to determine supported install choices” error, follow the given options below sequentially.

Option 1 – Try to run the Installer of the downgraded version in Compatibility Mode

This is the first thing you can try to resolve the issue instead of going right ahead on making a bootable device. So if you are downgrading Windows, you can try to run the installer in the compatibility mode for that specific Windows version.
  • Look for the setup file.
  • Once you find it, right-click on it and select Properties from the context menu.
  • After that, go to the Compatibility tab and mark the checkbox for “Run this program in compatibility mode for:” and from the drop-down list, select either Windows 7 or Windows 8.
  • You also have to check the “Run as administrator” option.
  • Now click the Apply button and then click OK to save the changes made and check if it has resolved the issue or not.

Option 2 – Try to troubleshoot compatibility

This option is almost the same as the first one except it is an alternative way of fixing the “Setup has failed to determine supported install choices” error in case the first one didn’t work. In this option, you will troubleshoot the compatibility issue.
  • Look for the setup file.
  • Then right-click on it and select the “Troubleshoot compatibility” from the context menu.
  • After that, click on the “Try recommended setting” option. Once the process is done, the error message should be gone.

Option 3 – Run the DISM tool

You can run the DISM tool as well to help fix the error code 0x80244022 during Windows Update. Using this built-in tool, you have various options such as the “/ScanHealth”, “/CheckHealth”, and “/RestoreHealth”.
  • Open the Command Prompt with admin privileges.
  • Then type in the following commands and make sure to hit Enter right after you type each one of them:
    • Dism /Online /Cleanup-Image /CheckHealth
    • Dism /Online /Cleanup-Image /ScanHealth
    • exe /Online /Cleanup-image /Restorehealth
  • Do not close the window if the process takes a while as it will probably take a few minutes to finish.

Option 4 – Try using the image from the official site of Microsoft

If none of the options given above worked, you can try to use the image from Microsoft’s official site. This would help, especially if the error is caused by a corrupted image or image folder with incomplete files.
Read More
Prevent screen from shutting down in Windows
You left your computer to go to the bathroom or to fetch something to eat, maybe you have to answer the phone or open door to a friend and after some time you get back to your computer see the black screen, you move the mouse and it starts to come from sleep slowly. I am the kind of person who gets annoyed by this kind of behavior, I like my PC to be ON all time when I want it to be ON and my power plan on best performance so naturally, I have turned this sleep feature OFF. If you are interested to see how you to can turn off your screen sleeping follow this easy guide.
  1. Press ⊞ WINDOWS to open the start menu and click on the settings Windows 10 Start menu with marked settings icon
  2. On settings, screen click on system Windows settings with System section selected
  3. When the system dialog opens go to Power & Sleep and on the right side change all values to never. windows settings power and sleep
Please note that after each update Windows tend to reset these settings so you will sadly have to return to this after each major update.
Read More
1 2 3 162
Logo
Copyright © 2022, ErrorTools. All Rights Reserved
Trademarks: Microsoft Windows logos are registered trademarks of Microsoft. Disclaimer: ErrorTools.com is not affiliated with Microsoft, nor claim direct affiliation.
The information on this page is provided for information purposes only.
DMCA.com Protection Status