Not enough USB controller resources Error

As you know, USB is now being widely used in all devices with USB A as the leading type with most devices based on it. Peripheral devices such as Pen Drives, External Hard disks, and many more also use a USB port. On the other hand, USB C is also coming up to be the next big standard in the computing world because of its high transfer speeds, wider compatibility as well as support for external Graphics Processing Units. However, just recently, USB 3.0 ports have been reported to cause the following error to pop up on Windows 10 computers every time a USB device is plugged in.

“Not enough USB controller resources. The controller does not have enough resources for this device.”

To fix this error, here are some guidelines you can check out. Make sure to follow them carefully.

Option 1 – Try to use a lower generation USB port

The first thing you can do is to try using a lower generation USB port as this issue mostly occurs when a device is connected to a USB 3,0 port. This means that you have to plug in your device to a USB 2.0 port and then see if it fixes the error or not. You can easily decipher a USB 3.0 port from a USB 2.0 port as the former is in blue.

Option 2 – Try to use a dock

You could also try to use a dock to resolve the error. Note that when too much power on laptops and notebooks are drawn from the USB ports and as a USB 3.0 port draws more power compared to a USB 2.0 port. Thus, if you plug in your USB storage device into a USB 2.0 port with the help of a dock, it should fix the problem.

Option 3 – Try disabling the xHCI Mode option in the BIOS

  • First, boot your computer into the BIOS.
  • Once your computer has booted, go to the Advanced tab.
  • Next, make sure that the entry for “xHCI Pre-boot mode” is set to Disabled under the USB Configuration section.
  • Now save the changes you’ve made and then restart your computer to Windows 10 and see if the error is now fixed.

Option 4 – Update or reinstall the Universal Serial Bus Controller driver

Since it could be a driver issue, you can try to update or reinstall the Universal Serial Bus Controller drivers using the Device Manager. Refer to the following steps:

  • First, click the Start button and type “device manager”.
  • Then click on the “Device Manager” from the search results to open it.
  • From there, look for the “Universal Serial Bus controllers” option and then right click on each one of the USB drivers, especially the Generic USB Hub driver, and then select the Update Driver from the menu.
  • Restart your PC and then click the “Search automatically for updated driver software” option.

Note: If updating the USB Controller drivers didn’t work, you can try to reinstall them instead.

Option 5 – Run the Hardware and Devices Troubleshooter

You could also run the Hardware and device Troubleshooter to try and fix the “Not enough USB controller resources” error.

  • The first thing you need to do is click on Start and then on the gear-like icon to pull up the window for Settings.
  • After opening Settings, look for the Update and Security option and select it.
  • From there, go to the Troubleshoot option located on the left-hand side of the list.
  • Next, select Hardware and Devices from the list and open the Troubleshooter and run it. Once it is doing its job, wait for it to complete the process and then restart the system.
  • After the system restarts, check if the problem’s now fixed. If not, refer to the next option given below.
If you like to learn and find out more about various Windows errors, and how to repair them go to our vast archive or use search to find articles that will explain and help you in solving your issue.
However, if you prefer to do things fast and with automatization then we are proposing to use an automated solution for your issues. The application that we are recommending is Advanced System Repair Pro
Advanced System Repair utilizes multiple tools all in one to give you a quick, simple, reliable, and very thorough diagnosis of your PC. It brings you all the tools you need in one program to clean, fix, protect, optimize and boost your PC!
1-Click Maintenance
All the tools to make it simple and easy! It's like having a professional technician at the click of a mouse.

Junk Cleaner
Keeping your computer free from unnecessary clutter also helps make your computer last longer. Like any other machine, if you keep it clean and take care of it, it will serve you better for longer!

Optimize background apps
Optimize applications background activity with the built-in Application Optimizer feature.

Disk Defrag
With a simple 1-click, Advanced System Repair speeds up your PC by assembling fragmented files on your machine and organizing them more efficiently.

Malware Removal
Finds and removes all types of harmful malware including trojans, worms, bots, adware, spyware, PUPs, and more!

Privacy Cleaner
The all-in-one privacy suite to Clean Your Tracks & Protect Your Privacy! Make your computer safe, secure, and more efficient!

System Tweak/Optimizer
ASR will analyze your complete system and settings to adjust your PC to function at its maximum performance.

Registry Cleaner
Over time, as you install and uninstall applications, the registry can become cluttered with old entries and broken settings which can result in program crashes, and annoying messages and slow the computer down.
Visit our Advanced System Repair Pro Download page to inform yourself about all the benefits of this software and get a free trial copy of it.
advanced system repair pro

Advanced System Repair Pro

One-click automated PC repair solution
ASR logo
With Advanced System Repair Pro you can easily
Replace damaged files
Restore performance
Free disk space
Remove Malware
Protects WEB browser
Remove Viruses
Stop PC freezing
DOWNLOAD
Privacy Policy | Terms of Use | Uinstall
Advanced System Repair Pro is compatible with all versions of Microsoft Windows including Windows 11

Share this article:

You might also like

KFConsole enters the console competition
Yes, you read that right, KFC is making a console partnered with Cooler Master. Bizzare at it sounds, it is even more bizarre that the console is designed to keep your food warm!!! You can pull out the drawer from the console out on its top and place some food there in order to keep it warm. kfconsole drawerThe console itself is coming in cylindrical shape powered by Intel CPU and ASUS GPU of the unknown chipset. It has Seagate Baraccuda 1TB SSD and it is VR-ready. The console will have raytracing and will be 4K ready.

My thoughts

Well, my thoughts are somewhat strange, on one side I am not really sold on food heating gimmicks and without specific hardware specifications, it is difficult to say how much power the console will have. Price is also not leaked so that is also a stumbling stone for making an informed opinion. I am a little puzzled and concerned about this whole heating food thing because personally, I can see 2 issues: Console overheating and fat dripping on inside hardware, I am sure they have somehow eliminated this but I would be very interested to see how.
Read More
How to Fix Error 2200

How to fix Error 2200

What is Error 2200?

Error 2200 is an error code that you are likely to experience if you have Dell Photo All in One Printer 926. Dell Photo Printer 926 is an inkjet multifunction device. It offers features like print, copy, scan, and fax.

Error 2200 may stop you from scanning and printing documents on your Dell Photo All in One Printer 926.

Solution

Restoro box imageError Causes

Error 2200 may occur due to several reasons. However, the most common causes include:

  • Registry issues
  • Broken or missing system files
  • Corrupted driver
  • Malware

Further Information and Manual Repair

To resolve error 2200 on your system try the methods listed below. These DIY methods are easy and effective and can repair this error in no time. These solutions require zero technical expertise and knowledge.

This means if you are not technically sound or you are not a computer programmer, you can try these solutions and repair error 2200 on your system easily.

Method 1

When the underlying cause of error 2200 is related to a corrupted driver then follow these steps to resolve the issue. Go to the Start menu, click Control Panel, Performance and Maintenance tab, System and Device Manager.

Navigate the device, click properties, driver, and then uninstall. Now reboot your PC to activate changes.  Now download the latest version of the Dell Photo All in One Printer 926 drivers from a reliable website and save install it on your PC.

Method 2

Malware can also damage and corrupt drivers and system files. If the reason for error 2200 on your PC is malware then download a powerful antivirus and scan your entire PC. Remove all malware and viruses infecting your system to resolve the error.

Method 3

The Windows registry is that part of the computer that stores much of the information and settings for software programs, operating system configurations, and hardware devices.

It also saves unnecessary and obsolete files like junk files, cookies, internet history, bad registry entries, and invalid files. If these files are not removed from the registry frequently, they accumulate in the registry and corrupt it thereby triggering different error codes.

These files damage the registry and other important system files.

To repair the registry and error codes triggered due to registry issues, it is suggested you download Restoro. This is a cutting-edge and user-friendly PC Fixer deployed with a powerful and intuitive registry cleaner.

The registry cleaner scans your entire PC, removes all the bad entries and obsolete files. It cleans the registry, repairs the damaged and corrupt system files thereby resolving registry issues instantly.

Click here to download Restoro and repair error 2200.

Method 4: Locate and Install the Driver As was pointed out, you might need to reinstall the printer driver again. Using DriverFIX, you’ll be able to automatically update your computer system and install the drivers your computer needs to operate smoothly.
Read More
How to Fix the Socket Error 10060

Repair Socket Error 10060

Socket Error 10060 - What is it?

Socket Error 10060 is a typical Outlook Express error. This error often occurs when the connection to the server fails. It specifically refers to a timeout while communicating with the email providers servers. The vast majority of all emails use SMTP for outgoing mail. Socket error 10060 in most instances is related to the SMTP settings for the user’s email. The error message is sometimes displayed in the following format:
Outlook Express Socket Error10060 - The connection to the server failed Account:’ your account’
Another thing you must know about this error is that it only stops the user from sending emails. This means that you can only receive emails, not send them.

Solution

Restoro box imageError Causes

The cause of this error code is hard to narrow down typically because there are many causes that can trigger the socket error code 10060. Some of the most common causes of this error code are:
  • Issues in email settings
  • Authentication settings
  • Firewall settings
  • Malware
Though this is not a critical error code it is advisable to fix it immediately without any delays. This error can hamper your communication via email and slow down your work productivity especially if you use Outlook for communication across the organization.

Further Information and Manual Repair

Here are some of the many methods to fix and resolve this error code. To help you resolve this issue, we have selected and listed down the best, quick, and easy do-it-yourself methods. Try them and repair Socket error code 10060 all by yourself without any professional assistance.

Method 1 - Check the Names of POP3 and SMTP Servers

To begin with, first check the names of the POP3 and SMTP servers to ensure that they are correct. Then check the outgoing SMTP port. Contact your email provider to determine the correct settings. Sometimes email providers change this value more than any other in their individual settings. Get it verified. Change the settings if needed.

Method 2 - Outgoing SMTP Server Requires Authentication

Sometimes the error code may occur due to authentication issues. If this is the reason then, don’t worry it is easy to fix. Simply go to the settings options and check the box ‘My server requires authentication’. Once you check the box, try sending the email again. This is most likely to resolve the socket error 10060 on your PC.

Method 3 - Disable Firewall

Your Firewall security may sometimes be the reason for socket error 10060 too. Therefore if after trying method 1 and 2, the error still persists, then it is advisable to disable firewall. Once you disable it, try sending an email using your Outlook account. If it works, the error is resolved.

Method 4 - Scan for Malware

There is a possibility that the Socket error 10060 is popping on your PC due to malware infection. If so, then it is advisable to download Restoro. This is a highly functional and a user-friendly PC fixer deployed with a powerful antivirus and several other scanners. Run it on your PC to scan for malware. It detects and removes all types of malware including Trojans, viruses, adware, spyware, and more in seconds. Click here to download Restoro to resolve socket error 10060 on your system today.
Read More
How to fix Windows 10 Error 0x803f7000

How to fix Windows 10 Error 0x803f7000

Error code 0x803f7000 -What is it?

Error code 0x803f7000 refers to an issue in Windows 10 with downloading apps through Windows Store. When you choose the app or game to download, it heads to Downloads in the Store app. Then it says it is acquiring a license but then fails. When you click the “See details” link, you see the error code 0x803F7000. It could mean that the date and time or region settings in your Windows 10 are incorrect or there are some problems with the Windows Store Cache.

Symptoms

  • This error appears when you are running Windows 10 and trying to download an app through the Microsoft store. The error code may appear with this message: Something went wrong. The error code is 0x803f7000, in case you need it
  • You might also see this message along with the error code: "It looks like you've reached your device limit for installing apps and games from the Store on your Windows 10 device. If you want to install apps and games from the Store on another Windows 10 device, remove a device from the device list."

Solution

Restoro box imageError Causes

There may be several reasons for this error:
  1. This problem may arise if the date and time in Windows 10 are incorrect.
  2. If the region has been set incorrectly.
  3. Problems with Windows store cache.
  4. Windows store server overloaded.
  5. The Windows version you are using is pirated.

Further Information and Manual Repair

Method 1:

Correcting date and time:
  • Open up Control Panel > Clock, Language, and Region.
  • Then click on Date & Time.
  • Now click on Change date & time to correct your time.

Method 2:

Correcting region:
  • Navigate to Control Panel > Clock, Language, and Region.
  • Then click on Region.
  • Then click on the Location tab.
  • Now set your actual region from Home location section.
  • Click Apply & OK.

Method 3:

Resetting Windows Store:
  • Press Windows Flag Key + X from your keyboard. Then select Command Prompt (Admin). It will launch Command prompt as administrator.
  • Then type wsreset and hit Enter.
  • Wait for a few seconds. It will automatically open Windows Store.
  • Then try to download any apps.

Method 4:

  1. Open Command prompt in local machine and type in the Windows Store reset tool exe
  2. Activate Windows by going to Settings>Updates and Security
  3. Run the Modern UI/metro app troubleshooter from Microsoft
  4. Keep trying it several times.
  5. Try changing locale and time zone to the United States as shown below
  6. Go to control panel, Language settings
  7. Select location to the United States
  8. This will reset the language to US English. After this try downloading the apps again.
  9. Try restarting the Windows Updater service or restart the machine once.
You must make sure that you have a good internet connection. You need that for the updates and downloads complete without disruption.

Method 5:

Make sure the app isn’t blocked by the Windows firewall: To make your PC more secure, some apps are blocked by Windows Firewall by default. For proper functioning, you might need to enable an app to receive info through the firewall. For more info, see the "Allow an app to receive info through the firewall," and follow the procedure from start to finish.

Method 6:

Check with your system admin: If your PC is part of a network in an organization, like a business, school, or government agency, your system administrator might have turned off the use of certain apps using the Group Policy. Contact your system admin if you believe that Group Policy is preventing you from using an app.

Method 7:

Make sure your apps are up-to-date: To make the apps working properly, you must keep your apps up-to-date. This could be done by turning on automatic updates in the Windows Store.

Method 8:

Contact the app publisher To view the publisher’s app support info, follow these steps:
  1. On the Start screen, tap or click Store to open the Windows Store.
  2. Search or browse for the app, and then tap or click it.
  3. Scroll to the Details section of the app's description page, and then tap or click the support link for the app under Learn more. The link will open an email message for you to contact support or will take you to a support website.
If you do not possess the technical expertise required to accomplish this yourself or do not feel comfortable doing so, download and install a powerful automated tool to get the job done.
Read More
Fix DRIVER_PAGE_FAULT_IN_FREED_SPECIAL_POOL
If you suddenly encounter the DRIVER_PAGE_FAULT_IN_FREED_SPECIAL_POOL Blue Screen error on your Windows 10 computer along with the error codes, 0x000000D5, 0xb10BBD9E, 0x0D82DA24, 0Xfecd479D, 0x779827CB then read on as this post will provide you some troubleshooting tips that could help you resolve the BSOD error. Getting this kind of BSOD error means that a driver has referenced memory that was freed earlier and it could also mean that the Driver Verifier Special Pool option has caught the driver accessing memory which was freed earlier. Follow the given options below to fix the DRIVER_PAGE_FAULT_IN_FREED_SPECIAL_POOL BSOD error.

Option 1 – Use the Driver Verifier Manager

The Driver Verifier Manager is another tool in Windows that could help you fix driver-related issues.
  • Type in the keyword “Verifier” in the Cortana search box to search for Verifier in Windows 10.
  • After that, select the option “Create custom settings”.
  • Make sure that you have checked everything except the options “DDI compliance checking” and “Randomized low resources simulation”.
  • Next, select the option “Select driver names from a list” option.
  • Afterward, you have to select all the drivers from any unofficial or third-party provider. To simply put it, you have to select all the drivers that are not supplied by Microsoft.
  • Then click on the Finish button.
  • Open Command Prompt as administrator and execute this command – verifier /querysettings
  • The command you just executed will display the Driver Verifier settings so if you see any of the flags enabled boot your Windows 10 PC into Safe Mode.
  • Open the Command Prompt as admin again and run this command – verifier /reset
  • The command will reset the Driver Verifier. Once the process is done, restart your PC and check.

Option 2 – Try updating SSD firmware

If you have installed SSD on your computer recently and you have started getting the DRIVER_PAGE_FAULT_IN_FREED_SPECIAL_POOL Blue Screen error since then you may have to update the SSD firmware. To fix this, you can download the Intel Solid-State Drive Toolbox from the official website. This toolbox is compatible with Windows 10 and Windows 7 and later versions.

Option 3 – Try running the Blue Screen Troubleshooter

The Blue Screen troubleshooter is a built-in tool in Windows 10 that helps users in fixing BSOD errors like DRIVER_PAGE_FAULT_IN_FREED_SPECIAL_POOL. It can be found in the Settings Troubleshooters page. To use it, refer to these steps:
  • Tap the Win + I keys to open the Settings panel.
  • Then go to Update & Security > Troubleshoot.
  • From there, look for the option called “Blue Screen” on your right-hand side and then click the “Run the troubleshooter” button to run the Blue Screen Troubleshooter and then follow the next on-screen options. Note that you might have to boot your PC into Safe Mode.

Option 4 – Try running Microsoft’s online Blue Screen Troubleshooter

If running the built-in Blue Screen Troubleshooter didn’t work, you can also try running Microsoft’s online Blue Screen Troubleshooter. All you have to do is go to Microsoft’s website and from there, you will see a simple wizard that will walk you through the troubleshooting process.

Option 5 – Try to reinstall or update device drivers of recently installed hardware

If the first few options didn’t work for you, then it’s time to either update or roll back the device drivers. It is most likely that after you updated your Windows computer that your driver also needs a refresh. On the other hand, if you have just updated your device drivers then you need to roll back the drivers to their previous versions. Whichever applies to you, refer to the steps below.
  • Open the Devices Manager from the Win X Menu.
  • Then locate the device drivers and right-click on them to open the Properties.
  • After that, switch to the Driver tab and click on the Uninstall Device button.
  • Follow the screen option to completely uninstall it.
  • Finally, restart your computer. It will just reinstall the device drivers automatically.
Note: You can install a dedicated driver on your computer in case you have it or you could also look for it directly from the website of the manufacturer.

Option 6 – Try disabling Hardware Acceleration

You might want to disable Hardware Acceleration system-wide or for a particular program like Google Chrome and see if it resolves the DRIVER_PAGE_FAULT_IN_FREED_SPECIAL_POOL BSOD error
Read More
uTorrent is not responding on Windows
As you probably know, uTorrent is one of the best software you can use to download torrents over the web. It has been around for many years now and is trusted by lots of users despite having competition here and there. Over the years, uTorrent has changed as it is now packed with tons of features. What’s more, is that this program is no longer the smallest client when it comes to file size. However, just like other software, it is not always working smoothly as there are instances when it’s not responding even when it’s already running. The first thing you can do is to close all the processes of uTorrent and then try opening it again. There are various reasons why your uTorrent program fails to respond. However, it is most likely caused by some virus that was brought on by the file you’ve just downloaded. On the other hand, it could also be caused by other factors as well but whichever the case is, here are some fixes you can check out to resolve the uTorrent issue.

Option 1 – Delete the file you’ve downloaded

As pointed out earlier, uTorrent might have failed to respond due to some file you’ve just downloaded which is why you have to delete it since there really is no point in keeping a file that’s causing this kind of issue. After deleting the file, try opening uTorrent again and see if it now works or not.

Option 2 – Allow uTorrent to run via Windows Defender Firewall

  • Click on the Cortana or the Start button and type “firewall” in the field.
  • From the search results that appear, click on the “Allow an app through Windows firewall”.
  • After that, a new window will pop up and from there, you will see a list of apps that can be allowed or disallowed using a Windows firewall. From this list, you have to search for uTorrent and once you find it, set it to Publick if you are on a public network or Private if you’re in a private network.

Option 3 – Uninstall or reinstall uTorrent software

You can also try to completely uninstall uTorrent from your computer and then reinstall it right back. to do so, follow the steps below.
  • In the search box, type in “control” and then click on Control Panel (desktop app) among the search results.
  • After that, select Programs and Features from the list which will give you a list of all the programs installed on your computer.
  • From there, look for uTorrent and select it and then uninstall it.
  • Once uTorrent is uninstalled, go to uTorrent’s official website and download its latest version.

Option 4 – Try scanning your computer using Windows Defender

  • Tap the Win + I keys to open Update & Security.
  • Then click on the Windows Security option and open Windows Defender Security Center.
  • Next, click on Virus & threat protection > Run a new advanced scan.
  • Now make sure that Full Scan is selected from the menu and then click the Scan Now button to get started.
Read More
Fix Error 0164, Memory size decreased
Computer upgrades are the most common and most efficient ones. RAM upgrade is one of the easiest ones you can do and the most common ones but even as simple an upgrade as this one can cause certain issues. If you are experiencing error 0164, memory size decreased after RAM upgrade we are offering you solutions on how to fix this particular error and get your computer back in working order.
  1. Change BIOS settings

    Enter your motherboard BIOS (usually by pressing the del key on startup) Load BIOS defaults Save changes and exit If the Error 0164: Memory size decreased issue persists even after loading setup defaults, then it must be configured manually inside the BIOS.
  2. Clear CMOS

    Follow the instructions precisely:
    • Turn off all peripheral devices connected to the computer.
    • Disconnect the power cord from the AC power source.
    • Remove the computer cover.
    • Find the battery on the board. The battery may be in a horizontal or vertical battery holder or connected to an onboard header with a wire.
    If the battery is in a holder, note the orientation of the + and – on the battery. With a medium flat-blade screwdriver, gently pry the battery-free from its connector. If the battery is connected to an onboard header with a wire, disconnect the wire from the onboard header.
    • Wait one hour, then reconnect the battery.
    • Put the computer cover back on.
    • Plug the computer and all devices back in.
    • Power on the computer.
Read More
Windows computer shuts down instead of Sleep
As you know the Windows 10 operating system is has a lot of features and some of them are related to turning off your computer in different ways in order to save power at different levels. These particular features are Shut down, Restart, Hibernate, and Sleep. However, there are times when you might encounter some issues when using any of the aforementioned features. One of these issues is when your computer shuts down instead of going to Sleep. This issue could be caused by several factors including a bug related to the Intel Management Engine Interface or IMEI driver as well as any misconfiguration in the power settings of the BIOS or UEFI. If your computer is going through this problem, read on as this post will guide you in fixing it. There are several potential fixes you can try to fix the problem. You can try to check the Sleep Advanced Settings or run the built-in Power troubleshooter or run the Power Efficiency Diagnostic Report. In addition, you can also try to troubleshoot the problem in a Clean Boot State or reset or update the BIOS.

Option 1 – Check the Sleep Advanced Settings

  • Click on the Windows key and type “control panel” in the field and select the related search result.
  • Next, select the Security and Maintenance option and click on the Power Options.
  • After that, you have to select the Change Plan Settings but keep in mind that this option is barely readable so you need to read each option carefully.
  • Now click on the Change advanced power settings button and a new window will appear.
  • Then look for the “Sleep” option and expand it. Make sure that the “Allow hybrid sleep” option is on.
  • Reboot your computer and check if your computer now functions properly. If it still didn’t work, you may have to reverse the changes you’ve made.

Option 2 – Try to run the Power troubleshooter

The next thing you can do is to run the Power troubleshooter. To do so, follow these steps:
  • Go to Settings and navigate to Update & Security > Troubleshoot.
  • After that, look for the “Power” option from the given list of built-in troubleshooters and click on it.
  • Next, click on the “Run the troubleshooter” button to run the Power troubleshooter.
  • Once the troubleshooter is done identifying the problems, follow the next on-screen instructions to resolve the problem.

Option 3 – Troubleshoot Sleep Mode issue in a Clean Boot State

The issue with Sleep Mode might be caused by some third-party programs installed on your computer. This program might be the one that puts your computer to sleep and so to isolate this possibility, you have to put your PC in a Clean Boot State using the steps below.
  • Log onto your PC as an administrator.
  • Type in MSConfig in the Start Search to open the System Configuration utility.
  • From there, go to the General tab and click “Selective startup”.
  • Clear the “Load Startup items” check box and make sure that the “Load System Services” and “Use Original boot configuration” options are checked.
  • Next, click the Services tab and select the “Hide All Microsoft Services” check box.
  • Click Disable all.
  • Click on Apply/OK and restart your PC. (This will put your PC into a Clean Boot State. And configure Windows to use the usual startup, just simply undo the changes.)
  • After that, try to put your computer to sleep again.

Option 4 – Try to run the Power Efficiency Diagnostics Report

You could also try to run the Power Efficiency Diagnostics Report to fix the problem. This tool is helpful and will help you analyze the status of the battery but note that this can be quite overwhelming especially if you’re not well-versed in this matter.

Option 5 – Try to update the BIOS

Updating the BIOS can help you fix the ATTEMPTED_WRITE_TO_READONLY_MEMORY BSOD error but as you know, BIOS is a sensitive part of a computer. Even though it is a software component, the functioning of the hardware depends on it largely. Thus, you must be careful when modifying something in the BIOS. So if you don’t know much about it, it’s best if you skip on this option and try the other ones instead. However, if you are well-versed in navigating the BIOS, then follow the steps below.
  • Tap the Win + R keys to open the Run dialog box.
  • Next, type “msinfo32” in the field and press Enter to open System Information.
  • From there, you should find a search field on the bottom where you have to search for the BIOS version and then press Enter.
  • After that, you should see the developer and version of the BIOS installed on your PC.
  • Go to your manufacturer’s website and then download the latest version of BIOS on your computer.
  • If you are using a laptop, make sure that you keep it plugged in until you have updated the BIOS.
  • Now double click on the downloaded file and install the new BIOS version on your computer.
  • Now restart your computer to apply the changes made.
Note: If updating the BIOS didn’t help, you might want to consider resetting it instead.
Read More
Step By Step Guide to Fixing Regsvr32.exe Error On Windows

How to Resolve Regsvr32.exe Error Code

What is Regsvr32.exe Error?

Regsvr32 (Microsoft Register Server) is a command-line utility in Microsoft Windows Operating System. This is used for registering and unregistering OLE controls such as ActiveX controls and DLLs in the Windows Registry. This is executed as Regsvr32.exe.  The filename extension .exe is the abbreviation for executable.   It is installed in the %systemroot%System32 folder in Windows XP and new Windows versions. The Regsvr32.exe is an error that occurs when you attempt to run Regsvr32.exe to register a 32 bit DLL (Dynamic Link Library) on a 64-bit version of Windows. The error message is displayed as the following:
  • Filename.dll is not an executable file and no registration helper is registered for this file type.
  • Unrecognized flag: /invalid_flag
  • No DLL name specified
  • Dll_Name is not an executable file and no registration helper is registered for this file type.
  • The module "%1" failed to load.

Solution

Restoro box imageError Causes

There are multiple causes for the Regsvr32.exe error code. These include:
  • Invalid entry (command) path
  • Active X control errors
  • Missing or Damaged .dll files
  • Viral infection (Trojans) (.exe can easily get infected by viruses)
  • Registry issues
If you come across the Regsvr32.exe error code, it is advisable to repair it immediately before the damage sets in. Since this may occur due to viral infection, it can pose privacy and data security risks to your PC.

Further Information and Manual Repair

Here are solutions that you can implement to resolve the Regsvr32.exe error code on your system:
  1. If an invalid entry point is the cause of the error, then simply open an elevated command prompt. If the 32-bit DLL is in the %systemroot%System32 folder, then move it to the %systemroot%SysWoW64 folder. After that run the following command: %systemroot%SysWoW64regsvr32 <full path of the DLL>. This will help resolve the Regsvr32.exe error.
  2. If the cause of the error is a viral infection, then you will need to run a powerful antivirus to detect and remove viruses from your system to resolve the Regsvr32.exe error on your system.
  3. Nonetheless, if the causes for Regsvr32.exe are either Active X controls or registry corruption, then you will need to scan your computer with different tools to resolve each issue separately.
This can be time-consuming and too many program installations at one time can also slow down your system’s performance. This means you’ll also have to compromise on your PC’s speed.

Repair Regsvr32.exe Error With Restoro

To avoid all this hassle yet repair the Regsvr32.exe error, download Restoro. This is a multi-functional and innovative PC repair tool deployed with multiple utilities in one program including features like a registry cleaner and an Active X controls error fixer. It also functions as a system optimizer. It is a one-stop solution for all your PC-related errors including the Regsvr32.dll error. It is safe, efficient, and user-friendly. It is compatible with all Windows versions. When the RAM overloads it leads to damaged dlls and registry corruption. The registry cleaner utility repairs the damaged dll files and the corrupt registry. It wipes out all the unnecessary files cluttering the RAM including the junk files, invalid registry entries, and temporary files. Restoro also has an Active X controls scanning utility. This utility can be of great use if the Regsvr32.exe error is triggered by Active X control-related issues. Click here to download Restoro and resolve Regsvr32.exe on your computer right away.
Read More
Alt-tab that is broken with KB5005033 update
Alt-tab
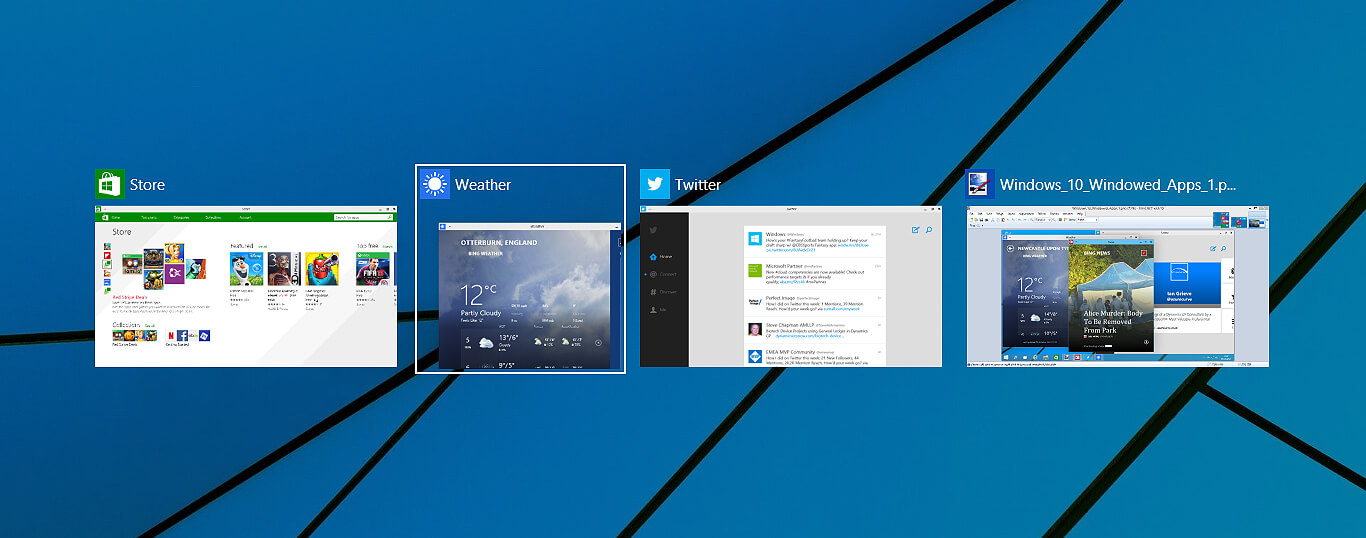
Lately, Microsoft has trying to fix Print Nightmare with various methods and patches. The last patch has seemingly fixed Print Nightmare but it has broken the Alt-tab key combination. It has been reported that the latest patch has broken famous key combinations for quickly switching from window to window. It seems that combination is not working or it is switching to desktop, even going to blank screen if switching from the full-screen game.

Fixing the issue

Luckily this issue is easily fixable. The first and easier fix for this issue is surprising to turn off the news and info widget, right-click on it and choose News and interests and then click on turn off. The second solution would be to uninstall the update. Go to Settings, then to Update & Security, and from there view Update History and remove the update.
Read More
1 2 3 162
Logo
Copyright © 2022, ErrorTools. All Rights Reserved
Trademarks: Microsoft Windows logos are registered trademarks of Microsoft. Disclaimer: ErrorTools.com is not affiliated with Microsoft, nor claim direct affiliation.
The information on this page is provided for information purposes only.
DMCA.com Protection Status