Fix mfewfpk.sys, Epfwwfp.sys Errors in Windows

If you suddenly encounter a Blue Screen error that points out to either the mfewfpk.sys and epfwwfp.sys files, then this post might help. Both of these files are created by third-party software. The mfewfpk.sys file is created by the McAfee security software while the epfwwfp.sys is created by the ESET Antivirus. These files are residual files and sometimes it blocks upgrading Windows 10.

Aside from blocking Windows 10 upgrade/update, these files can also cause a Blue Screen error after an upgrade which leaves your Windows 10 computer useless. When you get a Blue Screen error caused by any of these files, you will see an accompanying error message that states, “DRIVER IRQL NOT LESS OR EQUAL”. To fix this Blue Screen error, you can check out the suggestions laid out below but before you do that, you need to create a System Restore point first as it can help you undo any unwanted changes. In addition, make sure to also boot your computer into Safe Mode with Networking before you troubleshoot.

Option 1 – Try to remove the epfwwfp.sys file

You can try to remove the epfwwfp.sys file using Command Prompt. To do so, refer to the following steps:

  • Right-click on the Start button and click on Command Prompt (Admin) from the menu to open Command Prompt with admin privileges.
  • Next, type the following command and hit Enter to delete the epfwwfp.sys file:

DEL /F /S /Q /A “%systemroot%System32driversepfwwfp.sys”

  • After the scan is completed, restart your computer and see if it fixed the Blue Screen error.

Note: You can also use the ESET AV Remover tool to uninstall Eset security software to remove the epfwwfp.sys file.

Option 2 – Try to remove the mfewfpk.sys file

The same with the first option, you can remove the mfewfpk.sys file using CMD.

  • First, right-click on the Start button and click on Command Prompt (Admin) from the menu to open Command Prompt with admin privileges.
  • After, type the following command and hit Enter to delete the epfwwfp.sys file:

DEL /F /S /Q /A “%systemroot%System32driversmfewfpk.sys”

  • Once the scan is completed, restart your computer and see if it fixed the Stop error.

Note: You also have the option to remove the mfewfpk.sys file using McAfee Product Removal tool to uninstall the McAfee security software. All you have to do is download the McAfee Product Removal tool and run it and then follow the onscreen instructions to install it. Once it is installed, click on Next. After you select the radio button to agree to the terms of use, click on Next once again. Finally, restart your computer and check if it is able to resolve the problem or not.

Option 3 – Run the Blue Screen Troubleshooter

Troubleshooting Blue Screen of Death errors wouldn’t be complete without the Blue Screen troubleshooter. As you know, it is a built-in tool in Windows 10 that helps users in fixing BSOD errors. It can be found on the Settings Troubleshooters page. To use it, refer to these steps:

  • Tap the Win + I keys to open the Settings panel.
  • Then go to Update & Security > Troubleshoot.
  • From there, look for the option called “Blue Screen” on your right-hand side and then click the “Run the troubleshooter” button to run the Blue Screen Troubleshooter and then follow the next on-screen options. Note that you might have to boot your PC into Safe Mode.

Option 4 – Try running the DISM tool

You can try running the Deployment Imaging and Servicing Management or DISM tool to fix the Blue Screen error. Using this built-in tool, you have various options such as the “/ScanHealth”, “/CheckHealth”, and “/RestoreHealth”.

  • Open the Command Prompt with admin privileges.
  • Then type in the following commands and make sure to hit Enter right after you type each one of them:
    • Dism /Online /Cleanup-Image /CheckHealth
    • Dism /Online /Cleanup-Image /ScanHealth
    • exe /Online /Cleanup-image /Restorehealth
  • Do not close the window if the process takes a while as it will probably take a few minutes to finish.
If you like to learn and find out more about various Windows errors, and how to repair them go to our vast archive or use search to find articles that will explain and help you in solving your issue.
However, if you prefer to do things fast and with automatization then we are proposing to use an automated solution for your issues. The application that we are recommending is Advanced System Repair Pro
Advanced System Repair utilizes multiple tools all in one to give you a quick, simple, reliable, and very thorough diagnosis of your PC. It brings you all the tools you need in one program to clean, fix, protect, optimize and boost your PC!
1-Click Maintenance
All the tools to make it simple and easy! It's like having a professional technician at the click of a mouse.

Junk Cleaner
Keeping your computer free from unnecessary clutter also helps make your computer last longer. Like any other machine, if you keep it clean and take care of it, it will serve you better for longer!

Optimize background apps
Optimize applications background activity with the built-in Application Optimizer feature.

Disk Defrag
With a simple 1-click, Advanced System Repair speeds up your PC by assembling fragmented files on your machine and organizing them more efficiently.

Malware Removal
Finds and removes all types of harmful malware including trojans, worms, bots, adware, spyware, PUPs, and more!

Privacy Cleaner
The all-in-one privacy suite to Clean Your Tracks & Protect Your Privacy! Make your computer safe, secure, and more efficient!

System Tweak/Optimizer
ASR will analyze your complete system and settings to adjust your PC to function at its maximum performance.

Registry Cleaner
Over time, as you install and uninstall applications, the registry can become cluttered with old entries and broken settings which can result in program crashes, and annoying messages and slow the computer down.
Visit our Advanced System Repair Pro Download page to inform yourself about all the benefits of this software and get a free trial copy of it.
advanced system repair pro

Advanced System Repair Pro

One-click automated PC repair solution
ASR logo
With Advanced System Repair Pro you can easily
Replace damaged files
Restore performance
Free disk space
Remove Malware
Protects WEB browser
Remove Viruses
Stop PC freezing
DOWNLOAD
Privacy Policy | Terms of Use | Uinstall
Advanced System Repair Pro is compatible with all versions of Microsoft Windows including Windows 11

Share this article:

You might also like

Signs of a dying graphic card
Can graphic cards wear out over a longer period of time? Recent studies and experience from crypto miners say no but they can die due to different reasons like improper use, low cleaning habits, factory mistakes, etc. Many gamers and people who use GPU intense applications tend to think that some glitches and hiccups in the software are a sign that graphic card is dying out and that it is time to be replaced. Altho this could be true in many cases these kinds of behavior are mostly due to old drivers and software issues. Older cards can produce these kinds of results due to their old age and new software is often more demanding than these cards can handle. So in order to diagnose and be sure that your GPU is indeed dying out lookout for these signs.

The Main Signs of a Dying GPU:

The Computer Crashes and Won’t Reboot

If your computer shutdown while working in the graphic application or while playing the game and the monitor loses signal there is a high chance the graphic card is soon going to be gone. Some motherboards have hardware detection failure and can signal immediate fail. If when turning your computer ON you are greeted with a blue screen with the message that the signal can not be found or you do not have picture at all it is most likely that GPU has failed.

Graphic Glitches While Playing Games

If you are playing the game and all of sudden you get off-color pixels, screen flickering, strange graphic behaviors, random artifacts, or similar and that keeps repeating in multiple games it is likely that GPU days are coming to an end.

Abnormal Fan Noise or Performance

Fans are an essential part of cooling the GPU and over time if they are intensively used they could wear out and need replacing. If however you have not noticed and have not replaced the fans card can sustain overheating damage. Many cards have cooling fans that are designed to spin at a higher RPM only when the GPU is under load. It prevents bearings in the fans from dying prematurely, so don’t worry if one of your fans is inactive while you are browsing the web. However, when you play games that utilize software that your card isn’t built to support, the bearings in the fans wear out faster. Once the fans stop working under load, the graphics card can quickly die.

How to Diagnose a Dying Graphics Card

Presented next are essential steps in order to recognize a dying graphic card.

Check Motherboard Error Codes

Many motherboards today completely shut down a component that is no longer working. If your graphics card has died completely, this may be one of the easiest ways to tell. If your motherboard doesn’t have display codes, you can try testing the card in a new system.
  • Open the computer case: Use your screwdriver to remove screws on the side panel and gently slide it back.
  • Locate the error code display on your motherboard: If you have a motherboard with error codes, they should appear near an outer corner.
  • Try to reboot your computer: Record each error number you see after you boot your computer.
  • Consult the motherboard manufacturer manual for error codes: Open the manual and locate the list for your error codes. If the code matches a graphics processing unit error, your video card could have died.

Check Hardware for Damage or Debris

A graphics card that has damage or debris on the physical parts might quickly overheat and kill the card.
  • Remove the screws holding the GPU in place: There are typically one or two screws holding the card to a bracket on the case.
  • Unhook the power cords from the GPU and pull the release tab: Remove the power cords from your GPU by pushing in their tabs and gently rocking them out. Once you remove each cord, gently push or pull up on the release tab near the motherboard.
  • Inspect the GPU for damage/debris: Check the card for any dirt or debris buildup and clean it out with a Q-tip. You can replace broken fan pieces from the manufacturer.

Test Your GPU Under Load

Download GPU stress-testing and heat-monitoring software.
  • With the card installed, run a stress test.
  • As you are running the stress test, run heat-monitoring software: With the stress test running, check your heat-monitoring software for GPU overheating. Any reading over 80 degrees Celsius is too hot.
  • Check device manager for outdated drivers: If your GPU is clean, but still running too hot, your software drivers are not installed correctly. To check, type in “device manager” at the bottom of your desktop and click on Device Manager. Find your display adapter and right-click on it to see if it’s working. If your drivers are not working correctly, it is indicated here usually. However, the driver may appear to be functioning even if it says otherwise in the properties.

Keep your graphic card drivers updated

When you don’t have the right driver installed, graphics cards can quickly burn up, and their cooling components may fail faster. That’s why you should always keep drivers updated for each new game you install or play. Older games may also release new software patches, so your GPU drivers should be updated accordingly.
Read More
Fix Error 0x8000704ec in Windows 10
Universal Windows Platform (UWP) applications are the modern application in the windows store that can be used in all the Window devices like Xbox, Hololens, Tablet, PC or Phone. Basically, UWP provides a common platform for every device that runs Windows 10. When attempting to login into these applications and receive this error:
Can’t sign in with a Microsoft account This program is blocked by group policy. For more information, contact your system administrator. 0x8000704ec
Then this post is for you. We will guide you on how to easily resolve issues, please follow the steps provided.
  1. Local group policy editor solution

    • Press ⊞ WINDOWS + R to open the Run dialog.
    • In the Run dialog box type gpedit.msc and press ENTER to open Group Policy Editor.
    • Inside the Local Group Policy Editor, navigate to the path below:
    Computer Configuration > Windows Settings > Security Settings > Local Polices > Security Options
    • On the right pane, double-click on Accounts: Block Microsoft accounts to edit its properties.
    • Under Local Security Setting tab, click on the drop-down and select This policy is disabled.
    • Click Apply > OK to save the changes.
    • Exit Group Policy Editor.
  2. Registry editor solution

    As always, it is highly recommended to make a backup of the registry editor just in case that something goes wrong.
    • Press ⊞ WINDOWS + R to open the Run dialog.
    • In the Run dialog box, type regedit and hit ENTER to open Registry Editor.
    • Navigate to the registry key path below:
    HKEY_LOCAL_MACHINE\SOFTWARE\Microsoft\Windows\CurrentVersion\Policies\System
    • At the location, on the right pane, identify the NoConnectedUser key. The key value might be set to either 1 or 3.
    • Now, double-click the NoConnectedUser entry to edit its properties.
    • Input 0 in the Value data field and hit Enter to save the change.
Read More
The Extended Attributes Are Inconsistent Error
One of the most critical errors inside your Windows operating system is The Extended Attributes Are Inconsistent error. This error means that your operating system has been corrupted and it may produce many annoying issues like for example time lags, random crashes, and even freezing of the system when running multiple applications. There are a lot of reasons for this error, from the registry to faulty application installations to sometimes even hardware issues like bad RAM memory or bad hard drive. Mostly issue is due to corrupted files inside Windows and most often people only think that resetting the PC or complete reinstallation is the only way to fix this problem. Although reinstalling the system or resetting the PC will solve this error for sure there are other less time-consuming ways to fix this error. The Extended Attributes Are Inconsistent Error
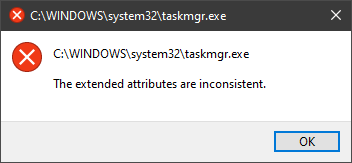
In this guide, we will show you common ways in fixing Extended Attributes are inconsistent errors inside your Windows that are easy to do and less time-consuming than complete reinstallation of the system.

Fixing Extended Attributes Are Inconsistent error

Run SFC scan

  1. Press ⊞ WINDOWS + X to open the hidden menu
  2. Click on command prompt (admin)
  3. In command prompt type in SFC /scannow and press ENTER
  4. Wait for the operation to complete
  5. Reboot your PC

Use System Image Repair Tool

  1. Press ⊞ WINDOWS + X to open the hidden menu
  2. Click on command prompt (admin)
  3. In command prompt type in Dism /Online /Cleanup-Image /RestoreHealth and press ENTER
  4. Wait for the operation to complete
  5. Reboot your PC

Change all user accounts to the administrator

  1. Press ⊞ WINDOWS + R to open the run dialog
  2. Type in netplwiz and press ENTER
  3. Select a first user account and click on Properties
  4. Click on the Group Membership tab
  5. Choose Others from the options
  6. Select administrator (if all accounts are already administrators change all to users)
  7. Repeat process for all other accounts
  8. Click OK to save settings

Change Windows Sound scheme to default

  1. Right-click on the sound icon in the taskbar
  2. Click on Sound options
  3. Go to the Sounds tab
  4. In Sound Scheme click and choose Windows Default
  5. Under Program Events choose Windows User Account Control
  6. Click on the drop-down menu and choose None
  7. Click on Apply
  8. Click on OK

Downgrade the Sound driver

  1. Press ⊞ WINDOWS + X to open the hidden menu
  2. Click on Device Manager
  3. Find your Audio driver and right-click on it
  4. Click on uninstall and then on OK
  5. Reboot your system

Do System Restore

If none of the provided solutions have worked, perform a system restore to the last point where everything was working fine.

Reset PC

If even system restore has not solved the issue or you do not have valid point in system restore time, perform Reset this PC and hopefully, the error will be finally fixed.

Conclusion

If all of the provided methods have not managed to repair this error that checks your hardware, your computer might have some faulty components if after complete PC reset error persists.
Read More
Four Proven Methods to Fix The Rundll Error

How to Fix Rundll Error

Rundll Error - What is it?

Rundll Error, DLL is also known as Dynamic Link Library is a Window library that basically consists of instructions and codes used and shared by multiple programs installed on your system. It helps programs load and run smoothly. Rundll error is generated when the system fails to access DLL files thereby hampering your ability to successfully run your desired program.

Solution

Restoro box imageError Causes

The rundll error code is triggered due to multiple reasons such as:
  • DLL file affected by virus and malware
  • Poor program installation
  • Invalid Windows registry entries
It is advisable to fix the run.dll error immediately without any delay because this error exposes your PC to serious threats such as system crash, freeze, failure, data loss, and even privacy threats like cybercrime, data breaches, and identity thefts.

Further Information and Manual Repair

To resolve the rundll error on your system, here are some solutions that you can try:

Solution 1: Reboot your System

Sometimes rebooting your system can also resolve the issue. However, if it doesn’t then you need to try some other solution to fix it.

Solution 2: Identify the Program Triggering the Error

To fix rundll error, the first thing that you need to do is to identify the program generating this error and check it for validity. For this, simply analyze the rundll error dialog box. Let’s say you get the following run.dll error on your system Error loading
C:\WINDOWS\system32\usvdgpo.dll.
This error message indicates that the program ‘usvdgpo’ is causing the run.dll error on the system. Once the program is identified, the next step is to stop it manually. For this, you go to the start menu and click run, now type ‘services.msc’ in the dialog box, and press ‘Enter’. After that right-click the related process to your rundll error and then click the ‘Stop’ button to stop the program. Now close the window. Though this action will stop the process it will not remove the reference to the bogus items. To remove that you will have to remove the program from the Windows Registry. This can be done by typing ‘Regedit’ in the Run dialog box. This will open the registry editor. From the keys listed in the left panel, navigate to the following key: HKEY_LOCAL_MACHINE/Software/Microsoft/Windows/CurrentVersion/Run. Now right-click on this key and click delete and then simply close the windows registry and reboot your system. After this, you will then have to uninstall the program to completely eradicate the rundll error. To do this, go to the control panel, Add/remove programs, and right-click to uninstall the program causing the run.dll error on your system. Click yes to confirm your decision. Once the program is uninstalled, reinstall the program using the program CD to get yourself an error-free program. This procedure is tricky, time-consuming, and maybe slightly challenging for you especially if you are not a computer programmer.

Solution 3: Run an Antivirus

If the cause of the run.dll error is a malware attack then you need to download an antivirus and run it on your system. However, this may impact the speed of your PC. Antivirus is notorious for slowing down PC speed.

Solution 4: Download Restoro.

If you are not a computer programmer, then running Restoro is possibly the easiest way for you to resolve rundll errors on your system in seconds. Restoro is an innovative, cutting edge, and multi-functional feature-filled PC repair tool that can be used to repair all kinds of system-related errors including rundll errors. The registry cleaner utility cleans up the RAM by removing unnecessary and obsolete files like junk files, invalid registry entries, and files from the uninstalled programs. It resolves disk fragmentation issues, repairs dll files, and the registry. In just a few clicks you can easily repair the registry and remove malware thereby resolving rundll errors on your system. Operating Total System Care is quite simple. It has a user-friendly interface and easy navigation. It is safe, efficient, bug-free, and compatible with all Windows versions Click here to download Restoro and resolve ‘rundll errors’ and access/run programs on your system smoothly.
Read More
Fix Rstrui.exe error in Windows 10

Fix Rstrui.exe error in Windows 10

Rstrui.exe is a service assigned to controlling system restore, it is considered an essential part of the Windows system and without it working you will not be able to perform a system restore operation. Without system restore working you will not be able to "rewind" Windows into a working state if needed which can create in itself many new complications. Luckily we have working solutions for this specific problem, so get ready, and let's start.

SFC scan

Sfc scan is a built-in Windows tool that scans and repairs system corrupted and missing files. To run it open up the command prompt in administrator mode and type in it: SFC /SCANNOW then, let the whole process finish, do not interrupt it, and reboot after it is done.

DISM scan

Similar to SFC scan, DISM is also a built-in tool for fixing files linked to Windows essential working. Start a command prompt in administrator mode and type in: DISM /Online /Cleanup-Image /RestoreHealth Again let the process completely finish and then reboot your system.

Scan for viruses and other malware

Viruses and other malware can seriously damage the system and with it rstrui.exe along with it. Scan your system with Windows defender or even better with some other dedicated security suite to eliminate malicious threats if they exist.

Update Windows

Keeping Windows updated can bring you more good than harm, it is very advisable to keep it up to date all the time so all security leaks and bugs are repaired and that you have your OS in top-notch working order. Updating can also fix corrupted system files or replace them with newer versions so if your Windows is not updated go to update central and do it.

Use automated solution

If you do not wish to go through manual fixing of issues, try an automatic repair solution like RESTORO, where you can fix this and many other issues with just a simple click. Congratulations, you have just Fixed the Rstrui.exe error in Windows 10 all by yourself. If you would like to read more helpful articles and tips about various software and hardware visit errortools.com daily. Now that’s how you fix the Rstrui.exe error in Windows 10 on a computer. On the other hand, if your computer is going through some system-related issues that have to get fixed, there is a one-click solution known as Restoro you could check out to resolve them. This program is a useful tool that could repair corrupted registries and optimize your PC’s overall performance. Aside from that, it also cleans out your computer for any junk or corrupted files that help you eliminate any unwanted files from your system. This is basically a solution that’s within your grasp with just a click. It’s easy to use as it is user-friendly. For a complete set of instructions in downloading and using it, refer to the steps below Perform a full system scan using Restoro. To do so, follow the instructions below.
  1. Download and install Restoro from the official site.
  2. Once the installation process is completed, run Restoro to perform a full system scan. restoro application screen
  3. After the scan is completed click the “Start Repair” button. restoro application screen
Read More
Intel's open-source Clear Linux* Project
clear linux project
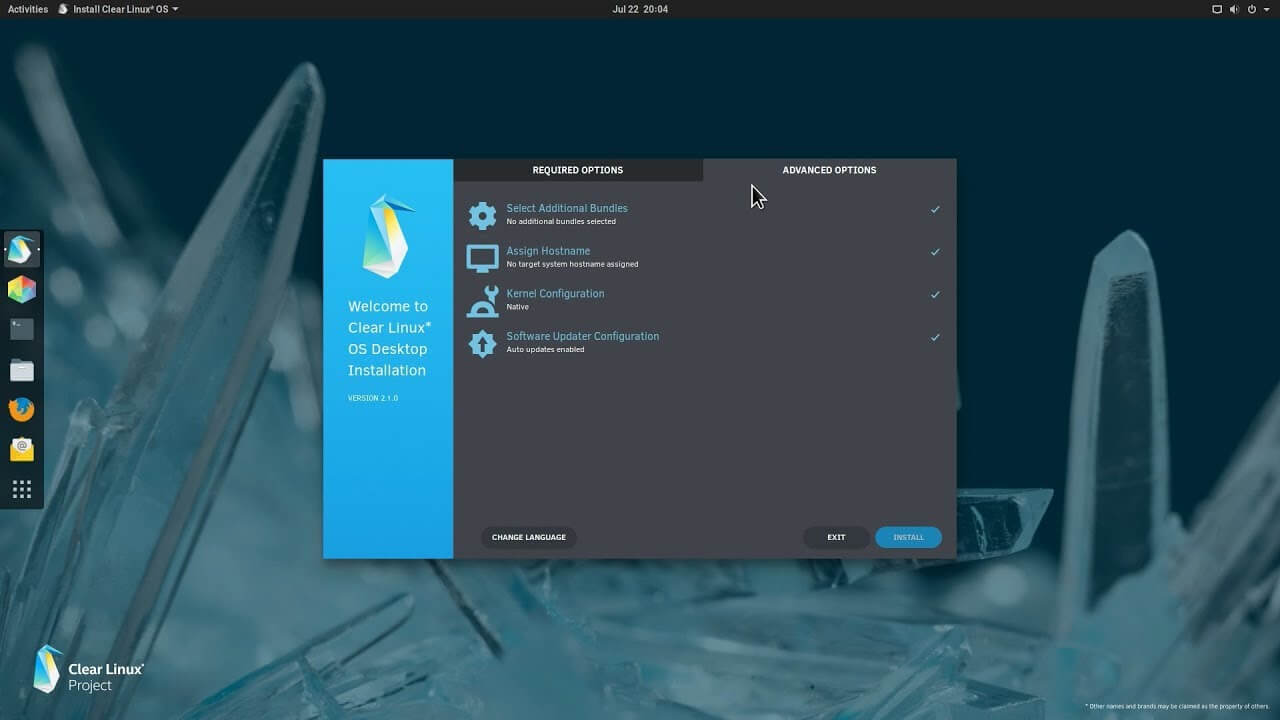
The Clear Linux Project creates an operating system and software stack that offers highly optimized performance, security, versatility, and manageability. Clearly optimized for Intel CPUs and based on GNOME it will offer you incredible speeds if you are on Intel CPU. The big news, though, is that Clear Linux sports the shiny new Gnome 40. This is a fresher Gnome than you'll find even on Ubuntu's more experimental 21.04 release. The only big names that let you test drive Gnome 40 are Fedora and Arch Linux.

Packages only when you need them

Installation of packages is used by Swupd, a Clear Linux* package management tool. It is easy to use and pretty straightforward.
  • "bundle-list" for showing what's installed
  • "bundle-info" for details on installed bundles (such as owned files via the "‑‑files" flag)
  • "search" for repository searching
  • "bundle-add" for installation
  • "bundle-remove" for uninstallation
The only problem here is the packages themselves. Clean Linux* has been imagined as a developer distro focusing mostly on well-development tolls. In intel’s words: “A Linux OS built for Linux developers”, so some things will be left out. Strangely enough some things as FFmpeg which if you want to have and blast some youtube videos while you work will have to complete manually by yourself.

Clear Linux* modular philosophy

Everything in Clear Linux* is based on a modular philosophy approach. There is no /etc/fstab file, the /boot directory is totally empty. Every partition to be mounted is enabled as a systemd "mount unit." Intel reaping the benefits of systemd's modular philosophy, where everything is a unit. If you know your way around systemd, intermediate-level configuration tasks should be straightforward. Any advanced configuration likely demands deep systemd knowledge.

Clear Linux* performance

As stated earlier this is Intel’s distro, optimized for Intel hardware meaning that Intel as the developer has every possible tool at its disposal to make use of hardware to its maximum potential and it shows. Distro almost leaves other ones two times in speed performance. So if you are looking for a distribution that will deliver you speed and it is aimed for developer Clear Linux* is for you.

Conclusion

Clear Linux* is a really interesting distro and seeing how Intel is adding new software packages on its official website it might have a bright future. But as always, be the judge for yourself and see if it can fit your needs. Go get it at: https://clearlinux.org/
Read More
How to Fix Win32kbase.sys BSOD error
There is various Blue Screen of Death errors that you can encounter as you use your Windows 10 computer and some of these Stop errors have something to do with the win32kbase.sys file. This post will guide you in fixing the BSOD errors related to the win32kbase.sys file.
  • A problem has been detected and Windows has been shut down to prevent damage to your computer. The problem seems to be caused by the following file: Win32kbase.sys.
  • Your PC ran into a problem and needs to restart. If you would like to know more, you can search online later for this error: win32kbase.sys.
  • SYSTEM_SERVICE_EXCEPTION (win32kbase.sys)
  • STOP 0x0000000A: IRQL_NOT_LESS_EQUAL – win32kbase.sys
  • STOP 0x0000001E:
KMODE_EXCEPTION_NOT_HANDLED – win32kbase.sys
  • STOP 0×00000050:
PAGE_FAULT_IN_NONPAGED_AREA – win32kbase.sys
The win32kbase.sys file is a Windows operating system Base Win32 Kernel Driver file located in the System32 folder so if it ends up getting corrupted or if it went missing, your computer will throw up Blue Screen error. To fix BSOD errors that have something to do with the win32kbase.sys file, here are some possible fixes that could help. Worry not for these possible fixes are not complicated.

Option 1 – Run the Check Disk or CHDSK utility

One of the first things you can try to resolve the win32kbase.sys Blue Screen error is running the CHKDSK utility. If your hard drive has issues with integrity, the update will really fail as the system will think that it’s not healthy and that’s where the CHKDSK utility comes in. The CHKDSK utility repairs hard drive errors that might be causing the problem.
  • Open Command Prompt with admin privileges.
  • After opening Command Prompt, execute the following command and hit Enter:
chkdsk /f C:
  • Wait for the process to be completed and then restart your computer.

Option 2 – Run SFC or System File Checker scan

System File Checker or SFC is a built-in command utility that helps in restoring corrupted files as well as missing files. It replaces bad and corrupted system files to good system files. To run the SFC command, follow the steps given below.
  • Tap Win + R to launch Run.
  • Type in cmd in the field and tap Enter.
  • After opening Command Prompt, type in sfc /scannow
The command will start a system scan which will take a few whiles before it finishes. Once it’s done, you could get the following results:
  1. Windows Resource Protection did not find any integrity violations.
  2. Windows Resource Protection found corrupt files and successfully repaired them.
  3. Windows Resource Protection found corrupt files but was unable to fix some of them.
 Restart your PC.

Option 3 – Try to run the DISM commands

You might want to repair potentially corrupted files in your system as having them could also trigger the win32kbase.sys Blue Screen error. To repair these corrupted system files, you can run the DISM commands:
  • Tap the Win + X keys and click on the “Command Prompt (Admin)” option.
  • After that, input each one of the commands listed below sequentially to execute them:
    • Dism /Online /Cleanup-Image /CheckHealth
    • Dism /Online /Cleanup-Image /ScanHealth
    • Dism /Online /Cleanup-Image /RestoreHealth
  • Once you’ve executed the commands given above, restart your computer and check if the dxgkrnl.sys Blue Screen error is now fixed.

Option 4 – Try to run the Blue Screen Troubleshooter

As you know, the Blue Screen troubleshooter is a built-in tool in Windows 10 that helps users in fixing Blue Screen errors related to the win32kbase.sys file. It can be found in the Settings Troubleshooters page. To use it, refer to these steps:
  • Tap the Win + I keys to open the Settings panel.
  • Then go to Update & Security > Troubleshoot.
  • From there, look for the option called “Blue Screen” on your right-hand side and then click the “Run the troubleshooter” button to run the Blue Screen Troubleshooter and then follow the next on-screen options. Note that you might have to boot your PC into Safe Mode.
Read More
Start Search is not displaying results
If you have just installed the latest Cumulative Update on your Windows 10 computer and you find that since then, the Windows 10 Start Search is not displaying any results when you try to use it to search for something in your computer, then this post might help as it will give you some suggestions to fix the problem. This problem might be caused by some bugs brought in by the new cumulative update you’ve installed. It is also possible that Cortana is having some issues or that the Windows Search service hasn’t been initialized. Whatever the cause is, here are some suggestions you need to follow to fix this issue. You can try running the Search and Indexing troubleshooter or configure the
  1. Run Search and Indexing Troubleshooter
  2. Configure the Windows Firewall
  3. Reinstall Cortana.

Option 1 – Try to run the Search and Indexing troubleshooter

The first thing you can do is to run the Search and Indexing troubleshooter in Windows 10 as it checks whether the settings for Cortana are in place and automatically corrects any issues if the update or software installation has changed the settings. To run it just click on the Start button and select Settings > Updates and Security > Troubleshoot. From there, select the Search and Indexing Troubleshooter.

Option 2 – Restart Cortana’s process in the Task Manager

Restarting Cortana’s process in the Task Manager could also help you resolve the problem. Refer to the steps given below to do so.
  • Tap the Ctrl + Alt + Del keys to open the Security options window.
  • From there, look for the Task Manager in the given list and open it.
  • Next, look for the process of Cortana and right-click on it, and then select the End Task option to end its process.
  • After that, the Cortana process will restart by itself and re-initialize.

Option 3 – Try resetting Cortana

  • Open Cortana and go to the Settings section where you’ll see the “Turning off Cortana clears what Cortana knows on this device, but won’t delete anything from the Notebook. After Cortana is off, you can decide what you’d like to do with anything still stored in the cloud” option. Turn this option off.
  • Restart your PC.
  • After your computer boots, launch Cortana again and check.

Option 4 – Try to configure the Windows Firewall

  • Tap the Win + Fn + Shift (Pause) keys to open Control Panel.
  • From there, open the Windows Defender Firewall applet and click on the Advanced Settings to open the Windows Firewall with the Advanced Security panel.
  • Next, click on the Outbound Rules section and look for Cortana and then double click on it to open its Properties.
  • After that, make sure that the “Allow the connection” is selected although this is the default working setting.

Option 5 – Try to reinstall Cortana

If none of the options given above works, you must consider reinstalling Cortana.
  • First, right-click on the Taskbar and select the Task Manager.
  • Next, select File menu > Run new task and type “Powershell” in the field and then select the “Create this task with administrative privileges” option.
  • Click on OK to open the PowerShell console.
  • After that, type the following command and hit Enter to execute it:
Get-AppXPackage -Name Microsoft.Windows.Cortana | Foreach {Add-AppxPackage -DisableDevelopmentMode -Register "$($_.InstallLocation)AppXManifest.xml"}
  • Restart your computer and check if the Windows Start Search is now working.
Read More
Onscreen keyboard becomes transparent
If you suddenly noticed that your Onscreen keyboard in Windows 10 has become completely white or transparent for some reason, then you’ve come to the right place as this post will guide you on what you can do to resolve this kind of issue in your computer. As you know, the on-screen keyboard is included in Windows 10 and has an executable file named “osk.exe”. The on-screen keyboard is a part of the Ease of Access feature in Windows 10 which allows users to navigate the computer with the help of the mouse instead of the physical keyboard. However, there are times when you might encounter some issues when using the on-screen keyboard. One of the issues reported recently is that the on-screen keyboard becomes transparent or it only displays the borders but there is no way for you to access it. You also won’t be able to move it from the view completely. To fix this problem, there are several suggestions you can check out. You can try to check the Fade button or run the Windows Touch Keyboard troubleshooter. You can also restart its process in the Task Manager. For more details, refer to each one of the given options below.

Option 1 – Try to check the Fade button

The first thing you can do is to check the Fade button on the on-screen keyboard. You can find it at the bottom right corner of the keyboard. If it is enabled, then it’s probably the reason why your on-screen keyboard is transparent as it lets it fade in the background. Thus, you have to disable it to resolve the problem.

Option 2 – Try to run the Windows Touch Keyboard troubleshooter

The next option you can check out is running the Windows Touch Keyboard troubleshooter. This troubleshooter will help you identify the problem and would fix them automatically.

Option 3 – Try to restart the process of the on-screen keyboard via Task Manager

The next thing you can do is to restart the on-screen keyboard’s process in the Task Manager. Just follow the steps below.
  • First, tap the Ctrl + Shift + Esc keys to open the Task Manager.
  • Next, go to the Processes tab and look for the option that says, “Accessibility On-screen Keyboard”.
  • Once you found it, click on the drop-down arrow next to it and right click on the “On-screen Keyboard” option, and select End task to end its process.
  • After that, tap the Win + R keys to launch the Run utility and type “osk.exe” in the field, and then hit Enter to open the on-screen keyboard.
Read More
Fixing PowerShell: File cannot be loaded ...
If you are using Windows PowerShell and it suddenly throws an error message saying, “File cannot be loaded because running scripts is disabled on this system”, then read on as this post will guide you on how you can fix this issue your Windows 10 computer. This kind of error in PowerShell is most likely due to the fact that your user account does not have the required permissions to execute the script. Although this does not mean that you need to have administrator-level permissions as it could also indicate that you have to be unrestricted to run these types of PowerShell scripts or cmdlets. Thus, to fix the error and carry out the task, you have to set the execution policy to be unrestricted. And to do that, you need to use the steps provided below as a reference. Step 1: To get started, you have to check what policies are set for the individual user groups on your computer by tapping the Win + X key combination or by right-clicking on the Start button and clicking on Windows PowerShell (Admin). You can also search for PowerShell in the Start Search and then right-click on Windows PowerShell and select Run as administrator. Step 2: If a User Account Control or UAC prompt appears, just click Yes to proceed. Once you’ve pulled up Windows PowerShell, type the following command to get the List of Execution Policy for all the scopes on your computer.
Get-ExecutionPolicy –List
Step 3: After you execute the command, it will give you a list of the User Groups as well as their Execution Policy status, and under the Scope column, look for “LocalMachine”. Once you find its Execution Policy you will notice that it’s either set to Undefined or Restricted. Step 4: Now that you’ve determined the Execution Policy, you need to set it to Unrestricted if it is set to Restricted. To do that, you have to enter the following command in the very same PowerShell window.
Set-ExecutionPolicy Unrestricted
Step 5: After you execute the command, you will see a message that asks for various permissions for which you either have to tap Y to say Yes to each one of the messages individually or tap the A key to say Yes to all the messages to once. However, if the command throws another error, you can just force the Execution Policy to change by executing the following command.
Set-ExecutionPolicy Unrestricted -Force
Step 6: Once you’re done, it will finally set the Execution Policy for the Windows PowerShell scripts as well as cmdlets to be Unrestricted and fix the “File cannot be loaded because running scripts is disabled on this system” error.
Read More
1 2 3 162
Logo
Copyright © 2022, ErrorTools. All Rights Reserved
Trademarks: Microsoft Windows logos are registered trademarks of Microsoft. Disclaimer: ErrorTools.com is not affiliated with Microsoft, nor claim direct affiliation.
The information on this page is provided for information purposes only.
DMCA.com Protection Status