Media Creation Tool Error 0x80072f76 – 0x20016

One of the most useful tools in the Windows 10 operating system is the Windows Media Creation tool. This tool is used to download and install the latest version of Windows 10. However, there are times when you might encounter some issues while using this tool. One of these issues is the Error code 0x80072F76 – 0x20016. If you encounter this error, you will see the following error message during setup:

“We’re not sure what happened, but we’re unable to run this tool on your PC. If you continue experiencing problems, reference the error code when contacting customer support – Error code: 0x80072F76 – 0x20016.”

This kind of error in the Media Creation tool could be due to an interrupted download or unstable internet connection, and many more. To fix it, you can run the Windows Update troubleshooter or try using another browser to download the tool to another location. You can also try changing the DNS or the ISP connection or use the Windows 10 Update Assistant as well as delete the $Windows.~BT & $Windows.~WS folders.

Check out the given suggestions below to fix the Media Creation Tool Error code 0x80072F76 – 0x20016 in your Windows 10 computer.

Option 1 – Try to run the Windows Update troubleshooter

Windows 10 have various troubleshooters that can help you resolve many system issues. So if you’re dealing with Windows Update errors like Error Code 0x80072f76 – 0x20016, you can run the Windows Update troubleshooter to resolve it.

To run the Windows Update troubleshooter, go to Settings and then select Troubleshoot from the options. From there, click on Windows Update and then click the “Run the troubleshooter” button. After that, follow the next on-screen instructions and you should be good to go.

Option 2 – Try using a different browser to download the tool to another location

You could also use another browser in downloading the tool and place it in a different location on your computer but if you do not have another browser, you can just install one and then download the same tool to another location like the Desktop.

Option 3 – Try to change the DNS

  • Tap the Win + R keys to open the Run dialog box.
  • Then type “inetcpl.cpl” in the field and hit Enter to pull up the Internet Properties.
  • After that, go to the Connections tab and select the LAN settings.
  • From there. Uncheck the “Use a Proxy Server” option for your LAN and then make sure that the “Automatically detect settings” option is checked.
  • Now click the OK and the Apply buttons.
  • Restart your PC and then check if the Media Creation tool error is fixed.

Note: If you are using a third-party proxy service, you have to disable it.

Option 4 – Try to change the ISP connection

There are times when the connection to the Microsoft servers is interrupted due to some glitch or it could also be blocked by your Internet Service Provider or ISP. To rule out this possibility, you can try to change your computer’s internet connection and then see if it fixes the problem.

Option 5 – Try to use the Windows 10 Update Assistant

There’s another tool you can use as an alternative to the Media Creation tool. It is called the Windows 10 Update Assistant. This tool can also help you download and install Windows updates seamlessly.

Option 6 – Try to delete the $Windows.~BT and $Windows.~WS folders

From time to time, the Windows Update files also get corrupted which can cause some problems and conflicts when downloading and installing a Windows Update. To fix this, you need to delete the $Windows.~BT & $Windows.~WS folders in your computer.

If you like to learn and find out more about various Windows errors, and how to repair them go to our vast archive or use search to find articles that will explain and help you in solving your issue.
However, if you prefer to do things fast and with automatization then we are proposing to use an automated solution for your issues. The application that we are recommending is Advanced System Repair Pro
Advanced System Repair utilizes multiple tools all in one to give you a quick, simple, reliable, and very thorough diagnosis of your PC. It brings you all the tools you need in one program to clean, fix, protect, optimize and boost your PC!
1-Click Maintenance
All the tools to make it simple and easy! It's like having a professional technician at the click of a mouse.

Junk Cleaner
Keeping your computer free from unnecessary clutter also helps make your computer last longer. Like any other machine, if you keep it clean and take care of it, it will serve you better for longer!

Optimize background apps
Optimize applications background activity with the built-in Application Optimizer feature.

Disk Defrag
With a simple 1-click, Advanced System Repair speeds up your PC by assembling fragmented files on your machine and organizing them more efficiently.

Malware Removal
Finds and removes all types of harmful malware including trojans, worms, bots, adware, spyware, PUPs, and more!

Privacy Cleaner
The all-in-one privacy suite to Clean Your Tracks & Protect Your Privacy! Make your computer safe, secure, and more efficient!

System Tweak/Optimizer
ASR will analyze your complete system and settings to adjust your PC to function at its maximum performance.

Registry Cleaner
Over time, as you install and uninstall applications, the registry can become cluttered with old entries and broken settings which can result in program crashes, and annoying messages and slow the computer down.
Visit our Advanced System Repair Pro Download page to inform yourself about all the benefits of this software and get a free trial copy of it.
advanced system repair pro

Advanced System Repair Pro

One-click automated PC repair solution
ASR logo
With Advanced System Repair Pro you can easily
Replace damaged files
Restore performance
Free disk space
Remove Malware
Protects WEB browser
Remove Viruses
Stop PC freezing
DOWNLOAD
Privacy Policy | Terms of Use | Uinstall
Advanced System Repair Pro is compatible with all versions of Microsoft Windows including Windows 11

Share this article:

You might also like

Software and hardware cleaning tips
Spring is almost here and with spring comes work, nature wakes up, people wake up, no more heating bills, time to start working, and time to start cleaning your PC. Good day everyone and welcome to another tip & trick for your PC. This time we are talking about cleaning your PC and keeping it up to software tight so you are ready for the upcoming spring season. Thank you for being with us and let's start:

Uninstall applications that you are not using

The unused applications can cause many issues for PC, from taking unnecessary disk space to even causing slower boot times if they have active services that require to be all-time up and running. They could slow down other applications like file explorer if they have extensions installed into them and can take RAM space with their background processes. If you are not using a particular application anymore or do not plan to use it soon it is always best practice to delete it from the system and thus removing all services and processes that go with it freeing so much-needed RAM and disc space.

Remove browser extensions you do not need

Browser extensions like applications can cause some issues with PC performance. if you spend a lot of time on the internet browser extensions can slow down browser and page loadings, they can make browsers take up more RAM memory and if they are outdated they could even present a serious security threat. Best practices are to keep only the extensions that you need all time, maybe some password managers or similar, extensions that you use on a daily basis, the rest should be uninstalled.

Remove things from the startup

Many services are booted along with Windows itself, some of them are crucial to the system even working, some not so. By eliminating not-needed services from the startup menu you will make sure that your boot times and overall performance of the system are in healthy form and that your PC is more responsive.

Organize files, folders, and desktop

The speeding of computer is not the only thing that you need to take care of, in order to be prepared and have maximum efficiency you will need to organize your files and folders as well. In a working environment, we often tend to save and place files all over the place, and in time they clog up desktop and hard drives. If the files are not well organized we will lose precious time trying to find anything that we need and require, so instead of wasting your time in locating files, why not organize them for easy and logical search so you can access them easily when needed.

Clean taskbar and start menu

Taskbar and start menu as well can be clogged with icons and non-organized application shortcuts and document shortcuts. Remove everything you do not need for that tidy and easily accessible access.

Sort bookmarks

It is very likely that you have plenty of bookmarks saved in our browser. It is also very likely that these bookmarks are not sorted and organized and now would be a great time to do it. Like files bookmarks also can cause you a lot of time loss if you need to find a specific one in a sea of many.

Run disc cleanup

Built-in disc cleanup utility will find temporary files, unused ones, and plenty of other junk on your hard drive. Now would be a great time to run it and get rid of junk files from your system.

Physically clean your computer

Now when we have taken care of the software part of our computer and system, it is time to clean up the computer itself. Unplug your computer and clean it, we will not go into details of this procedure, there is already an article on our site which deals with this part in detail so look it up if you need assistance with this part.

Clean your peripherals

Besides the computer for effective and pleasant work take care of your screen, keyboard, mouse, printer, etc. All of these devices need to be dust-free and clean if you expect them to behave on top of their game. If you would like to read more helpful articles and tips about various software and hardware visit errortools.com daily.
Read More
How to Fix the Error Code 28

How to Fix the Error Code 28

Error Code 28- What is it?

The error code 28 is a driver error. This is one of the many device manager error codes. When this error occurs on your computer, the following message is displayed:

“The drivers for this device are not installed. (Code 28)”
Another driver device error message you might encounter is error code 41. 

Error Causes

Error 28 occurs because of unsuccessful device driver installation. This usually happens when you try to update new drive versions on your system. It is advisable to repair this error right away as it can hamper your ability to use certain hardware. For example, if error 28 occurs due to the unsuccessful installation of the USB driver, then it if not fixed and resolved it may prevent you from using hardware devices. Unsuccessful driver installation means you either didn’t install it properly or your computer has registry issues. If it’s the registry then you must fix it without any delay because it can expose your PC to serious threats like system crash and failure. To avoid such inconvenience, repair it.

Further Information and Manual Repair

When it comes to repairing the error code 28, here’s what you can do: Simply go to the control panel and click on the Device Manager option:
  • In the details pane with the list of devices, locate the device for which you want to reinstall the driver software.
  • Double click on it to open the properties dialog box.
  • Now click on the driver tab and then click update driver.
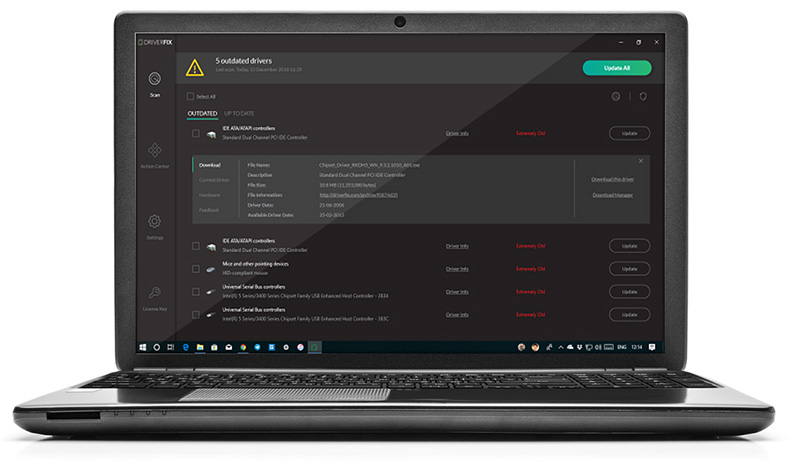
After updating, try using that device again if it doesn’t work and shows the error code 28 on your computer screen then this means the underlying cause is the registry. Congratulations, you have just Fixed Error Code 28 In Windows 10 all by yourself. If you would like to read more helpful articles and tips about various software and hardware visit errortools.com daily. Now that’s how you fix Error Code 28 In Windows 10 on a computer. On the other hand, if your computer is going through some driver-related issues that have to get fixed, there is a one-click solution known as DRIVERFIX you could check out to resolve them. This program is a useful tool that could repair corrupted drivers and optimize your PC’s overall performance. This is basically a solution that’s within your grasp with just a click. It’s easy to use as it is user-friendly. For a complete set of instructions in downloading and using it, refer to the steps below Perform a full system scan using DRIVERFIX. To do so, follow the instructions below.
  1. Download and install DRIVERFIX. from the official site.
  2. Once the installation process is completed, run DRIVERFIX. to perform a full system scan. driverfix screenshot
  3. After the scan is completed click the “Update All” button. driverfix screenshot
Read More
Basic IT skills everybody should know
In today’s world and age, there are some essential IT skills that basically everyone should know. No matter in what field you are working some skills are just needed in order to function properly in the work. So, without further ado let's dive into what are these essential IT skills everyone, even your grandmother should know.

Basic IT skills5 Essential IT skills everybody should know

  1. Word processing

    No matter are you creating or editing business documents or just trying to help a friend or relative, word processing skill is an essential asset and requirement in today’s age. Writing anything on a bunch of paper is time-consuming, papers can get lost, and searching for a particular item inside a bunch of papers is not a really enjoyable experience. A much easier solution is to write, format, and keep everything on the computer and almost all employers are asking for this skill.
  2. Send and using emails

    Today we live in the digital age and most communication is done in real-time via messaging apps and file sharing is done via file-sharing services. Despite mentioned technology, many files are shared and sent through emails. When a message is too long or complex when it needs to have some attachment or to be kept in archive emails are the way to go and therefore using email is a must-have essential skill.
  3. Using search engines

    When talking about using search engines we really do not think about firing up your favorite browser, going into the search engine,s and typing cat pictures. What we think is that a person should know how to use a search engine properly, tweak its search options, and phrase words and sentences to find everything he or she needs.
  4. Doing data work

    Data entry and data calculations have been made easier than ever thanks to today's technology. Microsoft excel, libre office calc, google sheets, etc. are all capable of performing a great variety of calculations and keeping track of plenty of required data. This skill is often asked by employers as an essential one.
  5. Cyber security

    Each employee or person, in general, should be quite aware of various scams and best practices to keep itself safe in this digital world. We have several articles on this topic and there are a great variety of articles on the internet as well.

Conclusion

No matter are you young or old, employed or looking for a job, these skills are a must-have in today’s world.  There are a lot of great tutorials online on these various topics and I am sure that your knowledgeable friend or cousin would be happy to help and show you how to do all of these things.
Read More
Disabling Auto Update in Chrome & Firefox
As you know, all the web browsers come with the support of auto-updates which include both Google Chrome and Mozilla Firefox. However, with these updates, the browser comes with the support of a new web APIs and better rendering. Although there could be a lot of problems that may arise due to these updates. These problems consist of depreciation of features, incompatibility with some websites, to name a few. It includes incompatibility with some websites, depreciation of features, and more. This might push someone to stop the auto-updates of these web browsers. So, in this guide, we will be checking out how to stop auto-update in Google Chrome and Mozilla Firefox on Windows 10. Thus, if you want to be rid of these issues, then you can disable the Chrome & Firefox auto-update and you can do that by either using the Windows Services Manager and the System Configuration utility.

Option 1 – Disable Chrome & Firefox auto-update via Windows Services Manager

The first thing you can do to disable the Chrome auto-update is through the Windows Services Manager. To do so, follow these steps:
  • First, tap the Win + R keys to open the Run dialog box.
  • Next, type “services.msc” in the field and hit Enter to open the Windows Services Manager.
  • After that, you will see a list of services and from there, look for the Google Update Services (gupdate) and Google Update Service (gupdatem).
  • Once you find these services, right-click on each one of them and select Properties and then make sure that the Service Status is set to be Stopped.
  • You should also select the Startup Type to Disabled and click on the Apply and OK buttons.
  • Now restart your computer. This should stop the automatic update of the Chrome browser.

Option 2 – Disable Chrome & Firefox auto-update via System Configuration utility or MSConfig

  • Tap the Win + R keys to open the Run utility and type “msconfig” in the field and tap Enter to open the System Configuration.
  • After that, go to the Services tab and uncheck the two entries, namely Google Update Service (gupdate) and Google Update Service (gupdatem).
  • Next, click on the Apply and OK buttons to save the changes made.
  • Restart your computer.
Note: Now that you’ve stopped the auto-update in Firefox, it’s time for you to stop the auto-update in Mozilla Firefox. To get started, follow the steps below.
  • Open the Mozilla Firefox browser and click on the hamburger menu located on the top-right portion of the screen.
  • After that, select Options and under the General panel and then go to the Firefox Updates section.
  • Next, click on the radio button for updates but select the option to let you install them.
  • You also have to uncheck the options named “Use a background service to install updates” and “Automatically update search engines”.
  • Once done, restart the Firefox browser. This should stop the automatic update.
Read More
Can the Adobe.Dll Error Be Fixed?

Fix Adobe.Dll Error

What Exactly Is Adobe.Dll?

Adobe.DLL is one of the numerous Dll files you are going to encounter on your Personal Computer. This isn't a system-established service and is usually the consequence of the sort of applications you install on your own Personal Computer. Because adobe.dll is a low-program process, in the event that you find it present on your pc, you can easily end it. It isn't required for the normal working of your OS but might trigger permanent harm if left unchecked. Don't forget that the Computer uses the AdobePDF.dll file for assorted tasks, and you need to make sure it's installed correctly.

Solution

Restoro box imageError Causes

When the adobe.dll is left un-fixed, you may shortly have to deal with sluggishness on your Computer. Simply put, this impedes the standard and amount of work you do while using your PC and impacts your productivity. Sometimes, adobe.dll happens because your computer experiences an overload. As a result, while resolving the malfunction, you've got to look for methods of decreasing the system overload. It's possible that lots of processes are functioning on your PC concurrently. Quit these processes. Lousy setup of the adobe.dll file causes this error too. Check and fix the files and settings that Adobe.Dll requires to run and you may not have to content with these error anymore.

Further Information and Manual Repair

Even though the adobe.dll may severely influence the functioning of your Computer, it is really a trouble or malfunction that one can fix manually.
  • Permanently Un-Installing the Adobe.dll Component is one of the better methods for repairing the malfunction.
Yes, you are able to completely eliminate the adobe.dll issue. The thing you really need to do is un-install it from your own computer fully, and for good.
  • Quit the many processes operating on your Computer and you may get rid of the adobe.dll malfunction.
Adobe.dll regularly happens due to system overload. Thus, the first thing you need to assess is if several processes are operating on the device. If they're, search for methods to stop them, and you'll not have to worry about the adobe.dll error anymore.
  • Utilize Microsoft System Configuration Utility
The MS System-Configuration Utility will settle the system overload problem, thus freeing up space for your programs to run smoothly and possibly avoid malfunctions, including adobe.dll. The Microsoft System-Configuration Utility manually locates and eliminates all running processes.
  • Perform Scans On Your Computer
Running scans on your own Computer may enhance or increase its operation. This technique may also aid in examining your Computer for adobe.dll, or such associated malfunctions, and resolve them forever.
  • Repair Adobe.Dll Files and Settings' Errors.
Considering that the adobe.dll malfunctions can be a result of the existence of malfunctions on your own PC's files and options, fix these properly. Begin by fixing the settings on the files and options utilized by your Computer to perform the adobe.dll, and you may have removed this issue completely. Finally, establish the source of the error message to effectively solve it. Once you do that and fix it, your PC will resume normal operations and even boost your work and productivity.
Read More
TeamViewer stuck on Initializing Display
One of the popular tools that allow a user to offer or obtain remote assistance on a computer is the TeamViewer. It is available on all the major computer and mobile platforms which makes it a lot useful to every kind of user, even on the go. If you are one of the users who frequently use TeamViewer, then you must be familiar with this one sentence that states, “Initializing display parameters”. In common cases, this sentence will appear for a second and load the other user’s screen. However, some users reported that TeamViewer gets stuck on that stage and did not move ahead even a bit. If you experience the same problem, read on as this post will guide you in fixing this issue with TeamViewer on your Windows 10 computer. At the time of writing, the cause of this issue is still unclear. It could be due to the quality of internet connection, conflicts in process, misconfiguration of Remote Access, and many more. To fix this issue, you can try to update TeamViewer for both the users or have it reinstalled with Unattended Remote Access, or reconfigure the Remote Access. You can also try to kill any conflicting processes or optimize your internet connection. For more details, refer to the given options below.

Option 1 – Reboot your router

The first thing you can try to do to fix the error is to simply restart your router. All you need to do is reboot the router from its Admin panel or you can also turn it off manually and turn it back on after a couple of seconds so that it can completely reboot. Once you’re done, try accessing your server again and see if the error is now fixed.

Option 2 – Try to update TeamViewer on both users’ end

You might have to update the TeamViewer on both ends and to do that, you need to start the TeamViewer installer again. Once it is installed, run the program and click on the Help option in the Menu ribbon and then select the “Check for updates…” option. If an update is found, you will be notified within a couple of seconds through a pop-up mini window. From there, click on Update and then follow the next onscreen instructions that appear and choose your TeamViewer version to update.

Option 3 – Try reinstalling TeamViewer via the Unattended Remote Access

If the first two given options didn’t work, you might have to reinstall TeamViewer from the Windows 10 Settings app or Control Panel.
  • Tap the Win + R keys to launch the Run utility and type “regedit” in the field and hit Enter to open the Registry Editor.
  • Here, navigate to this registry key: Computer HKEY_LOCAL_MACHINE SOFTWARE Wow6432Node TeamViewer
  • Next, look for the TeamViewer key and right-click on it, and select Delete.
  • After that, restart your PC to apply the changes made and then start TeamViewer again, and then click on Connection > Open Management Console.
  • Then sign in or sign up to get registered and select the Add new device radio button under Add > Add computer located on the top-right corner and then select the Download now option.
  • Now follow the next onscreen instructions that appear to complete the installation and then check if it fixes the problem or not.

Option 4 – Try reconfiguring the Remote Access

You can also try to reconfigure Remote Access in case there is some misconfiguration that might have caused the problem with TeamViewer.
  • On your Desktop, right-click on This PC and click on Properties.
  • Next, go to the left side of the navigation panel and click on Remote Settings.
  • From there, make sure that the “Allow Remote Assistance Connections to this computer” checkbox is checked under the Remote Assistance section.
  • Once done, click on the Advanced button. This will open a new mini window where you’ll have to check the “Allow this computer to be controlled remotely” option under the Remote Control section.
  • Then click on OK and see if it fixed the problem.

Option 5 – Try to kill any conflicting processes

  • Tap the Ctrl + Shift + Esc key combination to open the Task Manager.
  • Then navigate to the Processes tab and right-click on the BGInfo process.
  • Now select the End Task option to kill its process and then start TeamViewer again and check if the problem is resolved.

Option 6 – Try to optimize the quality of connection

You need to take care of two things under this option – first, you have to disable the loading of the Wallpaper of the computer which is the one that you’re trying to access remotely. To do that, you have to select the Extras menu from the menu ribbon and then select Options. And under the Remote Control section, check the “Remove remote wallpaper” option. The next thing you have to do is to optimize the quality for the speed by selecting the “Optimize Speed” for the menu of Quality still under the Remote Control section.
Read More
There is No Sleep Option in Power Menu
If the Sleep option is missing from the Power Menu then this could be caused by the power settings, local group policy configuration, etc. in your computer. Based on the reports of users who experience the same problem, the issue occurred after they’ve updated or upgraded their Windows 10 computers. As you know, the sleep mode is quite useful in certain cases and is utilized by most users. If you put your computer in sleep mode, it actually minimizes the power usage of your computer while at the same time keeps your current session running. So if sleep mode is suddenly missing, then that could be a problem but worry not for this post will give you possible fixes to resolve the issue. Make sure to follow each one of them carefully to achieve good results.

Option 1 – Check the Power settings

As mentioned, one of the reasons why the Sleep option is missing could be the power settings in your computer. To check this possibility, make sure that you’ve enabled the sleep mode in the Power options setting window. How? Refer to these steps:
  • First, go to the Start menu, and from there open Control Panel.
  • Next, set the View by Large icons and select the Power Options.
  • After that, click on the “Choose what the power buttons do” option on the left-hand side.
  • Then click on the “Change settings that are currently unavailable” option and make sure that Sleep is checked under the Shutdown settings.
  • Afterward, click on Save changes.

Option 2 – Modify the Local Group Policy

If the Power setting isn’t the cause of the problem, then you might want to check the Local Group Policy and modify it. There is a dedicated policy for showing the sleep option in the power menu and if this policy is disabled, then it’s no wonder why you don’t see the sleep option in the power menu. To change this policy, refer to the steps below.
  • Tap the Win + R keys to open the Run dialog box.
  • Then type “gpedit.msc” in the field and hit Enter to open the Group Policy Editor.
  • Next, navigate to this path: Computer Configuration -> Administrative Templates -> Windows Components -> File Explorer
  • Look for the “Show sleep in the power options menu” option from the right-hand side pane and double click on it.
  • Now change it to Enabled and click on the Apply and OK buttons to save the changes made and restart your computer.

Option 3 – Try to turn on Standby

Standby, also known as InstantGo, is a feature in Windows 8 and 10 that allows users to maintain network connectivity after a computer has been put into sleep mode. Thus, if this feature is disabled, it can cause the Sleep option to disappear from the power menu. To turn it on, follow these steps:
  • Tap the Win + R keys to open Run.
  • And type “Regedit” in the field and tap Enter to open the Registry Editor.
  • Next, navigate to this path: HKEY_LOCAL_MACHINESYSTEMCurrentControlSetControlPower
  • From this path, look for the “CsEnabled” key on the right-hand side of the pane and double-click on it.
  • Set its value to “1” and click OK to save the changes made.
  • Now reboot your PC.
Note: If you were not able to find the CsEnabled key, then this indicates that your computer does not support the Standby feature. And if that’s the case, proceed to the next given option below.

Option 4 – Try to install a Video Card driver

On the other hand, some users reported that the problem was caused by the video card driver. And if your computer lacks the video adapter driver, it can also cause the same problem. Windows 10 typically install the video card driver on its own, however, there are rare cases when it doesn’t which is why you have to do it yourself manually. All you have to do is go to your manufacturer’s website and look for the video card driver, download it and then install it. Once you’ve installed the video card driver, reboot your computer and check if it has fixed the problem.
Read More
Could not configure one or more components
If you are trying to install or upgrade your Windows 10 computer but suddenly encountered an error message saying, “Windows could not configure one or more system components”, read on as this post will show you how you can fix the problem. You are not alone in experiencing this problem as other users also reported having the same scenario. Some of them reported getting the following error message:
“Windows could not configure one or more system components. To install Windows restart the computer with error code 0xc1900101-0x30018.”
When you check on the Windows 10 rollback log, you will see a part with the “iisetup.exe” that’s related to the abort. Usually, the upgrade process completes over 50% and gets stuck and then rolls back later on and generates the error logs. This kind of error, in most cases, appears during the upgrade of Windows 10 and is related with the Internet Information Services or IIS in Windows 10. For some unknown reason, it restricts the installation or the upgrade which causes the error to appear. To fix the “Windows could not configure one or more system components” error, you can try to remove the IIS from the Windows Features or rename the “inetsrv” folder. You could also move all the folders related to IIS to another drive. For more details, refer to the options provided below.

Option 1 – Try to remove the IIS from Windows Features

The IIS is installed from the Windows Features and you can find it at Control Panel > Programs. From there, uncheck the checkbox for the Internet Information Services. Once done, click on the OK button to save the changes. Note that this process will get rid of all the related programs, services, and folders from Windows 10. So if you want to, you can just install them later on or use an offline installer from the official site of Microsoft.

Option 2 – Try renaming the inetsrv folder

The next option you can check out to resolve the problem is to rename the “inetsrv” folder. If you have uninstalled IIS from the Windows Features, this should remove the folders as well, however, it didn’t remove the folder then you have to delete the folders that are related to the IIS by following these steps:
  • First, you have to boot into the Advanced Recovery Mode and from there, open Command Prompt.
  • Next, execute this command to rename the folder from this location, C:Windowssystem32inetsrv: rename C:/Windows/system32/inetsrv/inetsrv.old
  • Once done, boot into your computer normally and try to upgrade Windows 10 again, and check if the problem is fixed or not.

Option 3 – Try to move the folders related to IIS to a different drive

  • Tap the Win + R keys to launch the Run utility and type “services.msc” in the field and hit Enter to open the Windows Services Manager.
  • Next, look for the Application Host Helper Service from the list of services and stop it.
  • Once done, take ownership of the “WinSxS” folder and then move the *windows-iis*.*” folders to another drive. You can just search using the “*windows-iis*.*” keyword in the Start Search.
  • Next, tap the Ctrl + X keys and paste the folders to another drive.
  • After that, start the update process for Windows 10 again.
Read More
Windows Update service could not be stopped
If you are running the Windows Update service but decided to stop it but you encountered an error message instead that says, “The Windows Update service could not be stopped”, read on as this post will help you fix the problem. This kind of error appears when you use the Command Prompt to stop the Windows Update service, especially if you are using cmd without admin privileges. A lot of users reported that they were not able to disable the automatic Windows Update in Windows 10 using Command Prompt. The command used to stop the Windows Update service is the “net stop wuauserv” command. However, when some users executed this command, they got the error message. So if you are one of these users that can’t stop the Windows Update Service via Command Prompt, you can try to fix that using PID as well as checking the Service dependencies. For more details, follow the given options below.

Option 1 – Try to stop the Windows Update service via PID

In case you don’t know, each running service or process has its own unique ID or PID and you can find it in the Task Manager. You can use it to stop the Windows Update service. How? Refer to these steps:
  • Tap the Ctrl + Shift + Esc keys to open the Task Manager.
  • Next, go to the Services tab and look for the service named “wuauserv” and get its PID.
  • After that, type “cmd” in the Windows Start search and right-click on Command Prompt from the search results and then select the “Run as administrator” option.
  • After opening Command Prompt with admin privileges, execute this command: taskkill /f /pid <PID>
Note: You need to replace “<PID>” with the PID of the “wuauserv” service. For instance, the PID is 6676, then this is how the command should be “taskkill /f /pid 6676”.
  • After you execute the command, you will this message on your screen, “SUCCESS: The process with PID 6676 has been terminated” which indicates that you have stopped the Windows Update service successfully.

Option 2 – Try to check the Service dependencies

Dependencies of a Windows Service in Windows 10 are when windows services depend on other services. Such is the case with the Windows Update service – it also depends on three different services such as the Remote Procedure Call or RPC service, DCOM Server Process Launcher, and the RPC Endpoint Mapper. Meaning to say, if two of these services are not working as expected, then the dependant service will also be affected. This could be the reason why the Windows Update service could not start.
  • Tap the Win + R keys to open the Run dialog box.
  • Next, type “services.msc” in the field and hit Enter to open Windows Services.
  • From the list of Services, look for the following services:
    • Remote Procedure Call (RPC) Service
    • DCOM Server Process Launcher
    • RPC Endpoint Mapper
  • After you find these services, double click on each one of them and check whether the Startup type for all is set to Automatic and the Service status is set to Running or not.
  • If the service status is not running, then click the Start button. Afterward, check if you can now run the Windows Update service.
Read More
Windows.UI.Xaml.Markup.XamlParseException UWP
Although the UWP platform is still new, it is working efficiently and significantly and it’s apparent that Microsoft is betting big on it. It helps developers in building applications for Windows 10 that are more modern and beautiful as well as responsive with the help of the .NET Core and XAML. However, all things considered, it still isn’t perfect and it could still encounter some errors. One of these errors is the Windows.UI.Xaml.Markup.XamlParseException UWP app error. This particular error can occur to any Universal Windows Platform or UWP application and according to security experts, it is due to some XAML parsing error. To fix this error, you can try to reinstall the faulty program or check its privacy settings. You can also run both the Program Compatibility and Windows Store Apps troubleshooters as well as run System Restore. For more information, check out the given options below.

Option 1 – Try to reinstall the faulty application

If you encounter this error in an application that is not a system-related one, then you can just uninstall it from the Windows 10 Settings app and then reinstall it again from the Microsoft Store. On the other hand, if it is a system application like the Camera or Calculator app, you can just uninstall and reinstall it using a PowerShell script.

Option 2 – Try to check the Privacy Settings of the concerned app

You might also want to check if all the Privacy Settings required for a certain application are configured properly as it could also cause issues like the Windows.UI.Xaml.Markup.XamlParseException UWP app error.

Option 3 – Try to run the Program Compatibility Troubleshooter

You might also want to run the Program Compatibility Troubleshooter. This built-in troubleshooter is available in the Windows Update & Security section. From there, select Troubleshoot. This will find a list of programs for you and since you have already downloaded the driver files, just click on Not Listed located at the top of the program list. After that, browse and select the driver files and then let the program do its job. In addition, you can try to run the Windows Store apps troubleshooter as it can also help you resolve the problem.

Option 4 – Run System Restore

If you have recently made changes in your computer’s settings, you could also run System Restore to fix the Windows.UI.Xaml.Markup.XamlParseException UWP app error. How? Refer to these steps:
  • Tap the Win + R keys to open the Run dialog box.
  • After that, type in “sysdm.cpl” in the field and tap Enter.
  • Next, go to the System Protection tab then click the System Restore button. This will open a new window where you have to select your preferred System Restore point.
  • After that, follow the on-screen instructions to finish the process and then restart your computer and check if the problem is fixed or not.
Read More
1 2 3 162
Logo
Copyright © 2022, ErrorTools. All Rights Reserved
Trademarks: Microsoft Windows logos are registered trademarks of Microsoft. Disclaimer: ErrorTools.com is not affiliated with Microsoft, nor claim direct affiliation.
The information on this page is provided for information purposes only.
DMCA.com Protection Status