Media Creation Tool Error 0x80042405-0xA001A

As you know, the Windows Media Creation Tool is a great utility in Windows that helps lots of users in installing Windows on their PCs. However, just like any other program in Windows, it also experiences a couple of issues every now and then. So in this post, you will be guided on how you can resolve a particular issue in the Media Creation Tool which is the error 0x80042405-0xA001A. You can encounter this error while creating a USB installation media used in installing Windows 10.

When getting this kind of error in the Windows Media Creation Tool, you will see the following error message on your screen:

“We’re not sure what happened, but we’re unable to run this tool on your PC, Error code 0x80042405 – 0xA001A”

The error 0x80042405 – 0xA001A occurs while creating a bootable USB installation drive. This is a common error faced by many users and it has something to do with the USB hardware. To get this issue fixed, here are some suggestions you could check out.

Option 1 – Try to reformat the USB drive

Reformatting your USB drive might help in fixing error 0x80042405 – 0xA001A.

  • Open This PC and right-click your USB drive from there then select Format.
  • Next, select FAT32 as the drive type and uncheck the “Quick Format” option.
  • After that, try to run the Windows Media Creation Tool again and check if the error is fixed or not. But hopefully, it should work since formatting the drive as FAT32 will give the driver a proper type and would resolve any minor issues in the drive.

Option 2 – Copy the Windows Media Creation Tool to the USB drive

If the first option didn’t work, you might want to copy the latest version of the Media Creation Tool to the USB drive. After you do that, you can run it from inside the drive. This is actually a working fix and can definitely get the USB drive to run with Windows inside it so it should resolve the error 0x80042405 – 0xA001A on the Windows Media Creation Tool.

Option 3 – Run CHKDSK to check the drive for errors

When it comes to some issues concerning the hard drive or removable devices, there is a utility in Windows that might help which is called “chkdsk”. This error check utility can help with several issues in the system including the “Diskpart failed to clear disk attributes” error.

  • Tap the Win + S keys to open the Search box.
  • Then type “command prompt” in the field and from the search results that appear, right-click on Command Prompt and select “Run as administrator”.
  • After opening an elevated command prompt, copy and paste the following command and hit Enter:

CHKDSK [volume [[path] filename]] [/F] [/V] [/R] [/X] [/C] [: size]]

Note: In the command given above, “[/F]” will try to fix the system errors while “[/R]” will be the one to fix the bad sectors.

  • Now if you are prompted to run CHKDSK after your reboot your PC, just tap Y and reboot your PC.
  • If CHKDSK is not able to find any errors, tap the Win + E keys and navigate the access window. From there, right-click on the concerned drive and click on Properties.
  • After opening Properties, click on the tab Tools and then click on the “Check” button under the Error-checking section.
  • Wait until the process is completed and then restart your computer.

Option 4 – Try checking the hardware components

On the other hand, it is also possible that the issue has something to do with a hardware problem and so you need to check the hardware components on your computer to determine that.

If you like to learn and find out more about various Windows errors, and how to repair them go to our vast archive or use search to find articles that will explain and help you in solving your issue.
However, if you prefer to do things fast and with automatization then we are proposing to use an automated solution for your issues. The application that we are recommending is Advanced System Repair Pro
Advanced System Repair utilizes multiple tools all in one to give you a quick, simple, reliable, and very thorough diagnosis of your PC. It brings you all the tools you need in one program to clean, fix, protect, optimize and boost your PC!
1-Click Maintenance
All the tools to make it simple and easy! It's like having a professional technician at the click of a mouse.

Junk Cleaner
Keeping your computer free from unnecessary clutter also helps make your computer last longer. Like any other machine, if you keep it clean and take care of it, it will serve you better for longer!

Optimize background apps
Optimize applications background activity with the built-in Application Optimizer feature.

Disk Defrag
With a simple 1-click, Advanced System Repair speeds up your PC by assembling fragmented files on your machine and organizing them more efficiently.

Malware Removal
Finds and removes all types of harmful malware including trojans, worms, bots, adware, spyware, PUPs, and more!

Privacy Cleaner
The all-in-one privacy suite to Clean Your Tracks & Protect Your Privacy! Make your computer safe, secure, and more efficient!

System Tweak/Optimizer
ASR will analyze your complete system and settings to adjust your PC to function at its maximum performance.

Registry Cleaner
Over time, as you install and uninstall applications, the registry can become cluttered with old entries and broken settings which can result in program crashes, and annoying messages and slow the computer down.
Visit our Advanced System Repair Pro Download page to inform yourself about all the benefits of this software and get a free trial copy of it.
advanced system repair pro

Advanced System Repair Pro

One-click automated PC repair solution
ASR logo
With Advanced System Repair Pro you can easily
Replace damaged files
Restore performance
Free disk space
Remove Malware
Protects WEB browser
Remove Viruses
Stop PC freezing
DOWNLOAD
Privacy Policy | Terms of Use | Uinstall
Advanced System Repair Pro is compatible with all versions of Microsoft Windows including Windows 11

Share this article:

You might also like

Fake Windows 11 installers come with malware
Being in the Microsoft Windows insider program will let you get a hands-on new Windows 11, but some people just want Windows 11 without being in the insider program. Well, people beware! It was detected that some groups have been releasing fake Windows 11 installers with malware into them. There’s one malicious file called 86307_windows 11 builds 21996.1 x64 + activator.exe. Based on the filename, one might guess that it includes Windows 11 build 21996.1, and on top of that, there’s something in it that will automatically activate Windows for you. It comes in at 1.75GB, so for some people, that might seem reasonable. It starts out looking like a normal installer, and then there’s a second installer that calls itself a download manager. If you accept the nonsense agreement that’s included, you get a bunch of malware. This is just one example of malicious installers running amok internet, but there are more of them with different software placed inside. Malware can be anything from adware to a Trojan virus. The adware usually isn’t super dangerous. It’s just malware that’s meant to inject your PC with advertisements. Viruses can be more of an issue, and they can be harder to get rid of if your machine is infected. Windows Defender does a good job of getting rid of this stuff. The only problem is that if you’re downloading Windows 11 from shady sources, you’re probably already set to click through the dozen or so warnings that pop up telling you not to install it. The solution will be to get Windows from a trusted source of roll inside the insider program and get it from Microsoft directly.
Read More
Can't Connect to Blizzard Battle.net App
Blizzard is one of the most beloved game company which brought some of the most and greatest titles in PC gaming. Blizzard has released its own launcher in which you can launch games, sadly sometimes launcher does not want to work and fails to connect. If this happens to you be sure to:
  1. Reset your network devices to make sure your router hasn't become flooded with data.

    Power cycling your modem and router allows them to reset and re-establish a connection to your ISP. Follow these steps to completely power cycle the devices in your network connection:Note: If your modem has a battery backup, you will need to take the battery out or use the reset button on the modem.
    1. Shut down all computers connected to the modem/router.
    2. Power down and unplug the modem and the router if you're using one.
    3. Allow to sit for 60 seconds unplugged.
    4. Plug in and turn on the modem and router, and allow them to completely boot up until the front panel connection lights on the modem show a steady connection.
    5. Start the computer and allow it to completely boot up.
  2. If you're using a wireless connection, optimize your internet connection to rule out a connection issue.

    If you're experiencing issues with your low-speed or wireless internet connection, follow the steps below to troubleshoot the problem.
    1. Try plugging your computer directly into your modem.
    2. Shut down other programs that access the internet, such as other games or download programs.
    3. Satellite, mobile phone, and WiMax internet connections are not stable connections and may cause further connection issues when playing Blizzard games. If possible, consider switching to a more stable connection.
  3. Update your drivers and operating system to resolve any compatibility issues.

    Out-of-date drivers and operating systems can cause a variety of issues and are one of the first things to check when a game is having problems. The instructions below will help you check and update your drivers.
    • Even new computers can have out-of-date drivers and operating systems because updates are released routinely.
    • Some games and programs might run fine on a system with old drivers, but outdated drivers can still create technical issues with specific games or programs.
    • Check our supported video cards articles to make sure your hardware is compatible:
    Refer to the steps below to update drivers and software for your operating system.
  4. Release and renew your IP and flush your DNS to resolve any network conflicts.

    1. While on the desktop, press Windows Key and type CMD.
    2. Right-click Command Prompt and select Run as administrator.
    3. Type ipconfig /release in the command prompt.
    4. Wait a few seconds for a reply that the IP address has been released.
    5. Type ipconfig /renew in the command prompt.
    6. Wait a few seconds for a reply that the IP address has been re-established.
    7. Type ipconfig /flushdns in the command prompt.
    8. Close the command prompt and attempt to make a connection.
  5. Close all other applications to resolve software conflicts and free up resources.

    Before trying the steps below, close unnecessary programs and restart your computer. Identify Problematic Startup Items
    1. Press Ctrl+Shift+Esc to open the Task Manager.
    2. Click More Details.
    3. Select the Startup tab.
    4. Right-click on each item and select Disable.
    5. Restart the computer.
    If this resolves the issue, enable the startup application one at a time to determine which one is causing the problem. You will need to restart between each application you enable. Note: To re-enable startup applications, follow steps 1-4 and select Enable.
  6. Delete the Battle.net Tools folder to automatically rebuild outdated or corrupt files.

    1. Close Blizzard processes.
      1. Press Ctrl + Shift + Esc to bring up the Task Manager.
      2. Click the Processes tab.
      3. Select all Agent, Blizzard Battle.net desktop app, and game processes, and click End Process.
    2. Navigate to the folder containing the Battle.net directory:
      1. Press Windows Key + R to open the Run dialogue.
      2. Type C:\ProgramData\ into the Open field and press Enter.
    3. Delete the Battle.net folder.
    4. Run Battle.net and update the game to see if the issue persists.
    If the error persists after you try these steps, another program may be causing the problem. Restart your computer and delete the Battle.net folder one more time.
    Note: The above steps may cause the Blizzard Battle.net desktop app to forget game install locations. If your games can’t be found, you will see Install on the Blizzard Battle.net desktop app game tab instead of Play. To find your installation, click Locate this game or run the game launcher.
Read More
How to Fix Windows 10 Error 0x80248014

How to Fix Windows 10 Error 0x80248014

Error Code 0x80248014 - What is it?

Error Code 0x80248014 is an error that is particularly associated with the Windows 10 operating system. It generally appears during the Windows Update process and can interrupt the update installation, causing it to fail.

Common symptoms include:

  • Inability to download, install, or run updates on the Windows 10 operating system
  • The vague message that appears when the error occurs
  • Inability to finalize purchases made from the Windows Store
  • Inability to run a check to see if updates need to be installed

The resolutions available for Error Code 0x80248014 include the use of the command prompt and delving into the settings for Windows. While most users should be able to navigate the resolution methods on their own if you do not feel comfortable undertaking these steps on your own or if you aren’t able to resolve the error fully using these methods, get in touch with a qualified Windows repair technician who is familiar with issues in Windows updates.

Solution

Restoro box imageError Causes

There are several common culprits that can make Error Code 0x80248014 appear on your Windows device. The most common ones include problems with your connections, interference on the server, or problems in the settings for the Windows Store itself from which the updates are downloaded.

If you believe that your error relates most specifically to the Windows Store, you may want to jump directly to method two in order to attempt to resolve the issue.

Further Information and Manual Repair

There are a number of ways that you can try to resolve Error Code 0x80248014 on your Windows 10 operating system. The first will attempt to reset the issue using the command prompt, while the second attempts to address the issues that are associated directly with the Windows Store.

If you do not feel comfortable taking the steps below, be sure to get in touch with a qualified Windows repair technician to assist you.

Here are the top two methods to resolve Error Code 0x80248014 on the Windows 10 operating system:

Method One:  Attempt to Resolve the Error Using the Command Prompt

To use this method, employ the following steps in order:

  • Step One: To begin, open up the Start menu and select the option for the Command Prompt, choosing to run it in Admin mode.
  • Step Two: Put in the commands below, hitting the Enter key after each one:
    • net stop WuAuServ
    • %windir%
  • Step Three: Open up the Windows folder on your local hard drive. Look for the folder labeled “SoftwareDistribution” and change the name to “SDold”.
  • Step Four: Go back into the Command Prompt as an administrator and enter this command:  “net start WuAuServ”.
  • Step Five: Attempt to run your check for Updates again.

You may want to reboot your computer after running the steps above to ensure that the changes that you’ve made are fully applied to your device.

Method Two:  Reset Your Windows Store Settings

In some cases, Error Code 0x80248014 can appear on a device when the settings for the Windows Store have been altered or cannot be successfully read by the machine in question. If you believe that this is the case on your machine, you can run a simple command to renew your Windows Store settings.

To attempt to reset your Windows Store settings, open up your search bar and type in the following phrase “wsreset.exe,” then hitting Enter. Running this command will reset your Windows Store settings to their defaults.

After you reset your Windows Store settings, it may be a good idea to reboot your computer to ensure that all changes have fully taken effect on your device. Once this has been done, you can open the Windows Store back up and try to download or install the programs that you were attempting to purchase when the error code occurred.

If you are still experiencing the effects on your Windows 10 operating system or if you have not been able to follow the steps above to completion, it may be time to get in touch with a qualified Windows repair technician to assist you with the error resolution process.

Method Three: Use An Automated Tool

If you wish to always have at your disposal a utility tool to fix these Windows 10 and other related issues when they do arise, download and install a powerful automated tool.

Read More
Fix oobesettings error inside Windows 11
oobesettings
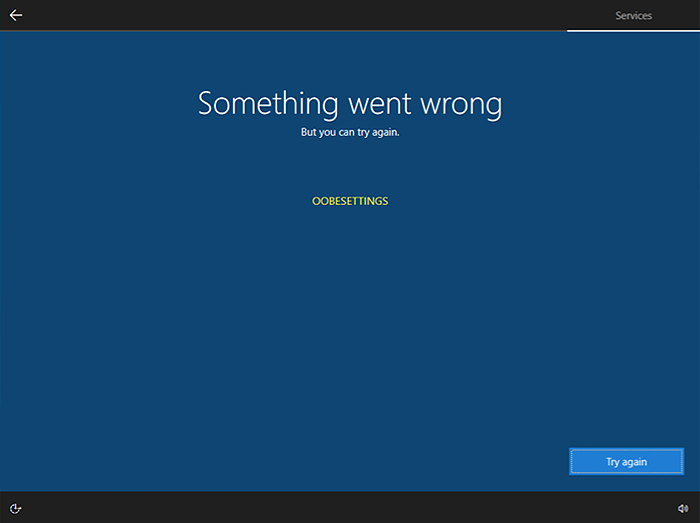
Oobesttings error is the blue screen of death error caused by some faulty settings inside the Windows registry. The good news is that this is not a hard error to fix and if by any chance you are one of the unfortunate people getting this dreaded annoying error, please do keep reading because we have several things that you can do in order to eliminate this issue from your computer.

Reboot your system

This is the easiest and straightforward solution and can work sometimes since if the system has not been properly rebooted in a while memory could be filled with various processes and it can trigger oobesettings error. A simple restart of the system can solve the issue by decluttering files and emptying memory.

Scan and repair with SFC

If rebooting the system was not helpful and sadly you still receive an error then let's scan and repair system files by using Windows built-in tool SFC. In order to use this, we will have to run the command prompt in elevated administrator mode. Follow instructions closely. First click on the search icon on the taskbar and type in CMD The command prompt will show as a search result, on the right side click on Run as administrator. Once it opens type in following command: sfc /scannow and press ENTER Wait for the process to finish completely and restart your device after.

Repair the system registry

If the SFC scan has not repaired the issue then we will move to the next solution that involves repairing the system registry itself. Please note that you need to follow step-by-step for provided instructions since playing with the system registry can cause some serious issues if not done properly and can even render the system unstable. That being said, let's begin: Press ⊞ WINDOWS + R to open Windows run dialog Type inside regedit and press ENTER Inside registry editor locate the following key: HKEY_LOCAL_MACHINE/SYSTEM/CurrentControlSet/Control/Session Manager/ Memory Management. and click on it to see properties Inside the properties right-click on CommitLimit value and choose delete. Confirm with yes. Close registry editor and reboot your computer.

Reset Windows 11

If even clearing key inside the registry editor has not helped next step would be to reset the system itself. Press ⊞ WINDOWS + I to open Windows settings and click on System on the left. Inside on the right part click on Recovery In recovery click on the button next to Reset this PC that says Reset PC Choose between keep my files and remove everything (a better option is remove everything, but be sure that you have all your files on a separate drive backed up) Choose between Cloud Download or Local reinstall. Click on next to confirm choices and after that on Reset to start the reset process. Follow onscreen instructions until it is fully done.
Read More
Turn off or on Mobile Hotspot remotely
In case you don’t know, new support has been added by Microsoft to Windows 10 that now allows users to turn off or on the Mobile Hotspot remotely. The Mobile Hotspot feature, known earlier as “Virtual Networks”, was first introduced with the initial release of Windows 10. With this new feature to remotely turn on or off the Mobile Hotspot in Windows 10, users can just use the Bluetooth on their mobile phones to turn off or on the Mobile Hotspot even when their Windows 10 computers are out of their reach. To turn off or on the Mobile Hotspot feature in your Windows 10 computer remotely, there are two options you can try. First, you can do it using the Windows 10 settings app or using the Registry Editor. To get started, refer to the following options.

Option 1 – Turn off or on the Mobile Hotspot remotely via Windows 10 Settings app

  • First, you need to open the Windows 10 Settings app and from there go to Network & Internet and then go to the Mobile Hotspot section.
  • After that, scroll down to the “Turn on remotely” section.
  • Once done, make sure that the toggle button is set to ON and that the Bluetooth of both devices is turned on and paired as well. This should enable the feature to turn on or off the mobile hotspot remotely.

Option 2 – Turn off or on the Mobile Hotspot remotely via Registry Editor

Before you get started with the second option, make sure that you create a System Restore point first. Once done, proceed to the following steps:
  • Tap the Win + R keys to open the Run dialog box and type “Regedit” in the field and then hit Enter to open the Registry Editor.
  • Next, navigate to this registry path: ComputerHKEY_LOCAL_MACHINESOFTWAREMicrosoftWcmSvcTethering
  • From there, look for the DWORD named “RemoteStartupDisabled” and set its Value data to be “0”. This will enable the feature that will allow you to remotely turn on or off the mobile hotspot in your Windows 10 computer. To disable it, just set its Value data to “1”.
Read More
Windows can’t stop your Generic volume device
One of the issues with external storage devices is that unplugging them right away without using the “Safely Remove Hardware” feature is not safe and doing so could lead to data corruption and data loss. However, in some cases, even when you use the “Safely Remove Hardware” feature, you could get an error that says:
“Windows can’t stop your ‘Generic volume’ device because a program is still using it. Close any programs that might be using the device, and then try again later.”
It is possible that the system is still using the external device – for instance, a copy operation might still be in progress, or Windows is still indexing the contents of the drive in the background or it could also be that the drive is not configured to be quickly removed. To fix this error, there are a couple of suggestions you can try. You can try to close all the open programs and file explorer windows, or you could also configure the Device Removal Policy or change its file system to FAT32. In addition, you can also try to change its drive letter or use the DISKPART utility to get the drive to be offline or simply manage the hogging process that prevents it from being safely removed. Follow each one of the given potential fixes below to resolve the error when using the Safely Remove Hardware feature.

Option 1 – Close all the open programs and File Explorer windows

The first thing you have to do to resolve the error is to close any open programs as well as File Explorer windows. This is because there are some programs and File Explorer instances that could be using the external device in the background which explains why you’re getting the error when you try to safely remove your device.

Option 2 – Try to configure the Device Removal Policy

The next thing you can do is to configure the Device Removal Policy. How? Refer to these steps:
  • Open File Explorer and right-click on the drive where you encountered the error.
  • Next, select Properties from the context menu.
  • After that, navigate to the Hardware tab and select the disk drive where you got the error under the “All disk drives” section.
  • Then select Properties under the Device Properties section. This will open a new mini window and from there, select Change Settings on the bottom portion of the window.
  • Now navigate to the Policies tab and select the “Quick Removal (default)” option under the Removal Policy section.
  • Click on the OK and Apply buttons to save the changes made and then see if the error is now fixed.

Option 3 – Try to manage the hogging process

You could also try managing the hogging process to get rid of the error.
  • Tap the Ctrl + Shift + Esc key combination to open the Task Manager.
  • Then look for the running processes and programs that are hogging your USB storage device. If there is a program that’s using your device, it will hog on some Disk or CPU while transferring data and interacting with the device which is why you’re getting an error when you safely remove the device.
  • Next, select the concerned processed and right-click on each one of them, and then select the End Task or End Process option. You can also restart the Explorer.exe process and see if that helps.

Option 4 – Try to change the drive letters

  • Tap the Win + R keys to open the Run utility and then type “diskmgmt.msc” in the field and click OK or tap Enter to open Disk Management.
  • Next, look for your USB storage device using the drive letter that’s assigned to it. Right-click on your device and select the “Change Drive Letter and Paths…” option.
  • This will open a mini window and from there select the drive letter you want to change and click on the Change button.
  • After that, another smaller window will appear where you’ll have to select the new drive letter from the drop-down menu.
  • Click OK and if you got a warning prompt, just click on Yes.
  • Now restart your computer.

Option 5 – Try using DISKPART utility to get the drive to be offline

The next thing you can try to resolve the issue is to use DISKPART. Refer to the given steps below to do so.
  • Tap the Win + R keys to launch Run and then type “cmd” in the field and tap Enter or click OK to open an elevated Command Prompt.
  • Next, type and enter this command to execute it: diskpart
  • The command you entered will initiate the DISKPART utility. After that, type and enter this second command: list disk
  • Next, type and enter this third command: list volume
  • The commands you just executed will help you in either listing all the Disk connects or all the partitions on those disks formed and from there, you need to select one command depending on the “list” command you entered. You can execute either of the two following commands:
    • select disk #
    • select volume #
  • After that, it will select the Disk or Partition you want to select.
  • Now type either one of the following commands:
    • offline disk #offline volume #
  • The command you entered will mark the selected disk is Offline. Afterward, try to safely remove your USB Storage device. Just remember that when you plug it back in again, you have to carry out the same method except for the last given command as this time you will have to enter either of these commands in order to get your USB storage device back online:
    • online disk #
    • online volume #

Option 6 – Try to change the file system to FAT32

If you keep getting this error on a particular USB device, you might have to format the disk and change its file system to FAT32. Make sure that you copy its contents safely into another location before you format the disk. Keep in mind that formatting the disk will remove all the contents of your drive.
  • Open File Explorer and right-click on the drive where you got the error and then select Format from the context menu.
  • Next, in the newly opened mini window, select the FAT32 (Default) option from the drop-down menu under File System.
  • Now check the Quick Format checkbox and then click on the Start button to start formatting your drive.
Read More
An Easy Guide to Fixing Internal Error 2503

An Easy Guide to Fixing Internal Error 2503

Internal Error 2503 - What is it?

Internal Error 2503 mostly pops up on Windows 8. It occurs when you try to uninstall or install software on Windows 8. The error code message may vary and displayed in different formats such as:
The installer has encountered an unexpected error installing this package. This may indicate a problem with this package. The error code is 2503. Called RunScript when not marked in progress The installer has encountered an unexpected error installing this package. This may indicate a problem with this package. The error code is 2503. Called Install Finalize when no installation is in progress

Solution

Restoro box imageError Causes

Some of the most common causes for internal error 2503 are:
  • Permission not granted to access the Windows Installer Folder
  • Viruses
  • Problems with Windows Installer

Further Information and Manual Repair

To repair this issue on your PC without any professional assistance, try the DIY methods given below:

Method 1

Internal error 2503 may occur when your account has limited privileges. You don’t have the privilege to use or access the Windows Installer folder. Your inability to access this folder hampers you from successfully install or uninstall the desired program on your PC. To gain access, you need to ensure you have permission.
  • For this navigate to the C:\windows folder. Here find the installer folder and then right-click and choose properties.
  • After that click on the security tab and check if the System and Administrator account has Full access permission.
  • For that make sure the system group option has ‘all’ selected to allow you full permission.

Method 2 - Re-register Windows Installer

Another alternative to resolve internal error 2503 is to re-register Windows Installer.
  • To do this, go to Start and click Run. Now type ‘msiexec /unreg’ in the Run box and then press enter.
  • Follow the same steps and now type ‘msiexec /regserver’ in the box and then press enter. This will resolve the issue.

Method 3 - Remove Viruses

If internal error 2503 is triggered by a viral infection on your PC, then it is advisable to download an antivirus and scan your entire system. Viruses are notorious for system failures and pose data security threats. If not removed timely, these malicious programs can damage your PC. To remove all viruses on your system, run an antivirus. An antivirus detects all malicious software programs including viruses, malware, adware, and spyware. Delete all the malicious files found right away. This will help resolve internal error 2503.
Read More
Fix Windows Update Error 0x8024000B
As you know, Windows Updates are essential for your operating system as it keeps it protected from potential threats, fixes bugs and improves your experience in using Windows 10. However, there are instances when Windows Updates also cause errors and one of them is the Windows Update Error 0x8024000B. One of the causes of this particular Windows Update error is that Windows was not able to read the Update Manifest file which is needed to install the Windows Updates. This means that the operation was canceled by either the service or the user. On the other hand, this error could also occur if you are not able to filter the results. When you encounter this error, you will see an error message that says, “WU_E_CALL_CANCELLED: Operation was canceled”. This indicates that the operation was canceled by the operating system itself. To resolve the Windows Update Error 0x8024000B, here are some suggestions you need to check out.

Option 1 – Try to run the Cleanup (Decline) Superseded updates PowerShell script

The first thing you can do to fix the Windows Update Error 0x8024000B is to run the Cleanup (Decline) Superseded updates PowerShell script. This is actually an easy fix since all you have to do is download and run it from the Microsoft Technet site. Once you’re done downloading and running the file, restart your computer and see if the error is fixed or not.

Option 2 – Try to rename the Spupdsvc.exe file

If the first option didn’t work, you can try renaming the Spupdsvc.exe file which is one of the reasons why you’re getting the Windows Update Error 0x8024000B.
  • First, tap the Win + R keys to launch the Run utility.
  • Next, type the following command and hit Enter to execute it in cmd:
 /c ren %systemroot%System32Spupdsvc.exe Spupdsvc.old
  • The command you entered will rename the troublesome “Spupdsvc(.)exe” file to “Spupdsvc(.)old”.
  • Now restart your computer after the command has been executed.

Option 3 – Try to restart various Windows Update-related services and components

You could also try to restart some Windows Update-related services to resolve the Windows Update error. Refer to the following steps to do so:
  • Tap the Win + X key combination and select Command Prompt (Admin) to open Command Prompt with admin privileges.
  • After opening Command Prompt, copy and paste each one of the commands listed below one by one and tap Enter right after you enter each command.
    • net stop wuauserv
    • net stop bits
    • net stop appidsvc
    • ren %systemroot%SoftwareDistribution SoftwareDistribution.bak
    • ren %systemroot%system32catroot2 catroot2.bak
  • Once you’ve entered all the commands given above, they will stop all the Windows Update services that are running on your computer as well as clear the SoftwareDistribution folder, and reset the Catroot2 folder. Now you have to start all these Windows Update services you’ve just stopped by executing the following commands:
    • net start wuauserv
    • net start bits
    • net start appidsvc
    • net start cryptsvc
  • After that, restart your computer and try to run the setup again, and see if the error is now fixed.

Option 4 – Try to run the Windows Update Troubleshooter

You should also try to run the built-in Windows Update troubleshooter as it could help you resolve the Windows Update Error 0x8024000B. To run it refer to these steps:
  • Go to Settings and then click on Windows Update from the given menu.
  • Next, click on the Troubleshoot option and select Windows Update from the given options to run the Windows Update troubleshooter.
  • After that, follow the next on-screen instructions and wait until the process is completed, and check if the Windows Update Error 0x8024000B is fixed or not.
Read More
How to Fix Windows Store Error Code 0x80240017

How to Fix Windows Store Error Code 0x80240017

Error Code 0x80240017 – What is it?

Error code 0x80240017 is associated with installing or updating a Windows Store app. This error is more common in Windows 8 and Windows 8.1. It appears due to missing certain system files and also corrupt registry.

Common symptoms

  • When you try to install a Windows Store app on a PC running Windows RT 8.1, Windows 8.1, or Windows Server 2012 R2, the installation fails and you receive an error message: 0x80240017
  • Certain apps may become unresponsive.
  • You may not be able to download apps or Windows update
  • You may have difficulty updating or installing and uninstalling other built-in programs inside Windows 8 and Windows 8.1.
  • When you have multiple applications running, you may experience crashes and freezes.

Solution

Restoro box imageError Causes

The error code 0x80240017 in Windows 8.1 or Windows 8 usually appears due to the fact that your system has changed after you installed a third-party application. It might also appear if registry entry has changed after a reboot of the operating system and you do not have the required permissions. Other causes may be due to:
  • Corrupted, broken, or missing system files.
  • Malware/spyware infection or virus attack
  • Hardware/RAM decline
  • Fragmented file
  • Unnecessary or redundant program installations

Further Information and Manual Repair

Repairing Error Code 0x80240017 in Windows 8/Windows 8.1

Method 1:

Resetting Windows Store app:
  1. Press and hold the Windows key and press R. This will open up the Run command
  2. Now, type exe and hit Enter
  3. Just wait for it to finish and it will re-launch Windows Store. Now, try and install the app you were trying to install which was previously showing an error.
This basic solution will delete the cache and reset Windows Store.

Method 2:

Using Windows troubleshooter:
  1. Click on Search on the Charm bar and type Troubleshooting. Click on the very first option.
  2. A new window will open. Click View all from the left pane.
  3. Scroll down to the bottom and click on Windows update.
  4. Troubleshooter window for Windows update will pop up. Click on NEXT. It may ask you for administrative permission.
  5. The troubleshooter will automatically detect problems and fix them.
  6. Now, close this window and try download/install the app which was previously showing an error.

Method 3:

Disable Proxy Settings: Disable proxy server on Internet Explorer
  1. Press the Windows + R Run window will appear.
  2. Type cpl and hit Enter
  3. Click the Connections tab and click LAN settings
  4. Under proxy server uncheck “Use a proxy server for your LAN”
  5. Click OK
Now try to install apps from Windows Store.

Method 4:

Boot in Safe Mode:
  1. Open Run command as previously described
  2. Type MSConfig
  3. Click on the Boot tab
  4. Tick Safe boot in Boot option
  5. Select Network
  6. Click Apply and OK
  7. Reboot your system
Your system will boot in Safe mode with Networking. You may now try and open Windows Store and should not see any errors.

Method 5:

Note: It is recommended that you back up your files and folders before attempting this step:
  1. Move the mouse cursor over to the upper right side of the screen.
  2. A menu will pop up on the left. Click on the “Settings” feature on the menu.
  3. On the Settings window, click on the “Change PC settings.”
  4. Now, left-click on the “Update and recovery” feature.
  5. For the next step, left-click on the “Recovery” feature.
  6. There is an option here saying “Refresh your PC without affecting your files.” There, left-click on the “Get started” button.
  7. Now, follow the instructions on the screen to finish the Refresh process.
  8. After the Refresh process has finished restart your Windows 8.1 or Windows 8 device.
  9. Check again to see if the error 0x80240017 has been fixed.
If you do not possess the technical expertise required to accomplish this yourself or do not feel comfortable doing so, download and install a powerful automated tool to get the job done.
Read More
WeatherBlink Malware Removal Guide

WeatherBlink is an extension for google chrome, Mozilla, and internet explorer. It allows users to check out the weather anywhere in the world at any time. This might seem like a convenient feature, however, this toolbar also displays unwanted ads, hijacks your browser home page, collects personal data about your web surfing habits, visits, and clicks. From the author: Access local weather forecasts, weather radar, allergy, and pollen reports, and worldwide weather news – all in one convenient spot! This extension configures your New Tab page to WeatherBlink™ to provide these features.

Be prepared with instant weather forecasts. Access FREE and accurate weather forecasts with one click!

About Browser Hijackers

Browser hijack is a very common type of online fraud where your web browser settings are modified to make it do things you do not intend. Browser hijackers can do more than simply modifying home pages. It redirects you to the sponsored internet sites and inserts ads on the internet browser that helps its creator generate ad revenue. A lot of people assume that these kinds of websites are legitimate and harmless but that is not true. Nearly every browser hijacker poses an actual threat to your online safety and it is necessary to classify them under privacy dangers. In a worst-case scenario, your internet browser could be hi-jacked to open up your computer to a host of additional computer infections.

Indications of browser hijack

Below are some symptoms that indicate you’ve been hijacked: 1. the browser’s home page is changed 2. bookmark and the new tab are also modified 3. default online search engine is modified 4. you see unwanted new toolbars added 5. you notice a lot of pop-ups on your computer screen 6. web pages load very slowly and often incomplete 7. you’ve disallowed entry to particular web pages, for example, the website of an antimalware software firm like SafeBytes.

So how exactly does a browser hijacker infect a computer?

A browser hijacker could be installed on your PC when you go to an infected website, click an email attachment, or download something from a file-sharing website. They also come from add-on applications, also referred to as browser helper objects (BHO), browser extensions, or toolbars. Sometimes you may have mistakenly accepted a browser hijacker as part of a software program bundle (usually freeware or shareware). Typical examples of browser hijackers include CoolWebSearch, Conduit, RocketTab, OneWebSearch, Coupon Server, Searchult.com, Snap.do, and Delta Search.

Tips on how to remove browser hijackers

Certain browser hijacking can be easily stopped by discovering and eliminating the corresponding malware application from your control panel. However, certain hijackers are more difficult to find or eliminate as they might get themselves associated with certain crucial system files that enable it to work as a necessary operating-system process. You should think about carrying out manual repairs only if you’re a tech-savvy person because there are possible risks associated with fiddling around with the system registry and HOSTS file.

How One Can Eliminate Malware that is Blocking Websites or Preventing Downloads

Malware could potentially cause several different types of damage to PCs, networks, and data. Certain malware goes to great lengths to prevent you from downloading or installing anything on your PC, especially anti-malware applications. If you’re reading this, you probably have got infected by a virus that prevents you from downloading security software like Safebytes Anti-Malware. There are a few fixes you could try to get around with this issue.

Start Windows in Safe Mode

Safe Mode is actually a unique, basic version of Windows where just essential services are loaded to counteract malware as well as other problematic programs from loading. In the event the malware is blocking access to the internet and affecting your PC, launching it in Safe Mode enables you to download anti-virus and run a diagnostic scan while limiting possible damage. To start the computer into Safe Mode, hit the “F8” key on your keyboard right before the Windows logo screen comes up; Or after normal Windows boot up, run MSCONFIG, check Safe Boot under Boot tab, and click Apply. Once you restart into Safe Mode with Networking, you may download, install, as well as update anti-malware software from there. At this point, you could run the anti-malware scan to eliminate computer viruses and malware without any interference from another application.

Switch over to an alternate browser

Some malware may target vulnerabilities of a specific browser that block the downloading process. The most effective solution to avoid this problem is to pick a browser that is renowned for its security features. Firefox has built-in Phishing and Malware Protection to help keep you secure online.

Install antivirus on a thumb drive

To effectively remove the malware, you have to approach the problem of running an anti-malware software program on the affected computer from a different angle. Adopt these measures to run the anti-virus on the affected computer. 1) Download Safebytes Anti-Malware or Windows Defender Offline onto a virus-free computer system. 2) Plug the USB drive into the clean PC. 3) Double-click the Setup icon of the anti-malware program to run the Installation Wizard. 4) When asked, choose the location of the USB drive as the place in which you would like to store the software files. Follow activation instructions. 5) Unplug the flash drive. You may now utilize this portable anti-virus on the infected computer. 6) Double-click the Safebytes Anti-malware icon on the flash drive to run the program. 7) Press the “Scan Now” button to begin the virus scan.

SafeBytes Anti-Malware: Lightweight Malware Protection for Windows Computer

Do you want to install the best anti-malware software for your computer system? There are plenty of applications available in the market which comes in paid and free versions for Microsoft Windows computers. A few of them are good, some are ok types, while some will damage your computer themselves! You need to be careful not to select the wrong application, particularly if you purchase a paid application. On the list of recommended software programs is SafeBytes AntiMalware. SafeBytes has a very good track record of top-quality service, and customers seem to be very happy with it. SafeBytes can be described as a powerful, real-time anti-spyware application that is made to assist the common computer end user in safeguarding their PC from malicious internet threats. Using its cutting-edge technology, this application can assist you to get rid of multiples types of malware which include computer viruses, PUPs, trojans, worms, ransomware, adware, and browser hijackers. SafeBytes has a variety of features that can help you protect your PC from malware attacks and damage. Below are a few of the great ones: Antimalware Protection: With a critically acclaimed anti-malware engine, SafeBytes gives multi-layered protection which is intended to find and eliminate viruses and malware that are concealed deep in your computer’s operating system. Real-time Threat Response: SafeBytes provides round-the-clock protection for your PC restricting malware intrusions in real-time. It’ll regularly monitor your laptop or computer for hacker activity and also gives users sophisticated firewall protection. Quick Multi-threaded Scanning: SafeBytes’s high-speed malware scanning engine lessens scan times and extends the life of the battery. At the same time, it’ll effectively detect and get rid of infected computer files or any internet threat. Internet Security: Safebytes allots all sites a unique safety score that helps you to get an idea of whether the website you’re just about to visit is safe to browse or known to be a phishing site. Low CPU/Memory Usage: SafeBytes is well known for its minimal influence on computer resources and great detection rate of numerous threats. It works quietly and efficiently in the background so you are free to utilize your computer or laptop at full power all the time. 24/7 Customer Support: You will get 24/7 technical support to promptly resolve any problem with your security tool.

Technical Details and Manual Removal (Advanced Users)

To remove WeatherBlink manually, go to the Add or Remove programs list in the Control Panel and select the program you want to get rid of. For internet browser plug-ins, go to your browser’s Addon/Extension manager and select the plug-in you want to remove or disable. You will probably also want to reset your internet browser. Finally, examine your hard drive for all of the following and clean your registry manually to remove leftover application entries after uninstallation. Please remember that only experienced users should try to manually edit the registry because incorrect file deletion results in a major problem or perhaps a PC crash. Furthermore, certain malware is capable of replicating or preventing deletion.

Carrying out this malware-removal process in Safe Mode is recommended.

Files: C:Program FilesWeatherBlink C:ProgramDataWeatherBlink C:UsersYOUR_USERAppDataRoamingWeatherBlink Registry: Key HKLMSOFTWAREClassesWeatherBlink.DynamicBarButton Key HKLMSOFTWAREClassesWeatherBlink.FeedManager Key HKLMSOFTWAREClassesWeatherBlink.HTMLMenu Key HKLMSOFTWAREClassesWeatherBlink.HTMLPanel Key HKLMSOFTWAREClassesWeatherBlink.MultipleButton Key HKLMSOFTWAREClassesWeatherBlink.PseudoTransparentPlugin Key HKLMSOFTWAREClassesWeatherBlink.Radio Key HKLMSOFTWAREClassesWeatherBlink.RadioSettings Key HKLMSOFTWAREClassesWeatherBlink.ScriptButton Key HKLMSOFTWAREClassesWeatherBlink.SettingsPlugin Key HKLMSOFTWAREClassesWeatherBlink.SkinLauncher Key HKLMSOFTWAREClassesWeatherBlink.SkinLauncherSettings Key HKLMSOFTWAREClassesWeatherBlink.ThirdPartyInstaller Key HKLMSOFTWAREClassesWeatherBlink.ToolbarProtector Key HKLMSOFTWAREClassesWeatherBlink.UrlAlertButton Key HKLMSOFTWAREClassesWeatherBlink.XMLSessionPlugin Key HKLMSOFTWAREMicrosoftWindowsCurrentVersionExplorerBrowser Helper Objects9b9dcae3-be34-424c-8d73-75e305a9e091 Key HKLMSOFTWAREMicrosoftWindowsCurrentVersionExplorerBrowser Helper Objectsdc9051c2-8f55-479a-97a4-747980d9047f Key HKLMSOFTWAREMicrosoftWindowsCurrentVersionUninstallWeatherBlinkbar Uninstall Firefox Key HKLMSOFTWAREMicrosoftWindowsCurrentVersionUninstallWeatherBlinkbar Uninstall Internet Explorer Key [email protected]/Plugin Key HKLMSOFTWAREWeatherBlink Key HKLMSOFTWAREMicrosoftWindowsCurrentVersionRunValue: WeatherBlink Search Scope Monitor Data: C:PROGRA~1WEATHE~2bar.bingcsrchmn.exe Key HKLMSOFTWAREMicrosoftWindowsCurrentVersionRunValue: WeatherBlink Browser Plugin Loader Data: C:PROGRA~1WEATHE~2bar.bingcbrmon.exe
Read More
1 2 3 162
Logo
Copyright © 2022, ErrorTools. All Rights Reserved
Trademarks: Microsoft Windows logos are registered trademarks of Microsoft. Disclaimer: ErrorTools.com is not affiliated with Microsoft, nor claim direct affiliation.
The information on this page is provided for information purposes only.
DMCA.com Protection Status