How to Fix Low Wi-Fi signal strength on Windows 10

If you are experiencing a Low Wi-Fi signal strength on your Windows 10 PC after you’ve updated or reinstalled it, read on as this post will guide you on what you can do to fix the problem.

The way devices connect these days has evolved with our cognitive revolution. Various devices use some or other wireless technology to connect with other devices. However, all wireless technology has some kind of limitation when it comes to range and signal strength. From time to time, you might have faced several Wi-Fi issues. Low Wi-Fi signal strength usually happens after you update or reinstall your Windows 10 system. This issue can be identified easily by looking at the signal bars in the Wi-Fi icon or by measuring its strength. Since this problem is wide scope, there are tons of possibilities which is why this post covers the most generic situations that could help most users. Refer to the options given below to fix the low Wi-Fi signal strength of your Windows 10 PC.

Option 1 – Try running the Network Adapter Troubleshooter

If a few days ago the range and signal of the Wi-Fi was perfectly fine before you did an update or reinstall, it is possible that there were some changes made in the configuration as well. In most cases, the latest configuration that came with the update has not aligned the config in your computer or laptop. The easiest and simplest way to fix this is by using the Network Adapter Troubleshooter. How? Follow the steps below.

  • Right-click on the Wi-Fi icon from the system tray to start troubleshooting.
  • After that, select Troubleshoot problems. Note that it might take a while to run it but once it’s finished, it will show you all the problems with the network adapter.

Note: The Network Adapter Troubleshooter will also fix the issues in the background but there might be some issues that will require manual action. And if the troubleshooter wasn’t able to identify and fix the problem for you, proceed to the next given option below.

Option 2 – Try using the Device Manager

If the problem is related to hardware, you need to seek out the help of the Device Manager. To do so, follow the steps below.

  • Pull up the Device Manager.
  • Next, look for your Wi-Fi adapter under the Network Adapters.
  • Once you found it, right-click on it and open Properties.
  • After that, you will see all the actions related to drivers under the driver tab.
  • You can either update or roll back the selected driver or you could also disable and re-enable it to see if the problem’s fixed.

Note: If updating the driver didn’t help, you might have to dig into the advanced settings. From this post on, it can get a bit complicated as there are terms that you might not understand as well as some configuration. To make it easier for you, you can search for your Wi-Fi adapter online and try following the instructions from there. And before you make any further changes to your computer’s settings, make sure that you create a system restore point first.

Option 3 – Try changing the Wi-Fi Roaming Sensitivity

If you want to enhance the Wi-Fi reception as well as the performance on your Windows 10 PC, you might want to change the Wi-Fi Roaming Sensitivity or Aggressiveness. Roaming Sensitivity is the rate at which your computer chooses and switches to the nearest available point of access which offers a better signal. It is based on the strength and quality of the Wi-Fi and not on the distance to the Wi-Fi point.

Option 4 – Try adjusting the Wi-Fi range

The issue could also be caused by the position of your computer with respect to the Wi-Fi router instead of your hardware or drivers. It could be that your physical location might be a factor for the low signal strength of your Wi-Fi so you might want to adjust the Wi-Fi range to fix the problem.

If you like to learn and find out more about various Windows errors, and how to repair them go to our vast archive or use search to find articles that will explain and help you in solving your issue.
However, if you prefer to do things fast and with automatization then we are proposing to use an automated solution for your issues. The application that we are recommending is Advanced System Repair Pro
Advanced System Repair utilizes multiple tools all in one to give you a quick, simple, reliable, and very thorough diagnosis of your PC. It brings you all the tools you need in one program to clean, fix, protect, optimize and boost your PC!
1-Click Maintenance
All the tools to make it simple and easy! It's like having a professional technician at the click of a mouse.

Junk Cleaner
Keeping your computer free from unnecessary clutter also helps make your computer last longer. Like any other machine, if you keep it clean and take care of it, it will serve you better for longer!

Optimize background apps
Optimize applications background activity with the built-in Application Optimizer feature.

Disk Defrag
With a simple 1-click, Advanced System Repair speeds up your PC by assembling fragmented files on your machine and organizing them more efficiently.

Malware Removal
Finds and removes all types of harmful malware including trojans, worms, bots, adware, spyware, PUPs, and more!

Privacy Cleaner
The all-in-one privacy suite to Clean Your Tracks & Protect Your Privacy! Make your computer safe, secure, and more efficient!

System Tweak/Optimizer
ASR will analyze your complete system and settings to adjust your PC to function at its maximum performance.

Registry Cleaner
Over time, as you install and uninstall applications, the registry can become cluttered with old entries and broken settings which can result in program crashes, and annoying messages and slow the computer down.
Visit our Advanced System Repair Pro Download page to inform yourself about all the benefits of this software and get a free trial copy of it.
advanced system repair pro

Advanced System Repair Pro

One-click automated PC repair solution
ASR logo
With Advanced System Repair Pro you can easily
Replace damaged files
Restore performance
Free disk space
Remove Malware
Protects WEB browser
Remove Viruses
Stop PC freezing
DOWNLOAD
Privacy Policy | Terms of Use | Uinstall
Advanced System Repair Pro is compatible with all versions of Microsoft Windows including Windows 11

Share this article:

You might also like

How to Fix 0x0000001A Error Code in Just a Few Clicks!

Repair Error 0x0000001A

What is 0x0000001A Error Code?

The 0x0000001A is a severe memory management blue screen of death error code. This is Windows error is also called a Stop code The system is automatically forced to reboot state which means any unsaved work is likely to be lost. This error code pop-up locks you out of the program running on the screen and prevents you from working on it.

Solution

Restoro box imageError Causes

Experiencing error codes on your PC is an unusual activity that triggers that there is definitely something wrong with your system which should be repaired before it becomes a serious threat. The underlying causes of each error code are different. When you come across a 0x0000001A error message this triggers several issues on your PC but largely it’s related to defective or mismatched RAM (Random Access Memory). This could be due to disk De-fragmentation, cluttered registry, and overheating of PC hardware, or perhaps the power supply units that have been used to overcapacity which prompts your PC to show a 0x0000001A error message on your screen. In addition to this, another reason could be a fault in the BIOS motherboard that could be outdated. No matter what the underlying cause of the 0x000001A may be, it is imperative to get it resolved as it seriously damages your computer and leads to system failure.

Further Information and Manual Repair

Restoro is the best way to resolve almost all types of error codes including 0x0000001A in just a few clicks. It is a multi-functional PC registry cleaner that serves as a one-stop solution for all PC issues. This tool can be used to resolve the blue screen of death errors like 0x0000001A in seconds and help you resume and get access to the program that you were working on before you experienced the error code. With this helper, you don’t need to have the technical expertise or sound knowledge about the underlying cause of 0x0000001A. This is an intuitive and advanced tool with built-in cutting edge technology that scans and identifies the cause of 0x00000001A and fixes it right away. It has a neat design layout and a user-friendly interface that is easy to use for even novice users. Restoro registry cleaner cleans up registry disk space, occupied by unnecessary files including junk files, invalid registry entries, temporary internet files, and entries of uninstalled programs that are still present in the registry. It cleans and clears up disk space and wipes out clutter stored in the registry of your system which is likely to trigger RAM and memory mismanagement issues triggering an error code 0x0000001A pop-up message. Restoro is feature-filled which makes it multi-functional.  It is safe, secure and efficient. For optimum data security during repair, it creates backup files. This helps recover data in the event of data loss during repair, which is quite rare. So what are you waiting for? Download Restoro Registry Cleaner today and resolve the error pop-up 0x0000001A now!
Read More
Customize Lock Screen in Windows 11
Same as in Windows 10, Windows 11 also features a lock screen. IN this lock screen by default, you will see a clock and date above the standard Windows 11 background. Not all users will be happy with this choice but do not worry, you can choose and customize your lock screen to better suit your idea of it.

Lock Screen in Windows 11To personalize the lock screen do:

  1. Right-click on Desktop and select Personalize
  2. Click on the lock screen
  3. Choose one of three options and customize it
    • Personalize Your Lock Screen

      this option will let you set a custom image or slideshow for your lock screen. Choose either one that best suits you. Under selecting picture or pictures for the slide show you can uncheck the option to see tips, tricks, and facts on your lock screen.
    • Lock screen status

      when clicking on this option you can select the application widget that you wish to be shown on the lock screen like weather, mail, calendar, etc. Choose if you would like one by clicking on it.
    • Show the lock screen background picture on the sign-in screen

      as self-explanatory this switch will enable or disable chosen lock screen wallpaper on your login credentials screen.
  4. Close settings
All settings will be automatically saved and applied and when you wish to lock the screen easiest way is to press ⊞ WINDOWS + L shortcut on your keyboard.
Read More
Folder shortcuts in Windows 11 on Start menu
Special folders like music, pictures, download, videos, etc, can be placed as shortcuts in the start menu inside Windows 11 for easy access. Shortcuts will appear in the start menu on the bottom as simple glyphs. They are not present in the start menu by default so it needs to be turned ON first. Folder shortcuts
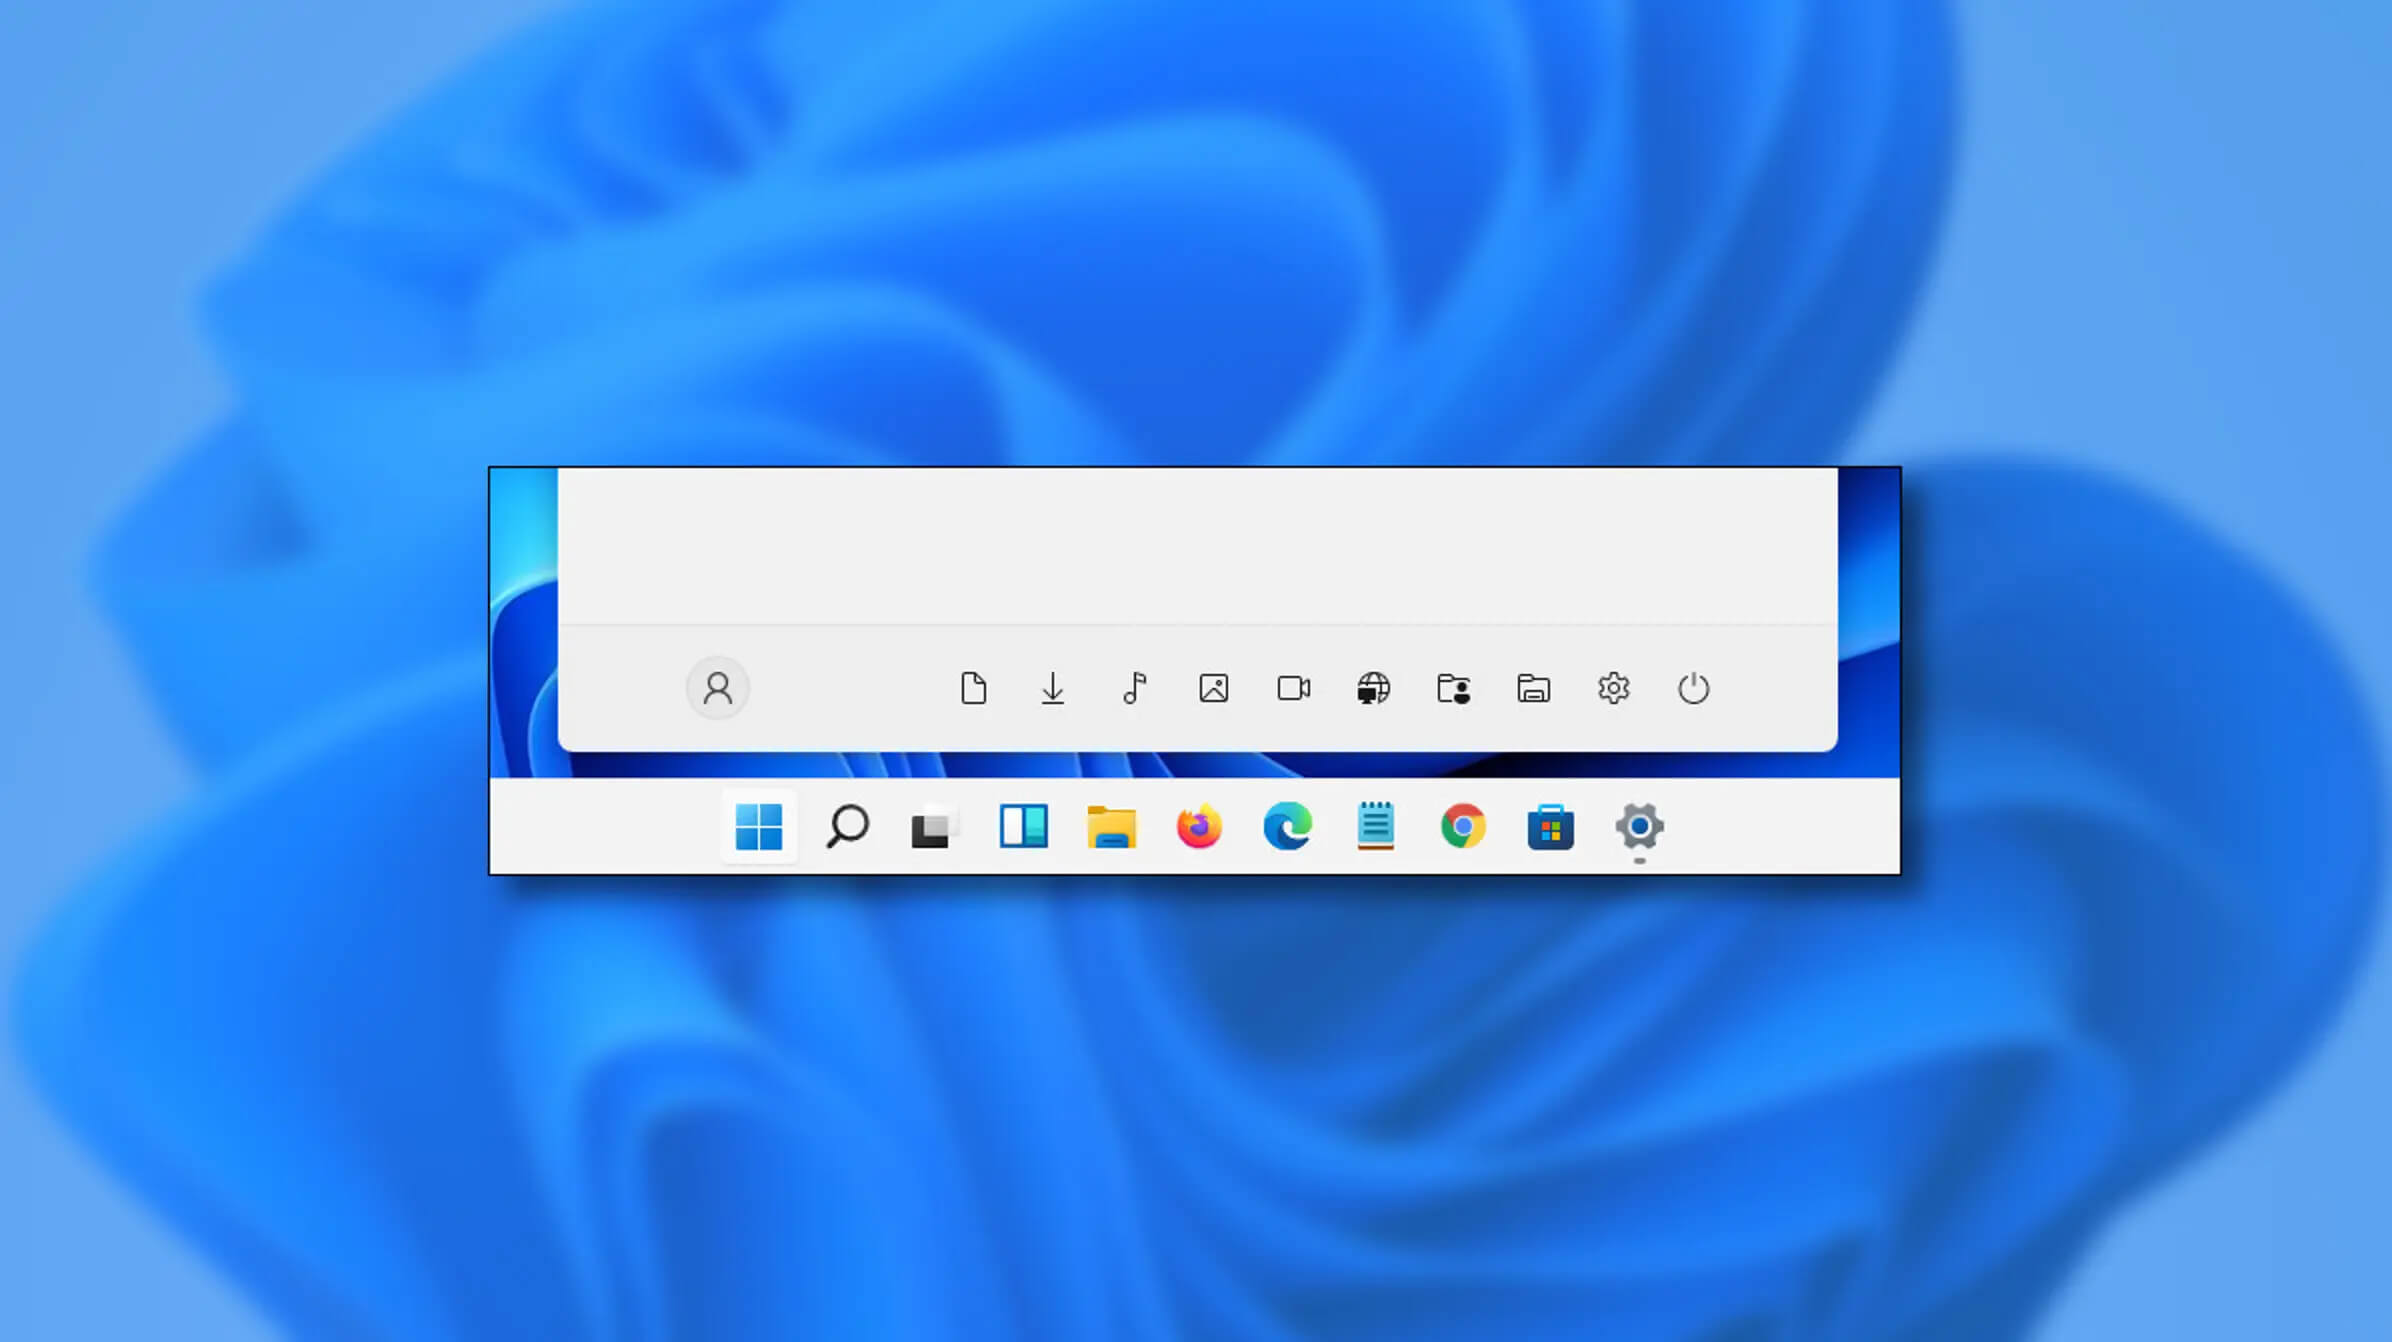
If you want to place these icons in your Star menu follow this step-by-step guide and you will have them in no time.
  1. Open Windows settings
  2. In settings go to Personalization > Start
  3. In Start click on Folders
  4. On the given list of Settings, File Explorer, Documents, Downloads, Music, Pictures, Videos, Network, and Personal folder click on the switch beside them if you want them as shortcuts in the Start menu. You can choose whichever you want.
  5. Close settings
You can revisit the settings menu to add more icons or remove some of them later if you wish so.
Read More
0x800701e3, The request failed due ...
A lot of things can go wrong even when you’re only doing some simple operations or tasks on your computer and this is due to the fact that there are various small operations make up in order to perform the larger operations on your computer. So if any of these smaller operations are not properly working, it crashes the operation as a whole and it throws an error code instead. And one of these error codes is Error 0x800701e3. This particular error pops up when an error has occurred in the File Explorer when a transfer is initiated from one disk to another in your Windows 10 computer. When you encounter this error, you will get the following error message:
“Error 0x800701e3: The request failed due to a fatal hardware error.”
There are several methods you can check out to fix this error – you can try to run System Restore or Check Disk or format the destination drive or check the SMART attribute of the drive. For more details, refer to each one of the following options.

Option 1 – Try to run System Restore

Error 0x800701e3 might be due to some adjustments you’ve made in your computer’s settings. Thus, to fix this error, you can try undoing those changes using System Restore. How? Refer to these steps:
  • Tap the Win + R keys to open the Run dialog box.
  • After that, type in “sysdm.cpl” in the field and tap Enter.
  • Next, go to the System Protection tab then click the System Restore button. This will open a new window where you have to select your preferred System Restore point.
  • After that, follow the on-screen instructions to finish the process and then restart your computer and then check if your mouse is now back to its normal state.

Option 2 – Try running the Check Disk utility

You can also run the Check Disk utility in fixing Error 0x800701e3.
  • In the Windows Search box, type “command prompt” and from the search results, right-click on Command Prompt and select “Run as administrator”.
  • After opening Command Prompt, type this command and tap Enter: chkdsk <Partition Letter>: /f /r /x /b
  • The command you entered will start to check for errors and fix them automatically. Else, it will throw an error message saying, “Chkdsk cannot run because the volume is in use by another process. Would you like the schedule this volume to be checked the next time the system restarts? (Y/N)”.
  • Tap the Y key to schedule Disk Check the next time your computer restarts.

Option 3 – Try to format the destination drive

Formatting the destination drive could also help you resolve error 0x800701e3. To format your drive, follow these steps:
  • First, open File Explorer and then right-click on the drive where you encountered the error.
  • Next, select Format from the context menu. This will open a new mini window.
  • Then select the NTFS option from the drop-down menu for the File System menu.
  • After that, check the box labeled as Quick Format.
  • Now click on Start. Keep in mind that doing so will remove all the contents of your storage device.

Option 4 – Verify the hard drive using SMART attributes

In case you don’t know, Windows has a built-in feature of SMART analysis which analyzes the hard drive/SSD and checks all the parameters by performing some minor operations. To use it, follow these steps:
  • Tap the Win + S keys and type “command prompt” in the field then right-click on the related search result and select the “Run as administrator” option.
  • After opening Command Prompt as admin, type the “wmic diskdrive get status” command and hit Enter.
  • You should get a result after that, and if you see that it’s “normal”, proceed to the next option below
Read More
A Quick Guide to Fixing Error Mswrd632.wpc

Error Mswrd632.wpc Fix Guide

Mswrd632.wpc - What is it?

Mswrd632.wpc is a Microsoft Office Word error message.  This error message is often displayed in the following format:
‘Word cannot start the converter mswrd632.wpc’
The error message mswrd632.wpc may pop up when computer users try to open certain MS Word documents using the .doc extension.

Solution

Restoro box imageError Causes

Error Mswrd632.wpc may be triggered due to several reasons. Some of the common reasons for the mswrd632.wpc error code include:
  • Issues with Microsoft Word application
  • MSwrd632.wpc file corrupted
  • Changes in the registry configuration settings
  • Issues with security updates
Sometimes when you attempt to access the Word file of the older version of the MS Word application after new security updates, you may experience this error code. This happens because the new security features that you have installed in the updated version blocks old files from being accessed.

Further Information and Manual Repair

If you can’t access important MS Word files on your PC, due to the error Mswrd632.wpc, then don’t you worry! The good news is that it is easy to fix and repair. By following a few simple methods, you can easily resolve this issue and access your MS Word files. Try the methods listed below to repair error Mswrd632.wpc on your system:

Method 1: Copy the MSwrd632.wpc file From Another Computer

The error may also occur if the MSwrd632.wpc file is corrupted. In such as situation, copy the MSwrd632.wpc file on your PC from another computer. You can usually find this file in the following path C:\Program Files\Common Files\Microsoft SharedTextConv. However, please note this method is not secure and may make your PC vulnerable to a possible security hack. Do it when your PC is not connected to the internet.

Method 2: Unregister the Text Converter

This issue can also be resolved by unregistering the converter. Here is a step-by-step guide to unregister the converter.
  • First, go to the start menu and select RUN.
  • Type REGEDIT and press the OK button.
  • Next, what you have to do is find and click on registry subkeys. Here are the keys that you have to click on
HKEY_LOCAL_MACHINESOFTWAREMicrosoftSharedToolsText ConvertersImportMSWord6.wpc (Windows 32 bit OS) HKEY_LOCAL_MACHINESOFTWAREWow6432NodeMicrosoftSharedToolsText ConvertersImportMSWord6.wpc (Windows 64 bit OS)
  • Choose the key according to your Windows bit operating system. After that, click on the Edit menu, select the Delete option and click ‘Yes’ to activate changes.
This change will effectively unregister the text converter and disable it for third-party applications and for Microsoft Office enabling you to access your desired MS Word files easily.

Method 3 - Download Restoro to Resolve Registry issues

If the error is related to the registry, then the best and most efficient way to fix it is to download Restoro. This is a powerful registry cleaner and a PC Fixer deployed with a user-friendly interface and compatible with all Windows versions. It scans and removes all registry errors and repairs the registry in seconds. Click here and download Restoro to resolve the MSwrd632.wpc error now!
Read More
Fix Windows Update error 0xC1900209
What is Windows Update Error 0xC1900209? Before you can install any updates on your Windows 10 computer, there are a lot of conditions that have to be fulfilled and one of these conditions is software compatibility. It is one of the important factors in installing Windows Updates. So if one of the software in your computer is not compatible with the new Windows Update for your OS, then the Windows 10 setup will not proceed and will block the installation of the new update. This both applies to the cumulative updates and feature updates. In such cases, you will get the following error message when you run Windows Update:
“0xC1900209, Incompatible software is blocking the upgrade process. Uninstall the application and try the upgrade again.”
This error message comes under the umbrella of the Windows 10 pre-upgrade validation using Setup.exe. And for you to identify the incompatible app, you need to grab a Windows 10 install image using the Windows Media Creation tool to download the suitable Windows 10 version and mount it. After that, execute the setup.exe file that’s located in the root folder of the Windows 10 install image. Once you execute the setup file, the upgrade wizard will give you a list of incompatible apps. Once you have determined which software is not compatible with the Windows Update, there are two options you can try to resolve the Windows Update error 0xC1900209 – you can either try to update the conflicting software or uninstall it. For more details, follow the given options below.

Option 1 – Try to update the conflicting software

If you are using an older version of the software that’s in conflict with the Windows Update, you might want to update it to its latest version and then try to apply the updates again to your Windows 10 computer. You can update the concerned software by visiting the official website of the software or any of its distribution sources. On the other hand, you can also use the Check for updates feature of that particular software if it’s available.

Option 2 – Try to uninstall the conflicting software

If updating the problematic program didn’t work, the next option you can try is to uninstall it. All you have to do is follow these steps to uninstall it successfully:
  • Tap the Win + R keys to open the Run dialog box.
  • Then type “appwiz.cpl” in the field and tap Enter to open the Programs and Features in Control Panel.
  • Next, arrange the list of installed programs in the order of the installation date.
  • After that, look for the problematic program and right-click on it, and then select Uninstall.
  • Once the uninstallation process is done, restart your computer and see if the Windows Update error 0xC1900209 is fixed or not.
Read More
Removing FlightSearchApp from your computer

FlightSearchApp is a browser extension for Google Chrome. This extension claims to be a simple tool to provide updates regarding flight arrivals, flight departures, flight tracking, and access to time zone converters. However, it is a potentially unwanted program which is also known as a browser hijacker.

This extension hijacks your browser home page and search engine changing it to MyWay. While this extension is active you will see additional ads, sponsored links, and sometimes even pop-up ads appearing through your browsing sessions. It also keeps track of your browsing data, recording your browsing activity, website visits, clicks, and potentially personal information. It also adds a toolbar to the browser header which can lag the browser while also reducing usable screen size.

Several anti-virus scanners have marked this extension as a Browser Hijacker, and is therefore not recommended to keep on your computer.

About Browser Hijackers

Browser hijacking is regarded as the internet’s constant risk that targets web browsers. It is a kind of malicious software that alters your web browser’s configuration settings so that you are redirected to websites or webpages that you had no intention of visiting. Basically, nearly all browser hijackers are made for marketing or advertising purposes. The idea would be to force users to visit particular websites which are looking to improve their visitor traffic and produce higher ad earnings. It might appear naive, but the majority of such sites are not legitimate and will pose a serious threat to your on-line safety. Some browser hijackers are designed to make certain modifications beyond the web browsers, like changing entries in the computer registry and allowing other malware to further damage your PC.

How one can know whether the browser is hijacked?

Symptoms that your browser is hi-jacked include: 1. the browser’s homepage is changed 2. you see new unwanted favorites or bookmarks added, typically directed to ad-filled or pornography websites 3. The default search page of your web browser is altered 4. unsolicited new toolbars are added to your web browser 5. many pop-up ads show up and/or your browser pop-up blocker is disabled 6. your web browser has become unstable or starts running slowly 7. You can’t access particular websites, in particular anti-virus sites.

How it infects your PC

Browser hijackers can get into a computer by some means or other, for instance via file sharing, downloads, and email too. They are generally included with toolbars, add-ons, BHO, plugins or browser extensions. Some browser hijackers spread in user’s computer systems using a deceptive software distribution technique known as “bundling” (usually through freeware and shareware). Browser hijackers may record user keystrokes to collect potentially valuable information that leads to privacy issues, cause instability on computers, significantly disrupt user’s browsing experience, and finally slow down the computer to a point where it will become unusable.

Browser hijacker removal tips

Some types of browser hijackers can be quickly removed from your PC by uninstalling malicious programs or any other recently installed freeware. At times, it can be a challenging task to identify and eliminate the malicious component since the associated file could be running as part of the operating system process. On top of that, manual removal expects you to execute many time-consuming and intricate procedures that are very hard to carry out for new computer users. You might opt for automatic browser hijacker removal methods by just installing and running an efficient anti-malware program. One of the recommended tools for fixing browser hijacker infections is SafeBytes Anti-Malware. It assists you eliminate any pre-existing malicious software on your system and provides you real-time monitoring and protection against new threats. Utilize a system optimizer (such as Restoro) along with your anti-malware to fix various registry issues, remove computer vulnerabilities, and enhance your computer's overall performance.

Virus Blocking Internet And All Anti-Malware Software? Do This!

Every malware is bad and the degree of the damage will differ greatly with regards to the type of infection. Some malware is meant to interfere with or prevent things that you wish to do on your personal computer. It may not allow you to download anything from the net or prevent you from accessing a few or all of the websites, particularly the anti-malware websites. If you’re reading this now, you have perhaps realized that a malware infection is the real cause of your blocked internet traffic. So how to proceed if you want to download and install an anti-malware program like Safebytes? There are some solutions you could try to get around with this issue.

Download the application in Safe Mode with Networking

Safe Mode is a unique, simplified version of Windows in which just bare minimum services are loaded to prevent malware and other troublesome applications from loading. If the malware is set to load immediately when PC starts, switching into this mode can prevent it from doing so. To start the computer into Safe Mode, hit the “F8” key on your keyboard just before the Windows boot screen shows up; Or after normal Windows boot up, run MSConfig, check “Safe Boot” under Boot tab, and click Apply. Once you are in Safe Mode, you can attempt to download and install your antivirus program without the hindrance of the virus. After installation, run the malware scanner to remove standard infections.

Utilize an alternate web browser to download an anti-malware program

Some malware mainly targets specific browsers. If this is your situation, use another internet browser as it could circumvent the malware. The ideal solution to overcome this issue is to opt for a browser that is well known for its security measures. Firefox contains built-in Phishing and Malware Protection to help keep you secure online.

Run anti-virus from your pen drive

Another solution is to save and run an antivirus software program completely from a USB drive. Follow these steps to run the antivirus on the affected computer system. 1) Download the anti-malware software on a virus-free PC. 2) Plug the Thumb drive into the uninfected computer. 3) Double click on the downloaded file to open the installation wizard. 4) Select the USB stick as the location for saving the software file. Do as instructed on the computer screen to finish off the installation process. 5) Transfer the flash drive from the clean PC to the infected PC. 6) Double-click the anti-malware software EXE file on the USB flash drive. 7) Hit the “Scan” button to run a full system scan and remove malware automatically.

Features and Benefits of SafeBytes Anti-Malware

In order to protect your computer or laptop from many different internet-based threats, it is important to install anti-malware software on your computer. But with countless numbers of anti-malware companies out there, these days it is tough to decide which one you should buy for your PC. Some of them do a good job in getting rid of malware threats while some will damage your PC by themselves. When looking for an anti-malware tool, purchase one which gives dependable, efficient, and comprehensive protection against all known viruses and malware. Among few good programs, SafeBytes Anti-Malware is the highly recommended software program for the security-conscious user. SafeBytes anti-malware is a trustworthy tool that not only secures your system permanently but is also extremely easy to use for people of all ability levels. Through its cutting-edge technology, this software protects your personal computer against infections caused by different kinds of malware and other threats, including spyware, adware, viruses, worms, trojans, keyloggers, potentially unwanted programs (PUPs), and ransomware. SafeBytes anti-malware provides an array of enhanced features that sets it aside from all others. The following are a few of the great ones: World-class AntiMalware Protection: This deep-cleaning anti-malware application goes much deeper than most antivirus tools to clean out your PC. Its critically acclaimed virus engine finds and disables hard-to-remove malware that hides deep inside your computer. Real-time Threat Response: SafeBytes offers completely hands-free real-time protection and is set to check, block and get rid of all computer threats at its first encounter. It will regularly monitor your pc for hacker activity and also gives end-users sophisticated firewall protection. Safe Web Browsing: SafeBytes checks the links present on a webpage for possible threats and informs you whether the site is safe to visit or not, through its unique safety rating system. “Fast Scan” Features: Safebytes AntiMalware, with its advanced scanning engine, gives ultra fast scanning which can quickly target any active online threat. Minimal CPU Usage: SafeBytes is really a lightweight application. It use up a very small amount of processing power as it operates in the background so you are free to use your Windows-based PC the way you really want. 24/7 Online Support: You may get absolutely free 24/7 technical support from their IT experts on any product queries or computer security concerns. All in all, SafeBytes Anti-Malware is a solid program since it has plenty of features and can identify and eliminate any potential threats. Once you’ve downloaded and installed SafeBytes Anti-Malware, you no longer have to bother about malware or any other security concerns. If you’re searching for the absolute best malware removal application out there, and if you don’t mind spending some money for it, opt for SafeBytes Anti-Malware.

Technical Details and Manual Removal (Advanced Users)

If you want to manually get rid of FlightSearchApp without using an automated tool, it may be possible to do so by deleting the application from the Microsoft Windows Add/Remove Programs menu, or in cases of web browser plug-ins, going to the browser’s AddOn/Extension manager and uninstalling it. You may even want to reset your home page and search providers, as well as delete temporary files, browsing history, and cookies. Lastly, check your hard disk for all of the following and clean your computer registry manually to get rid of leftover application entries after uninstalls. Please remember that only experienced computer users should try to manually edit the registry because incorrect file removal results in a serious problem or even a PC crash. In addition, some malware is capable of replicating itself or preventing deletion. Doing this in Safe Mode is advised.
Files: %PROGRAMFILES(x86)%\FlightSearch_fo %PROGRAMFILES%\FlightSearch_fo %UserProfile%\Local Settings\Application Data\FlightSearchTooltab %LOCALAPPDATA%\FlightSearchTooltab Registry: HKEY_LOCAL_MACHINE\SOFTWARE\Microsoft\Windows NT\CurrentVersion\Image File Execution Options\msmpeng.exe Debugger = svchost.exe HKEY_LOCAL_MACHINE\SOFTWARE\Microsoft\Windows NT\CurrentVersion\Image File Execution Options\msseces.exe Debugger = svchost.exe HKEY_LOCAL_MACHINE\SOFTWARE\Microsoft\Windows\CurrentVersion\Uninstall\free.flightsearchapp.com HKEY_CURRENT_USER\Software\Microsoft\Windows\CurrentVersion\Internet Settings WarnOnHTTPSToHTTPRedirect = 0 HKEY_LOCAL_MACHINE\SOFTWARE\Microsoft\Windows\CurrentVersion\Internet Settings WarnOnHTTPSToHTTPRedirect = 0 HKEY_LOCAL_MACHINE\SOFTWARE\Microsoft\Windows NT\CurrentVersion\SystemRestore DisableSR = 1 HKEY_LOCAL_MACHINE\SOFTWARE\Microsoft\Windows NT\CurrentVersion\Image File Execution Options\ekrn.exe Debugger = svchost.exe HKEY_LOCAL_MACHINE\SOFTWARE\Microsoft\Windows NT\CurrentVersion\Image File Execution Options\msascui.exe Debugger = svchost.exe HKEY_LOCAL_MACHINE\SOFTWARE\Microsoft\Windows\CurrentVersion\Run 3948550101 HKEY_CURRENT_USER\Software\Microsoft\Windows\CurrentVersion\Run xas HKEY_CURRENT_USER\Software\free.flightsearchapp.com
Read More
Nostalgia hit: Commodore 64 emulator and games
If you are a kid or in your teenage years you maybe will be not familiar with Commodore 64 but we are welcoming you anyway to go with us on this journey through time and find out about one of the most influential and beloved home computer of all time.

commodore 64
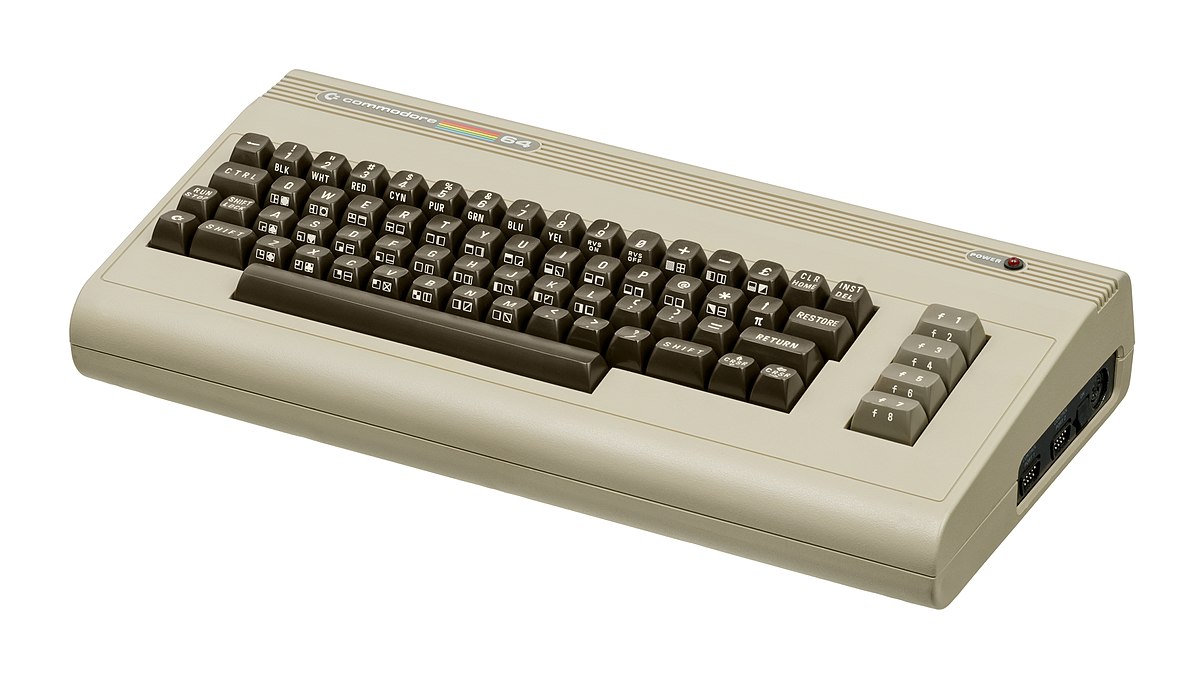
History of Commodore

Firstly shown to the world in January of 1982, at the Consumer Electronics Show, C64 caught attention right away with its low price of only $595. Although it had some issues like limited functionality in some fields and a non-wide range of use by 1984 its price dropped below $200 and it cemented itself as an affordable home computer for the middle class. In as same year Apple has released their Apple II computer with far superior capabilities, commodore 64 remains a middle-class favorite due to its price. Also, the company has decided to distribute its homemade computer via some other means including not only just electronics stores specialized in that kind of equipment but in general shops and big department stores, through toy stores and book shops as well as through specialized dealers. This has given C64 a more competitive edge and mixed with the affordable price it soon became a staple of home computing. c64 storeWith sales booming and the early reliability issues with the hardware addressed, software for the C64 began to grow in size and ambition during 1984. This growth shifted to the primary focus of most US game developers. The two holdouts were Sierra, who largely skipped over the C64 in favor of Apple and PC compatible machines, and Broderbund, who was heavily invested in educational software and developed primarily around the Apple II. In the North American market, the disk format had become nearly universal while cassette and cartridge-based software all but disappeared. So most US-developed games by this point grew large enough to require multi-loading. 
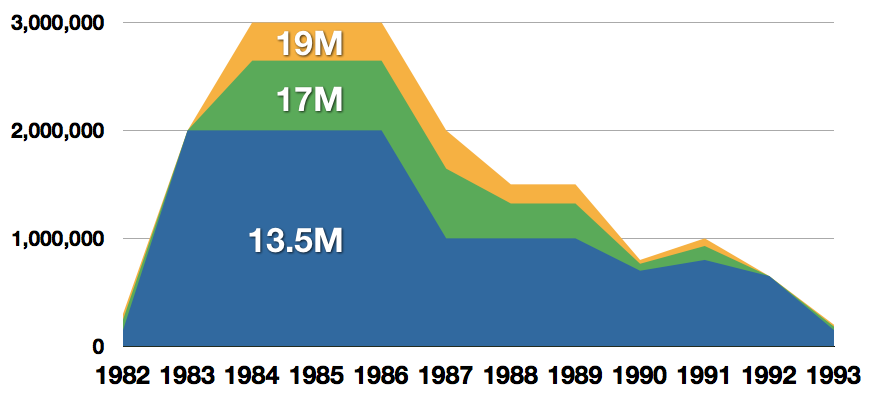
At a mid-1984 conference of game developers and experts at Origins Game Fair, Dan Bunten, Sid Meier, and a representative of Avalon Hill said that they were developing games for the C64 first as the most promising market. By 1985, games were an estimated 60 to 70% of Commodore 64 software. Over 35% of SSI's 1986 sales were for the C64, ten points higher than for the Apple II. Everything was great for Commodore but the industry was moving forward and by the year 1988, PC compatible computers were stated to be the largest and fastest-growing home entertainment systems pushing C64 on to second place. Also, Nintendo’s gaming system has started to take hold in the world with amazing 7 million systems sold in 1988 only. By the year 1991, many developers exited the gaming market for Commodore 64 home computer system and its popularity started to fall due to lack of software and not so many hardware changes. commodore salesCommodore announced that the C64 would be finally discontinued in 1995. However, only one month later in April 1994, the company filed for bankruptcy. When Commodore went bankrupt, all production on their inventory, including the C64, was discontinued, thus ending the C64's 11 and a half year production.

Legendary titles

The history of Commodore 64 is interesting ones and I believe that it has done much for computers in general, yes it ran 11 years and that seems like a small-time, but remember that it was 11 years of C64 alone, there were other computers released by the company but none except arguably AMIGA 500 has not reached that much popularity as Commodore 64. That being said the system has left some of the great titles in its catalog that are great to be played even today and have been classic games on other platforms, even on PC itself. That being said I am giving you the top 100 games for Commodore 64:
  1. maggotZak McKracken and the Alien Mindbenders
  2. Pirates!
  3. Maniac Mansion
  4. IK+
  5. Bubble Booble
  6. Turrican II: The Final Fight
  7. Last Ninja 2
  8. Space Rogue
  9. Ultima IV: Quest of the Avatar
  10. Archon: The Light and the Dark
  11. Turrican
  12. Wasteland
  13. Defender of the Crown
  14. Elite
  15. Ultima V: Warriors of Destiny
  16. Laser Squad
  17. Prince of Persia
  18. Impossible Mission
  19. U.L.E.
  20. Pool of Radiance
  21. Bruce Lee
  22. Paradroid
  23. Project Stealth Fighter
  24. Curse of the Azure Bonds
  25. Ultima III: Exodus
  26. Legacy of the Ancients
  27. Winter Games
  28. Leaderboard Golf
  29. Supremacy
  30. Airborne Ranger
  31. Exile
  32. Last Ninja, The
  33. World Class Leader Board
  34. MicroProse Soccer
  35. Project Firestart
  36. Boulder Dash
  37. Summer Games 2
  38. Great Giana Sisters, The
  39. Neuromancer
  40. Mad Doctor
  41. Mail Order Monsters
  42. Zork I: The Great Underground Empire
  43. Buck Rogers: Countdown to Doomsday
  44. Katakis
  45. Bard's Tale, The: Tales of the Unknown
  46. WIzball
  47. Times of Lore
  48. Emlyn Hughes International Soccer
  49. Ultimate Wizard
  50. Alternate Reality: The Dungeonalternate reality dungeon
  51. World Games
  52. Leaderboard Executive
  53. California Games
  54. Samurai Warrior: The Battles of Usagi Yojimbo
  55. Summer Games
  56. Creatures 2: Torture Trouble
  57. Gunship
  58. Space Taxi
  59. International Karate
  60. Silent Service
  61. Bard's Tale III, The: Thief of Fate
  62. Seven Cities of Gold
  63. Armalyte
  64. Raid on Bungeling Bay
  65. Alter Ego: Male Version
  66. Enforcer: Fullmetal Megablaster
  67. Detective Game, The
  68. Creatures
  69. Skate or Die!
  70. Heart of Africa
  71. E.R.O. - Helicopter Emergency Rescue Operation
  72. Way of the Exploding Fist, The
  73. Stunt Car Racer
  74. Wizard of Wor
  75. Bard's Tale II, The: The Destiny Knight
  76. Mayhem in Monsterland
  77. Train, The: Escape to Normandy
  78. Jumpman
  79. Champions of Krynnchampions of krynn
  80. Pitstop II
  81. Barry McGuigan World Championship Boxing
  82. Montezuma's Revenge
  83. Boulder Dash II: Rockford's Revenge
  84. Spy vs Spy
  85. Mercenary: Escape from Targ
  86. Midnight Resistance
  87. Lords of Midnight
  88. Lode Runner
  89. Castles of Doctor Creep, The
  90. Boulder Dash Construction Kit
  91. Buggy Boy
  92. Racing Destruction Set
  93. Dino Eggs
  94. Realm of Impossibility
  95. Rainbow Islands
  96. Beach-Head II: The Dictator Strikes Back
  97. Barbarian: The Ultimate Warrior
  98. Grand Prix Circuit
  99. Head Over Heels
  100. Sentinel, The

Commodore 64 emulator and game ROMs

Commodore 64 might be in the past but its legacy still lives on even today through emulators and ROMs for emulators. You can even purchase one in working condition if you want and relive the full experience as it once was. vice c64 emulator
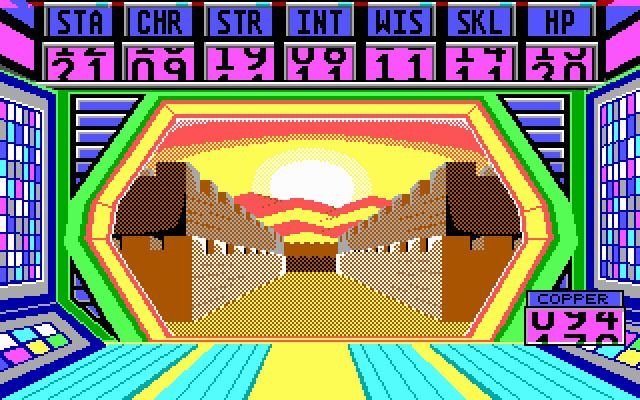
If you are not keen on spending money for reliving and checking games or software of C64 here are some links to help you to at least experience part of it completely free. 
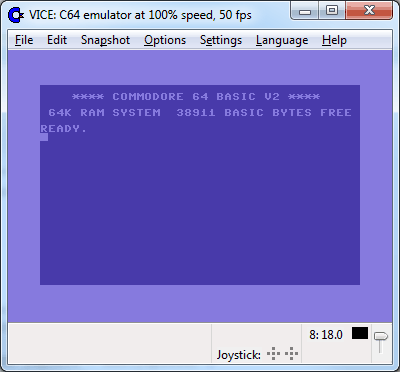
Commodore 64 Emulator C64 Game ROMs

Conclusion

It is without a doubt that the C64 home system has made a great mark on home computers echoing even today and I am very grateful that I have been part of it as a kid. Sometimes today I will still spin some old classic via emulator just for nostalgia and enjoy its simplicity. Thank you for reading the article and I hope to see you soon again.
Read More
The application was unable to start 0xc00007b
As you know, Windows programs depend on several operations to get executed and at the same time, there are also numerous parameters that have to be fulfilled for a program to get executed. However, based on some reports, there was an error when some users tried to run a program. This error says, “The application was unable to start correctly (0xc00007b)”. There could be various reasons why this error occurs but the main one is most likely due to an x86 application that is not compatible with the x64-based operating system. To fix this problem, you can run the Check Disk utility or reinstall the application or the Microsoft .NET Framework. You can also try reinstalling DirectX or replace the corrupted DLL file(s). For more details, refer to the given options below.

Option 1 – Try running the Check Disk utility

  • In the Windows Search box, type “command prompt” and from the search results, right-click on Command Prompt and select “Run as administrator”.
  • After opening Command Prompt, type this command and tap Enter: chkdsk <Partition Letter>: /f
  • The command you entered will start to check for errors and fix them automatically. Else, it will throw an error message saying, “Chkdsk cannot run because the volume is in use by another process. Would you like the schedule this volume to be checked the next time the system restarts? (Y/N)”.
  • Tap the Y key to schedule Disk Check the next time your computer restarts.

Option 2 – Re-enable the Microsoft .NET Framework

You could also try to disable the Microsoft .NET Framework then enable the latest version of the .NET Framework on your PC and check if the error is fixed

Option 3 – Try to reinstall the program

There are times when some supporting module for your application under the hood could have messed up the application where you get the error. To fix this, you have to uninstall the program and then download its latest version from its official site and then install it again. Once you’re done, run the application and see if the error is fixed.

Option 4 – Run System File Checker scan

If reinstalling the program didn’t work, you can also try running the System File Checker or SFC scan to fix the error. System File Checker is a command utility built into your computer that helps restore corrupted files and missing files. Refer to the following steps to run it:
  • Hit the Win + R keys to launch Run.
  • Type in cmd in the field and tap Enter.
  • After opening Command Prompt, type in sfc /scannow
The command will start a system scan which will take a few whiles before it finishes. Once it’s done, you could get the following results:
  1. Windows Resource Protection did not find any integrity violations.
  2. Windows Resource Protection found corrupt files and successfully repaired them.
  3. Windows Resource Protection found corrupt files but was unable to fix some of them.
  • Reboot your computer.

Option 5 – Try running the DirectX Diagnostic Tool

Since the error has something to do with the DirectX Graphics APIs, you can run the DirectX Diagnostic tool to resolve the problem.

Option 6 – Try updating or re-installing DirectX

If the DirectX Diagnostic tool didn’t work, you can try to update or reinstall DirectX instead. This can help in fixing the problem because when you reinstall or update DirectX, it will replace the incompatible or corrupted components of DirectX from your computer.
Read More
How to Repair Error Code 33

How to Repair Error Code 33

Code 33 - What is it?

Code 33 is a typical Device Manager error. This error code occurs when Windows is unable to start a device that you are trying to use on your PC. The error code 33 is usually displayed in the following format:

“Windows cannot determine which resources are required for this device. Code 33”

Solution

driverfix boxError Causes

Error code 33 may be triggered due to two reasons. One reason can be the translator's failure to find the correct resource for the device driver.

And since this error code is associated with the Device Manager, another reason can be an outdated or corrupted device driver. In most cases, the underlying problem for Device Manager error code is outdated/corrupted drivers.

The good news is that Device Manager error code 33 is not detrimental. However, if the error is not resolved timely, it can lower the functionality and the performance of your PC. You may not be able to use the hardware device.

Further Information and Manual Repair

To resolve code 33, you don’t need to be technically sound or hire a professional computer programmer. Just like any other Device Manager error code, code 33 is also easy to repair.

To help you fix this issue on your system, below are some of the best, easy, and effective DIY solutions.

Method 1 - Configure Hardware Device

Properly configure the problematic hardware device to fix error code 33. It is important to understand that when you install a device that is not plug-and-play, the resource settings are not configured automatically.

This means for such devices you will have to perform device configuration manually.

For device configuration, here’s what you should do:

  1. Go to the start menu
  2. Click Control Panel, then click Performance and Maintenance, and then System
  3. Now on the hardware tab, click on Device Manager and then double click the device you wish to configure
  4. Click the resources tab and then click on the check box next to the Use Automatic Setting
  5. After that click, the ‘Setting Based On’ and then click the hardware configuration you wish to change
  6. Press the ‘Resource Type’ you will like to configure in the ‘Resource Settings’ box
  7. Now go to the Change Settings tab and type a new value for the Resource Type

Method 2 - Update the Problematic Drivers

Code 33 can also be generated due to driver problems. In such a scenario, it is recommended to update the outdated or corrupted drivers.

Identifying all problematic drivers and updating them individually can be frustrating and time-consuming. Therefore to save time and avoid the hassle involved in updating drivers manually, it is advisable to download DriverFIX.

Method 3 - Download DriverFIX to Update Drivers Automatically

DriverFIX is a next-generation and user-friendly program compatible with all Windows versions.

This software is exclusively designed to repair and resolve device driver-related problems and error codes.

Once installed, its intelligent and intuitive programming system detects all outdated, corrupted, and misconfigured device drivers on your PC. It automatically updates all the problematic drivers in a few seconds. It makes sure that the driver versions are the latest and compatible with your operating system.

Furthermore, it also ensures that drivers are continuously updated whenever new versions are available. So, you don’t have to worry about keeping device drivers up to date.

Click here to download DriverFIX to resolve Device Manager error code 33 today!

Read More
1 2 3 162
Logo
Copyright © 2022, ErrorTools. All Rights Reserved
Trademarks: Microsoft Windows logos are registered trademarks of Microsoft. Disclaimer: ErrorTools.com is not affiliated with Microsoft, nor claim direct affiliation.
The information on this page is provided for information purposes only.
DMCA.com Protection Status