Fix Failed to create a graphics device Error

As you know, the Windows 10 operating system has support for a dedicated high-end graphics processor that brings in capabilities inside to support Graphics Cards from NVIDIA or AMD. This helps the operating system to function in a much better way by segregating the graphics-intensive operations from the CPU to a dedicated processor. However, there are times when it also experiences some issues that lead to some errors like the “Failed to create a graphics device” error.

It is possible that your computer has more than one screen or graphics card which is why you’re getting this error. To fix it, you need to try reinstalling DirectX or reinstall the Graphics Card driver. You could also try to manually check the hardware or power cycle of your computer.

To start troubleshooting the “Failed to create a graphics device” error, follow the given suggestions below.

Option 1 – Try running the DirectX Diagnostic Tool

Since the error has something to do with the DirectX Graphics APIs, you can run the DirectX Diagnostic tool to resolve the problem.

Option 2 – Try updating or re-installing DirectX

If the DirectX Diagnostic tool didn’t work, you can try to update or reinstall DirectX instead. This can help in fixing the problem because when you reinstall or update DirectX, it will replace the incompatible or corrupted components of DirectX from your computer.

Option 3 – Update or reinstall the Graphics card drivers

  • First, boot your computer into Safe Mode.
  • After that, tap the Win + R keys to launch Run.
  • Type in MSC into the box and tap Enter or click OK to open the Device Manager.
  • After that, a list of device drivers will be displayed. From there, look for the Display Adapters and click on them.
  • After that, right-click on each entry under the Display Adapters and select the “Uninstall Device” option from the menu.
  • Now restart your computer.
  • After restarting your computer, go to the Settings app and Check for Updates in the Windows Update section.

Note: You also have the option to go directly to the website of your graphics card manufacturers like NVIDIA, Intel, or AMD and go to the section called Drivers then check if there’s a new available update – if there is, download and install it.

Option 4 – Try to physically check the hardware of your computer

You might also want to check the physical status of the hardware in your computer. You can clean the dust off the hardware components like the Graphics Card of the computer. In doing so, you have to use a small blower or you could also use a soft cloth and run the components gently. Make sure that you don’t damage any parts with moisture or cause harm to any circuits while you carry out this task.

Option 5 – Try to power cycle your computer

You could also try to power cycle your computer to fix the error. To do that, you have to turn off your computer in a way that the power is completely cut off and all the fresh configurations of files are loaded when your computer is booted up. The first thing you have to do is to shut down your computer and if you are using a laptop with a removable battery, you must remove the battery for a couple of minutes before you plug it back in and boot your laptop. On the other hand, if you are using a desktop computer, press and hold the power button until the CPU goes off and take out the power cable for a minute or so and then plug it back in. Boot your computer and see if the error has been resolved.

If you like to learn and find out more about various Windows errors, and how to repair them go to our vast archive or use search to find articles that will explain and help you in solving your issue.
However, if you prefer to do things fast and with automatization then we are proposing to use an automated solution for your issues. The application that we are recommending is Advanced System Repair Pro
Advanced System Repair utilizes multiple tools all in one to give you a quick, simple, reliable, and very thorough diagnosis of your PC. It brings you all the tools you need in one program to clean, fix, protect, optimize and boost your PC!
1-Click Maintenance
All the tools to make it simple and easy! It's like having a professional technician at the click of a mouse.

Junk Cleaner
Keeping your computer free from unnecessary clutter also helps make your computer last longer. Like any other machine, if you keep it clean and take care of it, it will serve you better for longer!

Optimize background apps
Optimize applications background activity with the built-in Application Optimizer feature.

Disk Defrag
With a simple 1-click, Advanced System Repair speeds up your PC by assembling fragmented files on your machine and organizing them more efficiently.

Malware Removal
Finds and removes all types of harmful malware including trojans, worms, bots, adware, spyware, PUPs, and more!

Privacy Cleaner
The all-in-one privacy suite to Clean Your Tracks & Protect Your Privacy! Make your computer safe, secure, and more efficient!

System Tweak/Optimizer
ASR will analyze your complete system and settings to adjust your PC to function at its maximum performance.

Registry Cleaner
Over time, as you install and uninstall applications, the registry can become cluttered with old entries and broken settings which can result in program crashes, and annoying messages and slow the computer down.
Visit our Advanced System Repair Pro Download page to inform yourself about all the benefits of this software and get a free trial copy of it.
advanced system repair pro

Advanced System Repair Pro

One-click automated PC repair solution
ASR logo
With Advanced System Repair Pro you can easily
Replace damaged files
Restore performance
Free disk space
Remove Malware
Protects WEB browser
Remove Viruses
Stop PC freezing
DOWNLOAD
Privacy Policy | Terms of Use | Uinstall
Advanced System Repair Pro is compatible with all versions of Microsoft Windows including Windows 11

Share this article:

You might also like

Override default Regional settings in Windows
As you probably know, Windows 10 does not offer lots of choices for its Regional settings depending on where you are and what locale you work with or belong to. The standard region settings for Windows 10 allow users to select one set of formats for the calendar and more. However, this has somewhat changed in the Windows 10 v1809. If you don’t want such a change, you can just override the default regional format settings in the Windows 10 Improved local experience. So in this post, you will be guided on how you can do such a thing. Follow the given instructions below to override the default Regional Format settings in Windows 10. Step 1: Go to Settings > Time and Language > Region. Step 2: From there, the default region is what Windows and apps might use to provide you with local content. However, this won’t be much of use if you work for a different locale and need to have different format settings like Calendar, Dates, Times, Currency, and First day of the week, all of which you can modify under the Regional format. Step 3: You need not reboot your Windows 10 computer after changing. On the other hand, some of the apps will have to close and launch again in order to apply the new format. Thus, if you need to use apps that are of different locales, you will only see the changes after you re-launch the app. Note: You can also select a different language that makes more sense to you. In other words, if you prefer more common words to standard words for your Windows 10 computer, then this is definitely the way to do it. This local format will be used for messages, menus, navigation, settings, and other topics. Step 4: Look for a link that says “Add a Windows display language with local experience packs” under Languages. In case you don’t know, Local Experience Packs are Microsoft Store apps that deliver Windows display language quality improvements. So once you click the link, it will download the packs from the Microsoft Store. In addition, Windows has already begun using AI or Artificial Intelligence as well as neural network-based Machine Learning for Windows localization. And as the number increase, the Machine language improvements and feedback from users will help in making the translations a lot better and make them available to even more languages. All in all, it’s pretty much an interesting and a good move for Microsoft as the demands for topics and machines to be available in local languages have been increasing for the past couple of years.
Read More
Nostalgia hit: Commodore 64 emulator and games
If you are a kid or in your teenage years you maybe will be not familiar with Commodore 64 but we are welcoming you anyway to go with us on this journey through time and find out about one of the most influential and beloved home computer of all time.

commodore 64
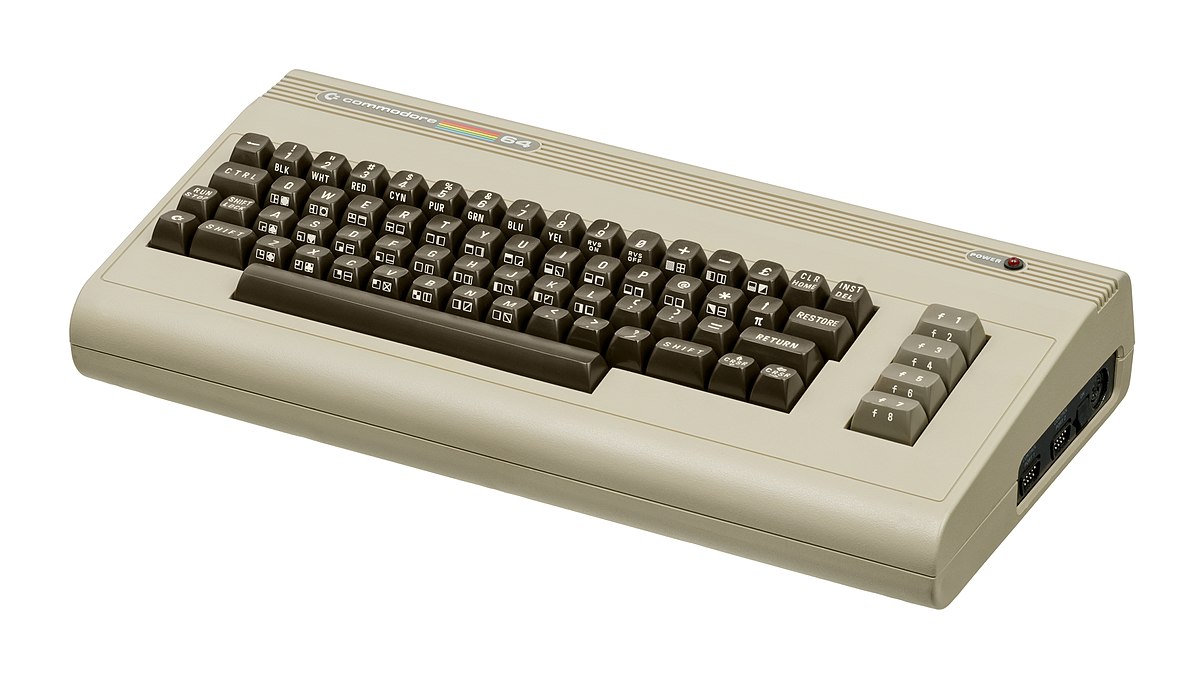
History of Commodore

Firstly shown to the world in January of 1982, at the Consumer Electronics Show, C64 caught attention right away with its low price of only $595. Although it had some issues like limited functionality in some fields and a non-wide range of use by 1984 its price dropped below $200 and it cemented itself as an affordable home computer for the middle class. In as same year Apple has released their Apple II computer with far superior capabilities, commodore 64 remains a middle-class favorite due to its price. Also, the company has decided to distribute its homemade computer via some other means including not only just electronics stores specialized in that kind of equipment but in general shops and big department stores, through toy stores and book shops as well as through specialized dealers. This has given C64 a more competitive edge and mixed with the affordable price it soon became a staple of home computing. c64 storeWith sales booming and the early reliability issues with the hardware addressed, software for the C64 began to grow in size and ambition during 1984. This growth shifted to the primary focus of most US game developers. The two holdouts were Sierra, who largely skipped over the C64 in favor of Apple and PC compatible machines, and Broderbund, who was heavily invested in educational software and developed primarily around the Apple II. In the North American market, the disk format had become nearly universal while cassette and cartridge-based software all but disappeared. So most US-developed games by this point grew large enough to require multi-loading. At a mid-1984 conference of game developers and experts at Origins Game Fair, Dan Bunten, Sid Meier, and a representative of Avalon Hill said that they were developing games for the C64 first as the most promising market. By 1985, games were an estimated 60 to 70% of Commodore 64 software. Over 35% of SSI's 1986 sales were for the C64, ten points higher than for the Apple II. Everything was great for Commodore but the industry was moving forward and by the year 1988, PC compatible computers were stated to be the largest and fastest-growing home entertainment systems pushing C64 on to second place. Also, Nintendo’s gaming system has started to take hold in the world with amazing 7 million systems sold in 1988 only. By the year 1991, many developers exited the gaming market for Commodore 64 home computer system and its popularity started to fall due to lack of software and not so many hardware changes. commodore sales
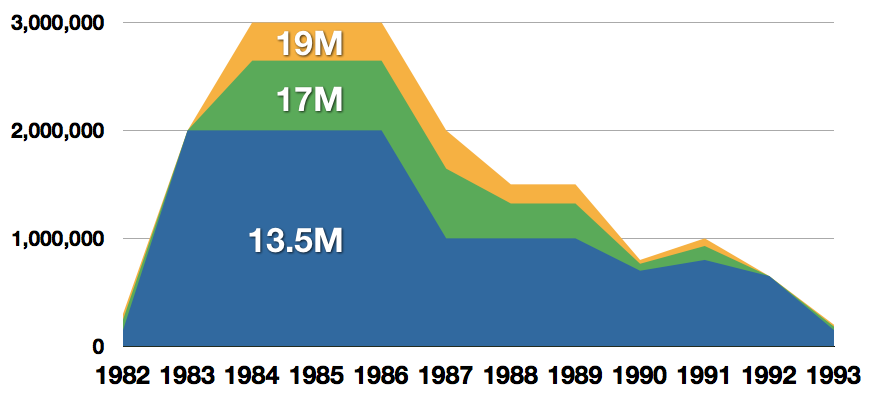
Commodore announced that the C64 would be finally discontinued in 1995. However, only one month later in April 1994, the company filed for bankruptcy. When Commodore went bankrupt, all production on their inventory, including the C64, was discontinued, thus ending the C64's 11 and a half year production.

Legendary titles

The history of Commodore 64 is interesting ones and I believe that it has done much for computers in general, yes it ran 11 years and that seems like a small-time, but remember that it was 11 years of C64 alone, there were other computers released by the company but none except arguably AMIGA 500 has not reached that much popularity as Commodore 64. That being said the system has left some of the great titles in its catalog that are great to be played even today and have been classic games on other platforms, even on PC itself. That being said I am giving you the top 100 games for Commodore 64:
  1. maggot
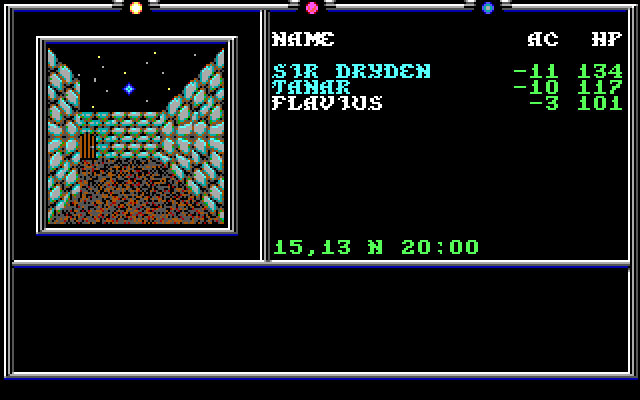
Zak McKracken and the Alien Mindbenders
  2. Pirates!
  3. Maniac Mansion
  4. IK+
  5. Bubble Booble
  6. Turrican II: The Final Fight
  7. Last Ninja 2
  8. Space Rogue
  9. Ultima IV: Quest of the Avatar
  10. Archon: The Light and the Dark
  11. Turrican
  12. Wasteland
  13. Defender of the Crown
  14. Elite
  15. Ultima V: Warriors of Destiny
  16. Laser Squad
  17. Prince of Persia
  18. Impossible Mission
  19. U.L.E.
  20. Pool of Radiance
  21. Bruce Lee
  22. Paradroid
  23. Project Stealth Fighter
  24. Curse of the Azure Bonds
  25. Ultima III: Exodus
  26. Legacy of the Ancients
  27. Winter Games
  28. Leaderboard Golf
  29. Supremacy
  30. Airborne Ranger
  31. Exile
  32. Last Ninja, The
  33. World Class Leader Board
  34. MicroProse Soccer
  35. Project Firestart
  36. Boulder Dash
  37. Summer Games 2
  38. Great Giana Sisters, The
  39. Neuromancer
  40. Mad Doctor
  41. Mail Order Monsters
  42. Zork I: The Great Underground Empire
  43. Buck Rogers: Countdown to Doomsday
  44. Katakis
  45. Bard's Tale, The: Tales of the Unknown
  46. WIzball
  47. Times of Lore
  48. Emlyn Hughes International Soccer
  49. Ultimate Wizard
  50. Alternate Reality: The Dungeonalternate reality dungeon
  51. World Games
  52. Leaderboard Executive
  53. California Games
  54. Samurai Warrior: The Battles of Usagi Yojimbo
  55. Summer Games
  56. Creatures 2: Torture Trouble
  57. Gunship
  58. Space Taxi
  59. International Karate
  60. Silent Service
  61. Bard's Tale III, The: Thief of Fate
  62. Seven Cities of Gold
  63. Armalyte
  64. Raid on Bungeling Bay
  65. Alter Ego: Male Version
  66. Enforcer: Fullmetal Megablaster
  67. Detective Game, The
  68. Creatures
  69. Skate or Die!
  70. Heart of Africa
  71. E.R.O. - Helicopter Emergency Rescue Operation
  72. Way of the Exploding Fist, The
  73. Stunt Car Racer
  74. Wizard of Wor
  75. Bard's Tale II, The: The Destiny Knight
  76. Mayhem in Monsterland
  77. Train, The: Escape to Normandy
  78. Jumpman
  79. Champions of Krynnchampions of krynn
  80. Pitstop II
  81. Barry McGuigan World Championship Boxing
  82. Montezuma's Revenge
  83. Boulder Dash II: Rockford's Revenge
  84. Spy vs Spy
  85. Mercenary: Escape from Targ
  86. Midnight Resistance
  87. Lords of Midnight
  88. Lode Runner
  89. Castles of Doctor Creep, The
  90. Boulder Dash Construction Kit
  91. Buggy Boy
  92. Racing Destruction Set
  93. Dino Eggs
  94. Realm of Impossibility
  95. Rainbow Islands
  96. Beach-Head II: The Dictator Strikes Back
  97. Barbarian: The Ultimate Warrior
  98. Grand Prix Circuit
  99. Head Over Heels
  100. Sentinel, The

Commodore 64 emulator and game ROMs

Commodore 64 might be in the past but its legacy still lives on even today through emulators and ROMs for emulators. You can even purchase one in working condition if you want and relive the full experience as it once was. vice c64 emulator
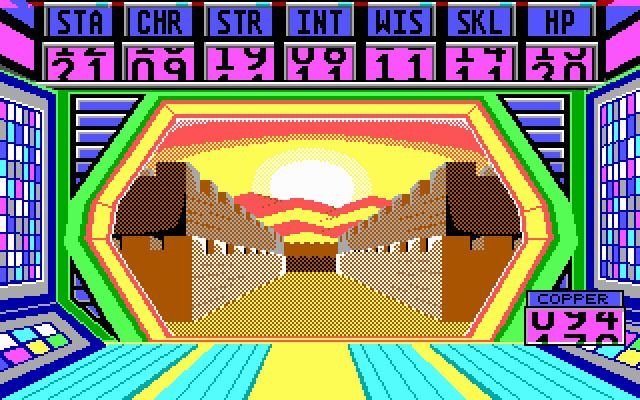
If you are not keen on spending money for reliving and checking games or software of C64 here are some links to help you to at least experience part of it completely free. 
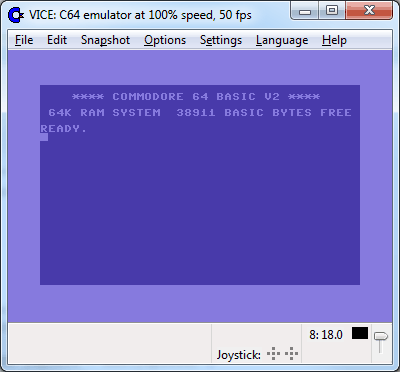
Commodore 64 Emulator C64 Game ROMs

Conclusion

It is without a doubt that the C64 home system has made a great mark on home computers echoing even today and I am very grateful that I have been part of it as a kid. Sometimes today I will still spin some old classic via emulator just for nostalgia and enjoy its simplicity. Thank you for reading the article and I hope to see you soon again.
Read More
Fix One Drive Error: This is not a valid file name
As you know, Microsoft’s consumer cloud storage platform is none other than OneDrive. It is where users can save any of their files albeit it’s mostly used to store common files like documents and photos. However, there are times when you might encounter some problems when saving these files. Recently, some users reported that they had problems saving Word documents to OneDrive and if you experience the same issue, then you’ve come to the right place as this post will guide you on how to resolve it. According to users who encountered the problem, when they try to save Word documents on OneDrive, an error message appears instead stating, “This is not a valid file name”. This kind of error only occurs when the file is opened from within OneDrive for saving in a different folder. In other words, if the file is saved in the same folder, the error won’t pop up but if it is saved in a separate folder, that’s when the error appears. Worry not though for fixing this error is not complicated and won’t take too long. It seems that this error is due to the 259-character limitation when creating and saving files as far as the Office products are concerned. To resolve it, there are several workarounds you can check out. Before you proceed with these workarounds, make sure that you have a stable internet connection.

Option 1 – Try renaming the file with a shorter name

The first thing you can do to fix the problem is to rename the file with a shorter name. Just right-click on the file and select the Rename option from the menu and then type in the new name and click OK or tap Enter to rename the file.

Option 2 – Try renaming the folders where the file is located

Like what you did in the first given option, all it takes is a right-click but this time on a folder. Rename the folder with a different name and save the changes made and then check if you can now save the Word document on OneDrive.

Option 3 – Try moving the file to a folder with a shorter path

If the first two options didn’t work, you can try moving the file to a folder with a shorter path. Note that it is not the same as doing it locally on a Windows 10 computer so you have to right-click on the file and select the “Move to” option. After that, locate the folder where you want to move the file and select it and then click on the Move button to complete the task.

Option 4 – Try making some changes in the document

You could also try to make some modifications to the document. Once you’ve done that, click the File tab and select the Save As option and then go to the folder where you want to save the file and tap enter.
Read More
Animated background on desktop on Windows 10
Windows Vista had in it animated wallpapers on desktop but sadly how they were heavy on system resources Microsoft abandoned the idea. Moving forward a couple of years later we have Windows 10 but still, we do not have live animated wallpapers. Since I am the kind of person who does not want to wait on Microsoft and now it is time to bring animated wallpapers back I am going to make one all by myself and you are welcome to join the ride and do the same for you as well. Enough talk, let's dive into how we can make animated wallpaper for our Windows 10.

Choosing the application

First, we will need some form of application which can we look at our animated wallpapers and since they are animations it means video, so we will need a video player and what better choice than a VLC player, an open-source light weighs all-format player. Get a VLC player from here and install it.

Finding video source

The next thing is to of course have some looping video that we will use as background. There are many sites and ways to get seamless loop videos, I use this youtube channel for my backgrounds. Altho you can use any video footage you want it is recommended that it is not too long, that it is hi-resolution so we do not have pixels on-screen, and if you can, get it as seamless since we do not want to see stutter when the video is lopped from the beginning. So hopefully you have desired video and VLC player installed.

Putting it all together

Copy the following code and paste it into your search bar in Windows to open the Startup folder, or navigate to the Startup folder yourself via file explorer if you know where it is. %appdata%\Microsoft\Windows\Start Menu\Programs\Startup Now, next thing is to copy and past the VLC shortcut into this folder so it is started when Windows is first time booted. Right-click on the shortcut and in the edit field paste this: "C:\Program Files\VideoLAN\VLC\vlc.exe" --video-wallpaper --qt-start-minimized --no-qt-fs-controller --repeat --no-video-title-show --qt-notification=0 "C:\videopath\filename.mp4" where "C:\Program Files\VideoLAN\VLC\vlc.exe" is the path where VLC is installed, point this to where you have installed it "C:\videopath\filename.mp4" is the path where you have your video that you wish to use as animated wallpaper. Please note also that in my case there is mp4 as an extension but it does not need to be mp4, just use any extension VLC can open and play.

Conclusion

And that's it, you have successfully made an animated background or live wallpaper on your Windows 10 computer. You can change your wallpaper anytime by editing shortcut and giving it a new path to a new video or simply overwrite the existing one with a new baring same name.
Read More
Linkury Smartbar Engine Removal Guide for Windows

Linkury Smartbar Engine is a Brower Toolbar for Internet Explorer. Upon investigation, we discovered that this toolbar does not work with the latest versions of Internet Explorer.

From the Author:

What the Smartbar does: – Changes the default search engine in your web browser’s built-in search box. – Changes the default home page of your web browser. – Adds alternative “page not found” functionality. – Enable search from the address bar of your web browser. – Allows software updates of the application once a new version is released. – Adds, removes, or modifies components interacting with search input fields.

While installed, users may see additional unwanted ads throughout their browsing sessions.

Several anti-virus applications have marked this toolbar as a Browser Hijacker, and it is not recommended to keep it on your computer, especially if you are using a newer version of internet explorer that renders this toolbar useless.

About Browser Hijackers

Browser hijacking means a malicious program code has taken control over and modified the settings of your browser, without your permission. Browser hijackers will do a number of things on a computer. These are typically used to force visitors to a particular site, manipulating web traffic to earn ad revenue. It may appear naive, but the majority of these sites are not legitimate and may pose a serious threat to your online safety. They did not just screw up your web browsers, but browser hijackers can also modify the system registry, leaving your computer susceptible to other attacks.

How you can determine if your browser is hijacked

When your browser is hijacked, the following could happen: home-page is changed; you see new unwanted favorites or bookmarks added, usually directed to advertisement-filled or pornography sites; the default browser settings are changed and/or your default web engine is altered; you find unsolicited new toolbars added; never-ending pop-up adverts appear and/or your web browser pop-up blocker is disabled; your web browser starts running slowly or exhibits frequent errors; you can’t visit specific websites like home pages of security software.

Precisely how browser hijacker infects computer systems

Browser hijackers could use drive-by downloads or file-sharing websites or perhaps an e-mail attachment in order to reach a targeted computer. They may also come from any BHO, browser extension, add-on, toolbar, or plug-in with malicious intent. A browser hijacker can be installed as a part of freeware, shareware, demoware, and fake programs. A good example of a well-known browser hijacker is the latest Chinese malware called “Fireball”, which has infected 250 million PCs across the world. It works as a hijacker but can be turned into a fully functioning malware downloader afterward. The existence of any browser hijacker malware on your system could substantially diminish the web browsing experience, monitor your internet activities that lead to serious privacy concerns, create system stability problems and ultimately cause your PC to slow down or to a nearly unusable state.

Removing browser hijackers

Some kinds of browser hijackers can be removed from your computer by deleting malicious software applications or any other recently added freeware. At times, it could be a tough job to find and eliminate the malicious program since the associated file could be running as part of the operating system process. Also, manual removals require in-depth system understanding and thus can be a very difficult job for novice computer users. Browser hijackers could be effectively removed by installing and running an anti-malware program on the affected PC. To eradicate any kind of browser hijacker from your laptop or computer, you could download this certified malware removal application – SafeBytes Anti-Malware. Utilize a system optimizer (like Restoro) together with your anti-malware software to fix various computer registry problems, eliminate computer vulnerabilities, and enhance your computer's overall performance.

Help! Malware Blocking Anti-virus Installation And Access To The Web

Practically all malware is bad, but certain kinds of malware do a lot more damage to your computer than others. Some malware sits in between the computer and your net connection and blocks some or all websites that you really want to check out. It would also block you from installing anything on your machine, especially anti-virus software. If you are reading this now, you have probably recognized that a malware infection is the real cause of your blocked web traffic. So how to proceed if you need to download and install an anti-malware application such as Safebytes? There are some steps you can take to circumvent this issue.

Eliminate viruses in Safe Mode

If the malware is set to load at Windows start-up, then booting in Safe Mode should prevent it. Only the minimum required applications and services are loaded whenever you start your laptop or computer in Safe Mode. You need to do the following to remove malware in Safe mode. 1) After switching on the computer, hit the F8 key before the Windows splash screen starts to load. This should bring up the Advanced Boot Options menu. 2) Select Safe Mode with Networking using arrow keys and hit ENTER. 3) As soon as this mode loads, you will have an internet connection. Now, utilize your web browser normally and navigate to https://safebytes.com/products/anti-malware/ to download and install Safebytes Anti-Malware. 4) Right after installation, run a complete scan and let the program get rid of the threats it detects.

Switch over to some other browser

Web-based malware can be environment-specific, aiming for a particular web browser or attacking particular versions of the web browser. The best solution to overcome this issue is to choose a browser that is well known for its security features. Firefox has built-in Phishing and Malware Protection to help keep you safe online.

Install antivirus on a USB drive

To successfully remove the malware, you will need to approach the issue of installing an antivirus program on the infected computer system from a different angle. To run antivirus using a thumb drive, follow these simple measures: 1) On a virus-free computer, install Safebytes Anti-Malware. 2) Plug the Thumb drive into the clean computer. 3) Double click on the exe file to run the installation wizard. 4) Choose a USB drive as the location when the wizard asks you where you wish to install the software. Follow activation instructions. 5) Transfer the pen drive from the clean PC to the infected PC. 6) Double-click the antivirus software EXE file on the USB flash drive. 7) Simply click “Scan Now” to run a scan on the affected computer for malware.

SafeBytes Anti-Malware Features

In order to protect your personal computer from many different internet-based threats, it’s important to install anti-malware software on your PC. But with so many anti-malware companies in the market, these days it’s challenging to decide which one you should purchase for your laptop. Some are really worth your money, but most aren’t. You must choose one that is efficient, practical, and has a strong reputation for its malware protection. While considering the trustworthy applications, Safebytes Anti-Malware is undoubtedly the strongly recommended one. SafeBytes anti-malware is really a powerful, highly effective protection application created to assist users of all levels of IT literacy in identifying and eliminating harmful threats from their PC. With its most advanced virus detection and repair technology, this software protects your PC against infections caused by different kinds of malware and similar internet threats, including adware, spyware, viruses, worms, trojans, keyloggers, potentially unwanted program (PUPs), and ransomware.

SafeBytes anti-malware offers a myriad of advanced features that sets it aside from all others. Here are some of the best ones:

Most Reliable AntiMalware Protection: Built upon a highly acclaimed antivirus engine, this malware removal application can detect and get rid of the most stubborn malware threats like browser hijackers, PUPs, and ransomware that other common anti-virus programs will miss. Real-time Threat Response: SafeBytes provides totally hands-free live protection and is set to check, block, and get rid of all computer threats at its very first encounter. They’re extremely efficient in screening and getting rid of numerous threats since they’re constantly revised with the latest updates and alerts. Web Protection: SafeBytes checks the links present on a web page for possible threats and notifies you whether the site is safe to browse or not, through its unique safety rating system. “Fast Scan” Features: Safebytes AntiMalware, using its enhanced scanning engine, gives super-fast scanning that can quickly target any active internet threat. Light-weight: This program is lightweight and can work silently in the background, and will not have an effect on your PC efficiency. 24/7 Online Support: Support service is accessible 24 x 7 x 365 days via email and chats to answer your concerns. To sum it up, SafeBytes has developed a meaningful anti-malware solution that is aimed to protect you against various malware. You can be sure that your PC will be protected in real-time once you put this software to use. So when you want advanced forms of protection features & threat detections, buying SafeBytes Anti-Malware could be worth the money!

Technical Details and Manual Removal (Advanced Users)

If you do not wish to use an automated tool and prefer to eliminate Linkury Smartbar Engine manually, you might do so by going to the Add/Remove Programs menu in the control panel and removing the offending program; in cases of web browser plug-ins, you may uninstall it by visiting the browsers Add-on/Extension manager. You’ll likely also want to reset your web browser. To be certain of complete removal, find the following Windows registry entries on your system and eliminate them or reset the values appropriately. Please note that this is for advanced users only and might be difficult, with wrong file removal leading to additional system errors. Furthermore, certain malware is capable of replicating itself or preventing deletion. Carrying out this in Safe Mode is suggested.
Files: %LOCALAPPDATA%\Smartbar\Application\Lrcnta.exe %LOCALAPPDATA%\Linkury\Application\Linkury.exe %LOCALAPPDATA%\Smartbar\Application\QuickShare.exe %USERPROFILE%\Local\AppData\Smartbar\Application\Delta.exe %ALLUSERSPROFILE%\WCService\WCService.exe %LOCALAPPDATA%\Smartbar\Application\Luckysave.exe %LOCALAPPDATA%\Smartbar\Application\Muvic.exe %LOCALAPPDATA%\Linkury\Application\Smartbar.exe %LOCALAPPDATA%\Smartbar\Application\SavePass.exe %LOCALAPPDATA%\Smartbar\Application\SafeFinder.exe %LOCALAPPDATA%\Smartbar\Application\WhiteSmoke.exe %LOCALAPPDATA%\Smartbar\Application\BrowserHelper.exe %LOCALAPPDATA%\Smartbar\Application\SnapDo.exe %LOCALAPPDATA%\Smartbar\Application\ProductsRemovalTool.exe %LOCALAPPDATA%\Smartbar\Application\MagicBox.exe Registry: HKEY_LOCAL_MACHINE\SOFTWARE\Microsoft\Tracing\Linkury_RASMANCS HKEY_LOCAL_MACHINE\SOFTWARE\Microsoft\Tracing\Linkury_RASAPI32 HKEY_LOCAL_MACHINE\SOFTWARE\Wow6432Node\Microsoft\Tracing\Linkury_RASMANCS HKEY_LOCAL_MACHINE\SOFTWARE\Wow6432Node\Microsoft\Tracing\Linkury_RASAPI32 HKEY_CURRENT_USER\Software\Microsoft\Internet Explorer\Main\FeatureControl\FEATURE_BROWSER_EMULATION, value: Linkury.exe HKEY_CURRENT_USER\Software\Microsoft\Installer\Products\C5670CA607D1C7C4AA305DE018401AA3 HKEY_CURRENT_USER\Software\Microsoft\Installer\Features\C5670CA607D1C7C4AA305DE018401AA3 HKEY_CURRENT_USER\Software\Linkury HKEY_LOCAL_MACHINE\SOFTWARE\Microsoft\Shared Tools\MSConfig\startupreg\Browser Infrastructure Helper HKEY_LOCAL_MACHINE\SOFTWARE\Classes\LinkurySmartBar.LinkurySmartBarBandObject HKEY_LOCAL_MACHINE\SOFTWARE\Classes\LinkurySmartBar.LinkuryMenuForm HKEY_LOCAL_MACHINE\SOFTWARE\Classes\LinkurySmartBar.DockingPanel HKEY_LOCAL_MACHINE\SOFTWARE\Classes\LinkurySmartBar.BandObjectAttribute HKEY_LOCAL_MACHINE\SOFTWARE\Microsoft\Windows\CurrentVersion\Run, value: Linkury Chrome Smartbar HKEY_LOCAL_MACHINE\SOFTWARE\Microsoft\Tracing\Mntz_Installer_RASAPI32 HKEY_LOCAL_MACHINE\SOFTWARE\Microsoft\Tracing\Mntz_Installer_RASMANCS HKEY_LOCAL_MACHINE\SOFTWARE\Wow6432Node\Microsoft\Tracing\Mntz_Installer_RASAPI32 HKEY_LOCAL_MACHINE\SYSTEM\CurrentControlSet\services\sulpnar HKEY_LOCAL_MACHINE\SYSTEM\ControlSet002\Services\Stpro HKEY_LOCAL_MACHINE\SYSTEM\ControlSet001\Services\Stpro HKEY_LOCAL_MACHINE\SOFTWARE\mtPlusdax HKEY_LOCAL_MACHINE\SOFTWARE\Wow6432Node\mtPlusdax
Read More
Guide to Resolving the Msvcr71.dll Error Code

Fix Msvcr71.dll Error Code

Msvcr71.dll Error - What is it?

Msvcr71.dll is a dynamic library link that belongs to the Microsoft Visual C Runtime library. This file is a core Windows component used by numerous Windows applications like Microsoft Office version 2002 and 2003, Windows XP Media Center, and Windows XP Tablet PC Edition. The Msvcr71.dll error commonly occurs when two applications share the same DLL file. When an application is deleted sometimes the Msvcr71.dll file is also deleted which is associated with two applications on your PC. So, when you try to run the other application you come across the Msvcr71.dll error on your system. The error also occurs when you try to install new programs or update the old program versions. This also misconfigures the DLL files and results in the Msvcr71.dll error. Msvcr71.dll error messages are often displayed as the following:
  • “This application has failed to start because Msvcr71.dll was not found.”
  • “Mscvr71.dll is a bad windows image. Please check against your installation diskette.”
  • “Cannot find [PATH]msvcr71.dll"
  • "The file msvcr71.dll is missing."

Solution

Restoro box imageError Causes

Deletion of the Msvcr71.dll file is one cause for the Msvcr71.dll file error. However, this error can also be generated due to other causes such as:
  • Corrupt, missing, or misconfigured msvcr71.dll file
  • Damaged and missing .dll files
  • Corrupt runtime code library
  • Registry issues
  • Malware attack and viral infection
  • Msvcr71.dll error codes usually occur on Windows versions XP and Vista.

Further Information and Manual Repair

Here are different ways to resolve the Msvcr71.dll error code on your system:

1. Reinstall the program/application that is causing the Error to Pop up on the Screen

When this error code occurs due to misconfigured or missing the Msvcr71.dll file, try reinstalling the program/application that is causing the error to pop up on your screen. When doing this, make sure there is no problem with the setup files from the disk you are performing the installation on your PC.

2. Check the Recycle Bin and Restore the Deleted File

If the Msvcr.dll file was deleted accidentally when you uninstalled a program on your PC, then the deleted file is most likely to be in the recycle bin. Check it and if you find it, restore it. Once the file is restored try running the application again.

3. Scan for Malware and Viruses

Install an antivirus and scan for malware and viruses. This software can also corrupt DLL files and runtime code libraries. However, this is not the best solution especially if you already have too many programs installed on your PC. New program installations cause more complications and besides antivirus are infamous for slowing down PC speed.

4. Repair the Corrupt Registry

If the three methods discussed above don’t help you resolve the Msvcr71.dll error code on your system, then this means the cause of the error is more critical than you think. The error is triggered by a corrupt and damaged registry. If this issue is not addressed timely, it can result in system failure and a fatal crash. To resolve the error code Msvcr71.dll, you need to repair the corrupt registry. And the best way to go about it is to download Restoro Restoro is a user-friendly, highly functional, and multi-functional repair tool integrated with high speed and powerful utilities such as a registry cleaner, system stability scanner, Active X and class error module, and an antivirus. It also functions as a system optimizer. It is the answer to your entire PC-related errors and issues. The automated and intuitive algorithm deployed inside this tool enables it to detect all registry errors and issues generating Msvcr71.dll error. DLL files often get damaged due to data overload, disk fragmentation, and malicious files saved in the registry. The registry cleaner removes all the unnecessary and obsolete files from the registry, clears up disk space, and repairs defragmented, damaged, and misconfigured disks. DLL files including Msvcr71.dll and also fixes the registry. It’s an in-built antivirus scan and removes viruses and the system optimizer feature ensures that your PC runs at its optimum speed. It is safe, bug-free, efficient, and easy to use.  It runs smoothly on all Windows versions. Click here to download Restoro and resolve the Msvcr71.dll error on your PC.
Read More
How to Set up and Use a Ram Drive in Windows
RAM drive is basically a hard drive made of your RAM memory. Altho this kind of drive can not and is not available to save any data when the computer is shut down its advantage is lightning fast speed since the application is installed in RAM itself, it is loading from there and executing from there. Creating this kind of drive which will use your RAM memory, well part of it can not be done natively in Windows, you will need some kind of application for this task. Luckily there is a free open source application for this kind of task. ImDisk, you can download the application here. ImDisk Toolkit is an application for managing virtual drives. It also includes a utility that allows the creation of RAM drives. Download the application and install it, make sure that you select all components on the installation selection screen. After installation is finished double click on icon labeled RamDisk Configuration. Once the application is running adjust the disk size in the box at the top of the window for your RAM drive. Click “OK” at the bottom of the window. This will create your RAM drive, which is just a virtual disk that’s assigned to your computer’s RAM. The process happens transparently, so there’s nothing you need to do. If you get a warning about shutdown settings, click on the “Shutdown Settings” button. Then unlock the settings pane with your administrator password. Finally, uncheck the checkbox next to “Turn on fast startup (recommended)” and click “Save Changes” at the bottom of the window. Your RAM drive is now ready for use. Fast Startup speeds up the process of turning on your computer by saving a system state between completely off and hibernation to your hard drive. This happens when the computer writes the contents of your RAM to a stable hard drive. As you may guess, this could mess with your RAM drive’s ability to preserve and track its data. With Fast Startup off, boots may take slightly longer, but it’s doubtful that you’ll notice much. Disabling a fast startup will satisfy the warning window, but let’s consider why. This will also allow ImDisk to save your RAM drive’s data to an image file when you shut down your computer. If you don’t, the contents of your RAM drive will be erased completely every time, with no saved image storage. It would also disable the RAM drive’s ability to load the previous content. Basically, the drive would act much more like RAM and much less like a disk. Depending on your use case, that may be disappointing or unusable. You can access and use it just like any normal hard drive. It shows up in Windows’s file explorer just like any other drive. However, a Ram drive is exponentially faster than traditional types of storage. And we mean exponentially. Whereas an SSD might offer 300 to 500 MB when reading from the disk, a RAM drive can offer more than 5000 MB, even on mediocre memory sticks.
Read More
A Quick Guide to Fixing Error 404

Repair Error 404

Error 404 - What is it?

Error 404 is a HTTP status code. You may come across the error code 404 while browsing online. The message indicates the web page you are trying to log on to couldn’t be found on the server. This error code is frequently customized by individual websites. Most of the time it is displayed by:
  • “404 Error"
  • "404 Not Found"
  • "Error 404"
  • "404 File or Directory Not Found"
  • "HTTP 404 Not Found”
  • "The requested URL [URL] was not found on this server."
  • "HTTP 404"
  • "404 Page Not Found"
  • “Error 404 Not Found"
The error message 404 can occur in any browser including Firefox, Internet Explorer and Google Chrome. It can also occur is any operating system. In addition to this, the error 404 may also occur during Windows updates.

Solution

Restoro box imageError Causes

Technically, the error 404 is a client-side error that implies you couldn’t access the desired web page because either you typed the wrong URL or either the page has been removed from the website. Other causes of this error code include:
  • Junk files in the browser
  • Junk registry entries
  • Browser cache issues
  • DNS server problems

Further Information and Manual Repair

If the error code does not occur due to web page removal from the owner of the website, then this means there is some other underlying issue from the error code 404. To avoid inconvenience and to access the website, it is advisable to resolve the error right away. To help you resolve the error 404 on your PC, we have listed some of the best and easy DIY solutions. Try these methods to fix the issue on your system:

Method 1

Press F5 to retry accessing the web page. F5 is the refresh/reload button. If the error is temporary this will resolve the issue immediately.

Method 2

Check the URL - ‘The error 404 not found’ may also appear because the URL was typed wrong. Search for the page on the popular search engines. Insert the correct URL for the web page you want to access. This will most likely fix the error.

Method 3

Clear your browser’s cache – For this, simply go to the history and clear up your browser’s cookies.

Method 4

Change the DNS Servers - If the entire website you want to access is giving you error 404 and if the site is available to others on different servers then you might want to try changing your DNS server. 404 errors are not particularly common unless your ISP or government filters or censors websites.

Method 5

Remove Junk files and Junk registry entries - Another way to resolve the error is to clean the registry. The underlying cause of the error could be accumulation of the junk, invalid and bad registry entries. You can remove them manually, but that process will require technical expertise and will be quite time-consuming. Nonetheless, the easy and efficient way to clean up the registry is to download Restoro. This is an advanced, highly functional and next-generation Registry Cleaner.

Why Use Restoro?

  • It is deployed with a cutting-edge and intuitive algorithm that detects, scans, and removes all the registry issues on your entire PC in seconds.
  • This registry cleaner wipes out all bad entries and junk files saved on the disk immediately, fixes the damaged and corrupt files, and restores the registry back to normal.
  • Besides functioning as a registry cleaner, this software is also integrated with several other utilities such as an antivirus that removes all kinds of malicious software from your system, a system optimizer for optimum PC functioning, and Active X controls and Class ID scanner.
  • It is safe to download, user-friendly and efficient. This error tool is compatible with all Windows versions.
To resolve error 404 on your PC, click here to download Restoro today!
Read More
Fix Hello Errors 0x801c004d or 0x80070490
As you know, Windows Hello offers you quick access to computers since you can log in to your Windows devices three times faster compared to passwords with the help of the camera via Face recognition and fingerprint reader. This way, Windows Hello will recognize you right away. However, there are also times when you might encounter some problems when using Windows Hello. For one, if you are trying to add the PIN method to Windows Hello on your Windows 10 computer but you suddenly encountered an error code of 0x801c004d or if you are trying to use your existing pin and you encounter an error code of 0x80070490 along with an error message that says, “Not recognized”, then read on as this post will guide you on how you can fix both of these errors. Here is the complete content for both errors:
  • 0x801c004d – Unable to enroll a device to use a PIN for login”
  • 0x80070490 - Not recognized, Pin and fingerprint are no longer options for signing in”
If you got any of these two errors, there are several potential fixes you can check out to resolve them. You can try to check for any Windows Updates or create the PIN again or check the CNG Key Isolation Service. You could also try to reset the TPM or create a new User Account. For more information, follow the instructions provided below.

Option 1 – Try checking for any available Windows Updates

The first thing you can do is to check for any available Windows Updates. It is possible that your computer may be outdated and is the reason why you’re having troubles with Windows Hello. To check for Windows Updates, just go to Settings and from there, head over to the Update and Security section and click on Windows Updates located on the left pane, and then click on the Check for Updates option. Wait until the process of checking updates is completed and if it finds new updates, install it. After you install the new Windows Updates, check if you can now add the PIN on Windows Hello or not.

Option 2 – Try creating the PIN again

The next thing you can do is to create the PIN again by signing out and signing in again and then try creating the PIN once more. If this does not work, you can try restarting your computer and creating the PIN again. You could also try removing the PIN and then change it.
  • Remove the PIN by going to Settings > Accounts > Sign-in options.
  • From there, go to the PIN section and click on the Remove button.
  • You will be asked to verify your account to proceed in removing the PIN, enter your credentials.
  • Restart your computer and then set up a new PIN.
  • Once you’re done, restart your computer and check if the error is gone now.

Option 3 – Try checking the CNG Key Isolation Service

The CNG Key Isolation Service is the one that stores and uses long-lived keys in a secure process complying with the common criteria requirements and it is possible that the error could be related to this service. This service is hosted in the LSA processes and provides key process isolation to private keys and associated cryptographic operations as required by the common criteria. Thus, you need to check this service to see if it’s the one that’s causing the error.
  • Tap the Win + R keys to open the Run dialog box and type “services.msc” in the field and hit Enter to open the Windows Services Manager.
  • Next, locate the “CNG Key Isolation Service” and once you find it, double click on it to open its Properties box.
  • After opening its Properties, check its Startup type and select Manual. This is the default setting and if it is Disabled, then it’s no wonder why you’re getting errors with Windows Hello, thus, you need to enable it.
  • Once done, restart your computer and check if you can now add the PIN to Windows Hello. If you still get the error, then you might want to try setting the CNG Key Isolation Service from Manual to Automatic and then click on the Start button and see if it fixes the error or not.

Option 4 – Try to reset the Trusted Platform Module or TPM

You might also want to try resetting the Trusted Platform Module or TPM to fix the error. You can do this by opening Windows PowerShell and then executing the “Clear-Tpm” command. After that, check if the error is now resolved.

Option 5 – Try to create a new User Account

You could also try to create a new User Account on your Windows 10 computer to fix the Windows Hello error. Once you have created a new local user or administrator account in Windows 10, check if you are now able to add the PIN from this newly created user account.
Read More
MyScrapNook Complete Removal Tutorial

MyScrapNook is a browser extension for Google Chrome that allows users to easily find scrapbook templates, layouts, and graphics. This extension requires the use of Adobe Flash Player and does not work with Chrome’s built-in flash player.

When installed MyScrapNook will change your home page and default search engine to MyWebSearch.com. It will also inject unwanted ads and sponsored links into your search queries. This extension has been marked as a Browser Hijacker by several anti-virus applications and is recommended to remove it from your PC.

From the Author:

FREE scrapbooking templates, layouts, and graphics! Get creative with tons of FREE scrapbooking features. With MyScrapNook, you can make beautiful, custom scrapbooks — with just a few clicks. Let us help you capture the memories with FREE scrapbook templates. The MyScrapNook extension offers convenient web search and features from the Chrome New Tab page.

About Browser Hijackers

Browser hijack is a common type of internet fraud where your web browser configurations are altered to make it do things you don’t intend. Basically, nearly all browser hijackers are created for marketing or advertising purposes. These are generally used to force visitors to predetermined sites, manipulating web traffic to generate ad revenue. Many people assume that such websites are legitimate and harmless but that is not the case. Nearly all browser hijacker pose an existent threat to your on-line safety and it is important to classify them under privacy dangers. Browser hijackers can even allow other vicious programs without your knowledge to further damage your computer.

How to know whether the web browser is hijacked?

There are numerous signs of browser hijacking. Below are some of them: the browser’s home page is changed; bookmark and the new tab are likewise modified; the default online search engine has been changed and your browser security settings have been cut down without your knowledge; you notice many toolbars on the web browser; numerous pop-up ads show up and/or your browser popup blocker is disabled; your web browser gets slow, buggy, crashes often; You cannot access particular websites, especially anti-virus sites.

Exactly how browser hijacker infects PCs

There are several ways your computer can become infected by a browser hijacker. They typically arrive through spam e-mail, via file-sharing websites, or by a drive-by-download. They also come from add-on application, also known as browser helper objects (BHO), web browser extensions or toolbars. Also, certain freeware and shareware can put the hijacker within your PC through the “bundling” technique. An example of some notorious browser hijacker includes Anyprotect, Conduit, Babylon, SweetPage, DefaultTab, Delta Search, and RocketTab, however, the names are constantly changing. Browser hijackers can interrupt the user’s web browsing experience greatly, track the websites visited by users and steal sensitive information, cause problems in connecting to the net, and then finally create stability problems, causing applications and system to freeze.

Removing browser hijackers

Some hijackers can be removed by deleting the free software they came with or by eliminating any extension you have recently added to your browser. Sometimes, it could be a difficult job to discover and remove the malicious component because the associated file could be running as part of the operating system process. And there is no denying the very fact that the manual fixes and removal methods can certainly be a difficult job for an amateur computer user. On top of that, there are plenty of risks associated with fiddling around with the system registry files. Experts always recommend users get rid of any malicious software including browser hijacker by using an automatic malware removal tool, which is easier, safer, and faster than the manual removal process. If you’d like to eliminate persistent hijackers effectively, install the top-rated, award-winning anti-malware software Safebytes Anti-Malware. Together with the anti-virus tool, a system optimizer, like SafeBytes’s Total System Care, will help you in deleting all linked files and modifications in the computer registry automatically.

Learn How To Install Safebytes Anti-Malware On An Infected PC

All malware is bad and the degree of the damage can vary greatly with regards to the type of infection. Some malware sits in between your computer and the internet connection and blocks a few or all internet sites that you want to visit. It might also block you from installing anything on your computer, especially the antivirus program. If you’re reading this, you may have infected by malware that prevents you from installing security software such as Safebytes Anti-Malware. There are some steps you can take to get around this issue.

Download the software in Safe Mode with Networking

In the event the malware is set to run at Windows start-up, then booting in safe mode should prevent it. Since only the bare minimum programs and services start-up in “Safe Mode”, there are rarely any reasons for issues to take place. Here are the steps you have to follow to boot into the Safe Mode of your Windows XP, Vista or 7 computers (go to Microsoft site for instructions on Windows 8 and 10 computers). 1) Press the F8 key repeatedly as soon as your computer boots, however, before the big Windows logo or black screen with white texts shows up. This will invoke the “Advanced Boot Options” menu. 2) Select Safe Mode with Networking using arrow keys and press ENTER. 3) As soon as this mode loads, you should have the internet. Now, utilize your browser to download and install Safebytes Anti-malware. 4) Immediately after installation, run a complete scan and allow the software program to delete the threats it finds.

Switch to some other internet browser

Malicious code could exploit vulnerabilities in a specific browser and block access to all anti-virus software sites. If you seem to have a virus attached to Internet Explorer, then switch over to an alternate browser with built-in safety features, such as Firefox or Chrome, to download your favorite antivirus program – Safebytes.

Install and run anti-malware from your flash drive

Another solution is to store and run an antivirus program completely from a USB drive. Abide by these steps to run the anti-malware on the affected computer. 1) Make use of another virus-free computer to download Safebytes Anti-Malware. 2) Connect the USB flash drive to a USB port on the uninfected computer. 3) Double click on the downloaded file to open the installation wizard. 4) Pick a thumb drive as the place when the wizard asks you where you want to install the software. Follow activation instructions. 5) Transfer the USB drive from the uninfected computer to the infected PC. 6) Double-click the EXE file to run the Safebytes program from the thumb drive. 7) Click on the “Scan” button to run a full system scan and remove viruses automatically.

Detect And Destroy Viruses With SafeBytes Anti-Malware

Want to download the very best anti-malware software program for your desktop? You can find many applications on the market that comes in free and paid versions for Windows computers. A few are really worth your money, but most aren’t. You have to be very careful not to select the wrong product, particularly if you purchase a paid software. One of the highly recommended software by industry experts is SafeBytes Anti-Malware, a popular security application for Windows computers. SafeBytes anti-malware is a trustworthy tool that not only protects your computer system completely but is also very user friendly for people of all ability levels. Once you’ve got installed this software program, SafeBytes superior protection system will ensure that absolutely no viruses or malware can seep through your personal computer.

There are many great features you will get with this particular security product. Here are a few popular features found in this computer software:

Anti-Malware Protection: With a critically acclaimed malware engine, SafeBytes offers multilayered protection that is intended to catch and get rid of threats that are concealed deep inside your computer’s operating system. Live Protection: SafeBytes gives you round-the-clock protection for your PC limiting malware intrusions in real-time. This software will always keep track of your PC for any suspicious activity and updates itself continuously to keep abreast of the constantly changing threat situation. “Fast Scan” Features: This software program has got one of the fastest and most efficient virus scanning engines in the industry. The scans are extremely accurate and take a short amount of time to complete. Safe Web Browsing: SafeBytes inspects the links present on a web page for possible threats and tells you whether the site is safe to view or not, through its unique safety ranking system. Light-weight: This software program is not “heavy” on the computer’s resources, so you’ll not see any performance troubles when SafeBytes is operating in the background. 24/7 Premium Support: You can obtain high levels of support 24/7 if you’re using their paid version. SafeBytes has created a wonderful anti-malware solution to help you conquer the latest malware threats and virus attacks. Malware trouble will become a thing of the past once you put this tool to use. If you’re seeking the very best malware removal tool out there, and if you don’t mind paying out some dollars for it, go for SafeBytes Anti-Malware.

Technical Details and Manual Removal (Advanced Users)

If you’d like to manually remove MyScrapNook without the use of an automated tool, it might be actually possible to do so by deleting the application from the Microsoft Windows Add/Remove Programs menu, or in cases of browser plug-ins, going to the browser’s AddOn/Extension manager and removing it. It’s also advised to reset your browser settings to their default state. If you opt to manually delete the system files and Windows registry entries, use the following list to ensure that you know precisely what files to remove before executing any actions. Please be aware that this is for professional users only and may be challenging, with incorrect file removal causing additional PC errors. In addition, some malware keeps replicating which makes it difficult to get rid of. Doing this in Safe Mode is recommended.
Folders: %LOCALAPPDATTA%\Google\Chrome\User Data\Default\Extensions\lbapdklahcjljfincdglncfpdgfhckcf %LOCALAPPDATTA%\Google\Chrome\User Data\Default\Local Extension Settings\lbapdklahcjljfincdglncfpdgfhckcf %LOCALAPPDATTA%\Google\Chrome\User Data\Default\Sync Extension Settings\lbapdklahcjljfincdglncfpdgfhckcf %LOCALAPPDATTA%\My Scrap NookTooltab Registry: key My Scrap Nook at HKEY_CURRENT_USER\Software\ key My Scrap NookTooltab Uninstall Internet Explorer at HKEY_CURRENT_USER\Software\Microsoft\Windows\CurrentVersion\Uninstall\
Read More
1 2 3 162
Logo
Copyright © 2022, ErrorTools. All Rights Reserved
Trademarks: Microsoft Windows logos are registered trademarks of Microsoft. Disclaimer: ErrorTools.com is not affiliated with Microsoft, nor claim direct affiliation.
The information on this page is provided for information purposes only.
DMCA.com Protection Status