Fix Error opening file for writing

If you got encounter an error message saying, “Error opening file for writing” while running a setup file to install some program on your computer, read on as this post will give you some suggestions on how you can fix it. You can encounter this error when running a setup file for installing a program like GlassWire, Notepad++, VLC, Steam, OBS, Mod Organizer, WinpCap, NSIS, FileZilla, BSPlayer, Kodi, Wireshark, rtcore64, qt5core.dll, MSI Afterburner, GWCtlSrv.exe, npf.sys, vcredist_86 and many more. And so when this error pops up while you run a setup file, refer to the steps given below which might help resolve the problem.

Step 1: First, you have to make sure that there is no other installation in progress as multiple installations can most likely cause this error to show up. You can restart your computer and try to run the setup file again.

Step 2: If you still got the error even after your restart your computer, click on Retry to try again and if it does nothing, click Abort to terminate the installation. After that, go to the folder where you’ve placed the setup file and then delete it.

Step 3: Make sure that you have enough disk space on your computer. You can use the Windows 10 Storage Sense feature which can clean all the temporary files from your computer and help you save storage space. To use Storage Sense, follow the steps below.

  • Open Setting > System > Storage from the WinX Menu.
  • From there, you will see a list of all the local and connected storage devices along with the details on the free space.
  • Now make sure that the Storage Sense feature is turned On then go find a link that says “Free Up Space” and click it to open.
  • After that, a screen which is the built-in program in Windows 10 will appear and will scan your computer for the following junk files so you can free up disk space:
  • Windows Upgrade Log Files
  • The system created Windows Error Reporting Files
  • Thumbnails
  • Temporary Internet Files
  • Previous Windows Installation Files
  • Delivery Optimisation Files
  • DirectX Shader Cache

Note: Once you’re done freeing up space on your drive, try to run the setup file again.

Step 4: If freeing up space didn’t help, you can just delete the setup file and download another one from the official homepage of the program. From there download the setup file and place it in a different location. After that, run the setup file once again.

Step 5: Make sure that you have downloaded the correct setup file according to your operating system, i.e. x64 or x86.

Step 6: Restart your computer once more and make sure that you sign in as administrator. After that, right-click on the setup file and click “Run as administrator”.

If it still didn’t help, you might want to take ownership of the folder where you saved the setup file. How? Follow the steps below but before you do that, you have to create a System Restore Point first, once that’s done, proceed.

  • First, locate the concerned folder and right-click on it then select Properties.
  • Next, click on the Edit button in the Properties window and click OK to confirm if you got a User Account Control elevation request.
  • After that, select user/group from the permission windows or click on the Add button to add another user or group. It would be best if you add “Everyone” to give permission.
  • Then check “Full Control” under the “Allow” column to assign full access rights control permissions.
  • Now edit the permission to Full Control for “Everyone”.
  • Click OK to save the changes made and then exit.
If you like to learn and find out more about various Windows errors, and how to repair them go to our vast archive or use search to find articles that will explain and help you in solving your issue.
However, if you prefer to do things fast and with automatization then we are proposing to use an automated solution for your issues. The application that we are recommending is Advanced System Repair Pro
Advanced System Repair utilizes multiple tools all in one to give you a quick, simple, reliable, and very thorough diagnosis of your PC. It brings you all the tools you need in one program to clean, fix, protect, optimize and boost your PC!
1-Click Maintenance
All the tools to make it simple and easy! It's like having a professional technician at the click of a mouse.

Junk Cleaner
Keeping your computer free from unnecessary clutter also helps make your computer last longer. Like any other machine, if you keep it clean and take care of it, it will serve you better for longer!

Optimize background apps
Optimize applications background activity with the built-in Application Optimizer feature.

Disk Defrag
With a simple 1-click, Advanced System Repair speeds up your PC by assembling fragmented files on your machine and organizing them more efficiently.

Malware Removal
Finds and removes all types of harmful malware including trojans, worms, bots, adware, spyware, PUPs, and more!

Privacy Cleaner
The all-in-one privacy suite to Clean Your Tracks & Protect Your Privacy! Make your computer safe, secure, and more efficient!

System Tweak/Optimizer
ASR will analyze your complete system and settings to adjust your PC to function at its maximum performance.

Registry Cleaner
Over time, as you install and uninstall applications, the registry can become cluttered with old entries and broken settings which can result in program crashes, and annoying messages and slow the computer down.
Visit our Advanced System Repair Pro Download page to inform yourself about all the benefits of this software and get a free trial copy of it.
advanced system repair pro

Advanced System Repair Pro

One-click automated PC repair solution
ASR logo
With Advanced System Repair Pro you can easily
Replace damaged files
Restore performance
Free disk space
Remove Malware
Protects WEB browser
Remove Viruses
Stop PC freezing
DOWNLOAD
Privacy Policy | Terms of Use | Uinstall
Advanced System Repair Pro is compatible with all versions of Microsoft Windows including Windows 11

Share this article:

You might also like

Fix No Internet, Secured in Windows 10
Strange and anxious message no internet, secured can happen even during when everything is ok and you do indeed have internet. So in order to fix this issue please keep on reading.

Reset Router

Most a simple and most straightforward solution and 80% of the time it works like a charm. Before trying other solutions, try this simple one.

Run the Networking Troubleshooter

  1. Run the build-in Windows 10 troubleshooter for networking.
  2. To do this, right-click Start then select Settings
  3. In the Settings window, click Update & Security > Troubleshoot > Additional troubleshooters > Internet Connections > Run the troubleshooter then follow the instructions

Device Manager solution

The Windows device manager is the place where you can update, disable and re-enable, and reinstall your devices, including the network adapter which is most likely the cause of this issue. In Device Manager, click Network adapters then locate your network adapter and right-click on it
Do the following things in order presented:
  1. Update driver.
  2. Disable device, enable Flight mode in the taskbar, reboot PC, then Enable device and turn off Flight mode.
  3. Uninstall device, reboot PC, reinstall the device if it was not installed automatically

Refresh IP Configuration

Refreshing your IP configuration reassigns your IP address, which will fix the problem if it was down to your IP allocation issues Open the Command Prompt, then enter the following commands:

Reset Winsock

There are a couple of other things you can try in the command prompt. The Winsock protocol controls a big chunk of your computer’s communication with network services and resetting it will reset many of those under-the-hood elements to their default settings. Enter the following into the command prompt:

Fix Connection’s Properties

Click the Wi-Fi (or Ethernet) connection icon in the taskbar, then Network & Internet Settings. In the new window, click Change adapter options then right-click the affected connection and click Properties.
In the Properties window, make sure all the following boxes are ticked:
  • Client for Microsoft Networks
  • File and Printer Sharing
  • Internet Protocol Version 4
  • Internet Protocol Version 6
  • Link-layer Topology Discovery Responder
Click OK and restart PC.

Disable iPv6

IPv6 is the relatively new Internet protocol that more and more PCs are using due to the fact that the number of available IPv4 addresses is simply running out. Not all networking equipment and ISPs play nice with iPv6, however, so if you have this switched on, then it could be interfering with your connection. If you suspect this might be the issue, uncheck the IPv6 box under your connection’s Properties.
Read More
Fix igfxem.exe application error in Windows 10
When you get an igfxem.exe error in Windows, it is not really clear what does this means, usually, Windows throw us some code or we get a DLL error, rarely we get an EXE error. So what does this error means? Intel Graphics Executable Main Module, shortly called as IgfxEM module is a part of the Windows operating system. When you run Microsoft .NET Framework applications that use the AS/400 Data Queue ActiveX control (Mseigdq.dll) to read from and to write to IBM iSeries (AS/400) data queues, you may experience this error. In order to overcome this error and cope with it try the following things:
  1. Increase Virtual Memory

    Go to the Start Menu and click on Settings. Type performance. Choose Adjust the appearance and performance of Windows. In the new window, go to the Advanced tab and under the Virtual memory section, click on Change. At the bottom of the new window, check what the Recommended value is and how it compares to Currently allocated. If the current setting is significantly less than the recommended, uncheck the Automatically manage paging file size for all drives box at the top of the same windows and then click on Custom size. Enter the Recommended value in the Initial Size box, and a larger figure in the Maximum size box. Click OK to save the new settings.
  2. Download and update .NET framework

    Go to the Microsoft website and download the latest .NET framework. Once the download is complete, install the package following onscreen instructions.
  3. Reinstall INTEL graphic drivers

    Go to the intel website and download the latest graphic drivers for your graphic card model. Once the download is complete, install the package following onscreen instructions.
  4. Run SCF scan

    If all else fails, run command prompt and inside type sfc /scannow
Read More
A Quick Guide to Resolving Photoviewer.dll Error

Fix Photoviewer.dll Error

Photoviewer.dll Error - What is it?

Photoviewer.dll is a shared library for SampleRes.dll and x3daudio1_1.dll in computers installed with Microsoft Windows 7, 8, Vista, and XP including 32 bit and 64 bit operating systems. Photoviewer.dll is associated with 1728000 system files. The Photoviewer.dll error occurs when you upgrade your Windows operating system to a new version like Windows 7 or 8 on which this shared library is used. Once you upgrade the Windows and you right-click on JPG images, the Photoviewer.dll error pops up. This error message is displayed as the following:
  1. Photoviewer.dll missing/not found
  2. Photovewer.dll entry point not found/application can’t initiate

Solution

Restoro box imageError Causes

Photoviewer.dll error can pop up due to several reasons. These include:
  • Modification of .dll files during Windows installation
  • Infection of Trojan virus
  • Photoviewer.dll missing /broken
  • Photo Gallery was earlier your default image editor before you upgraded your system
It is advisable to repair this issue timely to avoid inconvenience and serious PC threats especially if the cause of this issue is viral infection or registry damage.

Further Information and Manual Repair

Here are some of the best ways to help you resolve Photoviewer.dll error on your system:

1. Rebuild the Windows Photo Gallery

If you were previously using Vista and then you upgraded your system to Windows 7, then try this:
  • Go to the Start menu, click on the control panel and go to the folder options.
  • Then select the view tab option. Here you’ll find the Advanced setting window, select the show hidden files and folders tab.
  • Now click Ok to continue. Navigate to the following folder( %user% is the name of the account with the problem) C:\Usersusername\AppData\Local\Microsoft\Windows\Photo Gallery.
  • Then copy files to another location as a backup and delete them from the Windows Photo directory. Once the files have been deleted, try to start Windows Photo Gallery again. If this seems difficult, install Windows Photo Gallery application from the internet on your system.

2. Repair Broken Photoviewer.dll files and Remove Malware

Another way to fix the photoviewer.dll error is to download Restoro. This is an advanced, user-friendly, and multi-functional PC fixer smoothly integrated with a registry cleaner. By running it on your system you can resolve all Photoviewer.dll error causes in seconds. Restoro has an easy-to-use interface and a neat layout. It is safe, efficient, and bug-free. In addition to this, it is compatible with all Windows versions. The registry cleaning utility is deployed with an automated algorithm that scans your entire PC and detects Photoviewer.dll file errors in seconds. It fixes damaged, misconfigured, and broken Photoviewer.dll files, clears up disk space from unnecessary and obsolete files like the files from the uninstalled Windows programs which could be generating Photoviewer.dll error on your system. It repairs the registry and modifies the registry keys to their correct configuration thus repairing the Photoviewer.dll error on your PC. The powerful privacy error detector is integrated with all the properties and characteristics of an anti-virus. It scans for malware and viruses like Trojans and removes them from your system right away. Besides these utilities, other features integrated into this repair tool include a system stability scanner and Active X and class error detector. It resolves Photoviewer.dll error while optimizing your computer’s speed and performance. Click here to download Total System Care on your system to resolve the Photoviewer.dll file error today!
Read More
How to Fix Task Scheduler Error 0x80070057
One of the important functions in the Windows operating system is the Task Scheduler. It can automatically run various tasks at a certain time where you’ll have to add a task that needs to be executed and then choose the time it has to run at. So when that time comes, the Task Scheduler will run the task automatically. However, some users reported getting an Error 0x80070057 where the Task Scheduler fails to start. This kind of error may be due to a disabled service that prevents the service from running. It is also possible that the antivirus program interfered with the task – it could be that the Task Scheduler is somewhat in the block list since the antivirus adds it to the list automatically when it’s installed. On the other hand, it could be that you lack administrator-level privilege which is why the Task Scheduler was not able to carry out the task. To fix this issue, here are some suggestions you can try.

Option 1 – Try to restart the Task Scheduler service

As mentioned, it is possible that the Task Scheduler service could be disabled. You could have disabled it when trying to enhance your computer’s performance and whatnot. Thus, you need to verify if it’s running or not and then restart it.
  • First, you need to tap the Win + R keys on your keyboard to open the Run dialog box.
  • Next, type “services.msc” in the field and click OK or tap Enter to open the Windows Services Manager.
  • You will see a list of Services and from there, look for the Task Scheduler service and double click on it.
  • After that, go to the General tab and click on the Startup Type options and then select “Automatically” from the given list.
  • Click on the “RUN” option and select the “Restart the Service” option.
  • And click on the “After Second Failure” option and then select the “Restart-Service” option again.
  • Now click on the “After Subsequent Failures” tab and select the “Restart the Service” option.
  • Finally, click on the Apply and OK buttons and then run the Task Scheduler and see if the issue is now fixed.

Option 2 – Try to temporarily disable the anti-virus program

As mentioned, the error could be due to the antivirus program or the Windows Defender Firewall installed in your computer. Thus, disabling them or any security software installed on your computer is always a good idea you can try when you’re not able to access the shared drive on your computer. There are times when you encounter problems like the Task Scheduler Error 0x80070057 due to interference of antivirus or security programs. Thus, you have to disable both your antivirus program for the meantime and check if it fixes the error or not.

Option 3 – Run the Task Scheduler with an administrator account

Like pointed out, the Task Scheduler Error 0x80070057 may be due to the lack of admin privileges. Thus, you have to log in to an administrator account and try running the Task Scheduler again. It is also recommended that the administrator account you’re going to use as a password when logging in.

Option 4 – Repair the Task Scheduler by deleting corrupted tasks

Note that a single corrupted file can cause big problems so this option is quite important. And for you to delete a corrupted task or any task from the Task Scheduler, you have to use the Registry Editor if you are not able to use the Task Scheduler interface. To do so, follow these steps:
  • Tap the Win + R keys to open the dialog box for Run.
  • Next, type in Regedit and click on OK or tap Enter to open the Registry Editor.
  • Then navigate to this path: ComputerHKEY_LOCAL_MACHINESOFTWAREMicrosoftWindows NTCurrentVersionScheduleTaskCacheTree
Note: In this path, you can see all the tasks that are currently set in the Task Scheduler. And since it would be hard to tell which one of them is corrupted, you have to delete the latest one in Task Scheduler last. But before you do so, make sure that you take note of the ID of the tasks. And for you to get the ID, you have to select the task you wish to delete and double click on the ID string located on your right-hand side, and then copy it in the Notepad.
  • Right-click on the task name and then delete it.
  • After that, delete the very same GUID which you have copied earlier from these folders:
  • ComputerHKEY_LOCAL_MACHINESOFTWAREMicrosoftWindows NTCurrentVersionScheduleTaskCacheBoot
  • ComputerHKEY_LOCAL_MACHINESOFTWAREMicrosoftWindows NTCurrentVersionScheduleTaskCacheLogon
  • ComputerHKEY_LOCAL_MACHINESOFTWAREMicrosoftWindows NTCurrentVersionScheduleTaskCacheMaintenance
  • ComputerHKEY_LOCAL_MACHINESOFTWAREMicrosoftWindows NTCurrentVersionScheduleTaskCachePlain
  • ComputerHKEY_LOCAL_MACHINESOFTWAREMicrosoftWindows NTCurrentVersionScheduleTaskCacheTasks
Note: You might not see the same GUID from these folders but if you see it, delete it right away.
  • Next, navigate to this location: C:/Windows/System32/Tasks
  • Delete the very same tasks you just deleted from the Registry Editor.
  • Restart your PC and check if the Task Scheduler is back to its normal state or not.
Read More
A Quick Guide to Fixing Error Code 10

Guide to Fixing Error Code 10

Error Code 10 - What is it?

Error code 10 is a type of Window Device Manager error code. This error code is generated when the Device Manager can’t start the hardware device or is experiencing device driver issues. It is displayed in the following format:

"This device cannot start. (Code 10)"

You can access complete details about error codes related to Device Manager such as code 10 through the Device Status area in the Device Properties.

By accessing Device Status, you can easily view the status of each device and learn about the specific device that could be causing the problem.

Solution

driverfix boxError Causes

Error code 10 can be triggered due to several reasons. These include:

  • Outdated drivers
  • Corrupted drivers
  • Incompatible drivers
  • Device configuration issues
  • Hardware compatibility problems

Device driver corruption can cause you great inconvenience and PC performance issues. The computer’s operating system relies heavily on device drivers to communicate with the hardware.

For example, the printer driver facilitates functioning of the printer. Similarly, the graphic card driver ensures proper video output on the monitor screen.

However, your PC hardware, such as printer or keyboard, may stop functioning properly if their device drivers become outdated or corrupt. Therefore to avoid inconvenience and to ensure your PC works properly, it is important to resolve the problem immediately without any delay.

Further Information and Manual Repair

To repair error code 10, you don’t have to be a technical whiz or hire a professional computer programmer. Here are some of the best and easy to perform DIY methods that can help you fix this device error in no time.

Method 1 - Reboot Your PC

Sometimes temporary problems in Device Manager can also generate code 10 error. Therefore it is advisable to restart your PC. Rebooting your system might fix the error. Try it! If it does, great, however, if the error still persists, then try other methods listed below.

Method 2 - Reinstall Drivers

Go through the Device Status in the Device Properties to view the driver causing the problem. If any driver is tagged with a yellow exclamation point, it means that driver is the one causing problems. Once identified, uninstall that driver and then reinstall it. This will hopefully resolve the problem.

Method 3 - Update the Device Driver

Whether the error code 10 is generated due to incompatible, corrupted, or outdated device drivers, simply update the device driver to resolve. To update the driver, go to the Device Manager, then click the driver tab in the device properties dialog box.

After that, click update driver. This will start the hardware update wizard. Then follow the instructions to update the driver on your PC. During this process, you may be prompted to provide the driver path.

If you don’t have it, then you will have to download the latest driver from the hardware vendor’s official website. This can be time-consuming and stressful.

Method 4 - Install DriverFIX

Another alternative is to install DriverFIX.  It is a user-friendly device driver management software with an intuitive interface.

Its intelligent algorithm is designed to detect all the problematic drivers in seconds. It automatically updates and accurately installs appropriate drivers and ensures your PC runs at its optimum level in no time.

Click here to download DriverFIX on your system to resolve error code 10.

Read More
Configuring Groove Music Equalizer in Windows
In case you don’t know, Groove Music is due to retire its OneDrive streaming service this month. Despite that being the case, there is actually a workaround you can try to still continue enjoying music streaming. The app also allows you to play your own local files and if required, you can also modify or tailor the experience with new features – for instance, Groove Music brings an Equalizer to the settings of the app. As the name suggests, the equalizer allows you to tweak frequency responses to your liking. On top of being able to tweak individual bands, the equalizer supports few pre-set settings to enable quick changes. This post will guide you on the process of accessing and using the equalizer in the Groove Music app. To get started, refer to the instructions provided below. Step 1: You need to make sure that you are running the latest version of the Groove Music app or version 10.18011.1211.0 or higher in order to use the equalizer in Groove Music. If needed, you can check the version number from Windows Store. Step 2: Open Windows Store and then click on the ellipses icon and select the Downloads and Updates option. Step 3: Next, search for Groove Music and check its version number. Step 4: Now that you’ve verified the version number of Groove Music, you need to open the equalizer setting. It is enabled by default and to access it, click on the gear icon for Settings and select equalizer under the Playback settings. Step 5: After that, the Equalizer window will pop up. It is where you can configure the equalizer settings using the drop-down menu. Here are the following presets you can choose from:
  • Flat
  • Treble Boost
  • Bass Boost
  • Headphones
  • Laptop
  • Portable speakers
  • Home Stereo
  • TV
  • Car
  • Custom
Step 6: Drag the dots upwards or downwards to set your own preferences, as needed. Note: The only downside to this setting is that there is no shortcut available for quick access as you have to navigate through the Settings section manually to access it and change the preset configurations. In addition, the Groove Music app also works on the mobile version of Windows 10.
Read More
Reversing Mouse & Touchpad scrolling direction
As you know, aside from making computing a lot easier, mouse and touchpad, it also makes computing more efficient and less time-consuming. And so life is unimaginable without these useful devices. However, it is a known fact that you can’t customize these devices since all touchpads and mice come with their own default scrolling direction but worry not for in this post you will be guided on how you can reverse their default scrolling directions. Every user has their own different preferences when it comes to scrolling directions. You might want the scrolling directions to look like the page is being scrolled in the same direction in where you move your fingers over the touchpad or you might prefer it in an inverted way. Reversing the scroll direction for your device’s touchpad is really easy as Windows by default offers this customization. So if you are trying to find a way to reverse the scrolling direction of your mouse, then you have to follow a tricky little method which will be provided in this post. It is apparent from the number of settings the touchpad is available that it has become more customizable. You can configure everything, from its gestures, taps, sensitivity, and even its scrolling direction. And now, if you want to reverse its scrolling direction, here’s what you have to do: Step 1: Tap the Win + I keys to open Settings. Step 2: From there, go to Devices and select Touchpad from the menu. Step 3: Next, look for the Scrolling Direction setting. Step 4: Then click on the drop-down and select your preferred setting.  If you want the same direction scrolling, just select the “Downwards motion scrolls down” option, and if you want the opposite select the other one. After you carry out these steps, the settings will be applied right away and you will see the changes. On the other hand, if you want to change the scrolling direction for your mouse, the procedure is not as simple as it was for the touchpad.

To reverse the scrolling direction for a mouse, refer to these steps:

Step 1: In the Start Search, type “device manager” and click on the appropriate result to open the Device Manager. Step 2: After opening the Device Manager, look for your Mouse under the “Mice and other pointing devices” section. It is mostly listed as an “HID-compliant mouse”. Step 3: Right-click on your mouse and click Properties. Step 4: From there, go to the Details tab and from the drop-down menu, select Device Instance Path. Step 5: Now take note of the value displayed on its value field and then tap the Win + R keys to open the Run dialog box. Step 6: Type in “Regedit” in the field and hit Enter to open the Registry Editor. Step 7: Next, navigate to the following location:
HKEY_LOCAL_MACHINESYSTEMCurrentControlSetEnumHID
Step 8: From this folder, you have to start matching the values in the first part of the value you’ve taken note of. Step 9: Open the folder which has the same value and repeat this for the second part of the value. Step 10: Afterwards, click on the Device Parameters and look for a property named “FlipFlopWheel” and invert its value from 0 to 1 or 1 to 0 to reverse the scrolling direction. And then restart your PC to apply the changes made. After you restart your PC, you should see the changes in the scrolling direction of your mouse. Note that you can change the value back to its original value or just use the registry backup to undo the changes you’ve made.
Read More
Bluetooth Headset in Windows gets disconnected
Many Windows 10 users use a Bluetooth headset as these kinds of Audio devices, as you know, lack wires since wires tend to get entangled and break which could get quite inconvenient. This is why using a wireless headphone is more preferable since it’s much simpler, however, using a wireless headphone also means it comes with a charging requirement and if it fails to charge, there is no music or audio or anything that you need a Bluetooth headphone for. However, wireless headphones are also susceptible to problems as you might encounter some problems when connecting your wireless headphone to your Windows 10 computer. One of these problems include when you try to get sound from the wireless device but nothing happened. This indicates that the Bluetooth headphone is disconnected in some way for some unknown reason even if you’ve already plugged it in. Thus, if you encounter this scenario, then there are several options you need to check out to fix the problem. To start troubleshooting the problem, here are the options you need to use as a reference.

Option 1 – Try turning off the device and turning it back on

The first thing you can do to resolve the problem is to turn off your wireless audio device and wait for a couple of seconds before you turn it back on. In most cases, this should fix the problem. In fact, you can also try to unpair and pair the Bluetooth audio device and see if it fixes the problem or not.

Option 2 – Try to set the headphone as the default device manually

There are times when you plug a headphone, it does not toggle the default audio device. Thus, to fix this issue, you have to set the default audio device to the headphones manually. To do that, follow these steps:
  • First, right-click on the volume icon located on the system tray.
  • Next, select the Open sound settings option to open the Sound section in the Windows 10 Settings app.
  • After that, go to the Output section and select Headphones for the “Choose your output device” option. This should fix the problem for you.

Option 3 – Try running the Bluetooth Troubleshooter

As you know, Windows 10 has various troubleshooters with user-friendly interfaces where you can utilize them to fix issues in your PC. And since you’re dealing with some Bluetooth problem, you have to run the built-in Bluetooth Troubleshooter. To do this, follow these steps:
  • Open the Windows 10 Settings.
  • Then go to Update & Security > Troubleshoot.
  • You should find the option for Bluetooth on your right-hand side – click on it then click on the “Run the troubleshooter” option.
  • Now follow the next screen options.

Option 4 – Try to update or reinstall the Bluetooth driver

The issue might have something to do with the Bluetooth drivers. It could be that it is outdated and needs to be updated or that you recently updated it and since then you have trouble in removing the Bluetooth devices and so to fix the issue, you can update, roll back or uninstall the Bluetooth drivers. How? Follow the steps below.
  • Tap the Win + X keys to open the Device Manager.
  • Next, look for the Bluetooth device and right-click on it.
  • Select the option “Update driver”.
  • After that, a new popup window will appear. In there, select the option, “Search automatically for updated driver software”.
Note: Checking the update may take a few minutes so you’ll have to wait until it finishes. If it is able to find an update, you must install it. And if you want to reinstall the Bluetooth driver, just select the “Uninstall driver” option and follow the next on-screen instructions that follow.
Read More
Intel to reveal roadmap during July 26 webcast
intel graphics
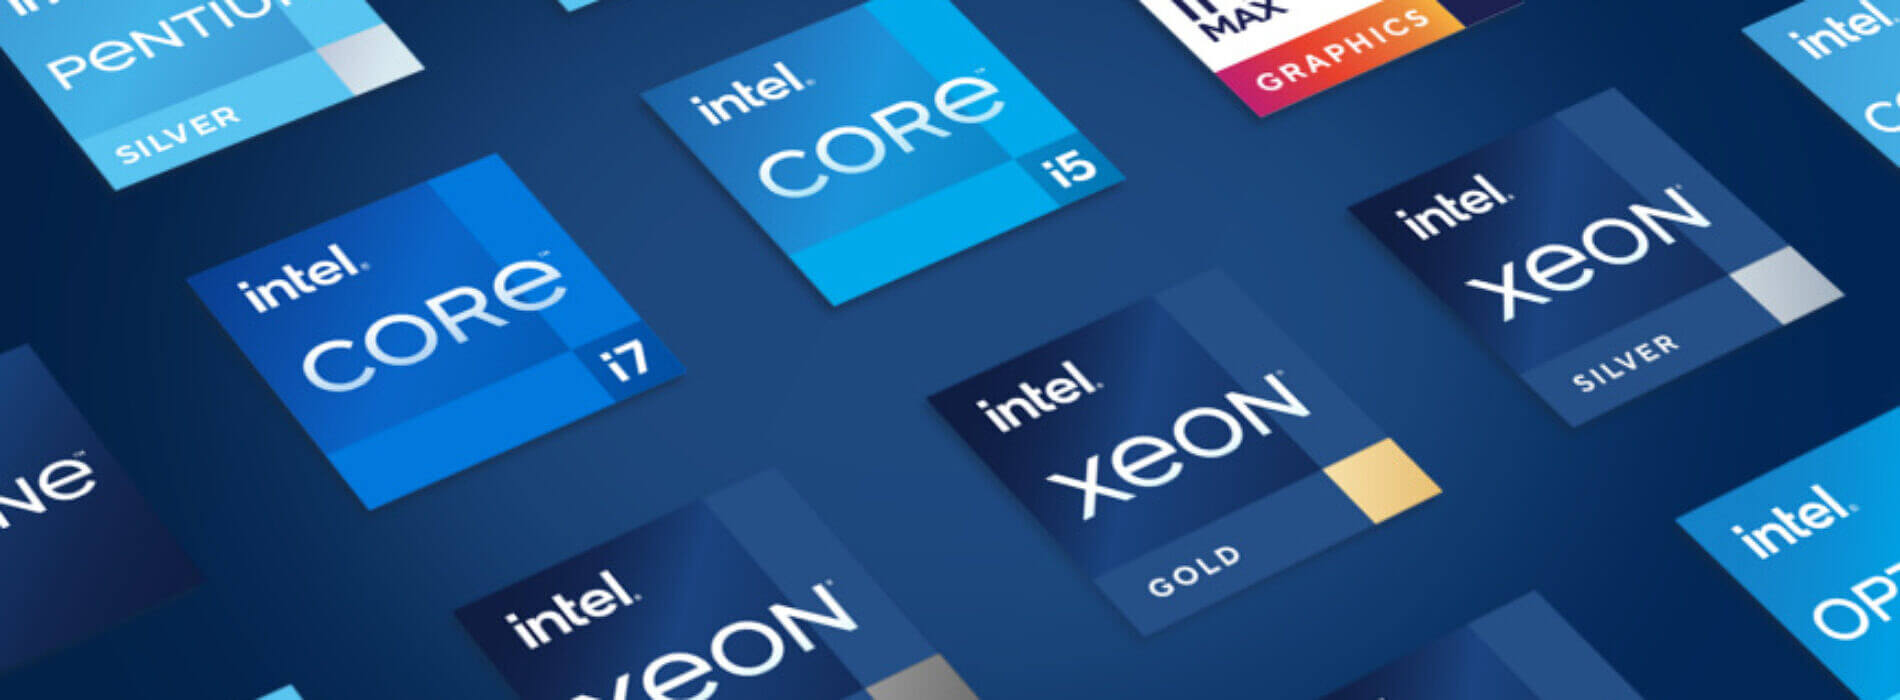
Intel announced that Pat Gelsinger (CEO) and Dr. Ann Kelleher  (technology Department head) will discuss Intel’s process and packaging innovations on an upcoming webcast that will happen on July 26th. The spokesman will talk and provide a deeper look at the process and packaging roadmaps for Intel. As we know Intel is planning to expand its production capabilities, outsource some of its technologies and offer foundry services to other chip design companies. The strategy will also include a shift to a 7nm process and Intel’s effort to set itself again as leader of CPU performance by 2024. There is also a chance that we will hear exact plans for Intel in the next three or four years. Intel didn't reveal much else about what Gelsinger and Kelleher plan to discuss during the webcast. The event will be streamed on July 26 at 2 pm PT via the Intel Newsroom; it will also be available to watch on-demand after the stream ends.
Read More
Fix Windows Update Error 0x8007025D-0x2000C
Recently, a number of users reported getting an error code 0x8007025D-0x2000C while updating their Windows 10 computers using an ISO or the Media Creation tool. You will also see a detailed error message saying, “The installation failed in the SAFE_OS phase with an error during APPLY_IMAGE operation” together with the error code 0x8007025D-0x2000C. This kind of issue usually occurs when there is some problem with the installation files and when Windows Update fails to apply upgrade using the Media Creation Tool or ISO. To resolve this issue, you can use the troubleshooting options given below as a reference.

Option 1 – Try recreating the Windows 10 installation USB

Recreating the Windows 10 installation USB might help in fixing the problem. You can use a USB drive to do so but make sure that it has a great read-write speed. Follow the steps below to recreate Windows 10 installation USB”
  • Click this link and then click the Download Tool Now button.
  • Next, click the “Use the tool to create installation media (USB flash drive, DVD, or ISO file)…” option and follow the next given instructions on the screen.
  • Now select the ISO file option in step 5.
  • After that, you should now have an ISO file.
  • Next, go to the location where you’ve downloaded the ISO file.
  • Then right-click on the Windows 10 ISO file and select the Open with option and then select File Explorer.
  • Now click on “setup.exe” and follow the next instructions that appear on the screen. When asked, you have to select either Nothing (clean install) or Keep personal files only option. Take note that you must not select the “Keep personal files, apps, and Windows settings since it doesn’t really work.

Option 2 – Try running the Windows Update troubleshooter

You might also want to run the Windows Update Troubleshooter as it could also help in fixing Windows Update error code 0x8007025D-0x2000C. To run it, go to Settings and then select Troubleshoot from the options. From there, click on Windows Update and then click the “Run the troubleshooter” button. After that, follow the next on-screen instructions and you should be good to go.

Option 3 – Update the BIOS

Take note that you have to be careful when modifying something in the BIOS. So if you don’t know much about it, it’s best if you skip on this option and try the other ones instead. However, if you are well-versed in navigating the BIOS, then follow the steps below.
  • Tap the Win + R keys to open the Run dialog box.
  • Next, type “msinfo32” in the field and press Enter to open System Information.
  • From there, you should find a search field on the bottom where you have to search for the BIOS version and then press Enter.
  • After that, you should see the developer and version of the BIOS installed on your PC.
  • Go to your manufacturer’s website and then download the latest version of BIOS on your computer.
  • If you are using a laptop, make sure that you keep it plugged in until you have updated the BIOS.
  • Now double click on the downloaded file and install the new BIOS version on your computer.
  • Now restart your computer to apply the changes made.

Option 4 – Try restarting the Background Intelligent Transfer Service

The Background Intelligent Transfer Service or BITS is a part of the Windows Update service and is the one that manages the background download of Windows Update, as well as scans for new updates and so on. And if Windows Update is experiencing some problems, you can try restarting BITS but make sure that you have admin privileges to do so.
  • Tap the Win + R keys to open the Run dialog box.
  • Next, type “services.msc” in the field and hit Enter to open Windows Services.
  • From the list of Services, look for the Background Intelligent Transfer Service and double-click on it to open Properties.
  • After that, you need to set the Startup type to “Automatic (Delayed Start) and click on Apply.
  • Now click the Stop button to stop BITS and then click the Start button to restart the service.
  • Click OK to save the changes made and then restart your PC.

Option 5 – Try to update Windows after a couple of minutes or an hour

There are times when the issue is from Microsoft’s end. It could be that there’s some issue with Microsoft’s server so it would be better if you give it a couple of minutes or an hour or so before trying to run Windows Update again.
Read More
1 2 3 162
Logo
Copyright © 2022, ErrorTools. All Rights Reserved
Trademarks: Microsoft Windows logos are registered trademarks of Microsoft. Disclaimer: ErrorTools.com is not affiliated with Microsoft, nor claim direct affiliation.
The information on this page is provided for information purposes only.
DMCA.com Protection Status