How to Fix Error Code 0x80073afc

How to Fix Error Code 0x80073afc

Error Code 0x80073afc - What is it?

Error code 0x80073afc deals with an antivirus program first built into Windows 8/8.1 This error occurs when Windows Defender, the built-in anti-virus software in Windows 8/8.1 and higher, does not start automatically and users attempt to manually start the program. During the initialization period of the program start-up, something goes wrong and users get a 0x80073afc Error message. The error message states there was a problem with the initialization of the program. Windows Defender provides protection of your computer and it is advised by the Microsoft Corporation that you ensure it starts up automatically on every start-up.

Solution

Restoro box imageFurther Information and Manual Repair

Users have found several manual repairs that have fixed the problem without needing to contact technicians for extra help. While the methods below should solve your problem easily, if this is the first time you have encountered the issue you may want to do a simple restart. This has fixed the problem for some users and is the easiest first troubleshooting move. If it doesn’t work move on to the methods listed below, which are easily completed without extra help.

Before trying any of these methods, please make sure that you are logged into a profile that is listed as the administrator of the computer of his administrative powers enabled. If this is not the case you will not be able to complete the following methods. Please log out and log back in on the administrator profile.

Method 1:

First, check to see if you have a third-party anti-virus program installed on your computer. Some users believe that the built-in Windows Defender program is not powerful enough to handle the safety of their computer so they usually download a third-party program. However, that program may have caused a conflict with Windows Defender and may not allow it to open. If you do have a third-party program installed, try uninstalling it then manually starting Windows Defender.

Method 2:

If method one does not work, you may be infected by malware or a virus that has tampered with the settings on your computer and will not allow Windows Defender to start automatically or manually.

First, open Run by holding the “Win” key and pressing the “R” key. Then type “Regedit”. The program will ask for permission to follow through with this action. Click on “Yes” and the Open Registry Editor will open.

Find the HKEY_LOCAL_MACHINESoftwareMicrosoftWindows NTCurrentVersionImage File Execution Option and check to see if there are any files similar to MSASCui.exe or MpCmdRun.exe. If there are any file entries that resemble that, you will want to right-click on them before selecting the “Delete” option. If you do not see any entries that match, this is not the issue with your Windows Defender and you will want to try another method.

The Registry on your computer is very important. It helps tell your computer what programs are safe to run, what programs should be run, and what programs should not be run. If it is tampered with by a virus or Malware, multiple system operations can be affected.

However, if you did find similar file names, and you deleted them, try to start Windows Defender manually. If it does not work again, move on to the next method. 

Method 3:

If the first two methods do not work for your issue, and you are still receiving error code 0x80073afc when attempting to start Windows Defender, this step should solve the problem if you have Restore Point installed on your computer, which you most likely do.

For this method, we will be restoring your computer to a previous Restore Point. First, just like in method two, hold the “Win” key and press the “R” key. This will open run. Next type “Rstrui.exe” and click “ok”. After some time, you will see System Restore Windows. Click “Next” and select the restore point that you would like to go back to. After your computer has restored to the point you selected, check to ensure that Windows Defender has started correctly.

If the above methods aren't able to rectify the issue, you might have to download and install a powerful automated tool to get the job done.

If you like to learn and find out more about various Windows errors, and how to repair them go to our vast archive or use search to find articles that will explain and help you in solving your issue.
However, if you prefer to do things fast and with automatization then we are proposing to use an automated solution for your issues. The application that we are recommending is Advanced System Repair Pro
Advanced System Repair utilizes multiple tools all in one to give you a quick, simple, reliable, and very thorough diagnosis of your PC. It brings you all the tools you need in one program to clean, fix, protect, optimize and boost your PC!
1-Click Maintenance
All the tools to make it simple and easy! It's like having a professional technician at the click of a mouse.

Junk Cleaner
Keeping your computer free from unnecessary clutter also helps make your computer last longer. Like any other machine, if you keep it clean and take care of it, it will serve you better for longer!

Optimize background apps
Optimize applications background activity with the built-in Application Optimizer feature.

Disk Defrag
With a simple 1-click, Advanced System Repair speeds up your PC by assembling fragmented files on your machine and organizing them more efficiently.

Malware Removal
Finds and removes all types of harmful malware including trojans, worms, bots, adware, spyware, PUPs, and more!

Privacy Cleaner
The all-in-one privacy suite to Clean Your Tracks & Protect Your Privacy! Make your computer safe, secure, and more efficient!

System Tweak/Optimizer
ASR will analyze your complete system and settings to adjust your PC to function at its maximum performance.

Registry Cleaner
Over time, as you install and uninstall applications, the registry can become cluttered with old entries and broken settings which can result in program crashes, and annoying messages and slow the computer down.
Visit our Advanced System Repair Pro Download page to inform yourself about all the benefits of this software and get a free trial copy of it.
advanced system repair pro

Advanced System Repair Pro

One-click automated PC repair solution
ASR logo
With Advanced System Repair Pro you can easily
Replace damaged files
Restore performance
Free disk space
Remove Malware
Protects WEB browser
Remove Viruses
Stop PC freezing
DOWNLOAD
Privacy Policy | Terms of Use | Uinstall
Advanced System Repair Pro is compatible with all versions of Microsoft Windows including Windows 11

Share this article:

You might also like

Add names of applications in the taskbar
Microsoft is trying to make Windows into a personalized OS, more and more features and parts can be customized to user liking. From larger things to smaller ones nowadays you can almost personalize every detail of Windows itself. In this article, we will tackle how to bring back the names of running applications on the taskbar. Placing names beside icons on the taskbar is a pretty simple and straightforward task easily done. First, right-click the Taskbar and select Taskbar settings. In Taskbar settings, click the menu labeled Combine taskbar buttons. Select Never. That's it, now all of your running applications have a name beside them. If you change your mind, you can always undo it by selecting Always hide labels in the Combine taskbar buttons menu.
Read More
0x800ccc79 Error Code - A Quick Fix
[vc_row][vc_column][vc_column_text]

0x800ccc79 Error Code Repair

0x800ccc79 Error - What is it?

0x800ccc79 error is an error message that you may come across when sending emails through Outlook Express from Microsoft. This error message is accompanied by a notification that is displayed as ‘email was not delivered’ or ‘the server doesn’t support SSL connection’.

Solution

Download Available to Recover all Lost Outlook data

Restoro box imageError Causes

This error code 0x900ccc79 is triggered due to the following causes:
  • Problems related to email servers
  • Changes in the configuration settings
  • Corrupted Windows Registry

Further Information and Manual Repair

When you receive the error 0x800ccc79 it may hamper your ability to send emails. Therefore it is advisable to fix it to ensure your emails are sent and received without any difficulty.

This Outlook error 0x800ccc79 is quite easy to repair. By following the quick fix 0x800ccc79 error code solutions given below you can resolve this error in just a couple of minutes.

Here’s what you need to do to fix this error right away:

Cause: Configuration issues

Solution: If the error occurs due to Outlook Express being configured to use the SSL protocol while sending and receiving emails via the web, then to resolve it, you need to allow Outlook Express to bypass the Secure Socket Layer settings.

To do so, click on ‘tools’ and then on ‘Accounts’. Now select the email account that you want to modify.

Now select the ‘Properties’ tab and then click on ‘Advanced Settings’.

Here search for the following text message ‘This server requires a secure connection’. Once you locate it, uncheck all the checkboxes given next to this option. After that save the changes and restart Outlook Express to see bring the changes into effect.

Cause: Missing or Corrupt Registry Entries

Solution: If the error 0x800ccc79 occurs due to missing or corrupt registry entries, then the best way to fix this error is to download and install a good registry cleaner on your PC.

The registry cleaner will help you clean your corrupt and damaged Windows registry entries and get rid of this error right away. It is suggested you download the registry cleaner tool from a reliable website to avoid any malware or virus downloads simultaneously.

Once you download the registry cleaner on your system, click on scan. The cleaner will scan your computer completely for registry errors and show you the results in a list form.

After the scanning is complete, click on repair to fix the errors.

So, next time if you or anyone at your office comes across the Outlook Express error 0x800ccc79, you can try these solutions and fix the error immediately without waiting for the network personnel to come and resolve it.

[/vc_column_text][/vc_column][/vc_row]
Read More
Fix Windows 0x8007002C – 0x400D Error
In Installing or upgrading your Windows 10, there really is no guarantee that everything will go smoothly as there are times you encounter errors like the “ We couldn’t install Windows 10, 0x8007002C - 0x400D ” error message among other Windows update/upgrade errors. When you encounter this particular error message you will the following message on your screen:
 “We’ve set your PC back to the way it was right before you started installing Windows 10. 0x8007002C-0x400D The installation failed in the SECOND_BOOT phase with an error during MIGRATE-DATA operation”
This kind of Windows upgrade error indicates that some of the files needed for the installation are locked out for some reason and that Windows was not able to migrate them to a new version. It could be that your computer does not have sufficient space for those files. Thus, no matter how many times you try to upgrade your computer, you always end up going back to the previous version of Windows. To fix the “0x8007002C – 0x400D, The installation failed in the SECOND_BOOT phase with an error during MIGRATE-DATA operation” error, here are some suggestions that might help:

Option 1 – Disable your antivirus program

There are times when the antivirus program installed in your computer blocks file access and even disk access. Thus, disabling the antivirus program or any security software installed in your computer is always a good idea you can try when the Windows Update process does not go smoothly. So before you try updating your computer again, make sure to disable the antivirus or security program and once the Windows Update is done, don’t forget to enable the antivirus program back again.

Option 2 – Perform a Disk Cleanup to free up disk space

Chances are, some unnecessary files in your computer might be interrupting the installation process which explains why you’re getting the “0x8007002C – 0x400D, The installation failed in the SECOND_BOOT phase with an error during MIGRATE-DATA operation” error instead so you need to perform a Disk Cleanup in order to fix the problem.
  • In the Cortana Search box, type “disk cleanup” and click on the related search result.
  • Then select the disk you want to clean and click OK.
  • Wait for the process to be completed and then restart your PC and try to install the Windows upgrade again.

Option 3 – Get rid of any file protection software

The Windows setup migrates the folder from one version to another during the upgrade. However, if some of your folders, if not all, are protected using some file protection software, then Windows won’t succeed in moving the folder and you will encounter this Windows upgrade error instead. Thus, you need to unlock all those protected files or better yet uninstall the file protection software after you remove the locked files. After that, try installing the upgrade again.

Option 4 – Rename the SoftwareDistribution folder

The Software Distribution folder in the Windows operating system is a folder that can be found in the Windows directory and is used to store files temporarily which might be required to install the Windows Update on your PC. Thus, it is required by the Windows Update and maintained by WUAgent. Aside from that, it also contains all the Windows Update History files and once you delete them, you will most likely lose the Update history. As a result, the next time you run the Windows Update, it may result in a longer detection time.
  • Open the WinX Menu.
  • From there, open Command Prompt as admin.
  • Then type in the following command – don’t forget to hit Enter right after typing each one of them.
net stop wuauserv net stop bits rename c:windowsSoftwareDistribution SoftwareDistribution.bak
  • After entering these commands, it will stop the Windows Update Service, the Background Intelligent Transfer Service, and rename the SoftwareDistribution folder.
  • Next, got to the C:\Windows\SoftwareDistribution folder and get rid of all the folders and files thereby tapping the Ctrl + A keys to select them all and then click on Delete. Note that if the files are in use, you won’t be able to delete them.
  • Once all the contents in the Software Distribution folder are deleted, restart your PC and then go back to Command Prompt and input the following commands again.
net start wuauserv net start bits
Since the folder has already been flushed, it will be populated afresh the instant your restart your computer and open Windows Update.

Option 5 – Run the DISM tool

As mentioned, the “0x8007002C – 0x400D, The installation failed in the SECOND_BOOT phase with an error during MIGRATE-DATA operation” error might also be caused by corrupted files in the computer. Thus, you can try using the DISM tool to repair them. Running the DISM tool can repair the Windows System Image and Windows Component Store in Windows 10.
  • Open the Command Prompt as admin.
  • Then type in this command: DISM /Online /Cleanup-Image /RestoreHealth
  • Do not close the window if the process takes a while as it will probably take a few minutes to finish.

Option 6 – Run the Windows Update Troubleshooter

Running the built-in Windows Update troubleshooter could also help you resolve this particular Windows upgrade error. To run it, go to Settings and then select Troubleshoot from the options. From there, click on Windows Update and then click the “Run the troubleshooter” button.

Option 7 – Try running Microsoft’s online troubleshooter

You also have the option to run Microsoft’s online troubleshooter which could help you fix Windows Update errors including the “0x8007002C – 0x400D, The installation failed in the SECOND_BOOT phase with an error during MIGRATE-DATA operation” error.
Read More
How to Fix TrayApp Error 1706

Repair TrayApp Error 1706

What is TrayApp Error 1706? A TrayApp Error 1706 is not something you want to see. It is generally caused by an error in hexadecimal formatting, which is a common format employed by software programmers for Windows OS-compatible hardware drivers, Windows system files, and software apps. Developers and manufacturers of hardware drivers and software apps employ different codes in order to indicate different types of errors. The TrayApp error 1706 occurs in a long numeric code with a technical explanation of the cause. In many cases, the TrayApp error 1706 can have different TrayApp error 1706 parameters. It will usually sport a message like:
  • Install Error 1706 Trayapp
  • Reinstall Error 1706 Trayapp
  • Error 1706 Trayapp crash
  • Error 1706 Trayapp is missing
  • Remove Error 1706 Trayapp
  • Download Error 1706 Trayapp
  • Error 1706 Trayapp virus

Solution

Restoro box imageError Causes

More often than not, the TrayApp error will occur because there are damaged files in your operating system. When the Windows system file entry gets corrupt, it means that there malfunctioning in your system and it can be exposed to major security threats. And if it’s not resolved, it can potentially result in complete and permanent data loss and can make your storage media or your system as a whole inoperable. There can be other triggers for the TrayApp error, the common of which include:
  • Incomplete installation of software
  • Incomplete un-installation of software
  • Improper deleting of hardware drivers
  • Improper deleting of software applications
If you have the TrayApp error, you realize how common it is when restarting your system followed an improper shutdown or a recent malware or virus recovery. These situations result in corruption or deletion of essential system files. When Windows system files get corrupted or go missing, the data that is needed to run software won’t be linked properly.

Further Information and Manual Repair

There are two common manual ways of fixing TrayApp error 1706. The manual solution is:

Boot Your System and Log in As Administrator.

  • Click on Start and select All Programs.
  • Go to Accessories, then System Tools, and select System Restore.
  • In the dialog box, select, ‘Restore computer to an earlier date’ and then click on Next.
Click next twice on the dialog boxes and then the Automatic System Restore will start and restart your device.

Reimage Plus Fix for Trayapp Error 1706

This is the easiest way to resolve TrayApp Error 1706. However, there are cases when the manual process may not really work, and this can be caused by improper maintenance of your system. For that, Restoro is your short and comprehensive answer. Restoro is a multi-functional PC Fixer that works as an antivirus, registry cleaner, system optimizer, and much more. It can not only help resolve TrayApp Error 1706, but can also resolve other errors that can hinder the performance of your system, programs, and applications. It can also clean your registry and optimize your system to make it faster and quick loading. The software is compatible with all Windows versions. Just click here and download Restoro and get rid of any issues in your system!
Read More
Remove recommended icons from the start menu
windows 11 start menu
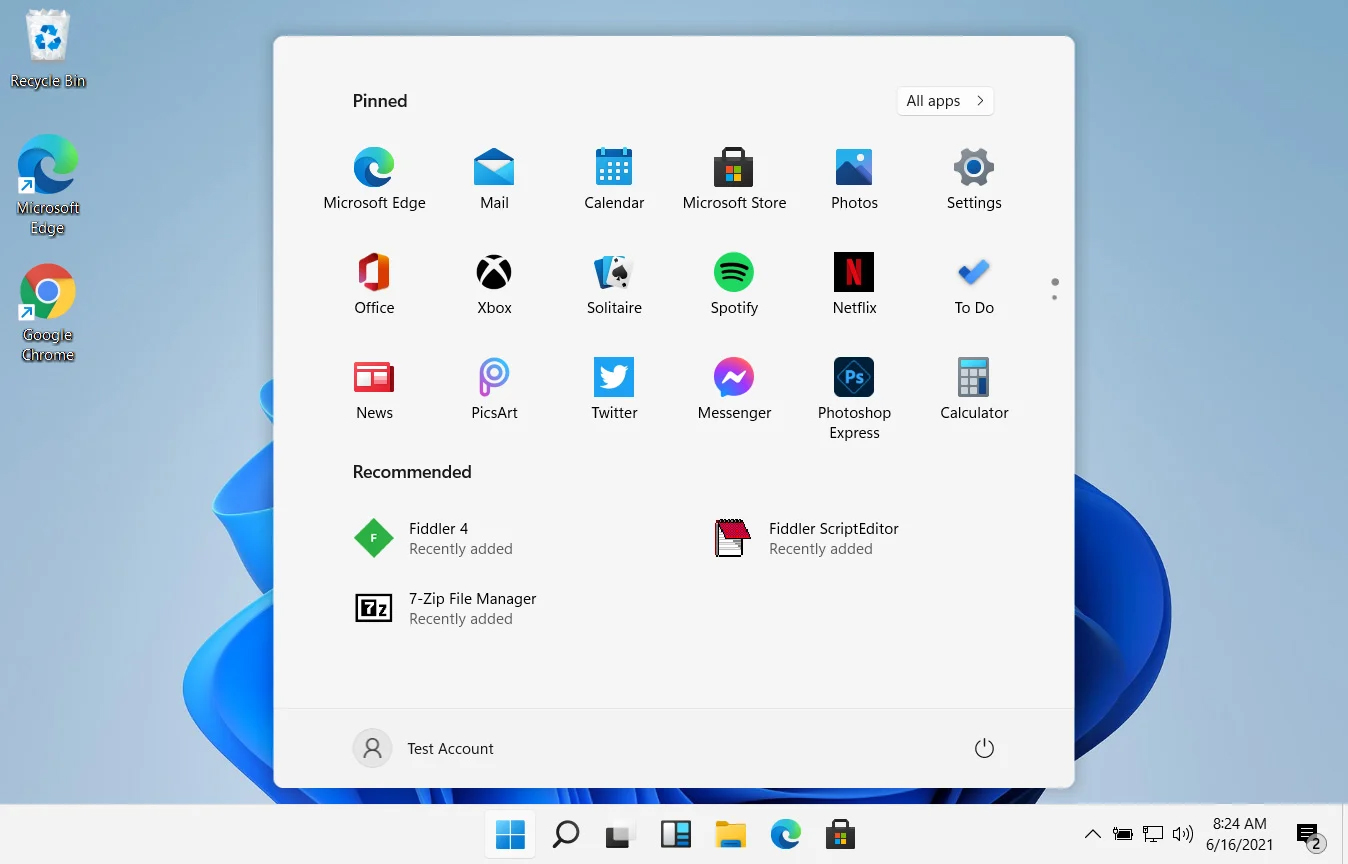
In Windows 11 by default inside the Start menu, there is recommended section that contains recently opened folders, documents, and files. If you do not wish this section and do not want recent items in your Start menu there is an easy way to turn it off.
  1. Press ⊞ WINDOWS + I to open settings
  2. Click on Personalization
  3. On the right side scroll down and click on Start
  4. Click on the switch beside Show recently opened items in Start, Jump lists, and File Explorer
  5. Close settings
Settings will be automatically applied and there will be no more recommended items inside your Start menu to create clutter, it will be nice and clean.
Read More
Backup and Restore pinned Taskbar Items
Pinned Windows 10 Taskbar Items. One of the most used interfaces in the Windows environment is the Taskbar. It is where users like to pin their most-used programs as well as shortcuts with extra privileges and automated tasks. In fact, it’s a lot better than the Start Menu. So if any Windows Update messes up with your computer, or if you’ve just switched to a different computer, setting up the Taskbar with the very same set of programs you used to have is definitely not an easy task. But worry not as this post will guide you on how you can backup and restore the items on your Taskbar either manually or automatically.

Manual Backup:

  • Tap the Win + R keys to open the Run prompt.
  • Then type “%AppData%MicrosoftInternet ExplorerQuick LaunchUser PinnedTaskBar” in the field and hit Enter to open the folder where you can see all the shortcuts or pinned items in the Taskbar.
  • After that, copy all the files in the folder and paste them somewhere else as a backup. For instance, E:\Pinned Items Backuppinnedshortcuts.
  • Next, tap the Win + R keys to open the Run prompt once more, and then type “Regedit” in the field and hit Enter to open the Registry Editor. When the User Account Control dialog box appears, click Yes.
  • After opening the Registry Editor, navigate to this key – HKEY_CURRENT_USERSoftwareMicrosoftWindowsCurrentVersionExplorerTaskband
  • Then right-click on the Taskbar folder and select Export.
  • Now save the file with the .reg extension to another location like the E:\Pinned Items Backup folder and then name it.
  • Close the Registry Editor.

Manual Restore:

Make sure to copy all the files to one of the drives if you are using another computer and then refer to the following steps.
  • Tap the Win + R keys to open the Run prompt.
  • Then type “%AppData%MicrosoftInternet ExplorerQuick LaunchUser PinnedTaskBar” in the field and hit Enter to open the same folder where you just copied all the shortcuts. Make sure to keep it open.
  • Then open the backup folder where you saved all the pinned items and copy all the files there.
  • Next, go to the Taskbar folder (%AppData%MicrosoftInternet ExplorerQuick LaunchUser PinnedTaskBar) and then paste your files in there. If you encounter a problem while doing so, just replace it with your own set of files.
  • After that, go to E:\Pinned Items Backuppinnedshortcuts and then double click on tb-pinned-items.reg. If a User Account Control prompt appears, click Yes. This will add the registry file into the main registry hub. You will also get a dialog box that will confirm that data has been added to the registry successfully. Click OK.
  • You should now see the items on the Taskbar. You have to restart Windows Explorer. To do so, end its process in the Task Manager.

Automatic Backup:

Backing up and restoring the pinned Taskbar items in your Windows 10 computer can be done automatically as well. But before you get started on the process, you need to understand what’s going on behind the hood first. First, you need to create two bat files and name them “Backup Pinned Taskbar Items” and “Restore Pinned Taskbar Items”. After you have that covered, refer to the following steps:
  • Open the Notepad app and paste the following details and save it as “Backup Pinned Taskbar Items.bat.
REG EXPORT HKEY_CURRENT_USERSoftwareMicrosoftWindowsCurrentVersionExplorerTaskband “E:\Pinned Items Backuptb-pinned-items.reg” xcopy “%AppData%MicrosoftInternet ExplorerQuick LaunchUser PinnedTaskBar” “E:\Pinned Items Backuppinnedshortcuts” /E /C /H /R /K /Y
  • After that, run the newly created bat file with admin privileges.

Automatic Restore:

  • Open the Notepad app and paste the following details and save it as “Restore Pinned Taskbar Items.bat”.
REGEDIT /S “E:Pinned Items Backuptb-pinned-items.reg” xcopy “E:Pinned Items Backuppinnedshortcuts” “%AppData%MicrosoftInternet ExplorerQuick LaunchUser PinnedTaskBar” /E /C /H /R /K /Y
  • After that, run the bat file with admin privileges.
Note: Just so you know, there is a drawback to this process as we’ve noticed that any pinned apps that were downloaded from the Windows Store don’t appear in these places and any items downloaded and installed separately from the internet and then pinned.
Read More
New Windows 11 keyboard shortcuts
New Windows brings new keyboard shortcuts, most of them are tied to new features and we are presenting you some new ones that are worth remembering. keyboad shortcuts⊞ WINDOWS + N - notification panel ⊞ WINDOWS + W - News and Interests feed With the News and Interests feed, Windows 11 offers users the ability to check the latest news, the weather, and more without opening a browser window. ⊞ WINDOWS + Z - Snap Layout Instead of the usual two windows snapping capability, Windows 11 allow users to snap their windows in a three-column layout. Users can access this by pressing Windows Key and Z to access the Snap layout. ⊞ WINDOWS + PRT SCN - taking screenshots This one isn’t exactly new, but pressing the Windows Key and Print Screen will automatically capture the entire screen and save a copy of the image on your PC. Once the screen flashes, you will know that the screenshot has been taken, after which you can find the file saved under your Pictures folder in a subfolder called Screenshot. ⊞ WINDOWS + C - Microsoft Teams chat Microsoft Teams app, the service allows anyone with a Microsoft account to quickly start a chat using the Windows + C shortcut.
Read More
Windows 11 ISO Insider Preview Build 22000.132
windows 11Microsoft just released Windows 11 ISo file, based on the latest Insider Preview Build 22000.132. Inside build, you can try all-new features like clock updated app, snip tool, and everything releases so far via various patches. You can also use Windows 11 ISO file to do a clean install on your computer, but if you go with this option all of your existing files will be deleted. Microsoft says it added the ability to name your PC during the setup experience. You’ll also get to experience the Get Started app that’s designed to help you get going on your new Windows 11 PC (even if it’s not actually a new one).

Download ISO

  • Go to the Windows Insider Downloads page. You will need to sign in with a Microsoft account registered with the Insider Program.
  • Scroll down to Select Edition and select the build you want to download. You will most likely want the one at the top from the developer channel, as this is where Windows 11 should arrive first. So far, only Windows 10 builds are available. Click confirm.
  • Select your preferred language. Not all languages ​​available for Windows are compatible with the Insider program, so you may have to stop depending on where you are from.
  • Click the download button and the ISO file will start downloading.
  • This is definitely an easier method, but unfortunately, it is not available yet. We will update this article once Windows Insider ISOs are available. Later, once Windows 11 64 bit is available to everyone, you can also download the stable build of Windows 11 iso. Microsoft offers the Media Creation Tool and Upgrade Assistant, which usually do just that. It will be some time before Windows 11 versions of the tools are available, as the operating system is only getting closer to this holiday.
Read More
Could not configure one or more components
If you are trying to install or upgrade your Windows 10 computer but suddenly encountered an error message saying, “Windows could not configure one or more system components”, read on as this post will show you how you can fix the problem. You are not alone in experiencing this problem as other users also reported having the same scenario. Some of them reported getting the following error message:
“Windows could not configure one or more system components. To install Windows restart the computer with error code 0xc1900101-0x30018.”
When you check on the Windows 10 rollback log, you will see a part with the “iisetup.exe” that’s related to the abort. Usually, the upgrade process completes over 50% and gets stuck and then rolls back later on and generates the error logs. This kind of error, in most cases, appears during the upgrade of Windows 10 and is related with the Internet Information Services or IIS in Windows 10. For some unknown reason, it restricts the installation or the upgrade which causes the error to appear. To fix the “Windows could not configure one or more system components” error, you can try to remove the IIS from the Windows Features or rename the “inetsrv” folder. You could also move all the folders related to IIS to another drive. For more details, refer to the options provided below.

Option 1 – Try to remove the IIS from Windows Features

The IIS is installed from the Windows Features and you can find it at Control Panel > Programs. From there, uncheck the checkbox for the Internet Information Services. Once done, click on the OK button to save the changes. Note that this process will get rid of all the related programs, services, and folders from Windows 10. So if you want to, you can just install them later on or use an offline installer from the official site of Microsoft.

Option 2 – Try renaming the inetsrv folder

The next option you can check out to resolve the problem is to rename the “inetsrv” folder. If you have uninstalled IIS from the Windows Features, this should remove the folders as well, however, it didn’t remove the folder then you have to delete the folders that are related to the IIS by following these steps:
  • First, you have to boot into the Advanced Recovery Mode and from there, open Command Prompt.
  • Next, execute this command to rename the folder from this location, C:Windowssystem32inetsrv: rename C:/Windows/system32/inetsrv/inetsrv.old
  • Once done, boot into your computer normally and try to upgrade Windows 10 again, and check if the problem is fixed or not.

Option 3 – Try to move the folders related to IIS to a different drive

  • Tap the Win + R keys to launch the Run utility and type “services.msc” in the field and hit Enter to open the Windows Services Manager.
  • Next, look for the Application Host Helper Service from the list of services and stop it.
  • Once done, take ownership of the “WinSxS” folder and then move the *windows-iis*.*” folders to another drive. You can just search using the “*windows-iis*.*” keyword in the Start Search.
  • Next, tap the Ctrl + X keys and paste the folders to another drive.
  • After that, start the update process for Windows 10 again.
Read More
How to Rectify Error 0xC1900101, 0x20017 in Windows 10

Error Code 0xC1900101, 0x20017 – What is it?

Error code 0xC1900101, 0x20017 in Windows 10 occurs when Windows users attempt to upgrade to Windows 10 but fail to complete the installation process. This Windows error code may occur due to issues with a third-party antivirus program or problems related to a driver or hardware. When this occurs users will receive an error message and their machine will automatically revert to the original operating system on the device. Common symptoms of the error code include the following:

  • Error code 0xC1900101-0x20017 message box
  • Inability to complete Windows 10 upgrade

Solution

Restoro box imageError Causes

Like many other error codes affecting Windows 10 users, 0xC1900101-0x20017 may result due to several different reasons. Oftentimes, error code 0xC1900101 -0x20017 affects users who attempt to upgrade their operating system but have incompatible drivers or hardware as well as antivirus or other security systems which prevent the upgrade from occurring. If this error message is not resolved, it could give birth to other error messages such as error code 0x80070652

Further Information and Manual Repair

To fix this particular error code affecting Windows 10 devices, you will need to employ at least one manual repair method mentioned within this article. Manual repair methods offer effective solutions as they seek to address the root causes related to Windows error codes. When the manual repair methods are implemented correctly, users are usually able to quickly overcome issues that cause Windows error codes and can thereafter access all the benefits Windows has to offer to its users.

Note, however, that in a few cases where technical skills are required, the need for a Windows repair technician may present itself. In such a case, resort to Windows forums and other resources to access help from a certified Windows professional. Also, consider using an automated tool where necessary.

Method One: Temporarily Disable or Uninstall Third-party Security Software

Some third-party security programs or antivirus software may interfere with the installation process when Windows users attempt to upgrade to Windows 10. To verify if this is the issue causing error code 0xC1900101-0x20017 on your device, temporarily uninstall or disable these applications. You may easily do so by checking the settings of these programs or visiting Settings within the Windows Start Menu.

Once you have disabled these programs on your device, reboot your machine and attempt to update to Windows 10. If the issue was caused by a third-party app, error code 0xC1900101-0x20017 will no longer occur and your machine will successfully upgrade to the version of Windows 10 you attempt to download.

However, in the case where error code 0xC1900101-0x20017 in Windows 10 reoccurs during the installation process, you will need to resort to another manual repair method listed below.

Method Two: Disable Firewall Software

Like method one, this manual repair method can be effective in combating issues related to 0xC1900101-0x20017. This is of course, dependent on whether or not the error code is due to an incompatible security program.

Temporarily disable your firewall by adjusting its settings. Once this step is complete, reboot your machine and attempt to install the latest version of Windows 10. If you are able to complete the process, this means the problem was due to an issue with your firewall. You can then enable the firewall you previously disabled or download another program as its replacement.

If the error code reoccurs, however, consider implementing the next manual repair method on this list.

Method Three: Use Command Prompt to Check for Damaged System Files

Command Prompt can be very effective in helping regular as well as technically skilled users repair issues with their PC. In the case of error code 0xC1900101-0x20017 in Windows 10, access Command Prompt using the following instructions.

  • Step one: Right-click Start Menu
  • Step two: Select Command Prompt (Admin)
  • Step three: Type sfc /scannow

Be sure to enter the command as it is written above, with a space between “sfc” and “/scannow”. Wait until the scan is complete. If there are any errors related to system files, i.e. if any system files are damaged, corrupted, or missing, your machine will begin to fix it. Once the process is complete, reboot your PC then reattempt the Windows 10 upgrade process via Windows Update. If you are successful, it means that you have rectified error code 0xC1900101-0x20017. Otherwise, you may need to contact a Windows repair technician.

Method Four: Download an Automated Tool

If you wish to always have at your disposal a utility tool to fix these Windows 10 and other related issues when they do arise, download and install a powerful automated tool.

Read More
1 2 3 162
Logo
Copyright © 2022, ErrorTools. All Rights Reserved
Trademarks: Microsoft Windows logos are registered trademarks of Microsoft. Disclaimer: ErrorTools.com is not affiliated with Microsoft, nor claim direct affiliation.
The information on this page is provided for information purposes only.
DMCA.com Protection Status