Fix Err_Connection_Closed in Windows

If you suddenly encounter an error message that says, “This webpage is not available, Err_Connection_Closed” while browsing the internet or visiting a website and the website fails to load, then it means that there is some problem with your network connection. Similarly, you may also get other error messages like “Err_Network_Changed”, “Err_Connection_Reset” and “Err_Internet_Disconnected” errors in different browsers like Chrome, Firefox, and Edge.

The problem lies in your Windows 10 computer and your internet connection since this is a network issue. So before you troubleshoot the problem using the suggestions given below, you need to refresh your browser first or you could also tap Ctrl + F5 on your keyboard to hard reload the webpage. If you’re still getting the same error message, then proceed to the guide below.

Option 1 – Try removing the Proxy

Removing the Proxy might also help you in fixing the “This webpage is not available, Err_Connection_Closed” error. Here’s how you can do it:

  • Tap the Win + R keys to open the Run dialog box.
  • Then type “inetcpl.cpl” in the field and hit Enter to pull up the Internet Properties.
  • After that, go to the Connections tab and select the LAN settings.
  • From there. Uncheck the “Use a Proxy Server” option for your LAN and then make sure that the “Automatically detect settings” option is checked.
  • Now click the OK and the Apply buttons.
  • Restart your PC.

Note: If you are using a third-party proxy service, you have to disable it.

Option 2 – Try using Google Public DNS

If the first option didn’t resolve the issue, you can try to use the Public DNS by Google and see if it can help fix the problem. You have to modify the DNS settings in your system explicitly and use the DNS IP addresses.

  • The first thing you have to do is right-click on the network icon in the Taskbar and select Network and Sharing Center.
  • Next, click on the “Change Adapter Settings” option.
  • After that, search for the network connection that you are using to connect to the internet. Note that the option might be “Wireless Connection” or “Local Area Connection”.
  • Right-click on your network connection and click on Properties.
  • Then select the new window to choose the “Internet Protocol 4 (TCP/IPv4)” option.
  • After that, click on the Properties button and click the checkbox in the new window for the option “Use the following DNS server addresses”.
  • Type in “8.8.8.8” and “8.8.4.4” and click OK and exit.

Option 3 – Reset Winsock, TCP/IP & Flush DNS

Resetting Winsock, TCP/IP, and flushing DNS might help you resolve the Err_Connection_Closed error. To do so, follow these steps:

  • Right-click on the Start button and click on Command Prompt (administrator) so you can pull up an elevated Command Prompt.
  • After that, execute each one of the commands listed below. And after you typed in one after the other, you have to hit Enter.
  1. netsh winsock reset – type in this command to reset Winsock
  2. netsh int ip reset resettcpip.txt – type in this command to reset TCP/IP
  3. ipconfig /flushdns – type in this command to flush the DNS cache
  • Next, restart your PC and check if the problem’s fixed.

Option 4 – Disable both the Antivirus program and Firewall temporarily

There are times when antivirus programs and the firewall blocks a website that they consider to be malicious or even because of false-positive effects which is why you have to disable these programs temporarily as it might be the reason why you’re getting the “This webpage is not available, Err_Connection_Closed” error when trying to browse the internet.

Option 5 – Try to check the network cables and then restart your router

The most obvious thing you can do first is to try checking if the network cables connected to your computer or router are properly connected or not. If it turns out that some network cables are not connected properly, then it’s probably why you’re getting this error.

Option 6 –Try a Network Reset

When all else fails, you might have to consider resetting your entire network settings. Simply follow the steps below to do so.

  • Click on the Start button and then click on the gear-like icon for Settings to open it.
  • Next, select Network and Internet.
  • Then scroll down and look for “Network Reset” – click on it and then click on the Reset now button.
If you like to learn and find out more about various Windows errors, and how to repair them go to our vast archive or use search to find articles that will explain and help you in solving your issue.
However, if you prefer to do things fast and with automatization then we are proposing to use an automated solution for your issues. The application that we are recommending is Advanced System Repair Pro
Advanced System Repair utilizes multiple tools all in one to give you a quick, simple, reliable, and very thorough diagnosis of your PC. It brings you all the tools you need in one program to clean, fix, protect, optimize and boost your PC!
1-Click Maintenance
All the tools to make it simple and easy! It's like having a professional technician at the click of a mouse.

Junk Cleaner
Keeping your computer free from unnecessary clutter also helps make your computer last longer. Like any other machine, if you keep it clean and take care of it, it will serve you better for longer!

Optimize background apps
Optimize applications background activity with the built-in Application Optimizer feature.

Disk Defrag
With a simple 1-click, Advanced System Repair speeds up your PC by assembling fragmented files on your machine and organizing them more efficiently.

Malware Removal
Finds and removes all types of harmful malware including trojans, worms, bots, adware, spyware, PUPs, and more!

Privacy Cleaner
The all-in-one privacy suite to Clean Your Tracks & Protect Your Privacy! Make your computer safe, secure, and more efficient!

System Tweak/Optimizer
ASR will analyze your complete system and settings to adjust your PC to function at its maximum performance.

Registry Cleaner
Over time, as you install and uninstall applications, the registry can become cluttered with old entries and broken settings which can result in program crashes, and annoying messages and slow the computer down.
Visit our Advanced System Repair Pro Download page to inform yourself about all the benefits of this software and get a free trial copy of it.
advanced system repair pro

Advanced System Repair Pro

One-click automated PC repair solution
ASR logo
With Advanced System Repair Pro you can easily
Replace damaged files
Restore performance
Free disk space
Remove Malware
Protects WEB browser
Remove Viruses
Stop PC freezing
DOWNLOAD
Privacy Policy | Terms of Use | Uinstall
Advanced System Repair Pro is compatible with all versions of Microsoft Windows including Windows 11

Share this article:

You might also like

6 colors of Western Digital
I must admit that I am a big Western Digital fan, I have been using their hard drives really long time and I must admit that I am very happy with their products. Sometimes they could be a little more expensive than other drives on market but security and performance are on their side. If you ever wanted to purchase Western Digital or WD hard drives or you are considering getting one, no doubt that you have come across their color cryptic line of products. 1TB Hard drive can come in 6 different colors in your search products query and if you are not familiar with the WD color coding of hard drives you might be a little lost as to which one is right for you and what are the differences. This article is made to explain exactly that, what are WD colors representing so you can choose the right one for your needs. Western Digital has decided to use color codes in order to mark their series of disks which means that each color represents different hard drive series and it is made and aimed for different use, we are going to explore in detail each series below:

WD BLUE

Blue series is all around typical hard drive made and meant for daily use in desktop computers for all kinds of tasks. You can use it in casual gaming or for storage, its purpose is tailored for all-around casual daily users.

WD RED

WD Red HDD is designed for NAS and RAID systems. Its purpose is to be turned 24/7 who ever need access to it. Get this series if you need to have constant access to files or if you need a reliable RAID hard drive.

WD GREEN

Green series of the hard drive is manufactured for low power consumption and for storage, they are meant to be used for storage and not accessed regularly.

WD PURPLE

Purple line of hard drive products is designed solely for video surveillance systems. Instead of having a preference on reading data like WD RED, the PURPLE series is given preference on writing, constant writing to be more precise.

WD BLACK

The black series is made for an external storage medium with high performance. Due to the high performance, WD Black hard drives are much popular among photo editors and high-end gamers.

WD GOLD

WD Gold HDD provides a long-term cold storage medium. Therefore, this series of Western Digital hard drives are suitable for data centers. These hard drives can handle many sophisticated systems simultaneously and work well with different servers That's it, I hope that you have now a more clear understanding of the WD color-coding of its hard drive series. As always thank you for reading and I hope you will have a great day. If you would like to read more helpful articles and tips about various software and hardware visit errortools.com daily.
Read More
INF file doesn't support this installation
If you got an error message saying, The INF file you selected does not support this method of installation while trying to install a driver using the “Install” option in the right-click context menu, read on as this post will guide you in fixing the problem. The INF file mentioned in the error message is a text file that’s divided into different types of formatted sections. Each one of the sections is designed for a particular purpose. For instance, one section is designed to copy files or to add entries to the registry. INF files are used to install drivers. However, if something is wrong, you might encounter this error while installing a driver on your Windows 10 computer. To resolve this problem, you can try to download the driver again from the official manufacturer website or check if the driver is compatible with your computer’s operating system architecture or you can also try installing the driver from the Device Manager. For more details, follow the given options below.

Option 1 – Try downloading the driver again from the official website of the manufacturer

Usually, you shouldn’t encounter this kind of issue no matter what installation method you used on your Windows 10 PC. However, there are times when the driver itself is corrupted for some reason which is why you are unable to complete the installation and receive an error message instead.

Option 2 – Try checking if the driver is compatible with the OS architecture

It is possible that you’re getting this error if you have a driver that is compatible with a 32-bit system and you are trying to install it on a 64-bit system and vice versa. Thus, you need to check if the driver you are trying to install is compatible with your operating system if you haven’t done it when you’ve downloaded the driver from the website of the manufacturer. To check the system architecture, in the Start Search, type “msinfo32” in the field and hit Enter to open the System Information window. From there, you should see all the information about your operating system. In addition, you can also search “system information” in the Cortana search box and look for the System Type entry and open it.

Option 3 – Try installing the driver from the Device Manager

If you have the driver files on your PC and you have to update a driver, refer to the steps given below to be guided on how to install the driver from the Device Manager.
  • First, click the Start button and type “device manager”.
  • Then click on the “Device Manager” from the search results to open it.
  • From there, look for the driver you want to update, and then right-click on each one of them and select the Update Driver from the menu.
  • After that, click on the “Browse my computer for driver software” option.
  • Next, select the “Let me pick from a list of available drivers on my computer” option and then click the Next button.
  • On the next screen, you should see the “Have Disk” option. Click on this option and then click on the Browse button to go to the location of the file. After that, you shouldn’t have any problem installing the INF file.

Option 4 – Try running the System File Checker Scan

The SFC or System File Checker scan could detect and automatically repair damaged system files that could be causing the “The INF file you selected does not support this method of installation” error. SFC is a built-in command utility that helps in restoring corrupted files as well as missing files. It replaces bad and corrupted system files with good system files. To run the SFC command, follow the steps given below.
  • Tap Win + R to launch Run.
  • Type in cmd in the field and tap Enter.
  • After opening Command Prompt, type in sfc /scannow
The command will start a system scan which will take a few whiles before it finishes. Once it’s done, you could get the following results:
  1. Windows Resource Protection did not find any integrity violations.
  2. Windows Resource Protection found corrupt files and successfully repaired them.
  3. Windows Resource Protection found corrupt files but was unable to fix some of them.
 Now restart your computer.
Read More
How to Remove PUP ExpressFiles Tutorial

ExpressFiles is a program developed by Express Solutions. A number of Anti-Virus programs have flagged this program as a Potentially Unwanted Application. In many instances, it is bundled with additional programs on installation.

The program claims it offers users easy to search for various currently popular search terms. During our testing, the software never displays any search results, no matter the search words. Upon installation and setup, it defines an auto-start registry entry which makes this program run on each Windows boot for all user logins. A scheduled task is added to Windows Task Scheduler in order to launch the program at various scheduled times. The program defines an exception rule in Windows Firewall, allowing it to connect to the internet without limitations and auto-update itself.

About Browser Hijackers

Precisely what is a PUP?

If you’ve ever downloaded a free application or shareware, chances are high that the computer can get installed with a bunch of unwanted applications. A PUA / PUP (potentially unwanted application / potentially unwanted program) is a software program that comes bundled with free software and you consent to install it on your PC. These are programs you almost certainly don’t want on your computer simply because it doesn’t give any valuable service. Despite being regarded as very detrimental, PUPs aren’t always viruses or malware One simple difference between PUP and malware is distribution. Malware is normally dropped by silent installation vectors like drive-by downloads while PUP gets installed with the consent of the computer user, who purposefully or unknowingly approves the PUP installation on its PC. Having said that, there is no doubt that PUPs remain bad news for PC users as they can be incredibly damaging to the computer in numerous ways.

Exactly how do unwanted programs look like?

Potentially Unwanted Programs appear in different forms and varieties, however, in the majority of instances, they are adware programs that exhibit irritating pop-up ads and advertisements on websites you explore. In addition, the majority of free programs these days come with some unwanted add-ons; in most cases an internet browser toolbar or browser modification like a homepage hijacker. They’ll keep track of your online routines, redirect your search results to risky websites where viruses can be downloaded and installed, hijack your home page, and slow your browser down to a crawl. Potentially Unwanted Programs occasionally act quite much like computer viruses or spyware. They might carry keyloggers, dialers, browser hijackers, and tracking components that gather system details, or tracks customer habits and relays this information to third-party firms. Even if the PUPs really aren’t basically malicious, these software programs still do absolutely nothing good on your personal computer – they will take valuable system resources, slow down your PC, weaken your computer security, and make your system more susceptible to trojans.

How do you avoid PUPs?

• Read cautiously before accepting the license agreement as it may have a clause about PUPs. • Always opt for the custom if you’re presented an option between “Custom” and “Recommended” Installations – never click Next, Next, Next blindly. • Have a top-notch antivirus program like Safebytes Anti-Malware which can protect your computer from PUPs. As soon as you install this software, protection from malware and PUPs is already switched on. • Think carefully before you download any kind of shareware or freeware. Disable or get rid of toolbars and browser extensions you don’t really need. • Only use official product websites for downloading programs. Stay away from download portals altogether as most websites compel users to download the software using their own download manager, which is often bundled up with some sort of PUPs.

What To Do If You Cannot Install Any Anti-Malware?

All malware is bad, but certain types of malicious software do a lot more damage to your computer than others. Some malware types modify browser settings by adding a proxy server or modify the PC’s DNS settings. In these instances, you will be unable to visit some or all of the websites, and therefore not able to download or install the required security software to remove the infection. If you are reading this right now, you have perhaps recognized that a malware infection is a reason for your blocked web connectivity. So how to proceed when you want to install an anti-malware application like Safebytes? Follow the instructions below to eliminate malware by alternative methods.

Install in Safe Mode

The Windows-based PC comes with a special mode called “Safe Mode” where just the bare minimum required applications and services are loaded. If the malware is set to load immediately when the computer starts, shifting to this mode may well prevent it from doing so. In order to enter into Safe Mode or Safe Mode with Networking, press the F8 key while the PC is starting up or run MSConfig and locate the “Safe Boot” options under the “Boot” tab. As soon as you restart the PC into Safe Mode with Networking, you could download, install, and update anti-malware software from there. Right after installation, run the malware scanner to get rid of standard infections.

Utilize an alternate internet browser to download antivirus software

Web-based malware could be environment-specific, targeting a specific web browser or attacking particular versions of the web browser. If you’re not able to download the anti-virus application using Internet Explorer, this means the virus is targeting IE’s vulnerabilities. Here, you need to switch to a different web browser such as Chrome or Firefox to download the Safebytes Anti-malware program.

Install and run antivirus from a Thumb drive

Here’s yet another solution which is creating a portable USB anti-virus software that can scan your computer for malware without the need for installation. Try these simple actions to clean up your infected computer using portable anti-malware. 1) Download Safebytes Anti-Malware or Microsoft Windows Defender Offline onto a clean PC. 2) Mount the pen drive on the same PC. 3) Run the setup program by double-clicking the executable file of the downloaded software, which has a .exe file extension. 4) Select the drive letter of the USB drive as the location when the wizard asks you exactly where you would like to install the anti-malware. Follow activation instructions. 5) Now, insert the thumb drive into the corrupted PC. 6) Run the Safebytes Anti-malware directly from the pen drive by double-clicking the icon. 7) Click the “Scan” button to run a full computer scan and remove viruses automatically.

Overview of SafeBytes Anti-Malware

If you are looking to download the anti-malware program for your computer, there are lots of tools in the market to consider nonetheless, you just cannot trust blindly anyone, irrespective of whether it is free or paid software. A few of them do a great job in removing threats while some will ruin your PC by themselves. You need to pick a company that develops industry-best antimalware and has achieved a reputation as trustworthy. When considering commercial tool options, most people opt for well-known brands, such as SafeBytes, and they are quite happy with it. SafeBytes anti-malware is really a powerful, very effective protection software made to help users of all levels of computer literacy in detecting and removing malicious threats out of their computer. Using its outstanding protection system, this utility will quickly detect and get rid of the majority of the security threats, which include adware, viruses, browser hijackers, ransomware, PUPs, and trojans. SafeBytes anti-malware takes computer protection to a totally new level with its advanced features. Here are a few typical features present in this software: Live Protection: SafeBytes offers complete and real-time security for your laptop or computer. It’ll regularly monitor your computer for hacker activity and also gives end-users superior firewall protection. Most Reliable AntiMalware Protection: With its enhanced and sophisticated algorithm, this malware elimination tool can find and eliminate the malware threats hiding in your PC effectively. “Fast Scan” Features: SafeBytes’s high-speed malware scanning engine minimizes scanning times and extends battery life. Simultaneously, it will effectively identify and remove infected computer files or any online threat. Web Protection: SafeBytes checks and gives a unique safety ranking to each and every website you visit and block access to webpages considered to be phishing sites, thus safeguarding you from identity theft, or known to contain malicious software. Low CPU/Memory Usage: SafeBytes is well known for its low effect on computer resources and great detection rate of diverse threats. It runs quietly and efficiently in the background so you’re free to use your PC at full power all of the time. 24/7 Premium Support: SafeBytes gives you 24/7 technical support, automatic maintenance, and upgrades for the best user experience.

Technical Details and Manual Removal (Advanced Users)

If you wish to manually remove ExpressFiles without the use of an automated tool, it may be possible to do so by removing the program from the Windows Add/Remove Programs menu, or in cases of browser extensions, going to the browsers AddOn/Extension manager and removing it. You will likely also want to reset your browser. To ensure the complete removal, manually check your hard drive and registry for all of the following and remove or reset the values accordingly. Please note that this is for advanced users only and may be difficult, with incorrect file removal causing additional PC errors. In addition, some malware is capable of replicating or preventing deletion. Doing this in Safe Mode is advised.

The following files, folders, and registry entries are created or modified by ExpressFiles

Files: %APPDATAExpressFilescurrent-cloud.html %COMMONDESKTOPExpressFiles.lnk %COMMONSTARTMENUExpressFilesExpressFiles.lnk %COMMONSTARTMENUExpressFilesUninstall.lnk %PROGRAMFILESExpressFilescurrent-cloud.de.html %PROGRAMFILESExpressFilescurrent-cloud.en.html %PROGRAMFILESExpressFilescurrent-cloud.fr.html %PROGRAMFILESExpressFilescurrent-cloud.ru.html %PROGRAMFILESExpressFilesEFupdater.exe %PROGRAMFILESExpressFilesExpressDL.exe %PROGRAMFILESExpressFilesExpressFiles.exe %PROGRAMFILESExpressFilesuninstall.exe %WINDIRTasksExpress Files Updater.job %APPDATAExpressFiles %COMMONSTARTMENUExpressFiles %PROGRAMFILESExpressFileslanguage %PROGRAMFILESExpressFiles Registry: key ExpressFiles.exe at HKEY_LOCAL_MACHINESOFTWAREConduitAppPaths. key ExpressFiles at HKEY_CURRENT_USERSoftware. key ExpressFiles at HKEY_LOCAL_MACHINESOFTWARE. key ExpressFiles at HKEY_USERS.DEFAULTSoftware. HKEY_CLASSES_ROOTMagnetsshellopencommand value $PROGRAMFILESExpressFilesExpressDL.exe at HKEY_LOCAL_MACHINESYSTEMControlSet001ServicesSharedAccessParametersFirewallPolicyStandardProfileAuthorizedApplicationsList. value $PROGRAMFILESExpressFilesExpressDL.exe at HKEY_LOCAL_MACHINESYSTEMControlSet002ServicesSharedAccessParametersFirewallPolicyStandardProfileAuthorizedApplicationsList. value $PROGRAMFILESExpressFilesExpressDL.exe at HKEY_LOCAL_MACHINESYSTEMControlSet003ServicesSharedAccessParametersFirewallPolicyStandardProfileAuthorizedApplicationsList. value $PROGRAMFILESExpressFilesExpressFiles.exe at HKEY_LOCAL_MACHINESYSTEMControlSet001ServicesSharedAccessParametersFirewallPolicyStandardProfileAuthorizedApplicationsList. value $PROGRAMFILESExpressFilesExpressFiles.exe at HKEY_LOCAL_MACHINESYSTEMControlSet002ServicesSharedAccessParametersFirewallPolicyStandardProfileAuthorizedApplicationsList. value $PROGRAMFILESExpressFilesExpressFiles.exe at HKEY_LOCAL_MACHINESYSTEMControlSet003ServicesSharedAccessParametersFirewallPolicyStandardProfileAuthorizedApplicationsList.
Read More
Windows Setup in Continuous Reboot Loop on Windows 10 Fix

Windows Setup in Continuous Reboot Loop – What is it?

After upgrading to Windows 10 operating system from Windows 7 or Windows 8/8.1, a lot of Windows users are complaining about the Windows setup in a continuous reboot loop. The computer would just keep on rebooting every time the machine is booted and this incites frustration for a lot of Windows users.

Solution

Restoro box imageError Causes

When Windows launched the third update for Windows 10, users trying to upgrade to Windows 10 encountered an endless reboot loop problem. The computer will crash repeatedly. The KB3081424, which is a roll-up of bug fixes of Windows 10, continuously fails once you start the update process and then triggers a message showing: “We couldn’t complete the updates, undoing the changes.” The undoing process will then cause a system reboot mandatorily.

Once you log back on your computer again, the Windows 10 update will try to reinstall KB3081424. You will not be able to stop the update which will cause your Windows setup in a continuous reboot loop.

The KB3081424 will not be successfully installed since if it fails for the first time, that initial failure can be detected to create a bad entry in your Windows 10 registry. This will then prevent your subsequent attempts to reinstall KB3081424 to make it work correctly.

Further Information and Manual Repair

In order to fix the problem of Windows 10 setup in a continuous reboot loop, there are a few methods you can try. Try following these simple steps and you’ll be able to get rid of the problem.

Note: If you’re not highly confident to solve this issue on your own, it is highly recommended to consult an authorized computer technician who would be knowledgeable enough to fix the issue for you. In addition, you can also use a system optimizer to resolve the issue.

Method One: Check For Windows Update

Microsoft Windows released an updated fix for the Windows setup in continuous reboot loop problem. You can try fixing the issue through Windows Update.

  1. Open Settings
  2. Go to Update & Security
  3. Select Windows Update then choose Check for updates
At this point, an additional update will be installed and downloaded to your operating system to resolve the continuous reboot loop problem.

Method Two: Eliminate Bad Registry Entry

Before KB3081424 attempts to install again, you can try doing this solution:

  1. Click on the Start menu then type regedit
  2. Once the window opens, go to HKEY_LOCAL_MACHINESOFTWAREMicrosoftWindows NTCurrentVersionProfileList
  3. Create a backup for your registry key (since this process is a bit risky). Select ProfileList then click on File and Export then choose your backup name.
  4. From the ProfileList IDs, remove anything with ProfileImagePath in it.
  5. Close Regedit then reboot. By this time, the KB3081424 should properly install.

Method Three: Perform A Startup Repair

Another thing you can try to solve the Windows setup in continuous reboot loop problem is to perform a startup repair from a working computer.

  1. Ensure that all unnecessary devices are disconnected from your computer as your computer might detect them.
  2. If you are connected to a network, you need to disconnect from this as well.
  3. On a working computer, download the Windows 10 ISO then you can perform a startup repair.
  4. Boot your computer from the Windows 10 DVD.
To change your BIOS option to boot from the Windows 10 DVD, follow these steps:
  1. Boot your computer then press the F2 function key to enter setup.

NOTE: You must do this quickly since the BIOS loads rapidly.

  1. Once you’re inside the BIOS, navigate to the Boot Configuration screen. On this screen, you’ll be able to change the first device to be loaded.
  2. Go to Removable Devices then hit Enter. Removable devices could either be a thumb drive or DVD. Select DVD to put it at the top and be the first boot device.
  3. Save your changes by pressing on the F10 function key. A setup confirmation box will appear with a message Save configuration changes and exit now. Select Yes.
  4. Exit BIOS by pressing on the ESC key. You should be prompted to boot from the Windows 10 DVD at this point.
If you're not able to execute the aforementioned processes on your own, get help or download and install a powerful system optimizer to assist with the windows continuous reboot loop process and other Windows 10 error messages.
Read More
Disabling Security Questions in Windows
We’ve already covered disabling Security Questions If you want to disable Security Questions on your Windows 10 computer then you’ve come to the right place as this post will guide you in doing exactly that. In this post, you will be disabling Security Questions using a PowerShell script. This PowerShell script is called “Update-AllUsersQA”. It is designed to remove or disable the security questions and answers for local users on a Windows 10 computer. It lets administrators take control of the security questions in the environment and at the same time minimizes the risk that comes with them. If a user has a Microsoft account that’s configured to sign in to Windows 10 then he will not probably notice the Password Recovery questions. On the other hand, if he has a chosen local account for installing Windows, he will e prompted to create three security questions that can be used to reset the password and log into the Windows 10 account in case there is any misfortune. However, if you do not have much use for these Security Questions, then you can definitely have them disabled using a simple PowerShell script which you can download from GitHub. For more details on how to disable security questions in a Windows 10 machine, refer to the steps provided below. Step 1: You need to first download the .ps1 file from the GitHub repository. Step 2: Once you’ve downloaded the file, open the PowerShell window with admin privileges. Step 3: After that, navigate to the folder where you had saved the .ps1 file. Then copy the address of the folder location. Step 4: Next, change the directory by using the following command:
cd "folder location address"
Step 5: After that, enter the following script to disable the security questions:
Update-AllUsersQA
Once you’ve completed the steps above, the Security Questions should be disabled and you will be notified with a message stating that the feature has been disabled. On the other hand, if you have a change of heart and you want to enable the Security Questions back, here are some steps you need to take: Step 1: First, open the PowerShell window as admin. Step 2: Next, run the same script with one more parameter such as:
Update-AllUsersQA -answer SecretAnswer
Step 3: And that’s about it. Do not forget to replace the Secret Answer with your preferred one and once you’re done, it will be set as the answer for all the Security Questions. Step 4: Now all that’s left to do is go to the Settings app to change the answer to the questions and you should be good to go.
Read More
Windows 10 exploit using App installer
Scammers have decided to target Windows’s 10 App installer process in order to infect your computer and steal your data. windows 10 mail exploitAs in most usual online scams, everything starts with a strange email containing threats and other poorly written and composed speech. At the end of the given email, there would be a link claiming that you, of course, need to read it and follow instructions about the threat, if you click the link it will open a web page where you will have an innocent-looking PDF file with more information about the threat itself. If you click on a seemingly innocent PDF file it will summon Windows 10's AppInstaller.exe tool, kickstarting a download-and-run process that'll put you in a bad place very quickly. From there, you'll have to deal with the dangers of malware BazarBackdoor, including data and credential theft. 
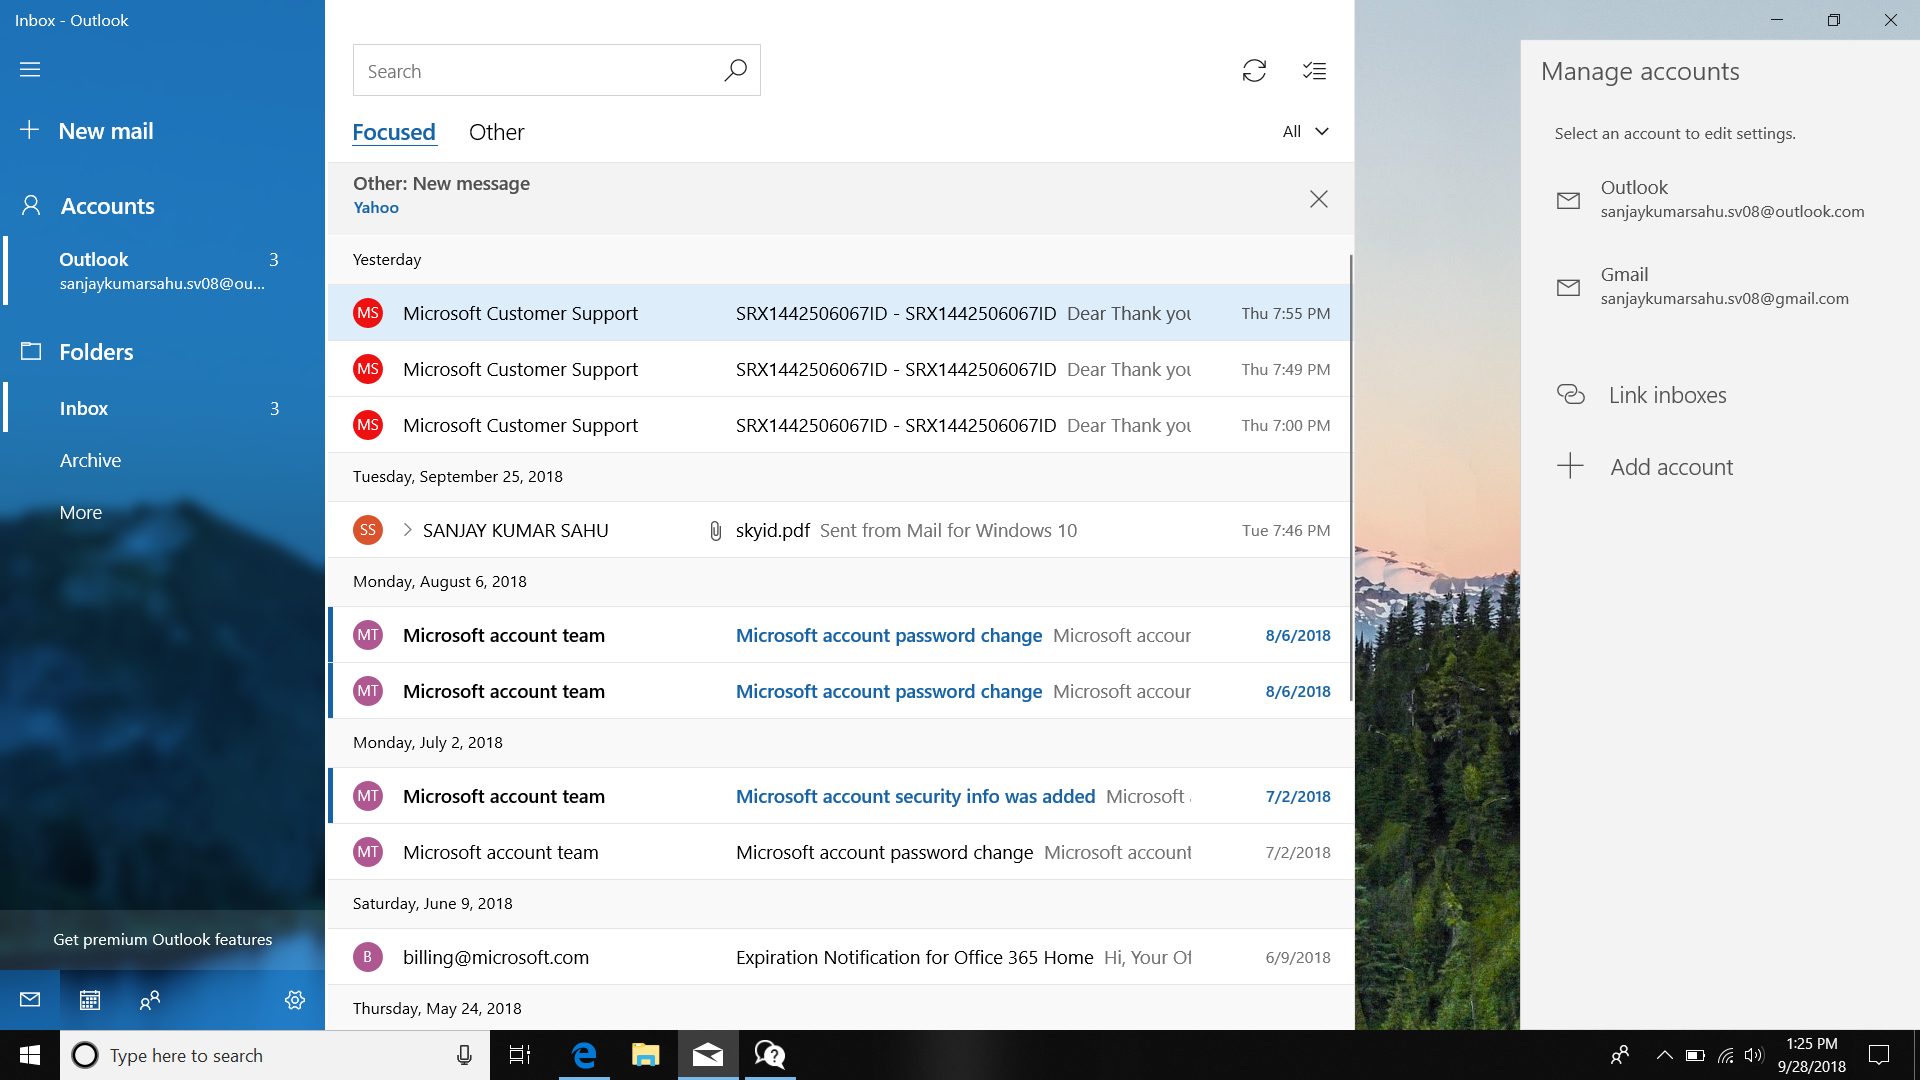
This kind of scam is nothing new but the interesting thing here is that it uses App installer and by clicking on a link you are opening and giving permission for a malicious crook to use it. So, stay safe and do not click on any links from unknown emails no matter what.
Read More
Windows is stuck in Airplane Mode
As of late, a number of users reported experiencing a problem where their Windows 10 computers get stuck on Airplane mode for some unknown reason. According to the affected users, they were unable to turn off the Airplane mode which means that their computers are also not able to connect to the internet. One of the possible reasons why this kind of issue occurs is that there could be a bug with the airplane mode or it could also be the doing of faulty network drivers or physical switch that’s turned on, and so on. If you are one of the few users who experience the same issue, then read on as this post will guide you on what to do if your Windows 10 computer gets stuck on Airplane mode. There are a couple of suggestions you can check out to resolve the problem. You can try to check the status of the Radio Management service, flush the DNS cache or you could turn off the airplane mode via system settings. You could also update the network drivers or turn off the physical switch for airplane mode or make some adjustments in the Windows Registry. For more details, refer to each one of the suggestions provided below.

Option 1 – Try to check the Radio Management Service status

  • First, tap the Win + R keys to open the Run dialog box and type “services.msc” in the field, and hit Enter to open the Windows Services Manager.
  • Next, look for the Radio Management service and select Properties.
  • From there, change its Startup type to Disabled and click on the Apply and OK buttons to save the changes made.
  • Once done, restart your computer and check if you can now turn off the airplane mode.

Option 2 – Flush the DNS cache

You could also try to flush the DNS cache to fix the “ERR_ICAN_NAME_COLLISION” error. All you have to do is open Command Prompt as an administrator and then execute each one of the following commands sequentially to flush the DNS cache:
  • ipconfig/release
  • ipconfig/renew
  • ipconfig/flushdns

Option 3 – Try turning off the airplane mode via System settings

If flushing the DNS cache did not help in fixing the problem, then you might want to turn off airplane mode via system settings.
  • In the Windows Search bar, type “airplane mode”.
  • From the search results that appear, click on Airplane mode.
  • After that, a window will appear where you have to turn off the toggle button for Airplane mode.

Option 4 – Try to update, rollback or reinstall the Network adapter drivers

The next thing you can do to resolve the problem is to update the Network Adapter drivers by following these steps:
  • Tap the Win + R keys to launch the Run window and then type in the “devmgmt.msc” command and hit Enter to open the Device Manager window.
  • Under the Device Manager, you will see a list of drivers. From there, look for the Network Adapters and expand them.
  • Look for the Broadcom Network Adapter and right-click on it, as well as other network adapters that have an exclamation icon, and update them all.
  • Restart your PC and see if it helped in fixing the problem.
Note: If updating the network drivers didn’t help in fixing the problem, you can also try to roll back the very same drivers from their previous versions and restart your Windows 10 PC. After that, the system itself will reinstall the drivers you just uninstalled. Alternatively, you can also download and install the drivers from the manufacturer’s website directly. To reinstall the network adapter drivers, refer to these steps:
  • Open the Devices Manager from the Win X Menu.
  • Then locate the device drivers and right-click on them to open the Properties.
  • After that, switch to the Driver tab and click on the Uninstall Device button.
  • Follow the screen option to completely uninstall it.
  • Finally, restart your computer. It will just reinstall the device drivers automatically.

Option 5 – Try to turn off the physical switch for Airplane mode

If your computer has a physical switch to turn on or off the airplane mode, then you might want to check that switch if you have one. Chances are, it could be the reason why you’re unable to turn off Airplane mode on your computer.

Option 6 – Try to make some adjustments in the Registry

  • Tap the Win + R keys to launch the Run utility.
  • Then type “Regedit” in the field and hit Enter to open the Registry Editor.
  • Next, navigate to this registry path: HKEY_LOCAL_MACHINESystemCurrentControlSetControlClass
  • From there, edit the registry value of “RadioEnable” to “1”.
  • Exit the Registry Editor once done, and restart your computer.
Read More
How to Fix REGISTRY_ERROR in Windows
As you know, you can encounter Blue Screen errors at any given point after your computer boots up and can just reboot it randomly which results in loss of unsaved work. One of these Blue Screen errors is the “REGISTRY_ERROR”. This kind of Stop error has a bug check value of 0x00000051 which indicates your computer’s registry has encountered a severe error. There could be a number of causes for this error but at the time of writing, it is quite difficult to narrow them down to one component. If you face this kind of Blue Screen error, worry not as this post will guide you in fixing it. As mentioned, this error indicates that there is something wrong with the registry, particularly an I/O error while it tried to read one of its files. This may be caused by hardware issues or file system corruption. It could also be due to failure in a refresh operation which is only used by the security system and only when resource limits are encountered. To fix the Registry_Error Blue Screen, you can try to use the CHKDSK utility or the System File Checker, or the DISM tool or run the Blue Screen troubleshooter. You may also try to reset your computer or repair Windows by using installation media.

Option 1 – Run the Check Disk utility

The first thing you can do to fix the REGISTRY_ERROR Blue Screen error is to run the Check Disk utility. How? Follow these steps:
  • In the Windows Search box, type “command prompt” and from the search results, right-click on Command Prompt and select “Run as administrator”.
  • After opening Command Prompt, type this command and tap Enter: chkdsk <Drive Letter>: /f /r /x /b
  • The command you entered will start to check for errors and fix them automatically. Else, it will throw an error message saying, “Chkdsk cannot run because the volume is in use by another process. Would you like the schedule this volume to be checked the next time the system restarts? (Y/N)”.
  • Tap the Y key to schedule Disk Check the next time your computer restarts.

Option 2 – Run the Blue Screen Troubleshooter

The Blue Screen troubleshooter is a built-in tool in Windows 10 that helps users in fixing BSOD errors like REGISTRY_ERROR. It can be found in the Settings Troubleshooters page. To use it, refer to these steps:
  • Tap the Win + I keys to open the Settings panel.
  • Then go to Update & Security > Troubleshoot.
  • From there, look for the option called “Blue Screen” on your right-hand side and then click the “Run the troubleshooter” button to run the Blue Screen Troubleshooter and then follow the next on-screen options. Note that you might have to boot your PC into Safe Mode.

Option 3 – Run System File Checker

  • Open Command Prompt with admin privileges.
  • After that, execute this command: sfc /scannow
  • Once the scan is completed, restart your computer and then check if the REGISTRY_ERROR is now fixed.

Option 4 – Run the DISM tool

You can try running the Deployment Imaging and Servicing Management or DISM tool to fix the REGISTRY_ERROR Blue Screen error. Using this built-in tool, you have various options such as the “/ScanHealth”, “/CheckHealth”, and “/RestoreHealth”.
  • Open the Command Prompt with admin privileges.
  • Then type in the following commands and make sure to hit Enter right after you type each one of them:
    • Dism /Online /Cleanup-Image /CheckHealth
    • Dism /Online /Cleanup-Image /ScanHealth
    • exe /Online /Cleanup-image /Restorehealth
  • Do not close the window if the process takes a while as it will probably take a few minutes to finish. Once it’s done, restart your computer.

Option 5 – Reset your computer

  • Tap the Win key or click on the Start button located in the Taskbar.
  • Then click on the Power button at the bottom right portion of the screen.
  • Next, press and hold the Shift key on your keyboard and then click on Restart. This will restart your Pc into the Advanced Startup options.
Note: Once you have access to the Advanced Startup options, you have to go to the setting which allows you to Reset your Windows 10 PC. All you have to do is select Troubleshoot > Reset this PC to reach the following screen Afterward, select either the “Keep my files” option and then proceed to the next on-screen instructions that follow to reset your Windows 10 computer without losing your files.

Option 6 – Try to perform repair install by creating a Windows 10 installation media

  • Click this link and then click the Download Tool Now button.
  • Next, click the “Use the tool to create installation media (USB flash drive, DVD, or ISO file)…” option and follow the next given instructions on the screen.
  • Now select the ISO file option in step 5.
  • After that, you should now have an ISO file.
  • Next, go to the location where you’ve downloaded the ISO file.
  • Then right-click on the Windows 10 ISO file and select the Open with option and then select File Explorer.
  • Now click on “setup.exe” and follow the next instructions that appear on the screen. When asked, you have to select either Nothing (clean install) or Keep personal files only option. Take note that you must not select the “Keep personal files, apps, and Windows settings”.
Read More
Microsoft removed password as a requirement
ms password gone
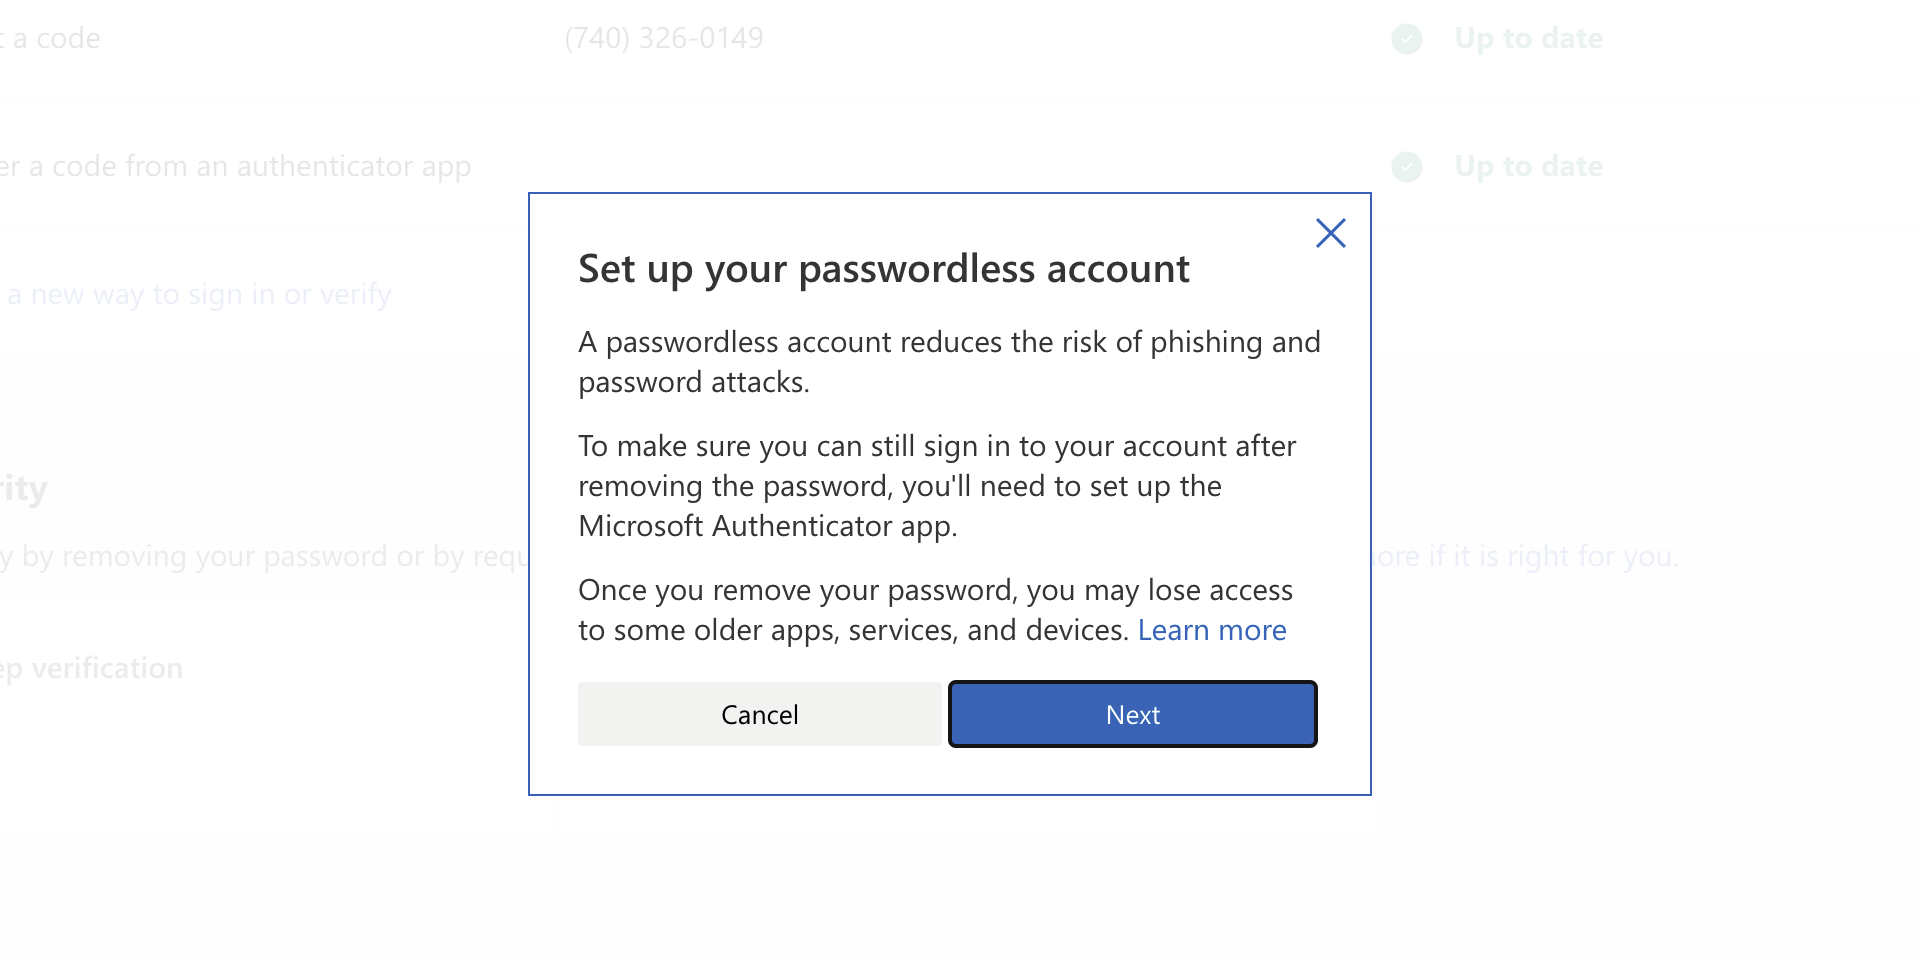
As of the time of writing this article you no longer need or are required to have a password if you plan to log in to your Microsoft account. Microsoft explored various options for account security and came to the conclusion that passwords are obsolete. Microsoft is letting you access your account through the Microsoft Authenticator app, Windows Hello, a security key, SMS verification, or email verification code. All of these methods are way better in terms of security than passwords.

How to turn these features on?

To get rid of your Microsoft password, the process is simple. You simply need to go to your Microsoft account, click “advanced security options,” then “enable passwordless accounts” under the Additional security section.
Read More
Best Browsers in 2021 with browser description
In today's digital life, when we access the internet daily, browsers are essential almost as our operating system, after all, we do access all of the internet data via them, and having a good, reliable, and personal browser tailored for our needs can make all the difference in the world. In today's article, we will introduce you to the five greatest browsers of today, we will point their advantages and disadvantages and why should you pick one or another. As with each piece of software, there is not an ultimate browser, better than anything else and we will not favor anyone on this list, the decision which you should use is solely up to you, we are here to provide you with an objective opinion on each one. All of this being said, let's begin with the countdown in no particular order.
  1. Mozilla firefox.

    firefox browser If you consider yourself a power user or you value your privacy then firefox is the browser for you. It is open source and is packed with great features like reporting when your email has been used for a known data breach, it stops annoying pop-up notifications, stops browser fingerprinting, and many more. Firefox is also a cross-platform browser making it a great choice if you want to transfer and use your data across multiple devices with one account. The downside of firefox however is its speed, this browser is the slowest on this list, I guess features and advantages took their tool in the speed department, but if that is not a concern for you and you feel like the positives outweigh some slower speed, grab it here.
  2. Google Chrome

    chrome browser Chrome browser has been a game-changer when it was released and even today some of its features are still great and needed. It is packed with some great features like tab freezing, for example, it is cross-platform meaning that also as firefox you can change data between browsers on different devices. it is a very expandable browser with tons of extensions and its speed performance is very very good. The downside of Chrome are two things sadly, one of them is its hunger for RAM, the browser takes a big chunk of RAM once it is active and on some older computer with limited RAM it performs slowly, another is telemetry which its sending, in other words, other browsers don’t come with the lingering fear that Google’s just a little bit too involved in all of our lives. But if downsides do not trouble you and you have a decent amount of RAM in your system chrome might be the best solution for you, grab it here and check it out.
  3. Microsoft Edge

    edge browser Or should I say Microsoft edge 2.0 since this new Edge is completely recoded and rethought, a completely new browser based on chromium. The first version of the edge was an inhouse attempt from Microsoft and it was a disaster, I guess the lesson was learned, and this new edge we have today is a great Browser, it is lightning fast and packed with some great features with one among them standing out I just love, that is the ability to save web pages as applications and truth to be told you have to try this in order to see al great advantages it offers. A very interesting feature is that edge itself wins the speed race from all of the 5 contestants here which is a great surprise. Of course, the downside of annoying Microsoft pushing it to be your default is, well it's Microsoft, as chrome is tied to Google so is edge tied to Microsoft, and the same dreaded feeling that big MS is watching you. If however, you do not concern yourself with these kinds of things, since it is already part of Windows 10, give it a spin and try it, I am sure you will at least love its blazing speed.
  4. Vivaldi

    vivaldi browser A new kid on the block, relatively unknown Browser Vivaldi offers some great customizable features no other one on this list offers, a very unique and down to each detail customization option, you can literally tweak each and every aspect of this browser making it best customizable and personal browser ever. How it is also based o chromium, every chrome extension works in it naturally. It is very good in speed and constantly updated and developed. The downside, well if you are anything like me, you could spend ages trying to customize it, ages, it has tons of features, and making it really feel and tick as you want can consume a really lot of time. If this thing does not bother you at all, grab Vivaldi here.
  5. Opera

    opera browser Last but not least, we have another relic of the old browser age, the Opera browser. Packed with great security and great in-house features like a built-in VPN, built-in ad blocker, built-in crypto wallet, etc this browser seems like a swiss army knife. Opera is full of features and it shows once you start using it. The downside of opera is that its look and feel are specifically tailored to a certain type of user and not everyone will find that appealing or attractive, add some great but hidden and hard to come by features and it may go unnoticed. However, I think you should really give it a go since it definitely deserves more attention than it gets. Grab it here and check it out.
That's it, 5 great browsers to look up, I hope that you have enjoyed the read and I hope to see you again here for more articles. If you would like to read more helpful articles and tips about various software and hardware visit errortools.com daily.
Read More
1 2 3 162
Logo
Copyright © 2022, ErrorTools. All Rights Reserved
Trademarks: Microsoft Windows logos are registered trademarks of Microsoft. Disclaimer: ErrorTools.com is not affiliated with Microsoft, nor claim direct affiliation.
The information on this page is provided for information purposes only.
DMCA.com Protection Status