Fix Err_Connection_Closed in Windows

If you suddenly encounter an error message that says, “This webpage is not available, Err_Connection_Closed” while browsing the internet or visiting a website and the website fails to load, then it means that there is some problem with your network connection. Similarly, you may also get other error messages like “Err_Network_Changed”, “Err_Connection_Reset” and “Err_Internet_Disconnected” errors in different browsers like Chrome, Firefox, and Edge.

The problem lies in your Windows 10 computer and your internet connection since this is a network issue. So before you troubleshoot the problem using the suggestions given below, you need to refresh your browser first or you could also tap Ctrl + F5 on your keyboard to hard reload the webpage. If you’re still getting the same error message, then proceed to the guide below.

Option 1 – Try removing the Proxy

Removing the Proxy might also help you in fixing the “This webpage is not available, Err_Connection_Closed” error. Here’s how you can do it:

  • Tap the Win + R keys to open the Run dialog box.
  • Then type “inetcpl.cpl” in the field and hit Enter to pull up the Internet Properties.
  • After that, go to the Connections tab and select the LAN settings.
  • From there. Uncheck the “Use a Proxy Server” option for your LAN and then make sure that the “Automatically detect settings” option is checked.
  • Now click the OK and the Apply buttons.
  • Restart your PC.

Note: If you are using a third-party proxy service, you have to disable it.

Option 2 – Try using Google Public DNS

If the first option didn’t resolve the issue, you can try to use the Public DNS by Google and see if it can help fix the problem. You have to modify the DNS settings in your system explicitly and use the DNS IP addresses.

  • The first thing you have to do is right-click on the network icon in the Taskbar and select Network and Sharing Center.
  • Next, click on the “Change Adapter Settings” option.
  • After that, search for the network connection that you are using to connect to the internet. Note that the option might be “Wireless Connection” or “Local Area Connection”.
  • Right-click on your network connection and click on Properties.
  • Then select the new window to choose the “Internet Protocol 4 (TCP/IPv4)” option.
  • After that, click on the Properties button and click the checkbox in the new window for the option “Use the following DNS server addresses”.
  • Type in “8.8.8.8” and “8.8.4.4” and click OK and exit.

Option 3 – Reset Winsock, TCP/IP & Flush DNS

Resetting Winsock, TCP/IP, and flushing DNS might help you resolve the Err_Connection_Closed error. To do so, follow these steps:

  • Right-click on the Start button and click on Command Prompt (administrator) so you can pull up an elevated Command Prompt.
  • After that, execute each one of the commands listed below. And after you typed in one after the other, you have to hit Enter.
  1. netsh winsock reset – type in this command to reset Winsock
  2. netsh int ip reset resettcpip.txt – type in this command to reset TCP/IP
  3. ipconfig /flushdns – type in this command to flush the DNS cache
  • Next, restart your PC and check if the problem’s fixed.

Option 4 – Disable both the Antivirus program and Firewall temporarily

There are times when antivirus programs and the firewall blocks a website that they consider to be malicious or even because of false-positive effects which is why you have to disable these programs temporarily as it might be the reason why you’re getting the “This webpage is not available, Err_Connection_Closed” error when trying to browse the internet.

Option 5 – Try to check the network cables and then restart your router

The most obvious thing you can do first is to try checking if the network cables connected to your computer or router are properly connected or not. If it turns out that some network cables are not connected properly, then it’s probably why you’re getting this error.

Option 6 –Try a Network Reset

When all else fails, you might have to consider resetting your entire network settings. Simply follow the steps below to do so.

  • Click on the Start button and then click on the gear-like icon for Settings to open it.
  • Next, select Network and Internet.
  • Then scroll down and look for “Network Reset” – click on it and then click on the Reset now button.
If you like to learn and find out more about various Windows errors, and how to repair them go to our vast archive or use search to find articles that will explain and help you in solving your issue.
However, if you prefer to do things fast and with automatization then we are proposing to use an automated solution for your issues. The application that we are recommending is Advanced System Repair Pro
Advanced System Repair utilizes multiple tools all in one to give you a quick, simple, reliable, and very thorough diagnosis of your PC. It brings you all the tools you need in one program to clean, fix, protect, optimize and boost your PC!
1-Click Maintenance
All the tools to make it simple and easy! It's like having a professional technician at the click of a mouse.

Junk Cleaner
Keeping your computer free from unnecessary clutter also helps make your computer last longer. Like any other machine, if you keep it clean and take care of it, it will serve you better for longer!

Optimize background apps
Optimize applications background activity with the built-in Application Optimizer feature.

Disk Defrag
With a simple 1-click, Advanced System Repair speeds up your PC by assembling fragmented files on your machine and organizing them more efficiently.

Malware Removal
Finds and removes all types of harmful malware including trojans, worms, bots, adware, spyware, PUPs, and more!

Privacy Cleaner
The all-in-one privacy suite to Clean Your Tracks & Protect Your Privacy! Make your computer safe, secure, and more efficient!

System Tweak/Optimizer
ASR will analyze your complete system and settings to adjust your PC to function at its maximum performance.

Registry Cleaner
Over time, as you install and uninstall applications, the registry can become cluttered with old entries and broken settings which can result in program crashes, and annoying messages and slow the computer down.
Visit our Advanced System Repair Pro Download page to inform yourself about all the benefits of this software and get a free trial copy of it.
advanced system repair pro

Advanced System Repair Pro

One-click automated PC repair solution
ASR logo
With Advanced System Repair Pro you can easily
Replace damaged files
Restore performance
Free disk space
Remove Malware
Protects WEB browser
Remove Viruses
Stop PC freezing
DOWNLOAD
Privacy Policy | Terms of Use | Uinstall
Advanced System Repair Pro is compatible with all versions of Microsoft Windows including Windows 11

Share this article:

You might also like

How to Permanently Disable Active History
What is Active History? A new feature has been introduced in Windows 10 that allows users to stay connected to their tasks across their devices. This new feature is called “Windows Timeline” and using this feature, users could continue their tasks all over their Windows 10 computers as well as on devices that run Android and iOS as well. This new feature was included in Microsoft Launcher and Microsoft Edge on Android devices as well as in Microsoft Edge for iOS devices. In order for the feature to work, you have to send either Basic or Full data and diagnostics of your computer to Microsoft which would sync it all over your devices with the help of the cloud. And now since all your data is stored on your Windows 10 computer and with Microsoft under your account, it is easier for you to access the back and start where you left off. This kind of option is called Active History. In this post, you will be guided on how you can permanently disable Active History using either the Windows Registry or Group Policy. Before you go on further, it is recommended that you create a System Restore Point first in case anything goes wrong. This is a precautionary measure you must take so that you can easily undo the changes you’ve made. After creating a System Restore Point, proceed to the given instructions below.

Option 1 – Disable Active History via Registry Editor

  • Tap the Win + R keys to open the Run dialog box and type in “Regedit” in the field and hit Enter to open the Registry Editor.
  • Next, navigate to this registry key: ComputerHKEY_LOCAL_MACHINESOFTWAREPoliciesMicrosoftWindowsSystem
  • From there, check if you can find a DWORD named “PublishUserActivities”. If you can’t find this DWORD, just create one with the same name and make sure that the base is selected to Hexadecimal.
  • After that, double-click on the DWORD and change its value from 1 to 0 to disable Active History.
  • Restart your computer to apply the changes you’ve made successfully.

Option 2 – Disable Active History via Group Policy Editor

Note that this second option won’t work if you are using the Home edition of Windows 10. This is because the Group Policy Editor does not come with Windows 10 Home. So if you are not using Windows 10 Home, follow the given steps below.
  • Tap the Win + R keys to open the Run box.
  • Then type in “gpedit.msc” in the field and hit Enter to open the Group Policy Editor.
  • Next, navigate to this path: Computer ConfigurationAdministrative TemplatesSystemOS Policies
  • After that, double click on the configuration listing named “Allow publishing of User Activities” to open the configuration page which has the following description:
“This policy setting determines whether User Activities can be published. If you enable this policy setting, activities of type User Activity are allowed to be published. If you disable this policy setting, activities of type User Activity are not allowed to be published. Policy change takes effect immediately.”
  • Now you have to select Disabled or Not Configured if you want to disable Publishing of User Activities or Enabled to Enable Publishing of User Activities depending on your preferences.
  • Next, click OK and exit the Group Policy Editor and then restart your computer to successfully apply the changes made.
Read More
Checking the Bluetooth Battery level
In case you don’t know, Windows 10 now allows users to check the Bluetooth battery level of devices. More often than not, the accessories or peripherals users use for their Windows 10 devices are connected to it using Bluetooth technology. This high-speed low-powered wireless technology is designed to link mobile devices, computers, and other network devices over a short distance wirelessly. Monitoring the battery level of a device where Bluetooth is enabled isn’t an easy task as most of these devices do not support the Bluetooth battery monitor or the battery level display. And even when on devices that do, you still have to install additional software to find it. However, Windows 10 eliminates this requirement and all you have to do is add a Bluetooth device and connect that Bluetooth device. How? Follow the instructions provided below. Step 1: Adding a Bluetooth Device The easiest way to get your Bluetooth device battery to be displayed on your Windows 10 screen is to simply add a Bluetooth device. To do so, follow these sub-steps:
  • First, turn on the Bluetooth mode on your device.
  • Next, go to Windows Settings > Devices > Bluetooth & other devices.
  • From there, click on the “+” button next to the ‘Add Bluetooth or other devices” option and select the type of device you want to add.
Step 2: Connecting the Bluetooth Device Once you’ve added the device, it will be visible under the “Add a device” screen.
  • Now select the newly added Bluetooth device and click the “Done” button.
  • After that, it will now be connected. Go back to the “Bluetooth & other devices” window and scroll down to the section of “Mouse, Keyboard, and Pen”.
  • From there, move the cursor alongside the connected device to display its battery level.
Keep in mind that there are several ways in which you can display the battery information of the Bluetooth device. However, Windows 10 understands only one of them per se. So if your device is not a Bluetooth Low Energy device, Windows 10 won’t be able to show its battery information and won’t display its battery level.
Read More
Fix Windows Update Install Error 0x80070005
If you are checking for an update on your Windows 10 PC and you got the error 0x80070005 due to some ACCESS DENIED permissions issue, then read on as this post will show you what you can do to fix the problem. For some reason, the Windows Update does not have enough rights or permissions to continue further which is why you’re getting an error instead. Thus, the first thing you can do before you troubleshoot further is to make sure that you’re logged in as admin. However, if you’re already logged in as one, then here are some suggestions that might help you fix the Windows Update Install Error 0x80070005.

Option 1 – Restart your computer and try installing the Updates again

You can restart your computer and then try installing the updates once again. There are instances when a simple restart resolves Windows Update errors. Thus, after you restart your computer, check for updates once again and see if you’re still getting the error or not.

Option 2 – Delete the contents in the Software Distribution folder and Catroot2 folder

  • Open the WinX Menu.
  • From there, open Command Prompt as admin.
  • Then type in the following command – don’t forget to hit Enter right after typing each one of them.
net stop wuauserv net start cryptSvc net start bits net start msiserver
  • After entering these commands, it will stop the Windows Update Service, Background Intelligent Transfer Service (BITS), Cryptographic, and the MSI Installer
  • Next, go to the C:/Windows/SoftwareDistribution folder and get rid of all the folders and files thereby tapping the Ctrl + A keys to select them all and then click on Delete. Note that if the files are in use, you won’t be able to delete them.
After resetting the SoftwareDistribution folder, you need to reset the Catroot2 folder to restart the services you just stopped. To do that, follow these steps:
  • Type each one of the following commands.
net start wuauserv net start cryptSvc net start bits net start msiserver
  • After that, exit Command Prompt and restart your computer, and then try to run Windows Update once more.

Option 3 – Try running the Windows Update Troubleshooter

Running the built-in Windows Update troubleshooter is one of the things you can first check out as it is known to automatically resolve any Windows Update errors like error 0x80070005. To run it, go to Settings and then select Troubleshoot from the options. From there, click on Windows Update and then click the “Run the troubleshooter” button. After that, follow the next on-screen instructions and you should be good to go.

Option 4 – Take control of the User App Data

There are times when permission to access the files is not configured correctly. As a result, it blocks the downloading of the updates. Thus, you have to take full control of the User App Data which is placed at C:/Users/USERNAME/AppData.
  • First, go to C:/Users/USERNAME/AppData and right-click on it then select Properties.
  • Next, click on the Edit button in the Properties window and click OK to confirm if you got a User Account Control elevation request.
  • After that, select user/group from the permission windows or click on the Add button to add another user or group. It would be best if you add “Everyone” to give permission.
  • Then check “Full Control” under the “Allow” column to assign full access rights control permissions.
  • Now edit the permission to Full Control for “Everyone”.
  • Click OK to save the changes made and then exit.

Option 5 – Try to update Windows after a couple of minutes or an hour

There are times when the issue is from Microsoft’s end. It could be that there’s some issue with Microsoft’s server so it would be better if you give it a couple of minutes or an hour or so before trying to run Windows Update again.
Read More
CLR20R3 error while launching an Application
CLR20R3 error is received when you are launching an application in Windows 10. It can happen because of two reasons, a corrupted application file or missing system components. Keep on reading in order to find solutions to fix this error.
  1. Run the program in compatibility mode

    Locate problematic application executable file Right-click on executable Click on properties Go to the compatibility tab and try running the application in the previous version of Windows or as an administrator.
  2. Reset Windows media component

    Right-click on Start, then left-click on command prompt (admin) In command prompt type next command and after each line of command press ENTER regsvr32 atl.dll cd C:\WINDOWS\eHome ehSched /unregServer ehSched /service ehRecvr /unregServer ehRecvr /service ehRec.exe /unregServer ehRec.exe /regserver ehmsas.exe /unregServer ehmsas.exe /regserver
  3. Reinstall Windows media player

    Go to control panel Click on Program and Features > Turn Windows feature on or off. Expand Media Features, uncheck Windows Media Player, and click Ok. Restart your PC, go through the same steps, tick Windows Media Player, and restart your computer once again.
  4. Reinstall .NET framework

    Go to control panel Click on Program and Features > Turn Windows feature on or off. Uncheck “.NET Framework 3.5” and “.NET Framework 4.8”, and click Ok. Restart your computer, go through the same steps, check “.NET Framework 3.5” and “.NET Framework 4.8”, and restart your computer once again.
  5. Update Windows

    Go to settings and check for updates
Read More
Fixing error 0xc000000e in Windows 10
If you encounter a Recovery Error code 0xc000000e, “Your PC needs to be repaired” error on your Windows 10 computer, then it means that there is some hardware failure or an incorrect drive configuration. Apart from the error, it may be accompanied by different error message such as:
  • A required device is inaccessible
  • The selected entry could not be loaded
  • A required device isn’t connected or cannot be accessed
  • The selected entry could not be loaded because the application is missing or corrupt
  • The boot selection failed because a required device is inaccessible.
As mentioned, the error code 0xc000000e or STATUS_NO_SUCH_DEVICE error indicates that there is a hardware failure or an incorrect drive configuration and to fix it, you have to check your cables as well as check the drive with the diagnostic utility available from the manufacturer of the drive. And if you are using older PATA (IDE) drives, then this kind of error also indicates an incorrect master/subordinate drive configuration. There could be different causes for this error. It could be that the winload.exe file is not accessible or is corrupted or that the boot location for the operating system cannot be found. Thus, for you to boot into and access the operating system, you can try the suggestions given below.

Option 1 – Try rebuilding the Boot Configuration Data (BCD) file

  • Once you get to the Welcome Screen part, click on Next.
  • Afterward, click on the Repair your computer option located on the bottom-left part of the window.
  • Then click on Troubleshoot.
  • Next, select the Advanced Options and then Command Prompt.
  • Once Command Prompt has been pulled up, the following command to rebuild BCD files.
bootrec /rebuildbcd
  • Once the command line is successful in finding out a Windows installation, hit Y to let it boot from the list which will successfully rebuild BCD.
  • Now type “exit” to close Command Prompt and then restart your computer to successfully apply the changes made.

Option 2 – Try to run the Automatic Repair Utility

You might also want to use Automatic Repair in fixing the error code 0xC000000E. To do so, follow the steps below.
  • You can start by creating and booting from a bootable Windows 10 USB Stick.
  • After that, click on Repair your computer located in the bottom left corner when you are on the initial Windows Startup screen.
  • Next, click on Troubleshoot, and then on the other screen, click the Startup Repair option.
  • Now select the operating system you want to repair. Once you do that, it will start to repair your operating system. Wait until the process is completed and then check if the problem’s now fixed.

Option 3 – Try checking the physical device connections

You might also want to try checking if there are other devices that are connected to your PC. This is because of the configuration of the BIOS or UEFI might be configured in a way that any external device connected to the computer has a higher boot priority compared to the hard disk.  And if it’s really the case, the externally attached disk might be the drive your computer is trying to boot into and not the hard disk. In such cases, Pen Drives, USB storage devices, CDs, DVDs, and so on, are included in this category of physical device connections.

Option 4 – Try updating the BIOS

As you know, the BIOS is a sensitive part of a computer. Even though it is a software component, the functioning of the hardware depends on it largely. Thus, you must be careful when modifying something in the BIOS. So if you don’t know much about it, it’s best if you skip on this option and try the other ones instead. However, if you are well-versed in navigating the BIOS, then follow the steps below.
  • Tap the Win + R keys to open the Run dialog box.
  • Next, type “msinfo32” in the field and press Enter to open System Information.
  • From there, you should find a search field on the bottom where you have to search for the BIOS version and then press Enter.
  • After that, you should see the developer and version of the BIOS installed on your PC.
  • Go to your manufacturer’s website and then download the latest version of BIOS on your computer.
  • If you are using a laptop, make sure that you keep it plugged in until you have updated the BIOS.
  • Now double click on the downloaded file and install the new BIOS version on your computer.
  • Now restart your computer to apply the changes made.

Option 5 – Try resetting the BIOS/UEFI configuration

You might also want to reset the BIOS configuration which will lead to arranging the boot configuration since it is intended by the manufacturer. Note that this will get rid of any blockage in the boot process.

Option 6 – Try marking your Disk as Online

Marking your Disk as Online can also help in resolving the error code 0xC000000E. To do so, follow the steps below.
  • You need to first create a bootable Windows 10 Media and then boot from it.
  • After that, click on Repair your computer on the first window of the Windows 10 installation setup.
  • Now, choose the operating system partition from the options and click on Next.
  • Then select Command Prompt from the System Recovery Options box.
  • Next, type in “diskpart” and hit Enter to initiate the Diskpart utility inside the Command Prompt.
  • Now type in either “list disk” or “list volume” and hit Enter. Either of these commands will help you in listing all the Disk connects or all the partitions on those disks formed. So you have to select one command depending on the list command you entered.
  • Afterward, type in “select disk #” or “select volume #” and hit Enter to select the Disk or Partition you want to select.
  • Now type in “online disk #” or “online volume #” and press Enter to mark the disk you selected as Online.
Read More
New Windows vulnerability discovered
The latest security vulnerability was discovered inside both Windows 10 and Windows 11 letting any user access admin privileges inside the operating system. This can, of course, be used by a potential attacker to get full control of the system. The problem lies in Microsoft's security rules assigned to the Windows Registry and the Security Account Manager. Both for some reason have reduced restrictions allowing any local user to fully access the files without administrator privileges. The problem is even more amplified if we think about Security Account Manager which includes all account data including the passwords of all users using the same PC. This can provide a potential attacker with all information and let them log on into the administrator account for full control. Microsoft is aware of the matter and is tracking it with code CVE-2021-36934, and includes a complete workaround for the issue, which includes restricting access to  %windir%\system32\config and deleting any restore points or Shadow volumes that were created before that point until the hole is plugged with an official security patch.
Read More
Fix Copy & Paste issue in Windows 10
Copy & Paste function is an essential option in properly working Windows, from copying text to weblinks and many other sources like pictures and files it is one of the crucial features in Windows. When the copy and paste feature is not working we are somewhat left in Windows limbo, essentially Windows itself is working but without this specific feature it is very hard, almost impossible to get any work done, if you are an unfortunate user who has faced this particular issue do not worry, we have solutions for you.
  1. Update Windows

    Glitches come in various forms and sometimes they are introduced in updates, check to see if it is available Windows update and if it, download and install it, there is a very high chance that the next update will bring fixes for known glitches.
  2. Disable antivirus

    A good antivirus is an essential piece of software for any PC, however, sometimes it can interfere with the basic operations of windows itself. Disable it completely to see if copying and pasting will start to work, if this is a case, see can you somehow turn options off in antivirus or switch to another one.
  3. Run Check disc

    Corrupted applications and system files can cause issues with Windows functioning, the easiest way to solve this issue is to run build-in Windows Check disk utility and let it scan and fix potential issues.
  4. Run SFC

    If the check disk failed to fix the issue, run command prompt as administrator and type in sfc /scannow, file checker will go through all files and fix if it finds anything including corrupted system files. Reboot your system after the operation completes. Please note that an SFC scan can take a long time sometimes, do not interrupt the scanning process and leave it to finish.
  5. Restart rdpclip process

    Restarting rdpclip.exe can solve the issue. Open task manager and under process find rdpclip.exe, right-click on it and end it, then go to windows/system32 and search for rdpclip.exe and double click it. Please note that you will be able to find this process only if you are on a remote PC machine, on a local user machine rdpclip is not running.
  6. Rollback to the previous system restore point

    If this particular issue was introduced in the latest update and previous solutions have not worked, roll back to the restore point where everything was working as it should.
  7. Stop virtualization

    if you are using virtual software there is a chance that the shared clipboard feature is interfering with Windows, turn the Virtual machine off and try copy & paste again.
Read More
Windows installation stuck on Set up a Pin
After you fresh install Windows 10 on your computer, it allows you to set up a PIN just before you can start using it. However, a number of users reported that the Windows 10 installation gets stuck on the “Set up a Pin” phase. If you are one of the users who experience the same thing, then read on as this post will walk you through fixing the problem. As users start to use their newly installed Windows 10 computer, they reported that the screen is still stuck even after they enter the correct PIN twice and there is no way for them to go forward or backward. Note that this is a part of the account setup and that your computer must stay connected to your internet connection before you finalize everything. And even though the PIN works when the computer is offline, the account setup still needs an internet connection, at least for a fresh installation. The solution for this kind of issue is quite easy and there won’t be any problem even if your computer shuts down or restarts since the installation is already complete and all that’s left is the account setup. To fix this problem, follow the steps given below. Step 1: The first thing you have to do is to turn off your internet connection or disable all connectivity from your computer. Note: If you are using either an Ethernet cable or a Wi-Fi switch to connect to the internet, you have to disable or remove them. But if you don’t have any options, just completely turn off your internet connection. Step 2: The next thing you have to do is to force your computer to shut down and then restart your computer. The setup process will eventually pick up exactly where it left off. The only difference is that there is no connection to the internet and your screen will no longer be stuck on the PIN setup screen so you now have the option to skip it and wait until you’re logged in for the first time. Step 3: Once you’re done, you can then you can choose to Setup Pin later on and turn your internet connection back on or connect your computer with an internet connection.
Read More
Intel to reveal roadmap during July 26 webcast
intel graphics
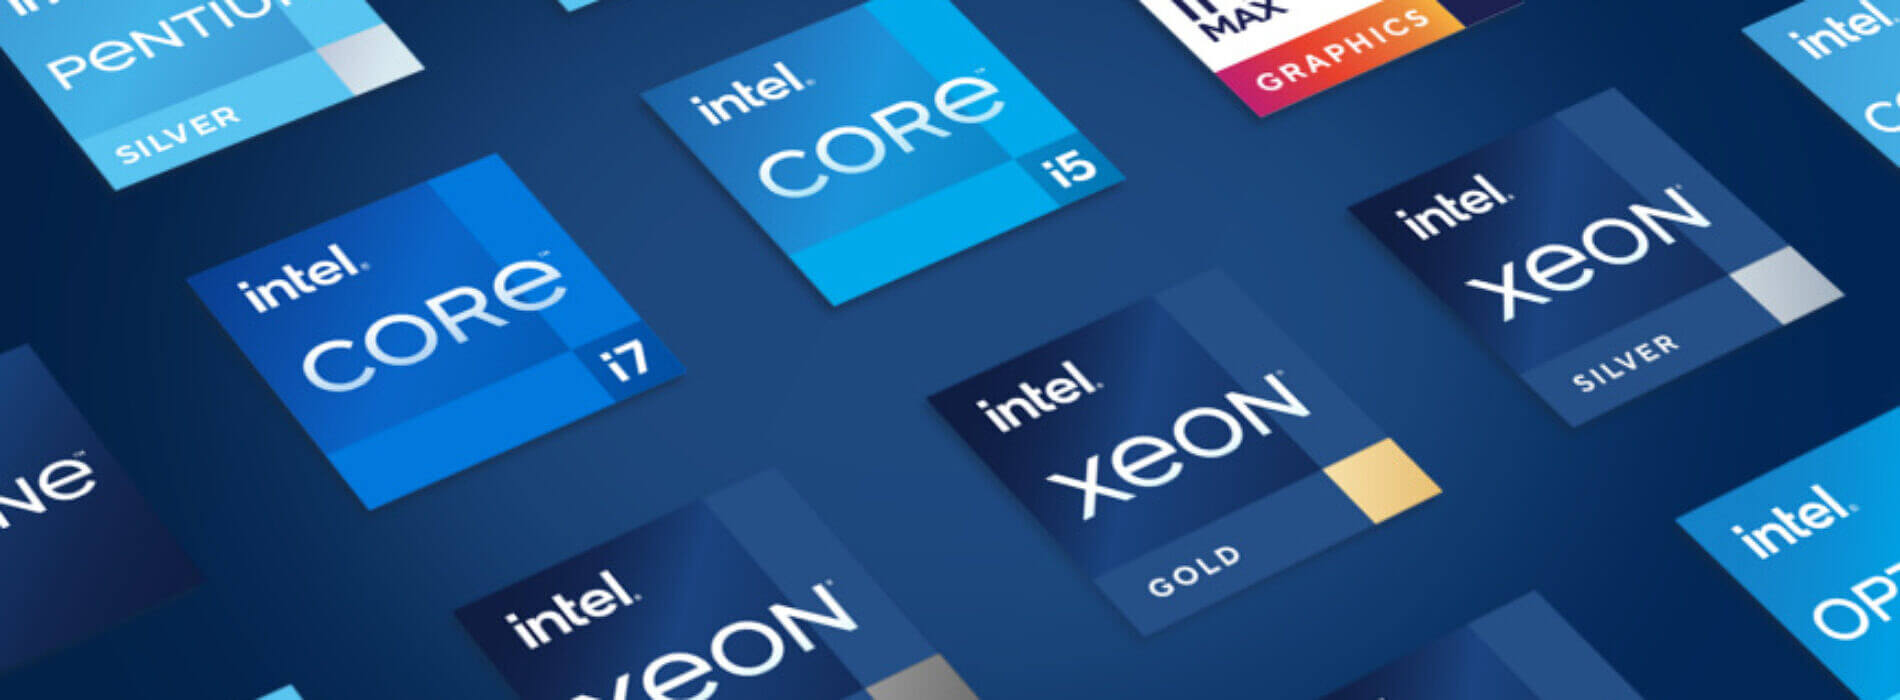
Intel announced that Pat Gelsinger (CEO) and Dr. Ann Kelleher  (technology Department head) will discuss Intel’s process and packaging innovations on an upcoming webcast that will happen on July 26th. The spokesman will talk and provide a deeper look at the process and packaging roadmaps for Intel. As we know Intel is planning to expand its production capabilities, outsource some of its technologies and offer foundry services to other chip design companies. The strategy will also include a shift to a 7nm process and Intel’s effort to set itself again as leader of CPU performance by 2024. There is also a chance that we will hear exact plans for Intel in the next three or four years. Intel didn't reveal much else about what Gelsinger and Kelleher plan to discuss during the webcast. The event will be streamed on July 26 at 2 pm PT via the Intel Newsroom; it will also be available to watch on-demand after the stream ends.
Read More
Fix Error code 30068 when installing Office
If you are trying to install Microsoft Office on your Windows 10 computer but encounter an error code 30068 instead, read on as this post will guide you in fixing this problem. One of the causes of this error is an issue with the Office Click-to-Run service. It can also occur due to issues with the installation. And aside from the error code 30068, the error codes could also appear like this: 30068-29 (2), 30068-4 (3), 30068-4 (1715), 30068-39 (3), and many more. In most cases, the installation of Microsoft Office happens directly from the Microsoft servers which work via Click-to-Run service. This service is an alternative to MSI or offline installation. It is a Microsoft streaming and virtualization technology that helps in reducing the time that’s required to install Microsoft Office. Although it saves a lot of time, it also requires a good and stable internet connection for it to properly work. So if you encounter error code 30068 or any of the aforementioned error codes above when using this service, here are some potential fixes that could help.

Option 1 – Try to restart your computer and reinstall Office

The first thing you can do is restart your computer and then try installing Office again. It is possible that there’s some glitch and a restart might fix it. Once you’ve restarted your computer, install Office again. And if the online installation didn’t work, you can also try to download an offline Office setup.

Option 2 – Try checking if the Click-to-Run service is disabled

The next thing you can do is to verify if the Click-to-Run service is enabled or disabled. You can check its status in Services. How? Refer to these steps:
  • Tap the Win + R keys to open the Run dialog box and then type “services.msc” in the field and tap Enter or click OK to open Services.
  • Next, look for the Microsoft Click-to-Run service from the list of services and once you found it, double click on it.
  • After that, go to the General tab and in the Startup type section, click on the drop-down menu and select Automatic.
  • Then click on the Apply and OK buttons to save the changes made.
  • Once you’re done, try to install Office again and see if the error is now fixed.
Option 3 – Try to uninstall and reinstall Office If neither of the two given options above worked, then you might want to uninstall Office and reinstall it. All you have to do is download the Microsoft Office Uninstall tool from the official site of Microsoft and run it. This will remove any incomplete Office installation as well as unwanted files. It will also get rid of all the Office apps and settings on your computer. This same option can be also applied if you encountered error code 30068-4 (3) when installing Office. On the other hand, if the Uninstaller tool throws an error that says, “Office installation is missing”, you have to check if there is an ongoing installation of Office.
Read More
1 2 3 162
Logo
Copyright © 2022, ErrorTools. All Rights Reserved
Trademarks: Microsoft Windows logos are registered trademarks of Microsoft. Disclaimer: ErrorTools.com is not affiliated with Microsoft, nor claim direct affiliation.
The information on this page is provided for information purposes only.
DMCA.com Protection Status