DiskPart has encountered an error

As you know, Diskpart is a useful utility that helps in managing the disks in a computer. It is a very useful tool that even when the GUI-based disk management tools in Windows 10 operating system fails, the Diskpart utility still tends to work. However, it also does not mean that this utility does not experience issues as it still does, from time to time. One of the issues you may encounter when using the Diskpart utility is when you encounter an error message that says, “DiskPart has encountered an error, Access is denied”.

This kind of error in the Diskpart utility could be caused by a number of factors. For one, it could be that the Write-Protection is enabled on the drive where the operating is being performed or it could also be that the Command Prompt terminal does not have administrator-level permissions to carry out the command. Thus, you can try to run the Diskpart utility again but this time with admin privileges or you could also remote the Write-Protection from the concerned drive. For more details, refer to the instructions given below.

Option 1 – Try running Command Prompt with Administrator-level permissions

  • In the Start Search, type “command prompt” and from the search results that appear, look for Command Prompt.
  • Once you found it, right-click on it and select the “Run as administrator” option.
  • After that, try to execute the Diskpart operation once again and see if you still encounter the same error.

Option 2 – Try to remove the Write Protection from the drive

As mentioned, removing the Write-Protection on the concerned drive could also help you fix the problem and there are two ways to get rid of the write protection – you can either use the Diskpart utility or the Registry Editor. How? Refer to the following steps.

Via Diskpart utility:

  • Open Command Prompt with admin privileges and then type the “diskpart” command and tap Enter to execute it.
  • Next, type “list disk” and tap Enter to get the list of all the Disk connects or all the partitions that are formed on those disks.
  • After that, you need to choose one command depending on the list of commands you entered. Type “select disk #” and tap Enter to select the disk or partition you want to select.
  • Then type “attribute disk clear readonly” and tap Enter to Disable the Write Protection on the selected disk or partition.

Via Registry Editor:

  • Tap the Win + R keys to open the Run utility and type “Regedit” in the field and then tap Enter to open the Registry Editor.
  • Next, navigate to the following registry key:

ComputerHKEY_LOCAL_MACHINESYSTEMCurrentControlSetControlStorageDevicePolicies

  • After that, look for the DWORD named “WriteProtect” and double click on it, and then set its Value Data to “0”.
  • Now restart your computer and see if the problem is now fixed or not.
If you like to learn and find out more about various Windows errors, and how to repair them go to our vast archive or use search to find articles that will explain and help you in solving your issue.
However, if you prefer to do things fast and with automatization then we are proposing to use an automated solution for your issues. The application that we are recommending is Advanced System Repair Pro
Advanced System Repair utilizes multiple tools all in one to give you a quick, simple, reliable, and very thorough diagnosis of your PC. It brings you all the tools you need in one program to clean, fix, protect, optimize and boost your PC!
1-Click Maintenance
All the tools to make it simple and easy! It's like having a professional technician at the click of a mouse.

Junk Cleaner
Keeping your computer free from unnecessary clutter also helps make your computer last longer. Like any other machine, if you keep it clean and take care of it, it will serve you better for longer!

Optimize background apps
Optimize applications background activity with the built-in Application Optimizer feature.

Disk Defrag
With a simple 1-click, Advanced System Repair speeds up your PC by assembling fragmented files on your machine and organizing them more efficiently.

Malware Removal
Finds and removes all types of harmful malware including trojans, worms, bots, adware, spyware, PUPs, and more!

Privacy Cleaner
The all-in-one privacy suite to Clean Your Tracks & Protect Your Privacy! Make your computer safe, secure, and more efficient!

System Tweak/Optimizer
ASR will analyze your complete system and settings to adjust your PC to function at its maximum performance.

Registry Cleaner
Over time, as you install and uninstall applications, the registry can become cluttered with old entries and broken settings which can result in program crashes, and annoying messages and slow the computer down.
Visit our Advanced System Repair Pro Download page to inform yourself about all the benefits of this software and get a free trial copy of it.
advanced system repair pro

Advanced System Repair Pro

One-click automated PC repair solution
ASR logo
With Advanced System Repair Pro you can easily
Replace damaged files
Restore performance
Free disk space
Remove Malware
Protects WEB browser
Remove Viruses
Stop PC freezing
DOWNLOAD
Privacy Policy | Terms of Use | Uinstall
Advanced System Repair Pro is compatible with all versions of Microsoft Windows including Windows 11

Share this article:

You might also like

A Quick Guide to Fixing Error Code 7

Troubleshoot Error Code 7

Error Code 7 - What is it?

This is a typical system error that occurs during Windows setup. To be precise, this error may pop on your computer screen during the text mode portion of Windows setup. The setup hangs and stops responding and the error message is displayed in either one of the following formats:
‘The file I386Ntkrnlmp.exe could not be loaded. The error code is 7.’ or ‘The file I386L_intl.nlf could not be loaded. The error code is 7.’

Solution

Restoro box imageError Causes

Error 7 may be triggered due to several reasons but the 2 most common causes for this error code are:
  • Incorrect settings of the BIOS
  • Faulty RAM modules
  • Registry corruption

Further Information and Manual Repair

To resolve this error on your system, here are some easy and effective DIY methods that you can try.

Method 1 - Change Back the BIOS to its Default Settings

If the underlying cause of error code 7 is related to incorrect BIOS settings, then it is recommended to restore default settings to resolve. You can reset your computer’s BIOS (basic input and output system) settings to factory defaults by selecting the restore defaults option within BIOS or by removing CMOS ( Complementary Metal Oxide Semi-Conductor) battery from your unplugged computer for about five minutes. The battery removal method requires opening the computer case, so only attempt it if you are unable to access BIOS. To reset BIOS follow these steps, reboot your PC and then press the key assigned to loading BIOS during your computer boot splash screen. The key assigned to load and access BIOS varies from manufacturer to manufacturer but usually, it's F1, F2, or F12. Once you enter the BIOS, select the ‘Restore Defaults’ option listed in the menu.  I t may be a keyboard shortcut or be under the Advanced settings menu. Confirm settings and then exit BIOS. Hopefully, this will resolve Error 7.

Method 2 - Remove the Faulty RAM

When error code 7 is triggered by faulty RAM modules, then to resolve it simply remove the memory modules that are installed in the computer. If the error code is displayed again after you remove the memory module, remove a different memory module. This procedure requires you to reboot your PC several times to identify the specific memory module that is not working properly.

Method 3 - Repair the Corrupted Registry

Error code 7 is sometimes also linked with registry issues. If the reason for the error occurrence is a damaged or corrupted registry, then simply download Restoro. This is a powerful PC Fixer embedded with a registry cleaner. It is easy to operate and user-friendly. The registry cleaner detects and removes all errors in seconds. It cleans the registry and repairs the damages in no time. Click here to download Restoro.
Read More
ERR_SSL_VERSION_OR_CIPHER_MISMATCH
If you encounter an error message saying, “ERR SSL VERSION OR CIPHER MISMATCH” while visiting a website, then it is not primarily your fault as an end-user. In fact, it can happen on any website like Chrome, Edge, Firefox, and even Internet Explorer. Getting this error means that the website you are visiting is using an SSL certificate which your browser seems to be rejected because there is some issue with the certificate. It is also possible that the certificate that’s downloaded on your computer is corrupted or that your computer configuration for TSL/SSL is misconfigured. Here are the complete details of the error message:
“A secure connection cannot be established because this site uses an unsupported protocol, Error code ERR_SSL_VERSION_OR_CIPHER_MISMATCH”
To resolve the ERR_SSL_VERSION_OR_CIPHER_MISMATCH error, refer to the options given below and see which one works for you.

Option 1 – Try to access the website with the only HTTP

The first thing you can do is to try accessing the website using HTTP instead of HTTPS. If you can open the website using HTTP then it means that the problem is in the website itself. And if you are the website owner, you can check the following:
  • Check if your website’s SSL certificate name is mismatched. Here you need to ensure that the name and alias of the websites match with the actual website URL where the certificate is installed.
  • Second, check if your server is using the RC4 Cipher. If it is, then you need to fix that.
On the other hand, you may also check if your CDN also supports SSL since most of the CDN nowadays supports SSL. All you have to do is configure it correctly and it should be good to go.

Option 2 – Try enabling SSL 3 / TLS and disable QUIC Protocol

If you were using Google Chrome when you got the ERR SSL VERSION OR CIPHER MISMATCH error, then you need to follow the protocol fixes for SSL3/TLS and QUIC which are usually some of the reasons that cause the SSL version / Cipher Mismatch. It also has a few fixes for Windows 10 computer where you can clear the certificates and make sure that your computer date and time is in sync with your time zone and so on. If you were using Edge or Internet Explorer when you got the error, then you have to follow the steps below.
  • Type “Internet” in the search box of your browser. After that, you should see the Internet Options from the search results.
  • Next, open the Internet Properties window and switch to the Advanced tab and then scroll down to the Security section.
  • From there, check the “Use TLS 1.1” checkbox as well as the “Use TLS 1.2” checkbox and then click OK to save the changes made.
  • Restart the browser.
On the other hand, if you were using Firefox when you go the error, here’s what you have to do.
  • Open Firefox and in the address bar, type “about:config” and hit Enter.
  • If a warning appears, just click on the “I accept the risk!” button to proceed.
  • Next, type in “TLS” in the search field and hit Enter.
  • Then look for “security.tls.version.min” and double click on it and set its integer value to 3 to force the protocol of TLS 1.3.
  • Now click OK and restart Firefox and do the same thing with SSL.
Read More
Fix Error 0x80200056 during Windows Update
You might have experienced a situation where your Windows computer was interrupted due to some battery issues or power failure. It could be that the upgrade process was interrupted because you’ve signed out of your computer or you restarted it by accident. In this case, you will most likely get a Windows Update or Upgrade error 0x80200056. If you are getting this error, read on as this post will guide you in fixing it. This kind of error pops up when the upgrade process was interrupted and could be caused by anything but the baseline here is that your computer was restarted accidentally or someone could have signed out your PC. To resolve the problem, here are some fixes you ought to try:

Option 1 – Try updating or upgrading your computer again

This is the basic thing to do since the process was suddenly interrupted. Just log in to your account and restart the Windows Update or Upgrade process but make sure that your internet connection is stable and that you don’t touch anything so as not to interrupt the upgrade/update process again.

Option 2 – Check if your PC is plugged in or if the battery is full

It is always best to update your computer always when you’re really sure that the power won’t fail. If you’re using a desktop computer, make sure that everything is plugged in. And if you’re using a laptop when this error occurred, make sure that its battery is at 100% but it’s better if you just plug it into power just in case as there are times when the Windows update or upgrade gets stuck for too long like for hours so it will really help if your device is connected to power.

Option 3 – Try running the Windows Update Troubleshooter

Running the built-in Windows Update troubleshooter could also help you resolve the Windows Update errors as well as the error 0x80200056. To run it, go to Settings and then select Troubleshoot from the options. From there, click on Windows Update and then click the “Run the troubleshooter” button.

Option 4 – Delete the contents in the SoftwareDistribution folder

The Software Distribution folder in the Windows operating system is a folder that can be found in the Windows directory and is used to store files temporarily which might be required to install the Windows Update on your PC. Thus, it is required by the Windows Update and maintained by WUAgent. A lot of users tried deleting the files in this folder to fix the problem and so far it has worked. Like them, you can try clearing the Windows Update cache by simply deleting the contents of the folder named “SoftwareDistribution” since Windows apparently can’t clear and re-download the update contents once they are corrupted. Thus, deleting the contents of this folder will make Windows download the contents again which will fix the problem. To do that, follow the steps below.
  • Open the WinX Menu.
  • From there, open Command Prompt as admin.
  • Then type in the following command – don’t forget to hit Enter right after typing each one of them.
net stop wuauserv net stop bits
  • After entering these commands, it will stop the Windows Update Service and the Background Intelligent Transfer Service.
  • Next, got to the C:\Windows\Software\Distribution folder and get rid of all the folders and files thereby tapping the Ctrl + A keys to select them all and then click on Delete. Note that if the files are in use, you won’t be able to delete them.
  • Once all the contents in the Software Distribution folder are deleted, restart your PC and then go back to Command Prompt and input the following commands again.
net start wuauserv net start bits
Since the folder has already been flushed, it will be populated afresh the instant your restart your computer and open Windows Update.

Option 5 – Try running the System File Checker scan

System File Checker or SFC is a built-in command utility that helps in restoring corrupted files as well as missing files. It replaces bad and corrupted system files to good system files that might be causing the error 0x80200056. To run the SFC command, follow the steps given below.
  • Tap Win + R to launch Run.
  • Type in cmd in the field and tap Enter.
  • After opening Command Prompt, type in sfc /scannow
The command will start a system scan which will take a few whiles before it finishes. Once it’s done, you could get the following results:
  1. Windows Resource Protection did not find any integrity violations.
  2. Windows Resource Protection found corrupt files and successfully repaired them.
  3. Windows Resource Protection found corrupt files but was unable to fix some of them.

Option 6 – Run the Chkdsk utility to repair hard disk errors

You can also run the Chkdsk utility to resolve the Windows Update error 0x80200056. If your hard drive has issues with integrity, the update will really fail as the system will think that it’s not healthy and that’s where the Chkdsk utility comes in. The Chkdsk utility repairs hard drive errors that might be causing the problem.
  • Open Command Prompt with admin privileges.
  • After opening Command Prompt, execute the commands listed below, and don’t forget to hit Enter right after you type in each one of them and if you have installed Windows to some different directory, you must replace “C” with the name of the drive you’ve installed Windows with.
  • chkdsk C: /r /x
  • chkdsk C: /f

Option 7 – Run the DISM tool to repair the Windows Update client

The Windows update/upgrade error 0x80200056 might be caused by some issues in the Windows Update client so you need to run the DISM tool to repair it. Note that you have to use another computer or another Windows from a shared network to fix it.
Read More
Internet disconnected when VPN is connected
If your VPN software blocks and disconnects the Internet or Wi-Fi connection as soon as it is connected, read on as this post will give you fixes to resolve the problem. This kind of issue is odd but not unheard of. Many users use VPN for privacy and security but if it causes internet connection problems, you have to pin down the root cause of the problem and fix it in order to continue browsing the internet with privacy and security. Here are some suggestions you need to check out to resolve the issue between your VPN software and network.

Option 1 – Try installing the latest version of the TAP adapter

Since all VPN software uses a TAP adapter which is mostly from OpenVPN, you might want to download and install the TAP adapter driver to resolve the problem.

Option 2 – Run the Network Adapter Troubleshooter

  • Open the Search bar on your computer and type in “troubleshoot” to open the Troubleshoot settings.
  • Next, scroll down and select the “Network Adapter” option from the right pane.
  • Then click on the Run Troubleshooter” button.
  • After that, your computer will check for any possible errors and will pinpoint the root cause of the problem if possible.

Option 3 – Configure the client computer to use the default gateway

This kind of connection problem can occur when you configure the VPN connection as the default gateway on the remote network. In such a case, the VPN settings override the default gateway settings (TCP/IP settings). Thus, you have to configure the client computers in order to use the default gateway setting on your local network for internet traffic as well as a static route on the remote network for VPN-based traffic.

Option 4 – Try to use the Google Public DNS

You might want to change your DNS to Google Public DNS as it could help you resolve the internet connection problem caused by your VPN. To do so, follow the steps below.
  • The first thing you have to do is right-click on the network icon in the Taskbar and select Network and Sharing Center.
  • Next, click on the “Change Adapter Settings” option.
  • After that, search for the network connection that you are using to connect to the internet. Note that the option might be “Wireless Connection” or “Local Area Connection”.
  • Right-click on your network connection and click on Properties.
  • Then select the new window to choose the “Internet Protocol 4 (TCP/IPv4)” option.
  • After that, click on the Properties button and click the checkbox in the new window for the option “Use the following DNS server addresses”.
  • Type in “8.8.8.8” and “8.8.4.4” and click OK and exit.

Option 5 – Try checking the settings of your VPN software

If your VPN software has a built-in “kill switch” it prevents any internet usage every time there is a problem in connecting with the VPN server which explains why your internet connection is disconnected when your VPN software is connected. In addition, you could also try to change your VPN software’s protocol since all VPNs support multiple protocols. It could be that the protocol your VPN uses is blocked so try changing to another protocol and see if it fixes the problem.

Option 6 – Update the Network Adapter drivers

You might also want to update the Network Adapter drivers by following these steps:

  • Tap the Win + R keys to launch the Run window and then type in the “devmgmt.msc” command and hit Enter to open the Device Manager window.
  • Under the Device Manager, you will see a list of drivers. From there, look for the Network Adapters and expand it.
  • Then right-click on each one of the Network drivers and update them all.
  • Restart your PC and see if it helped in fixing the BSOD error.
Note: If updating the network drivers didn’t help in fixing the “Windows could not find a driver for your network adapter” error, you can also try to uninstall the very same drivers and restart your Windows 10 PC. After that, the system itself will reinstall the drivers you just uninstalled. Alternatively, you can also download and install the drivers from the manufacturer’s website directly.

To reinstall the network adapter driver, refer to these steps:

  • Open the Devices Manager from the Win X Menu.
  • Then locate the device drivers and right-click on them to open the Properties.
  • After that, switch to the Driver tab and click on the Uninstall Device button.
  • Follow the screen option to completely uninstall it.
  • Finally, restart your computer. It will just reinstall the device drivers automatically.
Read More
Fix Windows Activation Error Code 0x8007007B in Windows 10
If you recently upgraded your computer or if you’ve just switched to a new Windows 10 PC, the most common errors you might encounter are the Windows Activation errors. This issue boils down to the Windows Activation server which has either failed to validate or recognize the license tied to the digital account. In this post, you will be guided on how to fix an activation error in an organization with an error code 0x8007007B. It contains this exact error message: “We can’t activate Windows on this device as we can’t connect to your organization’s activation server. Make sure that you’re connected to your organization’s network and try again. If you continue having problems with activation, contact your organization’s support person. Error code 0x8007007B.” Various computers are activated via the KMS licensing (Key Management Server) in organizations. Computers that are activated using this process do not get a permanent activation and have to stay connected to the organization instead of for at least 7 months or 180 days. It is common in Pro and Enterprise versions that are deployed in bulk for at least hundreds or thousands of computers. So imagine a user with a personal computer in the office who decided to leave the organization but will still have an activated Windows key. And so to prevent that from happening, organizations use the KMS licensing. Another possible cause of the error is in case some user used an organization key and later on, the PC just got upgraded or downgraded to a version that is not compatible with that copy of Windows. To fix this Windows Activation error, here are some suggestions that might help.

Option 1 – You can try connecting to the organization’s network and activate the computer. But before that, you need to first check if the computer actually belongs to an organization or not.

  • Tap the Win + R keys to open the Run dialog box.
  • Type “cmd” and hit Enter to open an elevated Command Prompt.
  • After that type the vbs /dlv command and hit Enter to execute it.
  • Next, check if the Product Key Channel says “GVLK”. If it does, then it means that your computer was activated using volume licensing.

Option 2 – Change Licence Key

If you’ve recently left an organization then it’s best if you buy another copy of Windows 10 and then change the license key. This time, make sure that the license key is for the same version of Windows. However, if it’s different, you need to format your computer.

Option 3 – You can try activating Windows 10 using a mobile phone

Activating Windows 10 can also be done using your phone. Just note that you have to call Microsoft to do so.
  • In the Start Search box, type in “Slui 4” and tap Enter.
  • Next, select your country and click on Next.
  • Keep the window open and call the toll-free number of the country you’re from.
  • Afterward, a confirmation ID should be given by the automated system which you must take a note of.
  • Finally, in the box on the window, type in the confirmation ID and click on the Activate button. That should do it.

Option 4 – If you think that the issue is caused by some hardware changes, you can try using the Activation Troubleshooter.

There are times when users already have the license keys and were able to activate Windows. However, it doesn’t last long and only works for a while and it’s suddenly throwing up an activation error like this one. To use the Windows Activation Troubleshooter, just go to Settings and to Activation and then run the troubleshooter from there. If you've made some modifications to your hardware, you have to click the “I changed hardware on this device recently” option for further suggestions.
Read More
Diablo 2 Resurrected facing server issues
It has been some time since the release of Diablo 2 resurrected and overall reception was pretty good. People are enjoying the old classic game in hi-def. resolution and with new and improved visuals. Sadly some server issues are present still until this day and somewhat spoil the experience for players. diablo 2 server status
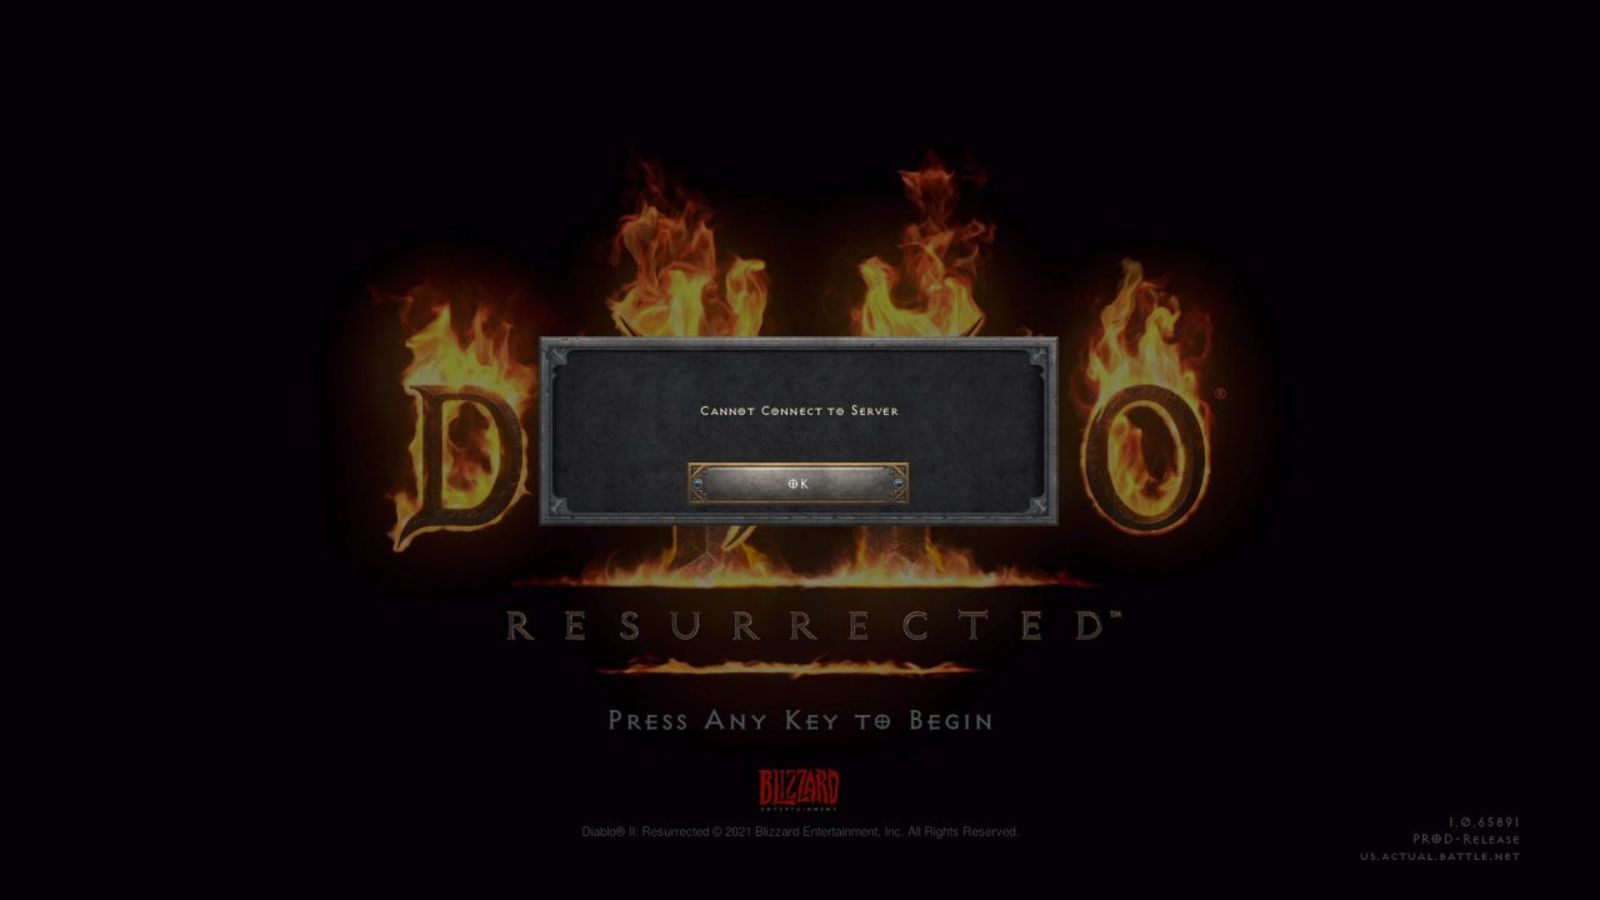
The greatest lag and server crashes are pinpointed to game-creating events. When a player creates a new online game, the server needs to pull a lot of details from the database and make a game, due to some legacy code present this process takes some time and it is demanding a bit on the server-side, and although code was optimized to cater to more modern approach some legacy code still remains. Another thing that was spotted to affect performance itself is player behavior, to be more specific, modern gamer behavior. Where players find good builds and runs on the internet and then go to farm-specific areas or bosses for loot or experience points, which in return boils down to making plenty and short runs that are made by creating games and after run eliminating them. Now pair that with the previous statement about legacy server and database code and you can add 1 and 1 and see how this might be an issue. A lot of short games over legacy code are placing games in a state it was not designed for back in 2001 and therefore we have issues. Sadly solutions without completely rewriting the whole code are not very promising and they include rate limiting, which will prevent players to create many games in succession in a short period of time and maybe even login queues to drop a load on servers. Blizzard reached to people in the whole company, even old diablo 2 developers to ask for advice and they say that they are working on solutions so they could lift limitations and have everything running fine.
Read More
Windows is stuck on signing out screen
As you know, each time you log out of your Windows 10 computer, it will take you to the login screen where you can switch users or log back in. But there are instances where Windows 10 remains stuck on the signing out screen, along with a blue spinning circle and all you can see is the process of your computer signing out, however, it does not progress and only gets stuck there. Thus, in this post, you will be guided on how you can resolve such an issue on your Windows 10 computer. So if you are one of the users who experience the same problem, there are several fixes you can check out if your computer is stuck on the signing out screen with a blue spinning circle. You can try to force shutdown your computer or troubleshoot the problem in a Clean Boot State. You could also try to check the status of the User Profile Service or repair User Profile, as well as run System Restore. For more details, refer to each one of the suggestions provided below. But before you troubleshoot the problem, make sure that you are logged in to your computer as an administrator.

Option 1 – Try to force shutdown your computer

The first thing you can do is to force reboot your computer as this simple fix could help in fixing the problem. This option is quite simple, just make sure that before you do it, you have to save all your work.
  • First, turn on your computer and press and hold the power button for at least 30 seconds. You might notice the screen flashing or making any changes, just ignore it.
  • After that, plug out and plug in your computer and automatically turn it on.
  • Once done, check if the issue is now fixed or not.

Option 2 – Put your computer in a Clean Boot State

It is possible that some third-party application is causing your computer to get stuck in the signing out screen. So you can try putting your computer in a Clean Boot State and see if it fixes the problem.
  • Log onto your PC as an administrator.
  • Type in MSConfig in the Start Search to open the System Configuration utility.
  • From there, go to the General tab and click “Selective startup”.
  • Clear the “Load Startup items” checkbox and make sure that the “Load System Services” and “Use Original boot configuration” options are checked.
  • Next, click the Services tab and select the “Hide All Microsoft Services” checkbox.
  • Click Disable all.
  • Click on Apply/OK and restart your PC. (This will put your PC into a Clean Boot State. And configure Windows to use the usual startup, just simply undo the changes.)
  • Once your computer is in a Clean Boot State, you should now be able to sign out or sign in without any problem.

Option 3 – Try checking the status of the User Profile Service

If forcing your computer to shut down or putting your computer in a Clean Boot State didn’t fix the problem, you can try to check the status of the User Profile Service since it is the one responsible for loading and unloading user profiles. Thus, if this service is disabled or stopped, you will no longer be able to sign out or sign in successfully.
  • Tap the Win + R keys to launch the Run utility and type “services.msc” in the field and hit Enter to open the Services Manager.
  • From there, look for the User Profile Service and make sure that its Startup Type is set to Automatic and that its status is “Started”.
  • Once done, exit the Services Manager and see if the issue is resolved.

Option 4 – Try to repair your corrupted profile via Registry

In this second option, you can try to repair the corrupted profile using the Registry but before you proceed, make sure to create a System Restore Point and then follow the steps below.
  • Tap the Win + R keys to open the Run dialog box.
  • Then type “regedit” in the field and hit Enter or click OK to open the Registry Editor.
  • Next, go to this registry key: ComputerHKEY_LOCAL_MACHINESOFTWAREMicrosoftWindows NTCurrentVersionProfileList
  • Once you’ve opened the registry key, you should see a list of all the user profiles on your computer. Now click on each S-1-5 folder and look for the “ProfileImagePath” entry and double click on it to check which user account it is related to. You will see a path like “CUsersACK” where “ACK” is the username.
  • You should know which of the user account is corrupted. Just look for a key named “RefCount” and change its Value data to “0” and click OK. And if it isn’t available, simply right-click on the right pane and create it.
  • After that, double click on the key named “State” and make sure that the Value data is “0” and click OK.
  • Exit the Registry Editor and restart your computer to apply the changes made and then check if it fixed the problem or not.

Option 5 – Run System Restore

  • Tap the Win + R keys to open the Run dialog box.
  • After that, type in “sysdm.cpl” in the field and tap Enter.
  • Next, go to the System Protection tab then click the System Restore button. This will open a new window where you have to select your preferred System Restore point.
  • After that, follow the on-screen instructions to finish the process and then restart your computer and check if the problem is fixed or not.
Read More
Screen of death colors in Windows 10
Receiving a screen of death is not a pleasant experience at all and most users would agree that they would very much like not to face one during their work with the computer. Sadly PC is not a perfect machine and it is not working in a perfect environment so errors happen. The most famous and well-known death screen is blue which is also the most common one, my bet would be that there is not a user which has not been faced with this blue error screen. There is no simple explanation why these stop errors occur as several factors can be involved. However, it is known that the malfunctioning of hardware drivers or drivers that are installed by third-party software drive this unwanted change. But did you know that there is more colors for infamous death screens and not just blue one? Microsoft has coded different errors to different colors in the goal for the technical team to be aware right away of what type and kind of error they are dealing with. Color for screen errors are: Blue, Black, Pink, Brown, Yellow, Red, Orange, Green and White If you are interested in what color represents what keep reading.

BLUE

blue screen of deathA stop error or exception error commonly called the blue screen of death (BSoD) or blue screen, is an error screen displayed on Windows computers following a fatal system error. It indicates a system crash, in which the operating system has reached a condition where it can no longer operate safely. This is caused by many different problems, such as a general hardware failure or a crucial process terminating unexpectedly.

BLACK

black screen of deathOn Windows 10 systems, a Black Screen of Death can be caused by an unfinished Windows Update. To resolve this problem, simply hold the power button down on your PC or laptop to switch off the computer. A cold start should result in the system booting properly.

PINK

pink screen of deathIt is a diagnostic screen with a white type on a pink background. Pink Screen is mainly seen when the VMkernel of an ESX/ESXi host experiences a critical error, becomes inoperative, and terminates any virtual machines that are running. It is not fatal and generally considered more of a developer testing issue. When encountered, it can be fixed quickly by following the simple action of pressing and holding your computer’s power button to shut down the device.

BROWN

brown screen of deathThe Microsoft Windows 10 Operating System Brown Screen of Death is an on-screen fatal error notification with bug check codes which is seen when a computer crashes due to graphics hardware or software-related problems (failing graphics drivers).

YELLOW

yellow screen of deathIt affects the functioning of a browser, particularly Mozilla Firefox. The Yellow Screen of Death makes the appearance with a weird buzzing sound in the background when the XML parser refuses to process an XML document causing a parsing error and a weird buzzing sound. The issue persists unless the computer is manually rebooted.

RED

red screen of deathCommonly the Windows 10 red screen is caused due to the hardware error, particularly if you overclock your Windows PC/laptop. Despite this, sometimes the red screen of death is also caused by outdated or incompatible drivers or due to BIOS issues.

ORANGE

orange screen of deathThe Orange Screen of Death on Windows occurs due to fatal hardware errors. Multiple reasons have been reported for the Orange Screen of Death. Some had this issue when watching a YouTube video, some were not able to boot into Windows. It can even occur when waking up from Sleep.

GREEN

green screen of deathThe green screen of death only appears when you're running an Insider Preview version of Windows 10. It's the same as the blue screen of death, and it will show the same error messages. ... If you see a green screen of death (GSOD) on your PC, that's a sign you're using an Insider Preview build of Windows 10.

WHITE

white screen of deathThe White Screen on Windows is also an error where the screen of the computer just turns white and freezes. There can be several things that can cause the white screen to appear on the Windows laptop monitor. But the main issue could be because of malfunctioning of the graphics hardware.
Read More
Fix Your PC can’t project to another screen
In case you don’t know, Windows 10 comes with a native ability to project to another screen, be it wireless or wired. All it takes to do that is by tapping the Win + P key combination to display options to manage the extended display. However, there are times when you might encounter errors when you do that like the “Your PC can’t project to another screen” error. This kind of error stops you from projecting your computer to the other screen. Here’s the full content of the error message:
“Your PC can’t project to another screen, Try reinstalling the driver or using a different video card.”
This error could be due to loosely connected hardware or the display adapter. It is also possible that a recent Windows Update has messed up its settings. To resolve this issue, you can try several suggestions that will be given in this post. You can try to check the hardware cable connections or run the Hardware and Devices troubleshooter. You could also update or reinstall the display adapters or replace the graphics card.

Option 1 – Try checking the hardware connections

The first thing you have to do before you further troubleshoot the problem is to check the hardware connections of your computer and see if there are damaged ones, just like with the ports as it would also affect the overall connectivity of the device with the computer. You also have to make sure that no pin is missing from the ports. So if you notice some irregularities in the connecting cable physically, you might have to buy another one and replace it and then see if it fixes the problem or not.

Option 2 – Run the Hardware and Devices Troubleshooters

  • The first thing you need to do is click on Start and then on the gear-like icon to pull up the window for Settings.
  • After opening Settings, look for the Update and Security option and select it.
  • From there, go to the Troubleshoot option located on the left-hand side of the list.
  • Next, select Hardware and Devices from the list and open the Troubleshooter and run it. Once it is doing its job, wait for it to complete the process and then restart the system.
  • After the system restarts, check if the problem’s now fixed. If not, refer to the next option given below.

Option 3 – Try to update or reinstall the display adapters

You might also want to update the drivers for Display adapters and Monitors or you might also have to update or reinstall your NVIDIA driver if you’re using one. To update or reinstall the display adapters, follow these steps:
  • Tap the Win + R keys to open the Run dialog box and then type in MSC and tap Enter or click OK to open the Device Manager.
  • Expand the section for Display Adapters.
  • And then select the Display Driver and right-click on it.
  • From the drop-down menu, select the Update Driver option and follow the on-screen instructions to install the latest version of the Display Driver.
  • Restart your PC after the installation.
If you find that updating the drivers does not help, you can try to reinstall them. How? Simply follow the steps below.
  • Tap the Win + X keys and select the Device Manager.
  • After that, look for the affected driver in the Device Manager window. And if you see a yellow exclamation mark beside it, right-click on it and select the option “Rollback” to roll back the driver.
  • And if the Rollback option is not available, just select Uninstall and then restart your PC.
  • Finally, open the Devices Manager once again and select the option “Scan for hardware changes” to install the driver.

Option 4 – Consider replacing the graphics card

You might also want to consider replacing the graphics card of your computer to resolve the problem if the options provided above didn’t work.
Read More
How to Fix Windows 10 Error Code 0x80070570

Error Code 0x80070570 - What is it?

Error Code 0x80070570 is a common Windows 10 error code that generally is seen by users who are attempting to install a new version of the operating system. While it is most often associated with Windows 10, variations on this same error code have been present in previous versions of the operating system, going all the way back to Windows 7.

Common symptoms include:

  • Inability to run through the installation process to completion when attempting to install a new version of the operating system
  • Error message regarding corrupt or missing files
While it is frustrating to encounter an error like Error Code 0x80070570 as you try to install a new operating system version on your device, there are several methods that can be used to try to resolve the issue. If you do not feel like you have the skill or knowledge necessary to successfully apply the steps below, be sure to get in touch with a trusted computer repair technician that is competent in the repair of Windows 10 errors.

Solution

Restoro box imageError Causes

In some cases, Error Code 0x80070570 arises erroneously when the system isn’t able to find a particular file that it needs. Other times, it happens when there is a conflict with the antivirus software that you are running and the installation software. Finally, there may be a faulty source of RAM in your computer that needs to be removed before the installation can be completed.

Regardless of what you believe to be the cause behind the error code, there are at least two different methods that you can use to try to resolve Error Code 0x80070570 on your device. The first is fairly simple and easy to follow, while the second requires a little bit more knowledge of your hardware in order to complete it successfully.

Further Information and Manual Repair

There are two common ways that users can attempt to get around Error Code 0x80070570 on their devices. Each requires a little more skill and technical knowledge than the last. If you don’t feel like you have the skill, time, or ability to invest in the methods below, be sure to get in touch with a Windows repair technician who can help you to complete the necessary steps in the right ways.

Here are the best ways to attempt to resolve Error Code 0x80070570 on your Windows device:

Method One:  Reattempt Installation

In some cases, when Error Code 0x80070570 appears on your computer, you can simply click on the OK button and then go back to the screen immediately proceeding where your installation has left off, choosing to restart the process of installation. For some users, repeating this method at least four times has allowed them to bypass the error without undertaking more serious and time-consuming methods to resolve the issue at hand.

Method Two:  Check Your Various Sources of RAM

If you have more than one source of RAM in your computer, first remove one of the sources, then re-attempt installation. If you are still encountering Error Code 0x80070570 after removing one of the sources, continue to remove each until you are down to a single source, then trade that last source for one of the ones that have been pulled.

If you have a bad source of RAM, this can help you to figure out which input is causing the error to appear and to address the problem appropriately. Once you have determined which specific source is causing the problem, you can reboot your computer and attempt to run the installation process one more time.

If your RAM sources are not specifically causing the issue, you may still need to run diagnostics tests on your hardware to identify the source of the problem at hand.

Method Three: Use An Automated Tool

If you wish to always have at your disposal a utility tool to fix these Windows 10 and other related issues when they do arise, download and install a powerful automated tool.

Read More
1 2 3 162
Logo
Copyright © 2022, ErrorTools. All Rights Reserved
Trademarks: Microsoft Windows logos are registered trademarks of Microsoft. Disclaimer: ErrorTools.com is not affiliated with Microsoft, nor claim direct affiliation.
The information on this page is provided for information purposes only.
DMCA.com Protection Status