Fix Communication with service process failed

This post will guide you in fixing the “Communication with service process failed” error in Windows 10. This error is related to the Intel Driver and Support Assistant application. Although this error does not reportedly cause any loss of functionality in the computer, however, it still indicates that there is something wrong with some of your driver modules.

Intel has taken a bold step and combined its older modules into this new application (Intel Driver and Support Assistant) recently. This application enables users to scan their computers for any available updates from Intel. This is the main application of Intel and provides users a way to update their driver software automatically instead of manually updating it. However, with the recent reports submitted by some users, it seems that something is wrong with this application, and users to have to deal with the “Communication with service process failed” error. This error might be caused by several reasons, for one, it could be that the application is corrupted or incomplete in its nature which is possible since this is still a developing and newly released app. It could also be that there are other utilities or modules that conflict with the Intel software. Whichever the reason may be, you can try out the options given below to resolve the problem but before you proceed, make sure that you have an administrator account as well as an active and stable internet connection.

Option 1 – Disable DSATray in Startup

If you receive this error message every time you start your computer then this means that the application is not able to launch properly. Like pointed out, it could be that it is still incomplete in nature or it conflicts with other applications. Thus, you can try to disable the service from the startup and check if it fixes the problem.

  • Tap the Win + R keys to open the Run dialog box.
  • Then type “taskmgr” in the field and hit Enter to open the Task Manager.
  • After that, go to the Startup tab and look for the Intel Driver and Support Assistant app.
  • Right-click on the app and select Disable.
  • Restart your PC and check if the error is now fixed or not

Option 2 – Reinstall the Intel Driver and Support Assistant

If the first option did not work, you can try reinstalling the Intel Driver and Support Assistant app. To do so, follow these steps:

  • In the search box, type in “control” and then click on Control Panel (desktop app) among the search results.
  • After that, select Programs and Features from the list which will give you a list of all the programs installed on your computer.
  • From there, look for Intel Driver and Support Assistant and select it and then uninstall it.
  • After you have the app uninstalled, open your browser and go to Intel’s official website. From there, download the driver utility manually.
  • Once the download is finished, right-click on it and select “Run as administrator” and install the app on your PC with elevated access.
  • Restart your PC and then check if the error is now fixed.
If you like to learn and find out more about various Windows errors, and how to repair them go to our vast archive or use search to find articles that will explain and help you in solving your issue.
However, if you prefer to do things fast and with automatization then we are proposing to use an automated solution for your issues. The application that we are recommending is Advanced System Repair Pro
Advanced System Repair utilizes multiple tools all in one to give you a quick, simple, reliable, and very thorough diagnosis of your PC. It brings you all the tools you need in one program to clean, fix, protect, optimize and boost your PC!
1-Click Maintenance
All the tools to make it simple and easy! It's like having a professional technician at the click of a mouse.

Junk Cleaner
Keeping your computer free from unnecessary clutter also helps make your computer last longer. Like any other machine, if you keep it clean and take care of it, it will serve you better for longer!

Optimize background apps
Optimize applications background activity with the built-in Application Optimizer feature.

Disk Defrag
With a simple 1-click, Advanced System Repair speeds up your PC by assembling fragmented files on your machine and organizing them more efficiently.

Malware Removal
Finds and removes all types of harmful malware including trojans, worms, bots, adware, spyware, PUPs, and more!

Privacy Cleaner
The all-in-one privacy suite to Clean Your Tracks & Protect Your Privacy! Make your computer safe, secure, and more efficient!

System Tweak/Optimizer
ASR will analyze your complete system and settings to adjust your PC to function at its maximum performance.

Registry Cleaner
Over time, as you install and uninstall applications, the registry can become cluttered with old entries and broken settings which can result in program crashes, and annoying messages and slow the computer down.
Visit our Advanced System Repair Pro Download page to inform yourself about all the benefits of this software and get a free trial copy of it.
advanced system repair pro

Advanced System Repair Pro

One-click automated PC repair solution
ASR logo
With Advanced System Repair Pro you can easily
Replace damaged files
Restore performance
Free disk space
Remove Malware
Protects WEB browser
Remove Viruses
Stop PC freezing
DOWNLOAD
Privacy Policy | Terms of Use | Uinstall
Advanced System Repair Pro is compatible with all versions of Microsoft Windows including Windows 11

Share this article:

You might also like

Basic IT skills everybody should know
In today’s world and age, there are some essential IT skills that basically everyone should know. No matter in what field you are working some skills are just needed in order to function properly in the work. So, without further ado let's dive into what are these essential IT skills everyone, even your grandmother should know.

Basic IT skills5 Essential IT skills everybody should know

  1. Word processing

    No matter are you creating or editing business documents or just trying to help a friend or relative, word processing skill is an essential asset and requirement in today’s age. Writing anything on a bunch of paper is time-consuming, papers can get lost, and searching for a particular item inside a bunch of papers is not a really enjoyable experience. A much easier solution is to write, format, and keep everything on the computer and almost all employers are asking for this skill.
  2. Send and using emails

    Today we live in the digital age and most communication is done in real-time via messaging apps and file sharing is done via file-sharing services. Despite mentioned technology, many files are shared and sent through emails. When a message is too long or complex when it needs to have some attachment or to be kept in archive emails are the way to go and therefore using email is a must-have essential skill.
  3. Using search engines

    When talking about using search engines we really do not think about firing up your favorite browser, going into the search engine,s and typing cat pictures. What we think is that a person should know how to use a search engine properly, tweak its search options, and phrase words and sentences to find everything he or she needs.
  4. Doing data work

    Data entry and data calculations have been made easier than ever thanks to today's technology. Microsoft excel, libre office calc, google sheets, etc. are all capable of performing a great variety of calculations and keeping track of plenty of required data. This skill is often asked by employers as an essential one.
  5. Cyber security

    Each employee or person, in general, should be quite aware of various scams and best practices to keep itself safe in this digital world. We have several articles on this topic and there are a great variety of articles on the internet as well.

Conclusion

No matter are you young or old, employed or looking for a job, these skills are a must-have in today’s world.  There are a lot of great tutorials online on these various topics and I am sure that your knowledgeable friend or cousin would be happy to help and show you how to do all of these things.
Read More
Fix CHKDSK is not available for RAW drives
One of the most useful tools you can use to repair bad or corrupted sectors in the hard disk of your computer is the CHKDSK utility. However, there are also instances when this Disk Checking tool could encounter some issues and one of them is the error that states, “The type of the file system are RAW, CHKDSK is not available for RAW drives”. This kind of issue is due to the RAW file format which is not recognized by the Windows operating system that you’ve installed which explains why you’re getting this error when running the CHKDSK utility. You can also encounter this error in case there is something wrong with the drive encryption. To fix this error, you have to change the File System of the drive. How? Refer to the steps given below. Step 1: The first thing you need to do is create a bootable Windows 10 media. Step 2: After that, click on Repair your computer on the first Windows 10 installation setup window. Step 3: Next, you have to select the operating system partition from the given options and then click on Next. Step 4: Now select Command Prompt from the System Recovery Options box and then type the following command and tap Enter to initiate the Diskpart utility inside Command Prompt.
diskpart
Step 5: Afterwards, type in either of the following commands to help you in either listing all the Disk connects or all the partitions on those disks formed.
diskpart or list volume
Step 6: Next, you need to select any of the two given commands below depending on the list you entered on the previous step.
select disk # or select volume #
Step 7: After you enter the command, it will select the Disk or the Partition you want to select. Now you have to type and enter the following command to clean your drive.
clean
Step 8: Now enter any of the two following commands.
list disk or list volume
Step 9: Then type the next command below to create a specified partition.
create partition primary
Step 10: Once done, type in the following command to select the newly created partition.
select partition 1
Step 11: Next, type the following command to mark the selected partition as active.
active
Step 12: Finally, restart your computer to successfully apply the changes made and then see if it has fixed the problem or not.
Read More
Rebuild Search Index in Windows 10
If by any chance your search result in Windows is misleading, missing, or incorrect then it is a high probability that your search index is out of date. To repair this issue follow this guide step by step. Please take note that rebuilding the whole search index can take a long time on some systems depending on the size of the index itself, CPU speed, HD speed, etc. Sometimes it can take even hours on large drives. First, press ⊞ WINDOWS + R to open the run dialog and type in it Control panel to open the control panel. keyboard with windows and r markedrun dialog with control panel typed in 
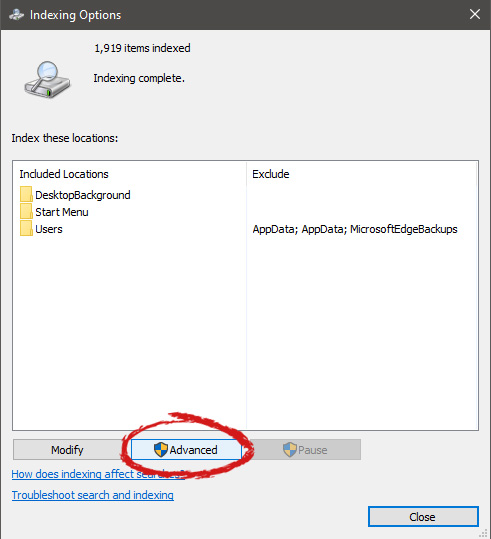
Once you are in the control panel, switch your view to large icons and locate Indexing options. Control panel with indexing options selectedInside indexing options, click on advanced. indexing options advanced button markedIn advanced options click on the rebuild and confirm. indexing options rebuild button marked
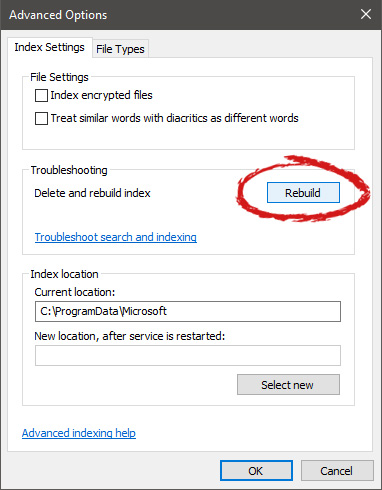
Leave your computer to finish and your searches should be working fine now.
Read More
Update cannot currently check for updates
If you receive an error message saying, “Windows Update cannot currently check for updates because updates on this computer are controlled”, while trying to change the Windows Update preferences or manually update, then read on as this post will guide you in fixing it. You can mostly encounter this error in managed systems where an Administrator controls the permission on the operating system. The reason why you are not able to modify the Windows Update preferences or manually update your system is that a group policy prevents you from doing so and that the only user who can do these things is none other than the administrator of the system. Troubleshooting this kind of problem is the same as when you troubleshoot an error message that says, “Some settings are managed by your organization”. In such cases, you need to check both the Windows Update Group Policy and Registry settings. If you’re just a standard user, you have to contact your system administrator regarding this issue and if you are the administrator, you can make adjustments to the system settings via the Registry Editor and the Group Policy Editor. Refer to the instructions given below for detailed instructions.

Option 1 – via the Registry Editor

If you are using the Home edition of Windows 10 and you want to change the policy for non-admin users on your local computer, then you can use the Registry Editor for that. Here’s how you can do it:
  • Tap the Win + R keys to open the Run dialog box.
  • Then type “Regedit” in the field and hit Enter to open the Registry Editor.
  • After that, navigate to the following registry key:
HKEY_LOCAL_MACHINESOFTWAREPoliciesMicrosoftWindows
  • From there, look for the key named “WindowsUpdate” in the Windows folder and if it does not exist, you can just right-click on the Windows folder and select New > Key.
  • Now name the new key “WindowsUpdate” and create a new sub-key under the newly created key and input “AU” as its name.
  • Keep AU selected and then right-click anywhere in the right pane and select New > DWORD (32-bit) Value.
  • Then name the Value as “AUOptions” and right-click on AUOptions and select Modify.
  • Next, change the value of the Value data to “5” and click OK to save the changes made to the settings. Note that the Value Data of 5 refers to the policy to allow the local admin to choose the setting.
  • Now restart your computer once you’re done and check if non-admin users can now modify the Windows Update settings or update Windows.

Option 2 – via Group Policy Editor

  • Tap the Win + R keys to open the Run dialog box and then type “gpedit.msc” and hit Enter to open the Group Policy Editor.
  • Next, navigate to this folder: Computer Configuration > Administrative Templates > Windows Components > Windows Update.
  • Now look for the “Configure Automatic Updates” policy on the right pane and double click on it to open its Properties.
  • After that, shift the Radio button to “Enabled” and from the drop-down menu for Configure automatic updating, select option 5: Allow local admin to choose the setting.
  • Then click on Apply and OK to save the changes made to the settings.
  • Restart your computer and check if the problem’s fixed or not.
Read More
Troubleshooting Error 1722

Troubleshooting Error 1722

What is Error 1722?

Error 1722 is a type of Windows Installer error. Developed by Microsoft, Windows Installer is a software component used for the installation, maintenance, and removal of software on Windows systems. This is basically an .MSI file that contains explicit instructions about installing and removing specific applications that are supported by this file for example JAVA and ArcGIS. The error 1722 occurs when there is a problem with the Windows Installer package. And because of this the program supported by Windows Installer Package fails to set up and install. This error message is displayed in the following format:
“Error 1722. There is a problem with this Windows Installer package. A program required for this install to complete could not be run. Contact your support or package vendor.”

Solution

Restoro box imageError Causes

You may encounter error 1722 due to multiple reasons such as:
  • Windows Installer Package corruption
  • Improper Windows Installer Package installation
  • Windows Script Hosting permission issues
  • Viral Infection
It is advisable to fix error 1722 to ensure the application supported by the Windows Installer Package that you are trying to set up on your PC, installs successfully.

Further Information and Manual Repair

To resolve Windows Installer Package error 1722 on your PC, try the methods given below:

Method 1

Sometimes the error 1722 may pop up if the Windows Installer Package is not installed properly. In such an event, it is advisable to uninstall Windows Installer Package and then reinstall it. To do so, click on start, then control panel, program, and features and then choose the Add/Remove Program option to uninstall the Windows Installer Package on your system. Once it is removed, click OK to save changes. Then reboot your PC. Now download the Installer package and reinstall. After the installation is complete, now try installing the application supported by the Installer package you wished to install. However, first, it is suggested that you remove any traces of the failed application first. For example, if you previously received the error while installing Java, then remove all traces of failed Java installation.

Method 2

The alternative method is to change Window Script Hosting settings. To do this, go to the start menu, open Run and then type ‘Regedit’ in the command line and then press OK to continue. Check for either or both of the following registry keys HKEY_CURRENT_USERSoftwareMicrosoftWindows Script HostSettingsEnabled HKEY_LOCAL_MACHINESoftwareMicrosoftWindows Script HostSettingsEnabled If either of these has a DWORD value of ‘0’, then scripting is disabled. Change the values to ‘1’ will enable scripting and resolve the issue.

Method 3

There can be two reasons for Windows Installer Package corruption, viruses or registry overloaded with bad entries and obsolete files. If the error is triggered by viruses, then run an antivirus program to remove viruses and restore your PC. However, if the error is related to registry issues, then download Restoro. This is an easy-to-use PC Fixer with a powerful registry cleaner. The registry cleaner wipes out all the obsolete files cluttering the registry and repairs the damaged and the corrupt important files thereby repairing all errors including error 1722 on your system. Click here to download Restoro.
Read More
How to Repair Runtime Error 216
[vc_row][vc_column][vc_column_text]

Fix Runtime Error 216

What is Runtime Error 216?

Runtime Error 216 is not a common error message like Runtime Error 339. However, it may sometimes occur when starting up the computer if you are using a Windows-based application or using Internet Explorer.

Solution

Download Available to Completely Repair Runtime Error 216

Restoro box imageError Causes

The runtime error 216 error occurs when your computer gets infected with one or more viruses. The most common virus, in this case, is the SubSeven Trojan virus. Once your computer gets infected with a virus(es) it creates a backdoor on your Windows system. This might give hackers access to monitor your PC remotely. This poses a great risk to confidential information and personal data stored on your PC. The hackers can easily monitor your PC, access your private information and misuse it.

Further Information and Manual Repair

If you experience this error message, it is advisable to repair it immediately without any delays; Runtime Error 216 can make your system vulnerable. Here’s what you must do:
  • First things first, disconnect the internet connection so that the hacker can’t access your PC.
  • Now perform a boot scan through a powerful antivirus.  The antivirus will scan your system for viruses. After the scan is complete, all the disinfected files will appear in the scan report results. You are advised to delete them and click repair to fix the error.
  • Remember the antivirus will not scan infected Windows Registry entries, therefore to remove SubSeven.exe Windows Registry entries go to the start menu and type REGEDIT in the search box.
  • Click on REGEDIT and select Run as Administrator. Now type the following registry path HKEY_LOCAL_MACHINESoftware. This will help locate SubSeven.exe infected files. Once located, delete all of them and close Windows Registry Editor.
To ensure your computer is completely free from SubSeven Trojan Virus and other possible viruses, it is advisable to remove all the recently installed programs and downloaded applications. This is recommended because sometimes while downloading programs, we tend to download corrupted programs which include viruses. It’s, therefore, best to delete all the programs you’ve installed recently. Secondly, to prevent virus and hacker attacks, you must frequently update your security program by installing a powerful antivirus program. Following the repair guide steps will protect your system from malware. It will also help fix runtime error 216 and ensure your PC is protected from similar threats.[/vc_column_text][/vc_column][/vc_row]
Read More
How to Fix Error 1005 Access Denied
Recently, some users reported that they were unable to access a website and only got the Error 1005 Access Denied instead. Specifically, users experience this issue when trying to open the Crunchyroll website – one of the largest anime and manga websites. This particular error is encountered not just on Crunchyroll but on a variety of websites like blogs, video streaming, forums, and so on. Here’s the full context of the error message:
“Error 1005 Access Denied – The owner of this website has banned the autonomous system number (ASN) your IP address from accessing this website.”
Usually, this error occurs when the website administrator decides to block an IP address or IP range. To fix this error, here are some suggestions you can try:

Option 1 – Uninstall the VPN service you are using or use a different provider

If you are using a VPN service, you might want to uninstall it. As mentioned, website administrator blocks IP ranges if they notice any malicious activities and because of this, your IP address might fall into the banned range even if you didn’t do anything at all. To uninstall the VPN service, follow the steps below.
  • Tap the Win + R keys to open the Run dialog box
  • Then type “appwiz.cpl” in the field and hit Enter to open the Programs and Features in Control Panel.
  • From there, look for the VPN service you are using, select it and then click on Uninstall to remove it.
  • After that, restart your computer and try to install the latest version of the program again. It should work now. If not, proceed to the next available option below.

Option 2 – Try disabling the Proxy server

There are some users who reported that they’ve fixed the problem after they’ve disabled the use of a proxy server using the built-in way. Follow the steps below to disable proxy server.
  • Tap the Win + R keys to open the Run dialog box.
  • Then type “inetcpl.cpl” in the field and hit Enter to pull up the Internet Properties.
  • After that, go to the Connections tab and select the LAN settings.
  • From there. Uncheck the “Use a Proxy Server” option for your LAN and then make sure that the “Automatically detect settings” option is checked.
  • Now click the OK and the Apply buttons.
  • Restart your PC.
Note: If you are using a third-party proxy service, you have to disable it.

Option 3 – Use the Google Public DNS

You might want to change your DNS to Google Public DNS as it could also help you in fixing the ERR_CERT_COMMON_NAME_INVALID error in Chrome. To do so, follow the steps below.
  • The first thing you have to do is right-click on the network icon in the Taskbar and select Network and Sharing Center.
  • Next, click on the “Change Adapter Settings” option.
  • After that, search for the network connection that you are using to connect to the internet. Note that the option might be “Wireless Connection” or “Local Area Connection”.
  • Right-click on your network connection and click on Properties.
  • Then select the new window to choose the “Internet Protocol 4 (TCP/IPv4)” option.
  • After that, click on the Properties button and click the checkbox in the new window for the option “Use the following DNS server addresses”.
  • Type in “8.8.8.8” and “8.8.4.4” and click OK and exit.

Option 4 – Try contacting the website administrator

If the first three given options didn’t work, you might want to consider contacting the website administrator especially if you’ve already determined that the issue does not occur due to a VPN or proxy server that you’re using. This option can be quite tricky since you won’t be able to submit a contact form since you’re banned from accessing the website but you can contact the admin via the form section if available.
Read More
Windows.UI.Xaml.Markup.XamlParseException UWP
Although the UWP platform is still new, it is working efficiently and significantly and it’s apparent that Microsoft is betting big on it. It helps developers in building applications for Windows 10 that are more modern and beautiful as well as responsive with the help of the .NET Core and XAML. However, all things considered, it still isn’t perfect and it could still encounter some errors. One of these errors is the Windows.UI.Xaml.Markup.XamlParseException UWP app error. This particular error can occur to any Universal Windows Platform or UWP application and according to security experts, it is due to some XAML parsing error. To fix this error, you can try to reinstall the faulty program or check its privacy settings. You can also run both the Program Compatibility and Windows Store Apps troubleshooters as well as run System Restore. For more information, check out the given options below.

Option 1 – Try to reinstall the faulty application

If you encounter this error in an application that is not a system-related one, then you can just uninstall it from the Windows 10 Settings app and then reinstall it again from the Microsoft Store. On the other hand, if it is a system application like the Camera or Calculator app, you can just uninstall and reinstall it using a PowerShell script.

Option 2 – Try to check the Privacy Settings of the concerned app

You might also want to check if all the Privacy Settings required for a certain application are configured properly as it could also cause issues like the Windows.UI.Xaml.Markup.XamlParseException UWP app error.

Option 3 – Try to run the Program Compatibility Troubleshooter

You might also want to run the Program Compatibility Troubleshooter. This built-in troubleshooter is available in the Windows Update & Security section. From there, select Troubleshoot. This will find a list of programs for you and since you have already downloaded the driver files, just click on Not Listed located at the top of the program list. After that, browse and select the driver files and then let the program do its job. In addition, you can try to run the Windows Store apps troubleshooter as it can also help you resolve the problem.

Option 4 – Run System Restore

If you have recently made changes in your computer’s settings, you could also run System Restore to fix the Windows.UI.Xaml.Markup.XamlParseException UWP app error. How? Refer to these steps:
  • Tap the Win + R keys to open the Run dialog box.
  • After that, type in “sysdm.cpl” in the field and tap Enter.
  • Next, go to the System Protection tab then click the System Restore button. This will open a new window where you have to select your preferred System Restore point.
  • After that, follow the on-screen instructions to finish the process and then restart your computer and check if the problem is fixed or not.
Read More
How to Enable Last Active Click feature
Microsoft has started to use group along with every open window in the Taskbar ever since the release of Windows 10. Early on, they used to show an individual entry for each one of the windows after grouping them which makes the taskbar look cleaner and organized. However, the main issue lies in the fact that you have to hover on your desired window to get on to them. At the time of writing, you need to tap the Ctrl key and click on the taskbar icon to open the last active window but you have to only click on the program’s taskbar icon after you apply the tweak given in this post for the last active window to open. Take note that the “Last Active” windows feature will only work if the taskbar buttons are combined. Before you get started doing the instructions given below, you need to create a System Restore Point first since you will be dealing with registry files and modifying some of the critical settings in Windows 10. Once you’ve done this, proceed to the given steps below. Step 1: Tap the Win + R keys to open the Run dialog box and then type “Regedit” in the field and hit Enter to open the Registry Editor. Step 2: If a User Account Control or UAC prompt appears, just click on Yes to proceed to open the Registry Editor. Step 3: Next, navigate to the following registry path:
HKEY_CURRENT_USERSoftwareMicrosoftWindowsCurrentVersionExplorerAdvanced
Step 4: From there, right-click on the right side of the panel and select New > DWORD (32-bit) and then name it “LastActiveClick”. Step 5: After that, double click on the newly created DWORd to modify its value. Put “1” as its value data. Step 6: Then click OK and close the Registry Editor. Step 7: Now restart your computer to successfully apply the changes made. Note: In case you want to revert back to the default configuration, all you have to do is set the value data of LastActiveClick to “0” or simply delete that DWORD and restart your computer to successfully apply the changes made.
Read More
Activision Blizzard Sued by California
blizzard hq
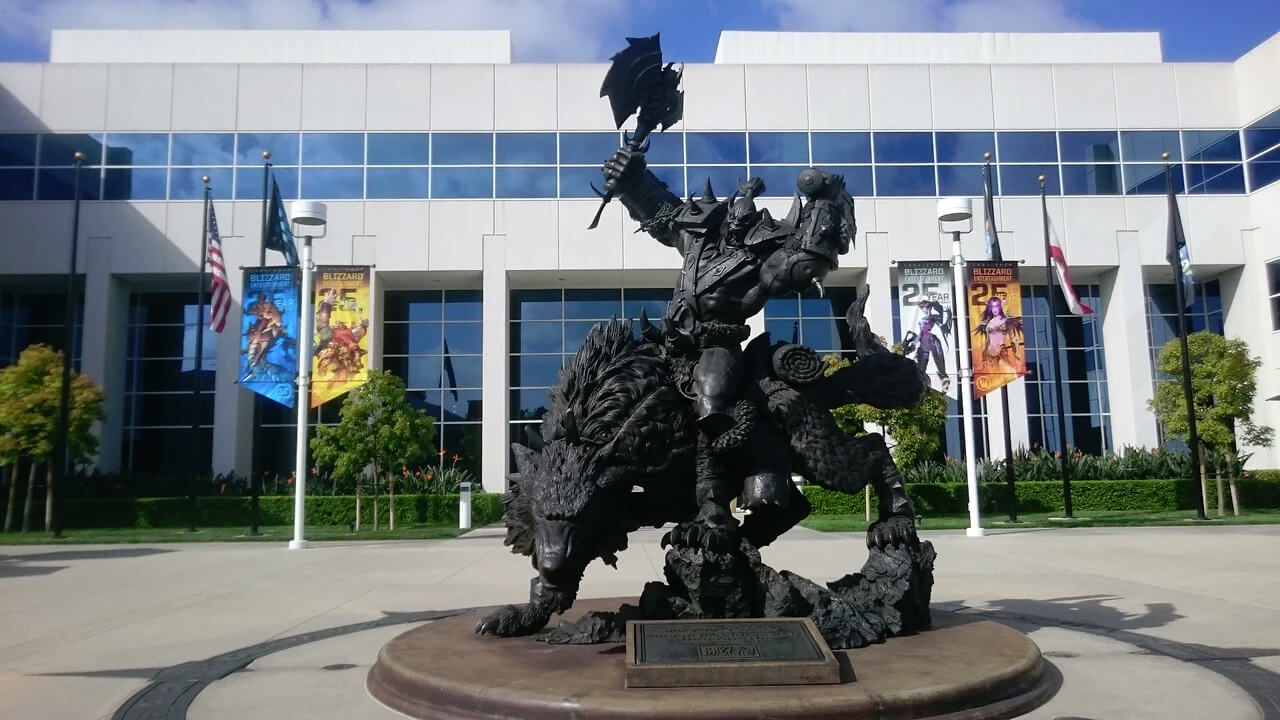
Following a two-year investigation by the California Department of Fair Employment and Housing, the state has filed a lawsuit against Activision Blizzard for fostering a "frat boy" culture in which female employees are allegedly subjected to unequal pay and sexual harassment. As reported by Bloomberg, Activision Blizzard is being accused by the state of California of discriminating against female employees at nearly all levels of employment, including in regards to compensation, promotion, assignments, and termination. The state alleges Activision Blizzard’s leadership has failed to address any of these outstanding issues or prevent them from occurring within the workplace. You can read the full details of the lawsuit here. The suit, filed Tuesday in the Los Angeles Superior Court, says Activision Blizzard, which is made up of about 20 percent women, assigns women, and women of color, to "lower paid and lower opportunity levels" with lower starting pay for similar work as their male counterparts. The documents also accuse Activision Blizzard of fostering a "pervasive 'frat boy' workplace culture in the office. Male employees are said to drink "copious amounts of alcohol" as they make their way through cubicles and "often engage in inappropriate behavior toward female employees." Male employees are said to come to work hungover, play video games during work "while delegating their responsibilities to female employees, engage in banter about their sexual encounters, talk openly about female bodies, and joke about rape." The lawsuit also cites one particular incident where a female employee, who was already subjected to intense sexual harassment at the company, committed suicide during a work trip with a male supervisor who allegedly brought inappropriate, sexual items with him on the trip. The lawsuit is asking for an injunction that will force Activision Blizzard to comply with workplace protections, as well as deliver unpaid wages, pay adjustments, back pay, and lost wages and benefits for female employees.

An Activision Blizzard spokesperson sent the following statement in response to the allegations:

We value diversity and strive to foster a workplace that offers inclusivity for everyone. There is no place in our company or industry, or any industry, for sexual misconduct or harassment of any kind. We take every allegation seriously and investigate all claims. In cases related to misconduct, the action was taken to address the issue. The DFEH includes distorted, and in many cases false, descriptions of Blizzard’s past. We have been extremely cooperative with the DFEH throughout their investigation, including providing them with extensive data and ample documentation, but they refused to inform us what issues they perceived. They were required by law to adequately investigate and to have good faith discussions with us to better understand and to resolve any claims or concerns before going to litigation, but they failed to do so. Instead, they rushed to file an inaccurate complaint, as we will demonstrate in court. We are sickened by the reprehensible conduct of the DFEH to drag into the complaint the tragic suicide of an employee whose passing has no bearing whatsoever on this case and with no regard for her grieving family. While we find this behavior to be disgraceful and unprofessional, it is, unfortunately, an example of how they have conducted themselves throughout the course of their investigation. It is this type of irresponsible behavior from unaccountable State bureaucrats that are driving many of the State’s best businesses out of California. The picture the DFEH paints is not the Blizzard workplace of today. Over the past several years and continuing since the initial investigation started, we’ve made significant changes to address company culture and reflect more diversity within our leadership teams. We’ve updated our Code of Conduct to emphasize a strict non-retaliation focus, amplified internal programs and channels for employees to report violations, including the “ASK List” with a confidential integrity hotline, and introduced an Employee Relations team dedicated to investigating employee concerns. We have strengthened our commitment to diversity, equity, and inclusion and combined our Employee Networks at a global level, to provide additional support. Employees must also undergo regular anti-harassment training and have done so for many years. We put tremendous effort into creating fair and rewarding compensation packages and policies that reflect our culture and business, and we strive to pay all employees fairly for equal or substantially similar work. We take a variety of proactive steps to ensure that pay is driven by non-discriminatory factors. For example, we reward and compensate employees based on their performance, and we conduct extensive anti-discrimination training including for those who are part of the compensation process. We are confident in our ability to demonstrate our practices as an equal opportunity employer that fosters a supportive, diverse, and inclusive workplace for our people, and we are committed to continuing this effort in the years to come. It is a shame that the DFEH did not want to engage with us on what they thought they were seeing in their investigation.

Conclusion

We will see how things work out, but I am not too optimistic for Activision Blizzard, truth to be told these reports are really bringing up some disturbing news on the sunlight. I just hope that all responsible will be brought to justice.
Read More
1 2 3 162
Logo
Copyright © 2022, ErrorTools. All Rights Reserved
Trademarks: Microsoft Windows logos are registered trademarks of Microsoft. Disclaimer: ErrorTools.com is not affiliated with Microsoft, nor claim direct affiliation.
The information on this page is provided for information purposes only.
DMCA.com Protection Status