How to Fix ACPI.sys Blue Screen Error

If, while using your computer, you encounter the ACPI.sys Blue Screen error, read on as this post will guide you in fixing the problem. The ACPI.sys file is a Windows operating system file that is related to the MSDN 2939. ACPI.sys, the Windows ACPI driver, is an inbox component of the Windows operating system. It is the one that supports the power management as well as the Plug and Play or PnP device enumeration. And so if this file ends up getting corrupted, it is known to cause a Blue Screen error.

Another possible cause for the ACPI.sys Blue Screen error includes RAM issues, incompatible firmware, hard disk issues, corrupted drivers or malware infection, and so on. Here are some Blue Screen errors that can be triggered by the ACPI.sys file:

  • KMODE EXCEPTION NOT HANDLED
  • PAGE FAULT IN A NONPAGED AREA
  • SYSTEM THREAD EXCEPTION NOT HANDLED
  • IRQL NOT LESS OR EQUAL
  • KERNEL DATA INPAGE
  • SYSTEM SERVICE EXCEPTION

To fix the Blue Screen error associated with the ACPI.sys file, refer to the instructions provided below.

Option 1 – Try to recreate the ACPI.sys file

If the first option didn’t work, the next thing you can do is to recreate the ACPI.sys file. Every time your Windows 10 PC boots up, it looks for all the system drivers in place and if it is unable to find them, it tries to create them. This is why if you remove your corrupt driver file, chances are, you might get a fixed file recreated just for you. How? Refer to the steps below.

  • Boot your Windows 10 PC in Safe Mode.
  • Then open File Explorer and navigate to this location: C:/Windows/System32/drivers
  • From there, look for the file named ACPI.sys and rename it to ACPI.old.

Note: As you can see, the file’s extension has changed from .sys to .old.

  • Now restart your computer and check if the ACPI.sys Blue Screen error is now fixed.

Option 2 – Try to update or rollback the ACPI Driver

The first thing you can try to fix the Storport.sys Blue Screen error is to either update or roll back the device drivers. It is most likely that after you updated your Windows computer that your driver also needs a refresh. On the other hand, if you have just updated your device drivers then you need to roll back the drivers to their previous versions. Whichever applies to you, refer to the steps below.

  • Tap the Win + X keys to open the Win X menu and from there, select the Device Manager.
  • After opening the Device Manager, look for the ACPI.sys driver and right-click on it, and then select Properties.
  • Next, go to the Driver section. Note that the rollback option would only be available if you’ve recently updated the ACPI.sys driver. So if you can’t see it then click on the Update Driver button.
  • After that, Windows will automatically check for the problems that could be related to the Blue Screen error.
  • Finally, restart your computer. It will just reinstall the device drivers automatically.

Note: You can also directly download the relevant drivers of your computer from the manufacturers’ website. So if you have an SSD, the issue might be due to an old storage driver. On the other hand, if updating the ACPI driver, didn’t work, you can also try to copy the ACPI.sys system driver file from the System32 folder of another computer that’s functioning properly and runs the same Windows OS version. Afterward, place it on your problematic computer and check if it fixes the BSOD error or not.

Option 3 – Run System File Checker or SFC scan

System File Checker or SFC is a built-in command utility that helps in restoring corrupted files as well as missing files. It replaces bad and corrupted system files with good system files. To run the SFC command, follow the steps given below.

  • Tap Win + R to launch Run.
  • Type in cmd in the field and tap Enter.
  • After opening Command Prompt, type in sfc /scannow

The command will start a system scan which will take a few whiles before it finishes. Once it’s done, you could get the following results:

  1. Windows Resource Protection did not find any integrity violations.
  2. Windows Resource Protection found corrupt files and successfully repaired them.
  3. Windows Resource Protection found corrupt files but was unable to fix some of them.

 Reboot your PC.

Option 4 – Run the Blue Screen Troubleshooter

Troubleshooting Blue Screen of Death errors wouldn’t be complete without the Blue Screen troubleshooter. As you know, it is a built-in tool in Windows 10 that helps users in fixing BSOD errors like ACPI.sys. It can be found on the Settings Troubleshooters page. To use it, refer to these steps:

  • Tap the Win + I keys to open the Settings panel.
  • Then go to Update & Security > Troubleshoot.
  • From there, look for the option called “Blue Screen” on your right-hand side and then click the “Run the troubleshooter” button to run the Blue Screen Troubleshooter and then follow the next on-screen options. Note that you might have to boot your PC into Safe Mode.

Option 5 – Run System Restore

  • Tap the Win + R keys to open the Run dialog box.
  • After that, type in “sysdm.cpl” in the field and tap Enter.
  • Next, go to the System Protection tab then click the System Restore button. This will open a new window where you have to select your preferred System Restore point.
  • After that, follow the on-screen instructions to finish the process and then restart your computer and check if the problem is fixed or not.
If you like to learn and find out more about various Windows errors, and how to repair them go to our vast archive or use search to find articles that will explain and help you in solving your issue.
However, if you prefer to do things fast and with automatization then we are proposing to use an automated solution for your issues. The application that we are recommending is Advanced System Repair Pro
Advanced System Repair utilizes multiple tools all in one to give you a quick, simple, reliable, and very thorough diagnosis of your PC. It brings you all the tools you need in one program to clean, fix, protect, optimize and boost your PC!
1-Click Maintenance
All the tools to make it simple and easy! It's like having a professional technician at the click of a mouse.

Junk Cleaner
Keeping your computer free from unnecessary clutter also helps make your computer last longer. Like any other machine, if you keep it clean and take care of it, it will serve you better for longer!

Optimize background apps
Optimize applications background activity with the built-in Application Optimizer feature.

Disk Defrag
With a simple 1-click, Advanced System Repair speeds up your PC by assembling fragmented files on your machine and organizing them more efficiently.

Malware Removal
Finds and removes all types of harmful malware including trojans, worms, bots, adware, spyware, PUPs, and more!

Privacy Cleaner
The all-in-one privacy suite to Clean Your Tracks & Protect Your Privacy! Make your computer safe, secure, and more efficient!

System Tweak/Optimizer
ASR will analyze your complete system and settings to adjust your PC to function at its maximum performance.

Registry Cleaner
Over time, as you install and uninstall applications, the registry can become cluttered with old entries and broken settings which can result in program crashes, and annoying messages and slow the computer down.
Visit our Advanced System Repair Pro Download page to inform yourself about all the benefits of this software and get a free trial copy of it.
advanced system repair pro

Advanced System Repair Pro

One-click automated PC repair solution
ASR logo
With Advanced System Repair Pro you can easily
Replace damaged files
Restore performance
Free disk space
Remove Malware
Protects WEB browser
Remove Viruses
Stop PC freezing
DOWNLOAD
Privacy Policy | Terms of Use | Uinstall
Advanced System Repair Pro is compatible with all versions of Microsoft Windows including Windows 11

Share this article:

You might also like

Intel i9 Alder Lake better than AMD Ryzen 9
Alder LakeIf we are to believe news from Intel, new series of processors based on Alder Lake architecture are about to be released somewhere in October. Alder Lake is the 12th Generation Core of Intel processors and it is meant to have all advantages of the current CPU structure. I9 is aimed to pack a punch against its competitors with technology including eight high-performance Golden Cove cores (P-cores) with Hyper-Threading and eight energy-efficient Goldmont (E-cores) equipped with a 30MB L3 cache and operating at high clock speeds. During the benchmark test, the new CPU outperformed all of Intel’s previous Rocket Lake structure processors which is logically expected but the big surprise came from results that indicate better performance than Apple’s new M1 processor even in single-threaded performance which is supposed to be best in that field. Another surprise was really beating AMD Ryzen 9 in each field. If we take into account that i9 has 16 cores in total and can process 24 threads against Ryzen 9 with 16 Cores and 32 threads this is an impressive feature. Now truth to be told Alder lake has massive L3 cache and microarchitectural advantages and consumes much more power but the results of performance are high. Also, note that this early CPU is not really a mass production one and maybe some things will still change but early results are very satisfactory. We will see what will price tag be since in this age of shortage and competition that will also play a big role in its overall success. Speaking of competition I eagerly await AMD’s response to this, in any way it seems that the CPU market is for some turbulence which is always a good thing for the final customer and I welcome it.
Read More
How to Turn off Advertising ID in Windows
In case you don’t know, Microsoft hooks up every machine that is running Windows 10 with an Advertising ID which helps them in providing Windows 10 users with relevant ads. These ads are delivered to users in the Action Center, Start Menu as well as the ads inside the UWP Applications. What makes these advertisements relevant is that they keep track of your browsing trends, likes and dislikes, with the help of the Advertising ID. However, if you are not fond of advertisements and you do not want this feature of Microsoft to track your usage, worry not for you actually have the option to disable targeted ads on your Windows 10 computer by turning off the Advertising ID. And you can do that during Windows 10 Setup or using the Group Policy Editor. For more details, refer to the instructions provided below for each one of the methods.

Option 1 – Turn off Advertising ID during Windows 10 setup

If you are about to install Windows 10, then during the installation process, your computer boots into the Install and Configure Windows 10 screen with Cortana that assist you during the setup. Once you reach the last page which is “Choose privacy settings for your device”, you will see the Advertising ID of your computer. Under the Advertising ID, you have to disable or toggle off the “Apps can use advertising ID to provide more personalized advertising in accordance with the privacy policy of the app provider” option. After you disable it, click on the Accept button to proceed with the installation. After that, the copy of your Windows 10 you are using will have the Advertising ID disabled by default.

Option 2 – Turn off Advertising ID via Group Policy Editor

  • First, tap the Win + R keys to launch the Run utility.
  • Then, type “gpedit.msc” in the field and click OK or tap Enter to open the Group Policy Editor.
  • Next, navigate to this group policy setting: Computer Configuration > Administrative Templates > System > User Profiles
  • Now double click on the “Turn off the advertising ID” option and set the radio button to Enabled. Once you do, you will see the following description on your screen:
“This policy setting turns off the advertising ID, preventing apps from using the ID for experiences across apps. If you enable this policy setting, the advertising ID is turned off. Apps can’t use the ID for experiences across apps. If you disable or do not configure this policy setting, users can control whether apps can use the advertising ID for experiences across apps.” Note that setting the radio button to Enabled or Not Configured will turn off the data collection of the Advertising ID.
  • Finally, exit the Group Policy Editor and then restart your computer to apply the changes made successfully.
Read More
Fix Some apps need to be uninstalled
When you update or upgrade your computer to Windows 10, the setup will look for the compatibility of both the hardware and software. And in this process, if suddenly got an error message saying, “Some apps need to be uninstalled” or “You need to uninstall a program in order to continue”, you have to look for the program(s) that might be causing the compatibility issues. But worry not as this post will help you resolve the issue. Simply follow the given suggestions below.

Option 1 – Look for the incompatible programs

There are times when Windows 10 will point out the programs that are incompatible with Windows 10. In this situation, just click on the Uninstall and continue button and then wait for the process to be completed. For more information, you can check out the official site Ready for Windows by Microsoft. This site can help you determine which software versions are compatible with Windows 10 and which ones are not. All you have to do is select the Windows 10 version and type your App name, after that, you will see the results about its compatibility. Thus, it’s now easier for you to figure out which software is causing an issue and if there is a new updated version available that you can install instead.

Option 2 – Try to install the Windows Update in a Clean Boot State

Putting your PC in a Clean Boot state can also help you install Windows Updates or Upgrades without any trouble because, during this state, you can start the system with a minimum number of drivers and startup programs that will surely help you in isolating the root cause of the issue.
  • Log onto your PC as an administrator.
  • Type in MSConfig in the Start Search to open the System Configuration utility.
  • From there, go to the General tab and click “Selective startup”.
  • Clear the “Load Startup items” checkbox and make sure that the “Load System Services” and “Use Original boot configuration” options are checked.
  • Next, click the Services tab and select the “Hide All Microsoft Services” check box.
  • Click Disable all.
  • Click on Apply/OK and restart your PC. (This will put your PC into a Clean Boot State. And configure Windows to use the usual startup, just simply undo the changes.)
  • After that, try to install the Windows Updates or upgrade again.

Option 3 – Try creating a new user account

Creating a new user account can resolve the “Some apps need to be uninstalled” error when upgrading or updating your Windows 10 PC. All you have to do is create a new admin account and initiate the setup. And this is a new user account, there will be no third-party applications installed on your computer. Thus, the installation should go through without any trouble. And in case you’ve already installed programs for that user, you just have to uninstall them all and then re-run the setup.

Option 4 – Perform a clean install

If none of the options worked, you can try to clean install Windows 10. Just make sure that you have the ISO from the official Microsoft Website and then a bootable USB drive to install Windows 10 again. Take note that this will delete all the data from your drive where Windows 10 was installed previously.
Read More
Fix Boot Configuration Data error 0xc0000185
This post will guide you in fixing a particular problem where your Windows 10 computer does not even let you turn it on and it appears as soon as it starts to boot the operating system and it displays an error message that says, “The Boot Configuration Data for your PC is missing or contains errors, Error code 0xc0000185”. On the other hand, it may also display a different error message saying, “The operating system couldn’t be loaded because a required file is missing or contains errors”. There are various suggestions you can try to resolve this error. You could check the physical status of your hardware or rebuild the Boot Configuration Data, use the Automatic Startup Repair or System Restore, or better yet, reset your Windows 10 computer. Since your computer will not boot, you will have to either try to get into the Advanced Startup Options screen, boot Windows 10 in Safe Mode, or use a bootable Windows 10 media to boot your computer.

Option 1 – Try to rebuild the BCD files

The first thing you can do to resolve the issue is to Rebuild Boot Configuration Data or BCD files.
  • You can start by booting into the installation environment for Windows 10 from an installation media.
  • After that, click on Repair your computer and on the blue screen, select Troubleshoot and then select the Advanced options menu.
  • From there, select Command Prompt and once you open it, enter each one of the commands given below by sequence.
    • bootrec /FixMbr
    • bootrec /FixBoot
    • bootrec /ScanOS
    • bootrec /RebuildBcd
  • Once you’re done executing the commands given above, type “exit” to close the Command Prompt window and then restart your computer and see if it fixed error code 0xc000014c.

Option 2 – Try to run Automatic Startup Repair

In this option, you need to boot your computer into the Advanced Startup Options and from there, run the Automatic Startup Repair and then wait until the process is completed.

Option 3 – Try running System Restore in Advanced Startup Options

Since you probably can’t boot into your Windows 10 computer, you can try to run System Restore again in the Advanced Startup Options.
  • Boot your computer into the Advanced Startup Options screen.
  • From there, you will see some options to troubleshoot when you can’t log in to Windows in the usual way.
  • Now select Troubleshoot > Advanced Options > Command Prompt.
  • After that, type “rstrui” and hit Enter to execute the command which will start the System Restore process.

Option 4 – Try to perform repair install by creating a Windows 10 installation media

  • Click this link and then click the Download Tool Now button.
  • Next, click the “Use the tool to create installation media (USB flash drive, DVD, or ISO file)…” option and follow the next given instructions on the screen.
  • Now select the ISO file option in step 5.
  • After that, you should now have an ISO file.
  • Next, go to the location where you’ve downloaded the ISO file.
  • Then right-click on the Windows 10 ISO file and select the Open with option and then select File Explorer.
  • Now click on “setup.exe” and follow the next instructions that appear on the screen. When asked, you have to select either Nothing (clean install) or Keep personal files only option. Take note that you must not select the “Keep personal files, apps, and Windows settings since it doesn’t really work.

Option 5 – Try to physically check the hardware

You should also check the physical status of the hardware in your computer. You can clean the dust off the hardware components like the Network Card of the computer. You might want to use a small blower or you could also use a soft cloth and run the components gently. Make sure that you don’t damage any parts with moisture or cause harm to any circuits while you carry out this task.
Read More
Fix Adobe causes high CPU usage in Windows 11
adobe creative suiteIn today's world any professional, whatever be design, print, web design or similar is using one or more Adobe programs. Adobe has cemented itself as a must-have software for any kind of serious and even amateur work. Sadly in the latest Windows 11 adobe software in some instances can slow down your computer and put some hard load on the CPU. If you are one of these unfortunate users, keep reading because we have a few things you can do to solve this.

1. Run SFC scan

SFC scan is a built-in Windows tool aimed at diagnosing and repairing system files inside Windows itself. Running an SFC scan usually solves most issues of these kinds so we will try that one first.
  1. Press ⊞ WINDOWS + S to open the Search bar and type in cmd
  2. Select command prompt and on the right side click on Run as administrator
  3. Inside command prompt type in: sfc /scannow and press ENTER
  4. Wait for the whole process to finish and reboot your system

2. Update Windows

Windows updates are designed to fix issues and solve problems, check to see if a new update is available to install.
  1. Press ⊞ WINDOWS + I to open the Settings app
  2. Click on Windows Update in the bottom left pane
  3. On the right check visually if there is an update pending and if there is, install it

3. Temporary turn off antivirus and firewall

Antivirus and firewall can interfere with adobe applications and background services, try turning your preferred protection software temporarily off and check if your CPU is still under high load.

4. Reinstall Adobe suite

Uninstall and install a clean version of the adobe creative suite or individual applications that you are using. Check your CPU load after reinstallation.

5. Uninstall Adobe CEF Helper

This is not a really advisable course of action but if non of the previous solutions have produced results then this might be the only option if you would like to keep using the software. Open File Explorer and paste the following line in the path box on top: C\:Program Files>Adobe Systems>Adobe CEF Helper or Adobe Creative Cloud >Adobe CEF Helper_uninstall.exe. Double click on the file and uninstall the CFT helper.
Read More
Fix Origin Error when loading the webpage
If you encounter a blank page with an error message saying, “Origin Error” when you try to load a webpage, then this post will surely help you resolve this error. As you can see, this error is a very uncommon one and it is not about the popular game known as Origin where all you have to do is reinstall the client. Although this error message is a very uncommon one, you will see a blank page with a message saying, “Origin Error” when you attempt to load a webpage. To fix this error, this post will provide you some potential fixes that might help. Follow the fixes given below carefully and see which one fixes the problem.

Option 1 – Use Ctrl + F5 keys to clear browser cache

The first thing you can try is to “Hard Refresh” to clear the cache of your browsers. You can do that by using the Ctrl + F5 keys on your keyboard. On the other hand, you can also clear the cache manually for Chrome, Edge, and Firefox.

Option 2 – Remove the Proxy

You might also want to try removing the Proxy as it could also help you in fixing the Origin error. Here’s how you can do it:
  • Tap the Win + R keys to open the Run dialog box.
  • Then type “inetcpl.cpl” in the field and hit Enter to pull up the Internet Properties.
  • After that, go to the Connections tab and select the LAN settings.
  • From there. Uncheck the “Use a Proxy Server” option for your LAN and then make sure that the “Automatically detect settings” option is checked.
  • Now click the OK and the Apply buttons.
  • Restart your PC.
Note: If you are using a third-party proxy service, you have to disable it.

Option 3 – Try to flush the DNS, reset Winsock and the TCP/IP

You might also want to flush the DNS and reset Winsock as well as reset TCP/IP as it could help in fixing the Origin error. To do so, refer to these steps:
  • Click the Start button and type in “command prompt” in the field.
  • From the search results that appear, right-click on Command Prompt and select the “Run as administrator” option.
  • After opening Command Prompt, you have to type each one of the commands listed below. Just make sure that after you type each command, you hit Enter
    • ipconfig /release
    • ipconfig /all
    • ipconfig /flushdns
    • ipconfig /renew
    • netsh int ip set dns
    • netsh winsock reset
After you key in the commands listed above, the DNS cache will be flushed and the Winsock, as well as the TCP/IP, will reset.
  • Now restart your computer and open Google Chrome then try opening the website you were trying to open earlier.

Option 4 – Try using Google Public DNS

You might want to try changing your current DNS to the Google Public DNS. All you have to do is change the DNS settings explicitly on your operating system by using the DNS IP addresses. Here’s are the steps to do that:
  • The first thing you have to do is right-click on the network icon in the Taskbar and select Network and Sharing Center.
  • Next, click on the “Change Adapter Settings” option.
  • After that, search for the network connection that you are using to connect to the internet. Note that the option might be “Wireless Connection” or “Local Area Connection”.
  • Right-click on your network connection and click on Properties.
  • Then select the new window to choose the “Internet Protocol 4 (TCP/IPv4)” option.
  • After that, click on the Properties button and click the checkbox in the new window for the option “Use the following DNS server addresses”.
  • Type in “8.8.8” and “8.8.4.4” and click OK and exit.
Read More
Error 740 Requested operation requires elevation
If you are trying to open a folder or run a program or delete a file but you encounter an error message instead saying, “Error (740), The requested operation requires elevation” on your Windows 10 computer, then this post should help. Make sure that you follow each one of the options given below carefully.

Option 1 – Always run the program as an administrator

There are some apps that require administrator privilege before they can be opened. So if you are got the “Error (740), The requested operation requires elevation” error when you try to open a particular app on your computer, you have to try opening it as administrator instead. On the other hand, if you are already using an administrator account or if you are a member of the administrator group, this option may not work for you so just proceed to the next one but if you’re only using a regular account, then follow these steps:
  • First, right-click on the app you are trying to open and select Properties.
  • After that, go to the Compatibility tab and check the checkbox labeled “Run this program as an administrator”.
  • Next, click the Apply and OK buttons and see if the app opens without any problem.

Option 2 – Try to change the folder permissions

If you encounter Error 740 while opening a folder, then you need to try changing the folder permissions.
  • First, right-click on the folder and click Properties.
  • Next, go to the Security tab and click the Advanced button.
  • After that, check the checkbox labeled, “Replace all child object permission entries with inheritable permission entries from this object” and then click the Apply and OK buttons to save the changes made.

Option 3 – Try disabling UAC

The User Account Control or UAC settings might be the one that’s responsible for Error 740 which is why you have to disable the User Account Control and then verify if it’s the one that triggers the error or not. To do that, simply search for “Change user account control settings” in the Taskbar search box and then drag the blue bar down to the bottom and click the OK button to save the change made.

Option 4 – Select the Elevate without prompting option in the Group Policy Editor

There is an option in the Group Policy Editor which allows you to disable the UAC prompt. Disabling the “Elevate without prompting” option can help in resolving Error 740 and to disable it, follow the steps below.
  • Tap the Win + R keys to open the Run dialog box.
  • Then type “gpedit.msc” in the field and hit Enter to open the Group Policy Editor.
  • Next, navigate to the following path:
Computer Configuration > Windows Settings > Security Settings > Local Policies > Security Options
  • From there, go to the Security Options folder where you can find a policy named “User Account Control: Behavior of the elevation prompt for administrators in Admin Approval Mode”. Double click on it to open its options.
  • Now select the Elevate without prompting option from the drop-down menu and click OK.
Read More
Remove login screen in Windows 10
Each time we turn ON our computer or wake it from hibernation we are greeted with a Windows login screen where we need to provide login credentials in order to get into Windows itself and start working. This method of preserving data and privacy is perfectly fine and as a matter of fact, it is recommended for mobile computers but if you have a home computer in a safe environment where no one will try to look at your data or rummage through your personal stuff then removing login screen is safe enough action and can cause you a lot piece, from time-saving to less frustration on every restart or sleep action. In previous Windows versions, it was much easier to turn off this feature but it seems Microsoft has determined that our privacy and security are important and somewhat removed the ability to turn OFF the lock screen. In this guide, we will show you how you can still remove the lock screen and automatically log in with your account like in the good old days. The first thing you need to do is to press ⊞ WINDOWS + R  to bring up the Run dialog keyboard with windows and r markedIn the dialog, type in netplwiz and press ENTER. run dialog with netplwiz typed inYou will find yourself in the User Accounts window, inside deselect Users must enter a user name and password to use this computer. Press OK user accounts windowSign in the window will pop up where you will have to type in your password and confirm it in order to start the feature. automatically sign in dialogAfter typing in your password and confirming it, press OK. That's it, next time you wake your computer from hibernation or turn it ON, you will automatically be greeted with a desktop instead of a Windows login screen.
Read More
Run as administrator is not working
Recently, a number of users reported that they were not able to use the “Run as administrator” context menu option when they tried using it or opening a program with administrator privilege. If you are one of these users facing this problem, then you’ve come to the right place as this post will guide you in fixing this issue. At the time of writing, it isn’t clear what the cause of the issue is but there are potential fixes you can try to fix the problem. You can try turning on the User Account Control or clean up the Context Menu items change the Group Membership. On the other hand, you can also perform both SFC and DISM scans via Command Prompt or troubleshoot the problem in a clean boot state as it is possible that some third-party programs are the ones that are causing the problem. You could also run an anti-malware scan using Windows Defender or your antivirus program.

Option 1 – Try to turn on the User Account Control

When you open a program with administrator privilege, the User Account Control or UAC prompt will pop up asking you to confirm the permission. However, if you have disabled the User Account Control by mistake or some malware has disabled it, then it’s no wonder why the “Run as administrator” option is not working. Thus, you need to check if UAC is turned on or not. All you have to do is go to the User Account Control settings.

Option 2 – Try changing the Group Membership

  • First, you need to sign in with your administrator account or ask your administrator to sign in for you. So if you only have a Standard User account, you have to add that account to the Administrators group.
  • In the taskbar search box, type “netplwiz” and check the search results.
  • From there, select your user account and click the Properties button.
  • After that, go to the Group Membership tab and select Administrator.
  • Now click on the Apply and OK buttons to save the changes made and then sign in to your computer again and see if the “Run as administrator” option is working or not.

Option 3 – Try to create a new Administrator User account

If you have a standard account, you can try creating a new account but this time, you create an administrator user account and then see if you can now use the Run as administrator option or not. Note that you have to sign in with your main account before you can create an admin account.

Option 4 – Run the DISM tool

You can run the DISM tool as well to help fix the problem with the “Run as administrator” option. Using this built-in tool, you have various options such as the “/ScanHealth”, “/CheckHealth”, and “/RestoreHealth”.
  • Open the Command Prompt with admin privileges.
  • Then type in the following commands and make sure to hit Enter right after you type each one of them:
    • Dism /Online /Cleanup-Image /CheckHealth
    • Dism /Online /Cleanup-Image /ScanHealth
    • exe /Online /Cleanup-image /Restorehealth
  • Do not close the window if the process takes a while as it will probably take a few minutes to finish.

Option 5 – Perform a System File Checker scan

The SFC or System File Checker scan could detect and automatically repair damaged system files that could be causing the problem with the “Run as administrator” option on your Windows 10 computer. SFC is a built-in command utility that helps in restoring corrupted files as well as missing files. It replaces bad and corrupted system files with good system files. To run the SFC command, follow the steps given below.
  • Tap Win + R to launch Run.
  • Type in cmd in the field and tap Enter.
  • After opening Command Prompt, type in sfc /scannow and hit Enter.
The command will start a system scan which will take a few whiles before it finishes. Once it’s done, you could get the following results:
  1. Windows Resource Protection did not find any integrity violations.
  2. Windows Resource Protection found corrupt files and successfully repaired them.
  3. Windows Resource Protection found corrupt files but was unable to fix some of them.
  • Once done, restart your computer.

Option 6 – Put your computer in a Clean Boot State

You can also troubleshoot the problem in a Clean Boot state. It could be that there are some third-party applications in your computer that are preventing you from using the “Run as administrator” option and to isolate this possibility, you need to boot your computer in a Clean Boot State and then try to use the Run as administrator again. Putting your computer in this state can help you identify which program is the culprit and thus isolates the problem. In a Clean Boot state, your computer will start using only the pre-selected minimal set of drivers and startup programs. Note that you have to disable and enable one process at a time.
  • Log onto your PC as an administrator.
  • Type in MSConfig in the Start Search to open the System Configuration utility.
  • From there, go to the General tab and click “Selective startup”.
  • Clear the “Load Startup items” check box and make sure that the “Load System Services” and “Use Original boot configuration” options are checked.
  • Next, click the Services tab and select the “Hide All Microsoft Services” check box.
  • Click Disable all.
  • Click on Apply/OK and restart your PC. (This will put your PC into a Clean Boot State. And configure Windows to use the usual startup, just simply undo the changes.)
  • After you’ve set your computer into a Clean Boot State, try to check if the error is now fixed and that you can now view the Properties.

Option 7 – Try scanning your computer using Windows Defender

As mentioned, if your computer was recently infected with some malware, it is possible that the malware changed the User Account Control settings which is why you’re not able to use the Run as administrator option. Thus, you need to scan your computer using Windows Defender.
  • Tap the Win + I keys to open Update & Security.
  • Then click on the Windows Security option and open Windows Defender Security Center.
  • Next, click on Virus & threat protection > Run a new advanced scan.
  • Now make sure that Full Scan is selected from the menu and then click the Scan Now button to get started.
Read More
Alt-tab that is broken with KB5005033 update
Alt-tab
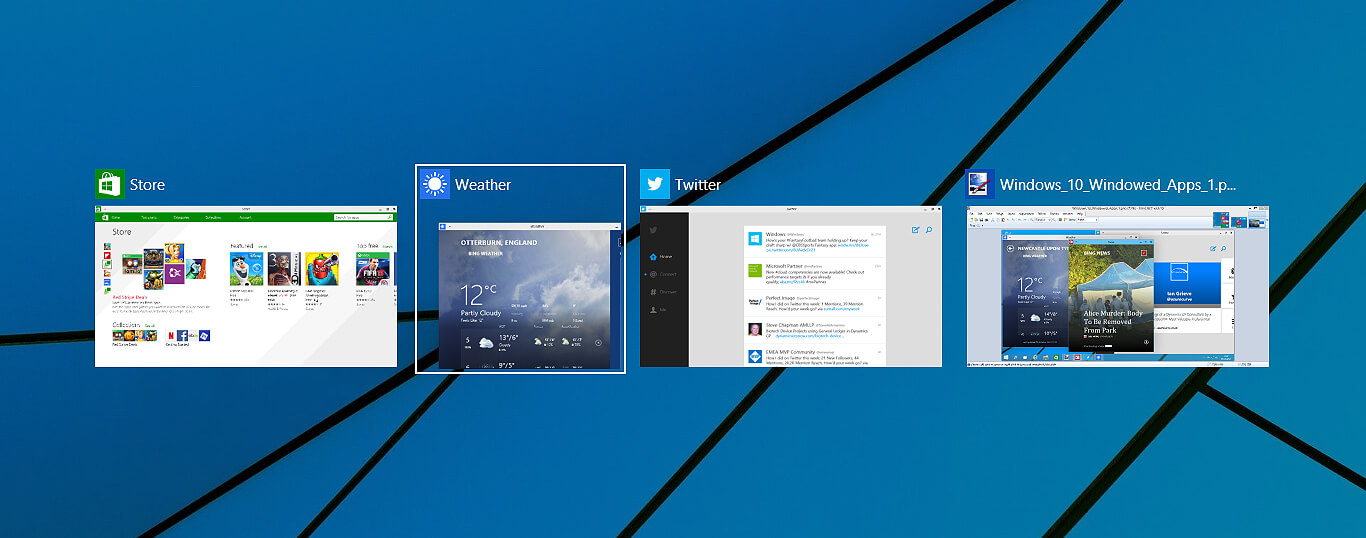
Lately, Microsoft has trying to fix Print Nightmare with various methods and patches. The last patch has seemingly fixed Print Nightmare but it has broken the Alt-tab key combination. It has been reported that the latest patch has broken famous key combinations for quickly switching from window to window. It seems that combination is not working or it is switching to desktop, even going to blank screen if switching from the full-screen game.

Fixing the issue

Luckily this issue is easily fixable. The first and easier fix for this issue is surprising to turn off the news and info widget, right-click on it and choose News and interests and then click on turn off. The second solution would be to uninstall the update. Go to Settings, then to Update & Security, and from there view Update History and remove the update.
Read More
1 2 3 162
Logo
Copyright © 2022, ErrorTools. All Rights Reserved
Trademarks: Microsoft Windows logos are registered trademarks of Microsoft. Disclaimer: ErrorTools.com is not affiliated with Microsoft, nor claim direct affiliation.
The information on this page is provided for information purposes only.
DMCA.com Protection Status