How to Disable Restart in Firefox

Mozilla Firefox has introduced a new feature known as Restart with Windows which allows the browser to automatically start when your Windows 10 computer boots. This means that if you leave the Firefox browser opened while shutting down your computer, Firefox will re-open automatically along with the tabs that were opened right before you shut down your computer.

Although some users may find this feature convenient, there are others who do not approve at all as it could be a nuisance. So if you’re one of the latter, then read on as this post will show you how you can disable the Restart with Windows feature in the Firefox browser on your Windows 10 computer. Refer to the instructions laid out below to get started.

  • Step 1: Open Mozilla Firefox and if it’s opened already, just open a new tab and then type the following text in the address bar:

about:config

  • Step 2: After typing the text given above, hit Enter and if a prompt with a warning message pops up, simply click on the “I accept the risk!” button to proceed.
  • Step 3: Next, type “Restart” in the search filter which should display the following preference in the window:

“toolkit.winRegisterApplicationRestart”

  • Step 4: After that, check for the preference value and then see if it’s set to true or not. If it is set to true, then it means that the Restart with Windows feature is enabled so obviously, to disable it, you need to set its value to false.
  • Step 5: Now restart your computer without closing Firefox. After restarting your computer, you should no longer see Firefox starting automatically.

The Restart with Windows feature by default is disabled for most users. On the other hand, Mozilla will have this feature enabled as the default configuration in the coming weeks so it’s best that you now know what to do when that time comes since the newer versions of Mozilla Firefox are already being shipped with the Restart with Windows feature. However, if this post did not help you, then you might want to check if the feature has been added to the Startup folder, and from there, you can disable this startup program using the Task Manager > Startup tab.

If you like to learn and find out more about various Windows errors, and how to repair them go to our vast archive or use search to find articles that will explain and help you in solving your issue.
However, if you prefer to do things fast and with automatization then we are proposing to use an automated solution for your issues. The application that we are recommending is Advanced System Repair Pro
Advanced System Repair utilizes multiple tools all in one to give you a quick, simple, reliable, and very thorough diagnosis of your PC. It brings you all the tools you need in one program to clean, fix, protect, optimize and boost your PC!
1-Click Maintenance
All the tools to make it simple and easy! It's like having a professional technician at the click of a mouse.

Junk Cleaner
Keeping your computer free from unnecessary clutter also helps make your computer last longer. Like any other machine, if you keep it clean and take care of it, it will serve you better for longer!

Optimize background apps
Optimize applications background activity with the built-in Application Optimizer feature.

Disk Defrag
With a simple 1-click, Advanced System Repair speeds up your PC by assembling fragmented files on your machine and organizing them more efficiently.

Malware Removal
Finds and removes all types of harmful malware including trojans, worms, bots, adware, spyware, PUPs, and more!

Privacy Cleaner
The all-in-one privacy suite to Clean Your Tracks & Protect Your Privacy! Make your computer safe, secure, and more efficient!

System Tweak/Optimizer
ASR will analyze your complete system and settings to adjust your PC to function at its maximum performance.

Registry Cleaner
Over time, as you install and uninstall applications, the registry can become cluttered with old entries and broken settings which can result in program crashes, and annoying messages and slow the computer down.
Visit our Advanced System Repair Pro Download page to inform yourself about all the benefits of this software and get a free trial copy of it.
advanced system repair pro

Advanced System Repair Pro

One-click automated PC repair solution
ASR logo
With Advanced System Repair Pro you can easily
Replace damaged files
Restore performance
Free disk space
Remove Malware
Protects WEB browser
Remove Viruses
Stop PC freezing
DOWNLOAD
Privacy Policy | Terms of Use | Uinstall
Advanced System Repair Pro is compatible with all versions of Microsoft Windows including Windows 11

Share this article:

You might also like

Methods To Repair "Error in Loading DLL" on Windows PC's

Fixing "Error in Loading DLL" on Windows

Error in Loading DLL - What is it?

This is a Dynamic Link Library (DLL) error. It results when a program calls upon a DLL file to perform a certain task and the file fails to load as it is damaged. In a nutshell, DLL is a collection of small programs. DLL is called upon by the executable program (EXE) that is running. The DLL file allows the executable program to run on the system. For example this error may occur when you try to run wizards in Microsoft Office Access such as the Import Wizard, the Report Wizard or the Control Wizard. This error is usually displayed as:
“Error in loading dll” “Object library not registered”

Solution

Restoro box imageError Causes

The error in loading DLL occurs due to numerous reasons. Some of the most common causes include:
  • The DLL or the referenced DLL is not in a directory specified in the path.
  • DLL File is damaged due to hard disk errors and registry corruption
  • Registry key may not exist
  • Malware errors add malicious codes to the application
  • Spyware and adware infections
When you come across error in loading DLL, it is advisable to fix it right away as this error can pose serious threats and lead to your PC malfunctioning. It can corrupt programs and put you at risk of data security and privacy threats.

Further Information and Manual Repair

To resolve this error in loading DLL files, you don’t always have to hire a technician even if you don’t have technical knowledge. This error is quite easy to repair. Here are two ways to resolve error in loading DLL without any professional assistance:

Solution 1: Reinstall the Program

Reinstalling the program can help you resolve this issue. However, when doing this you will first have to uninstall the program and also remove the DLL files from the registry to ensure the update is carried successfully. In addition to this, you will also have to uninstall some programs that share DLL files with the program that you are removing from your system to reinstall it again. Windows will prompt the DLL shared message if it is being shared by other software on your system. Though this is a method used to resolve errors in loading DLL this can be slightly tricky and confusing for many.

Solution 2: Repair the Registry and Remove Malware

This is the best, easiest and most efficient way to repair error in loading DLL files. Did you know 94% of the PC-related errors are triggered by registry corruption and malware infection? To repair the registry and remove malware from your system, you don’t have to download a separate registry cleaner and an anti-virus. Simply download Restoro. Restoro is a cutting-edge and multi-functional repair tool integrated with powerful utilities like a registry cleaner, system optimizer, and an anti-virus. By running Restoro on your computer you can resolve all the underlying causes for error in loading DLL files in seconds. Whether the error results from registry corruption or viral infection, Restoro is the only tool you need to run to repair. It is a safe, efficient and a super functional tool. It has a neat layout, easy navigation, and a user-friendly interface embedded with advanced technology and automated algorithms that scan your entire PC and repair all kinds of PC issues right away.  It can be easily operated by even novice users.

Restoro features

The registry cleaner feature repairs DLL errors and corrupt registry. It removes all the unnecessary and obsolete files that have overloaded and damaged the hard disk. It scans and wipes out such files clearing up the disk space. It fixes mis-configured registry keys and settings thus resolving errors in loading DLL files. If your system is infected by malware it may create Dll.exe malicious files on your system. If these are viruses, they can damage your system. Malicious software like Trojan and spyware are detected and removed with the help of the privacy error detector module integrated into Restoro. Other features that are worth mentioning are its backup feature and outstanding Windows compatibility. With Restoro users can create backup files for data recovery in the event of data loss during repair. Also, it is compatible with all Windows versions. To resolve error in loading DLL files on your system you just have to perform 3 simple steps:
  1. Click here to download Restoro.
  2. Run it on your system to scan for errors in loading DLL files
  3. Click repair to fix the issues.
Read More
How to Repair Windows 10 Upgrade Error 0x800F0923

Repair Windows 10 Upgrade Error 0x800F0923

Code 0x800F0923 – What is it?

The Error Code 0x800F0923 is one that appears only when attempting to update from older versions of Microsoft Windows to Microsoft Windows 10. This error does not occur with every install and is believed to be the result of a driver incompatibility issue. It is unclear which specific drivers are having the compatibility issues, though it is widely believed that DuplexSecure's SPTD drivers are the ones at fault. When operating correctly, without errors, the update process should not take longer than 30 minutes. Common symptoms include:
  • Error message window/pop-up during the install process, giving the Error Code 0x800F0923
  • Inability to install and update from older versions of Microsoft Windows to version 10

Solution

Restoro box imageError Causes

There are various relevant factors associated with the error code 0x800F0923 incompatibility issue in Windows 10 installation/upgrade. These factors include but are not limited to:
  • The Operating System (OS) upgrading does not support older hardware.
  • Your computer’s specs did not meet the minimum requirements.
  • Not enough hard disk space.
  • The new software might lack software drivers for older hardware

Further Information and Manual Repair

Microsoft has recently released its Windows 10 operating system. While there are still a few kinks to be worked out, overall the reviews have been positive. As with any new Microsoft update, compatibility issues can arise. If you are unsure whether your current PC will be able to handle the new Windows 10, here is an easy way to check your system.

Method 1: Check if your computer is compatible

  • Locate the “Get Windows 10” application icon in your notification tray (bottom right corner of your screen, white Windows logo).
  • Right-click on this icon, then select the “check your upgrade status” option.
  • Be prepared for the menu to take a few minutes to open.
  • Click on the menu on the upper left-hand corner of this new dialog box. (It looks like three blue horizontal lines)
  • Select “check your PC”
  • After the system checks for compatibility, it will let you know whether or not your PC has the appropriate drivers, etc. (Keep in mind that this is not a foolproof method for checking compatibility status).

Method 2: Download or upgrade your drivers/software

If you have already attempted to update to Windows 10, and have received the Error Code 0x800F0923, this is the simplest way to solve the issue yourself.

1. Open the “Get Windows 10” application. 2. Open the menu in the upper left corner, looks like three blue lines. 3. Select “Check your PC”. 4. The system will tell you which drivers are incompatible. 5. Go to the Microsoft Support website to install and/or update the drivers that proved to be an issue. 6. Once the driver issue is corrected, retry the Windows 10 update.

Method 3: Create space on your computer

If your computer does not have sufficient space to accept the upgrade, you might want to clear up some space on your computer. Here’s how to do it. If you have not attempted to install Microsoft Windows 10 yet, it is a good idea to check your system's compatibility prior to installing. While it is not absolutely necessary, it will save time and frustration. Microsoft Support suggests contacting them directly if you are unable to solve your driver compatibility issues, or if the above do-it-yourself method is unsuccessful. To resolve this compatibility issue and get your upgrade going use a powerful and user-friendly tool to clean up the problem. Click here to download Restoro. Users should also be aware that those who choose to upgrade to Windows 10 have 30 days in which they may decide that they would rather use their old system. However, reverting back to the older system may not be a smooth process, and some data could be lost.
Read More
How to personalize STEAM with custom skin
steam skin
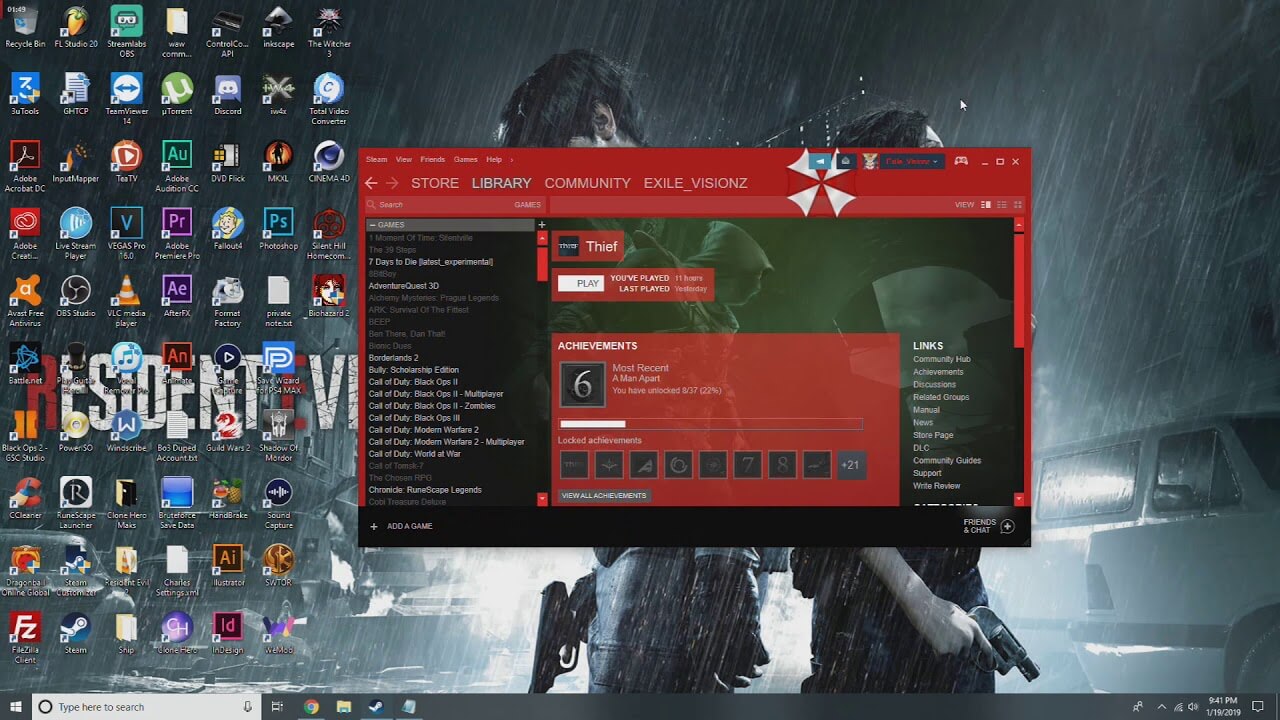
Skinning of applications is not new to PC users, but did you knew you could skin Steam? With skin, you can customize the UI and style of the client to what you want making it more personal and to your liking. First thing is to find the skin that you would like to install. There are a lot of sites where you could find custom made Steam skins but we would recommend steamskins.org The site itself is organized in tabs with different sections, once you click on the tab you will get a list of skins available for chosen section. If you click on the skin you will be taken to skin page detail where you can find what skin is aiming for, its legibility, a record of how the skin has been altered over time, or some mix of these aspects. Note that some skins might have issues like some buttons might be missing from big picture mode but so far none of the skins has any kind of client breaking feature, only functionality one.

Downloading skin

Once you have chosen desired skin and while on the skin details page, scroll to the middle of the page just above the Related Skins sections with two options: Direct Download and External Download. Now usually I would recommend Direct download but in this case, I would advise going with External Download for the simple reason that the External link will send you to the developer's website where there is a higher chance to get the latest updated skin.

Installing it in Steam

Once the skin is downloaded you will first need to create a skin folder inside your Steam installation location. Navigate to your Steam installation folder (default: C:\Program Files (x86)\Steam) and create a new folder inside it. Give new folder name Skins and confirm. Extract the skin zip file in the newly made folder. Once the file is extracted you can delete the ZIP file if you wish. Go to your Steam client and go to Steam>Settings. In settings select Interface on the left bar and on the right part then click the Select the skin you wish Steam to use the drop-down menu and select the skin that you wish to use. Confirm and restart your Steam client

Reverting to old skin

If you found skin unappealing or, unfortunately, has some functions missing you can always choose another skin or revert back to default Steam skin. Default Steam skin is named in the drop-down menu as < default skin >.
Read More
Fix Communication with service process failed
This post will guide you in fixing the “Communication with service process failed” error in Windows 10. This error is related to the Intel Driver and Support Assistant application. Although this error does not reportedly cause any loss of functionality in the computer, however, it still indicates that there is something wrong with some of your driver modules. Intel has taken a bold step and combined its older modules into this new application (Intel Driver and Support Assistant) recently. This application enables users to scan their computers for any available updates from Intel. This is the main application of Intel and provides users a way to update their driver software automatically instead of manually updating it. However, with the recent reports submitted by some users, it seems that something is wrong with this application, and users to have to deal with the “Communication with service process failed” error. This error might be caused by several reasons, for one, it could be that the application is corrupted or incomplete in its nature which is possible since this is still a developing and newly released app. It could also be that there are other utilities or modules that conflict with the Intel software. Whichever the reason may be, you can try out the options given below to resolve the problem but before you proceed, make sure that you have an administrator account as well as an active and stable internet connection.

Option 1 – Disable DSATray in Startup

If you receive this error message every time you start your computer then this means that the application is not able to launch properly. Like pointed out, it could be that it is still incomplete in nature or it conflicts with other applications. Thus, you can try to disable the service from the startup and check if it fixes the problem.
  • Tap the Win + R keys to open the Run dialog box.
  • Then type “taskmgr” in the field and hit Enter to open the Task Manager.
  • After that, go to the Startup tab and look for the Intel Driver and Support Assistant app.
  • Right-click on the app and select Disable.
  • Restart your PC and check if the error is now fixed or not

Option 2 – Reinstall the Intel Driver and Support Assistant

If the first option did not work, you can try reinstalling the Intel Driver and Support Assistant app. To do so, follow these steps:
  • In the search box, type in “control” and then click on Control Panel (desktop app) among the search results.
  • After that, select Programs and Features from the list which will give you a list of all the programs installed on your computer.
  • From there, look for Intel Driver and Support Assistant and select it and then uninstall it.
  • After you have the app uninstalled, open your browser and go to Intel’s official website. From there, download the driver utility manually.
  • Once the download is finished, right-click on it and select “Run as administrator” and install the app on your PC with elevated access.
  • Restart your PC and then check if the error is now fixed.
Read More
Fix 0xd00000e5, 0x8007139f, 0x80090030 PIN
The quickest and easiest way to log into your computer is when you use the PIN feature in Windows 10. Even though it is a bit slower compared to biometric logins such as Fingerprint and Iris scanning that comes under Windows Hello, the PIN feature is definitely less complicated. However, just like any other module of the software, it is also prone to some errors. In this post, you will be guided in fixing several PIN errors such as 0xd00000e5, 0x8007139f, and 0x8009003. These errors could be caused at different points in time like when you change or create a PIN or when you log into your computer. To fix the 0xd00000e5, 0x8007139f and 0x8009003 PIN errors, there are various solutions you can try. You may empty the contents of the NGC folder or remove and change the PIN or the password. You could also use the Group Policy Editor or reset the ACLs in the NGC folder as well as run built-in tools like System File Checker and the DISM tool.

Option 1 – Take ownership of the NGC folder and delete its contents

  • Boot your computer first into Safe Mode.
  • Next, you need to take ownership of the Ngc folder first and you can do that using Command Prompt.
  • Type “command prompt” in the Windows Search bar and then right-click on the relevant search result and select “Run as administrator”.
  • After that, if a User Account Control or UAC prompt appears, just click on Yes to proceed.
  • Next, type and enter this command: TAKEOWN /F C:WindowsServiceProfilesLocalServiceAppDataLocalMicrosoftNgc
  • Note that the <path> is the location of the folder or file in File Explorer.
  • Now type and enter this second command: ICACLS C:WindowsServiceProfilesLocalServiceAppDataLocalMicrosoftNgc /grant administrators:F
  • Finally, once the command has been executed, restart your computer.
  • Once your computer has restarted, delete all the contents in the Ngc folder and check if the error is now fixed.

Option 2 – Try to remove and change the PIN or password

The 0xd00000e5, 0x8007139f, and 0x8009003 PIN errors could be caused by some conflicting issues with the PIN or password you have set for the User Account of your computer. Thus, you have to remove or change the PIN or password to fix these PIN errors.
  • Remove the PIN by going to Settings > Accounts > Sign-in options.
  • From there, go to the PIN section and click on the Remove button.
  • You will be asked to verify your account to proceed in removing the PIN, enter your credentials.
  • Restart your computer and then set up a new PIN.
  • Once you’re done, restart your computer and check if the error is gone now.

Option 3 – Try to use the Group Policy Editor

  • Tap the Win + R keys to open the Run utility and type “gpedit.msc” in the field and tap Enter to open the Group Policy Editor.
  • Next, navigate to this policy setting: Computer Configuration > Administrative Templates > System > Logon
  • After that, double click on the “Turn on convenience PIN Sign-in” option located on the right-side panel.
  • Then set its radio button to Enabled. You will see the following description when you do so:
“This policy setting allows you to control whether a domain user can sign in using a convenience PIN. If you enable this policy setting, a domain user can set up and sign in with a convenience PIN. If you disable or don’t configure this policy setting, a domain user can’t set up and use a convenience PIN. Note: The user’s domain password will be cached in the system vault when using this feature. To configure Windows Hello for Business, use the Administrative Template policies under Windows Hello for Business.”
  • After setting the radio button to Enabled, it will turn on the Logins in your computer using the PIN.
  • Close the Group Policy Editor and restart your computer for the changes to take effect.

Option 4 – Try to reset the ACLs in the Ngc folder

  • Type “command prompt” in the Windows Search bar and then right-click on the relevant search result and select “Run as administrator”.
  • After opening Command Prompt with admin privileges, execute this command: C:/Windows/Service/Profiles/Local/Service/AppData/Local/MicrosoftNgc /T /Q /C /RESET
  • The command you entered will start checking for errors and fix them automatically.

Option 5 – Run the System File Checker scan and the DISM tool

System File Checker:

  • Tap Win + R to launch Run.
  • Type in cmd in the field and tap Enter.
  • After opening Command Prompt, type in sfc /scannow
The command will start a system scan which will take a few whiles before it finishes. Once it’s done, you could get the following results:
  1. Windows Resource Protection did not find any integrity violations.
  2. Windows Resource Protection found corrupt files and successfully repaired them.
  3. Windows Resource Protection found corrupt files but was unable to fix some of them.
  • Now restart your computer.

DISM tool:

  • Open Command Prompt.
  • Then type in the following commands and make sure to hit Enter right after you type each one of them:
    • Dism /Online /Cleanup-Image /CheckHealth
    • Dism /Online /Cleanup-Image /ScanHealth
    • Dism /Online /Cleanup-image /Restorehealth
  • After that, wait until the process is finished and do not close the window as the process will probably take a couple of minutes.
  • Once it’s done, restart your computer.
Read More
Parallels Desktop 17 brings Windows 11 to MAC
Parallels Desktop 17
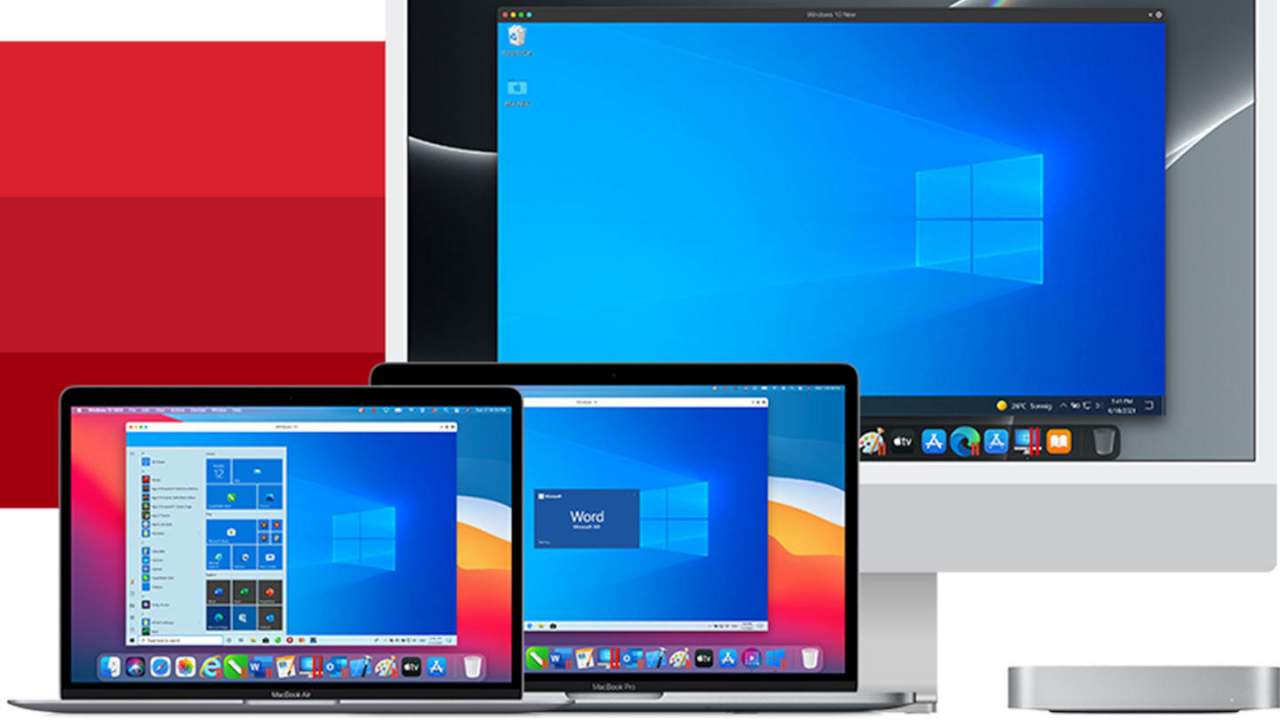
Parallels is an application developer for MAC OS mostly known for its PC virtualization software Parallels Desktop, a PC virtualization software running on Macs enabling running Windows and Linux with respective software on your MAC. With its latest Desktop 17 version, the software can run natively on both Intel-based and M1-based MACs. Thanks to this feature MAC users will be able to benefit from various speed improvements while running both Windows 10 or Windows 11 preview. On both Intel and M1 setups, Parallels resumes Windows and Linux up to 38% faster, provides an up to 25% bump in 2D graphics and a six-time increase in OpenGL graphics processing. M1-centric stats include 33% faster Windows start-up times, up to 28% faster DirectX 11 performance, and up to 20% better disk performance on Windows 10 Insider Preview. Parallels Desktop 17 delivers a set of fresh features including a new video driver that enhances video and game playback and boosts Windows UI responsiveness. An improved Coherence mode lets users run Windows apps within the Mac environment, cutting down on distracting changes in appearance during Windows sign-in, shut down, and software updates. Drag-and-drop operations are also improved, with support for text and graphics between Mac and Windows applications. This function works well with MAC OS Monterey's Quick Note feature, which can accept content from any Windows app. USB support, disk management, copy and paste unformatted text, and automatic virtual machine optimization also receive upgrades.
Read More
Recent Items aren't visible under Taskbar
In this post, you will be guided on what to do if the Recent Items are no longer visible in the Taskbar icons in Windows 10. This can be quite inconvenient especially if you work simultaneously on many files and documents together and would require you to visit them regularly to incorporate changes. Thus, if you find that the Recent items are not visible in the Windows Taskbar, read on. In order for the Recent Items to appear on the taskbar icons in Windows 10 again, there are four potential fixes you can check out. You can try to show the recently opened items via Settings or clear the cache of the recent items. You could also make some changes in the Windows Registry or use the Group Policy Editor. But before you proceed with these potential fixes, it’s best if you create a System Restore Point first just in case something goes wrong after you made changes in the system. The System Restore Point allows you to undo these changes and bring back the previous state of your computer. Thus, you need to create one and then carefully follow the given options below.

Option 1 – Show the recently opened items via Settings

The first thing you can do to fix the problem is to show the recently opened items through the Settings app.
  • Open the Settings app and select Personalization.
  • From there, select the Start option and scroll down until you see the “Show recently opened items in Jump Lists on Start or the taskbar” option.
  • Make sure that its toggle button is turned on.

Option 2 – Try to clear the Recent Items cache

  • Tap the Win + E keys to open File Explorer.
  • Next, copy and paste this link on the address bar: %AppData%Microsoftwindowsrecentautomaticdestinations
  • Once you’re in the given location, you should see multiple files. Now select all these files and completely delete them.
Note: These files are automatically recreated when you interact with the system like performing tasks such as opening apps or accessing files.
  • After that, go to this next location: %AppData%Microsoftwindowsrecentcustomdestinations
  • Once there, delete all of its files and restart your computer. This should resolve the problem.

Option 3 – Try making changes via Registry Editor

The next thing you can do to fix the problem is to apply some tweaks in the Registry by following these steps:
  • Tap the Win + R keys to open the Run dialog box and type “Regedit” in the field and hit Enter to open the Registry Editor.
  • Next, navigate to this registry sub-path: HKEY_CURRENT_USERSoftwareMicrosoftWindowsCurrentVersion
  • From there, select the Policies Explorer folder located in the left pane.
  • Then move to the right pane and look for the “NoRecentDocsHistory” entry and right-click on it.
  • Now delete this entry.
Note: This entry is the one that stores the Group Policy setting for “Do not keep the history of recently opened documents. The Group Policy adds this entry to the registry with a value of 1 if you enable the “Do not keep the history of recently opened documents” policy. On the other hand, if you disable the policy by setting it to “Not configured” or deleting it, the Group Policy will delete the entry from the registry, and the system will act as though the value is 0 – for instance, it keeps the history of the recently opened files in your computer.

Option 4 – Try to use the Group Policy Editor

  • Tap the Win + R keys to open the Run utility and type “gpedit.msc” in the field and tap Enter to launch the Group Policy Editor.
  • Next, navigate to User Configuration > Administrative Templates > Start Menu and Taskbar.
  • Afterward, double click on the “Do not keep a history of recently opened documents” policy located on the right panel. This is the policy that lets you enable or disable recent items and frequent places.
  • Now to enable the recent items, as well as the frequent places, feature, click on the “Disabled” or the “Not Configured” option.
  • Once you’re done, close the Group Policy Editor and restart your PC.
Note: If you choose to enable this setting, the system and Windows programs will not create shortcuts to documents opened while the setting is in effect. Aside from that, they also stay but won’t display the existing document shortcuts and the system will empty the Recent Items menu on the Start menu and the Windows programs won’t also display shortcuts in the Start Menu. In addition, the Taskbar won’t also show the recently opened or frequently used folders, files, or websites.
Read More
Windows requires a digitally signed driver
Device drivers are needed in order for the hardware and software to communicate in an operating system. Some of these drivers are digitally signed. These kinds of drivers are drivers that are signed by their issuing authority in a way that the end-user or any third party won’t be able to modify them. And there are times when you encounter an error that says, “Windows requires a digitally signed driver” when you try to install or update device drivers. Driver Signing is the process of associating a digital signature with a driver package. Digital signatures are used in Windows device installations to verify the identity of the vendor providing the driver packages as well as to verify the integrity of the driver packages. All the drivers you usually install on your PC from Windows Update, Original Equipment Manufacturers, or some other third-party driver download software and so on must be verified digitally by Microsoft through the digital signature. A digital signature is an electronic security mark that verifies the publisher for the driver and all the relevant information related to it. That’s why Windows won’t run a driver if it isn’t certified by Microsoft, be it a 32-bit or 64-bit system – this is called the Driver Signature Enforcement. The only Kernel-mode drivers that Windows 10 will load are the ones that are digitally signed by the Dev Portal. However, the changes only affect the new installations of the operating system with Secure Boot on while the non-upgraded fresh installations would require drivers that are signed by Microsoft. The “Windows requires a digitally signed driver” error indicates that the driver you are trying to update or install hasn’t been signed digitally by the issuing authority, preventing you from installing or updating it. To resolve this issue, you can try to update the drivers directly from the manufacturer’s site. You could also disable driver signing via Group Policy Editor.

Option 1 – Update the device drivers directly from the manufacturer’s site

The reason why you’re getting the “Windows requires a digitally signed driver” error in the first place is that you might have downloaded the drivers from external media. It could also be that the drivers didn’t update for some time now and the issuing authority changed its policies. Thus, you can try to update the drivers straight from the manufacturer’s website and install them. If this option didn’t work, then you’ll have to disable the driver signing or its recognition in Windows 10. Keep in mind that doing so is not advisable if you have to use the concerned driver.

Option 2 – Disable driver signing via Group Policy Editor

  • Tap the Win + R keys to open the Run utility and type “gpedit.msc” in the field and tap Enter to open the Group Policy Editor.
  • After that, navigate to this policy setting: User configuration > Administrative templates > System > Driver installation
  • Next, double click on the “Code signing for device drivers” entry located on the right pane to open its properties where you’ll see the following description:
“This setting determines how the system responds when a user tries to install device driver files that are not digitally signed. It establishes the least secure response permitted on the systems of users in the group. Users can use the System in Control Panel to select a more secure setting, but when this setting is enabled, the system does not implement any setting less secure than the one the setting established. When you enable this setting, use the drop-down box to specify the desired response. “Ignore” directs the system to proceed with the installation even if it includes unsigned files. “Warn” notifies the user that files are not digitally signed and lets the user decide whether to stop or to proceed with the installation and whether to permit unsigned files to be installed. “Warn” is the default. “Block” directs the system to refuse to install unsigned files. As a result, the installation stops, and none of the files in the driver package are installed. To change driver file security without specifying a setting, use System in Control Panel. Right-click My Computer, click Properties, click the Hardware tab, and then click the Driver Signing button.”
  • Now select the radio button for “Enabled” and select Ignore from the drop-down menu under “When Windows detects a driver file without a digital signature”.
  • Then click on the Apply and OK buttons to save the changes made. This will get rid of the “Windows requires a digitally signed driver” error but take note that this will also make your system less secure.
Read More
Repair Windows 10 Update Error 0x80070003, 0x20007

Error Code 0x80070003, 0x20007 - What is it?

Update Error 0x80070003, 0x20007 One of the most common errors encountered by users who updated to Windows 10 is the Error Code 0x80070003-0x20007. Normally, this error code is accompanied by the message saying “Windows could not search for new updates. An error occurred while checking for new updates or your computer” or “Error(s) found: Code 0x80070003 Windows update encountered an unknown error”.

This update-related error is often encountered any time while your device automatically installs updates once there’s an available system update or during manually installing updates for a specific app. Regardless if you are using a tablet, laptop, or PC, this update-related error could occur after upgrading your system to Windows 10.

Solution

Restoro box imageError Causes

There are several reasons why the update-related Error Code 0x80070003-0x20007 occurs. This includes the following:

  • Windows Firewall-related problem
  • A conflict in your device’s system might be present
  • Not enough space in your RAM
  • Not enough space in your installation disk
  • Problems in your system memory

Further Information and Manual Repair

An effective way to address problems like the Error Code 0x80070003-0x20007 is by applying certain manual repair methods. However, ensure that you strictly follow instructions since one slight slip-up might result in critical issues. If you’re not knowledgeable enough, it would be best to consult help from a professional Windows technician or you can make use of an automated tool to solve any issues you’re encountering.

When you encounter the update-related Error Code 0x80070003-0x20007, you must take action immediately to address the problem to lessen the risk of losing all your data or damaging the Windows registry host.

In fixing Error Code 0xC1900101-0x30018, you can repeat the same steps used for 0xc000021a (Method One) then apply the following steps as well:

  • Uninstall your antivirus prior to upgrading your system
  • Ensure that you have a simple machine name with no periods, dashes, or hyphens.
  • Restart several times then try again.
  • Disable the General USB Devices in your machine like the Smart Card Reader.
  • If you use a SCSI hard disk, ensure that you have available drivers you can use as your storage such as a thumb drive, and ensure as well that it is connected. Once you’re on the Windows 10 setup, click on Custom Advanced Option then use the Load Driver command in order to load the right driver for the SCSI drive. If this fails, try switching to an IDE-based hard disk.
  • Once done, perform a clean boot then try restarting the device again.
  • If you are upgrading your system using the .ISO file, disconnect your device from the Internet during setup. If your device is connected to the Internet by LAN or Wi-Fi, you need to disable both first then proceed to set up again.
  • If you’re performing the update through Windows Update, disconnect from the Internet LAN or Wi-Fi once the download reaches 100% then proceed with the installation.
  • If this still does not work, you can try using the .ISO file in upgrading.
  • Switch to a local account if your machine is connected to a domain.
  • Disconnect all external devices attached to your machine including gaming controllers, external hard disk, USB keys, and printers.

If the above steps still do not work, you can try performing a repair by doing the following steps:

  1. Put the installation disc into the disc drive. Afterward, boot the computer.
  2. Once the message: “Press any key to boot from CD or DVD…” appears, press any key.
  3. Choose a language, currency, time, and a keyboard or another input method. Click Next.
  4. Click on Repair your computer
  5. Select the operating system that you wish to repair then click Next
  6. Open the Command Prompt by clicking it in the System Recovery Options dialog box.
  7. Type BOOTREC /FIXMBR then hit Enter
  8. Type BOOTREC /FIXBOOT then hit Enter
  9. Type Drive:bootBootsect.exe /NT69 All then hit Enter

Can’t seem to put up with the long and technical manual repair process? You can still fix this error by downloading and installing a powerful automated tool that will surely get the job done in a jiffy!

Read More
Clipboard history in Windows 10
Copy & Paste is an essential part of Operating and working on a computer. We copy and paste a lot of different stuff through our workday, moving stuff from application to application. In an earlier article today we have explored troubleshooting and how to repair copy-paste stopped responses, this time we are going to focus on a little feature of Windows 10 called Clipboard history. Clipboard history is a built-in feature in Windows 10 which lets you store multiple copies of different types and then selectively pasting them into another application. Let's say you have multiple copies of different text from different websites and you then paste everything or just some into a Word processor. If this feature sounds interesting to you then let's turn it on. Press the start button and then on settings. Windows 10 Start menu with marked settings iconIn settings window click on System Windows settings with System section selectedin system dialog click on the clipboard and on the right screen turn ON CLipboard history. Windows settings for Clipboard
Read More
1 2 3 162
Logo
Copyright © 2022, ErrorTools. All Rights Reserved
Trademarks: Microsoft Windows logos are registered trademarks of Microsoft. Disclaimer: ErrorTools.com is not affiliated with Microsoft, nor claim direct affiliation.
The information on this page is provided for information purposes only.
DMCA.com Protection Status