As you know, Windows 10 comes with a pre-packed feature that allows you to rotate the screen at different angles, and to facilitate this feature, there are keyboard shortcuts you can use as well. However, from time to time, no matter how useful this feature is, users still experience a handful of issues. One of which is that they suddenly find their screen rotated or Upside Down even when they didn’t do a thing or adjust the setting.
You may have pressed the shortcut on the keyboard by accident or some other program changed the setting on your computer without your permission – whichever the case is, this post will show you what you can do to fix the upside-down screen on your Windows 10 PC using the options laid out below.
Option 1 – Try using hotkeys
As mentioned earlier, Windows have hotkeys in the UI that changes the orientation of the display. So the first thing you need to do is to make sure that these hotkeys are enabled and if they are, you can use the keyboard shortcut to adjust the orientation of your screen.
- Right-click on an empty part of your Desktop and then select the Graphic options.
- Next, select “Hot Keys” > “Enable”. After verifying that the hotkeys are enabled, you can tap the Ctrl + Alt + Up arrow keys to change your computer screen’s orientation.
- Alternatively, you can also tap the Ctrl + Alt + Right or Left or Down arrow keys to change the direction the other way.
Option 2 – Try using the Graphics Properties
You will probably see the “Graphics Properties” option if you use the Intel HD Graphics every time you click on your Desktop. Note that this option has all the graphics driver properties and helps you in changing the configurations as well as control several options like refresh rate, resolution, color-depth and many more. You have to navigate to these options to see if the orientation is changed in these properties. To do so, follow the steps below.
- Right-click on any empty space on your Desktop and then select Graphics Properties or Intel Graphics Settings.
- After that, select Display from the list of sub-options that appears.
- From there, you will see the rotation of the screen under the “Display settings” option where you have to make sure that the slider is set to “0”.
- Click the Apply button to save the changes made and then click on Exit. The orientation of your screen should automatically change.
Option 3 – Try using the Windows Display Settings
Since the Windows Settings have a section where you can manage the display settings of your computer, you can use them to help control the resolution of your PC’s display without any trouble. There is a possibility that the settings are changed there so that’s probably why your screen is turned upside down all of a sudden.
- Tap the Win + S keys to open search and then type in “settings” in the field and then hit Enter to open Settings.
- After opening Settings, click on System and then on Display using the left navigation bar and then scroll to the end and select the Advanced display settings.
- Next, click on the Display adapter properties and click on Intel HD Graphics control panel.
- Now change the rotation to 0 Degrees. Afterward, the display should revert back to its original form automatically.
Option 4 – Check your monitor’s physical controls
There are monitors that have buttons in them that allows users to shift the rotation of the screen to 90 degrees. It could be that your monitor has these buttons without you knowing and you suddenly pressed them by mistake which caused your screen to rotate. Thus, you have to check your monitor for any physical buttons on the side and if you see a menu, navigate to its options and check if there are screen rotation options. To make it easier for you, you can simply search your monitor’s model online and see if these buttons exist. You could also go over your monitor’s manual if you still have it as it contains details with regards to screen rotation.
Option 5 – Update your Graphics drivers
- Tap the Win + R keys to open the Run dialog box and then type in devmgmt.msc and tap Enter or click OK to open the Device Manager.
- Expand the section for the outdated device drivers.
- And then select the outdated driver(s) and right-click on it/them.
- From the drop-down menu, select the Update Driver option if you wish to update the driver or select the Uninstall device if you want to uninstall the driver and then follow the on-screen instructions to install the latest version of the driver.
- Restart your PC after the installation to allow the system to reinstall the driver.
If you like to learn and find out more about various Windows errors, and how to repair them go to our vast archive or use search to find articles that will explain and help you in solving your issue.
However, if you prefer to do things fast and with automatization then we are proposing to use an automated solution for your issues. The application that we are recommending is Advanced System Repair Pro
Advanced System Repair utilizes multiple tools all in one to give you a quick, simple, reliable, and very thorough diagnosis of your PC. It brings you all the tools you need in one program to clean, fix, protect, optimize and boost your PC!
1-Click Maintenance
All the tools to make it simple and easy! It's like having a professional technician at the click of a mouse.
Junk Cleaner
Keeping your computer free from unnecessary clutter also helps make your computer last longer. Like any other machine, if you keep it clean and take care of it, it will serve you better for longer!
Optimize background apps
Optimize applications background activity with the built-in Application Optimizer feature.
Disk Defrag
With a simple 1-click, Advanced System Repair speeds up your PC by assembling fragmented files on your machine and organizing them more efficiently.
Malware Removal
Finds and removes all types of harmful malware including trojans, worms, bots, adware, spyware, PUPs, and more!
Privacy Cleaner
The all-in-one privacy suite to Clean Your Tracks & Protect Your Privacy! Make your computer safe, secure, and more efficient!
System Tweak/Optimizer
ASR will analyze your complete system and settings to adjust your PC to function at its maximum performance.
Registry Cleaner
Over time, as you install and uninstall applications, the registry can become cluttered with old entries and broken settings which can result in program crashes, and annoying messages and slow the computer down.
Visit our Advanced System Repair Pro Download page to inform yourself about all the benefits of this software and get a free trial copy of it.

 I do not know about you, but I prefer to set my Windows to be more to my liking and not how Microsoft thinks it should be. Let’s face it, not all users feel comfortable whit Microsoft settings and idea how things should be.
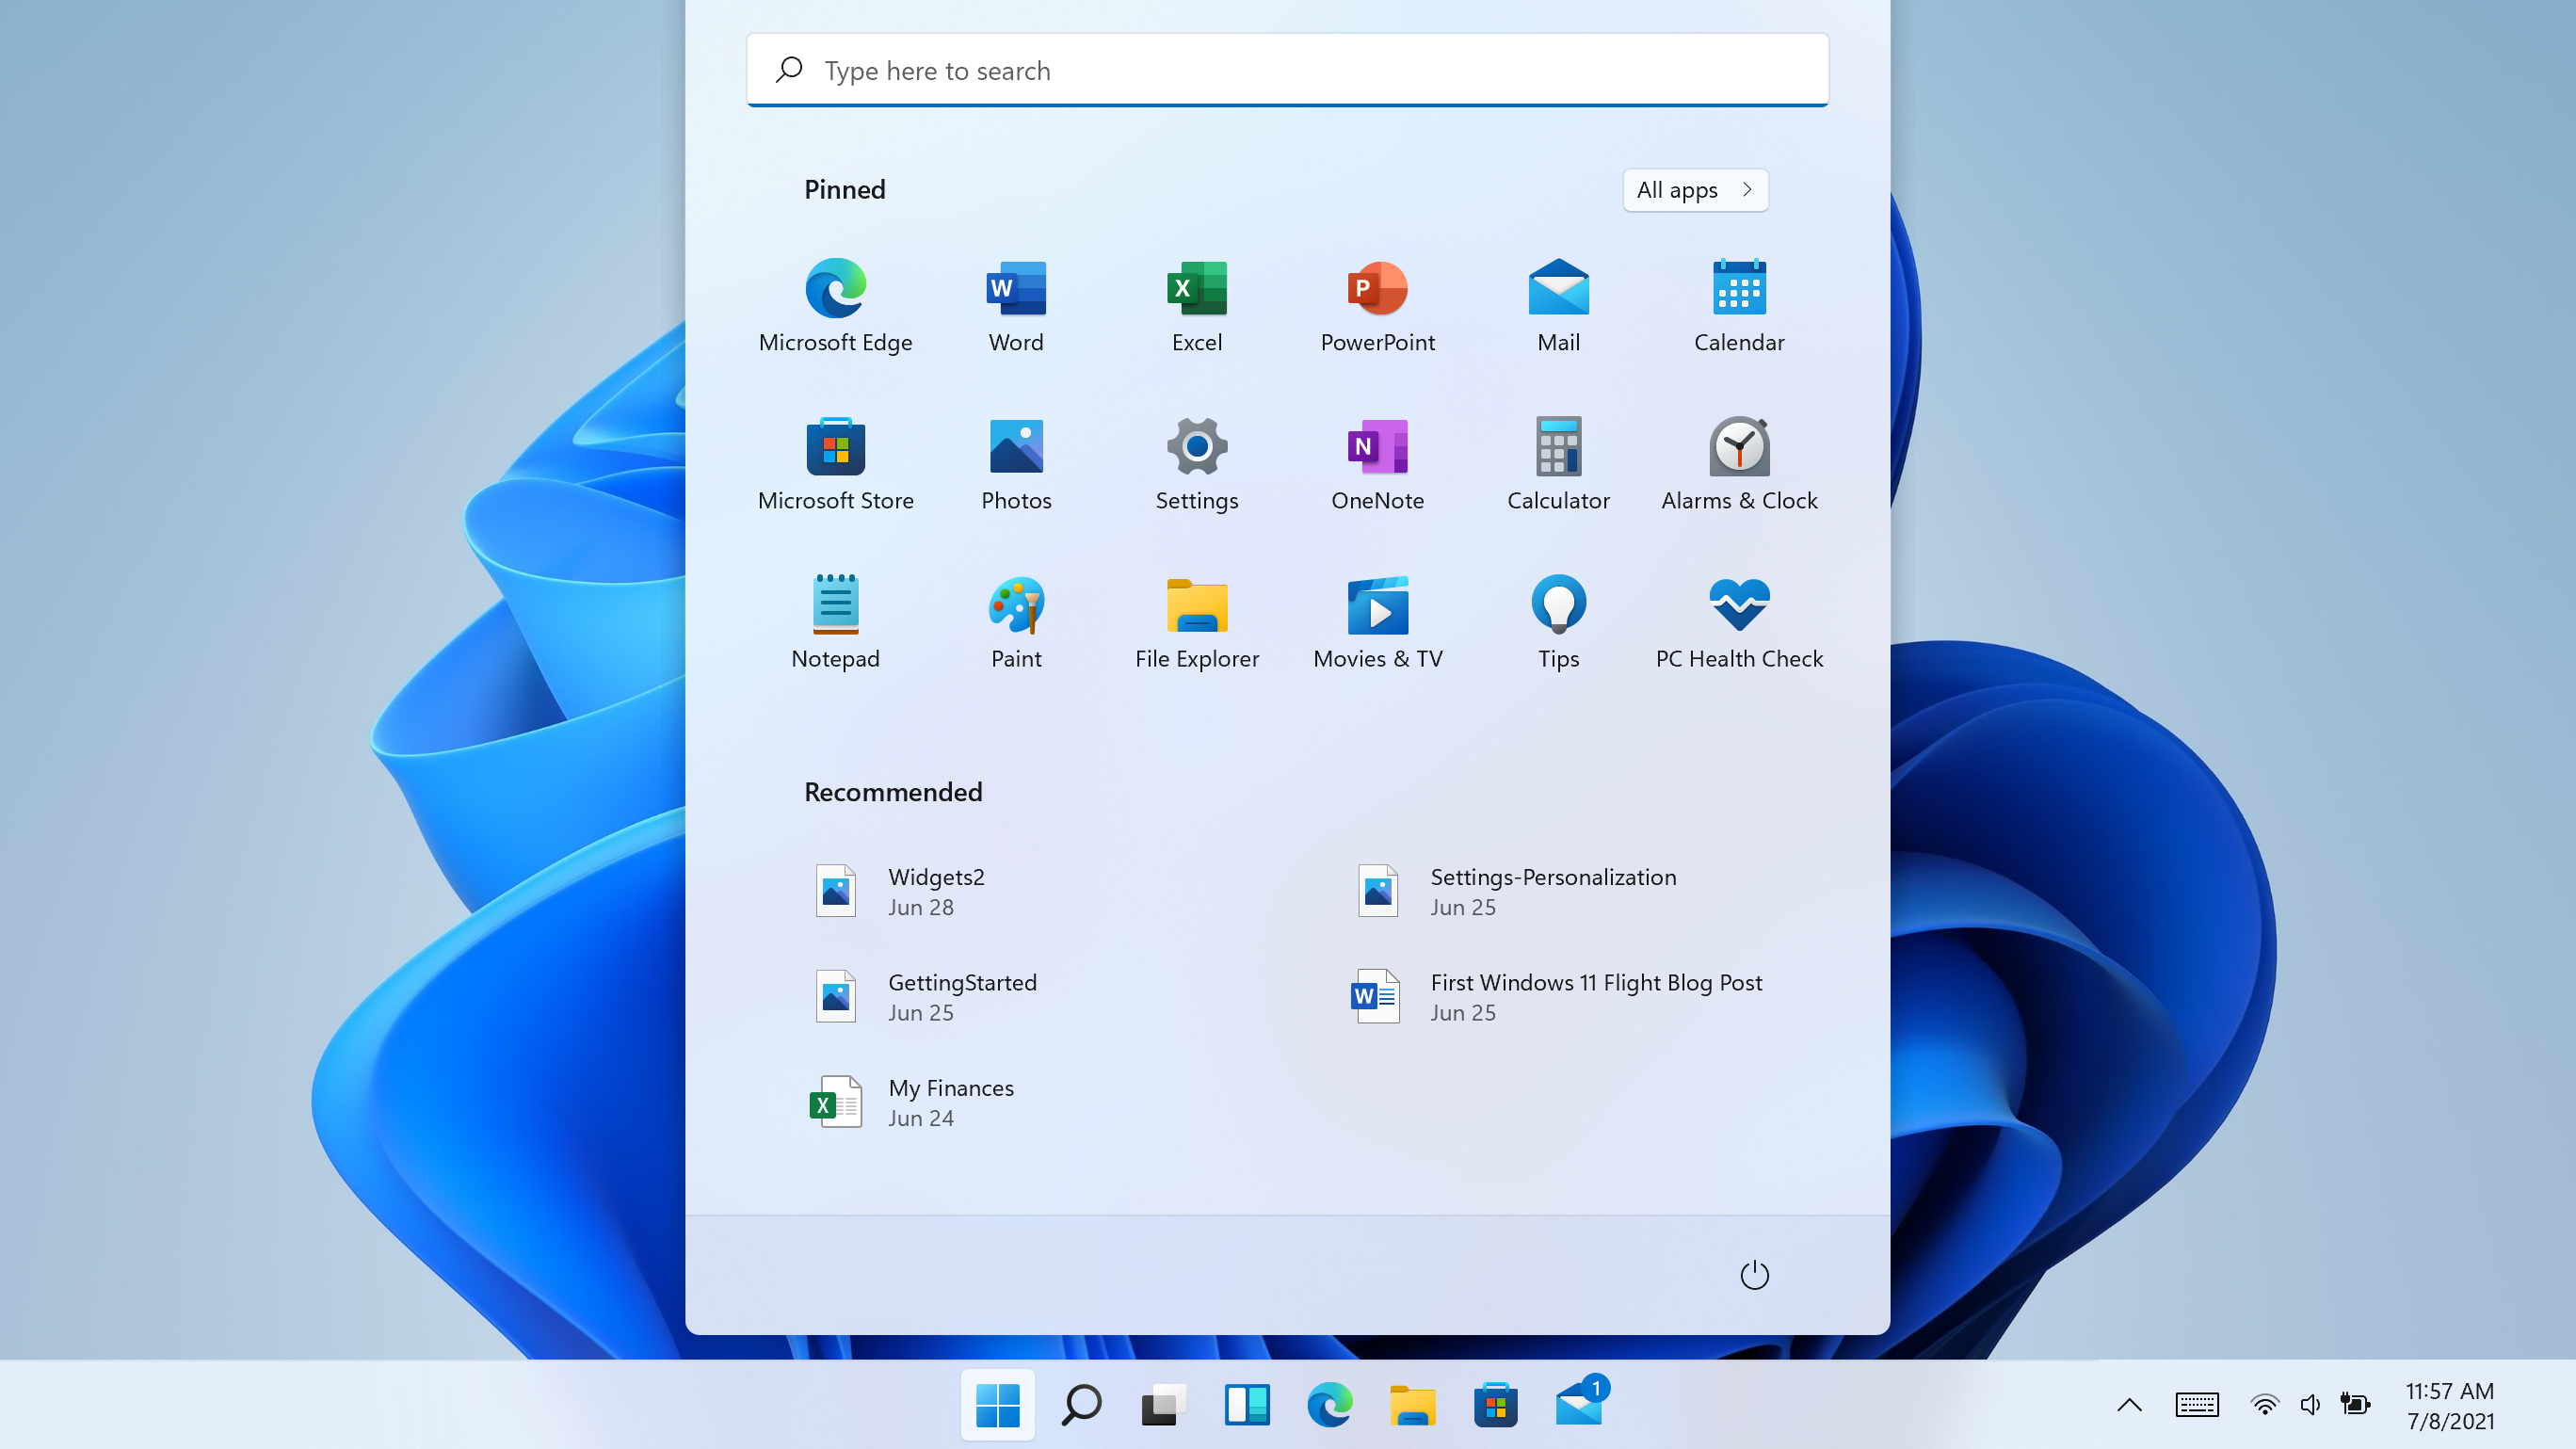
One of the things I particularly did not like even in Windows 10 is icons that come by default on my taskbar, now so far, well until the latest Windows 11 update you could remove default taskbar icons the same way as in Windows 10, just right-click on them and unpin, sadly with latest update build on Windows 11 this option has been removed.
In order to remove default icons from the taskbar, one must go now to Windows 11 settings and choose from there which one you would like to be placed on it. Of course, this is nothing game-breaking but it still feels strange why the standard option has been removed, it just makes no sense but lately not many things that come from Microsoft do.
I do not know about you, but I prefer to set my Windows to be more to my liking and not how Microsoft thinks it should be. Let’s face it, not all users feel comfortable whit Microsoft settings and idea how things should be.
One of the things I particularly did not like even in Windows 10 is icons that come by default on my taskbar, now so far, well until the latest Windows 11 update you could remove default taskbar icons the same way as in Windows 10, just right-click on them and unpin, sadly with latest update build on Windows 11 this option has been removed.
In order to remove default icons from the taskbar, one must go now to Windows 11 settings and choose from there which one you would like to be placed on it. Of course, this is nothing game-breaking but it still feels strange why the standard option has been removed, it just makes no sense but lately not many things that come from Microsoft do. 
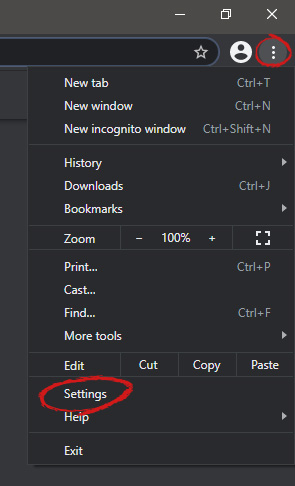 When you are in settings, on the left side move toward the bottom until you run into a tab that says On Startup and click on it. On right, a new section will open, click on Open a specific page or set of pages.
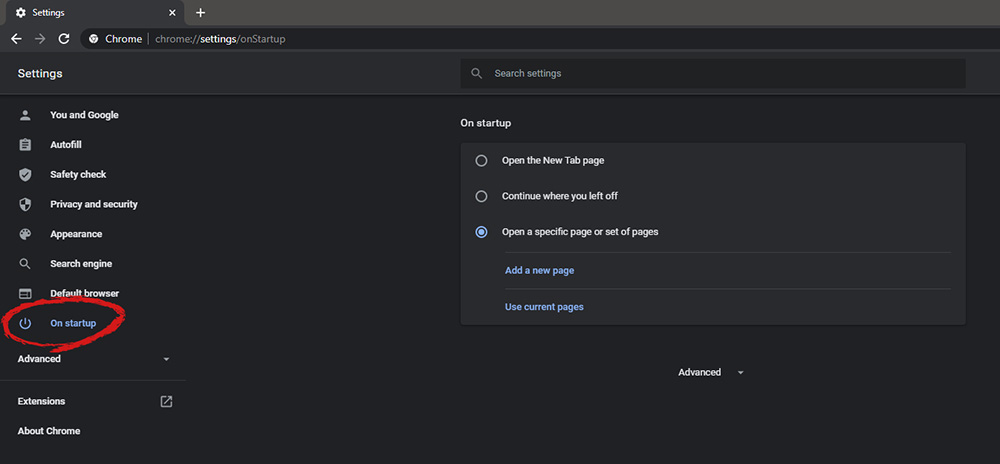 You will be presented with the option to add a new page by typing its URL or getting it from bookmarks or using a specific opened one. You can repeat this process until you have added all pages that you wish to be automatically opened once Chrome is opened for the first time.
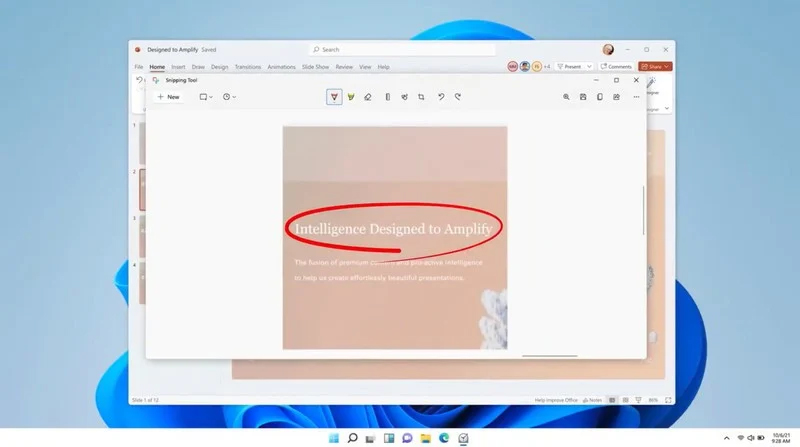 The latest update from Panos Panay on Twitter is including New and redesigned Snipping tool inside Windows 11. From the shared video, we can see that it includes modern Windows 11 UI redesign and it looks and feels like a part of Windows 11.
More things that can be seen from the shared video is that it looks like the new snipping tool is a merged version of the old with snip & sketch.
It is good to see that it is still possible to capture screen with easier way natively inside Windows 11 but some more functionality would be more welcome I guess.
Users were asking for added functions for a long time like adding simple text for example but from shared video, no new features were presented so for some users 3rd party solutions will still be the way to go.
The new and redesigned Snipping tool will roll out with the next update and we will see then about all new features inside it firsthand. Until then, take care.
The latest update from Panos Panay on Twitter is including New and redesigned Snipping tool inside Windows 11. From the shared video, we can see that it includes modern Windows 11 UI redesign and it looks and feels like a part of Windows 11.
More things that can be seen from the shared video is that it looks like the new snipping tool is a merged version of the old with snip & sketch.
It is good to see that it is still possible to capture screen with easier way natively inside Windows 11 but some more functionality would be more welcome I guess.
Users were asking for added functions for a long time like adding simple text for example but from shared video, no new features were presented so for some users 3rd party solutions will still be the way to go.
The new and redesigned Snipping tool will roll out with the next update and we will see then about all new features inside it firsthand. Until then, take care.