The system found unauthorized changes

If your Windows computer is not booting up and displays Secure Boot Violation – The system found unauthorized changes on the firmware, operating system, or UEFI drivers error message on the screen, then you can follow this tutorial to troubleshoot the problem.

When you encounter this kind of problem on your computer, you will get the following error message on your screen:

“Secure Boot Violation

The system found unauthorized changes on the firmware, operating system, or UEFI drivers.

Press [OK] to run the next boot device or enter directly to BIOS Setup if there are no other boot devices installed.

Go to BIOS Setup > Advanced > Boot and change the current boot device into other secured boot devices.”

This kind of error message pops up due to the Secure Boot that protects your computer from running any non-OEM signed boot software during startup. In other words, the Secure Boot firmware is the one that scans for non-signed boot software each time your computer boots up and if it detects anything strange, it will block the boot and will display the error message. To fix this error, there are two things you can try. You can try to disable the Secure Boot or try using a System Restore Point. For more detailed instructions, refer to each one of the options provided below.

Option 1 – Disable the Secure Boot in the BIOS

Disabling the Secure Boot in the BIOS settings is definitely recommended to resolve the issue. To disable Secure Boot, here’s what you have to do:

  • First, boot your computer into Windows 10.
  • Next, go to Settings > Windows Update. From there, check if there is anything that you have to download and install if you see any available updates. Usually, OEMs send and update the list of trusted hardware, drivers, and operating systems for your computer.
  • After that, go to the BIOS of your computer.
  • Then go to Settings > Update & Security > Advanced Startup options. If you click on Restart Now, it will restart your computer and give you all the advanced options.
  • Next, select Troubleshoot > Advanced Options. As you can see, this screen offers you further options including System restore, Startup repair, Go back to the previous version, Command Prompt, System Image Recovery, and UEFI Firmware Settings.
  • Select the UEFI Firmware Settings which will take you to the BIOS.
  • From there, go to the Security > Boot > Authentication tab where you should see Secure Boot. Note that every OEM has its own way of implementing the options so it varies.
  • Next, set Secure Boot to Disabled and set Legacy Support to On or Enabled.
  • Save the changes made and exit. Afterward, your computer will reboot.

Option 2 – Try running System Restore in Advanced Startup Options

Since you probably can’t boot into your Windows 10 computer, you can try to run System Restore again in the Advanced Startup Options.

  • Boot your computer into the Advanced Startup Options screen.
  • From there, you will see some options to troubleshoot when you can’t log in to Windows in the usual way.
  • Now select Troubleshoot > Advanced Options > Command Prompt.
  • After that, type “rstrui” and hit Enter to execute the command which will start the System Restore process.

Option 3 – Make a proper bootable USB Drive/Stick

To make a proper bootable USB drive, you need to use the Windows Media Creation tool. The Media Creation tool in Windows allows you to use the ISO installation file to make a bootable device that you can use to install Windows on your PC. Note that this is kind of different from the usual installation process as it could erase your computer’s current settings and data on the primary drive. Thus, before you proceed, you need to backup all your data into some removable drive and then use the Media Creation Tool to make a bootable drive.

  • After making the bootable drive, you need to plug it into your computer and then reboot.
  • Next, tap the F10 or Esc key to open the boot options.
  • Now set the boot priority of the removable drive the highest. Once the setup comes forth, follow the next onscreen instructions and install Windows without any problems.
If you like to learn and find out more about various Windows errors, and how to repair them go to our vast archive or use search to find articles that will explain and help you in solving your issue.
However, if you prefer to do things fast and with automatization then we are proposing to use an automated solution for your issues. The application that we are recommending is Advanced System Repair Pro
Advanced System Repair utilizes multiple tools all in one to give you a quick, simple, reliable, and very thorough diagnosis of your PC. It brings you all the tools you need in one program to clean, fix, protect, optimize and boost your PC!
1-Click Maintenance
All the tools to make it simple and easy! It's like having a professional technician at the click of a mouse.

Junk Cleaner
Keeping your computer free from unnecessary clutter also helps make your computer last longer. Like any other machine, if you keep it clean and take care of it, it will serve you better for longer!

Optimize background apps
Optimize applications background activity with the built-in Application Optimizer feature.

Disk Defrag
With a simple 1-click, Advanced System Repair speeds up your PC by assembling fragmented files on your machine and organizing them more efficiently.

Malware Removal
Finds and removes all types of harmful malware including trojans, worms, bots, adware, spyware, PUPs, and more!

Privacy Cleaner
The all-in-one privacy suite to Clean Your Tracks & Protect Your Privacy! Make your computer safe, secure, and more efficient!

System Tweak/Optimizer
ASR will analyze your complete system and settings to adjust your PC to function at its maximum performance.

Registry Cleaner
Over time, as you install and uninstall applications, the registry can become cluttered with old entries and broken settings which can result in program crashes, and annoying messages and slow the computer down.
Visit our Advanced System Repair Pro Download page to inform yourself about all the benefits of this software and get a free trial copy of it.
advanced system repair pro

Advanced System Repair Pro

One-click automated PC repair solution
ASR logo
With Advanced System Repair Pro you can easily
Replace damaged files
Restore performance
Free disk space
Remove Malware
Protects WEB browser
Remove Viruses
Stop PC freezing
DOWNLOAD
Privacy Policy | Terms of Use | Uinstall
Advanced System Repair Pro is compatible with all versions of Microsoft Windows including Windows 11

Share this article:

You might also like

Intel to reveal roadmap during July 26 webcast
intel graphics
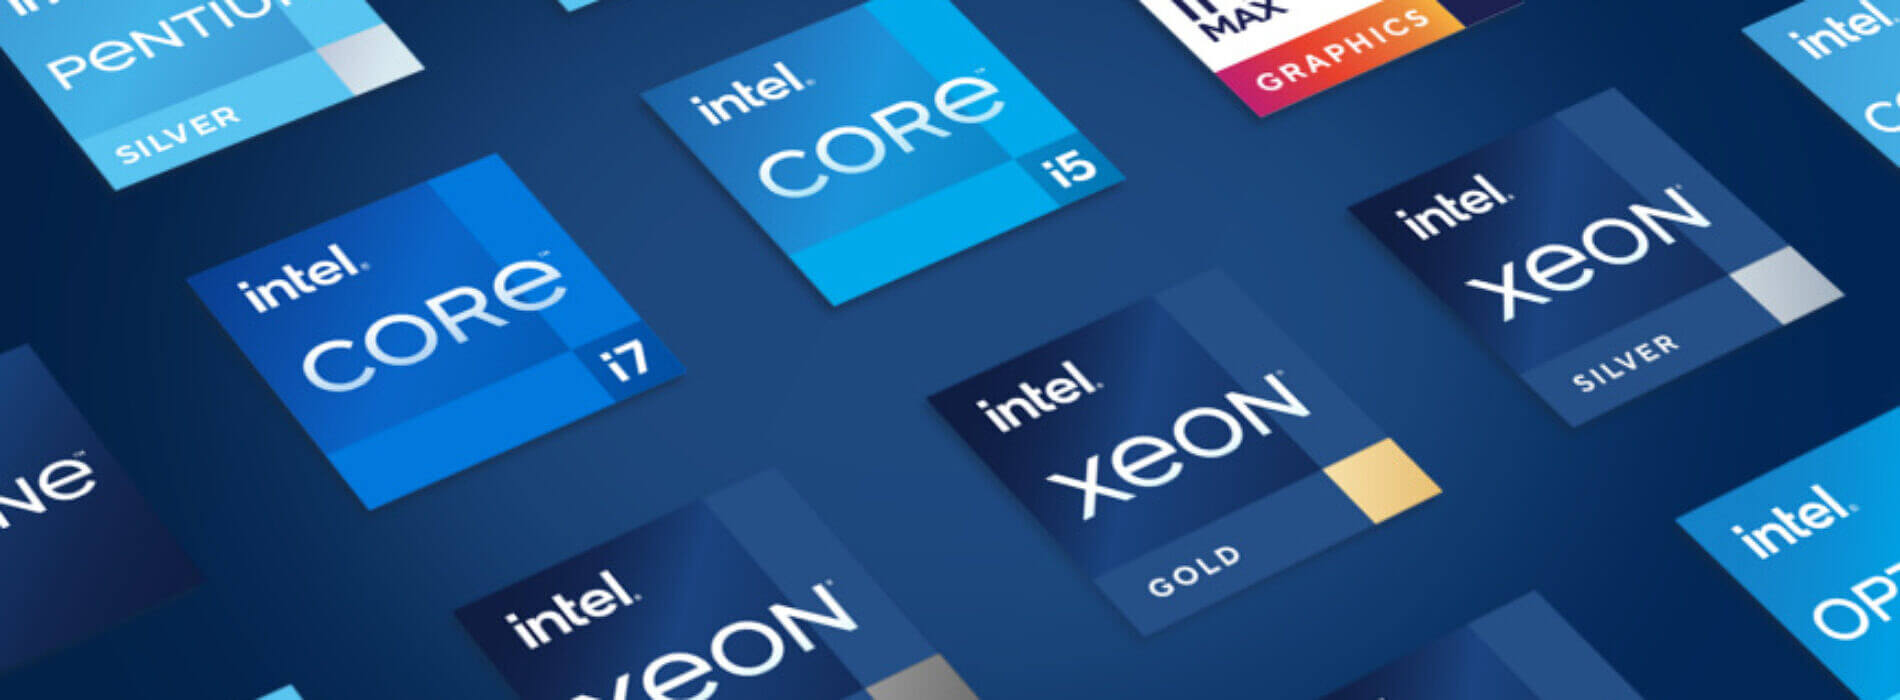
Intel announced that Pat Gelsinger (CEO) and Dr. Ann Kelleher  (technology Department head) will discuss Intel’s process and packaging innovations on an upcoming webcast that will happen on July 26th. The spokesman will talk and provide a deeper look at the process and packaging roadmaps for Intel. As we know Intel is planning to expand its production capabilities, outsource some of its technologies and offer foundry services to other chip design companies. The strategy will also include a shift to a 7nm process and Intel’s effort to set itself again as leader of CPU performance by 2024. There is also a chance that we will hear exact plans for Intel in the next three or four years. Intel didn't reveal much else about what Gelsinger and Kelleher plan to discuss during the webcast. The event will be streamed on July 26 at 2 pm PT via the Intel Newsroom; it will also be available to watch on-demand after the stream ends.
Read More
Fix Netwtw04.sys BSOD Error in Windows 10
Blue Screen of Death errors or Stop errors are indications that something’s wrong with your computer. So when you encounter one, you must find out what the root cause of the problem is before it gets out of hand. One of the BSOD errors you might encounter on your Windows 10 computer is the “DRIVER IRQL NOT LESS OR EQUAL or SYSTEM THREAD EXCEPTION NOT HANDLED, Netwtw04.sys failed” error. As you know, system files or .sys files are some of the essential parts of the Windows operating system. It is a repository of system driver settings used by the Windows operating system in order to communicate with the connected hardware and devices. They are essential for the normal functioning of the operating system. A lot of Windows 10 users are facing this particular Blue Screen of Death error whenever they open an app or disconnect external devices from the system. The Netwtw04.sys file is a part of the Intel PROSet/Wireless Wi-Fi software. And so when you might encounter two kinds of Stop errors for the Netwtw04.sys driver file such as:
  1. “DRIVER_IRQL_NOT_LESS_OR_EQUAL What failed: Netwtw04.sys.” – This kind of error message signifies that a kernel-mode driver tried to access pageable memory at a process IRQL that was too high.
  2. “SYSTEM_THREAD_EXCEPTION_NOT_HANDLED What failed: Netwtw04.sys” – This error message indicates that the root cause of the error might be incompatible drivers with the operating system. In general, the root cause of the Netwtw04.sys BSOD error might be due to several reasons such as corrupted files, incorrect device driver configuration, malicious programs, outdated drivers, bad drivers, corrupted Windows Registry as well as some damaged or corrupted system files.
Whichever of the two error messages you got, you can try the troubleshooting options given below to fix the “DRIVER IRQL NOT LESS OR EQUAL or SYSTEM THREAD EXCEPTION NOT HANDLED, Netwtw04.sys failed” BSOD error.

Option 1 – Try to rollback your Network driver

If you have updated the driver software as of late and you suddenly got this BSOD error, you might have to roll back the device driver – in other words, switch back to the previous working version. To do that, follow these steps:
  • Tap the Win + R keys to launch the Run window and then type in the “devmgmt.msc” command and hit Enter to open the Device Manager window.
  • Under the Device Manager, you will see a list of drivers. From there, look for the Network Adapters and expand it.
  • Next, select the driver entries that are labeled appropriately other than anything in the context of the WAN Miniport.
  • Then select each one of them and double-click to open a new mini window.
  • After that, make sure that you’re on the Driver tab and if you are not, just navigate to it then click the Roll Back Driver button to switch back to the previous version of your Network adapters.
  • Now restart your computer to successfully apply the changes made.

Option 2 – Try to update the Network drivers

If the present Network driver is giving you a headache that is the “DRIVER IRQL NOT LESS OR EQUAL or SYSTEM THREAD EXCEPTION NOT HANDLED, Netwtw04.sys failed” BSOD error, then you need to update the Network drivers. To do so, here’s what you have to do:
  • Tap the Win + R keys to launch the Run window and then type in the “devmgmt.msc” command and hit Enter to open the Device Manager window.
  • Under the Device Manager, you will see a list of drivers. From there, look for the Network Adapters and expand it.
  • Then right-click on each one of the Network drivers and update them all.
  • Restart your PC and see if it helped in fixing the BSOD error.
Note: If updating the network drivers didn’t help in fixing the problem, you can also try to uninstall the very same drivers and restart your Windows 10 PC. After that, the system itself will reinstall the drivers you just uninstalled. Alternatively, you can also download and install the drivers from the manufacturer’s website directly.

Option 3 – Try running the System File Checker Scan

The SFC or System File Checker scan could detect and automatically repair damaged system files that could be causing the Netwtw04.sys failed BSOD error. SFC is a built-in command utility that helps in restoring corrupted files as well as missing files. It replaces bad and corrupted system files to good system files. To run the SFC command, follow the steps given below.
  • Tap Win + R to launch Run.
  • Type in cmd in the field and tap Enter.
  • After opening Command Prompt, type in sfc /scannow
The command will start a system scan which will take a few whiles before it finishes. Once it’s done, you could get the following results:
  1. Windows Resource Protection did not find any integrity violations.
  2. Windows Resource Protection found corrupt files and successfully repaired them.
  3. Windows Resource Protection found corrupt files but was unable to fix some of them.

Option 4 – Run the DISM Tool

The DISM tool is another command-line tool in the Windows operating system that could help users fix various corrupted system files. To use it, follow these steps:
  • Open the Command Prompt as admin.
  • Then type in this command: DISM /Online /Cleanup-Image /RestoreHealth
  • The DISM command you entered will repair the corrupted system image. Do not close the window if the process takes a while as it will probably take a few minutes to finish.

Option 5 – Run the CHKDSK Utility

Running the CHKDSK utility might also help you resolve the Netwtw04.sys failed BSOD error. If your hard drive has issues with integrity, the update will really fail as the system will think that it’s not healthy and that’s where the CHKDSK utility comes in. The CHKDSK utility repairs hard drive errors that might be causing the problem.
  • Open Command Prompt with admin privileges.
  • After opening Command Prompt, execute the following command and hit Enter:
chkdsk /f /r
  • Wait for the process to be completed and then restart your computer.
Read More
Can't Connect to Blizzard Battle.net App
Blizzard is one of the most beloved game company which brought some of the most and greatest titles in PC gaming. Blizzard has released its own launcher in which you can launch games, sadly sometimes launcher does not want to work and fails to connect. If this happens to you be sure to:
  1. Reset your network devices to make sure your router hasn't become flooded with data.

    Power cycling your modem and router allows them to reset and re-establish a connection to your ISP. Follow these steps to completely power cycle the devices in your network connection:Note: If your modem has a battery backup, you will need to take the battery out or use the reset button on the modem.
    1. Shut down all computers connected to the modem/router.
    2. Power down and unplug the modem and the router if you're using one.
    3. Allow to sit for 60 seconds unplugged.
    4. Plug in and turn on the modem and router, and allow them to completely boot up until the front panel connection lights on the modem show a steady connection.
    5. Start the computer and allow it to completely boot up.
  2. If you're using a wireless connection, optimize your internet connection to rule out a connection issue.

    If you're experiencing issues with your low-speed or wireless internet connection, follow the steps below to troubleshoot the problem.
    1. Try plugging your computer directly into your modem.
    2. Shut down other programs that access the internet, such as other games or download programs.
    3. Satellite, mobile phone, and WiMax internet connections are not stable connections and may cause further connection issues when playing Blizzard games. If possible, consider switching to a more stable connection.
  3. Update your drivers and operating system to resolve any compatibility issues.

    Out-of-date drivers and operating systems can cause a variety of issues and are one of the first things to check when a game is having problems. The instructions below will help you check and update your drivers.
    • Even new computers can have out-of-date drivers and operating systems because updates are released routinely.
    • Some games and programs might run fine on a system with old drivers, but outdated drivers can still create technical issues with specific games or programs.
    • Check our supported video cards articles to make sure your hardware is compatible:
    Refer to the steps below to update drivers and software for your operating system.
  4. Release and renew your IP and flush your DNS to resolve any network conflicts.

    1. While on the desktop, press Windows Key and type CMD.
    2. Right-click Command Prompt and select Run as administrator.
    3. Type ipconfig /release in the command prompt.
    4. Wait a few seconds for a reply that the IP address has been released.
    5. Type ipconfig /renew in the command prompt.
    6. Wait a few seconds for a reply that the IP address has been re-established.
    7. Type ipconfig /flushdns in the command prompt.
    8. Close the command prompt and attempt to make a connection.
  5. Close all other applications to resolve software conflicts and free up resources.

    Before trying the steps below, close unnecessary programs and restart your computer. Identify Problematic Startup Items
    1. Press Ctrl+Shift+Esc to open the Task Manager.
    2. Click More Details.
    3. Select the Startup tab.
    4. Right-click on each item and select Disable.
    5. Restart the computer.
    If this resolves the issue, enable the startup application one at a time to determine which one is causing the problem. You will need to restart between each application you enable. Note: To re-enable startup applications, follow steps 1-4 and select Enable.
  6. Delete the Battle.net Tools folder to automatically rebuild outdated or corrupt files.

    1. Close Blizzard processes.
      1. Press Ctrl + Shift + Esc to bring up the Task Manager.
      2. Click the Processes tab.
      3. Select all Agent, Blizzard Battle.net desktop app, and game processes, and click End Process.
    2. Navigate to the folder containing the Battle.net directory:
      1. Press Windows Key + R to open the Run dialogue.
      2. Type C:\ProgramData\ into the Open field and press Enter.
    3. Delete the Battle.net folder.
    4. Run Battle.net and update the game to see if the issue persists.
    If the error persists after you try these steps, another program may be causing the problem. Restart your computer and delete the Battle.net folder one more time.
    Note: The above steps may cause the Blizzard Battle.net desktop app to forget game install locations. If your games can’t be found, you will see Install on the Blizzard Battle.net desktop app game tab instead of Play. To find your installation, click Locate this game or run the game launcher.
Read More
Fix an Unformattable and Unusable USB Drive
If you have a USB that has stopped working and does not show any signs of life do not throw it away just jet. Hello and welcome to another great tutorial on errortools.com, today we will explore how to bring back to life dead USB memories.

Detect a Corrupted  Drive:

If your computer is still able to detect your USB drive, you might want to know if it’s been corrupted. Select the Properties of the drive folder and check the device status. If it says This device is working properly this USB drive is worth saving. There’s no need to worry if you can’t see the USB drive folder.

Erase the USB Drive with Diskpart Tool

Press ⊞ WINDOWS + X top open start menu and choose Command prompt (admin) Type diskpart and press ENTER Type in list disk and press ENTER Locate your USB drive by size and type in select disk#, where # is the number of removable disks.

Reallocate the USB Drive Volume

Press ⊞ WINDOWS + R to open the run dialog and type in diskmgmt.msc Select the USB drive and Right-click on it and select create simple volume. It will lead to a new simple volume wizard window. Once you click next, you can specify the volume size for the pen drive. Select the maximum volume, which is shown as a default unit in MB. As soon as you see the next step, select assign drive letter which will help you view your pen drive once again. Format the partition in the next step. This may be just an extra step because you have already wiped the data clean. But it is always better to be sure. Click Finish to complete the new simple volume wizard which will now be allocated to the USB drive. After you reallocate the unallocated USB drive space, you will be able to view the USB drive storage once again.
Read More
Microsoft removed password as a requirement
ms password gone
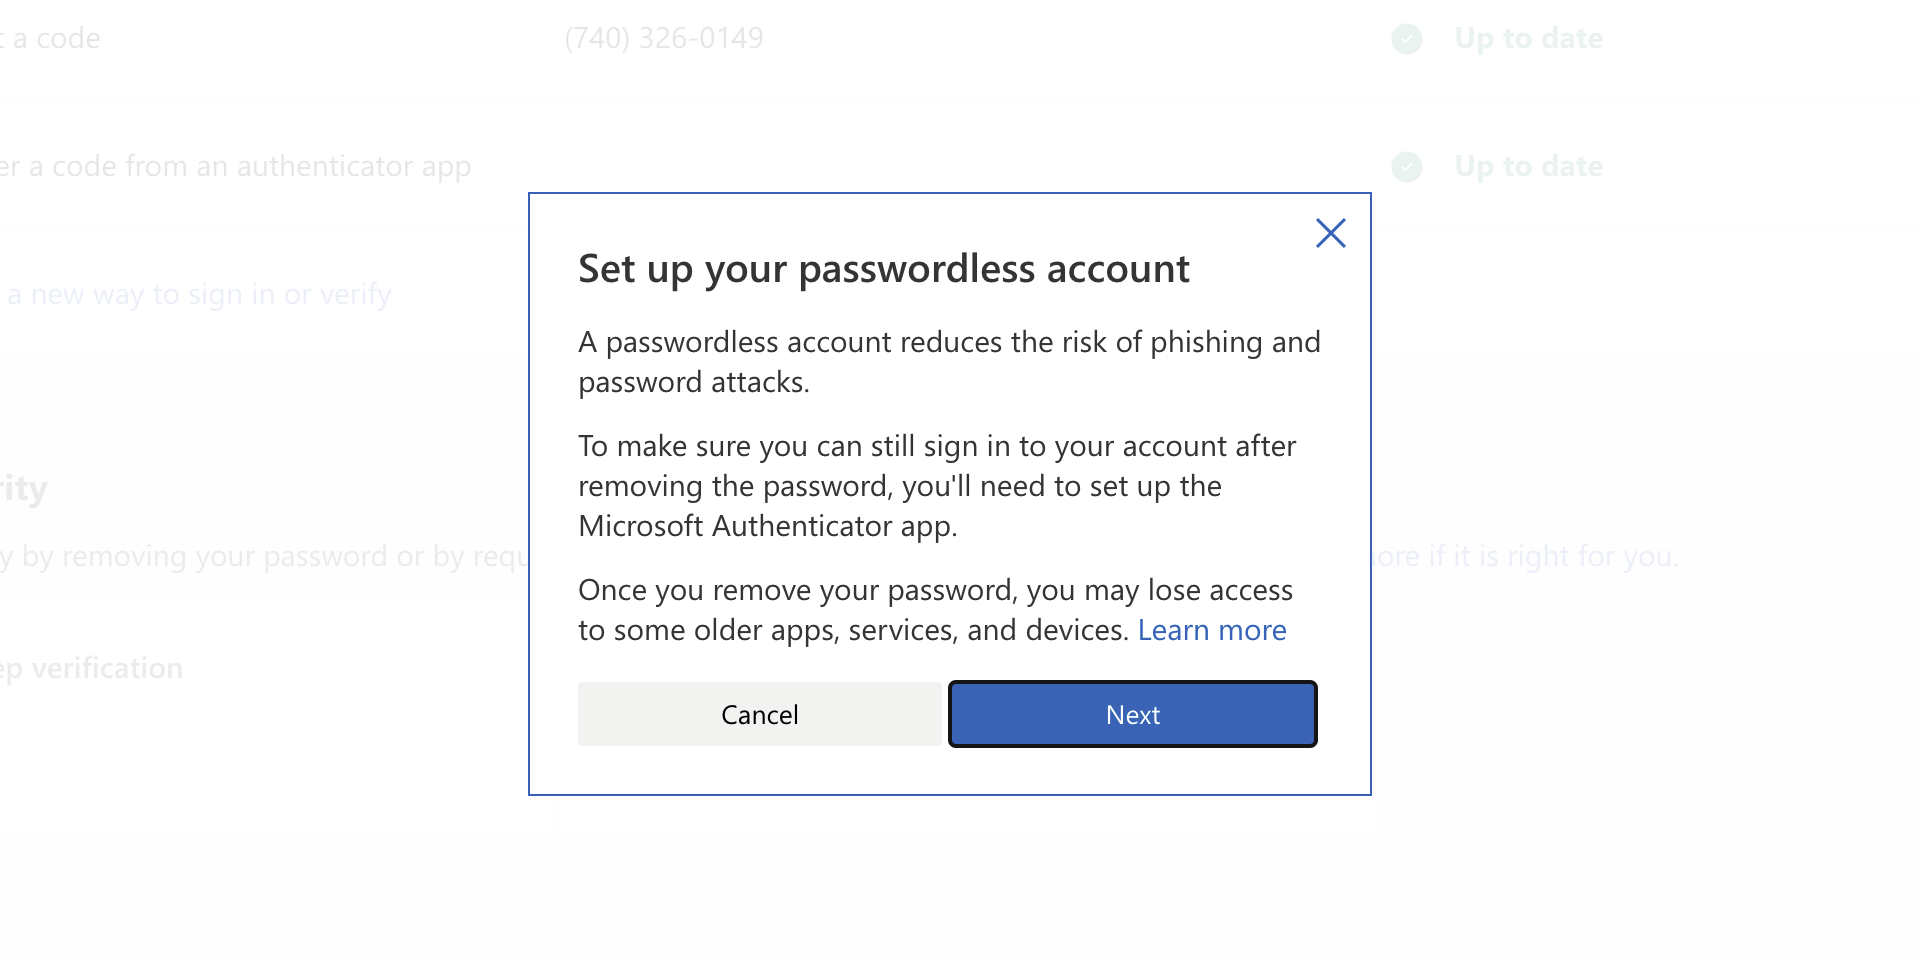
As of the time of writing this article you no longer need or are required to have a password if you plan to log in to your Microsoft account. Microsoft explored various options for account security and came to the conclusion that passwords are obsolete. Microsoft is letting you access your account through the Microsoft Authenticator app, Windows Hello, a security key, SMS verification, or email verification code. All of these methods are way better in terms of security than passwords.

How to turn these features on?

To get rid of your Microsoft password, the process is simple. You simply need to go to your Microsoft account, click “advanced security options,” then “enable passwordless accounts” under the Additional security section.
Read More
REvil vanishes over night without trace
REvilREevil is one of the most active and successful hacking groups connected to Russia and operating all over the world. The group recently demanded a huge bitcoin ransom for an attack targeting IT firm Kaseya in the USA. Since Tuesday blog and payment site run by REvil group cannot be longer reached without any kind of explanation or why. The reason behind the disappearance is unknown but has sparked speculation that the group may have been targeted deliberately by authorities. US President Joe Biden said he raised the issue with Vladimir Putin during a phone call on Friday, after discussing the subject during a summit with the Russian president in Geneva last month. Mr. Biden told reporters that he had "made it very clear to him...we expect them to act" on information and also hinted the US could take direct digital retaliation on servers used for intrusions. The timing of Tuesday's outage has sparked speculation that either the US or Russian officials may have taken action against REvil - though officials have so far declined to comment and cyber experts say sudden disappearances of groups are not necessarily uncommon. The development comes after a series of high-profile ransomware attacks which have hit major US businesses this year. The FBI accused REvil - also known as Sodinokibi - of being behind a ransomware attack on the world's largest meat processing company JBS last month.
Read More
Five Ways of Fixing Error Code 37

Repair Device Manager Error Code 37

What is Error Code 37?

Error Code 37 is a Device Manager Error Code that you may come across when you are unable to use an installed hardware device on your PC. It will pop up on your screen with the following display:

“Windows cannot initialize the device driver for this hardware. (Code 37)”

If you receive the above message, it means that your operating system was unable to acknowledge the drivers for a particular peripheral device.

Solution

driverfix boxError Causes

Error Code 37 mainly occurs due to device driver corruption. However, there are other factors that can trigger this error code, some of which are the following:

  • Missing device drivers
  • Out-of-date device drivers
  • Presence of malware or spyware in the system
  • The particular device is not compatible with your PC

Device driver corruption or other data corruption is not uncommon and part of everyday PC use.

From an installation gone wrong to an unexpected shutdown, commonly generated data errors are considered the main culprit behind error codes.

Further Information and Manual Repair

Just like most PC error codes, Error Code 37 isn’t that difficult to get rid of. There are many DIY methods you can try to have your PC running smoothly in no time. Here are a few methods to resolve this issue:

Method 1: Restart your PC

It is possible that the display of the error code is merely due to a temporary issue with your peripheral device and not anything serious.

Therefore, the quickest and easiest method to solve the error code 37 is to simply restart your PC.

Method 2: Scan for Viruses

If restarting does not do the trick, a quick scan for viruses and removing them is another simple method you can follow to fix your PC.

Since the error code is due to corruption of data, viruses such as malware or spyware create error in your PC’s registry and eliminating them can help restore some of the corrupt data, which also speeds up your PC.

Method 3: Undo recent changes

A possible explanation for the error code may be the recent changes in your Device Manager or due to the peripheral device installation. You can thus undo the changes by either:

  • Remove or change settings of the installed peripheral device
  • Roll back the version of the driver to the one before the update.
  • Use System Restore to reverse the changes made in the Device Manager

Method 4: Manually uninstall and reinstall the drivers

If the above stated methods do not help in speeding up your PC and is still giving you an error code, you may want to manually uninstall and reinstall the corrupt or missing drivers. Here are the following steps:

  • Double-check if the installed external device is properly connected and working smoothly
  • Open Device Manager and double click on the device that is causing problems
  • When it opens, click on the ‘Driver’ tab and click ‘Update Driver’

Method 5: Use DriverFIX

However, updating the missing or corrupt drivers can be time consuming and may also require having a hardware documentation ready that contains specific details about the driver that you should download.

To avoid this time-consuming process, you can use DriverFIX software.

DriverFIX will help you to download the required driver without you having to waste your precious time and effort looking it up in a user manual. This latest software technology is embedded with its own database that tracks the missing or corrupt driver according to your PC’s motherboard version and specific details.

It is user-friendly, which means that it will relieve you from the frustration of such PC error codes appearing from time to time and enable your PC to work efficiently in no time.

Click here to download DriverFIX to resolve Device Manager error code 37 today!

Read More
Recover or set a BIOS or UEFI Password
If you have been using Windows for quite some time now then you’re probably aware of the BIOS or UEFI password. This password lock is the one that ensures you enter the set password even before your Windows PC boots up. However, there’s just one downside with the BIOS or UEFI password – there is no recovery option, unlike your Microsoft account. Worry not though for this post will guide you on how you can set or recover a BIOS or UEFI password on your Windows computer. The BIOS or UEFI passwords are stored at the hardware level which means that unless the OEM wants or has configured a way to recover the password, it is pretty much impossible to reset it. There are times when they are so strict that the only way to get through it by contacting customer care. Note that any Windows computer with this lock can’t be unlocked by trying to reinstall Windows. In this post, you’re going to have to remove the CMOS battery temporarily, clear unknown BIOS/UEFI passwords using the bios-PW website as well as call customer care. For more details, refer to the options provided below.

Option 1 – Remove the CMOS battery temporarily

In case you didn’t know, every motherboard comes with a CMOS battery which helps the computer system to keep the clock ticking and in making sure that the BIOS settings are not lost when the computer is powered down. Every time a computer is turned on, the CMOS battery ensures that the information is available for the computer to boot up. So when you remove the CMOS battery temporarily, say about 30 seconds or a minute, the settings will be lost. There are some motherboards that are built-in ways that when you remove the battery for long, it will reset everything including the password for the BIOS or UEFI.

Option 2 – Clear the unknown BIOS or UEFI passwords using a bios-PW website

If the first option didn’t work, you can try using this BIOS Password website at http://bios-pw.org/ to clear the password.
  • When prompted by the BIOS, enter the wrong password a couple of times as doing so will lock you out of the system.
  • After that, you will see a new number or code on the screen which will include a message about System Disabled [XXXXX] Service TAG [YYYYY].
  • Next, open the BIOS Password website and enter the XXXXX code in it and make sure to tap the Shift + Enter keys or just enter.
  • Now it will open multiple unlock keys which you can use to clear out the BIOS or UEFI lock on your Windows PC.

Option 3 – Call the customer care

If the second option still didn’t work, you have to call customer care and follow their suggestions for they will walk you through fixing the problem using the service tag or might suggest that you visit a service center to make things easier for you. Note: You also have the option to set a BIOS or UEFI password. Although it isn’t recommended, you still can do it if you really want to. Remember that the BIOS or UEFI interface varies from OEM to OEM so you must find something related to either PASSWORD or SECURITY. You will have the following similar options:
  • Supervisor password – it’s the same as the master password that can change important system settings.
  • User password – with this password, any user can change minor settings.
  • Master password – you can use this password for a hard drive or as a general password.
There are several OEMs that offer micro-control where you have to enter the BIOS password. For instance, you’ll have the option to skip for a normal restart, or when you select a boot device while you might have to enter the password for unattended reboots or when your PC is powered on, etc. And if you are here to remove the password, you need to find a remove password option in the same section. You will be prompted to enter the set password once and if it’s correct, it will remove the BIOS password. After that, you have to save and exit the BIOS then restart your computer and check if the settings are properly applied.
Read More
Change mouse pointer size & style in Windows11
mouse pointer
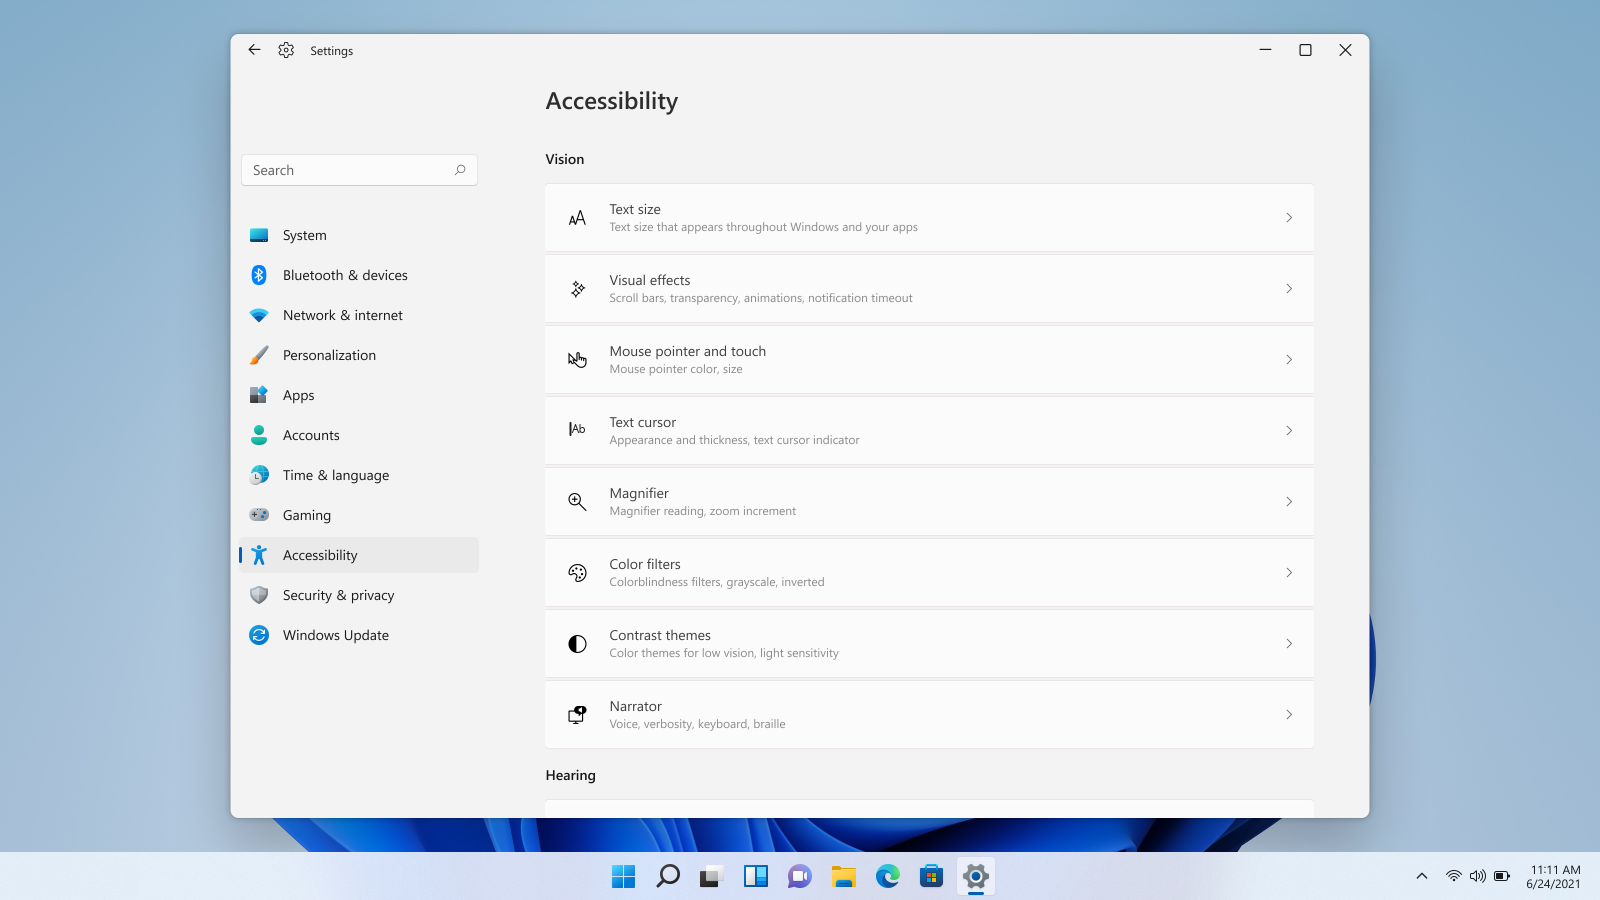
Windows 11 provides several different ways to make your cursor stand out and be easier to spot inside it. You can make the mouse pointer larger, invert it, or change its color.
  1. Press ⊞ WINDOWS + I to open settings
  2. Click on Accessibility in the sidebar
  3. Select Mouse Pointer and Touch
  4. Adjust mouse cursor size with size slider by clicking on circle and dragging it left or right
  5. Under Mouse Pointer Style pick desired style from White, Black, Inverted, and Custom
    1. White: The cursor is white with a black outline (standard setting)
    2. Black: Cursor is black with a white outline
    3. Inverted: Cursor automatically changes color to an inverted version of the color it is currently hovering over
    4. Custom: You can pick the color for the cursor that you want.
And that is all about it, once you are done with pointer customization just close settings, all changes are saved automatically.
Read More
The request failed due to a fatal device hardware error
When you are copying some files from your computer to your hard disk and vice versa or when you have several disks connected to your Windows 10 computer and you suddenly receive an error message saying, “The request failed due to fatal device hardware error”, then this means that there is some issue with the hardware of your computer. This issue might be caused by various reasons but whatever they may be, this post will guide you on how you can fix the “The request failed due to fatal device hardware error”. To fix the error, here are some suggestions that could help.

Option 1 – Check for any hard disk errors

  • On your desktop, right-click on the “This PC” or computer icon and then select Manage to open the Disk Management. Here you get to check your drive’s health.
  • Next, click on Disk Management on the left side panel.
  • From there, check the state of your drives. If it shows that all your partitions are healthy then it means all is good and that the problem may have something to do with some physical issues with your hard drive.

Option 2 – Run the CHKDSK utility

When it comes to some issues concerning the hard drive or removable devices, there is a utility in Windows that might help which is called “chkdsk”. This error check utility can help with several issues in the system including “The request failed due to fatal device hardware error”.
  • Tap the Win + S keys to open the Search box.
  • Then type “command prompt” in the field and from the search results that appear, right-click on Command Prompt and select “Run as administrator”.
  • After opening an elevated command prompt, copy and paste the following command and hit Enter:
CHKDSK [volume [[path] filename]] [/F] [/V] [/R] [/X] [/C] [: size]]
Note: In the command given above, “[/F]” will try to fix the system errors while “[/R]” will be the one to fix the bad sectors.
  • Now if you are prompted to run CHKDSK after your reboot your PC, just tap Y and reboot your PC.
  • If CHKDSK is not able to find any errors, tap the Win + E keys and navigate the access window. From there, right-click on the concerned drive and click on Properties.
  • After opening Properties, click on the tab Tools and then click on the “Check” button under the Error-checking section.
  • Wait until the process is completed and then restart your computer

Option 3 – Verify the hard drive using SMART attributes

In case you don’t know, Windows has a built-in feature of SMART analysis which analyzes the hard drive/SSD and checks all the parameters by performing some minor operations. To use it, follow these steps:
  • Tap the Win + S keys and type “command prompt” in the field then right-click on the related search result and select the “Run as administrator” option.
  • After opening Command Prompt as admin, type the “wmic disk drive get status” command and hit Enter.
  • You should get a result after that, and if you see that it’s “normal”, proceed to the next option below.

Option 4 – Format your hard disk

You can try formatting your drive since this problem also occurs on removable hard drives. In addition, if your drive is not properly initialized, this error will really pop up. Thus, you need to make sure that the hard drive is initialized and that the correct partition style is selected.
  • To get started formatting your drive, tap the Win + E keys and then go to the access page of the drive.
  • Next, right-click on the drive and select Format.
  • After that, uncheck the “Quick Format” option and then format your drive properly.
  • Now once the formatting process is finished, unplug the drive and plug it back in afterward.
  • Check if the error is already fixed. If the drive is not initialized, tap the Win + R keys and hit Enter.
  • After opening the Run dialog box, type “diskmgmt.msc” and hit Enter to open Disk Management.
  • From there, right-click on the drive volume and select Initialize Disk.
  • Next, select the correct partition type and proceed.
Read More
1 2 3 162
Logo
Copyright © 2022, ErrorTools. All Rights Reserved
Trademarks: Microsoft Windows logos are registered trademarks of Microsoft. Disclaimer: ErrorTools.com is not affiliated with Microsoft, nor claim direct affiliation.
The information on this page is provided for information purposes only.
DMCA.com Protection Status